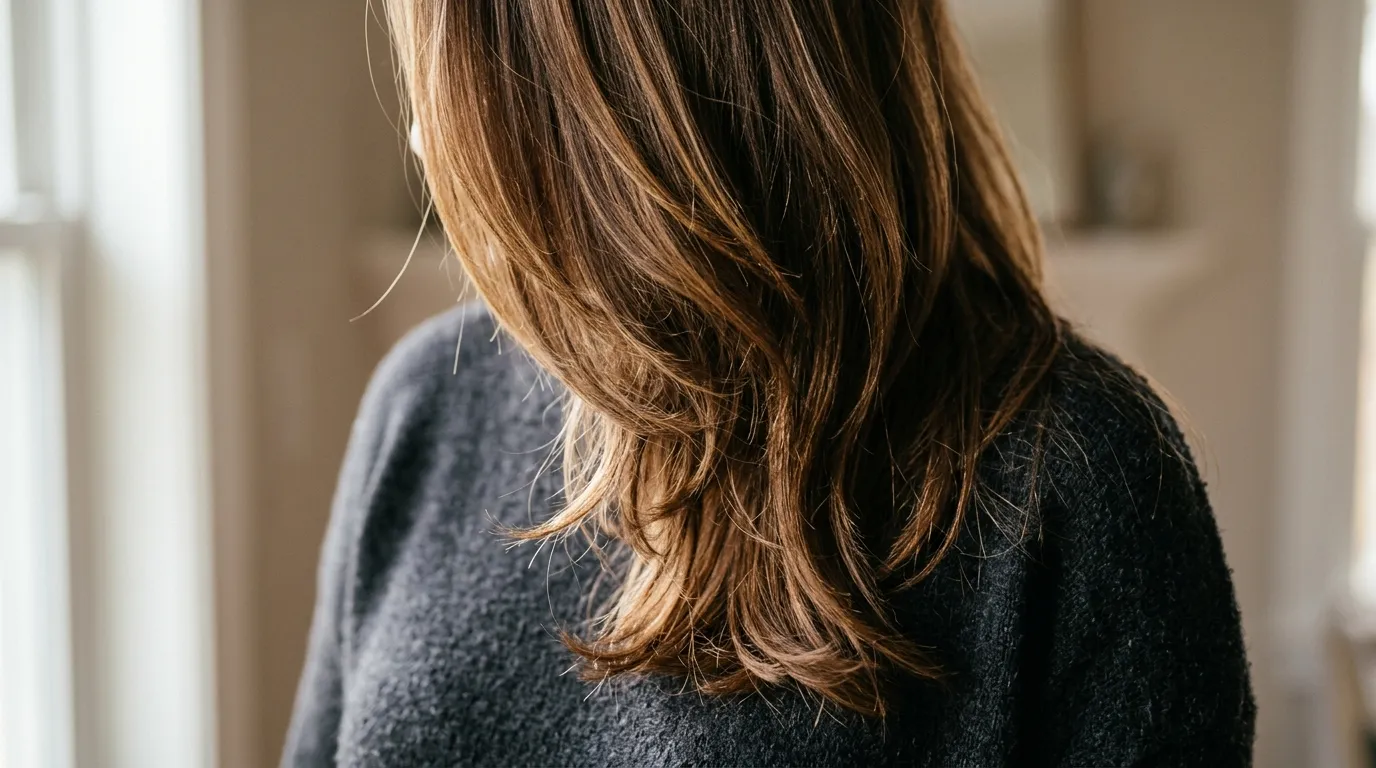
1. Long Layers with Face Framing Pieces
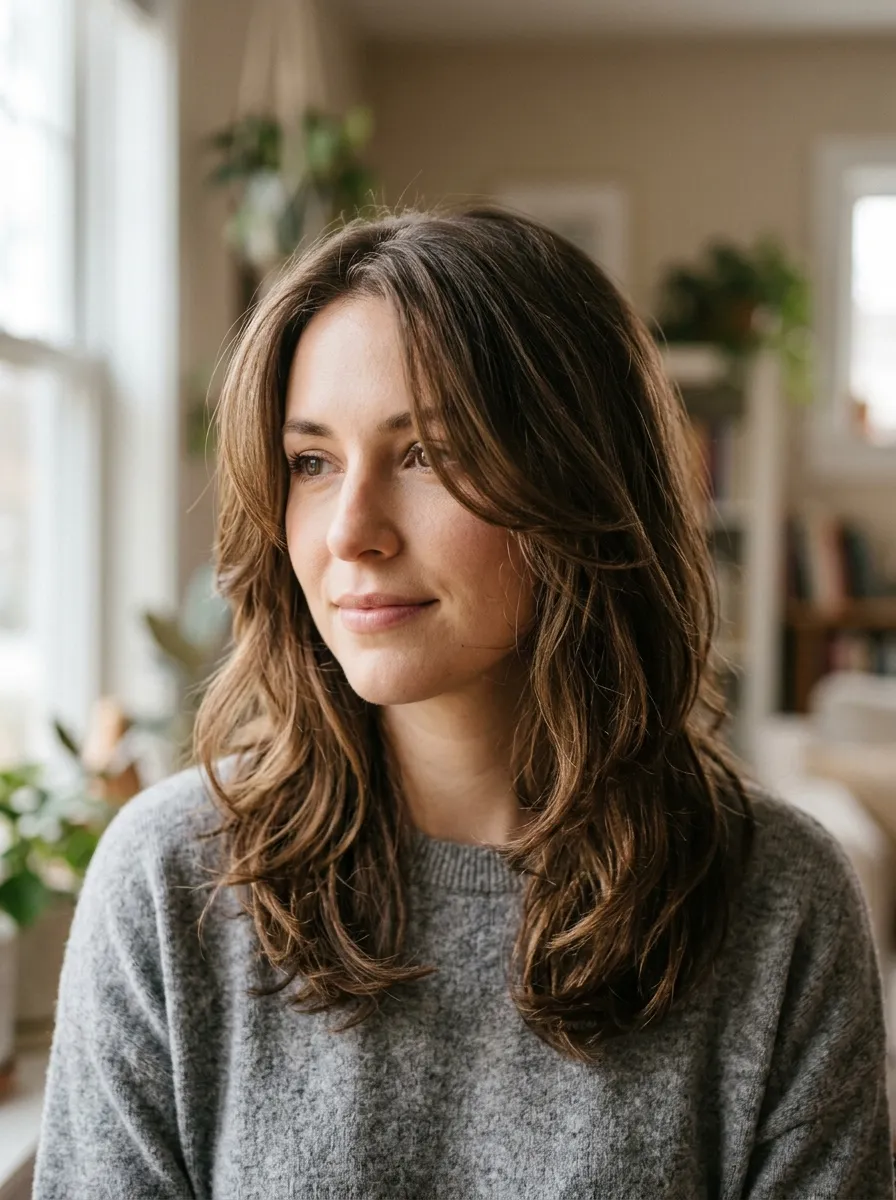
Long layers keep your length while softening the edges around your face. A stylist cuts shorter pieces near your cheekbones and chin, letting them curve inward. This shape flatters almost every face type. It works especially well if you have a longer face and want to create the look of width near your cheeks.
If you are on a budget, ask your stylist for a simple two layer cut rather than a heavily texturized version. It costs less time in the chair and still gives you movement. At home, you can section off your front pieces and trim them at an angle using sharp shears, cutting small amounts at a time.
Style these layers with a round brush for a soft curve, or let them air dry for a relaxed wave. Face framing layers also grow out gracefully, so you will not need frequent trims to keep the shape looking clean.
2.Shoulder Length Layers for Everyday Volume
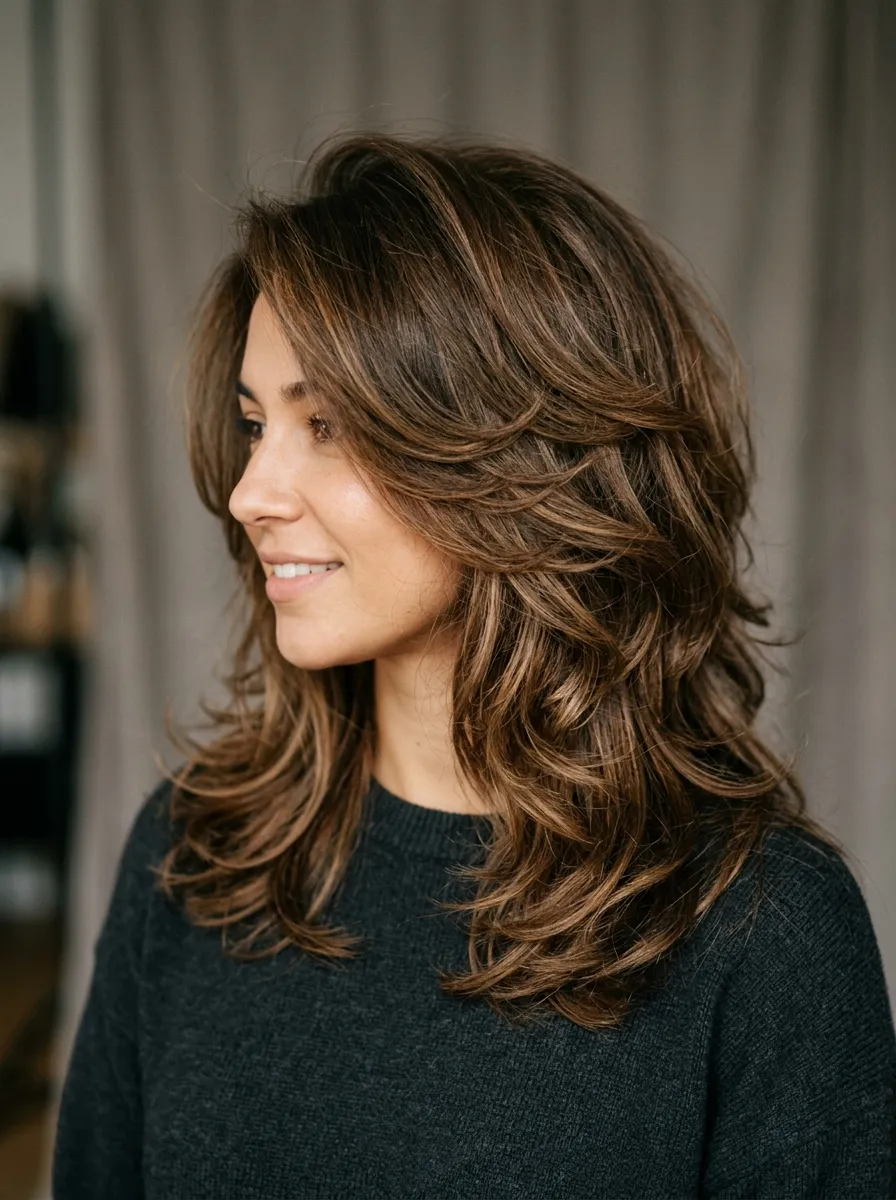
Shoulder length hair can look thin and flat without layers. Adding movement at this length gives your hair bounce and makes it look fuller from the roots down. This cut suits people who want low maintenance styling with a polished result.
Ask for layers that start around your chin and build gradually toward the ends. This keeps the shape from looking choppy while still adding lift. If you color your hair, this length also shows off highlights or balayage nicely since the layers catch light at different angles.
For a DIY approach, try a texturizing trim with thinning shears on dry hair, working only on the bottom two inches. Go slowly and check your reflection often. A blow dryer with a round brush adds instant volume, or you can twist small sections while damp and let them dry for loose waves.
This length works well for second day hair too, since layers hide oil and flatness better than one length cuts.
3.Curtain Bangs with Soft Layers
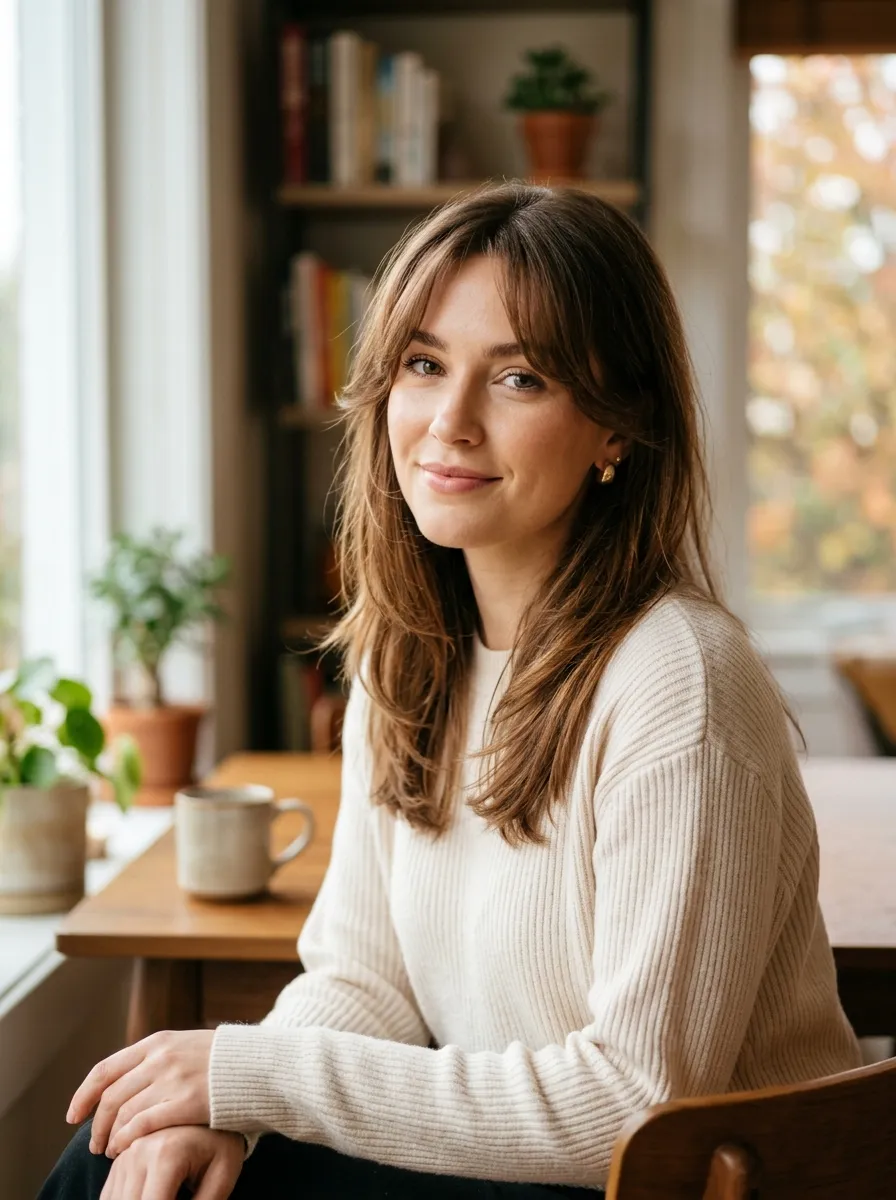
Curtain bangs paired with soft layers create a face framing effect that feels current without looking overly trendy. The bangs split down the middle and merge into the layers around your face, so there is no harsh line between your fringe and the rest of your hair.
This combination works on straight, wavy, and curly hair. Curly hair especially benefits since the layers help control bulk while the curtain shape keeps things soft around the forehead.
If you want to try this without committing, ask your stylist to cut long curtain bangs that you can tuck behind your ears when you are not in the mood to style them. This flexibility makes it a practical choice if you are unsure about bangs.
At home, you can trim your own curtain bangs by parting your hair down the middle, pulling two small sections forward, and cutting at an angle while the hair is dry. Style with a small round brush and blow dryer, curving the ends away from your face for the classic curtain look.
4.Choppy Layers for Textured Waves
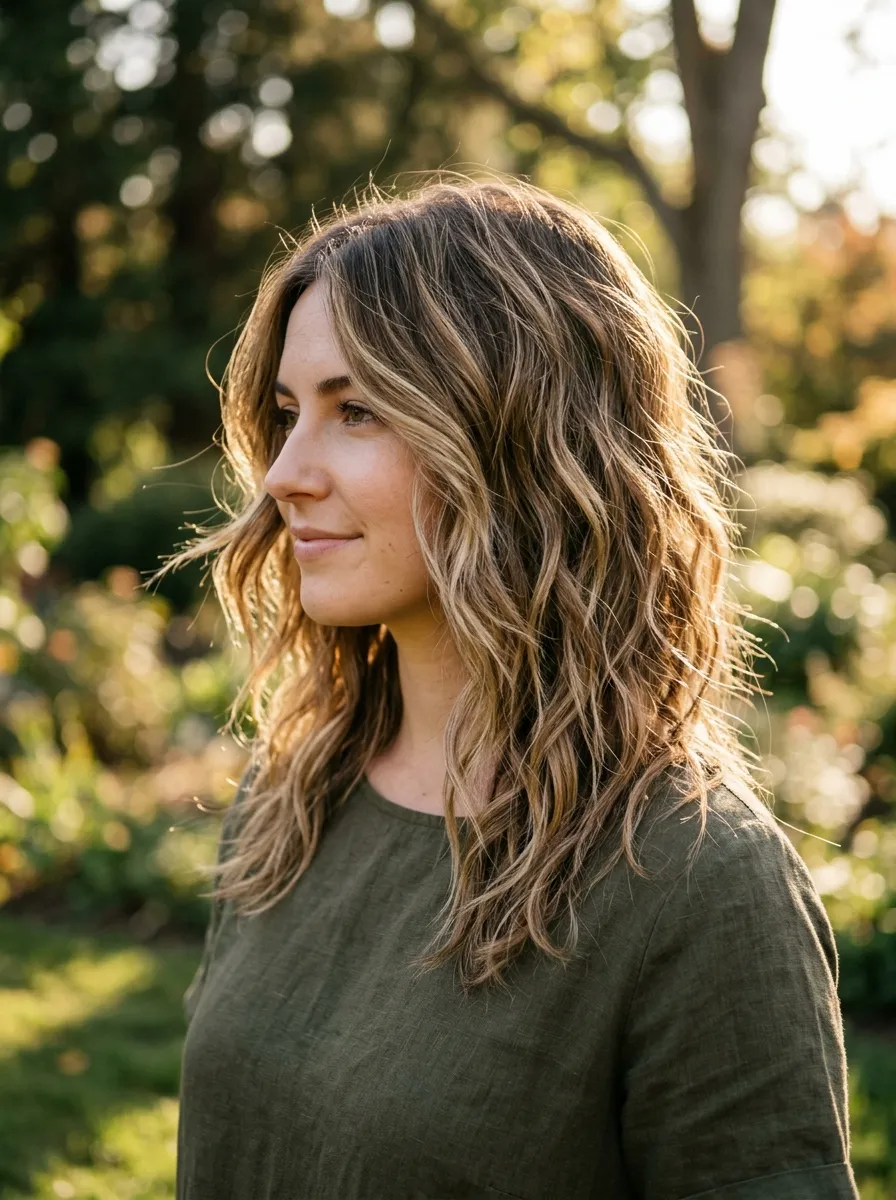
Choppy layers are cut with less blending between sections, giving hair a piecey, textured finish. This style pairs naturally with waves since the shorter pieces separate and create visible texture instead of one smooth mass.
This cut works well for thick or coarse hair since the layers remove bulk and weight. Fine hair can also handle choppy layers if they are kept shorter, since shorter layers create the illusion of thickness.
A texturizing spray is your best friend with this cut. Spray it on damp hair before air drying, or apply to dry hair and scrunch for extra grip. You do not need expensive products. A simple sea salt spray from the drugstore gives the same tousled effect as higher end versions.
If you want to DIY this look between salon visits, twist small sections of hair and snip the ends with sharp scissors at an angle. This creates soft, choppy pieces without removing too much length. Always cut less than you think you need, since you can always go back for more.
5.Feathered Layers for a Retro Touch
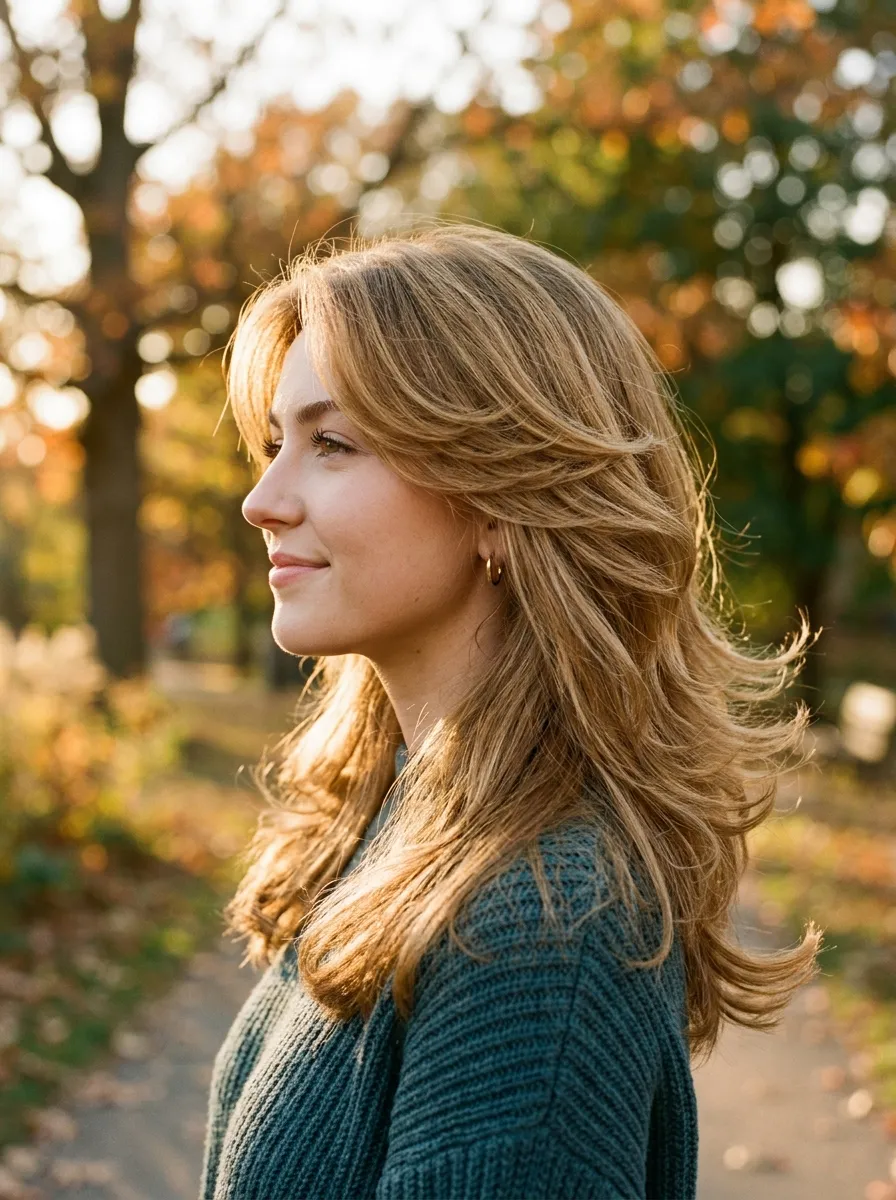
Feathered layers flip slightly away from the face, creating a soft, retro shape reminiscent of past decades. This cut works best on medium to long hair and adds noticeable volume around the crown and sides.
The key to this style is round brush blow drying. Section your hair and roll it under or away from your face as you dry, focusing heat at the roots for lift. A medium barrel curling iron can also mimic this effect if you flip the ends outward instead of curling them under.
Feathered layers suit straight and slightly wavy hair best, since curly textures can hide the flipped shape. If your hair is naturally curly, ask your stylist for longer layers so the feathering shows through your natural pattern instead of getting lost.
Budget tip, you do not need a salon blowout to maintain this look. A basic round brush and a drugstore heat protectant spray will get you most of the way there at home.
6.Short Layered Bob with Movement
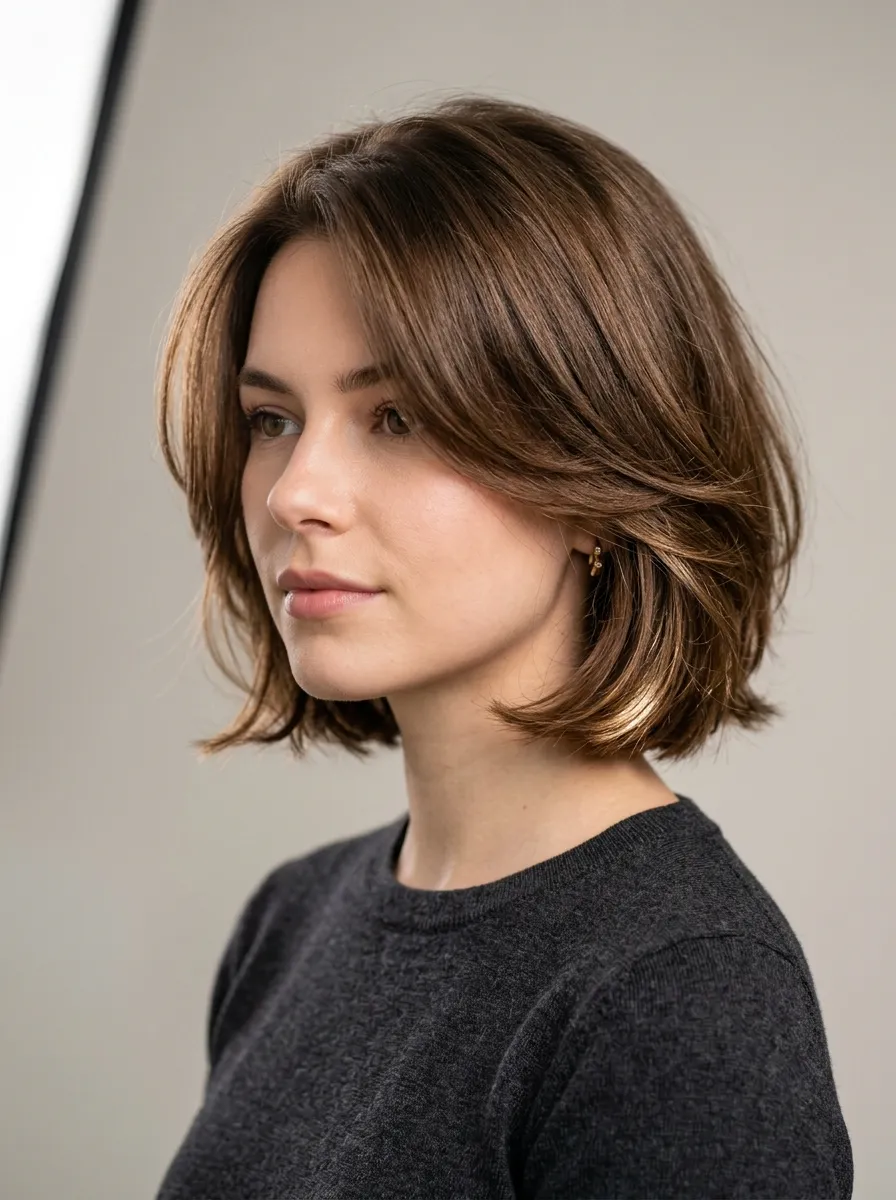
A short layered bob takes the classic bob shape and adds internal layers so it moves instead of sitting like a solid block. This works especially well for thick hair that tends to look heavy in a blunt bob.
Ask your stylist to keep the perimeter length even while adding layers underneath, close to the scalp. This keeps the outline clean while giving the hair lift and bounce at the roots.
Styling is quick with this cut. A light mousse applied to damp hair before air drying gives soft texture without much effort. If you want more polish, a small round brush at the ends creates a slight inward or outward curve.
This cut is a great low maintenance option if you want short hair without the flat, heavy look that sometimes comes with a one length bob. It also works on fine hair since the layers create the appearance of more density.
7.Long Layers with Curly Hair
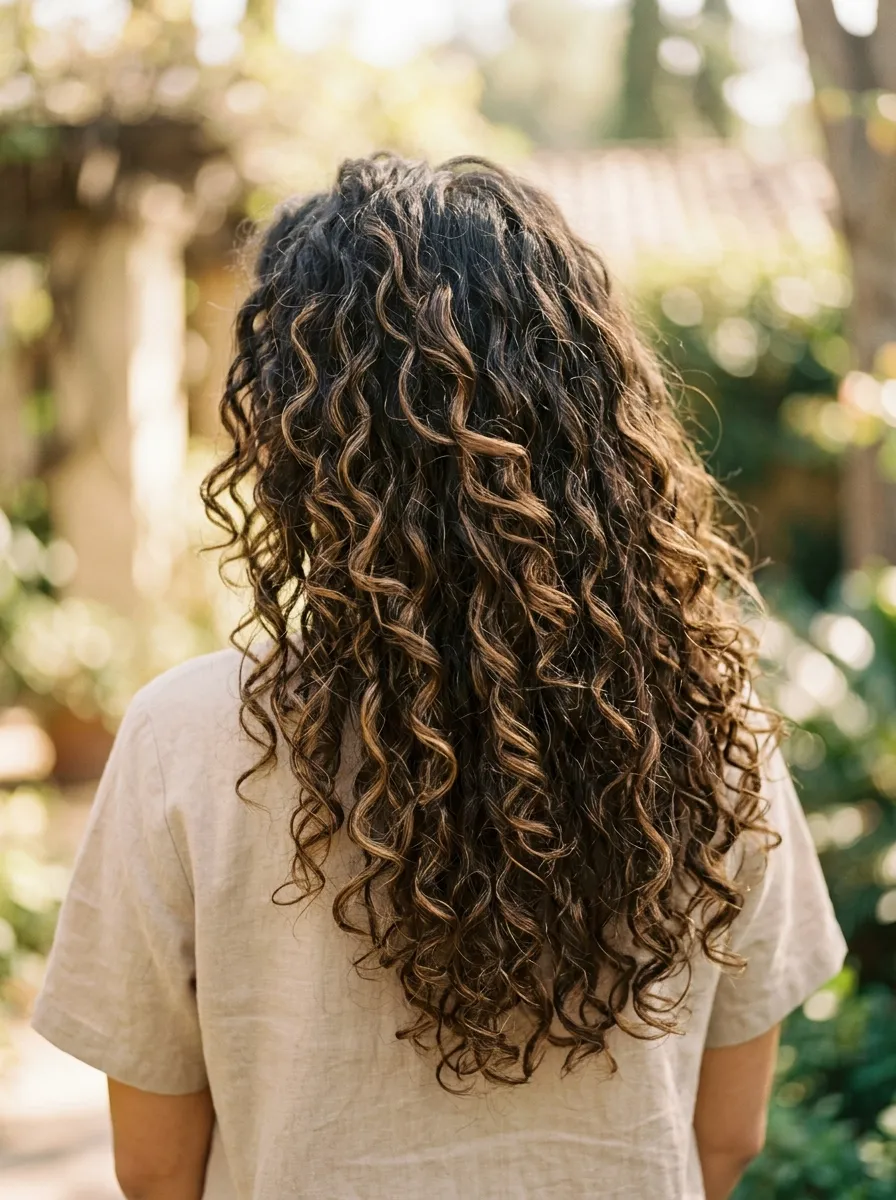
Curly hair often gets weighed down by its own volume, and long layers solve this by removing bulk while letting curls spring up and define themselves. Without layers, curly hair can turn into a triangle shape that widens at the bottom.
Ask your stylist to cut your curls dry, since curls shrink and shift differently than straight hair. A dry cut lets them see exactly how each curl will fall once it is finished.
At home, avoid cutting curly hair yourself unless you have real experience, since curls do not grow back evenly if mistakes happen. Instead, focus on product to enhance your existing layers. A curl cream applied to soaking wet hair, followed by air drying or diffusing, keeps curls defined and layers visible.
Long layers on curly hair also reduce frizz since there is less weight pulling curls out of shape. This makes the cut both a style choice and a practical one for curl health.
8.Layered Pixie for Fine Hair
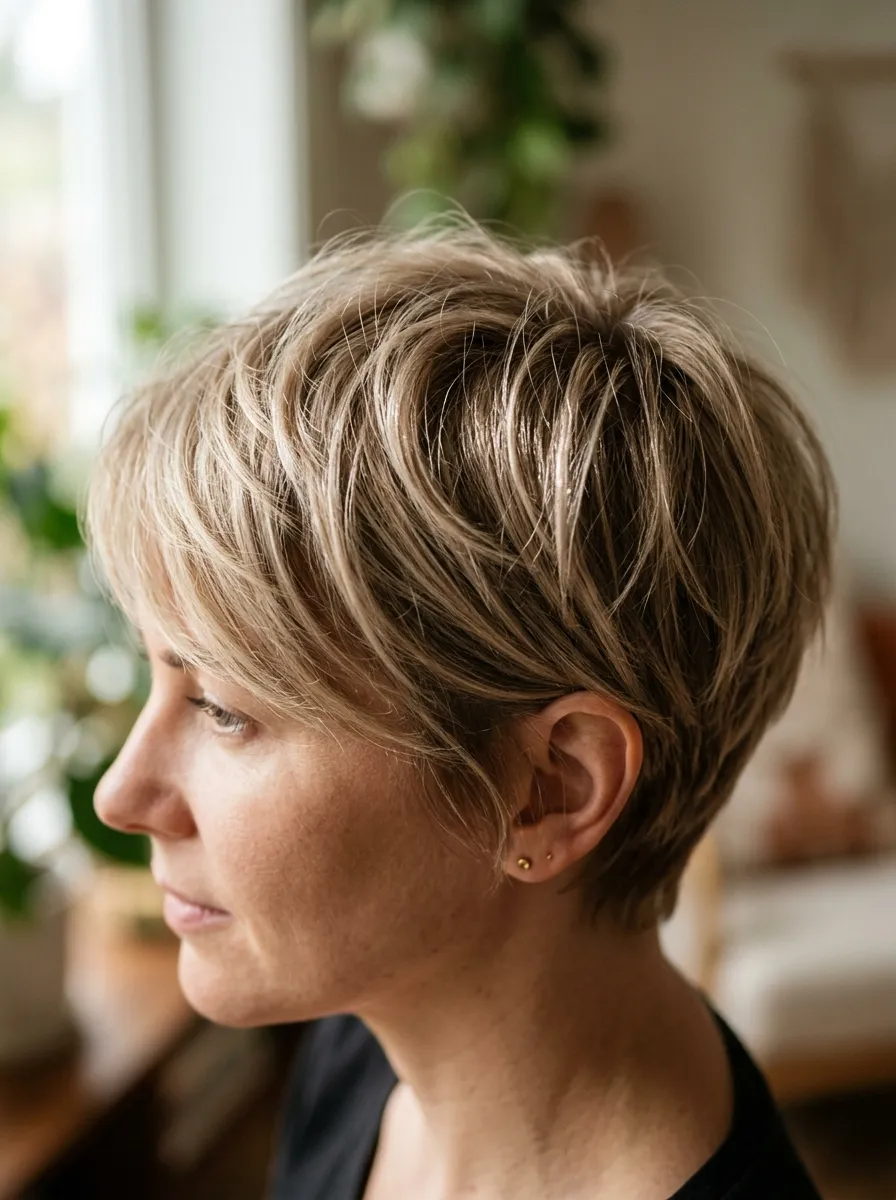
A layered pixie is one of the most effective cuts for fine hair since short layers create the appearance of thickness that longer hair cannot achieve as easily. The shorter length also reduces the pull of gravity, which flattens fine strands over time.
Ask your stylist for layers concentrated at the crown to build height, with slightly longer pieces around the face for softness. This combination avoids the flat, helmet like look that fine hair pixies sometimes get.
Styling only takes a few minutes. Apply a small amount of texturizing paste to damp hair and scrunch upward at the roots before air drying or using a diffuser. You do not need heavy products since fine hair gets weighed down easily.
This cut is also budget friendly long term. Pixies need trims every four to six weeks, but each trim is quick and often costs less than a full haircut on longer hair.
9.V Shaped Cut Layers for Thick Hair
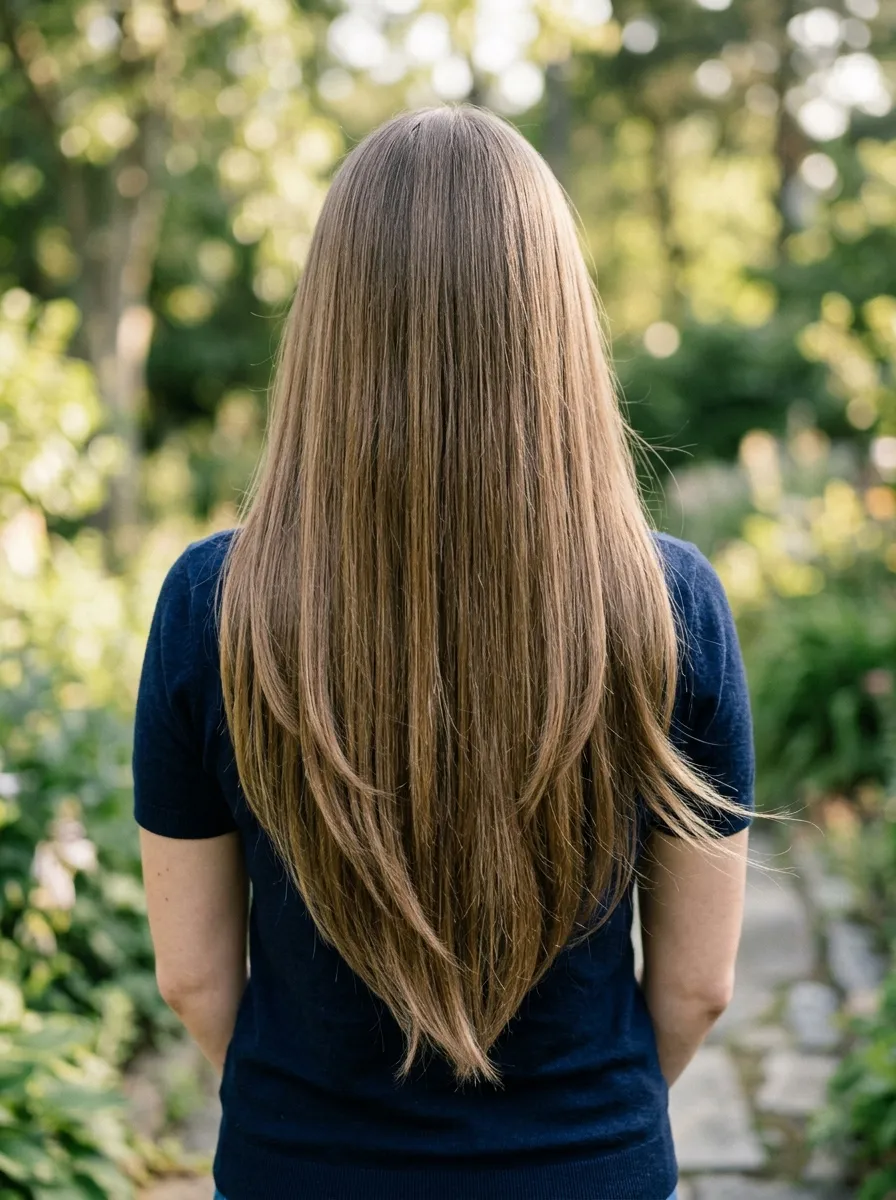
A V shaped cut removes weight from the ends of thick hair by cutting the back into a V shape, with layers built in throughout. This reduces bulk while keeping length, which is a common request from people with thick hair who still want long styles.
This cut suits straight and wavy hair best, since the V shape shows clearly against a smooth surface. Curly hair can still work, but the shape may be less visible once curls form.
If you want to try a version of this at home, gather your hair into a low ponytail at the nape of your neck and trim a small amount off the end at a slight angle. This mimics the V shape without needing to section your whole head.
Ask your stylist to add layers gradually from the crown down, rather than layers, so the thickness reduces evenly instead of leaving a blunt chunk of hair at the bottom.
10.U Shaped Cut Layers for Soft Curves
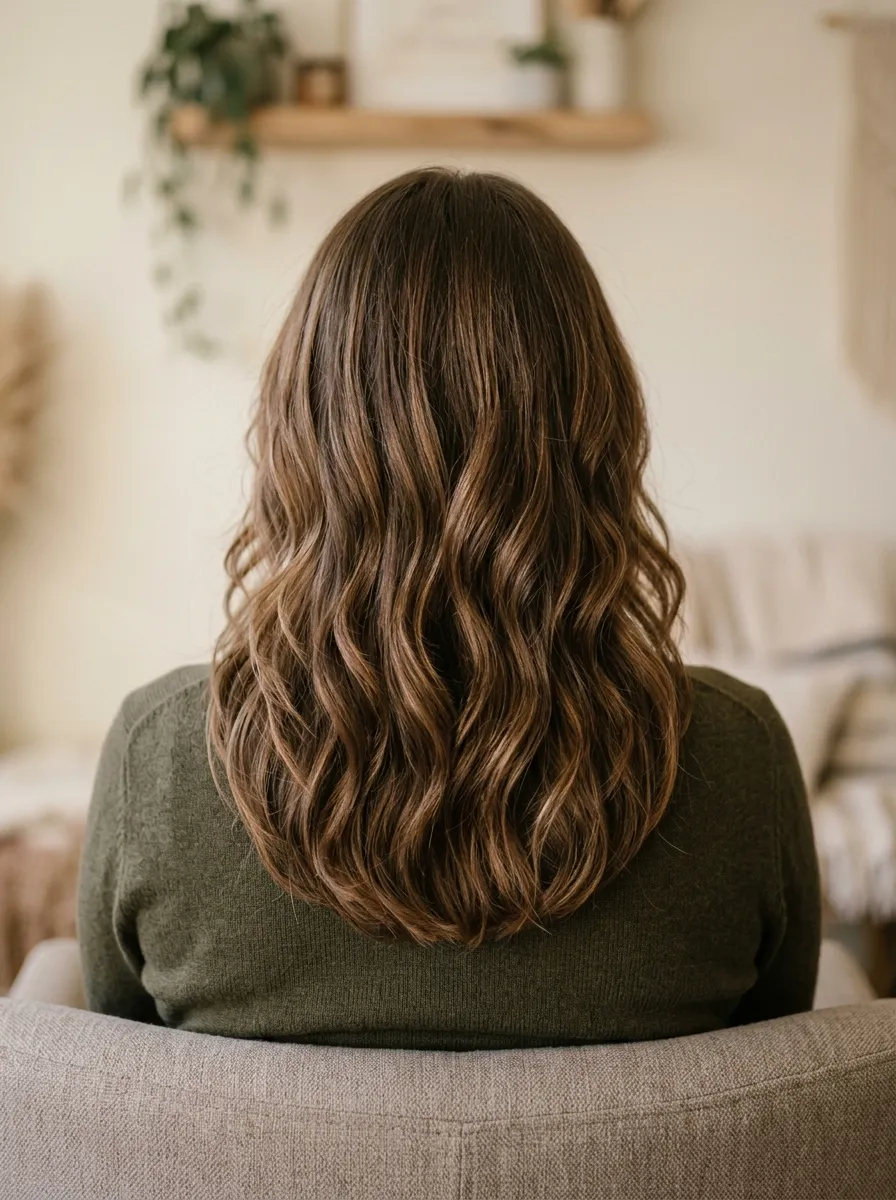
A U shaped cut layers a rounded shape into the ends instead of the sharper angle of a V shaped cut. This creates a softer look, and it suits people who want to remove weight without a dramatic point at the back.
This shape flatters most hair textures, including curly and wavy hair, since the rounded line blends naturally with natural texture. It also works well for people growing out length who still want a defined shape.
Layers are typically added starting a few inches below the crown, building gradually toward the ends. This keeps the shape from feeling heavy while still showing the rounded silhouette from the back.
For at home maintenance between cuts, a light trim every two to three months keeps the shape intact. Use sharp haircutting shears rather than regular scissors, since dull blades can cause split ends and uneven cuts.
11.Butterfly Layers for Maximum Volume
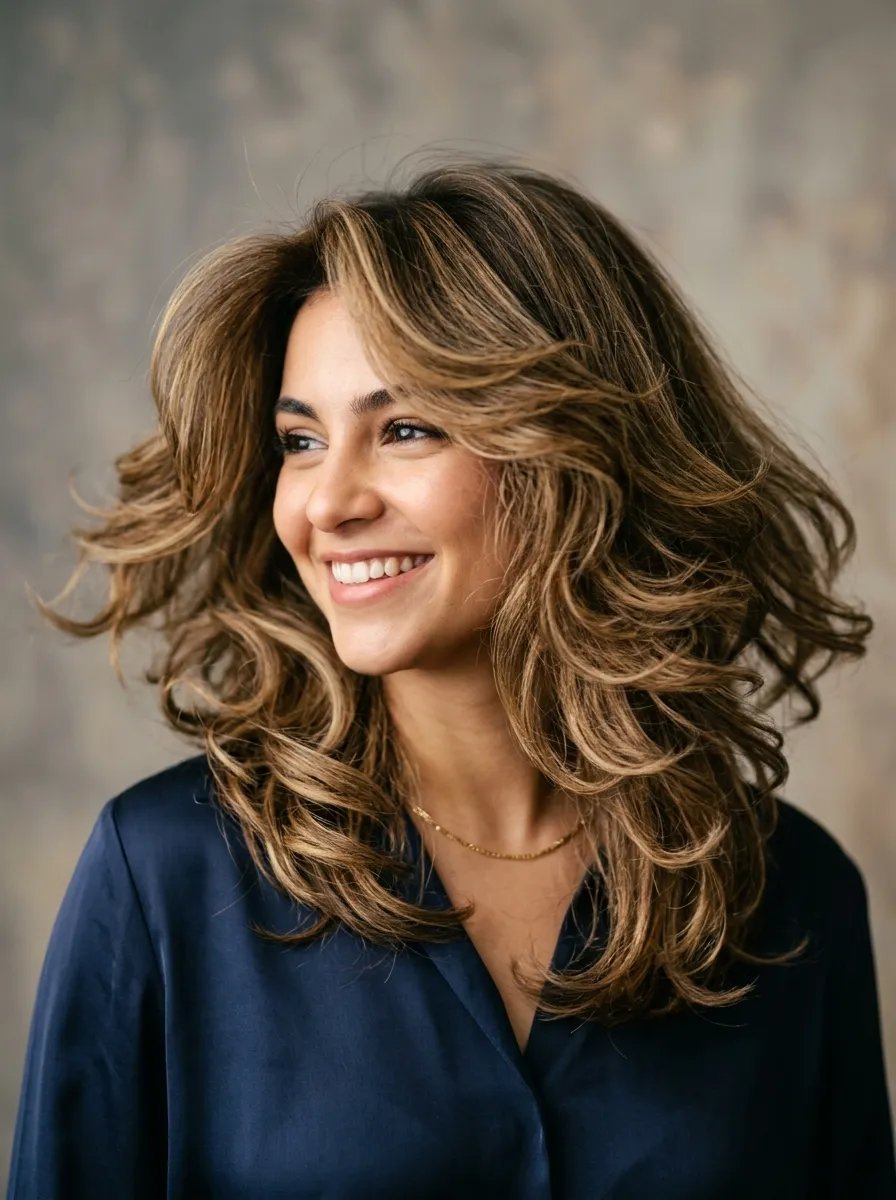
Butterfly layers are heavily blended, shorter layers concentrated around the crown and face, designed to create maximum volume and movement. The name comes from the way the shorter pieces flip outward like wings when styled.
This cut works best on medium to long hair and looks especially good with a center or slight side part. It suits straight and wavy textures well, since the layers need to be visible to create the signature shape.
Styling typically involves a round brush and blow dryer, flipping the shorter layers outward and away from the face. A texturizing spray on dry hair afterward adds extra separation and hold.
This style requires some upkeep to maintain the shape, so plan for trims every six to eight weeks. Between appointments, dry shampoo at the roots helps keep the volume looking full on days when you skip washing.
12.Layered Lob (Long Bob) with Texture
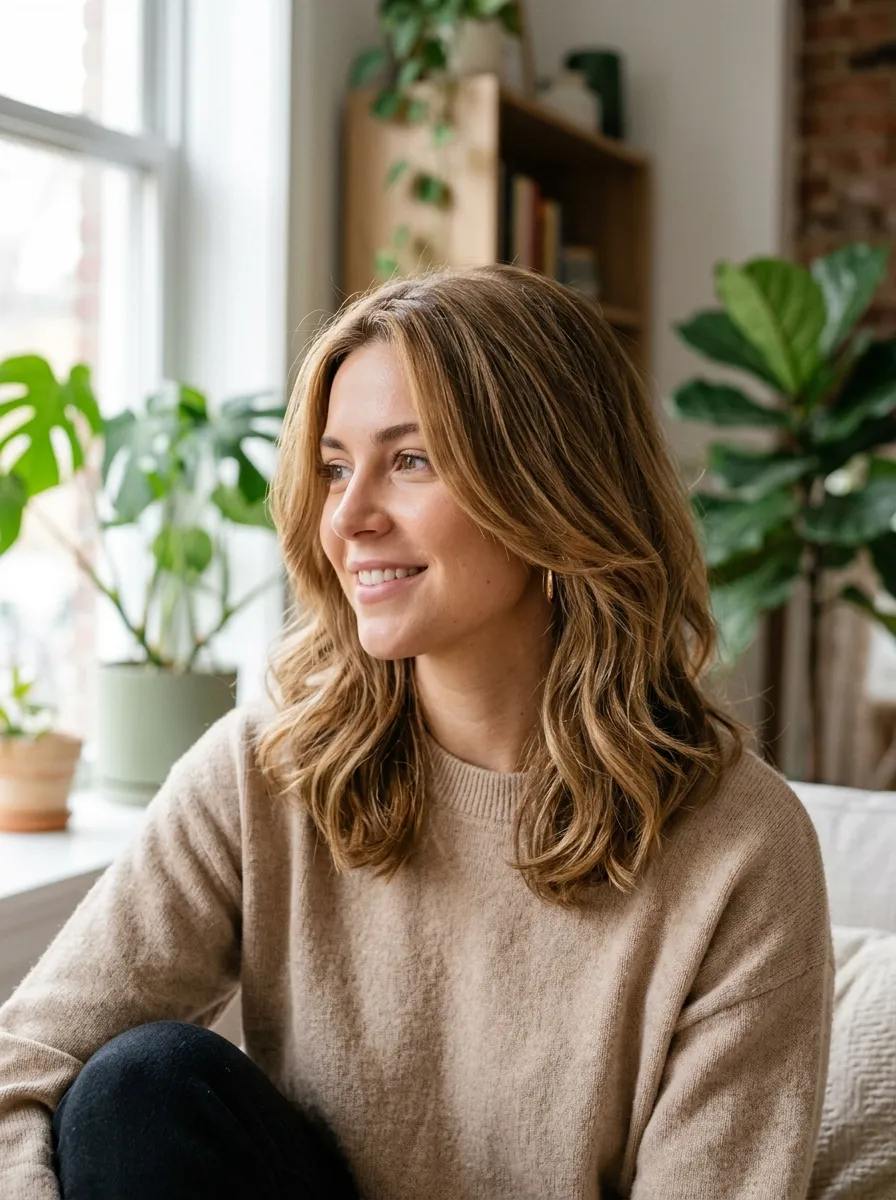
A layered lob sits between the chin and shoulders and gains extra personality when layers are added throughout. Without layers, a lob can look stiff. With them, it gains movement and a more relaxed finish.
This length works for almost every hair type and face shape, which makes it one of the most requested cuts at salons. Layers can be subtle for a polished look or heavier for a textured, undone finish.
If you have thick hair, ask for layers throughout the interior to reduce bulk. If you have fine hair, request layers only at the ends to avoid thinning out the overall shape.
A simple air dry with a texturizing cream gives this cut a lived in look. For more polish, a flat iron with a slight bend at the ends adds shine and shape without much effort.
13.Face Framing Layers for Round Faces
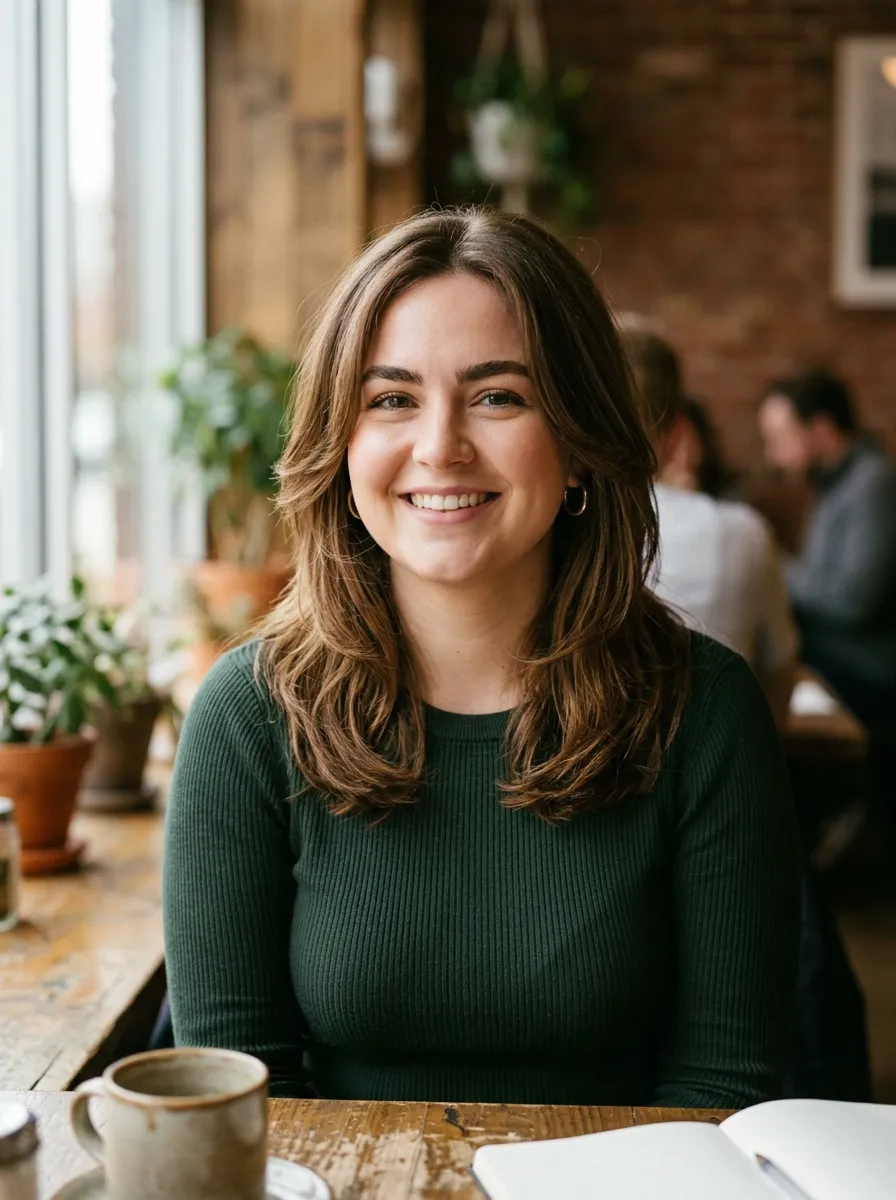
Face framing layers are cut to elongate the face by adding length and movement near the cheeks and jaw. For round faces, this creates the appearance of more angles and reduces width at the widest points.
Ask your stylist to keep the layers longer, starting around the chin and getting gradually shorter toward the cheekbones. Avoid layers that end right at the widest part of your face, since this can emphasize roundness instead of softening it.
This cut works on any length, from a lob to long hair past the shoulders. It also pairs well with side swept bangs, which add another layer of face framing detail.
At home, you can maintain the shape by trimming small amounts every few months, focusing only on the front pieces. A flat iron with a slight outward flick at the ends helps elongate the face further when styling.
14.Layered Shag for a Casual Look
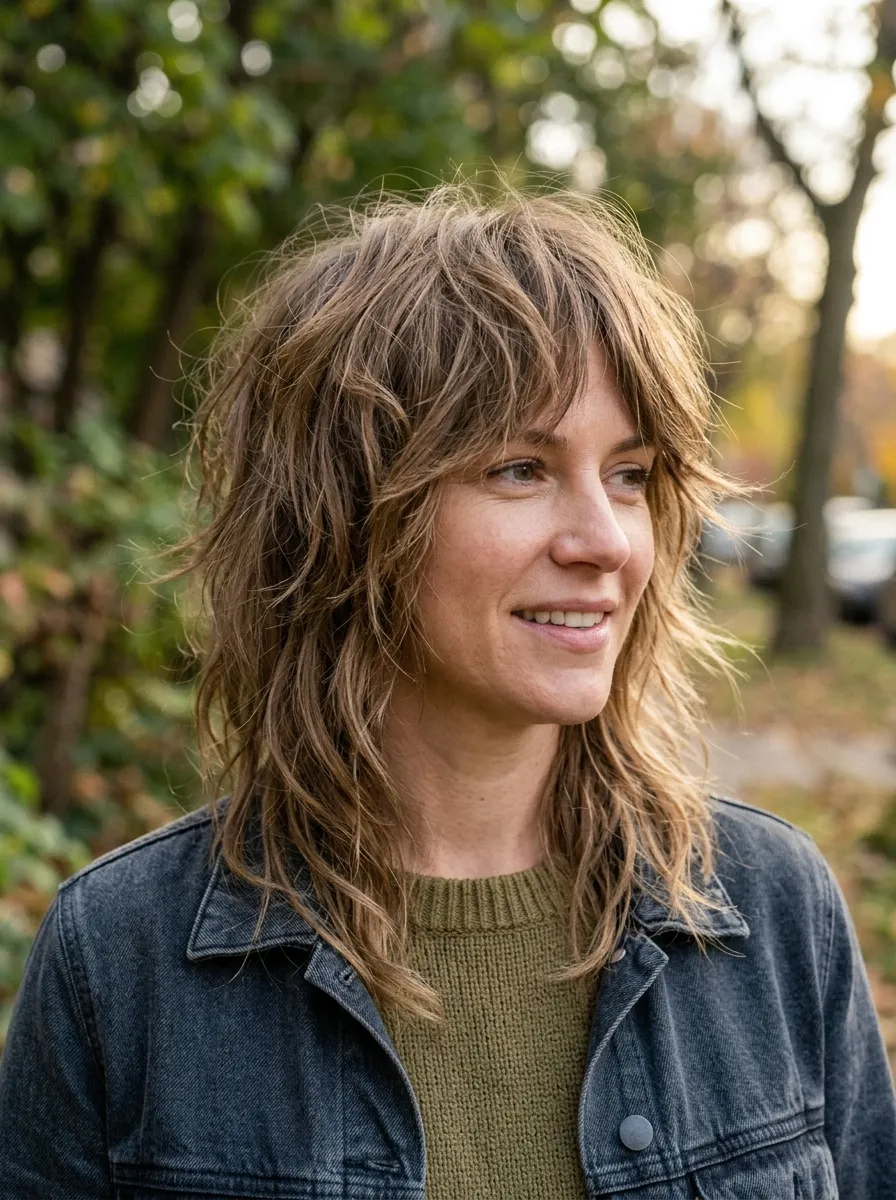
The shag is a heavily layered cut with a textured, undone finish that works well for people who want a low effort, high impact style. Layers are cut throughout the whole head, often including shorter pieces near the crown for volume.
This cut suits straight, wavy, and curly hair, since the point of the shag is texture rather than a smooth, blended shape. It pairs naturally with curtain bangs for a complete retro inspired look.
Styling requires minimal effort. Air drying with a texturizing spray gives the shag its signature messy finish. If you want more definition, twist small sections while damp and let them air dry before shaking them loose.
Because the shag relies on texture rather than precision, small growing out periods do not ruin the shape the way they might with a more structured cut. This makes it a practical choice if you cannot get to the salon often.
15.Long Layers with Balayage Highlights
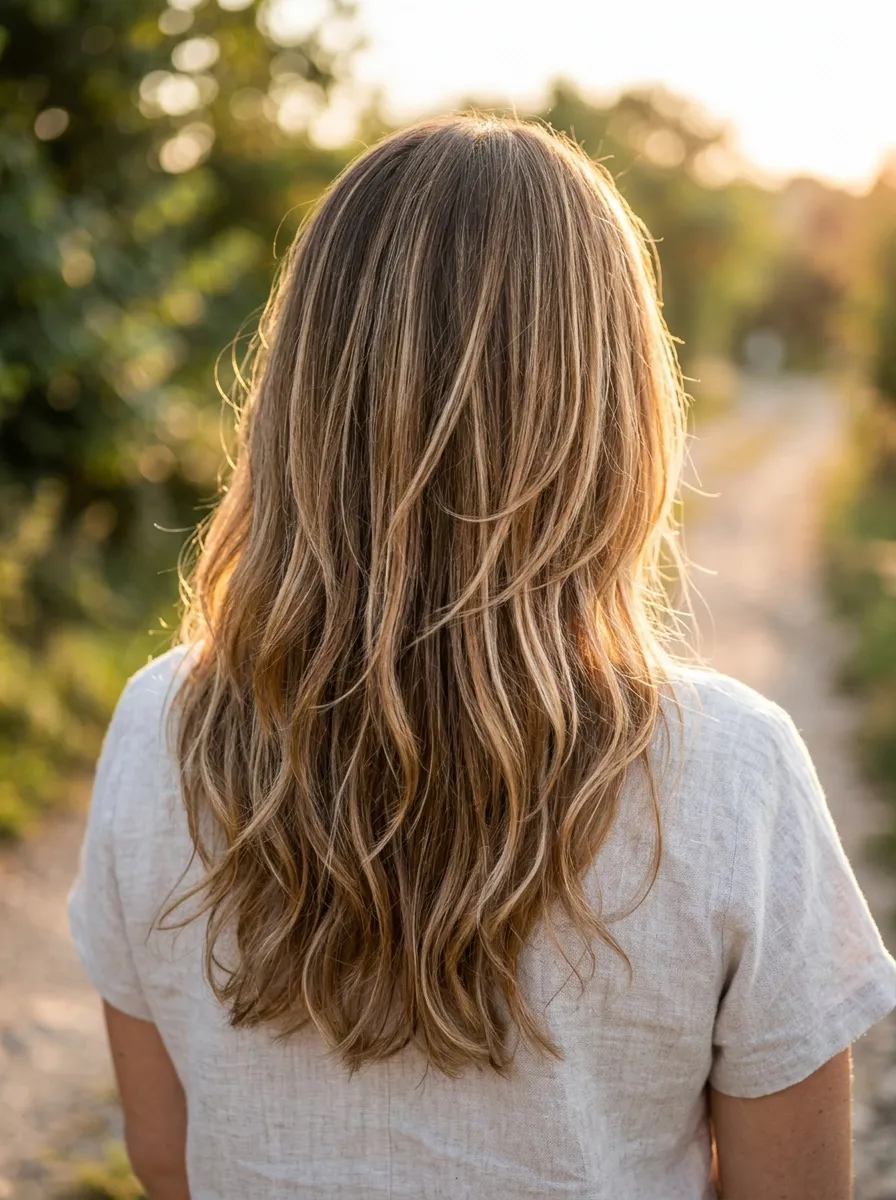
Long layers become more noticeable when paired with balayage, since the color naturally follows the movement created by the layers. Lighter pieces catch the eye as your hair moves, highlighting the shape of the cut itself.
This combination works best when the balayage is placed to follow the direction of the layers, brightening the face framing pieces and the ends. Ask your colorist and stylist to coordinate so the color placement matches the layer pattern.
If salon color is outside your budget right now, a box balayage kit or a few money piece highlights around your face can create a similar effect on a smaller scale. Focus the lightened pieces where your layers naturally fall.
Maintain the color with a purple shampoo once a week to prevent brassiness, and use a hydrating mask regularly since lightened layers tend to dry out faster than the rest of your hair.
16.Blunt Ends with Interior Layers
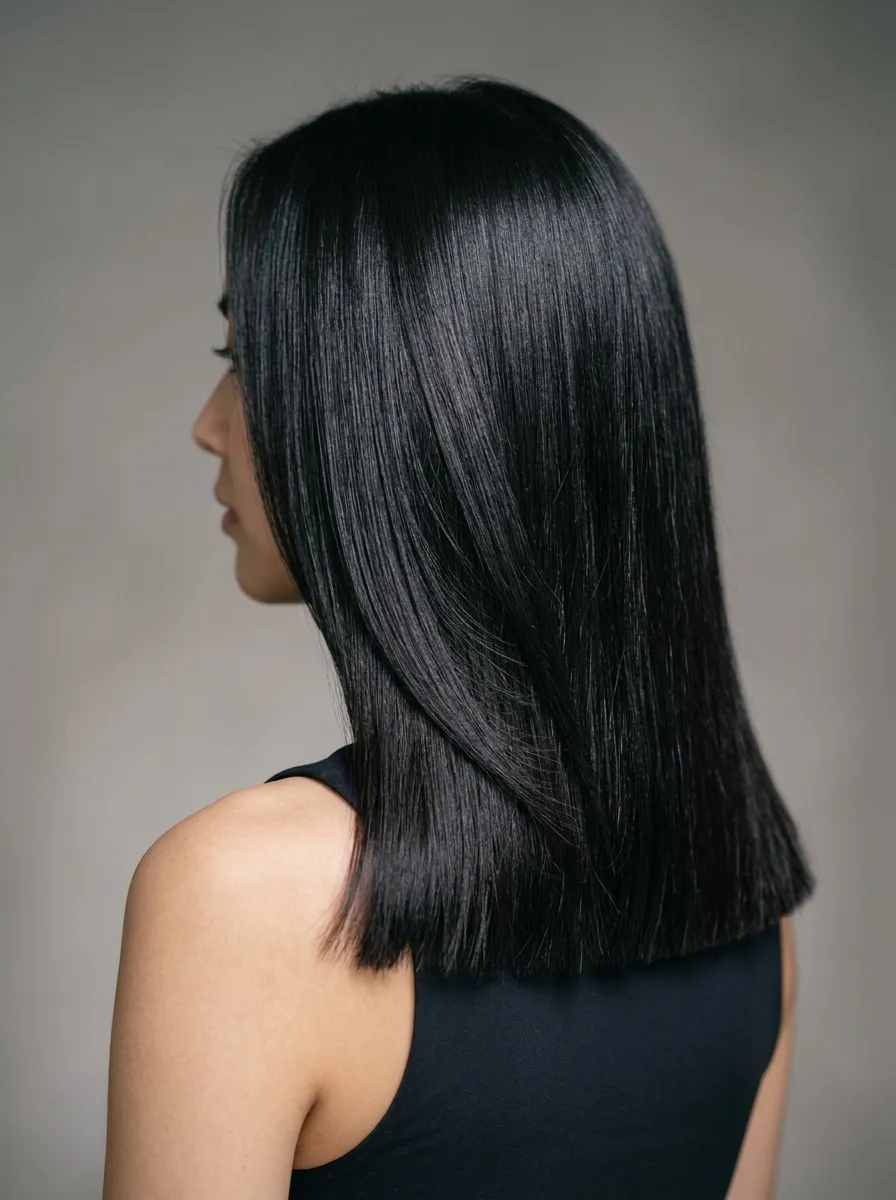
This style keeps the outer perimeter of your hair blunt and heavy while adding layers only on the inside, hidden beneath the top layer. The result looks like a one length cut from the outside but moves like a layered cut underneath.
This is a great option if you want the look of a blunt cut without the flatness that sometimes comes with it. It works especially well on thick, straight hair, where interior layers reduce bulk without changing the visible shape.
Ask your stylist specifically for interior layering, since this technique is different from standard layering and not every stylist offers it as a default option. Bring a photo reference if you can, since the terminology varies by salon.
At home, this cut is low maintenance since the blunt perimeter grows out evenly. You will mainly need trims to keep the ends healthy, without worrying about visible layer lines growing out unevenly.
17.Layered Bangs Paired with Long Hair
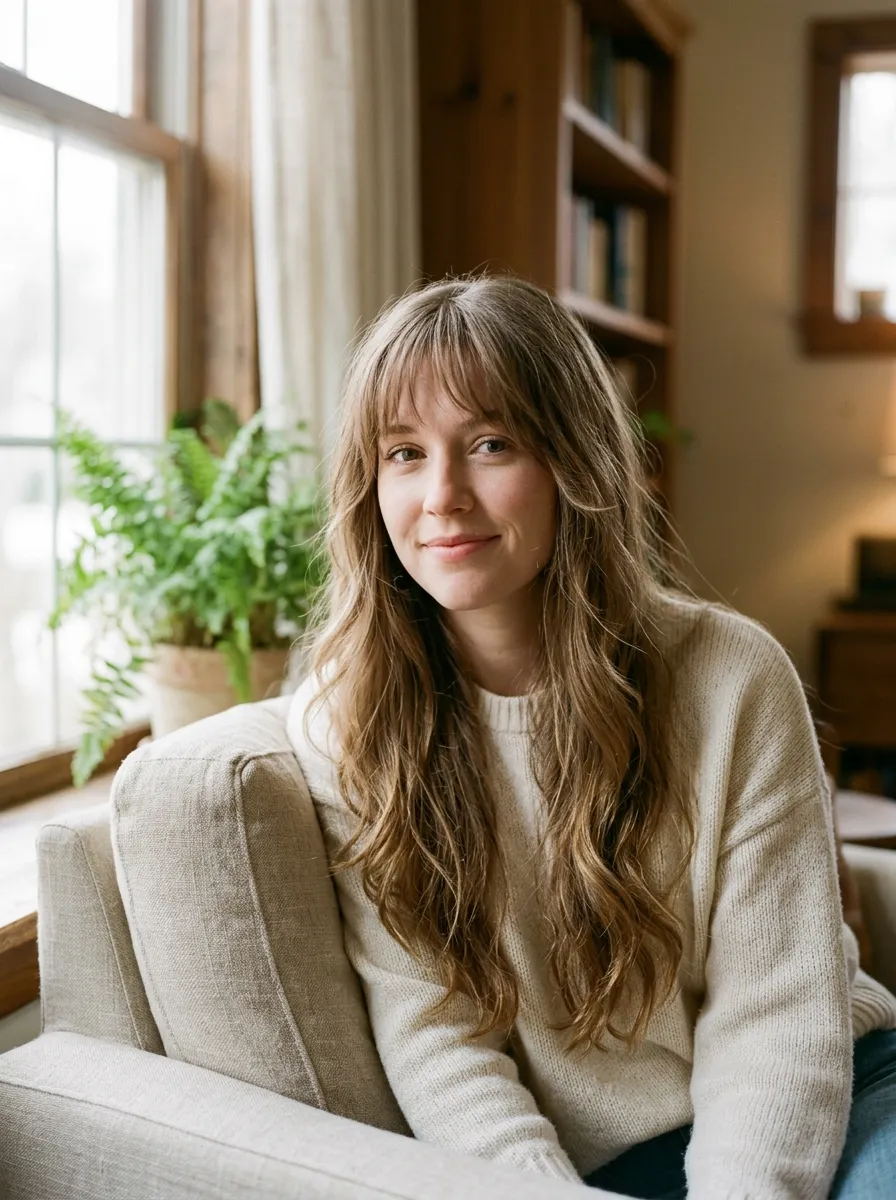
Layered bangs add softness to long hair by breaking up the fringe into pieces instead of one solid line. This creates a wispy, effortless look that blends more naturally into the rest of your length.
This style suits most face shapes since the layered edges can be customized. Longer, side swept layered bangs suit rounder faces, while shorter, textured bangs work well for oval or longer face shapes.
Styling is simple. Blow dry your bangs downward and slightly to the side using a small round brush, then set with a light hold spray. If you want extra texture, a flat iron with a loose bend at the ends prevents them from looking too straight and heavy.
Trim your bangs every three to four weeks to keep the layered shape crisp. Many people learn to trim their own bangs at home using small, sharp scissors and cutting only a tiny amount at a time.
18.Wolf Cut with Heavy Layers
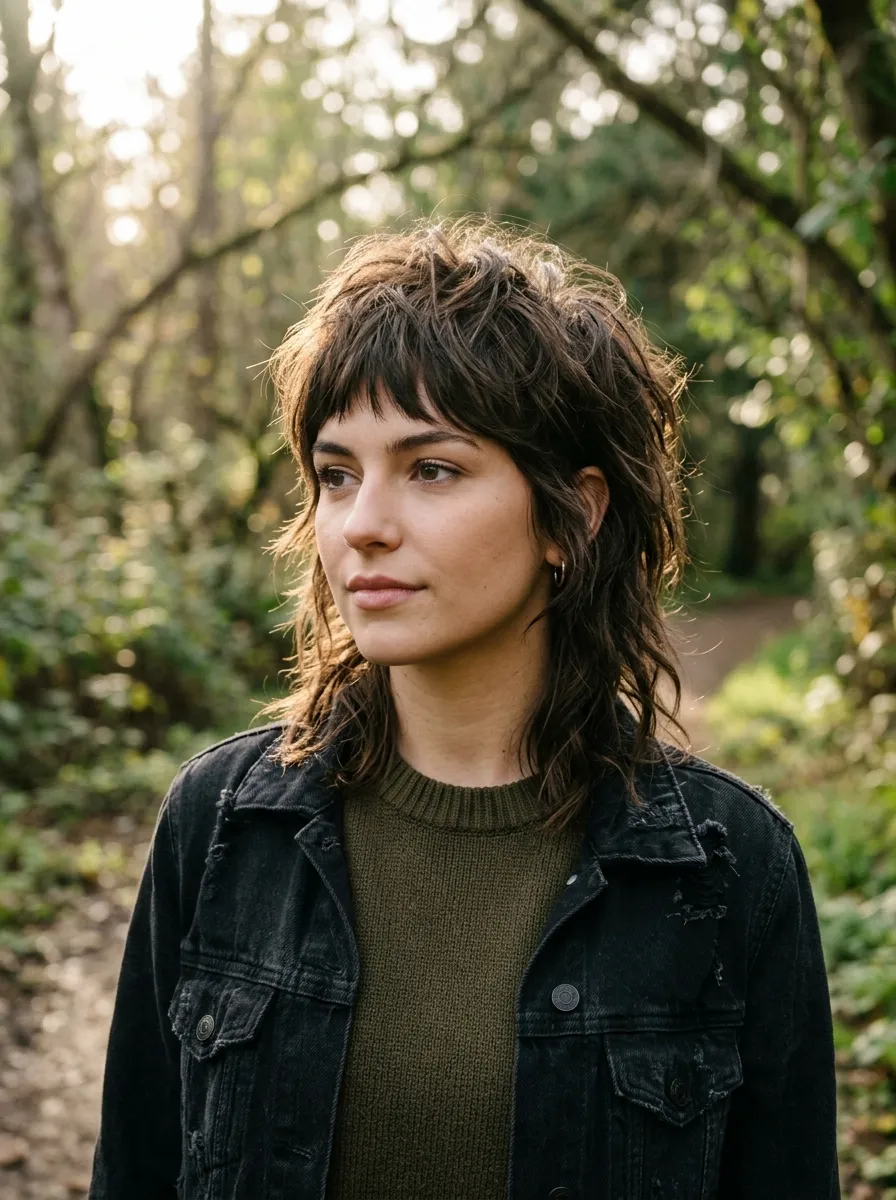
The wolf cut combines a shag with mullet inspired shorter layers at the crown, creating a bold, heavily textured shape. It works best on medium to long hair and looks especially striking on wavy or curly textures.
This cut requires confidence, since the layers are more dramatic than a standard layered cut. If you are unsure about committing fully, ask your stylist for a softer version with less contrast between the top and bottom layers.
Texturizing spray and a diffuser are your best styling tools here. Scrunch product through damp hair and let it air dry, or diffuse on low heat for extra volume at the roots.
Because this cut relies on visible texture, growing it out does not look as awkward as it might with a more precise style. This makes the wolf cut a good choice if you want a dramatic change without worrying about the in between stages.
19.Layered Hair for Thin, Fine Strands
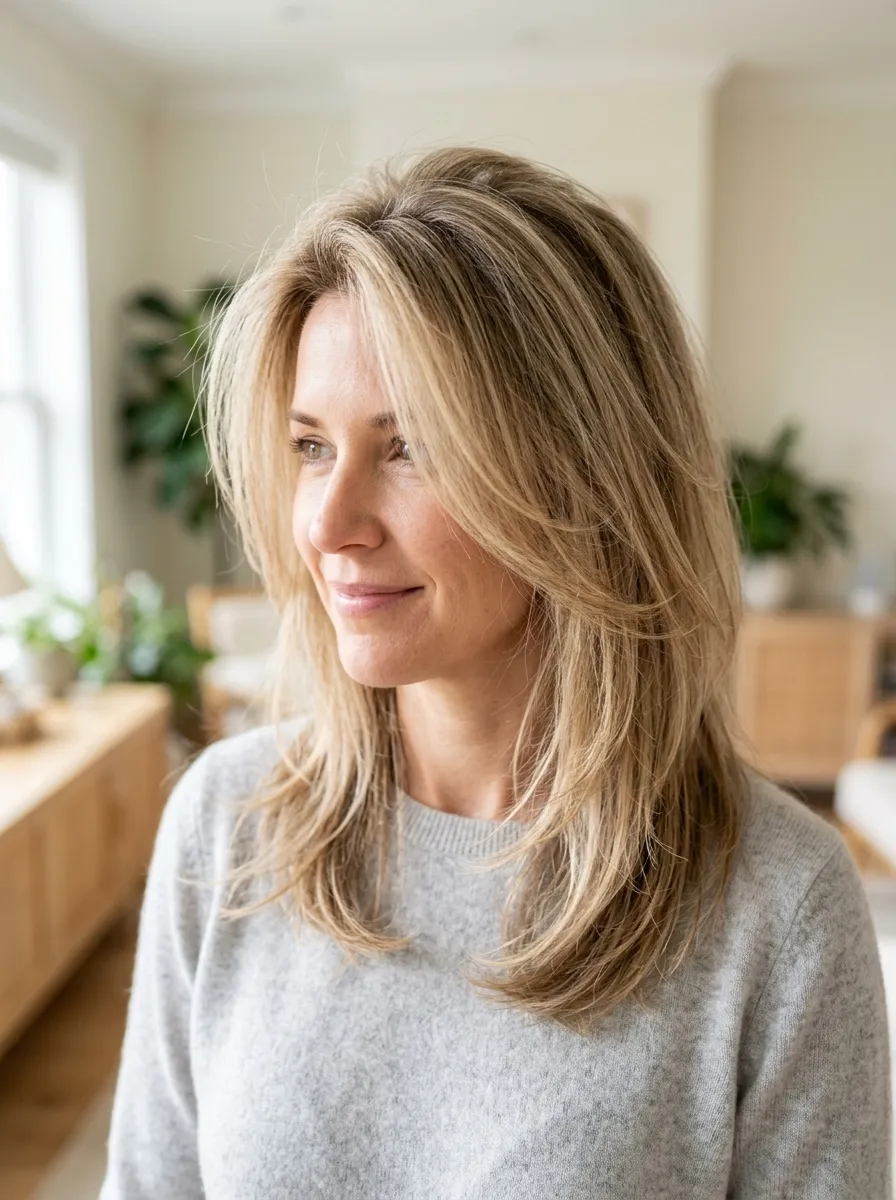
Fine hair benefits from shorter, more concentrated layers rather than long, subtle ones, since shorter pieces create the illusion of thickness. Long, soft layers can actually make fine hair look thinner by removing too much weight.
Ask your stylist for layers that stop above your shoulders even if your overall length is longer, concentrating the shorter pieces at the crown and around your face. This builds volume where it matters most.
Volumizing mousse applied to the roots of damp hair, followed by blow drying with your head flipped upside down, adds noticeable lift. Avoid heavy oils or creams, which weigh fine hair down quickly.
Regular trims every six to eight weeks help prevent thin ends from looking stringy. Fine hair shows split ends more visibly than thicker hair, so consistent trims matter more for keeping this style looking full.
20.Short Layers for Wash and Go Styles
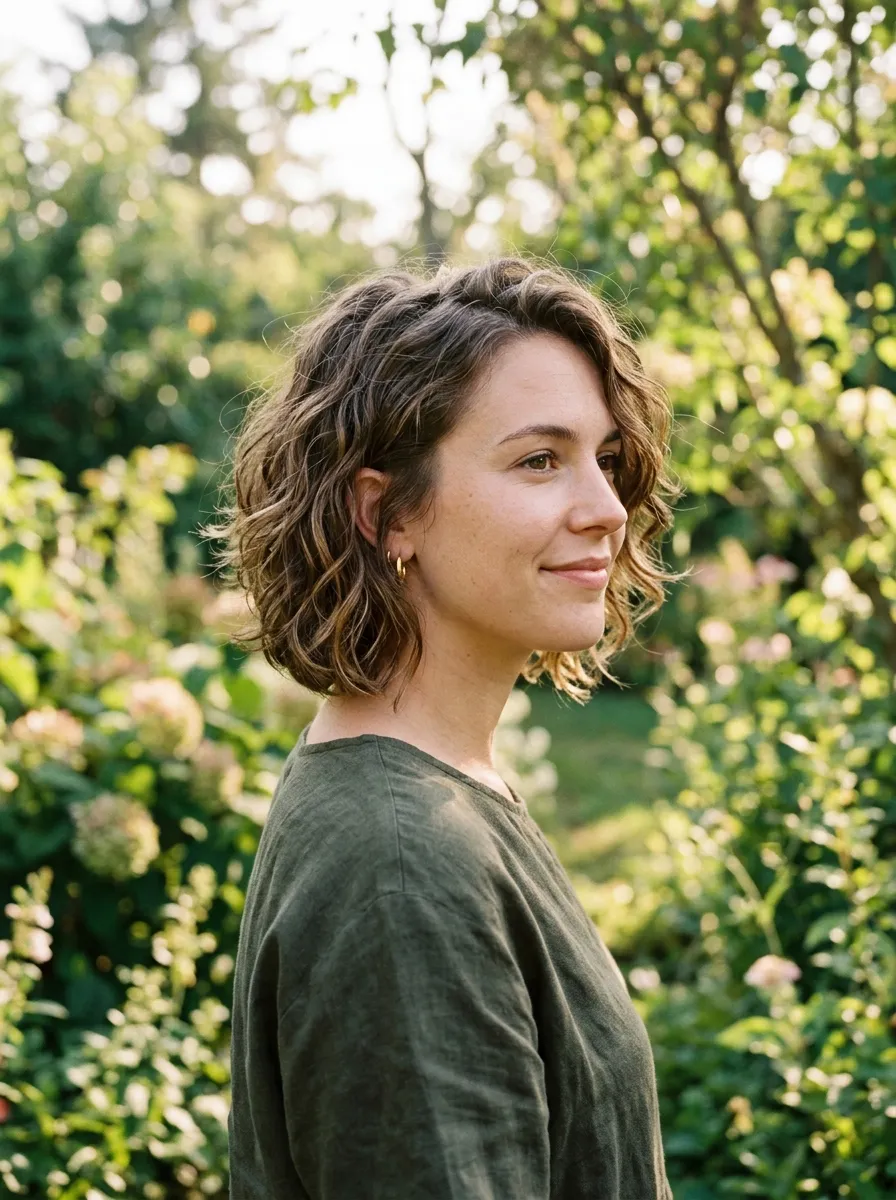
Short layers cut close to the head create a style that requires little more than washing and letting your hair dry naturally. This is a practical option for people who want low effort mornings without sacrificing shape.
This cut suits wavy and curly hair especially well, since the natural texture does most of the styling work. Straight hair can also work, though it may benefit from a small amount of texturizing spray to prevent flatness.
Ask your stylist for layers that start around ear level, building shorter toward the crown. This creates a rounded, easy to manage shape that looks intentional even without heat styling.
For upkeep, a lightweight leave in conditioner applied to damp hair keeps texture soft without weighing it down. This style also holds up well in humid weather, since the shorter layers do not have as much length to frizz or fall flat.
21.Layered Ponytail Cut for Length
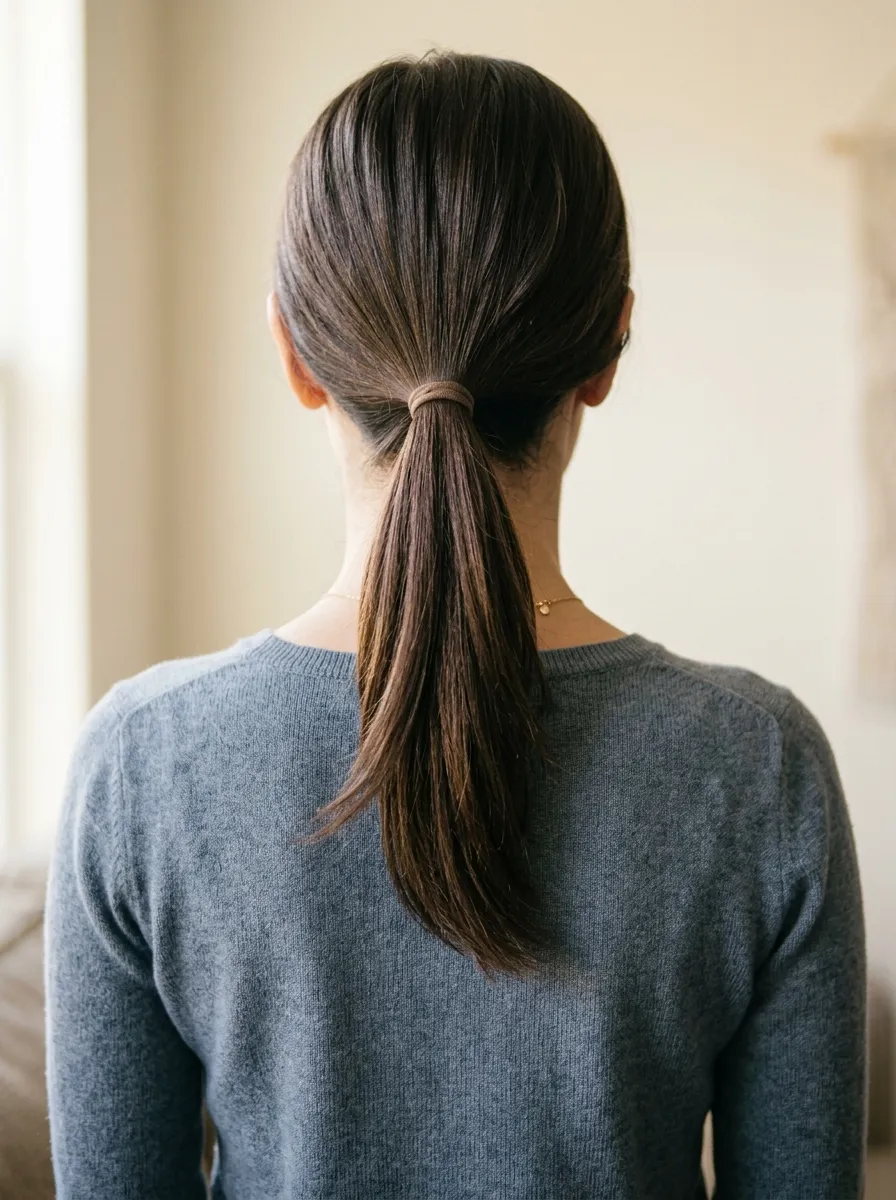
A layered ponytail cut is done by pulling hair into a ponytail and cutting the ends at an angle, which naturally creates a soft layered effect once the hair is released. This is a technique some at home cutters use to add movement without a full salon visit.
This method works best for straight to wavy hair and long lengths, since the angle becomes more visible the longer your hair is. It is not recommended for very curly hair, since the ponytail position can distort how the cut looks once released.
To try this safely at home, gather your hair into a low ponytail, comb it smooth, and trim a small amount at a slight angle using sharp scissors. Always cut less than you think, since you can trim more but cannot add hair back.
This is a budget friendly way to refresh your ends and add subtle layering between salon visits, though a professional cut is still recommended for more precise or dramatic layering.
22.Layered Waves for Beach Style Texture

Layered waves combine soft layering with a beachy, textured finish, giving hair a relaxed movement that looks effortless. This style works well on medium to long hair and suits most face shapes since the waves soften any harsh lines from the cut.
Ask your stylist for layers that start around the mid length of your hair, so the waves have enough length to move without looking too choppy near the roots.
To style, use a curling wand on alternating sections, curling away from your face, then run your fingers through the curls once they cool to loosen them into waves. A sea salt spray applied before curling adds extra texture and hold.
This look is budget friendly since it does not require expensive tools. A basic curling iron and a drugstore texturizing spray can achieve the same beachy result as salon styling, especially once you practice the technique a few times.
23.Layered Undercut for Bold Volume
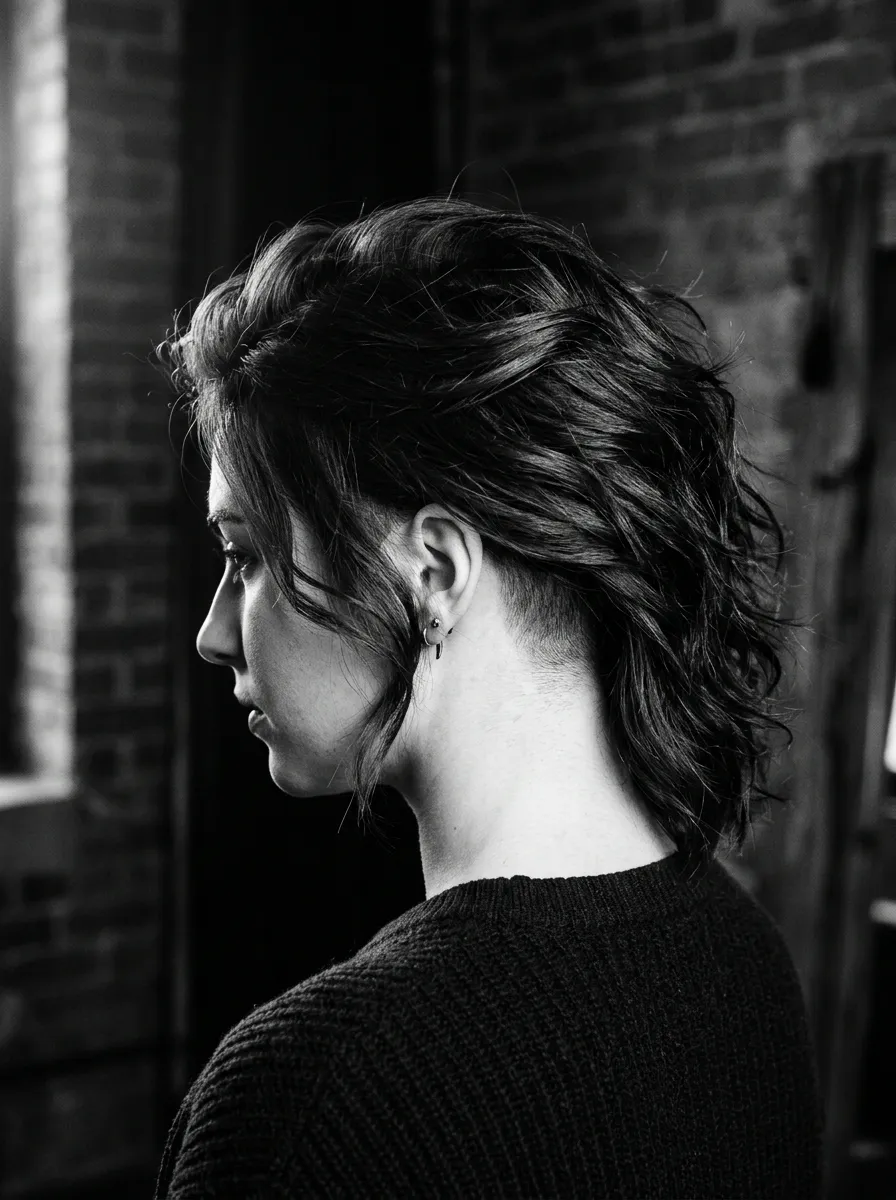
A layered undercut combines visible layers on top with a shaved or closely cropped section underneath, creating contrast and reducing bulk for people with thick hair. This is a bolder choice that suits people who want an edgier look alongside practical volume reduction.
The undercut portion is usually hidden beneath the top layers, so it can be revealed or concealed depending on how you style your hair for the day. This flexibility makes it a good option if you want a dramatic option without full commitment.
Ask your stylist to keep the top layers long enough to cover the undercut completely if you want the option to hide it for work or formal settings.
Maintenance involves trimming the undercut portion every four to six weeks to keep it neat, while the top layers can go longer between cuts since they are meant to grow out naturally over time.
Conclusion
Layers are a flexible tool that can solve almost any hair concern, from flatness and bulk to a lack of shape or movement. Whether you have fine strands looking for volume, thick hair looking for less weight, or curls looking for more definition, there is a layered cut on this list built for your texture and budget. Start by picking one or two styles that match your current length and hair type, bring reference photos to your next appointment, and use the simple styling tips shared here to keep your new layers looking their best between visits. Small changes like these can shift how your hair feels every single day, without a drastic overhaul or a big spend.
Leave a Reply