
1.Choppy Curtain Bangs Shag

Curtain bangs are the easiest way to soften a shag without losing the edge. Choppy ends give the fringe a broken up look instead of one straight line. This works well if you have round or square face shapes because the bangs frame your cheekbones. You can ask your stylist for a razor cut on the ends for extra texture. If you are trying this at home, only trim small sections at a time. Use sharp shears, not regular scissors, since dull blades cause split ends. Start with damp hair, comb it flat, then snip tiny vertical cuts into the ends instead of one straight line. This creates that piecey look without needing expensive tools. A cheap texturizing spray can help hold the shape between washes. If you want low maintenance styling, blow dry with a round brush pointing the bangs slightly outward. This cut pairs well with black or deep brown shades, which are common in emo styling. It also grows out nicely since the layers blend as length increases.
2.Razor Cut Wolf Shag

The wolf shag mixes a mullet with a classic shag for extra volume on top. A razor cut technique removes weight from the ends so hair looks wild instead of flat. This style suits thick or medium hair best since it needs enough density to hold the shape. Ask your stylist to focus the shortest layers around the crown and let the back grow longer. At home, you can fake the texture using a texturizing powder at the roots for lift. Flip your head upside down while blow drying to add natural volume. A cheap sea salt spray works well here too, since it roughs up the strands without expensive products. This cut looks great with dark roots fading into a lighter tip, which is a budget friendly way to add dimension without a full dye job. Keep trims every eight to ten weeks so the layers stay sharp. Avoid heavy conditioner on the roots since it can weigh down the volume this cut depends on.
3.Jet Black Feathered Layers
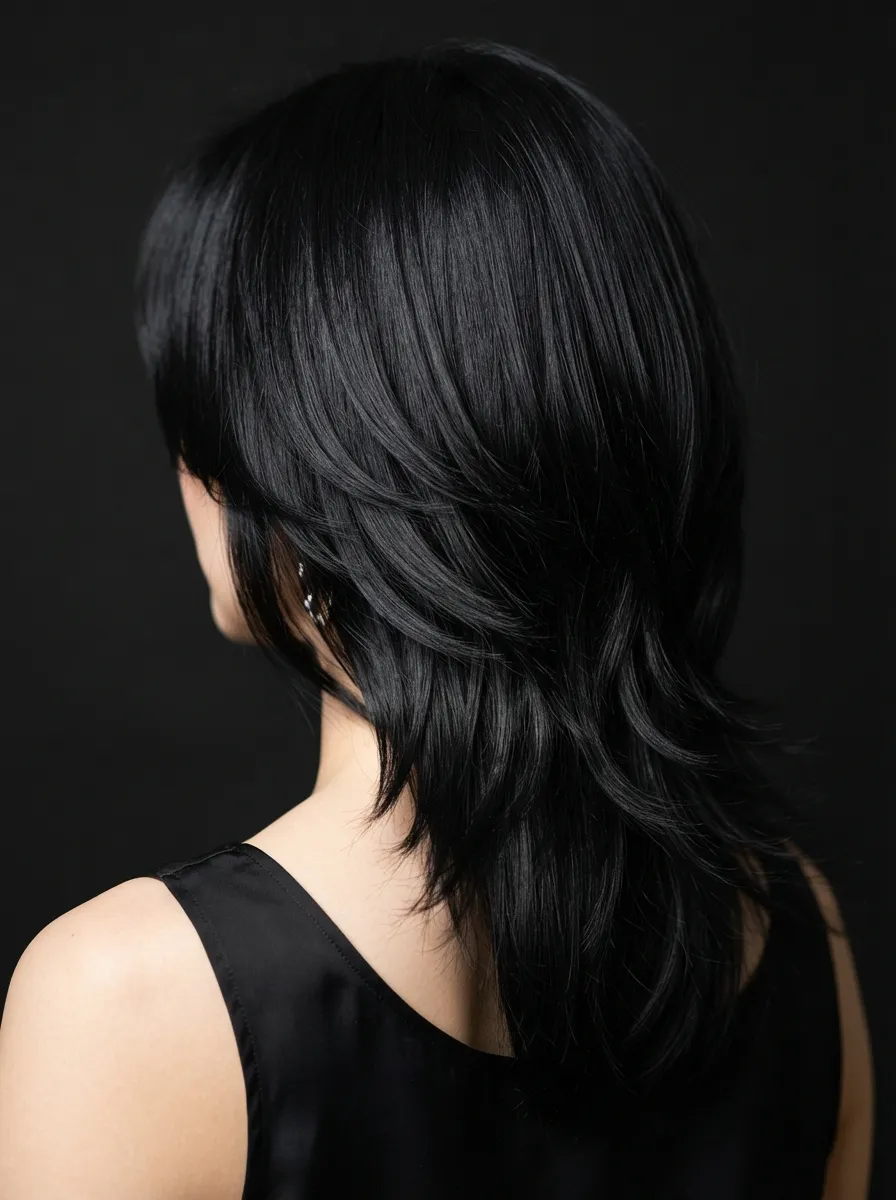
Feathered layers give a shag a softer, almost vintage emo feel. Jet black color makes the feathering stand out since light catches each layer differently. This works for long or medium hair and suits most face shapes. If you already have dark hair, you can skip the dye and just ask for the feathered layers to be added. At home, a flat iron with a slight curl at the ends recreates the feathered look without a salon visit. Budget tip: a basic ceramic flat iron under a few thousand rupees works fine if you use a heat protectant spray first. Comb the ends outward while curling instead of inward for that feathered flip. Deep conditioning once a week keeps jet black hair from looking dull, especially if you color it yourself. Coconut oil left in overnight before a wash is a cheap way to bring back shine without buying expensive hair masks. This look pairs naturally with smokey eye makeup for a complete emo aesthetic.
4.Two Tone Pink and Black Shag
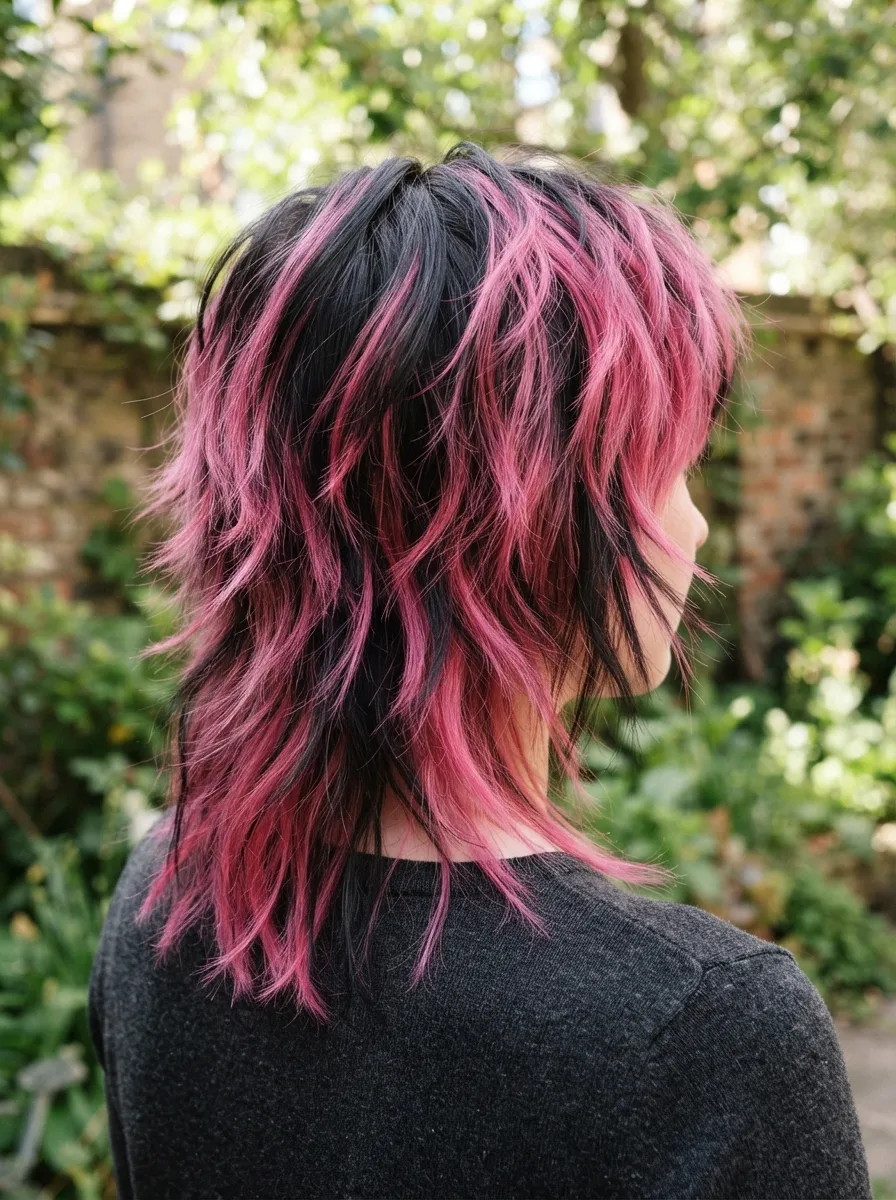
Two tone color adds instant edge to a shag without changing the cut itself. Pink and black is a classic emo combination, especially when the pink sits underneath the black top layer. This creates a peekaboo effect when hair moves. You do not need a full dye job to try this. Ask your stylist to only color the underlayer, which uses less product and costs less than an all over dye. At home, semi permanent pink dye works on pre lightened sections and washes out after a few weeks if you want to test the look first. Always do a strand test before committing to any at home color. Keep the black portion glossy by using a color safe shampoo, which prevents fading faster than regular shampoo. If your budget is tight, clip in colored extensions are a no commitment way to try this style for a single event or photo shoot. This combination photographs well and works for both short and long shag lengths.
5.Long Shag with Face Framing Pieces

Face framing pieces bring attention to your eyes and cheekbones while keeping the rest of the length intact. This version of the shag works well if you are not ready to commit to short bangs. The shorter pieces sit around the jaw or cheek area while the back stays long. This is a good pick for anyone growing out bangs but still wanting some shape near the face. At home, you can create temporary face framing layers using a curling wand to bend the front pieces inward. A budget round brush and hair dryer combo also works if you want a softer bend. Ask your stylist to keep the face framing layers slightly shorter than chin length for the most dramatic effect. This style pairs well with darker roots and lighter ends, which is a low maintenance color option since regrowth blends naturally. Regular trims every ten to twelve weeks keep the framing pieces sharp instead of growing out into the rest of the length.
6.Short Shag Pixie Mix
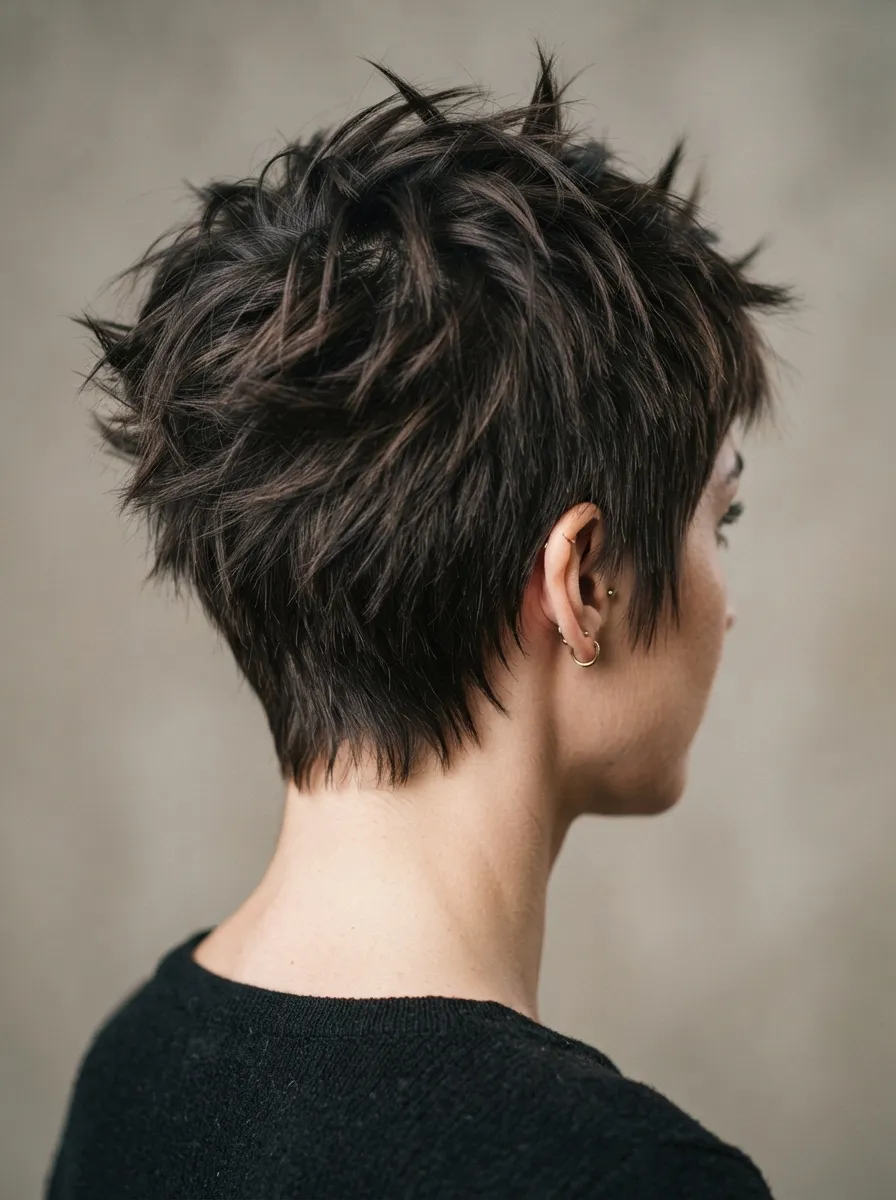
Mixing a pixie cut with shag layering creates a bold, low maintenance option. This style keeps length short around the sides while adding textured layers on top for movement. It suits people who want an edgy look without daily styling time. A small amount of matte wax is enough to define the top layers, and one tub usually lasts months, making it a budget friendly choice long term. Apply the wax to dry hair and scrunch upward for texture instead of combing it flat. This cut works well on thin hair since shorter layers make hair look fuller. Ask your stylist for disconnected layers around the crown for extra height. At home touch ups are simple since the length is short, meaning you can trim small pieces yourself between salon visits using thinning shears. This style also dries fast, which saves time and reduces heat damage from blow drying. Dark colors like black or deep burgundy suit this cut well for an emo finish.
7.Disconnected Undercut Shag
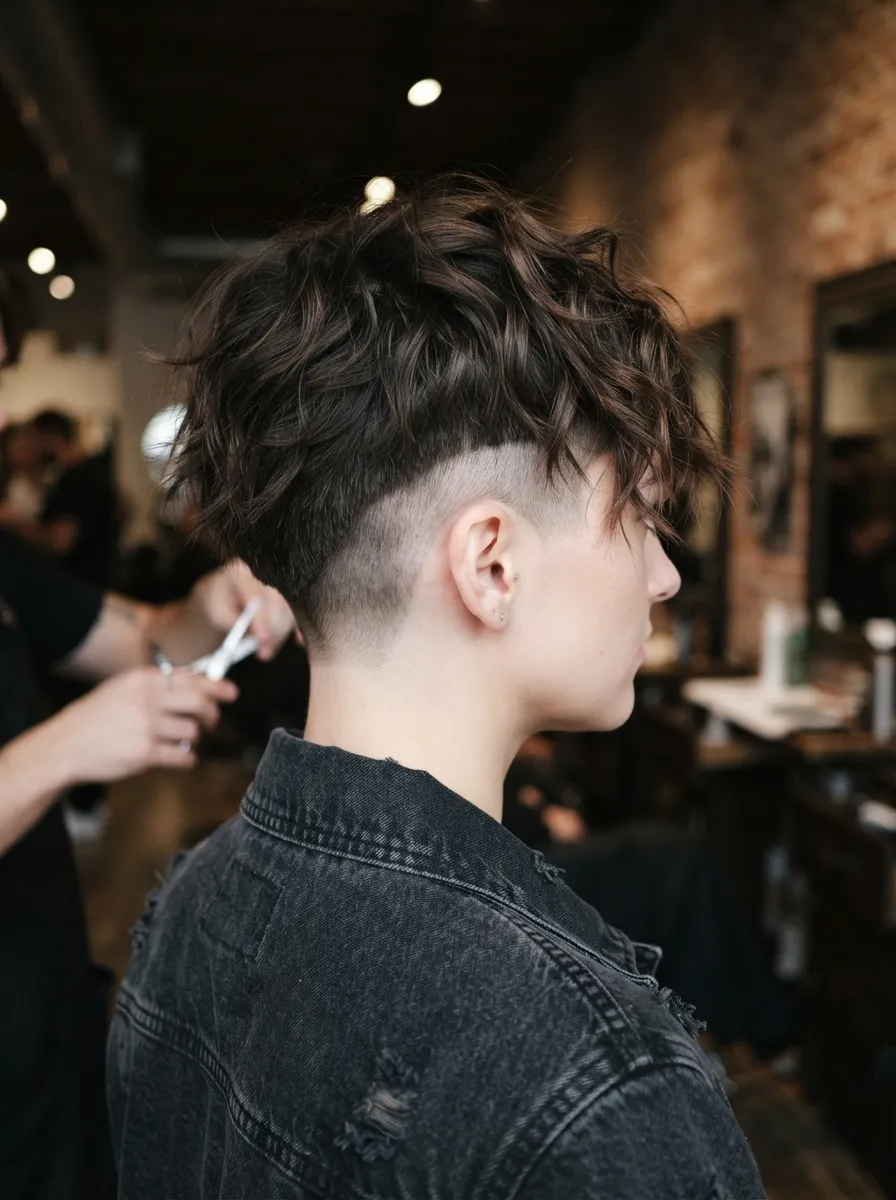
The disconnected undercut shag combines a shaved or very short side with longer, layered hair on top. This creates sharp contrast, which is a strong choice for emo styling. The top layers can be styled messy or swept to one side depending on your mood. Maintaining the shaved sides is affordable since most barbershops charge less for a simple buzz compared to a full haircut. You can also trim the sides yourself at home using a basic hair clipper, which pays for itself after just a few uses. Keep a guard size of two or three for a softer undercut look. The top layers need occasional trims to keep the shag texture, but this can be spaced out longer than the side maintenance. A light pomade helps style the top section without making it stiff. This cut suits most face shapes since the longer top balances out the shaved sides. Dark hair colors make the contrast between sections stand out more clearly.
8.Mullet Inspired Shag
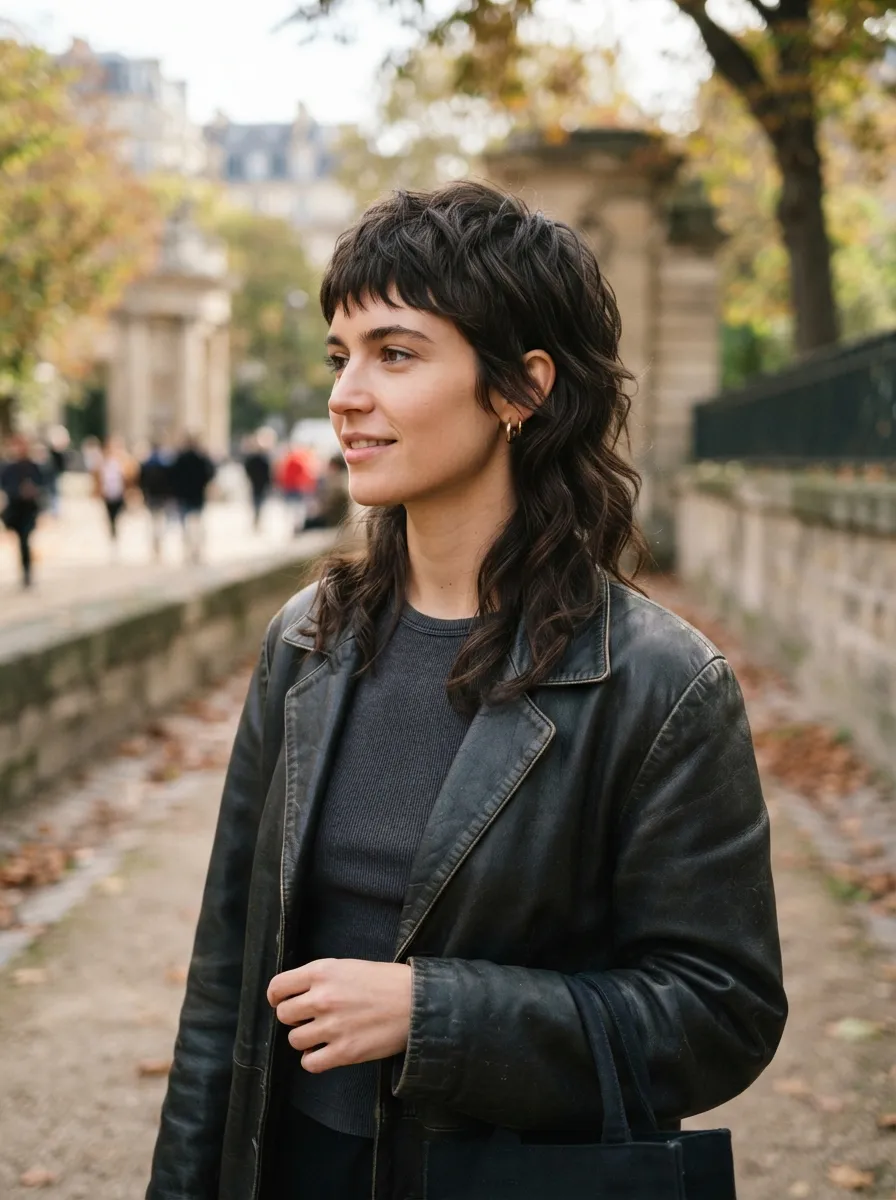
Combining a mullet with shag layering gives you short, textured hair on top with longer strands left at the back. This style has grown popular again because it photographs well and suits both curly and straight hair types. The back section works well left longer for a dramatic contrast against the shorter crown. At home, you can maintain this cut by only trimming the top and sides yourself while leaving the back for a stylist visit every few months, which cuts down on salon costs. A texturizing spray on the crown adds lift without needing a blow dryer. This cut suits round, oval, and heart face shapes particularly well since it adds height at the crown. Dark colors with subtle red undertones bring out the layers in natural light. If you want to test this look before fully committing, ask your stylist to leave extra length at the back so you can grow it out into a full mullet later if you change your mind.
9.Textured Crown Shag
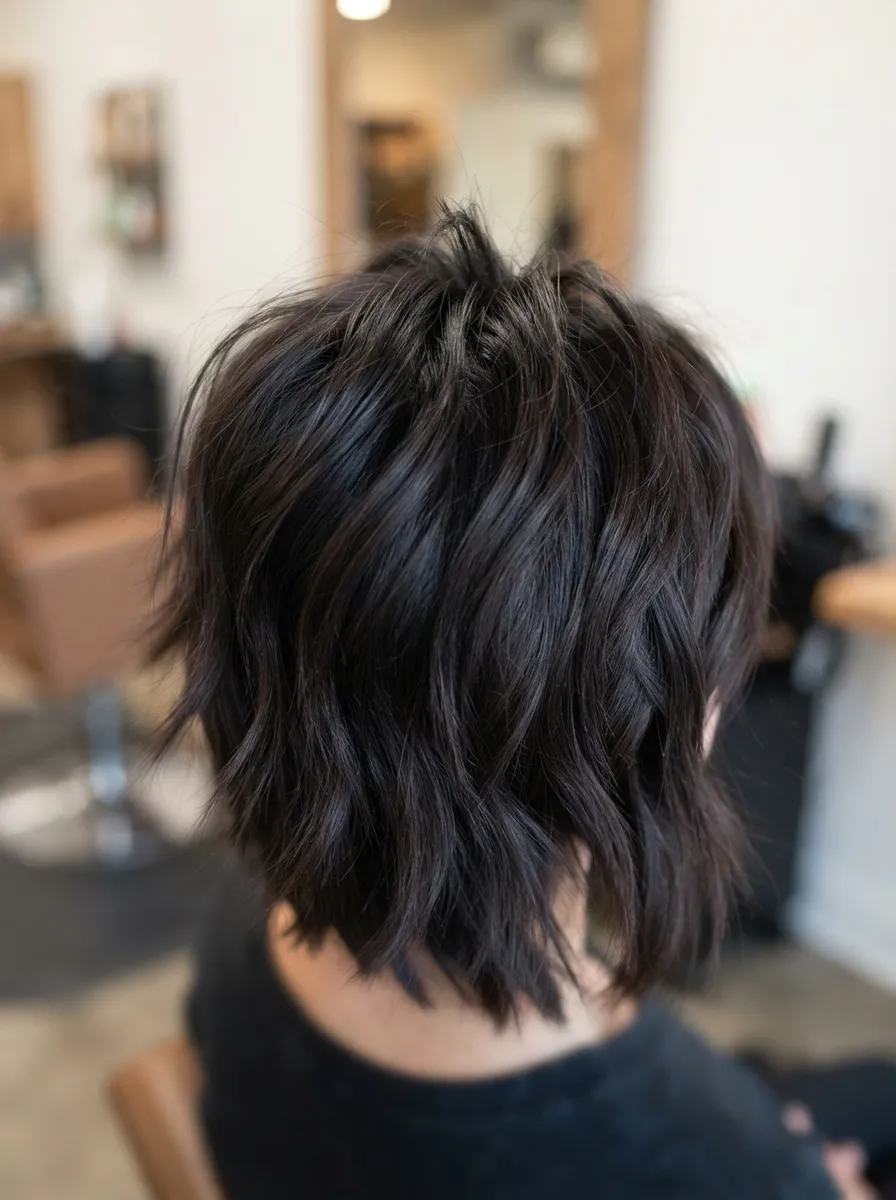
A textured crown gives a shag extra height and volume right at the top of the head. This works well for people with fine or thin hair who want a fuller appearance without extensions. Ask your stylist to point cut the layers at the crown instead of blunt cutting, which creates softer texture. At home, a small amount of root clay applied to damp hair before blow drying gives lasting lift. Flip your head upside down while drying for a few minutes to encourage volume at the roots. A cheap teasing comb can also add height for special occasions without daily use, which keeps hair healthier long term. This style pairs well with a middle or slight side part depending on your face shape. Avoid heavy oils near the roots since they can flatten the texture you are trying to build. Dry shampoo is a useful budget tool here too, since it adds texture and absorbs oil between washes.
10.Side Swept Bangs Shag
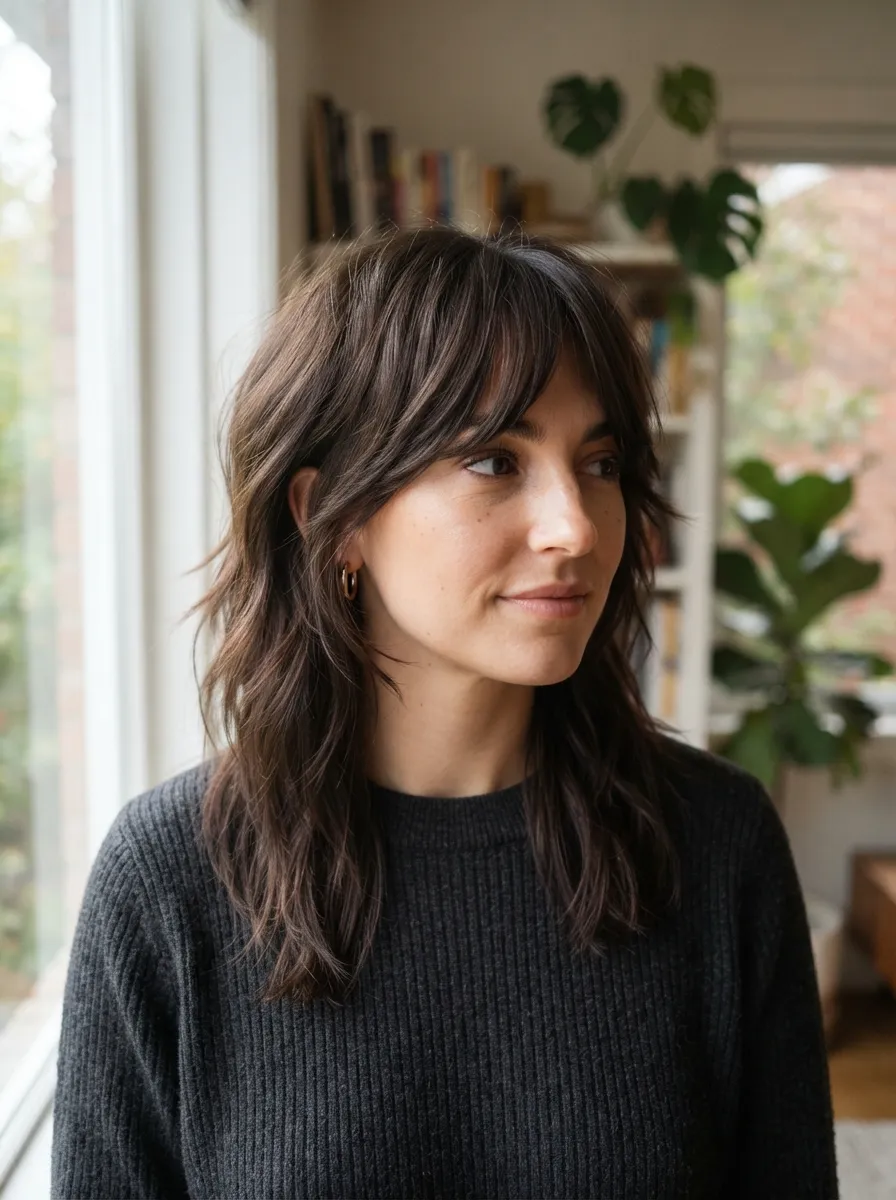
Side swept bangs add a softer emo touch compared to blunt fringe. They work well for square or round faces since the angled bangs create a slimming effect near the forehead. This style is low maintenance since the bangs blend into the rest of the layers as they grow out. At home, you can style side swept bangs using a round brush and blow dryer, brushing the hair diagonally across the forehead while drying. A small amount of hairspray keeps the direction in place through the day. If you are not ready for a permanent cut, you can test this look by parting your existing hair to one side and using bobby pins to hold shorter layers back temporarily. This cut suits both curly and straight textures, though curly hair may need a light cream to prevent frizz along the bang line. Dark colors with a slight sheen work particularly well here, since the bangs catch light differently than the rest of the shag.
11.Blunt Micro Bangs Shag
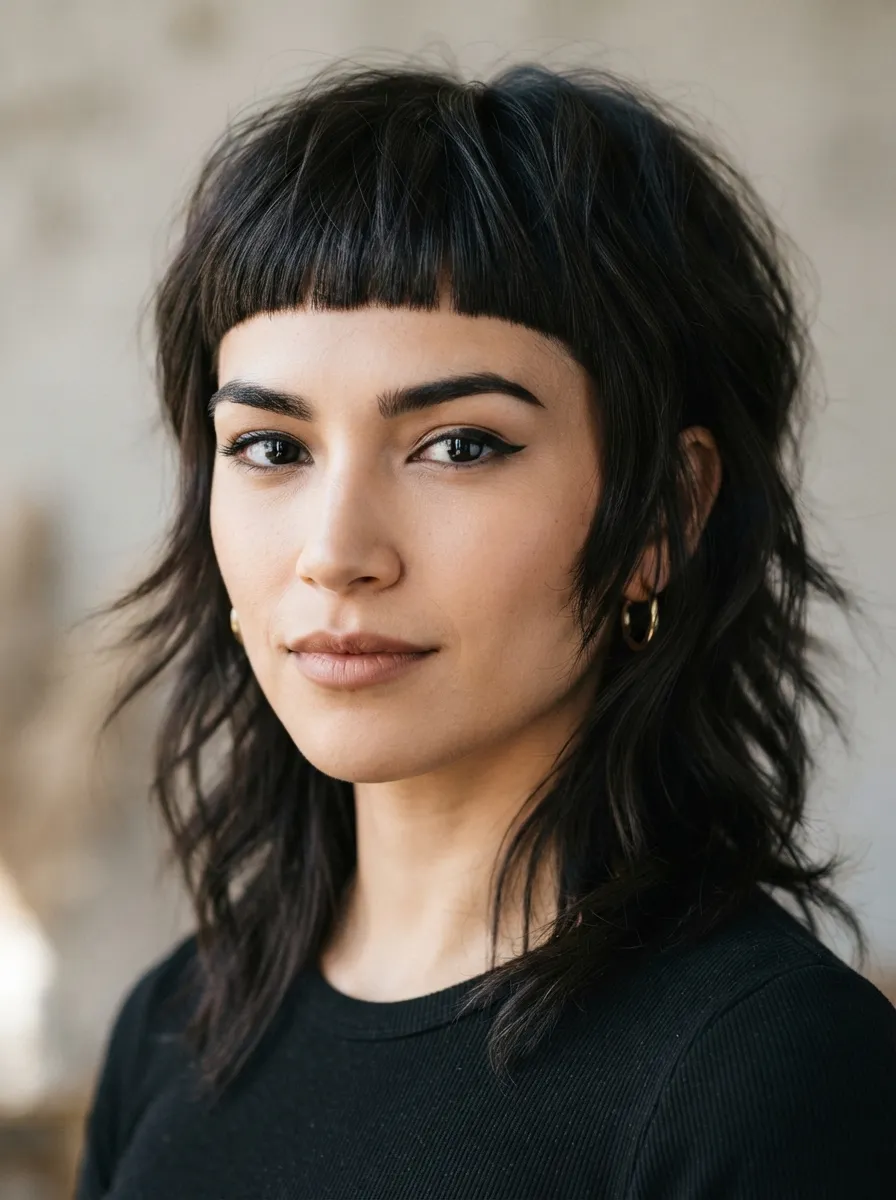
Micro bangs are a bold choice that instantly reads as emo or alternative. Cut high above the eyebrows, they work best paired with a longer shag underneath to balance the shorter fringe. This combination suits oval or long face shapes especially well. Micro bangs require regular trims, roughly every two to three weeks, since even small growth changes the shape. You can trim these yourself at home with sharp small scissors, cutting tiny sections while the hair is completely dry so you can see the exact length. Avoid cutting bangs when hair is wet since it shrinks slightly once dry, which often leads to bangs that end up too short. A light gel or wax keeps micro bangs from separating throughout the day. This style pairs well with black or dark brown hair since it keeps the focus sharp and graphic. If you are unsure about commitment, ask your stylist to cut a longer version first that you can shorten gradually over a few sessions.
12.Silver and Black Money Piece Shag
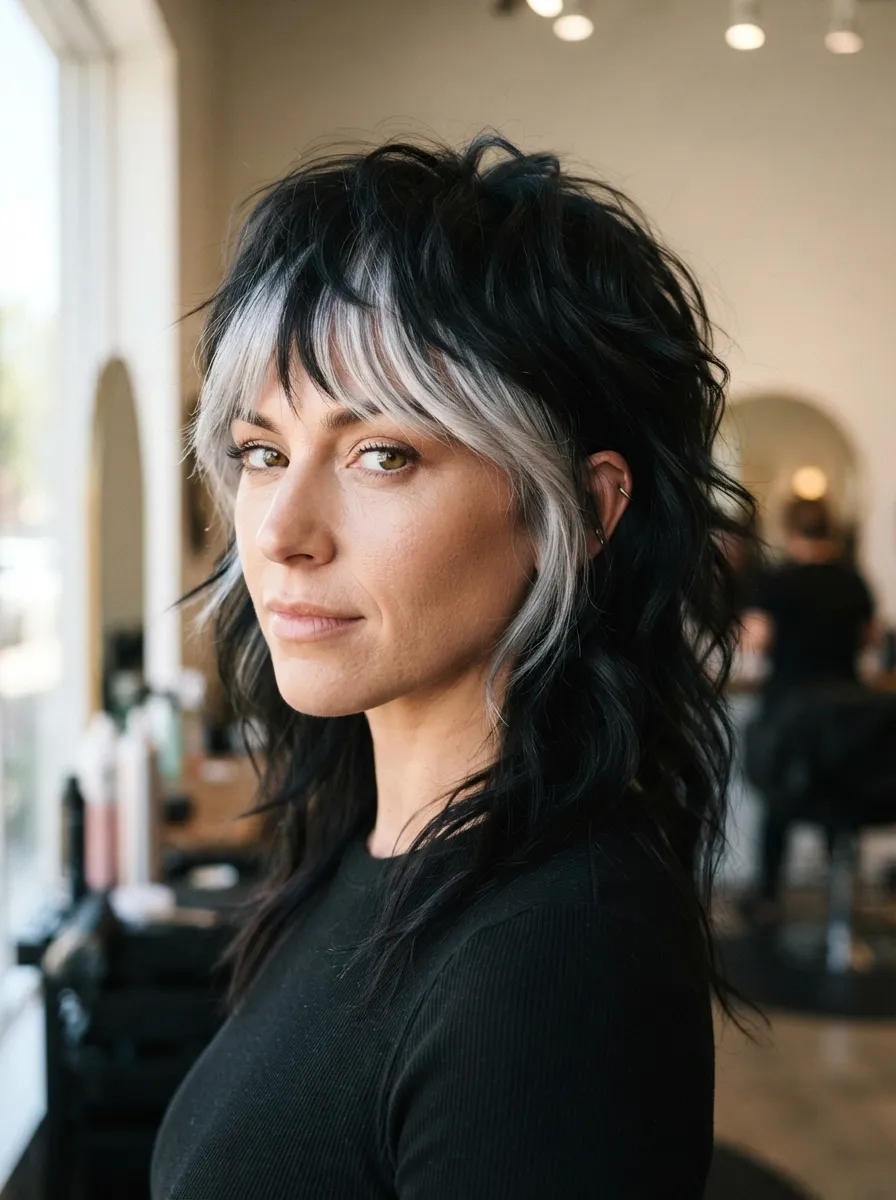
A money piece is a single face framing section colored differently from the rest of the hair. Pairing silver with black creates a striking contrast that works well with emo styling. Since only one section is colored, this is more affordable than a full head dye job and requires less frequent touch ups. Ask your stylist to lighten only the front piece before toning it silver. At home upkeep involves a purple shampoo occasionally to prevent the silver from turning yellow over time. This piece can be curled separately from the rest of the hair to highlight it further. If you want a temporary version, silver hair chalk or a semi permanent spray can be applied just to test how the look suits you before committing to bleach. This style works on both short and long shags and photographs particularly well under natural light since the contrast is easy to see from a distance.
13.Curly Hair Shag Adaptation
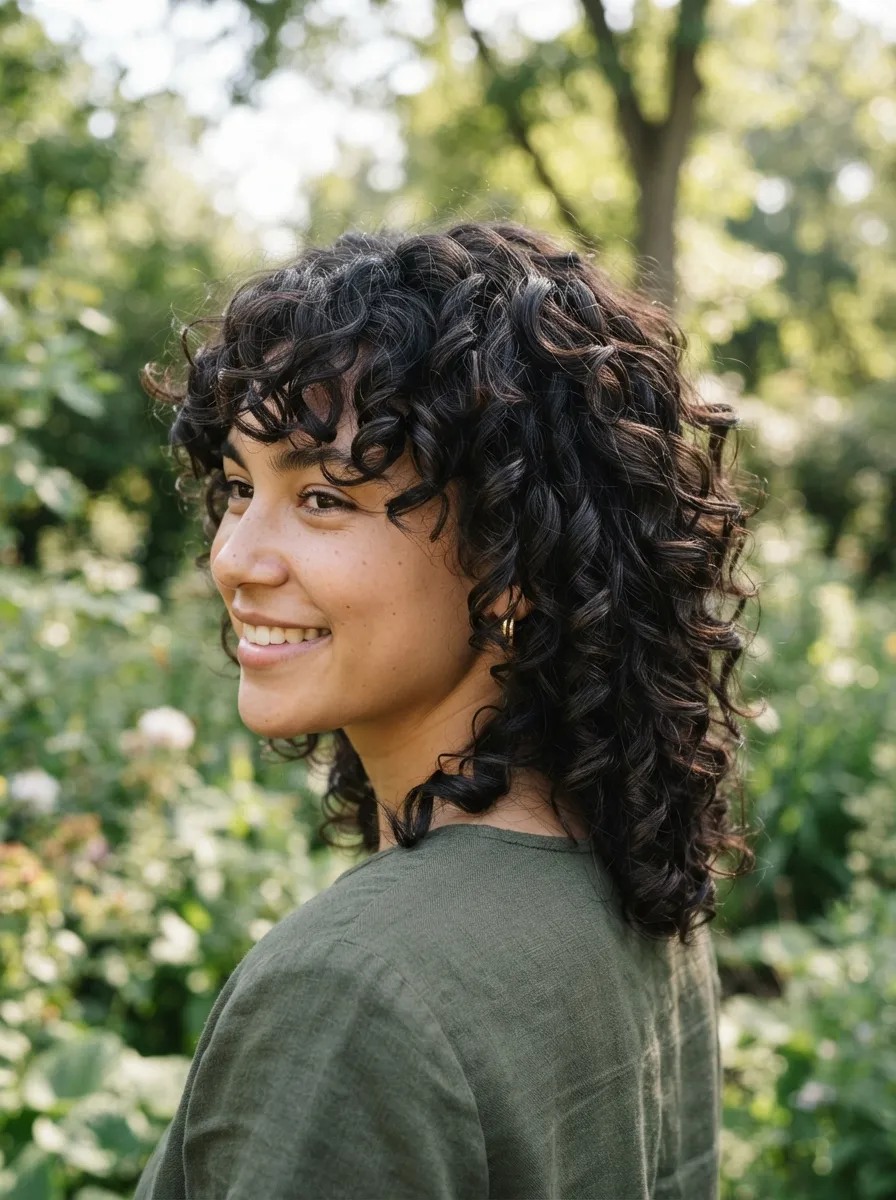
Shag cuts work on curly hair too, though the layering approach needs slight adjustments. Curls shrink upward when they dry, so stylists usually cut curly shags slightly longer than they would for straight hair. This prevents the layers from ending up too short once the curl pattern sets. At home, applying a curl cream on wet hair before air drying helps define the shag layers without frizz. Avoid brushing curly hair when dry since this breaks up the curl clusters and creates frizz instead of definition. A cheap microfiber towel or an old cotton t shirt works better than a regular towel for drying curls without disturbing the pattern. This cut suits most curl types from loose waves to tighter coils. Dark colors help define the layers more clearly in curly hair since the light and shadow between curls becomes more visible. Regular trims help maintain shape since curly layers can look uneven if left too long between cuts.
14.Thin Hair Volume Shag

Thin hair benefits from shorter layers near the crown, which create the appearance of thickness without extensions. This version of the shag focuses heavily on the top section while keeping the ends slightly longer for balance. A cheap volumizing mousse applied at the roots before blow drying gives lasting lift throughout the day. Avoid heavy conditioners on thin hair since they can weigh down the volume this cut depends on. Instead, apply conditioner only from mid length to ends. Blow drying upside down for a few minutes adds natural volume without extra products. Dark hair colors can make thin hair look fuller since lighter shades sometimes reveal the scalp more easily. Regular trims every eight weeks keep the ends from thinning out further, since split ends make hair look sparse. This cut pairs well with subtle waves added using a curling iron, which adds texture and makes the hair appear thicker overall.
15.Thick Hair Layered Shag
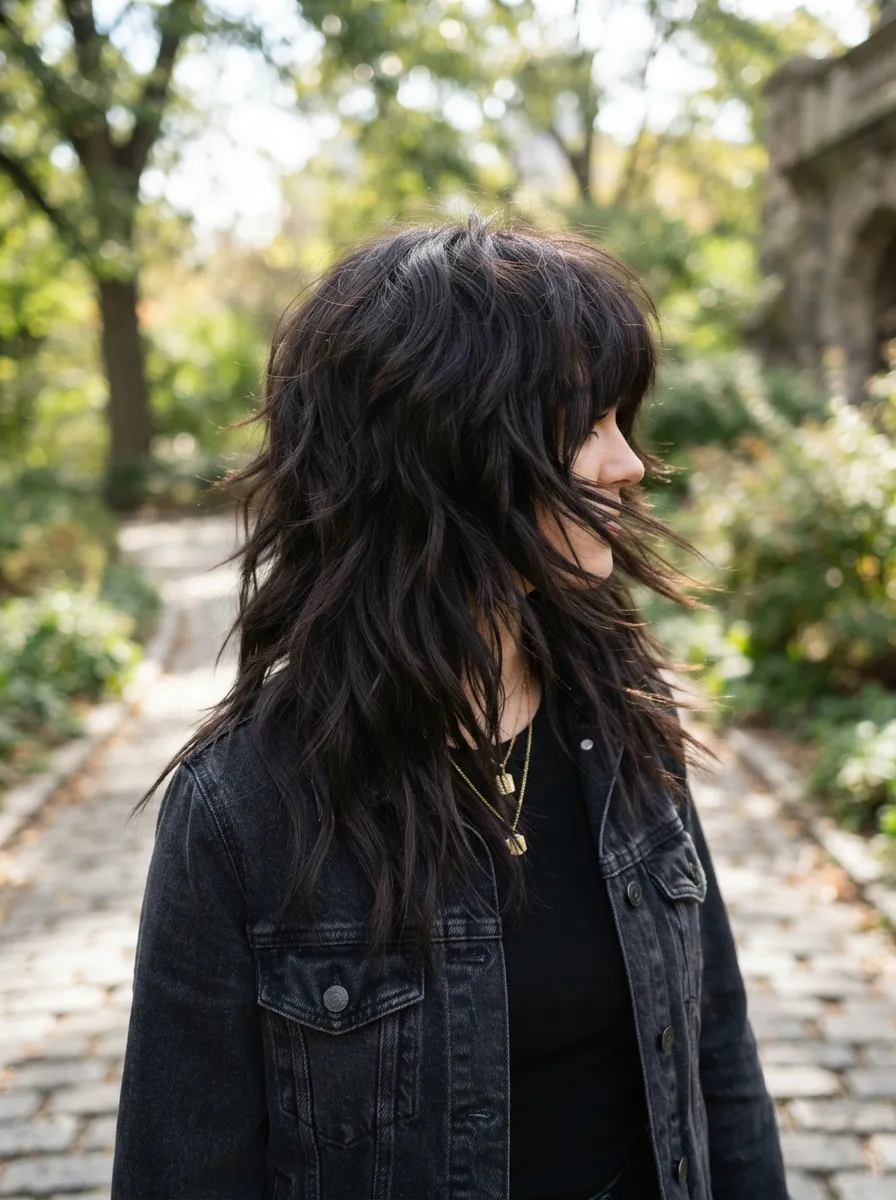
Thick hair can handle heavier layering, which removes bulk and adds movement. This version of the shag focuses on removing weight throughout rather than just at the crown. Ask your stylist to use thinning shears or a razor to reduce bulk without shortening the overall length too much. At home, a lightweight leave in conditioner helps manage thick hair without adding extra weight. Avoid heavy oils on the roots since thick hair already holds enough natural volume. This cut suits long or medium lengths best since shorter thick hair can sometimes look triangular without proper layering. Dark colors work well here since they help define the separation between layers under natural light. Regular trims keep the ends from looking blunt and heavy, which defeats the purpose of the layered shag. A diffuser attachment on your hair dryer helps distribute heat evenly through thick hair, reducing frizz while keeping the natural texture of the cut intact.
16.Round Face Soft Shag
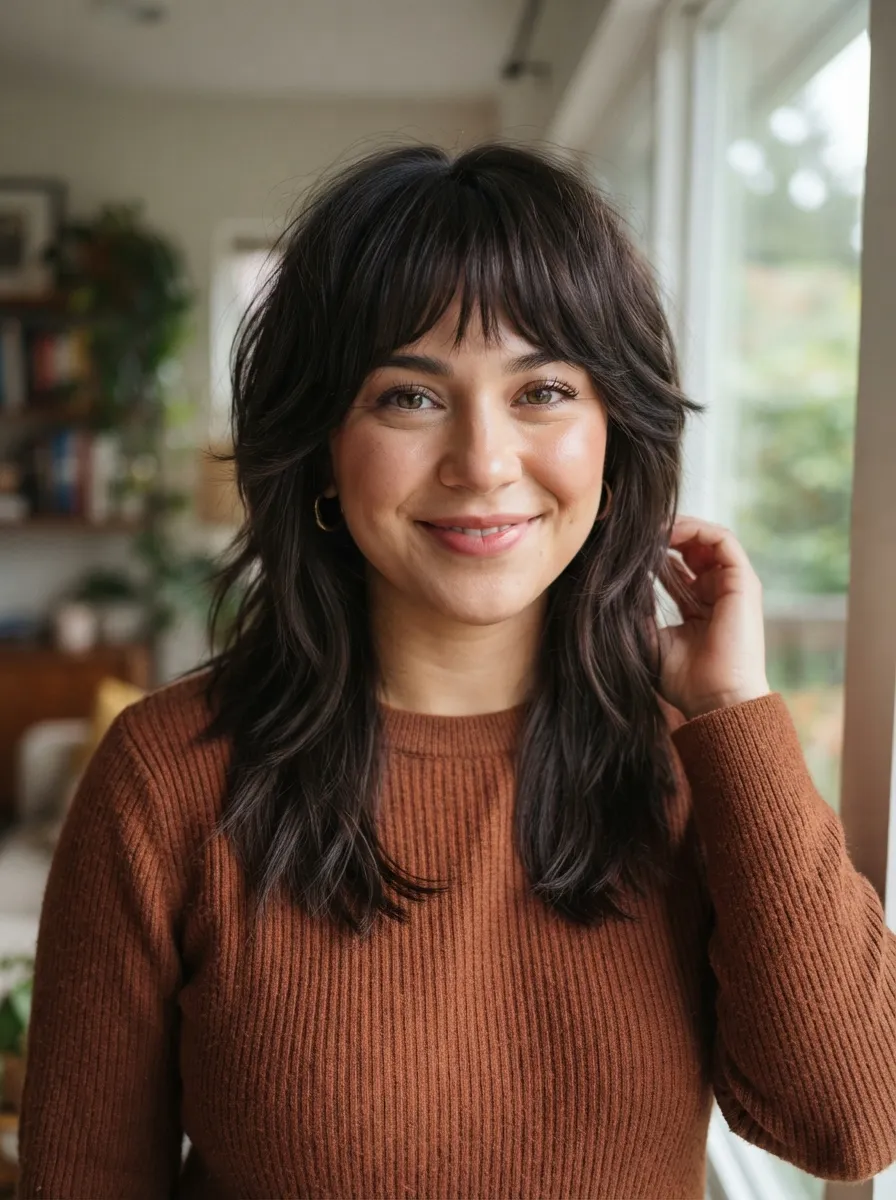
Round faces benefit from layers that add length rather than width near the cheeks. This version of the shag keeps the shortest layers below the chin instead of at the cheekbones, which helps elongate the face. Side swept bangs pair well with this cut since they avoid adding width across the forehead. At home, styling with a flat iron to create slight waves rather than tight curls helps keep the face looking longer instead of rounder. Avoid teasing hair directly at the sides since this can add unwanted width. Instead, focus volume at the crown, which draws the eye upward and away from the cheeks. Dark colors with subtle highlights near the face framing pieces can also help create the illusion of length. This cut works for both curly and straight hair types as long as the layers are placed correctly by the stylist. Regular trims keep the framing pieces at the right length for this face shape.
17.Square Face Angular Shag
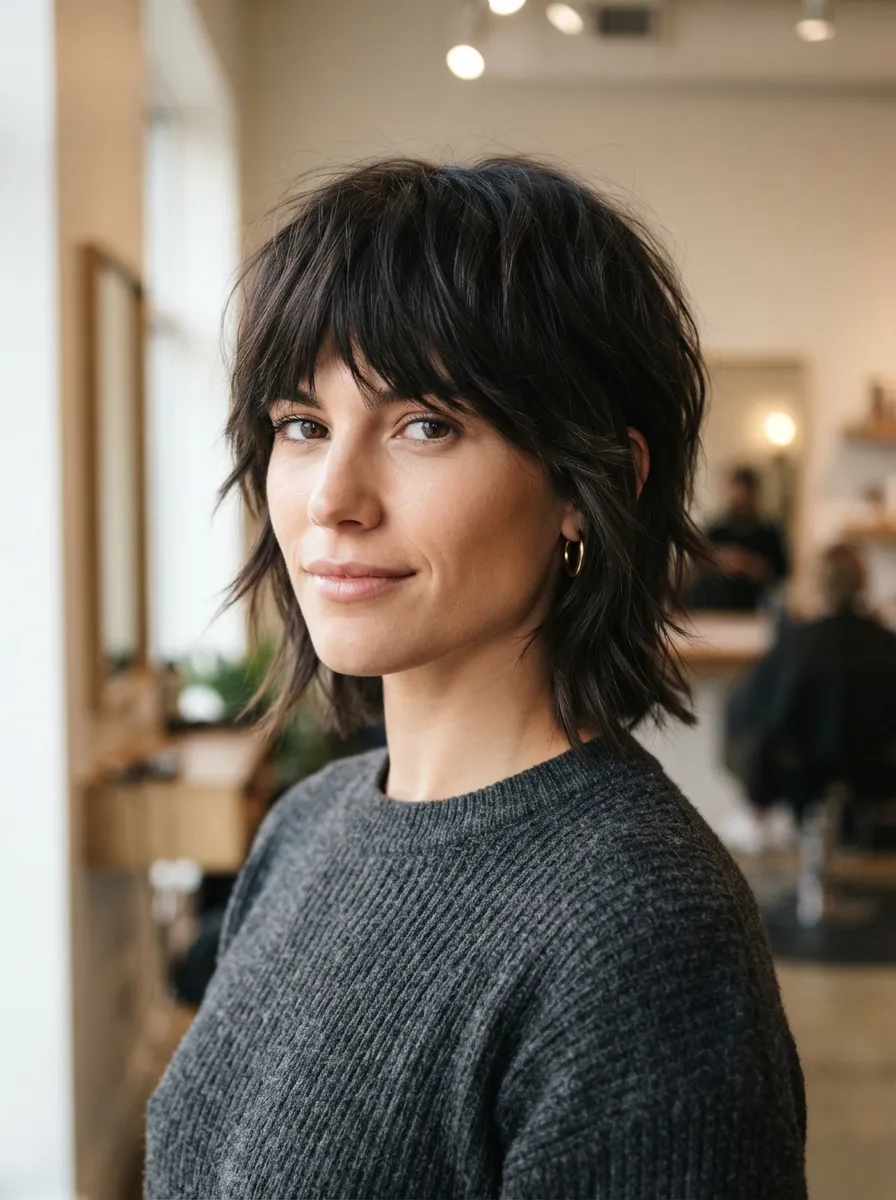
Square faces benefit from layers that soften the jawline rather than emphasize it. This version of the shag uses angled, longer layers around the jaw area to break up strong angles. Blunt bangs are usually avoided here since they can emphasize the forehead width. Instead, side swept or curtain bangs work better for this face shape. At home, curling the ends away from the face rather than inward helps soften the jaw further. A budget curling wand under a few thousand rupees works fine for this technique. Avoid one length blunt cuts since they can make the jaw look more pronounced. Dark colors with soft waves throughout help break up harsh lines naturally. This cut suits medium to long hair lengths best since shorter layers may not provide enough softening effect near the jaw. Regular trims every ten weeks keep the angled layers from growing out into a blunter shape that no longer flatters the face.
18.DIY Trim Between Salon Visits
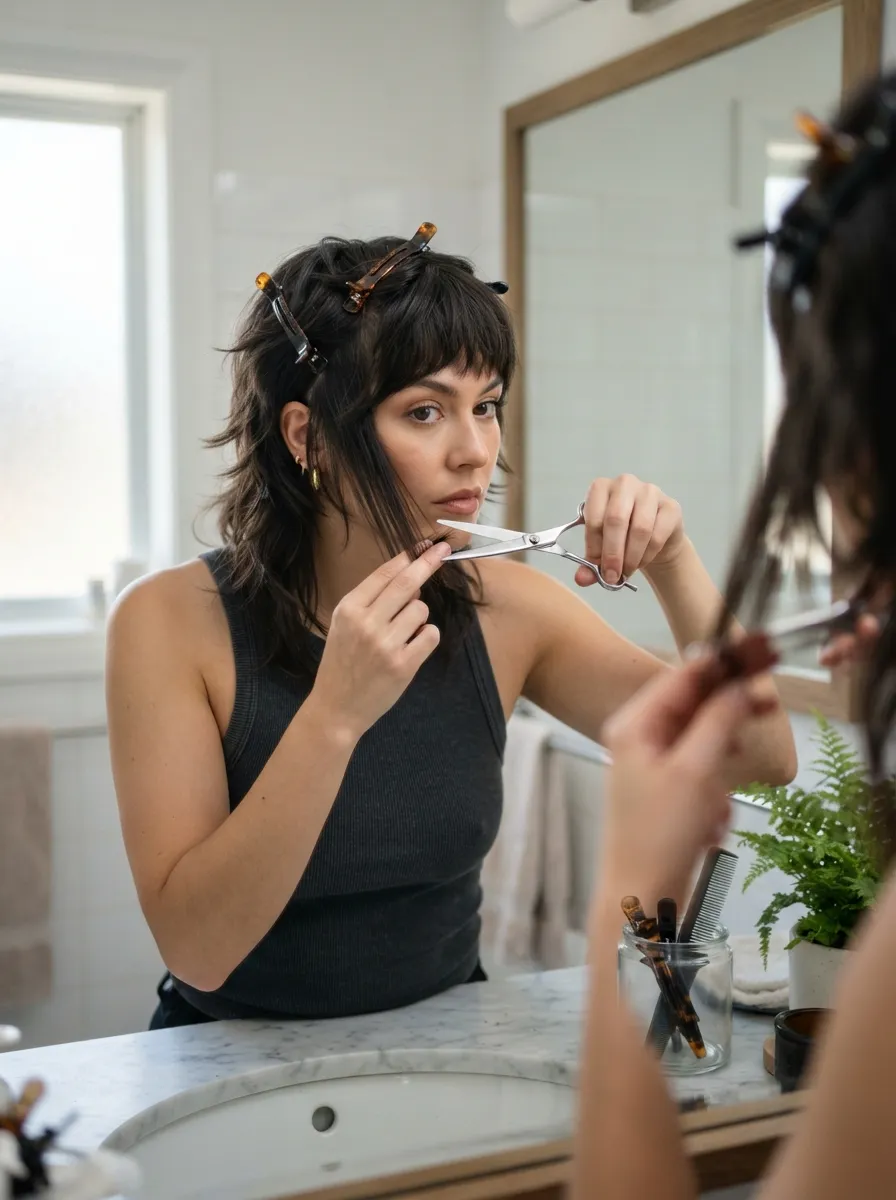
Salon visits can get expensive if you go too often. A simple at home trim between appointments keeps your shag looking fresh without the extra cost. Focus only on the ends and any face framing pieces rather than attempting a full restyle yourself. Use sharp hair cutting scissors, since kitchen scissors can cause split ends. Section your hair with clips and only trim tiny amounts at a time, checking as you go. This method works best for maintaining shape rather than changing the cut entirely. A handheld mirror or a second mirror behind you helps check the back sections before cutting. Always trim dry hair rather than wet, since wet hair can shrink once dried and lead to shorter results than expected. This simple habit stretches out the time between professional cuts, saving money over several months. If you are unsure about a section, it is safer to leave it slightly longer and let your stylist correct it at the next visit.
19.Budget Texture Spray Styling
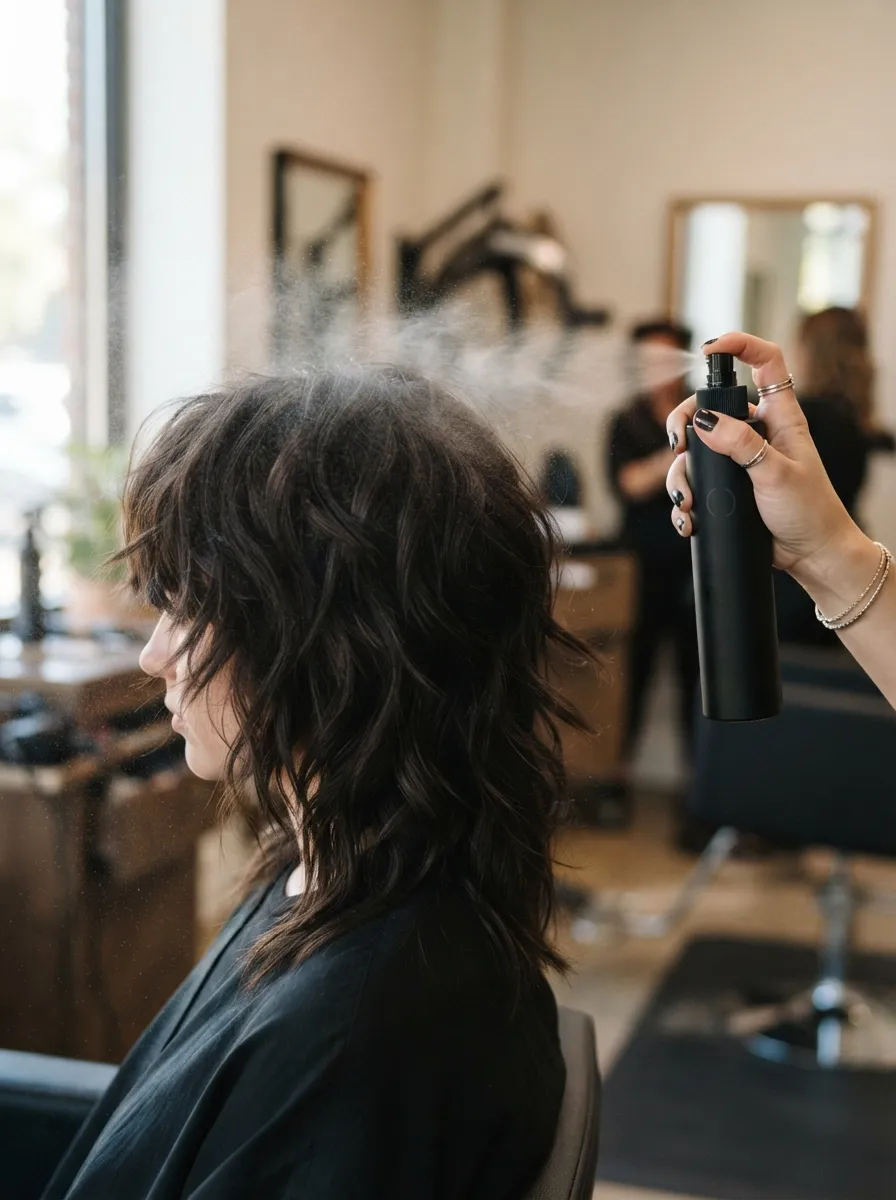
Texture spray is one of the cheapest tools for maintaining a shag haircut’s shape. A single bottle usually lasts several months with regular use. Spray it onto dry hair and scrunch upward with your fingers to bring out the natural layers. This works especially well on days when you do not have time for a full blow dry routine. If you do not want to buy a specific texture spray, a mix of water and a small amount of sea salt in a spray bottle creates a similar effect at home. Apply lightly since too much salt can dry out the hair over time. This method works on both curly and straight shag cuts, adding grip and separation between layers. Use it mid day if your hair starts to fall flat, spraying at the roots and scrunching gently. This is one of the simplest ways to refresh a shag style without needing heat tools, which also protects your hair from daily damage.
20.Home Hair Color Touch Up
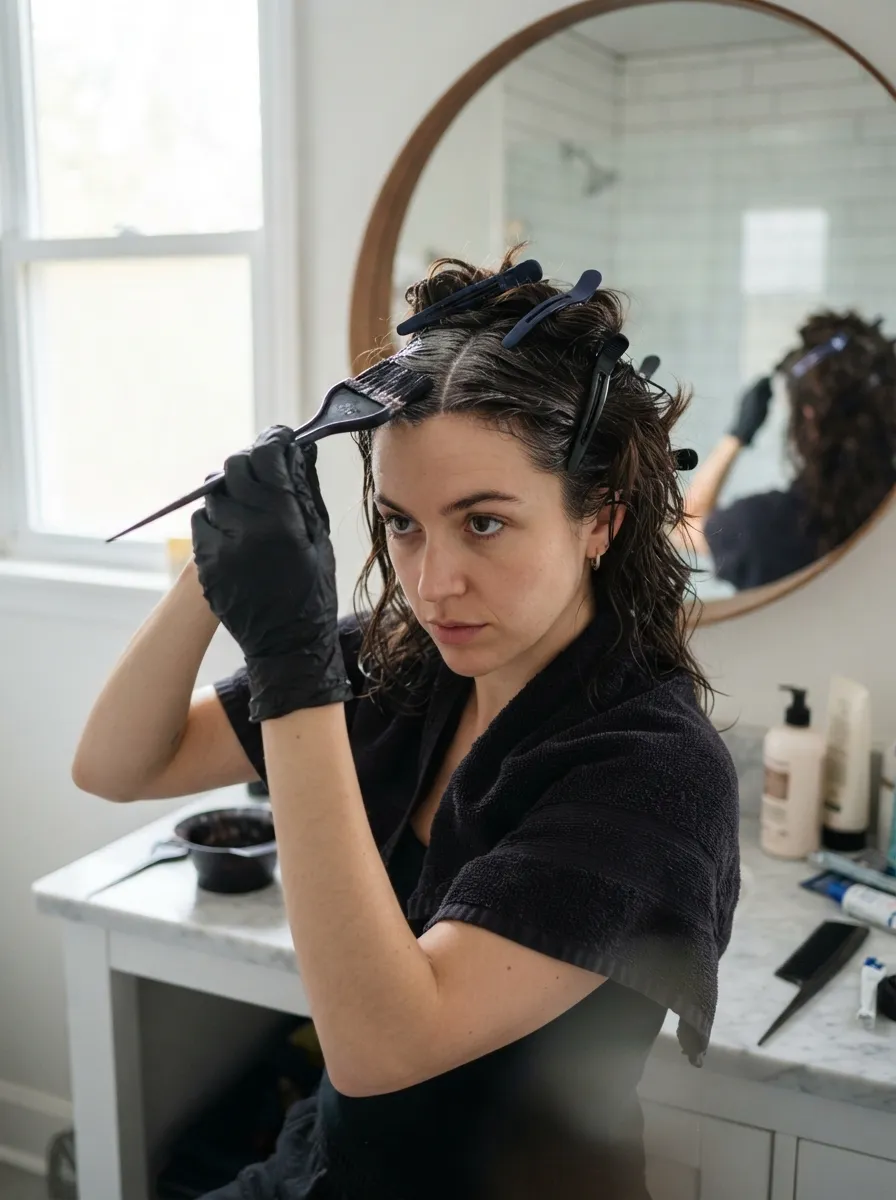
Root touch ups at home save money compared to full salon color visits. If your shag is dyed black or dark brown, a basic root touch up kit can extend the time between professional appointments significantly. Apply the dye only to the regrowth area, avoiding the previously colored lengths to prevent buildup and dryness. Always do a patch test on your skin before applying any new product, even if you have used a similar brand before. Use gloves and an old towel to avoid staining surfaces around you. Timing matters here, since leaving the dye on too long can cause uneven color or dryness. Follow the instructions on the box closely rather than guessing. After rinsing, a color safe conditioner helps lock in the tone and prevents fast fading. This simple habit keeps your shag looking fresh between salon visits, which is especially useful if you maintain a two tone or money piece style that needs regular upkeep.
21.Clip and Pin Accessory Styling
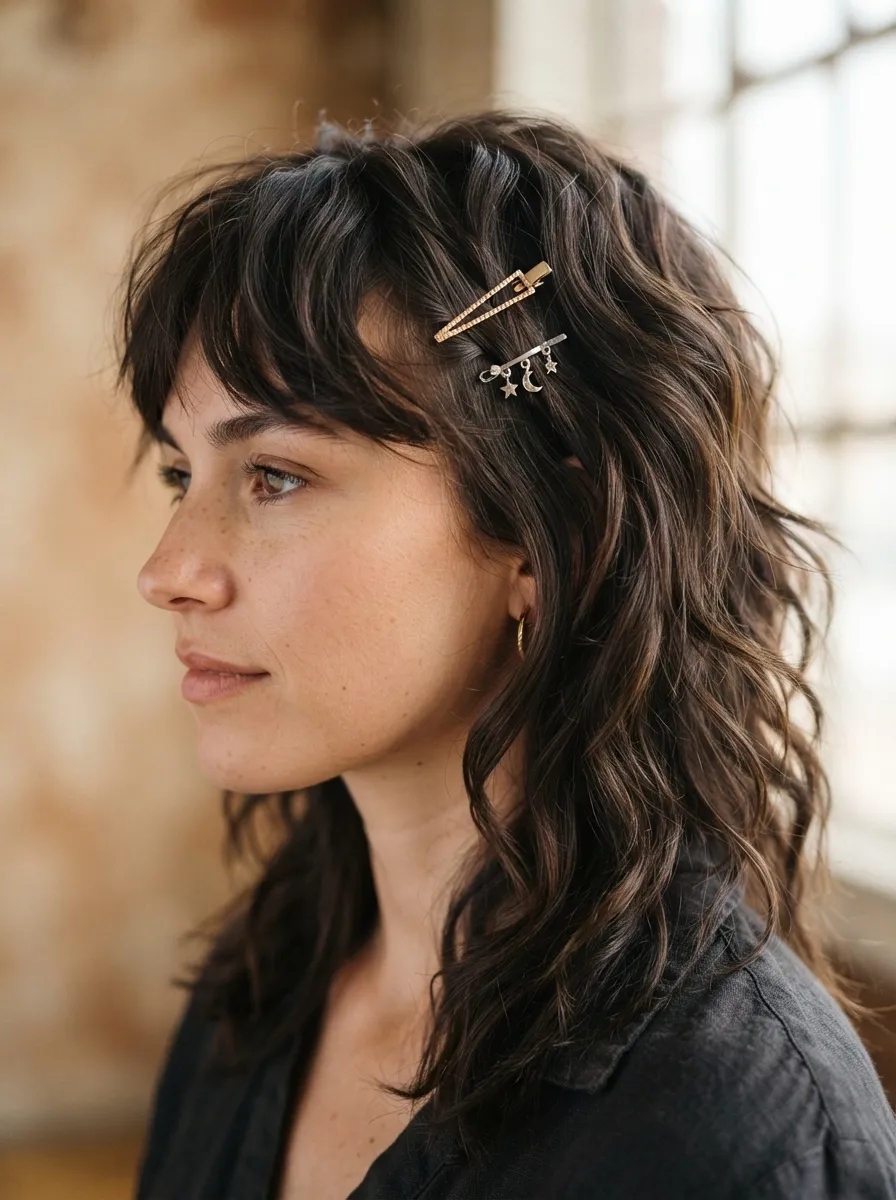
Accessories are an affordable way to change up a shag haircut without any cutting or coloring. Small metal clips, especially in silver or black, add an edgy detail near the face framing pieces. This works well if you are growing out bangs and want to pin them back temporarily. A set of basic hair clips usually costs very little and can be reused for years. Try clipping back just one side for an asymmetrical look, or use two matching clips on both sides for symmetry. This styling trick photographs well and adds instant detail to an otherwise simple shag. Pair clips with a middle part for a cleaner look, or with a messy top for something more casual. Clips also work well to hold hair back while doing makeup or getting ready, then can double as a finished style once you are done. This is one of the easiest low cost ways to change your shag’s appearance daily.
22.Beanie and Shag Combo
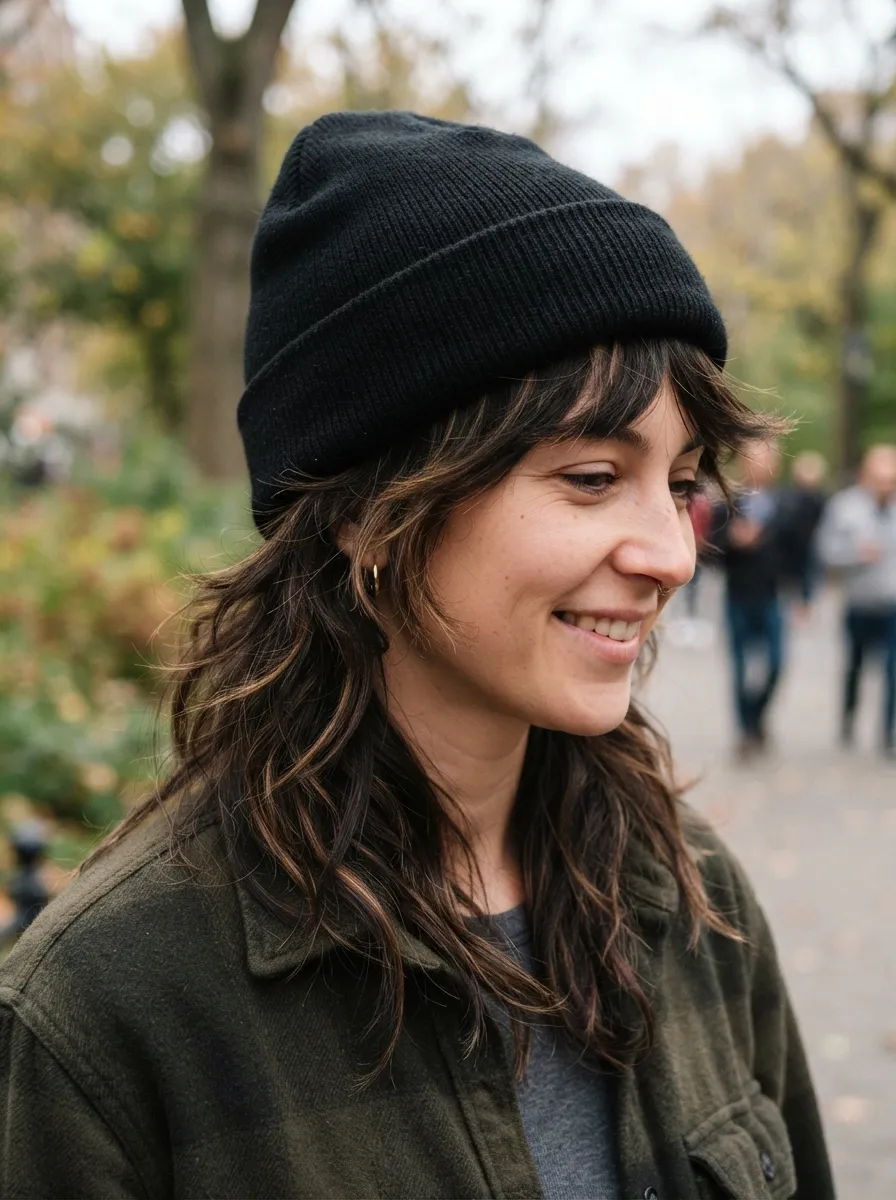
A beanie pairs naturally with shag haircuts, especially shorter or medium length versions. This combination is common in emo and alternative styling since it adds a casual, effortless look. A basic black or dark colored beanie works with almost any shag length and hair color. Pull a few face framing pieces out from under the beanie for a relaxed finish. This styling trick also works well on days when you do not have time to fully style your hair, since the beanie covers the roots while the ends remain visible and textured. Choose a slightly loose beanie rather than a tight one to avoid flattening the volume at the crown. This combo is budget friendly since a beanie is a one time purchase that works with multiple hairstyles over time. It also protects your hair from wind and cold weather while keeping the emo aesthetic intact. Pair with dark makeup and simple accessories for a complete look.
23.Air Dry Wavy Shag Routine
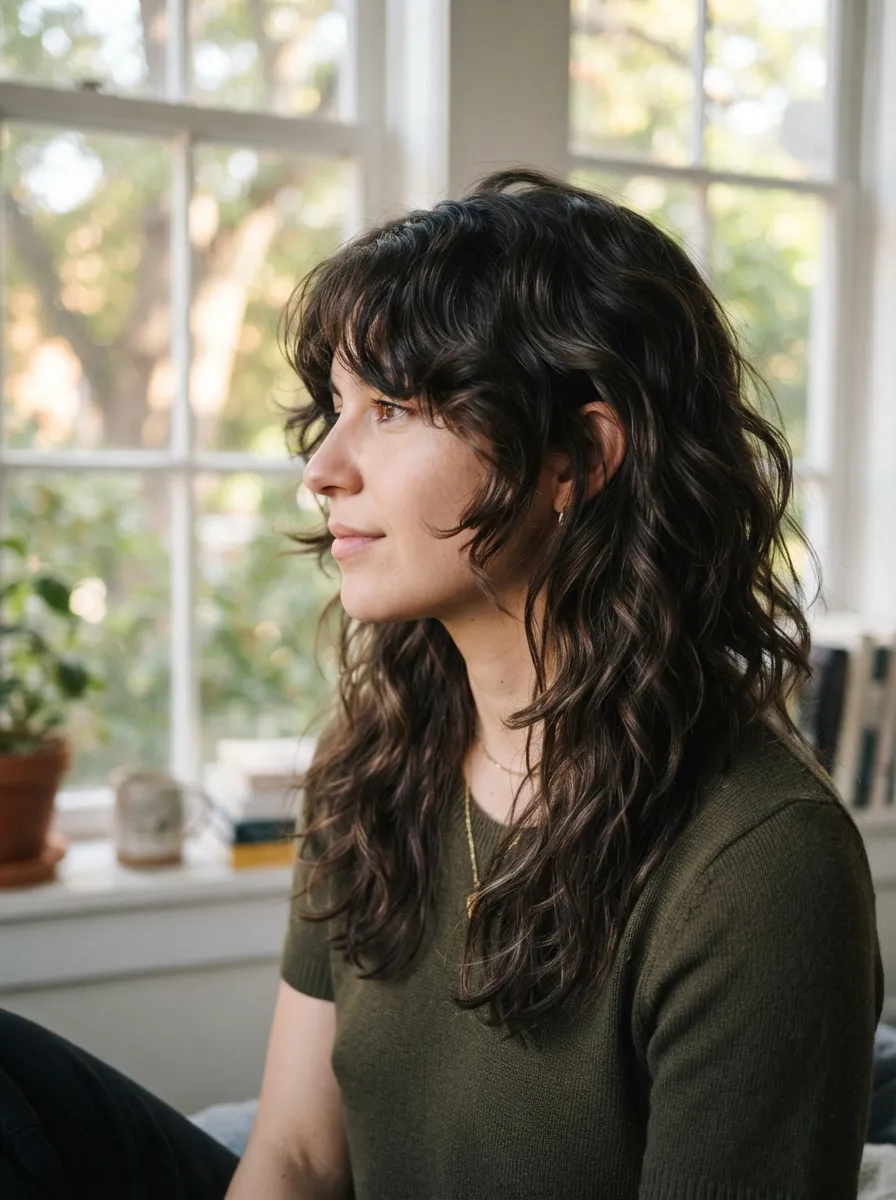
Air drying is a simple, no cost way to style a wavy shag without any heat tools. After washing, apply a small amount of leave in conditioner or curl cream to damp hair, then let it dry naturally without touching it too much. This preserves the natural wave pattern while highlighting the layered texture of the shag. Avoid brushing hair once it starts drying since this can cause frizz and disrupt the wave pattern. Instead, use your fingers to lightly separate sections if needed. This method works especially well in humid weather since heat styling often does not last as long anyway. Air drying also protects your hair from daily heat damage, which keeps color treated hair looking healthier for longer. If you want slightly more definition, twist small sections of hair before they fully dry, then release once completely dry for soft waves. This routine takes almost no product and no extra time beyond your normal shower routine.
Emo shag haircuts give you room to play with color, length, and texture without following one strict rule. From choppy bangs to two tone color and simple at home styling tricks, there is a version of this cut for almost every hair type and budget. Start with one or two ideas from this list that match your current length and hair texture, then build from there as you get comfortable. Small changes like a texture spray, a clip, or a root touch up can refresh your look between salon visits without extra cost. Pick the ideas that fit your daily routine and try them at home before making a bigger change with your stylist.
Leave a Reply