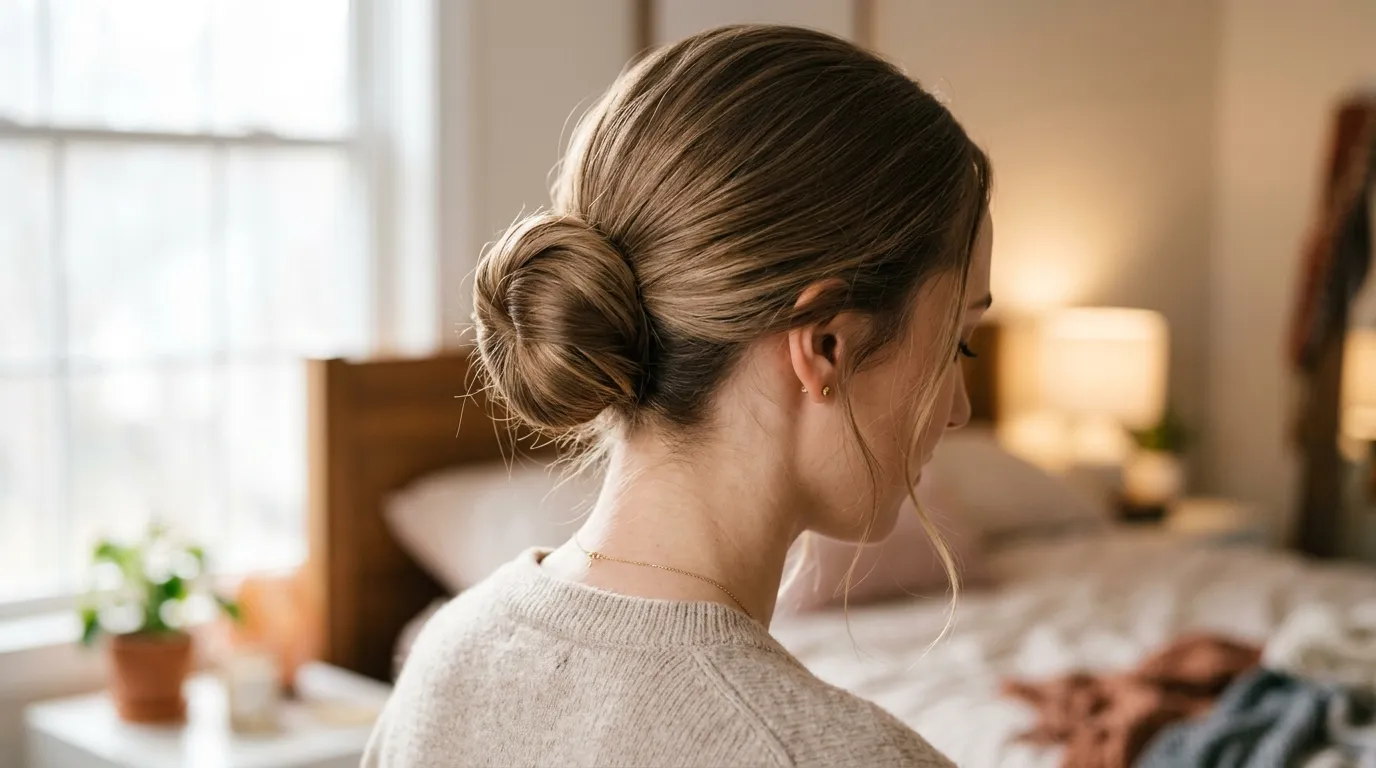
1. Classic Top Knot Bun
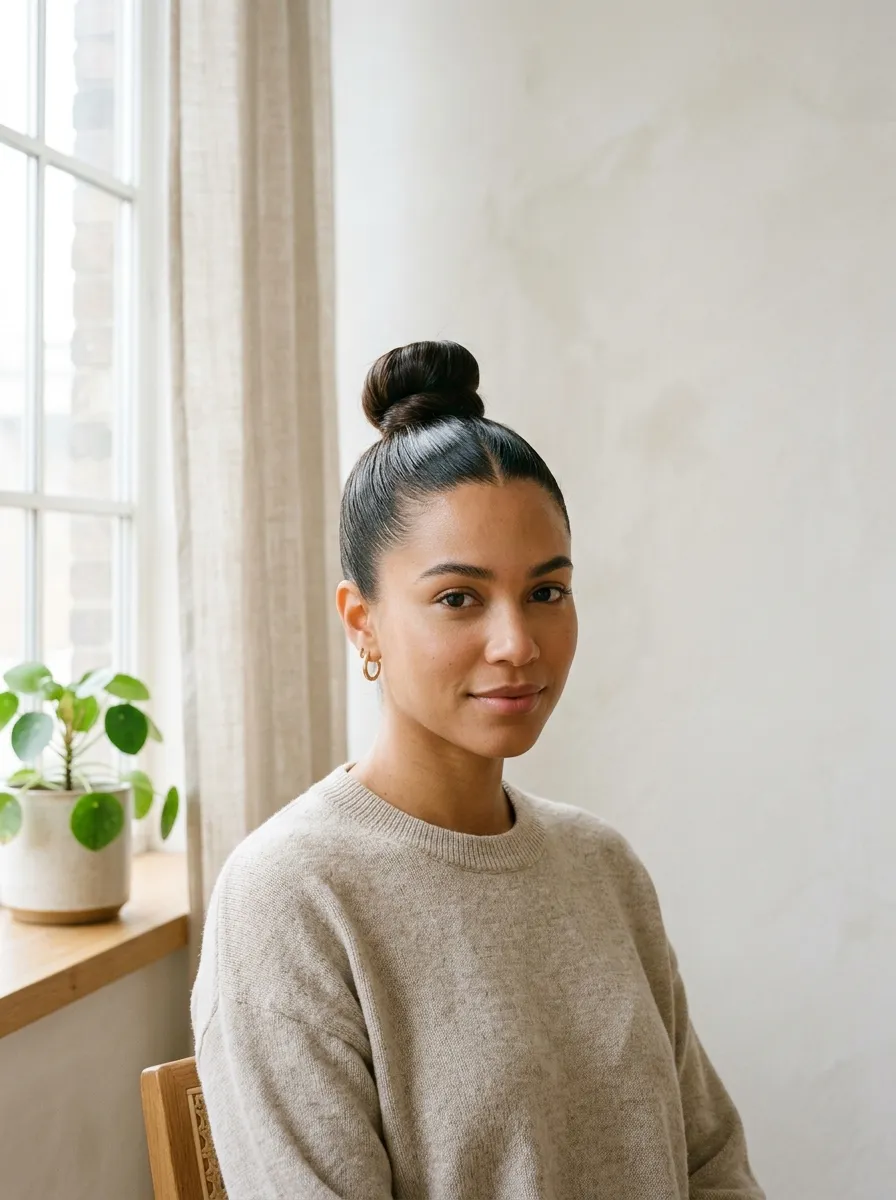
The top knot is the bun everyone reaches for first. It sits high on the crown and takes seconds to build. Gather your hair into a high ponytail, twist it around itself, and pin it flat. That is the whole process. This style keeps hair off your neck during hot weather and looks polished with almost no styling. You do not need fancy tools. A basic hair tie and two bobby pins from the dollar store will hold it in place all day. If your hair is fine, try backcombing the ponytail slightly before twisting so the knot looks fuller. If you have thick hair, split it into two sections, twist each one separately, then wrap them together for a bun that feels secure. Pair it with gold hoops for an office look or leave a few face framing pieces loose for something softer. This bun also works well under a headband if you want extra texture without extra effort. It is the fastest fix on a busy morning and still looks intentional.
2. Messy Low Bun
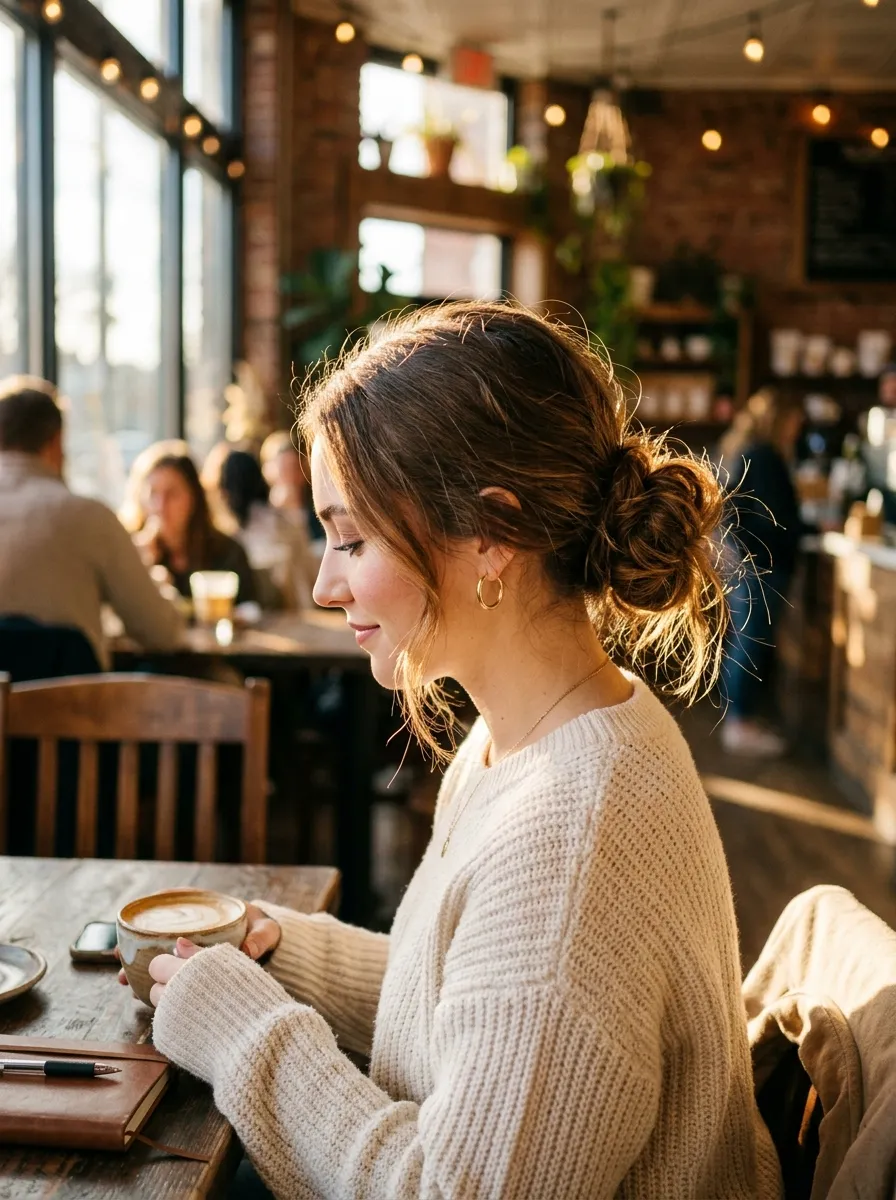
The messy low bun looks like it took no effort, which is exactly the point. Gather your hair loosely at the base of your neck, twist it once, and secure it with a claw clip or a couple of pins. Do not smooth it down. The slightly undone texture is what makes this style feel relaxed instead of stiff. This is a great option for second day hair since the natural oils actually help hold the shape. If your hair is freshly washed and too slippery, spritz a little dry shampoo or a homemade mix of cornstarch and water at the roots before you start. It adds grip without any real cost. This bun pairs well with jeans and a sweater or a flowy summer dress, which makes it one of the most flexible styles on this list. Pull a few strands loose around your face for a softer finish. It works for grocery runs, casual dates, or a low key day at the office when you want to look put together without spending time in front of the mirror.
3. Sleek Ballerina Bun
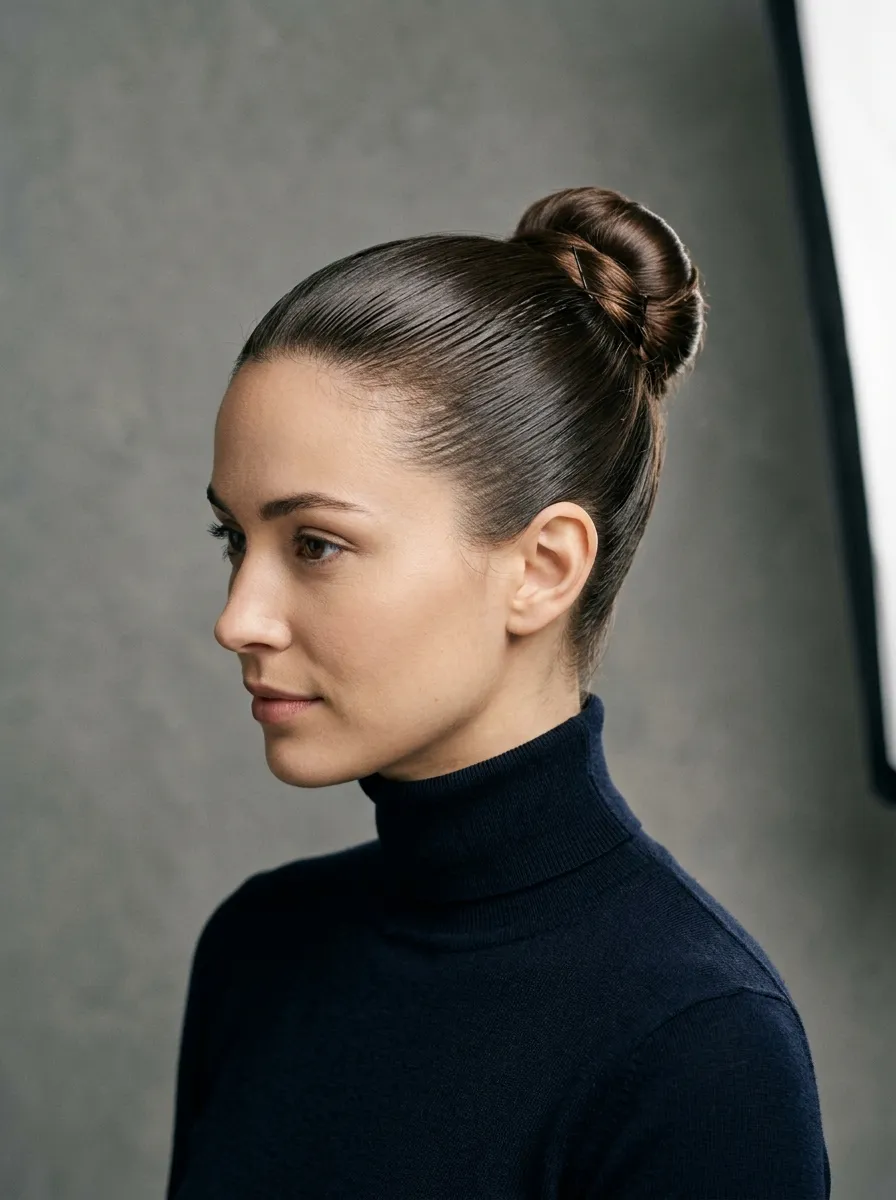
The ballerina bun is all about smooth lines and a tight, controlled finish. Brush your hair back with a fine tooth comb, secure it into a high ponytail, then twist and pin it flat against your head. A little gel or even hand lotion smoothed over your palms can tame flyaways without buying a special product. This bun works beautifully for formal events, job interviews, or any time you want a clean and confident look. The key is patience during the smoothing step, since rushing it is what leaves loose hairs sticking out. If you have shorter layers near your face, a bit of hairspray on an old toothbrush can press them down neatly. This style also holds up well through a full day, making it practical for long shifts or events with a lot of movement, like dancing or presentations. Add a thin headband or a simple pin for a touch of detail, or keep it bare for a minimal finish. It proves that a few extra minutes on smoothing can completely change how put together a bun feels.
4. Braided Bun
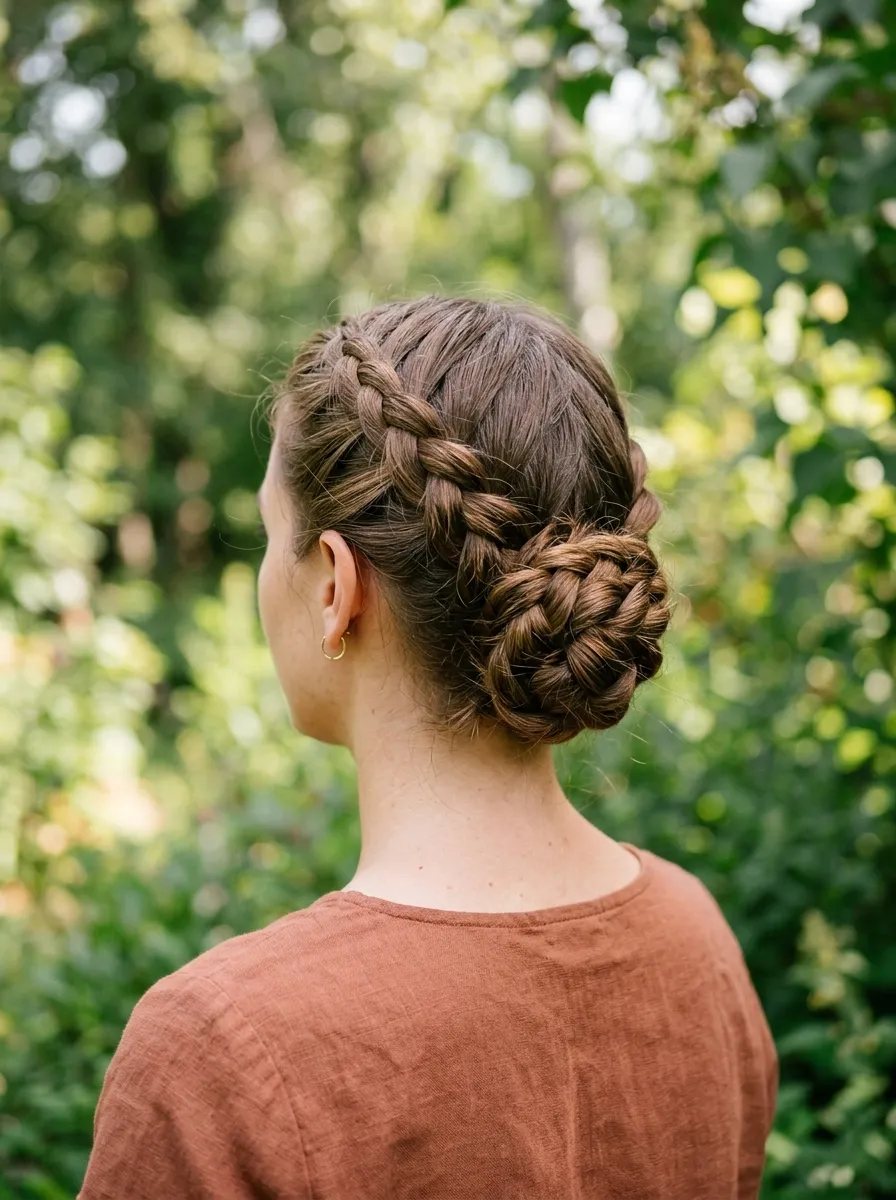
A braided bun adds texture without adding time. Braid your hair into a single loose braid, then coil it around itself at the base of your neck or higher on your crown. Pin the ends underneath so they stay hidden. This style hides second or third day hair especially well since the braid pattern disguises oil and flatness. If your hair is thin, a fishtail braid will look fuller once coiled compared to a plain three strand braid. You do not need any special tools, just your fingers and a few pins. This bun works well for outdoor activities like hiking or a day at the beach because the braid keeps hair secure even in wind. It also transitions nicely from day to night, since you can loosen a few pieces from the braid for a more romantic look come evening. Try pulling small sections loose around your hairline for a soft frame around your face. This is one of the easiest ways to make a plain bun look like you put in real effort, even on a day when you barely had five minutes to spare.
5. Double Buns
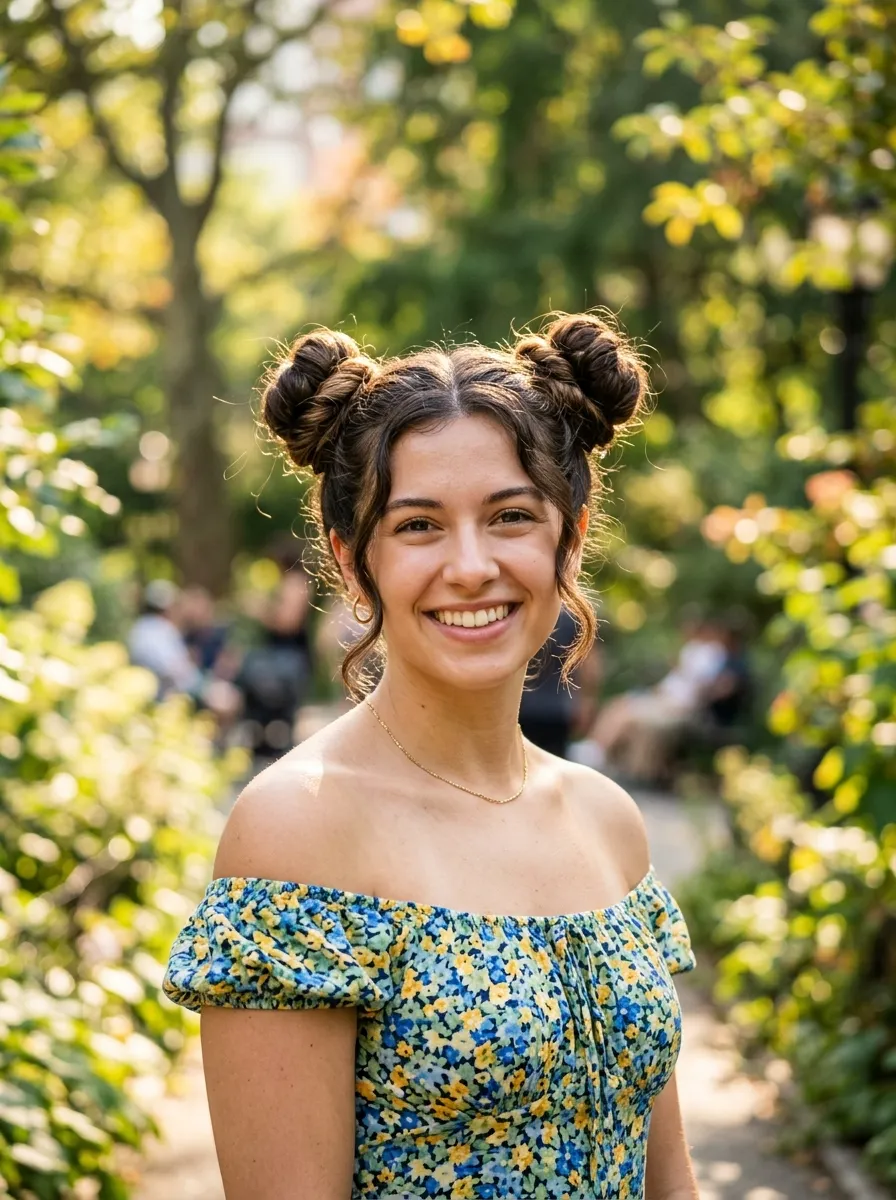
Double buns, often called space buns, bring a playful energy to an otherwise simple style. Part your hair down the middle, gather each side into its own ponytail, then twist and pin each one into a small knot. This works on almost any hair length, though shoulder length and longer hair holds the shape best. It is a favorite for festivals, weekend errands, or workouts since it keeps hair fully off your face and neck. For a budget friendly version, skip specialty hair ties and use simple elastics you already own, since the buns themselves do most of the visual work. If your part is not perfectly straight, do not worry, a slightly uneven part actually gives the style a more relaxed feel. Curly hair looks especially fun with this style since the natural texture adds volume to each bun. Try wrapping a thin ribbon or bandana strip around each base for extra color. This is a low pressure style that looks intentional even when you are moving fast, which makes it ideal for busy mornings or spontaneous plans.
6. Bubble Bun
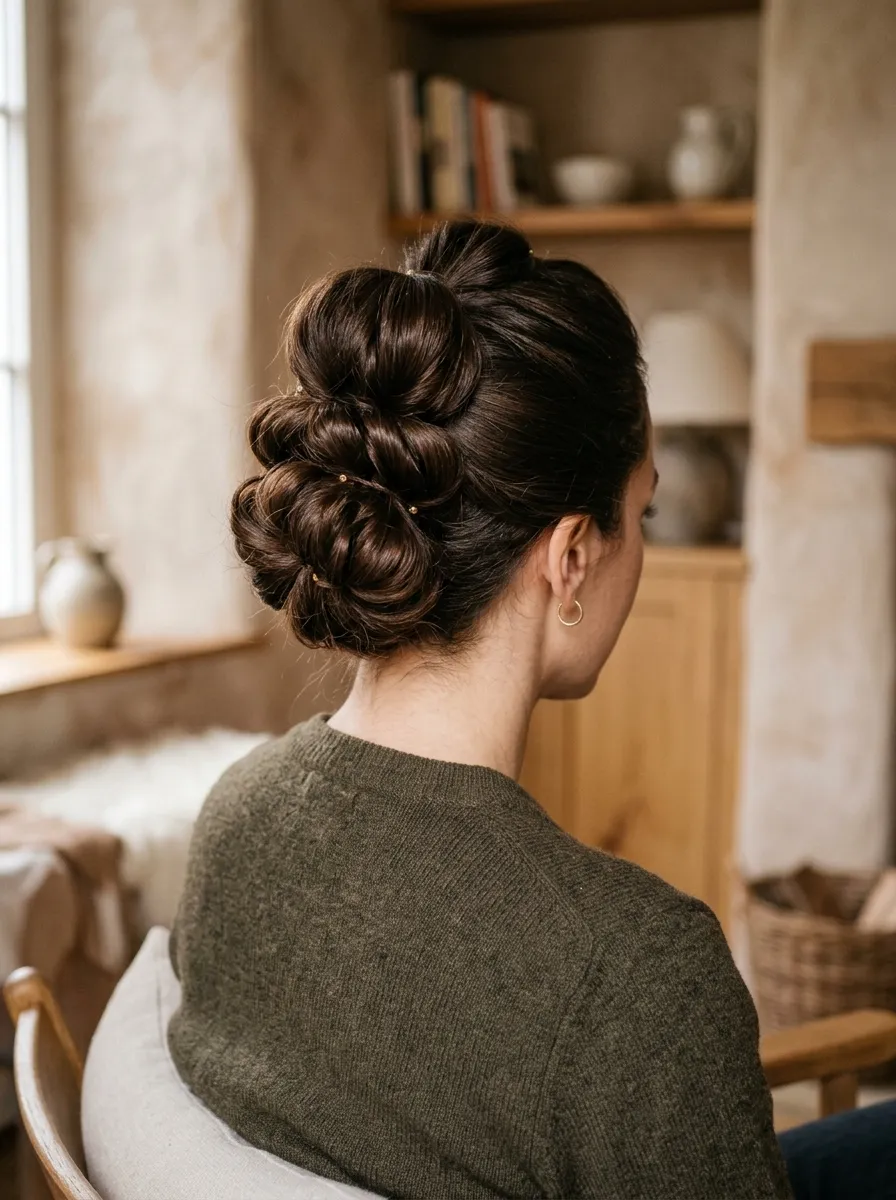
The bubble bun takes the classic ponytail and turns it into segmented rounded sections before wrapping the ends into a small bun. Start with a ponytail, then add small elastics every two inches down the length, gently pulling each section outward to create the bubble shape. Once you reach the end, twist the remaining hair into a bun and pin it. This style adds visible texture and looks far more detailed than the actual effort required. It is a fun option for a birthday celebration or a night out when you want something different from your usual routine. You do not need matching elastics, clear ones from any drugstore work fine and blend into the hair. This style holds well for hours since the segmented elastics distribute tension evenly rather than pulling from one point. If your hair is layered, some shorter pieces may pop out of the bubbles, which actually adds a soft undone quality rather than looking messy. This is a great weekend project style when you have a few extra minutes and want to practice something new without any real cost.
7. Twisted Bun
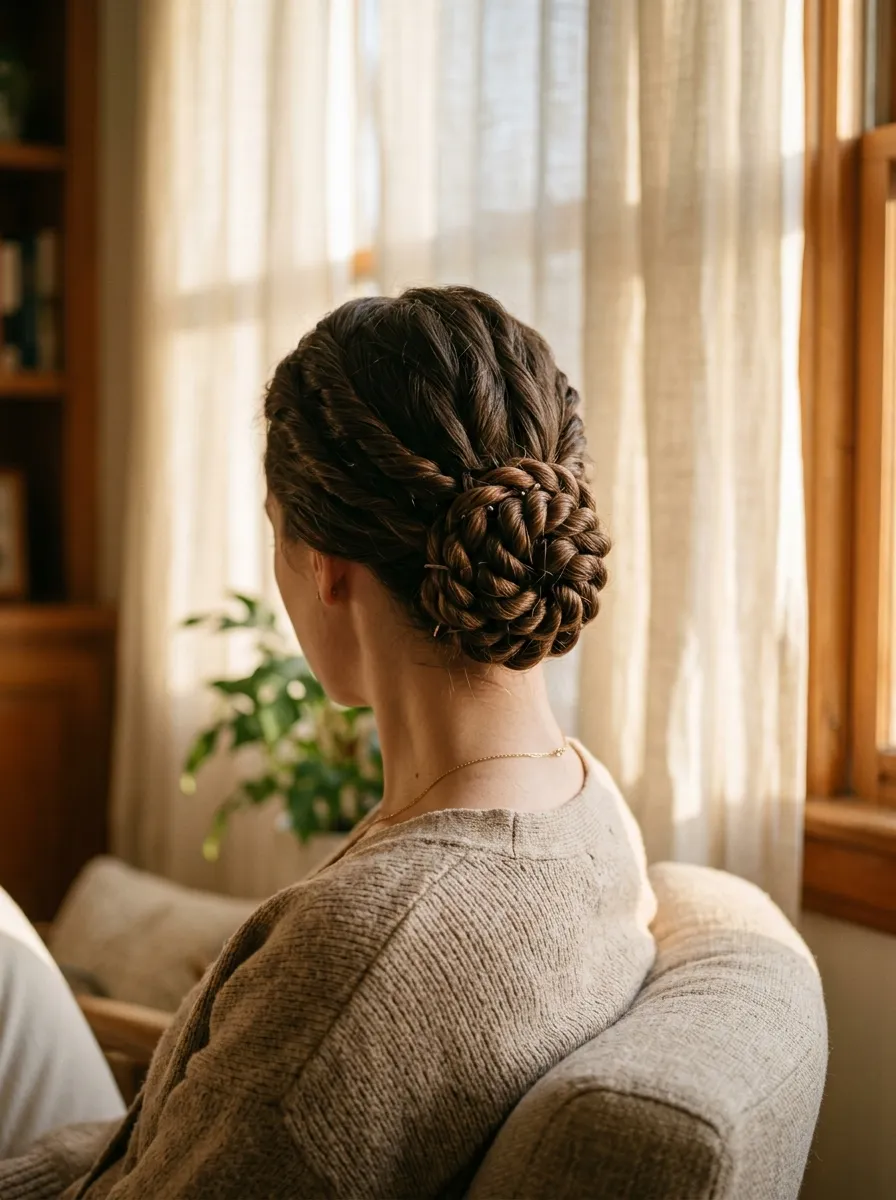
A twisted bun replaces the usual wrap and pin method with a simple two strand twist. Split your ponytail into two sections, twist each one, then twist them together around themselves and pin the end underneath. This creates a rope like texture that looks more detailed than a plain wrapped bun but takes barely any extra time. It works well on hair that is freshly washed and a bit slippery, since the twisting motion adds grip that a simple wrap sometimes lacks. This style is a solid pick for work meetings or errands when you want something that looks a little more finished without extra products. If you want more texture, dampen your hands slightly with water before twisting, which helps smooth flyaways for free. Longer hair will show more twist detail, while shorter hair creates a tighter, neater knot. Pair this with simple stud earrings for a clean daytime look or a statement necklace for evening plans. It is a quick upgrade from a basic bun and works for almost any occasion without requiring new tools or products.
8. Half Up Bun
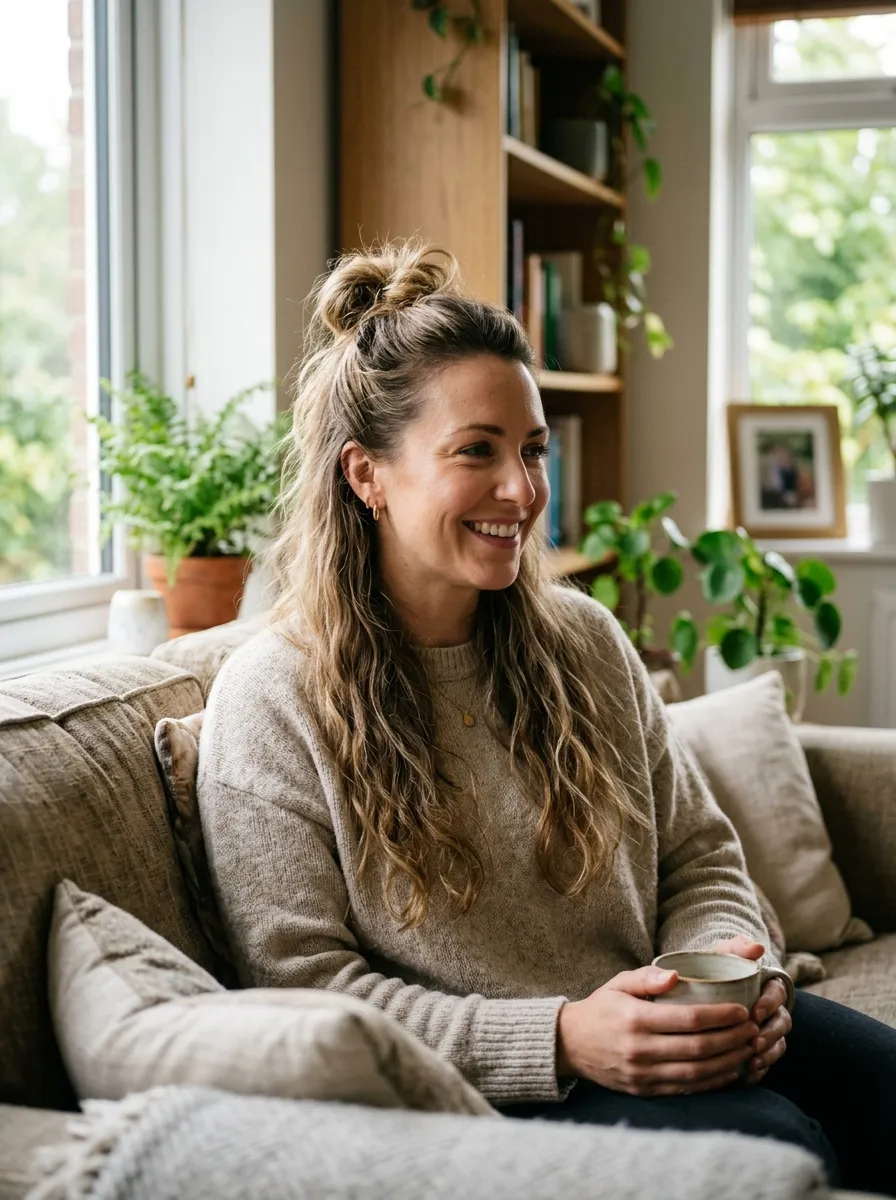
The half up bun is perfect for anyone who does not want to commit to pulling all their hair back. Gather the top section of your hair, twist or wrap it into a small bun, and pin it while leaving the rest down. This style keeps hair out of your face during work or cooking while still showing off length and movement. It is especially good for hair that has natural waves or curls, since the loose bottom section shows off texture while the top stays controlled. You do not need extra products, just a small elastic and a couple of pins. This bun transitions easily from daytime errands to a dinner out since it looks a little more done than a plain ponytail. If your hair is thin on top, backcomb the section slightly before twisting to add fullness to the bun itself. Try adding a small clip or bow at the base for a decorative touch. This style proves that you do not always need a full updo to look finished and pulled together.
9. Sock Bun
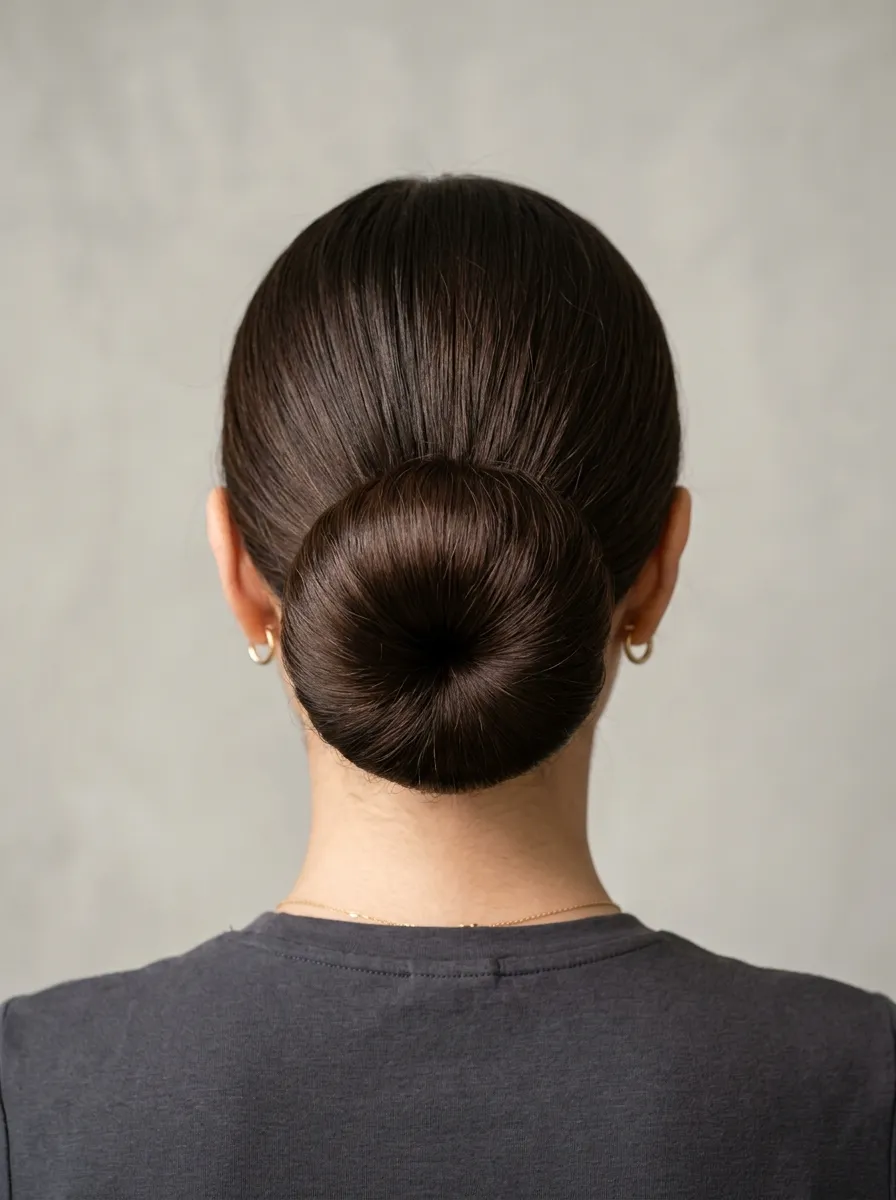
The sock bun trick has been around for years because it genuinely works, especially for people with thin or fine hair. Cut the toe off an old sock, roll it into a donut shape, then pull your ponytail through the center and roll your hair around the sock until it disappears inside. Pin the edges down and you get a full, rounded bun without buying a single new tool. This is one of the most budget friendly options on this list since it reuses something you likely already own. It works for buns of almost any size depending on how big your sock donut is. This style is great for formal occasions when you want a bun that looks fuller than your natural hair volume allows. If your hair is very fine, use a thicker sock or double up two thin ones for extra shape. The finished look is smooth, rounded, and holds its shape for hours, making it reliable for long events like weddings or graduations where you need your hair to stay put from morning until night.
10. Bun with Bangs
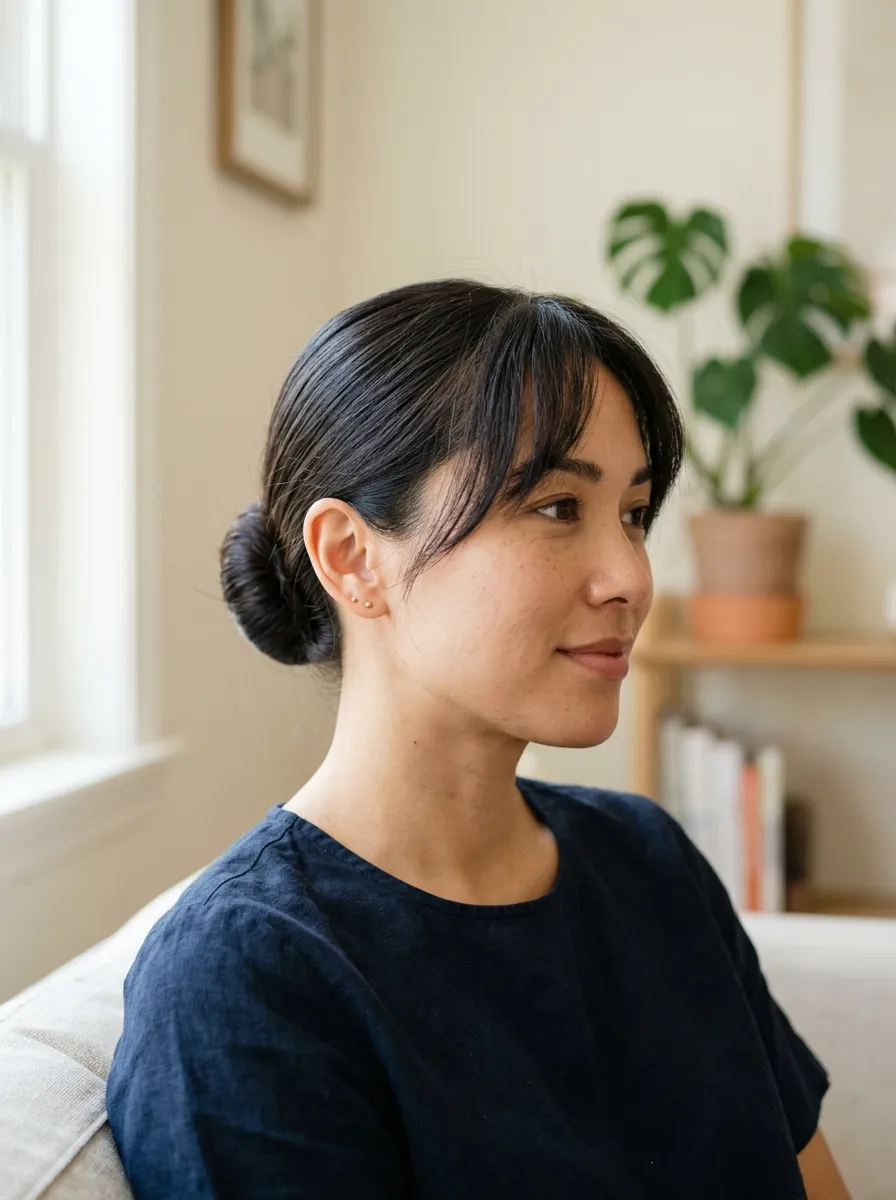
Bangs and buns together create a nice contrast between structure and softness. Pull the rest of your hair into any bun style you like, whether sleek or messy, and leave your bangs completely free in front. This works for both blunt bangs and softer curtain bangs since both styles frame the face while the bun keeps everything else controlled. If you do not have bangs but want to try the look temporarily, clip in bangs from a beauty supply store are an affordable option that many people already own or can borrow. This combination is especially good for round or oval face shapes since the bangs add definition around the forehead. A light mist of water or a small amount of leave in conditioner can help style your bangs into place without heat. This look works for both casual days and dressed up occasions since the bun can be adjusted from messy to sleek depending on the setting. It is a simple way to add personality to an otherwise plain bun without changing your entire hairstyle routine.
11. Textured Beach Bun
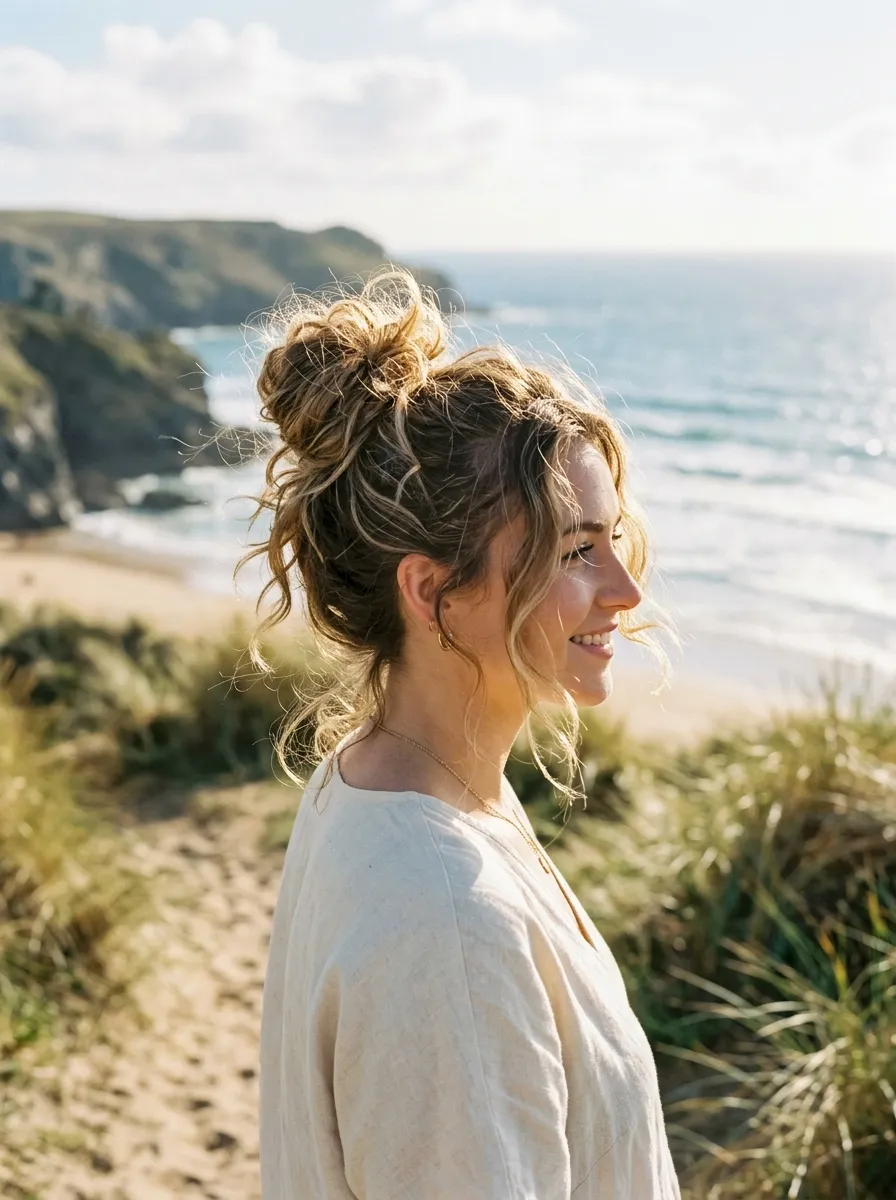
The textured beach bun works best with hair that already has natural waves or a bit of roughness to it. Instead of brushing your hair smooth, twist it up while it is still slightly tousled from the day. This gives the bun a relaxed, lived in look that feels effortless. If your hair is naturally straight, a homemade sea salt spray made from warm water, a spoon of sea salt, and a small splash of leave in conditioner in a spray bottle can add texture for free. Spritz it on damp hair and scrunch before letting it air dry or twisting it up. This bun style is ideal for warm weather, outdoor plans, or any day when you want a low maintenance look that still feels styled. Leave a few loose pieces around your hairline for extra softness. It pairs naturally with sundresses, shorts, and casual summer outfits. Because it embraces imperfection, this is one of the most forgiving buns to create, even on days when your hair is not behaving exactly the way you want it to.
12. Bun with Scarf Wrap
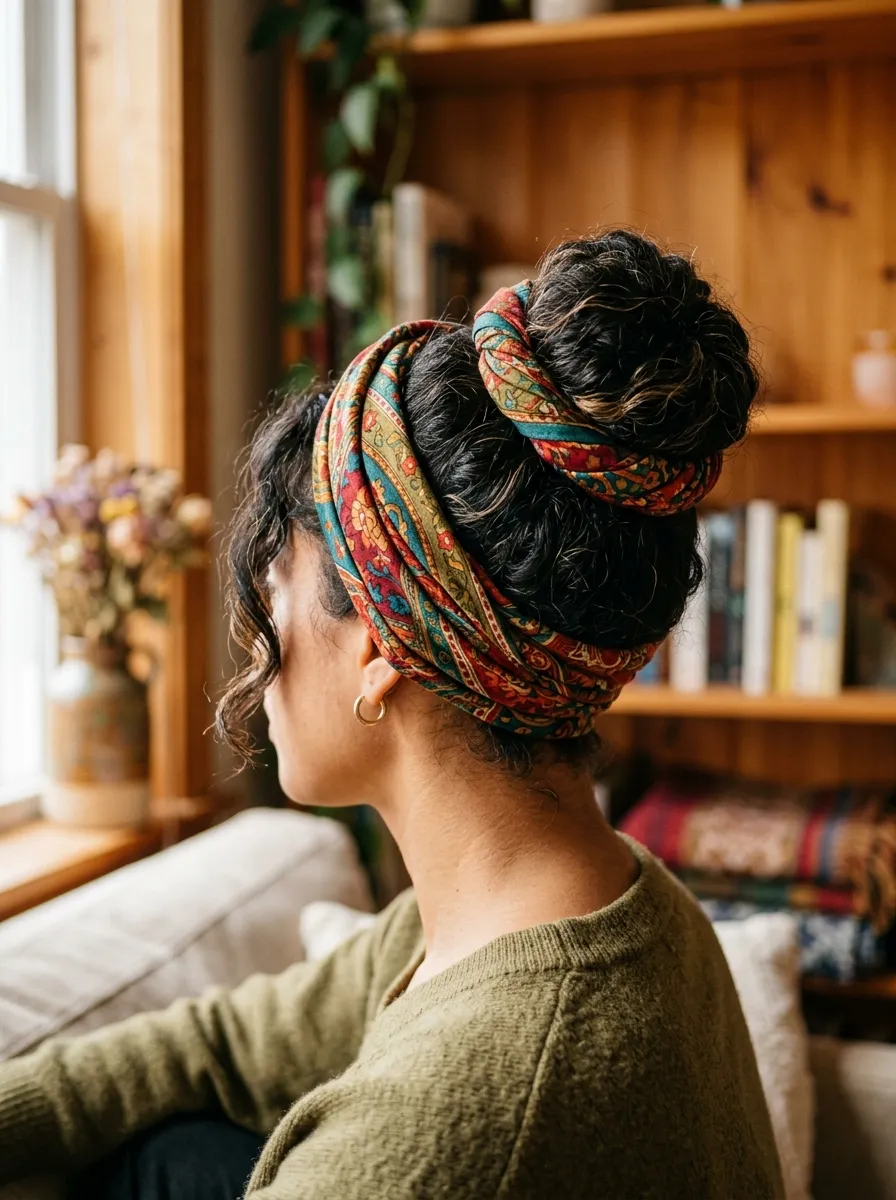
Wrapping a scarf around your bun is one of the easiest ways to add color and pattern without spending money on hair accessories. Twist your hair into any basic bun shape, then wrap a small scarf or fabric strip around the base, tucking the ends underneath or tying them into a small bow. You likely already own a scarf that would work perfectly for this, which makes it a nearly free upgrade. This style is great for adding a pop of color to a plain outfit or tying your look together with a specific color palette. It also works well for covering up a bun that did not come out as neat as you hoped, since the fabric hides any uneven sections underneath. Silk scarves add a smooth shine, while cotton ones give a more relaxed, textured look. This style is popular for both everyday wear and cultural or festive occasions where fabric wraps carry extra meaning. Try mixing patterns with a solid colored outfit so the scarf becomes the focal point. It turns a simple bun into something that feels personal and creative.
13. Donut Bun
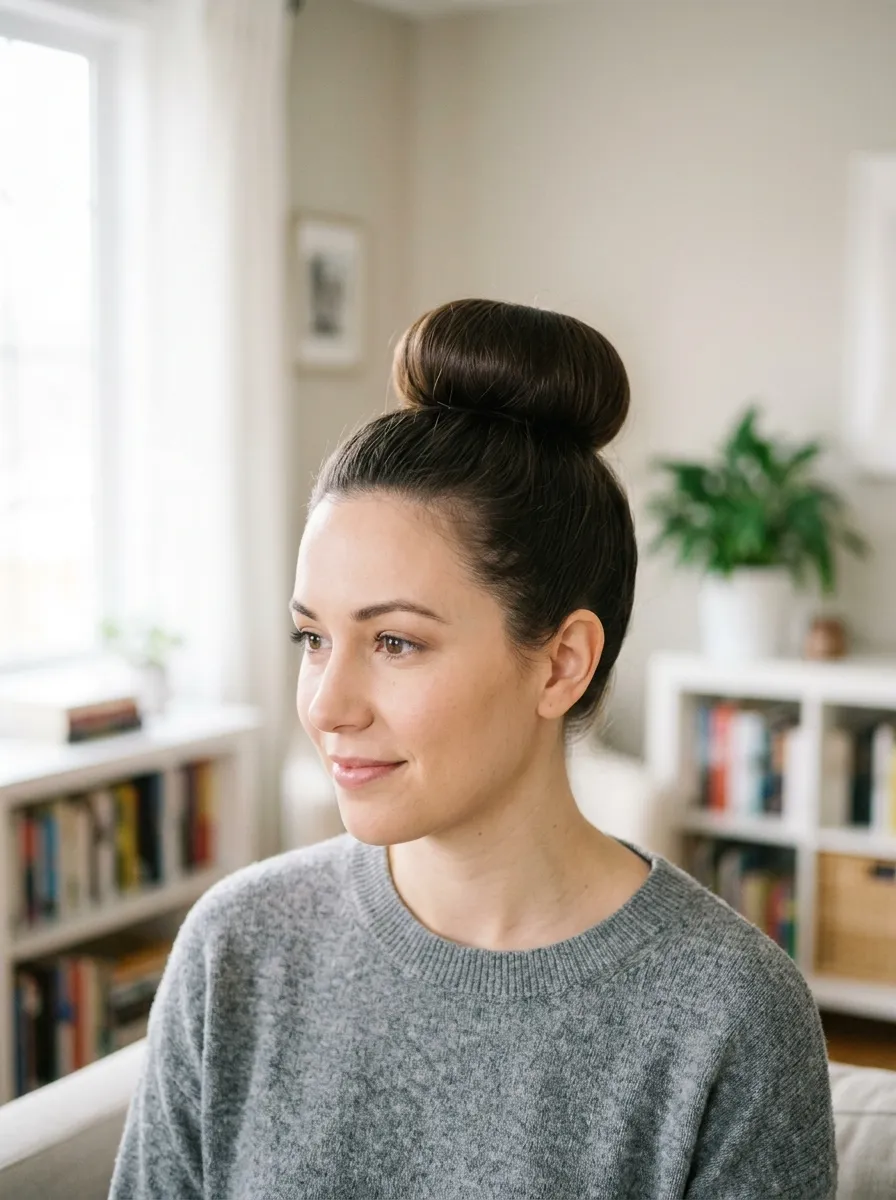
The donut bun uses a small foam ring, often sold cheaply at beauty supply stores, to create a perfectly even, rounded shape every time. Pull your hair into a ponytail, slide the donut over the base, spread your hair evenly around it, and secure the ends with pins tucked underneath. This tool typically costs less than the price of a coffee and lasts for years, making it one of the more practical investments for anyone who wears buns often. It gives a much more uniform shape compared to a hand rolled bun, which is especially helpful for formal events, job interviews, or photos where you want a polished finish. If you do not want to buy one, the sock method mentioned earlier works as a free substitute. This bun style holds its shape for long stretches of time, which makes it reliable for full day events like weddings, graduations, or work conferences. Once you get the hang of using the donut, this becomes one of the fastest and most consistent bun styles to recreate again and again.
14. Chignon Bun
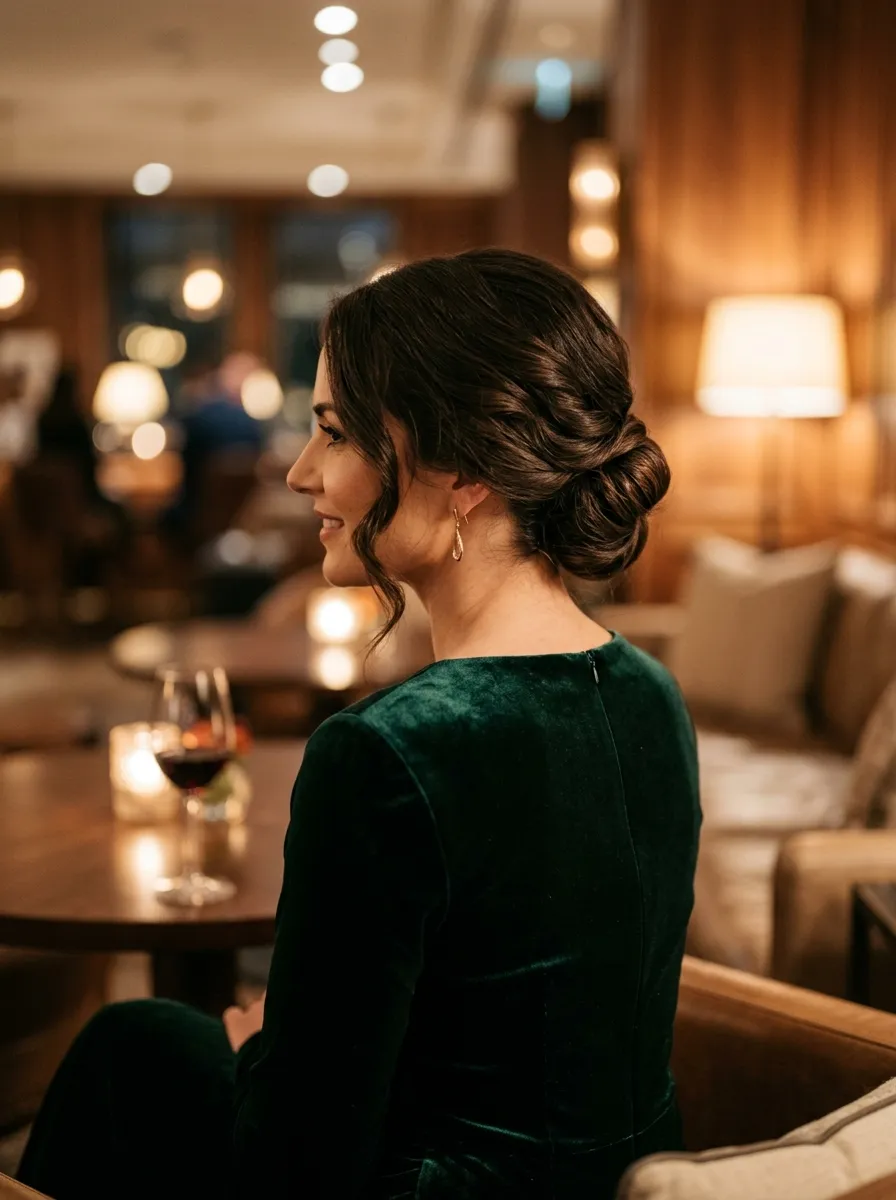
The chignon is a slightly more refined take on the low bun, often associated with formal or elegant occasions. Gather your hair low at the nape of your neck, twist it into a smooth coil, and tuck the ends under before pinning securely. Unlike a messy bun, the chignon favors smoother lines and a more tucked in finish. This style pairs beautifully with soft waves left around the face, which you can create using basic foam rollers left in overnight instead of expensive curling tools. The chignon works well for weddings, dinners, or any dressed up event where you want something polished but not overly tight or severe. If you struggle with smoothing flyaways, a small amount of coconut oil rubbed between your palms works as a budget friendly alternative to styling gel. This bun also flatters longer necklines and off the shoulder outfits since it draws attention upward and away from the collar. Once mastered, the chignon becomes a reliable go to for special occasions, offering an elegant finish that does not require professional styling.
15. Bun with Face Framing Pieces
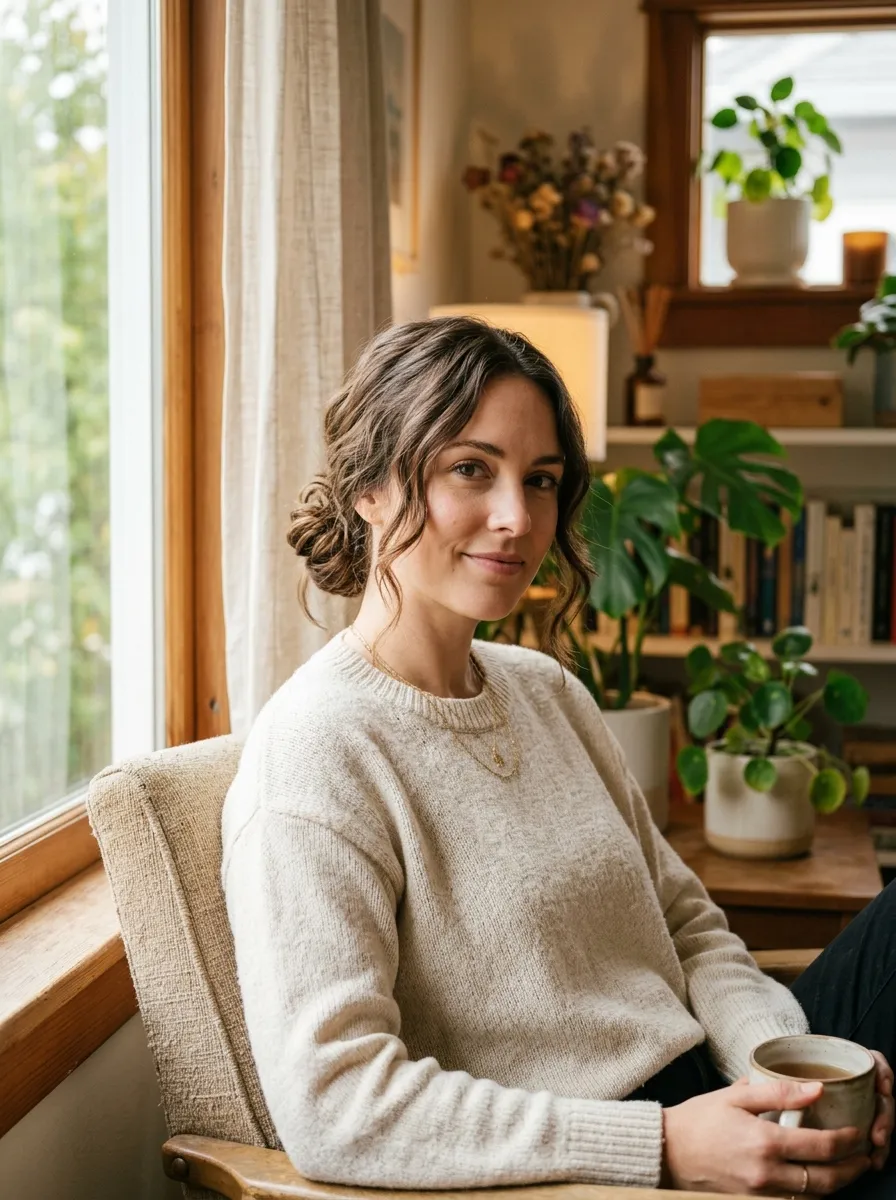
Leaving a few pieces loose around your face can soften almost any bun style, no matter how sleek or messy the rest of it is. Before pulling your hair back, gently tug a few strands loose near your temples and cheeks. Curl them lightly with a flat iron or leave them straight for a more natural finish. This small step changes the entire mood of a bun, making it feel more romantic and less severe. It works for both curly and straight hair types, though curly hair naturally gives these loose pieces more shape without extra styling. This technique costs nothing extra since it simply uses hair you were already going to pull back. It flatters most face shapes by softening the hairline and drawing attention to the cheekbones and jaw. This is a favorite trick for photos, since face framing pieces tend to look more flattering in pictures than hair pulled back completely. Try this with the ballerina bun for contrast, or with the messy low bun for an even softer, more relaxed overall look.
16. Rope Twist Bun
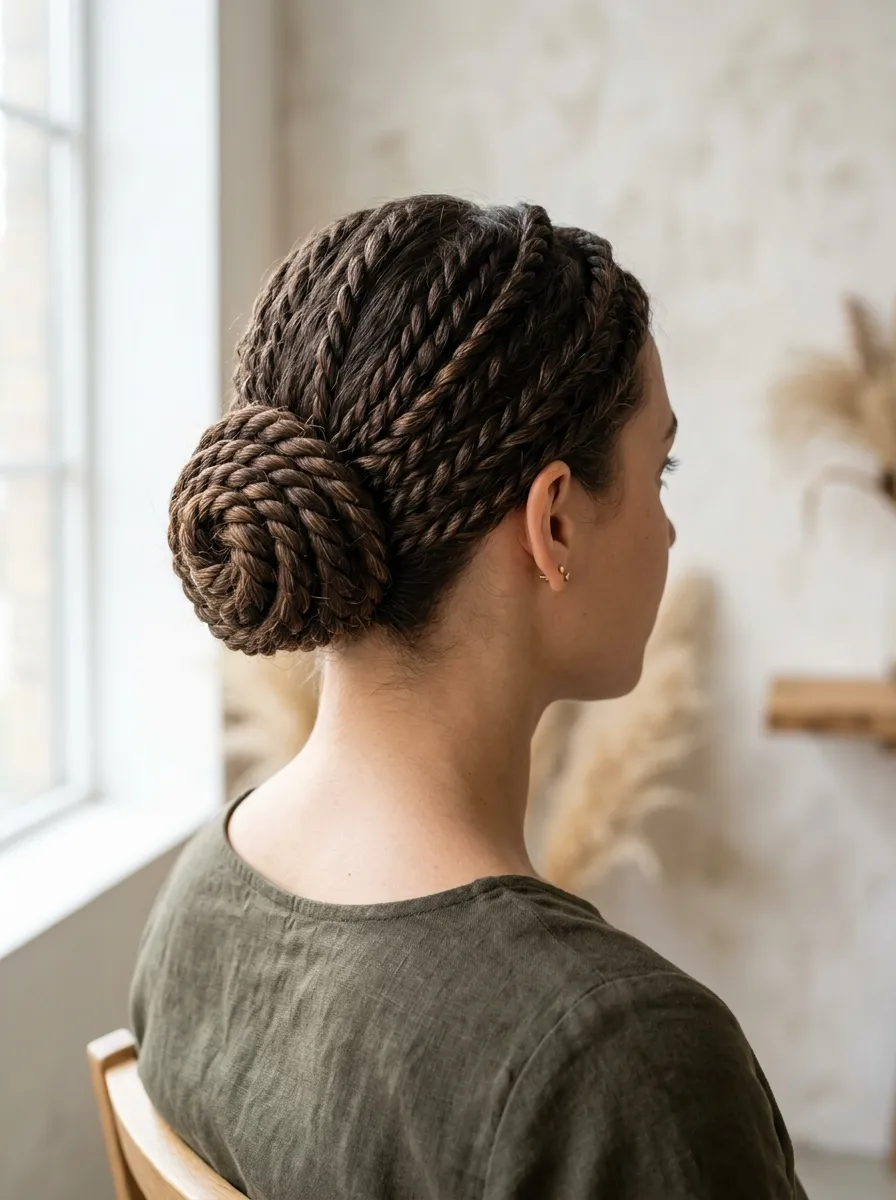
A rope twist bun takes the basic twisted bun idea and tightens it for a more defined, cord like texture throughout. Gather your hair into a ponytail, divide it into two sections, and twist each section tightly in the same direction until they start to kink slightly. Then twist the two sections around each other in the opposite direction, which locks the rope pattern into place. Coil the finished twist into a bun and pin the end. This style holds exceptionally well since the tight twisting creates natural tension that keeps flyaways in place without extra product. It looks intricate but only takes a few extra minutes compared to a standard twisted bun. This is a great option for humid weather or windy days since the tightness resists frizz better than looser styles. It works on medium to long hair best, since shorter hair does not always hold the tight rope shape as clearly. Pair it with simple gold jewelry for an elevated daytime look, or leave it plain for a clean, practical everyday style that lasts from morning to night.
17. Bun with Hair Accessories
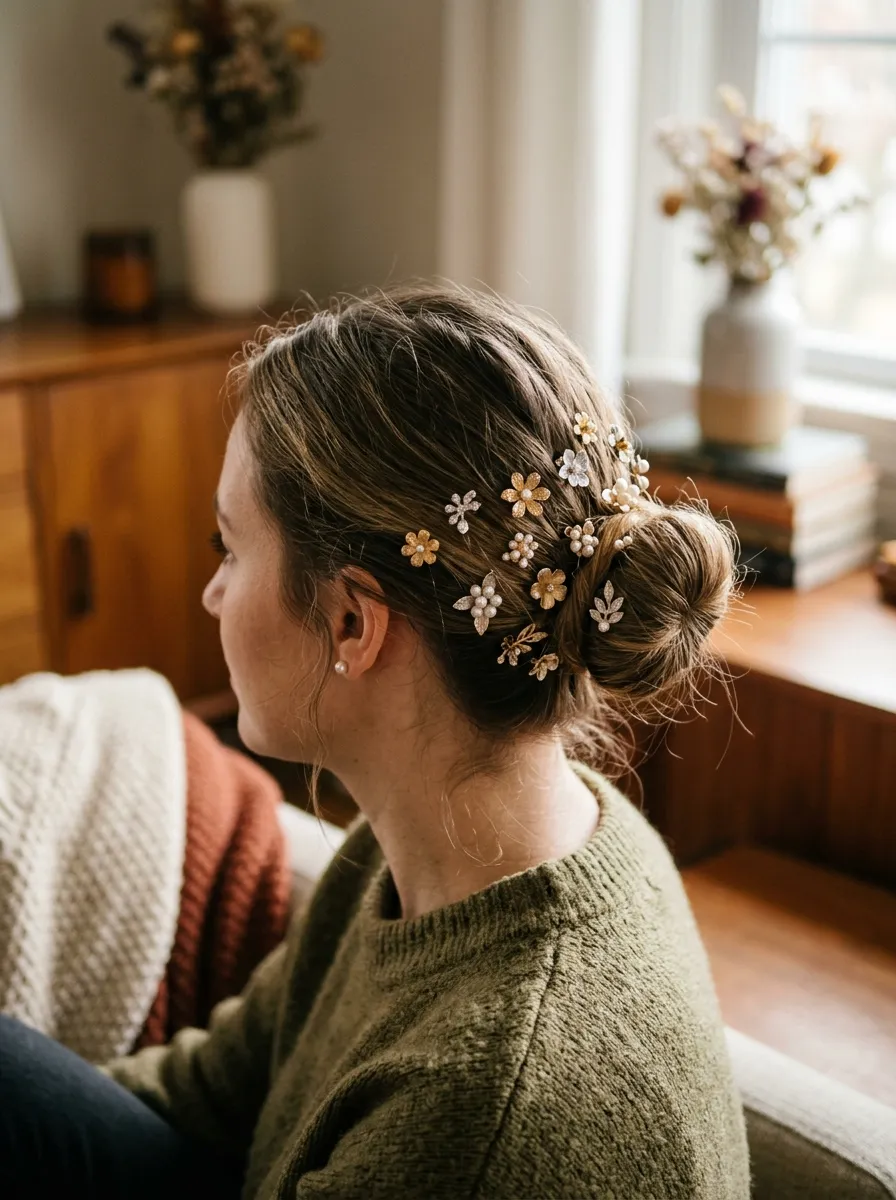
Adding a few small clips or pins around your bun is one of the cheapest ways to make a plain style feel special. Pearl clips, small metallic pins, or even bobby pins with tiny charms can be tucked into the twist or wrap of any bun for extra detail. Many of these accessories cost very little and can be reused across dozens of different looks. This works especially well for birthdays, holidays, or any occasion where you want to dress up your usual bun without changing the base style at all. If you do not want to buy new accessories, small fresh flowers from your garden or a nearby market can be tucked in for a similar effect at almost no cost. Scatter a few clips randomly around a messy bun for a whimsical look, or place them in a neat row along a sleek chignon for a more structured finish. This trick works with nearly every bun style already mentioned, since the accessories sit on top rather than changing the underlying technique. It is a small effort with a noticeably different final result.
18. Curly Bun
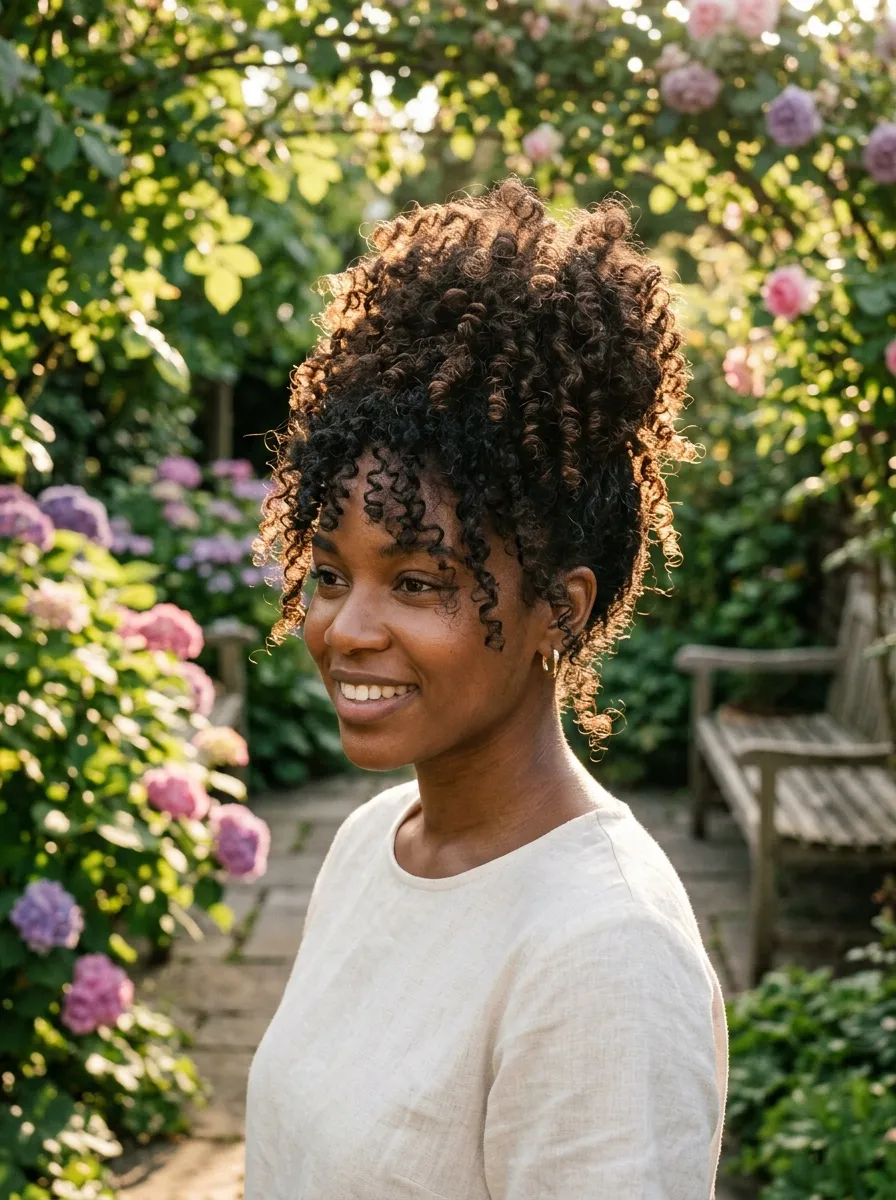
Curly hair adds natural fullness to a bun without any extra work. Gather your curls into a high or low ponytail depending on your preference, then twist and pin as usual, letting some curls stay loose and undefined within the twist itself. Fighting the natural texture by trying to smooth it flat often takes more time and product than simply working with the curls you already have. A small amount of coconut oil or shea butter, both inexpensive and widely available, can help define curls before pulling them back. This bun style is great for humid days since curly hair tends to hold shape and volume better than straight hair in moisture heavy weather. It also disguises second or third day curls well, since the twisted shape hides any flatness at the roots. Try pulling the bun slightly looser than you normally would to let some curls peek out around the edges for extra dimension. This style celebrates natural texture rather than fighting it, which makes it one of the lowest effort, highest impact options on this entire list.
19. Side Bun
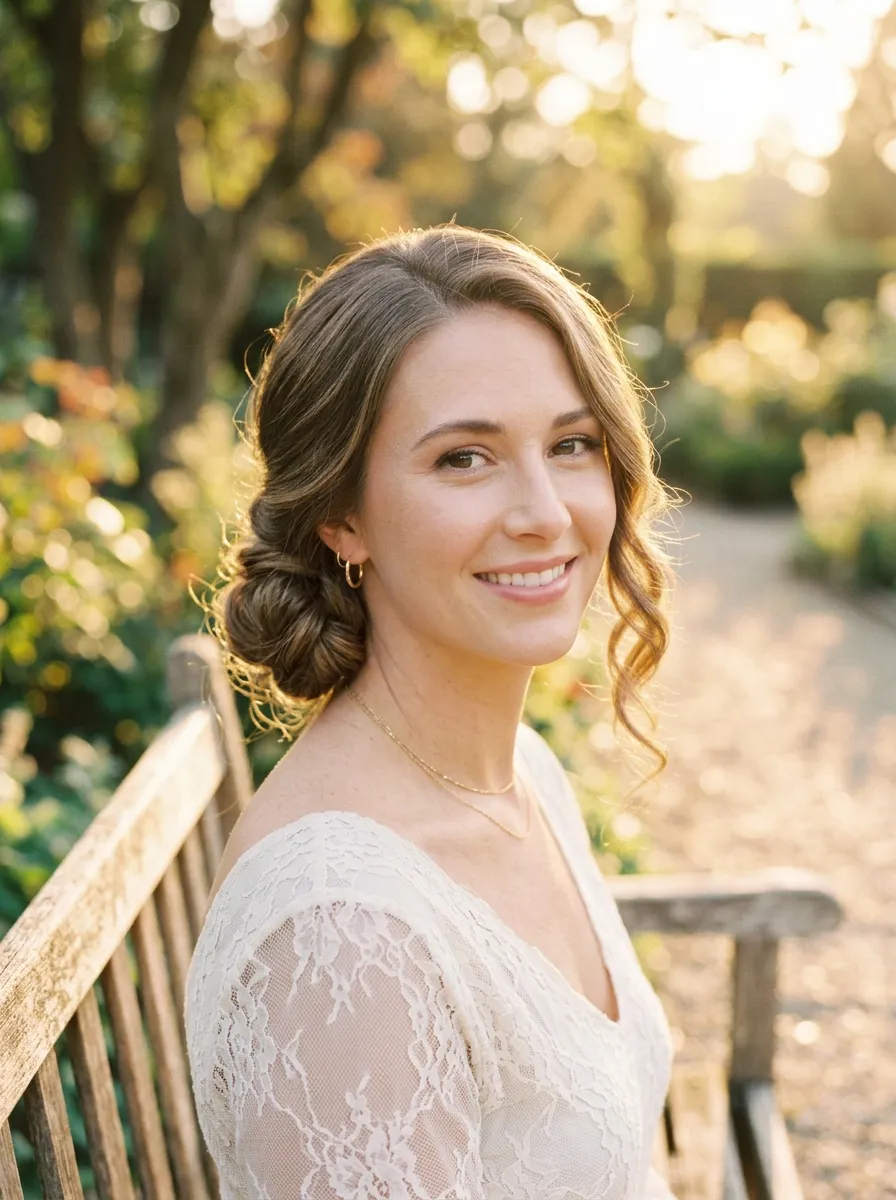
The side bun brings a slightly romantic, asymmetrical feel by shifting the usual centered placement to one side of the neck. Gather your hair as you would for a low bun, but pull it toward one shoulder before twisting and pinning it near your collarbone instead of directly at the back. This style works beautifully for evening events, dates, or any occasion where you want something a little more dressed up than a standard centered bun. It also flatters strapless or off the shoulder outfits since it keeps one side of the neckline completely open. If your hair does not want to stay on one side, a few extra bobby pins along the opposite side of your head can hold the direction in place without any special product. Loose waves left around the front of your face pair especially well with this style, adding softness to the overall look. This is a nice option when you want a bun that feels a bit more special without learning any new technique, since it simply repositions a style you likely already know how to do.
20. Bun with Bandana
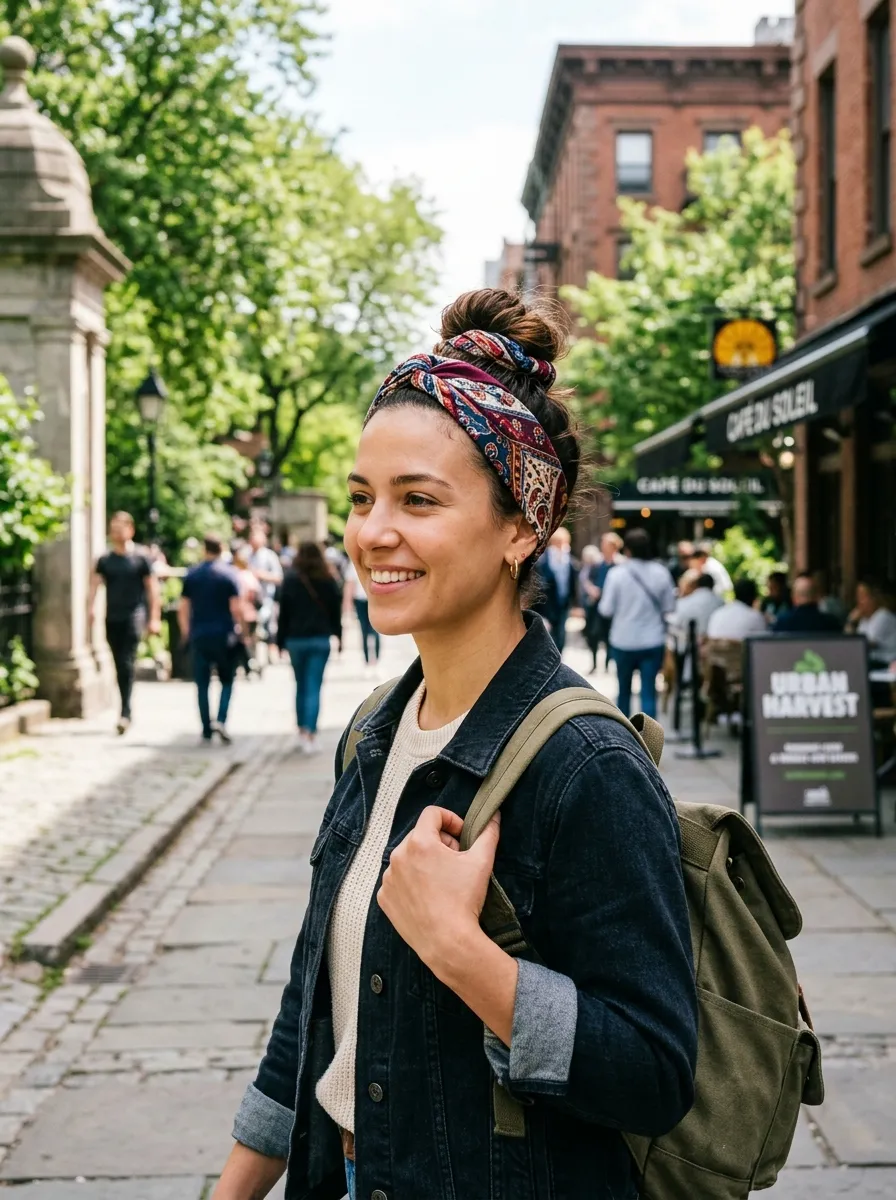
A bandana adds a casual, retro feel to any bun and doubles as a way to manage hair on days when you have not washed it. Fold a bandana into a strip, tie it around your hairline before pulling your hair back, then twist the remaining length into a bun behind the fabric. This hides roots and oily strands near the scalp while still looking styled and intentional. Bandanas are inexpensive and come in countless patterns, making this one of the more affordable ways to add personality to a simple look. This style works well for running errands, gardening, or casual weekend plans where you want something practical but still put together. It also works as a sweat management trick during workouts, since the fabric absorbs moisture around the hairline. Try knotting the bandana at the front for a classic look or at the back for something more subtle. This is a favorite among people who want a no fuss hairstyle that still photographs well and adds a bit of retro charm to an everyday outfit.
21. Knotted Bun
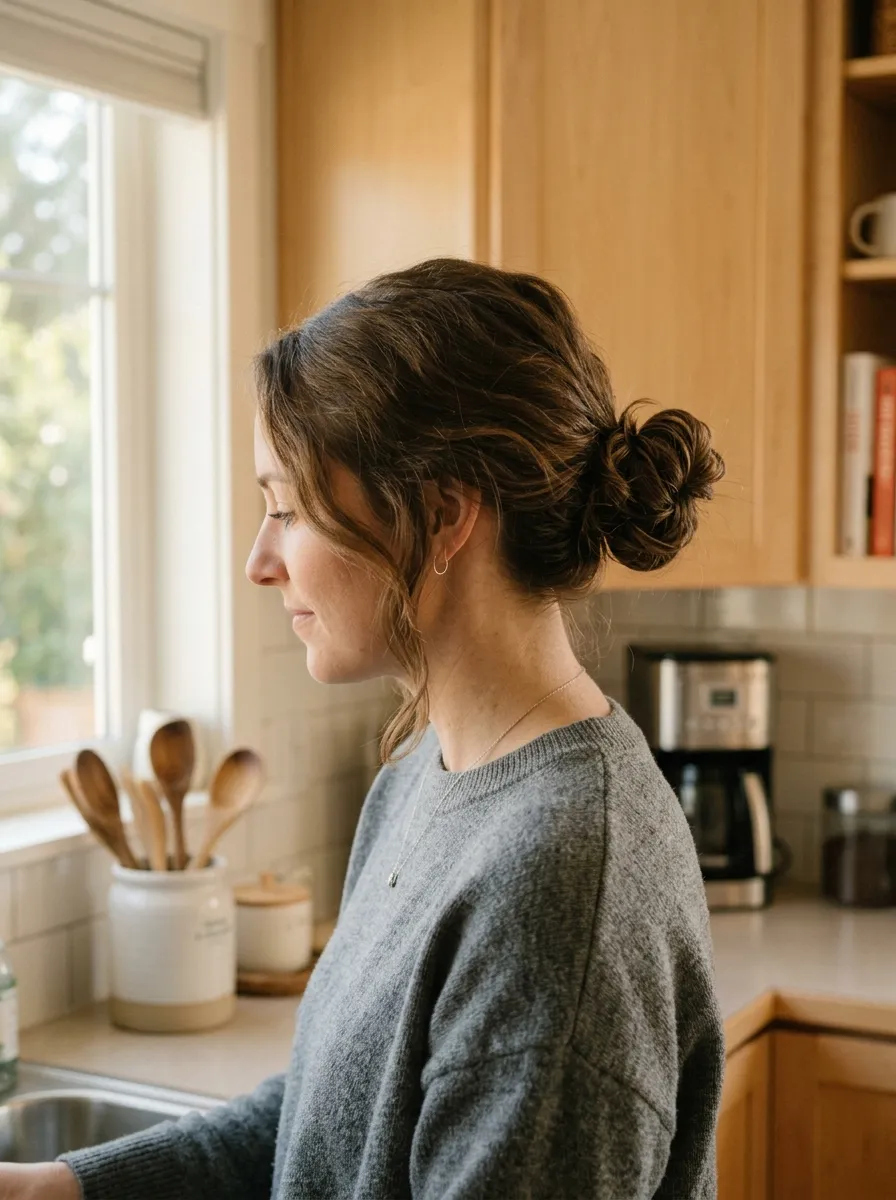
The knotted bun might be the single fastest bun on this entire list. Gather your hair into a ponytail, then instead of wrapping it around itself, simply tie it into a loose knot like you would tie a shoelace, tucking the ends underneath. No pins are required if your hair has enough texture to hold the knot in place, though a single bobby pin can add extra security for slippery hair. This style takes seconds and works perfectly for early mornings when you are already running behind schedule. It has a slightly undone, casual look that fits naturally with loungewear, workout clothes, or a quick coffee run. Because there is no wrapping or twisting involved, this is also a great option for anyone still learning basic bun techniques, since there is very little room for mistakes. If the knot feels loose, tying it twice, or a double knot, adds extra hold. This bun proves that a hairstyle does not need to be complicated or time consuming to look styled and intentional, even on the busiest of days.
22. Bun with Braided Crown
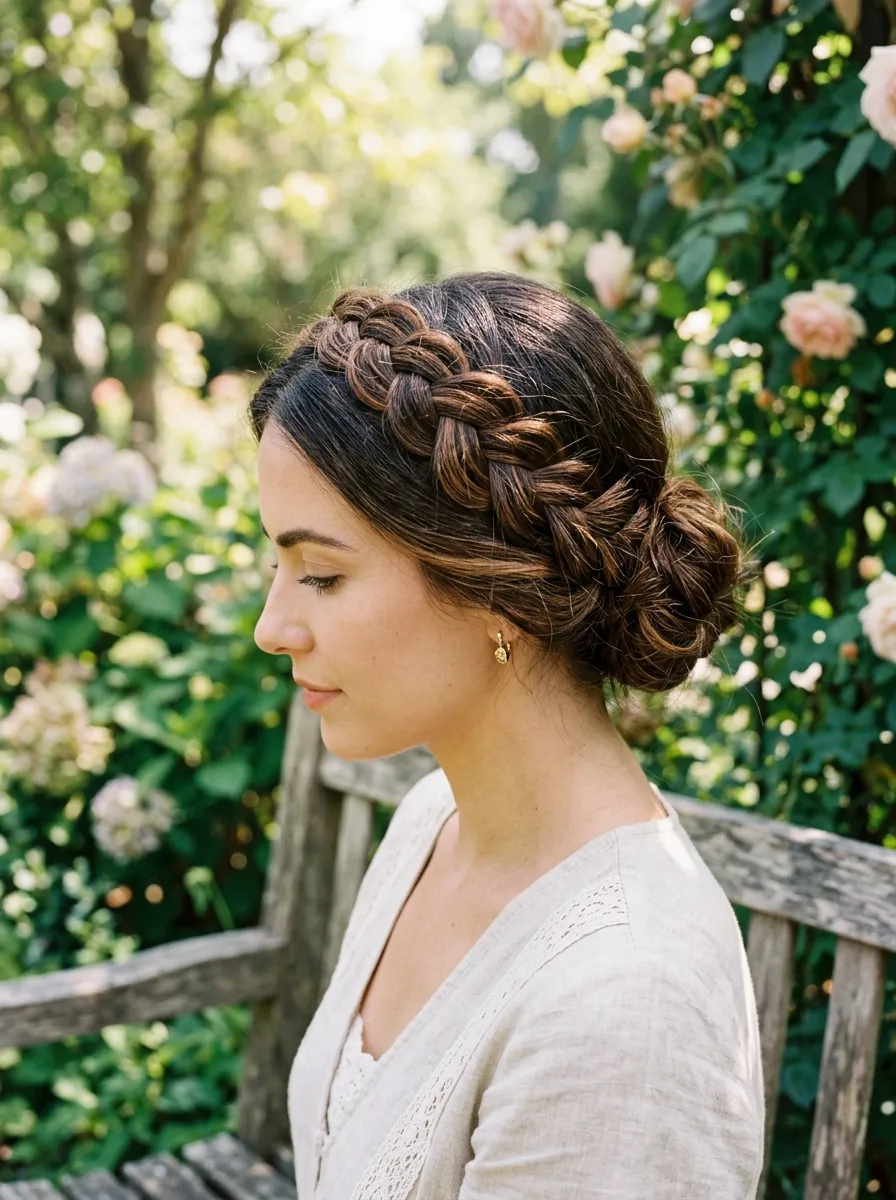
Combining a braided crown with a bun creates a look that feels far more detailed than the actual effort required. Braid two sections from the front of your hairline back toward the crown, then gather all your hair, including the braids, into a low bun at the nape of your neck. Pin everything together so the braids sit like a crown before disappearing into the bun below. This style works beautifully for weddings, graduations, or any event where you want something that photographs well from every angle. It also keeps hair fully secured for long days involving a lot of movement, like dancing or outdoor ceremonies. You do not need any special products, just a bit of practice with basic braiding. If your braids feel loose, small clear elastics at the end of each one before incorporating them into the bun will keep everything tight. This look works on most hair lengths starting around shoulder length, and it holds its shape for hours, making it one of the more reliable options for special occasions.
23. Voluminous Bun
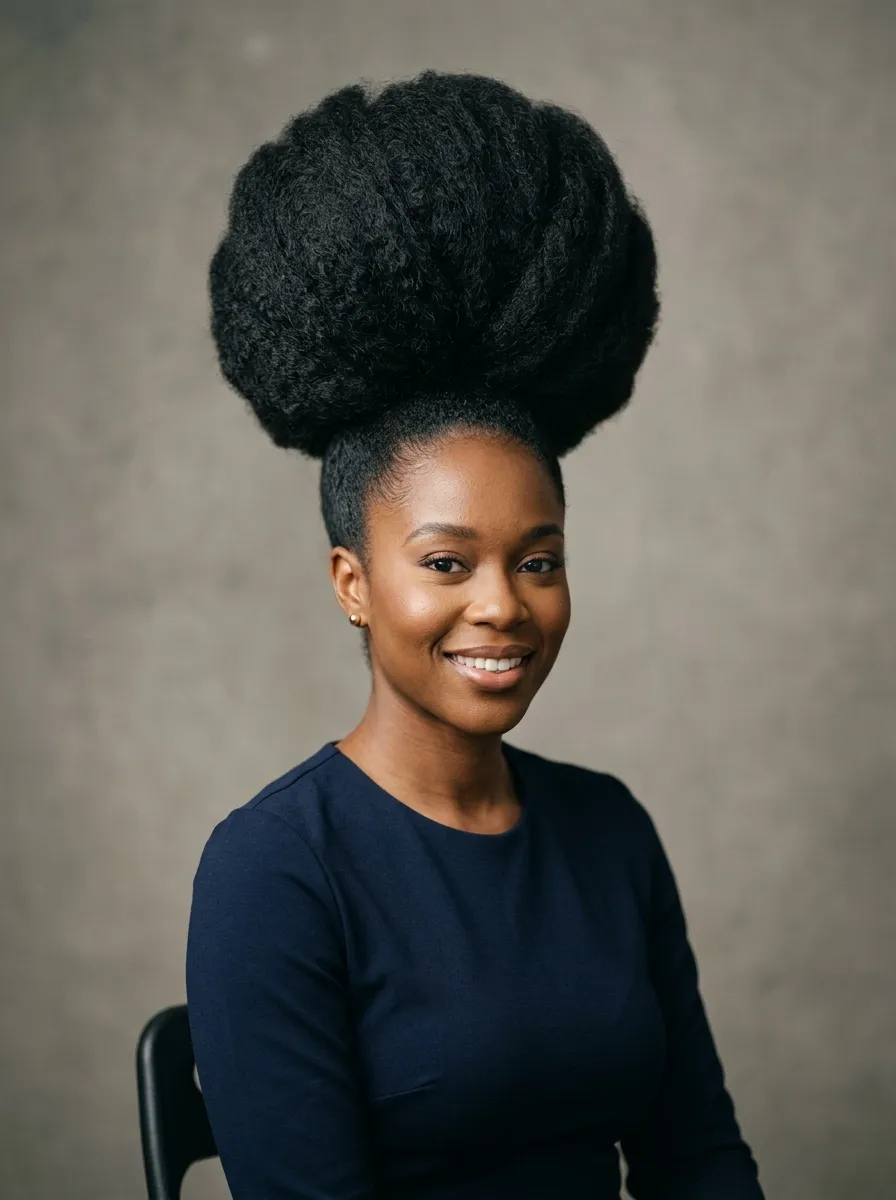
A voluminous bun is built for anyone who wants their hairstyle to make a statement. Backcomb your ponytail generously at the base before twisting it into a bun, which adds noticeable height and fullness without any extra tools. If your hair is naturally thin, clip in extensions, even inexpensive synthetic ones from a beauty supply store, can be tucked underneath a bun to add bulk that no one will notice once it is styled. This look works well for formal events, performances, or any occasion where you want your hairstyle to stand out in photos. The added volume also helps a bun hold its shape longer, since a fuller base gives pins more to grip onto. Take your time backcombing in small sections rather than rushing through the whole ponytail at once, since rushed backcombing tends to create tangles instead of smooth volume. This bun pairs well with statement earrings and bold makeup looks, since the hair itself already carries plenty of visual weight. It is proof that a bit of backcombing can completely transform a plain bun into something dramatic and memorable.
24. Low Bun with Ribbon
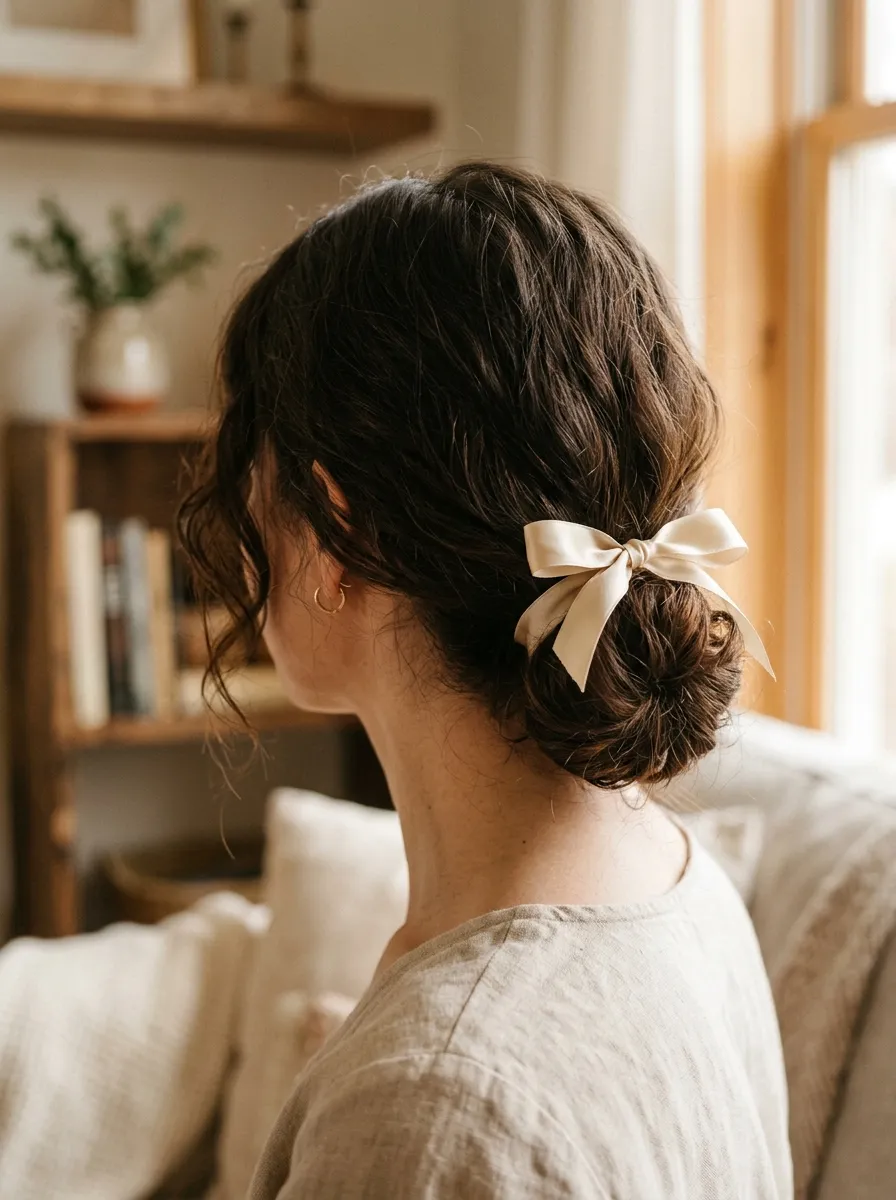
Tying a ribbon around a low bun adds a soft, romantic detail that costs almost nothing to create. Twist your hair into a simple low bun, then wrap a thin ribbon around the base before tying it into a small bow or knot. Satin or silk ribbons give a gentle shine, while cotton ribbons add a more relaxed, natural texture. This style works beautifully for birthdays, garden parties, or any occasion with a soft, feminine dress code. It also makes a great option for young children’s hairstyles, since ribbons are widely available in nearly every color and pattern imaginable. If you already own ribbon from gift wrapping or craft projects, this style costs literally nothing extra to try. The ribbon can also double as a way to disguise a bun that came out slightly uneven, since the fabric draws the eye toward itself rather than the hair underneath. Try matching the ribbon color to your outfit for a coordinated look, or choose a contrasting shade for a bit of visual interest. This small addition turns an ordinary bun into something that feels thoughtful and complete.
Conclusion
A great bun does not need expensive products, professional training, or hours in front of a mirror. Most of the styles above rely on things you already own, from hair ties and bobby pins to old socks and scarves tucked in a drawer. What matters most is picking a style that fits your day, whether that means a five second knotted bun before running out the door or a detailed braided crown for a big event. Try a few different styles from this list and see which ones feel natural for your hair type and daily routine. Once you find your favorites, they will become the styles you reach for again and again, no salon appointment required.
Leave a Reply