Hairstyle ideas for Black women have always been at the forefront of hair creativity. From protective styles to bold color transformations, the range of options is truly breathtaking. Whether you have natural coils, relaxed strands, or somewhere in between, there is a hairstyle that fits your lifestyle, budget, and personality. This guide walks you through 27 real, wearable hairstyle ideas that work for everyday life, special events, and everything in between. Each style comes with practical tips to help you get the look without spending a fortune. If you’re also exploring Hairstyle Ideas for Wavy Hair, soft layered cuts, defined waves, half-up styles, and textured looks can help enhance natural movement while keeping the hair easy to manage, versatile, and effortlessly stylish for any occasion.
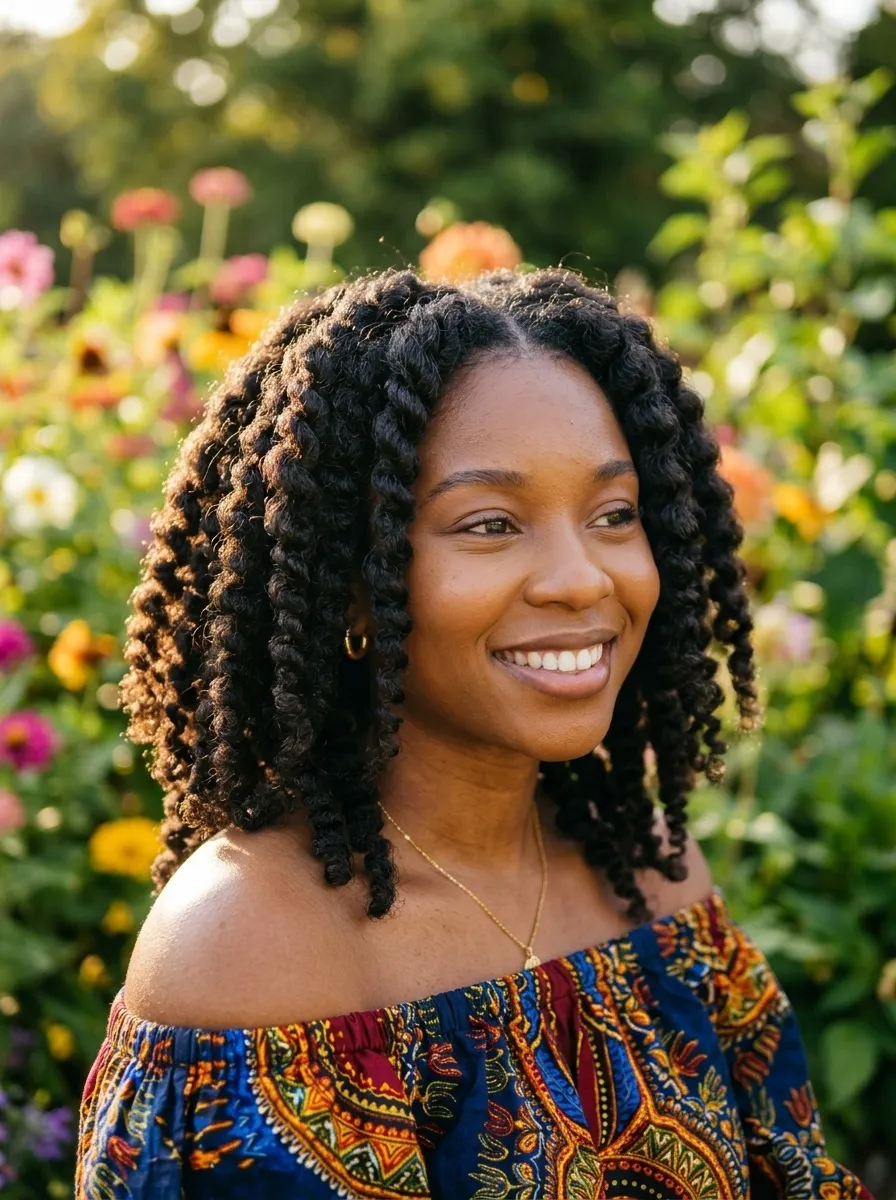
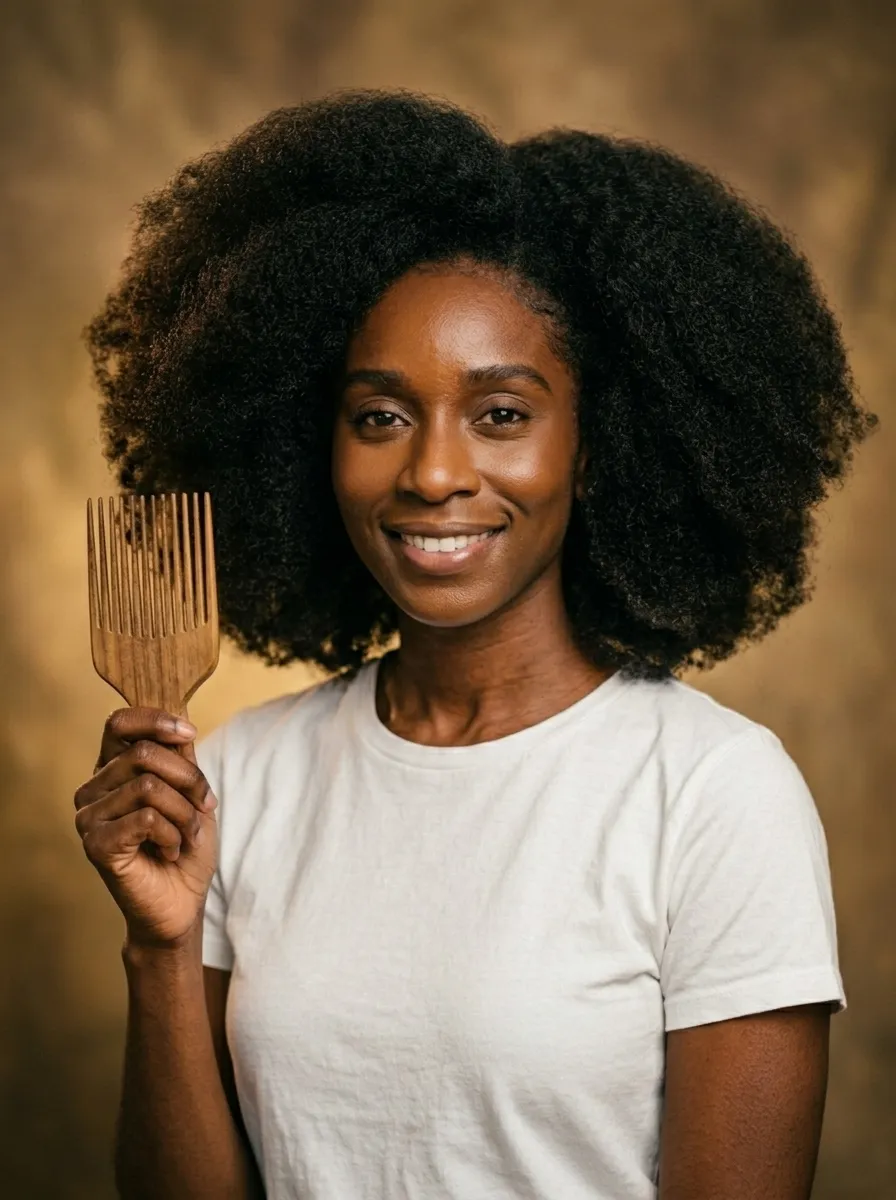
1. Big Chop Natural Afro Hairstyle ideas for black women
The big chop is a powerful starting point for any natural hair journey.
It means cutting away chemically processed or heat-damaged ends to start fresh with your natural texture.
Many women feel nervous about this step. But the results are often life-changing.
Here is what makes it work:
You do not need a salon to pull this off. A trusted friend with sharp shears and a YouTube tutorial can do the job.
After the cut, focus on moisture. Use a leave-in conditioner daily and seal with a light oil like jojoba or grapeseed.
A wide-tooth comb is your best friend for detangling.
Budget tip: drugstore brands like SheaMoisture and Cantu work just as well as high-end products for new natural hair.
The afro grows out beautifully over time. Many women find that the big chop gives them confidence they never expected.
Shape it with your fingers or a pick comb for a clean silhouette.
This is a low-maintenance style once you build a simple routine. Start small, stay consistent, and watch your crown grow.
2. Box Braids
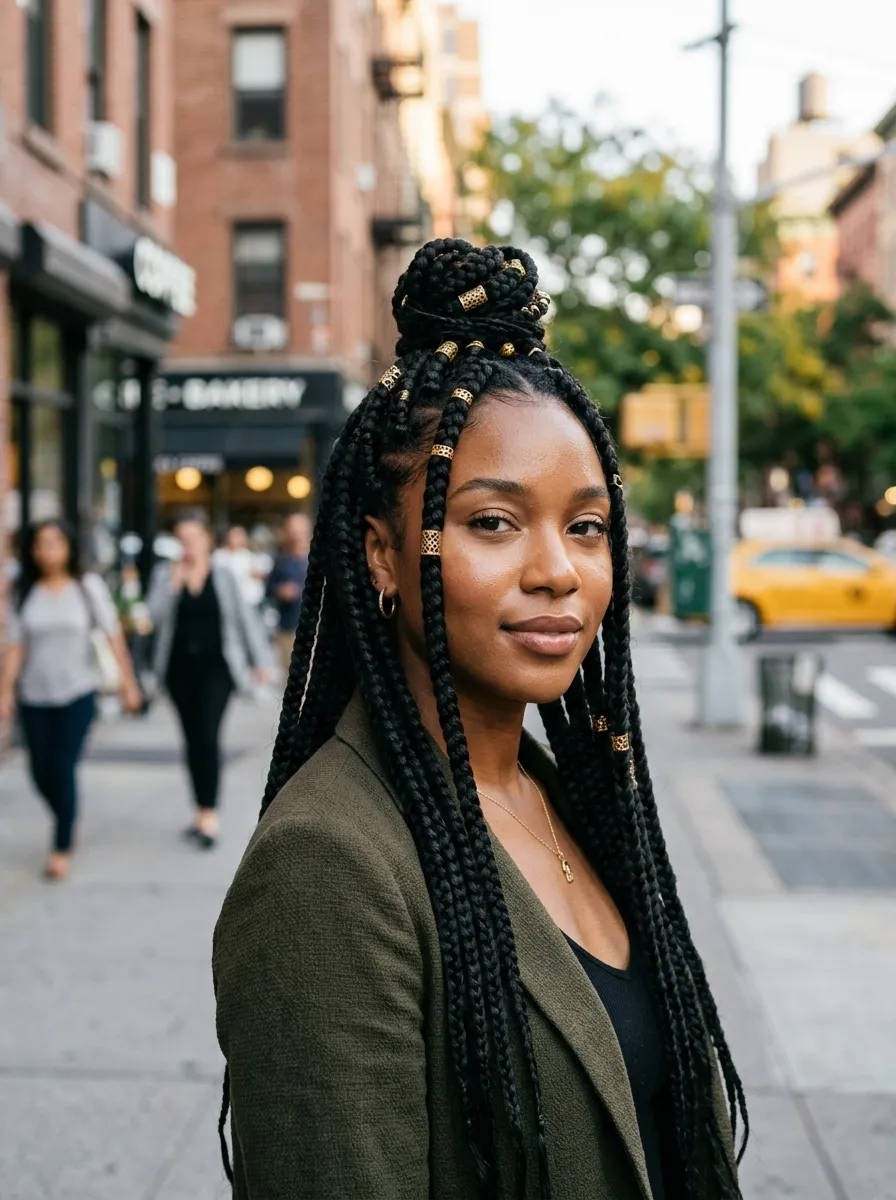
Box braids are one of the most popular protective styles for Black women.
They last anywhere from four to eight weeks with proper care.
Why women love them:
They protect your natural hair from manipulation and breakage. You do not have to style your hair every day. And they look amazing in every length.
You can go short, shoulder-length, or waist-long depending on your mood.
DIY option: You can braid your own hair with practice. Kanekalon hair extensions are affordable and easy to find at beauty supply stores. A full head of box braids at home can cost as little as $20 in hair.
At a salon, prices range from $100 to $300 depending on your city and stylist.
To keep braids fresh, spray your scalp with diluted rosewater or a braid spray every few days.
Sleep with a satin bonnet to reduce frizz and keep edges smooth.
Do not leave box braids in longer than eight weeks. Your natural hair needs a break to avoid matting or thinning.
Box braids are truly a classic for a reason.
3. Knotless Braids
Knotless braids have taken over as the go-to upgrade from traditional box braids.
The main difference is the starting technique. Instead of using a knot at the root, hair is added gradually using a feed-in method.
This means:
Less tension at the scalp. Less pain during installation. And a more natural look overall.
Knotless braids sit flatter against your head, which makes them look incredibly clean and polished.
They also tend to last just as long as regular box braids with good maintenance.
Budget tip: Ask your braider to use less hair per braid. Smaller amounts of extension hair still look full but cost less overall.
You can also purchase your own Kanekalon hair before your appointment to save money.
Moisturize your scalp regularly with a light oil spray, focusing on the parts and edges.
Wrap your hair in a silk scarf at night to maintain the style and keep frizz away.
If you are new to braids, knotless is a great starting point because the reduced tension makes the experience far more comfortable.
Many women with sensitive scalps prefer this style over any other braided option available.
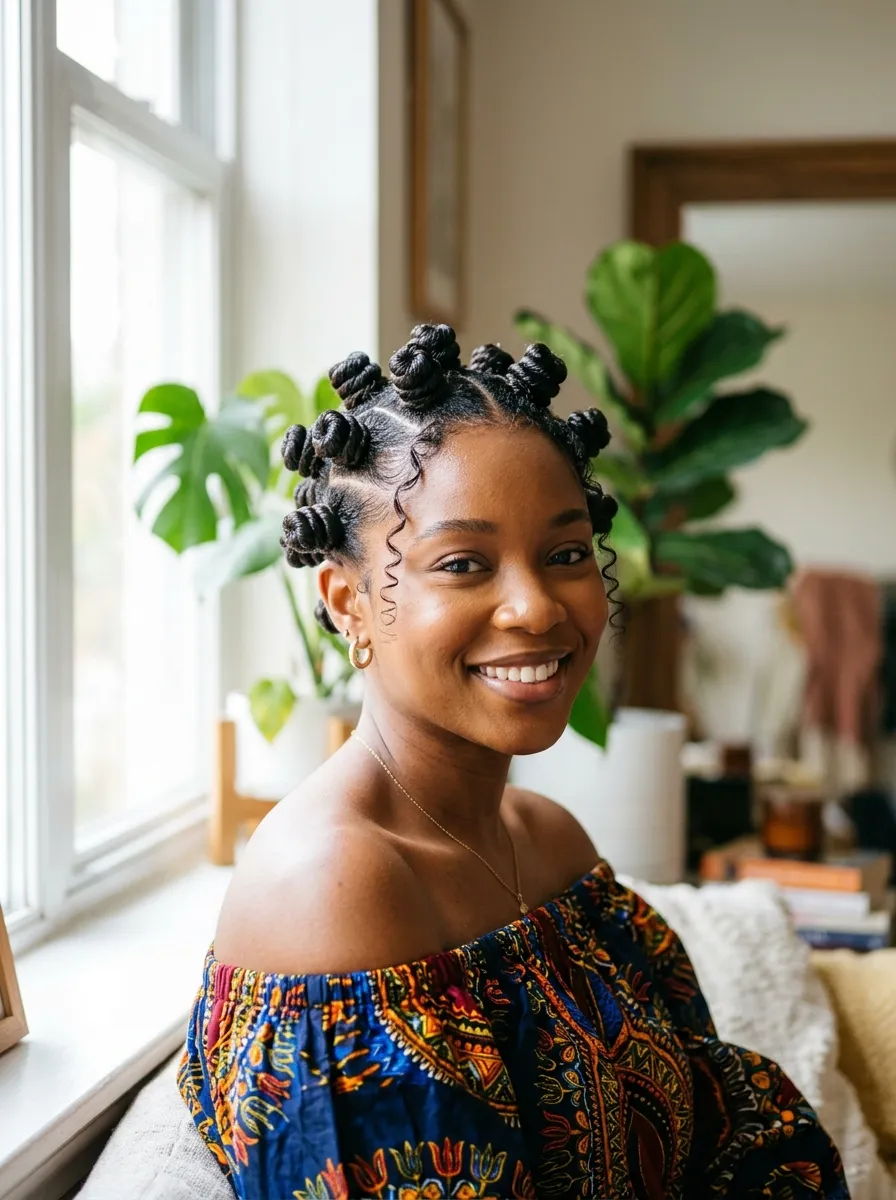
4. Bantu Knots
Bantu knots are a culturally rich style that looks stunning and doubles as a styling tool.
Wearing them as-is gives you a bold, sculptural look. But you can also undo them after a few hours for beautiful spiral curls, which is called a Bantu knot-out.
How to do them at home:
Section your hair into equal squares or diamonds. Twist each section tightly from root to tip. Then wrap the twist into a coil and tuck the end underneath.
Use a light styling cream or gel to hold each knot in place.
The bigger the sections, the looser the resulting curl. Smaller sections give tighter spirals.
Budget tip: You do not need any special products. A basic holding gel and a moisture cream from any drugstore will do the job perfectly.
Leave them in overnight and wake up to a gorgeous curly style.
Bantu knots work on all natural hair lengths, including short TWA (teeny weeny afro) styles.
They are especially popular for vacations, weddings, and outdoor events because they hold up well in humidity.
Try adding small beads or gold cuffs for extra flair on special occasions.
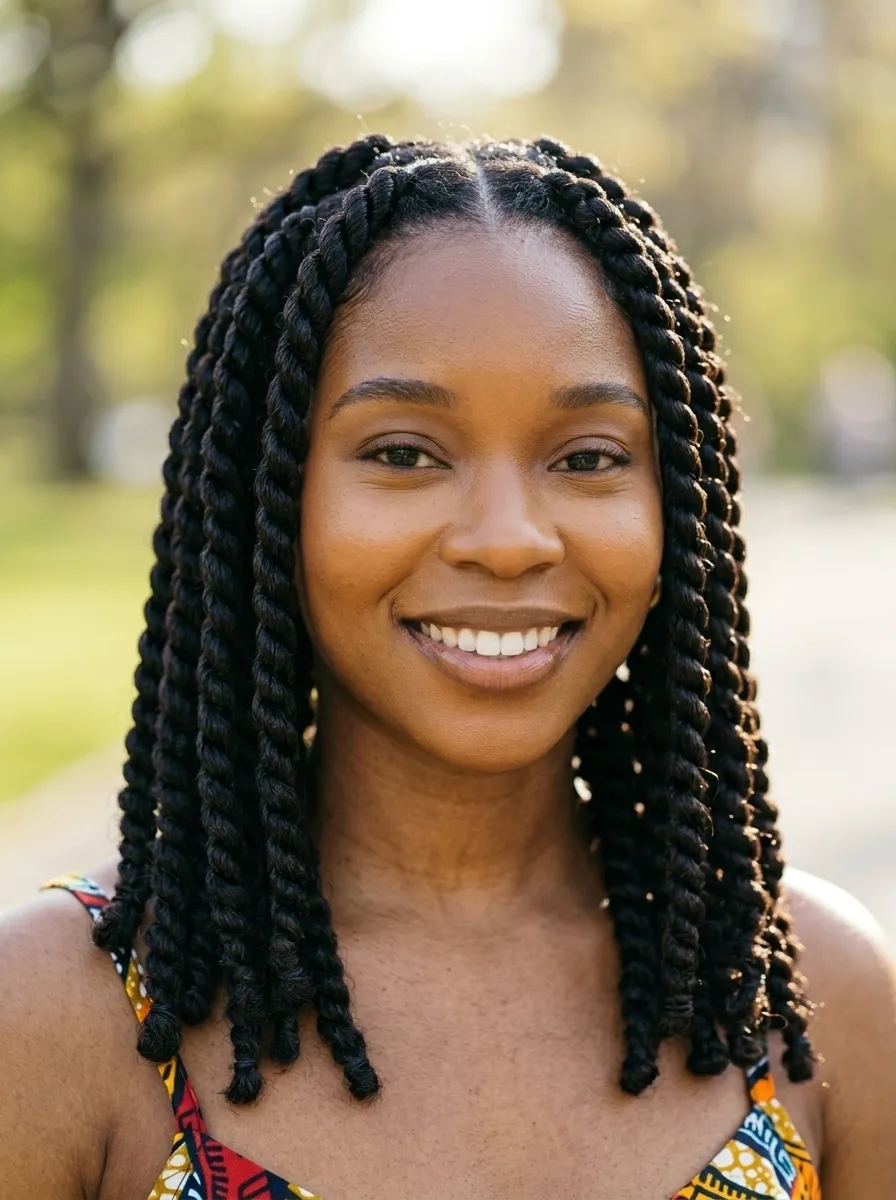
5. Senegalese Twists
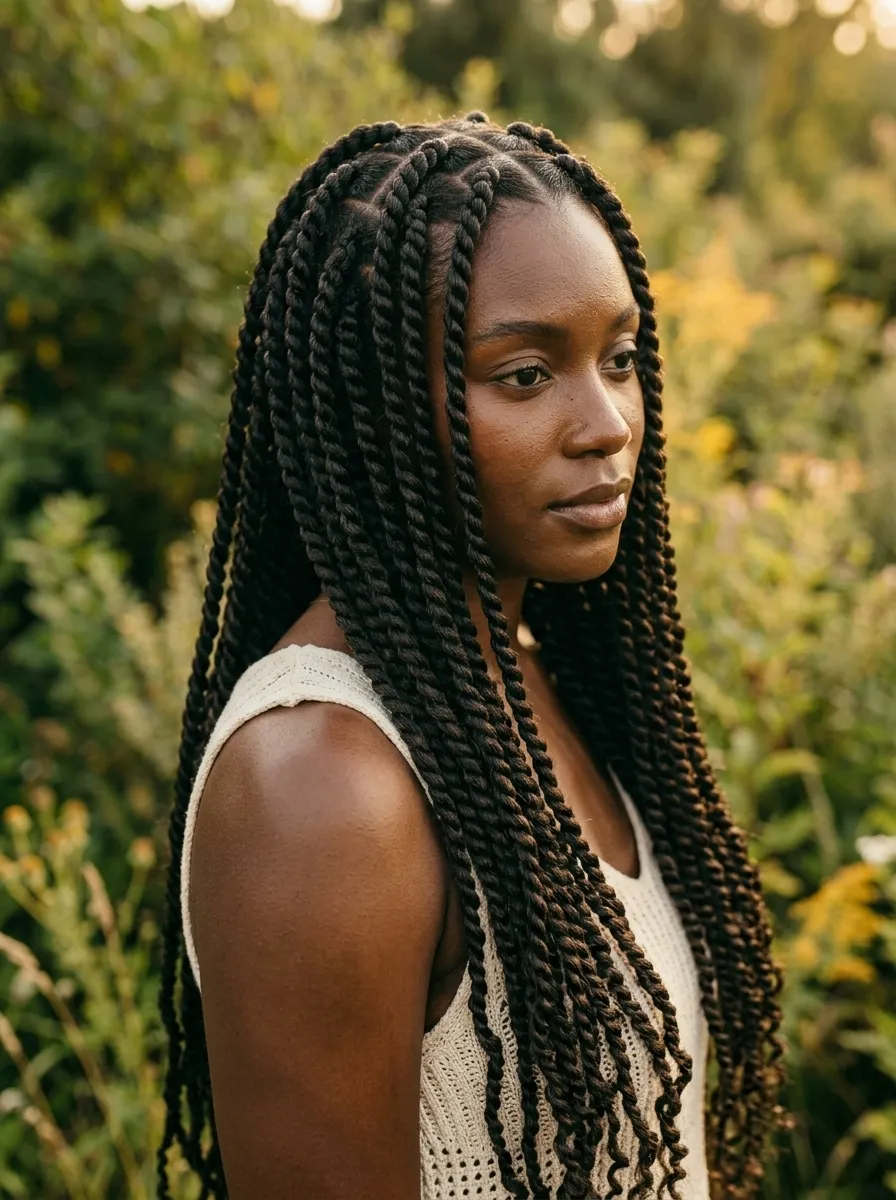
Senegalese twists are sleek, smooth, and incredibly elegant.
They are made using two strands of Kanekalon or Marley hair that are twisted tightly from root to tip.
The result is a rope-like texture that looks polished and professional.
What makes them different from box braids:
They feel lighter on the scalp. They have less bulk. And the smooth finish gives them a more refined appearance.
Senegalese twists are a fantastic option for women who want a protective style that works in corporate or formal settings.
DIY tips: Use pre-stretched Kanekalon hair for a smoother, faster installation. Section your natural hair cleanly before twisting.
Rattail combs help part hair with precision.
At-home installation takes practice but is absolutely doable over a weekend.
To maintain them, mist your scalp with a hydrating spray every two to three days.
Avoid heavy oils that cause buildup along the twists.
Sleep with a silk scarf or satin bonnet every night without fail.
Budget tip: Two to three packs of pre-stretched hair is usually enough for a full head. That can bring your total hair cost under $15.
6. Cornrow Updo
A cornrow updo is one of the cleanest, most put-together styles a Black woman can wear.
It keeps hair completely off your neck, protects your ends, and looks amazing whether you are going to work or a formal event.
The basics:
Cornrows are flat braids done directly against the scalp. They can be styled in straight lines, curves, or geometric designs.
For an updo, the braids are typically directed toward the back or top of the head and gathered into a bun or puff.
At-home option: Simple straight-back cornrows with a high bun are a beginner-friendly style. All you need is a rattail comb, edge control, and a small elastic.
More detailed designs require practice or a skilled braider.
Budget tip: Practice straight cornrows on a mannequin head before doing your own. Many beginner tutorials on YouTube can guide you step by step.
Keep your scalp moisturized under the braids using a nozzle applicator bottle with diluted leave-in conditioner.
Edges can be freshened up with a toothbrush and edge control gel at any time.
This style looks expensive but can be done at zero cost with practice.
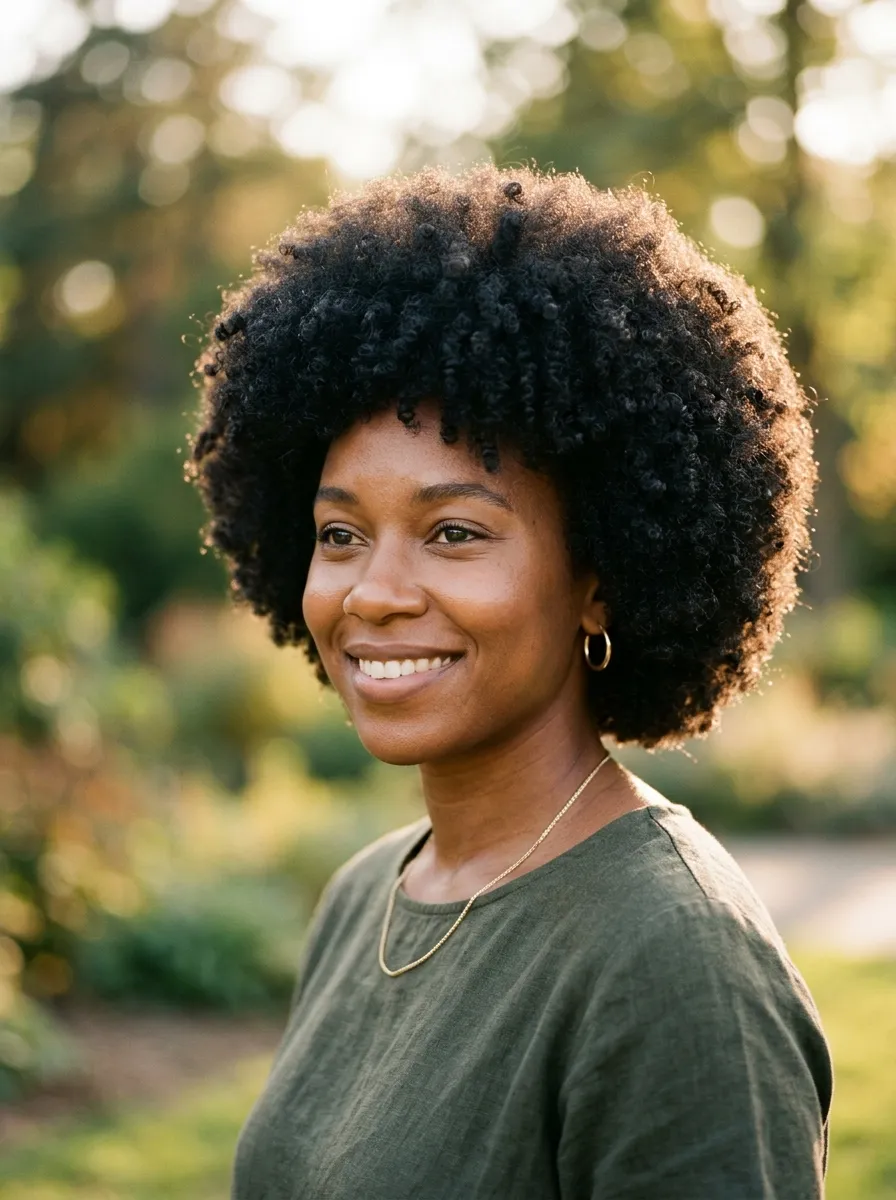
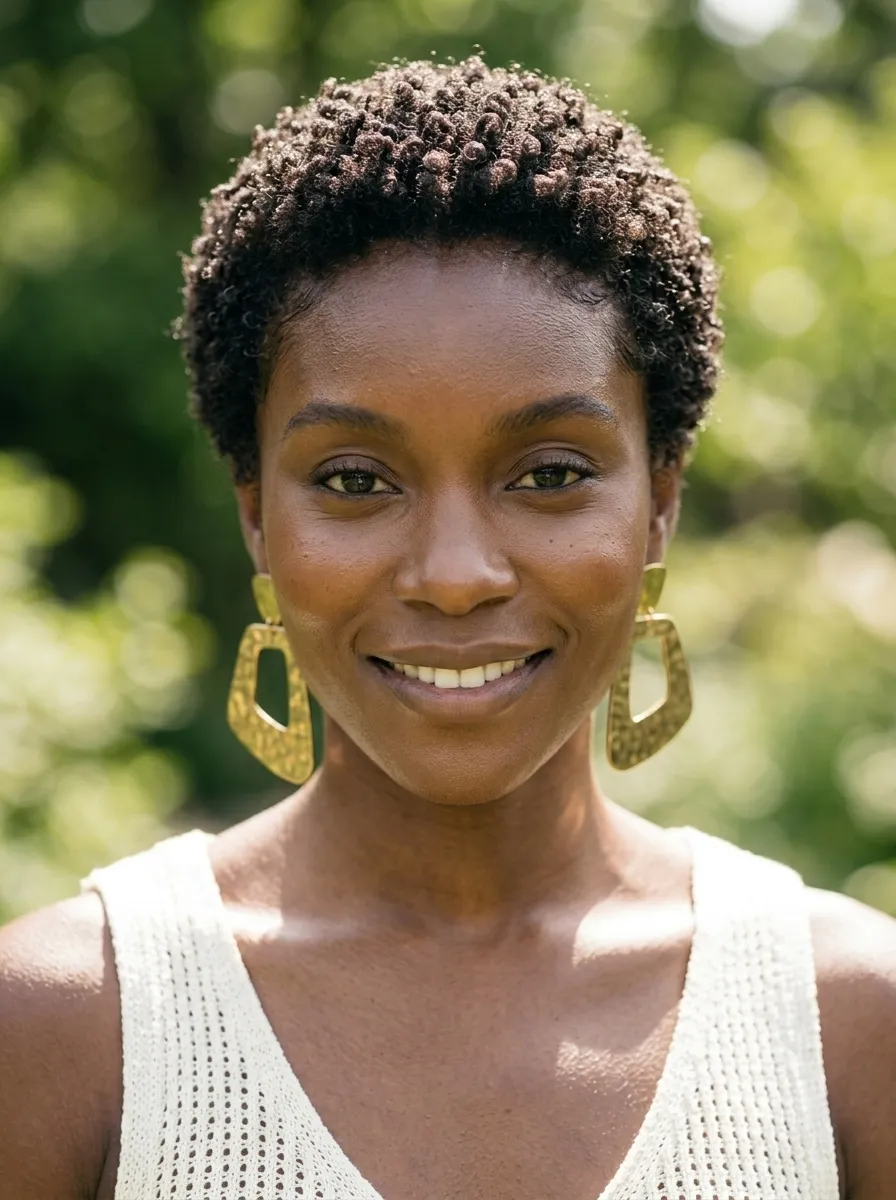
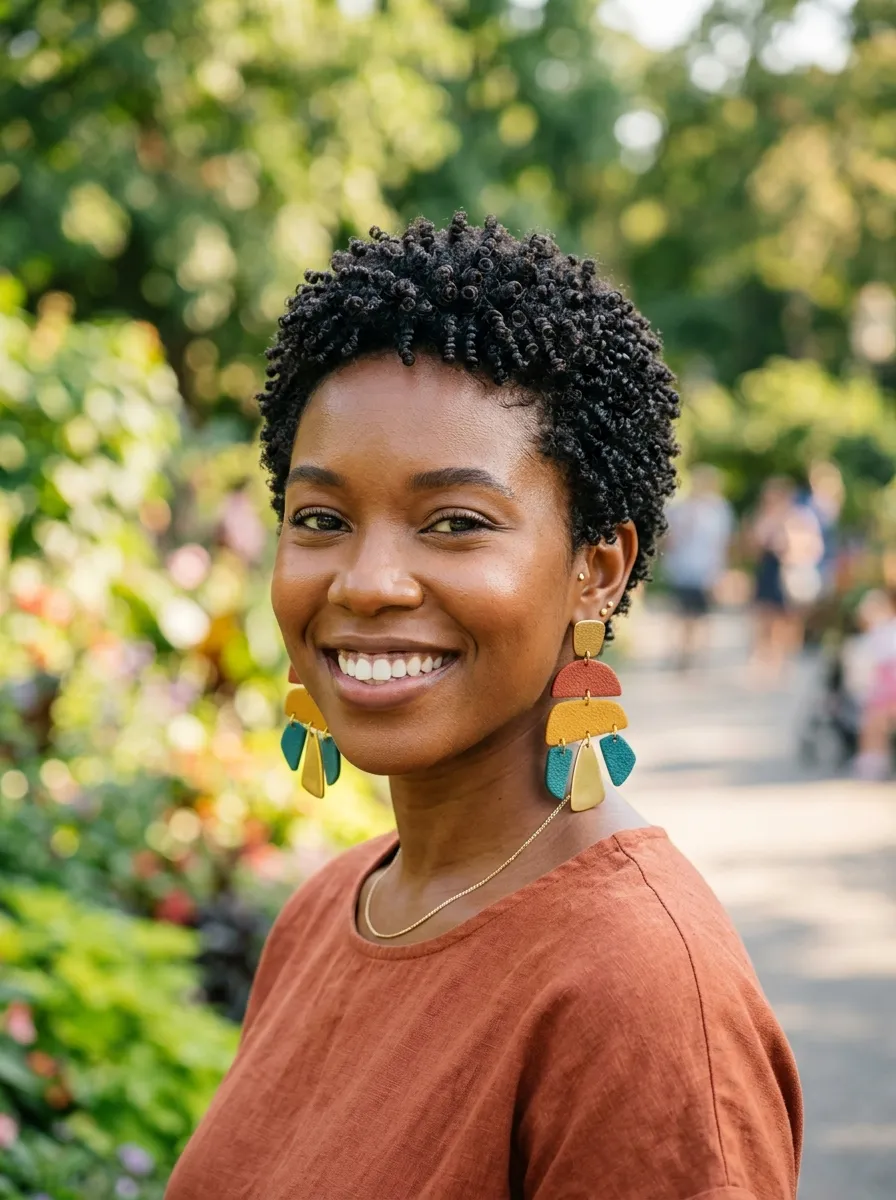
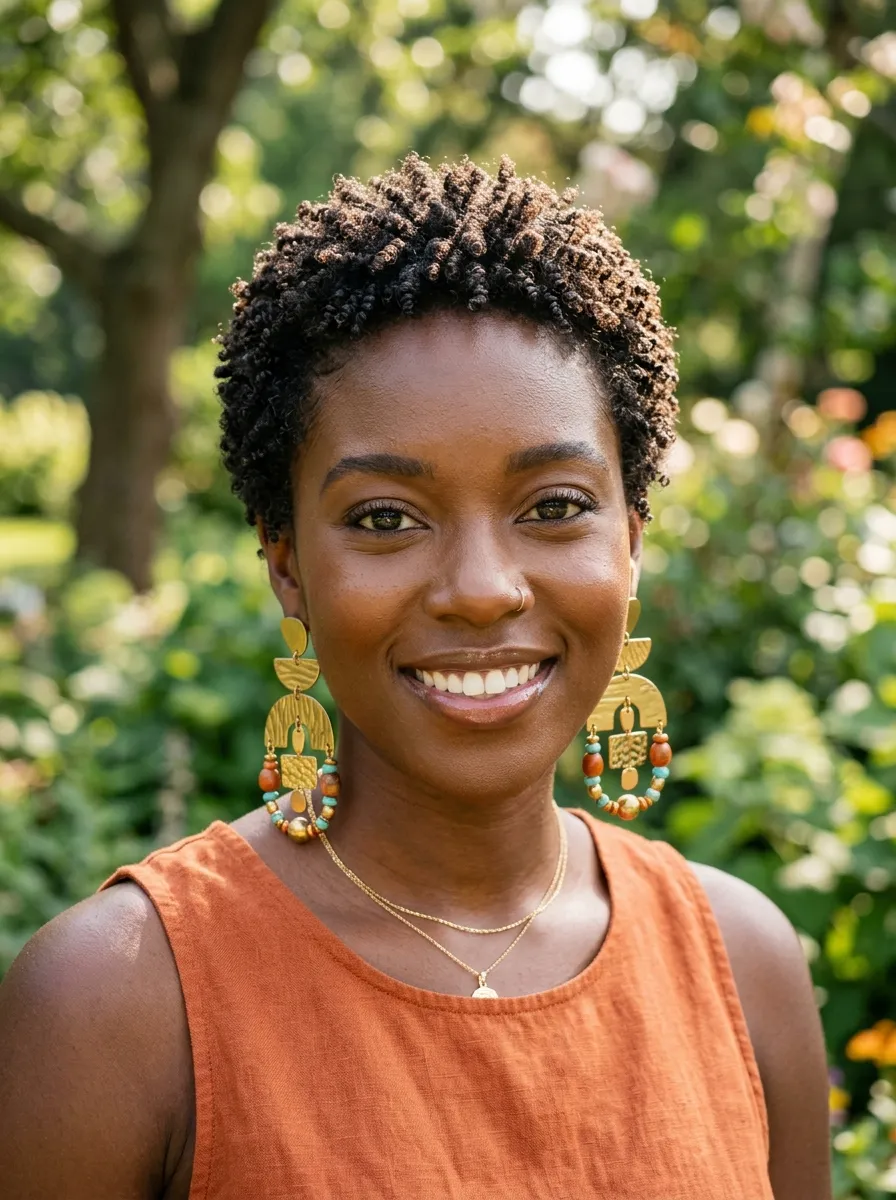
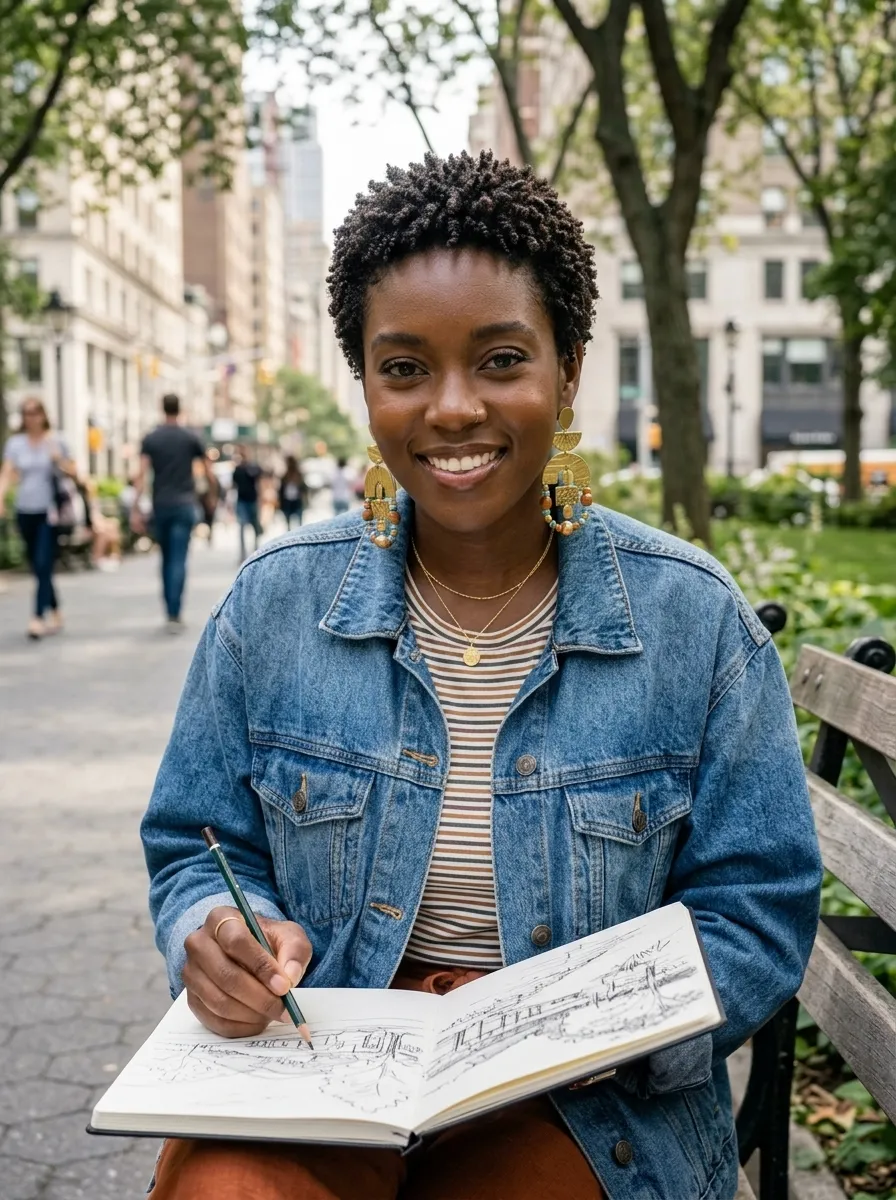
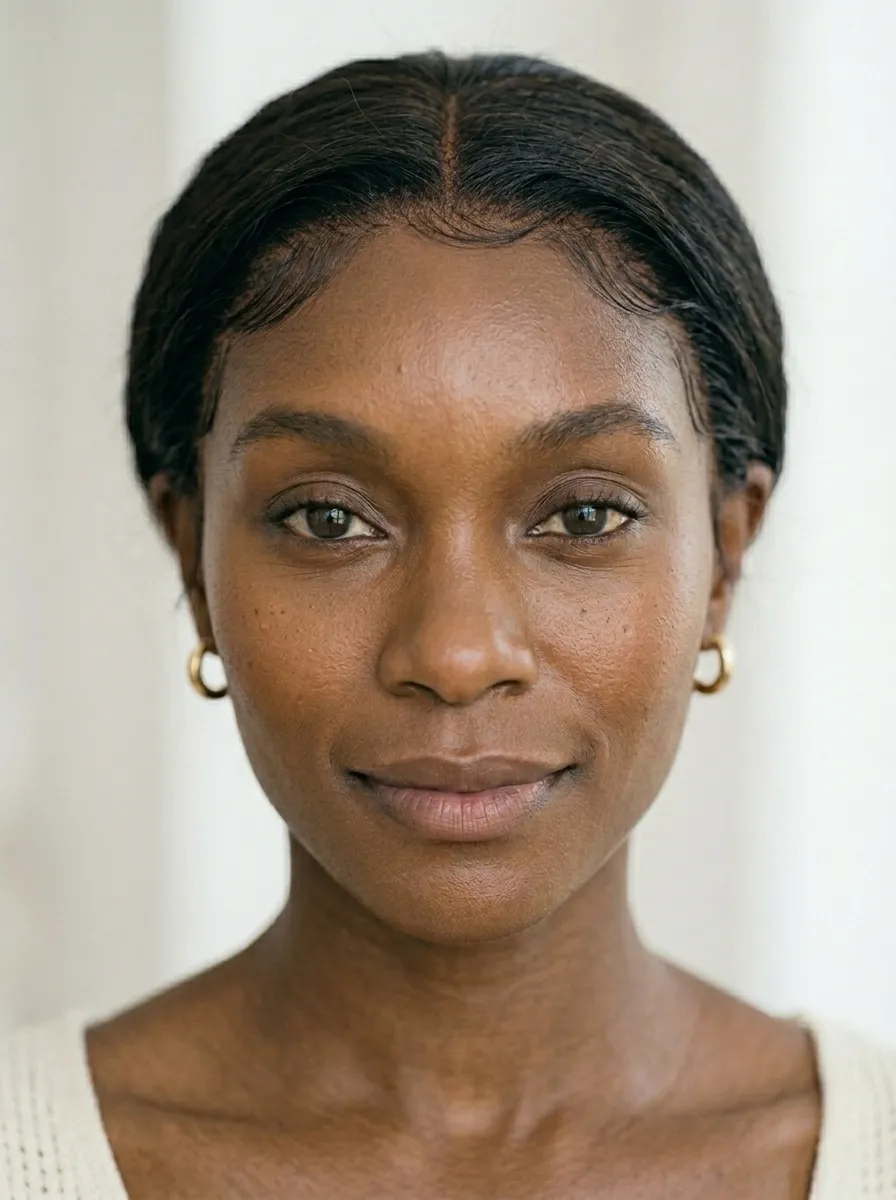
7. TWA (Teeny Weeny Afro)
The TWA is short, bold, and completely freeing.
Many women who cut their hair this short say it was one of the best decisions of their life.
It requires almost no product and minimal styling time each morning.
What it actually looks like: A TWA is usually under two inches in length. The natural coil pattern is fully visible, giving a clean, textured finish.
It suits almost every face shape, especially when you shape the edges neatly.
Styling it daily:
A small amount of curl cream applied to damp hair defines the coils. Use your fingertips to shape.
Edge control along the hairline gives a polished finish in seconds.
For variety, try a headband, bold earrings, or a fun hat to switch up the look without touching the hair itself.
Budget tip: A TWA needs almost nothing. One jar of curl cream and one edge control product will last you months.
Trim your own ends every six to eight weeks with sharp scissors to maintain the shape.
This style is ideal for active women, new moms, or anyone who wants to spend less time on their hair without sacrificing style.
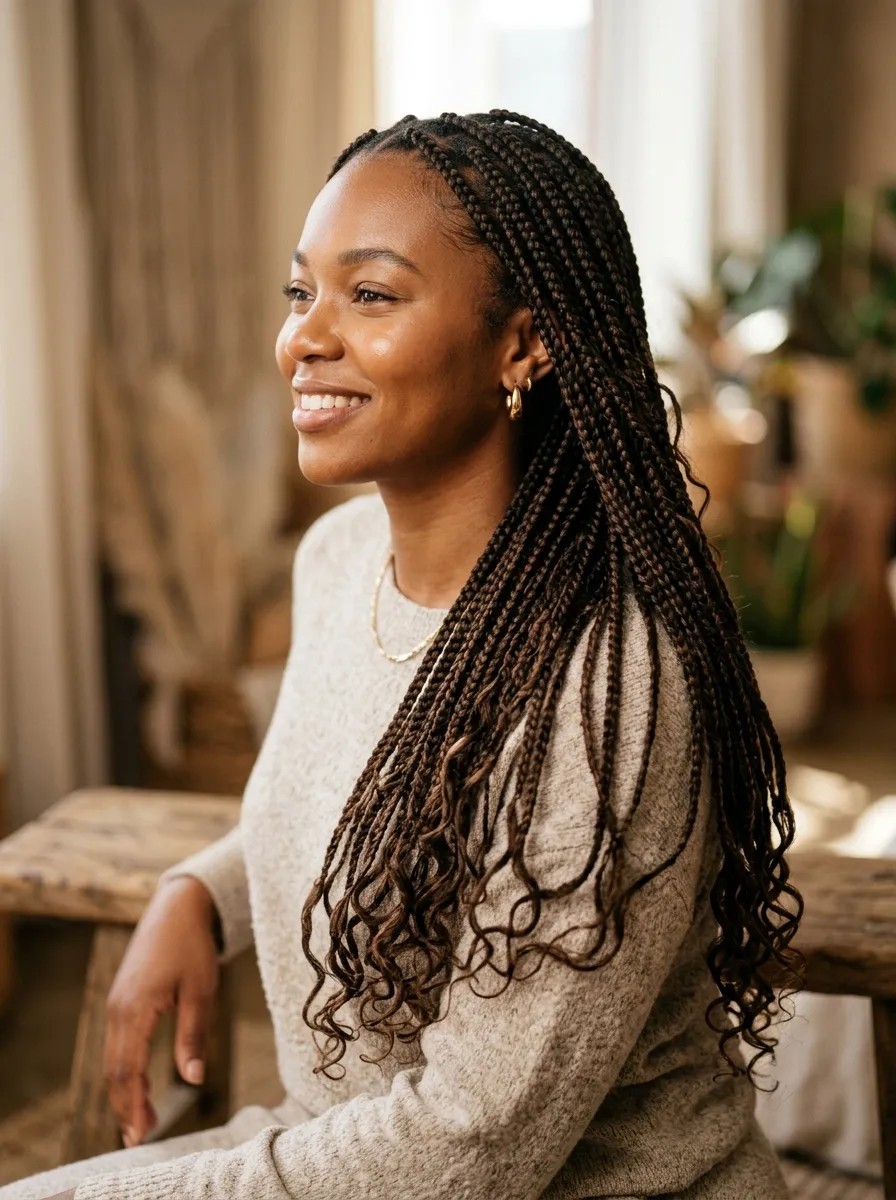
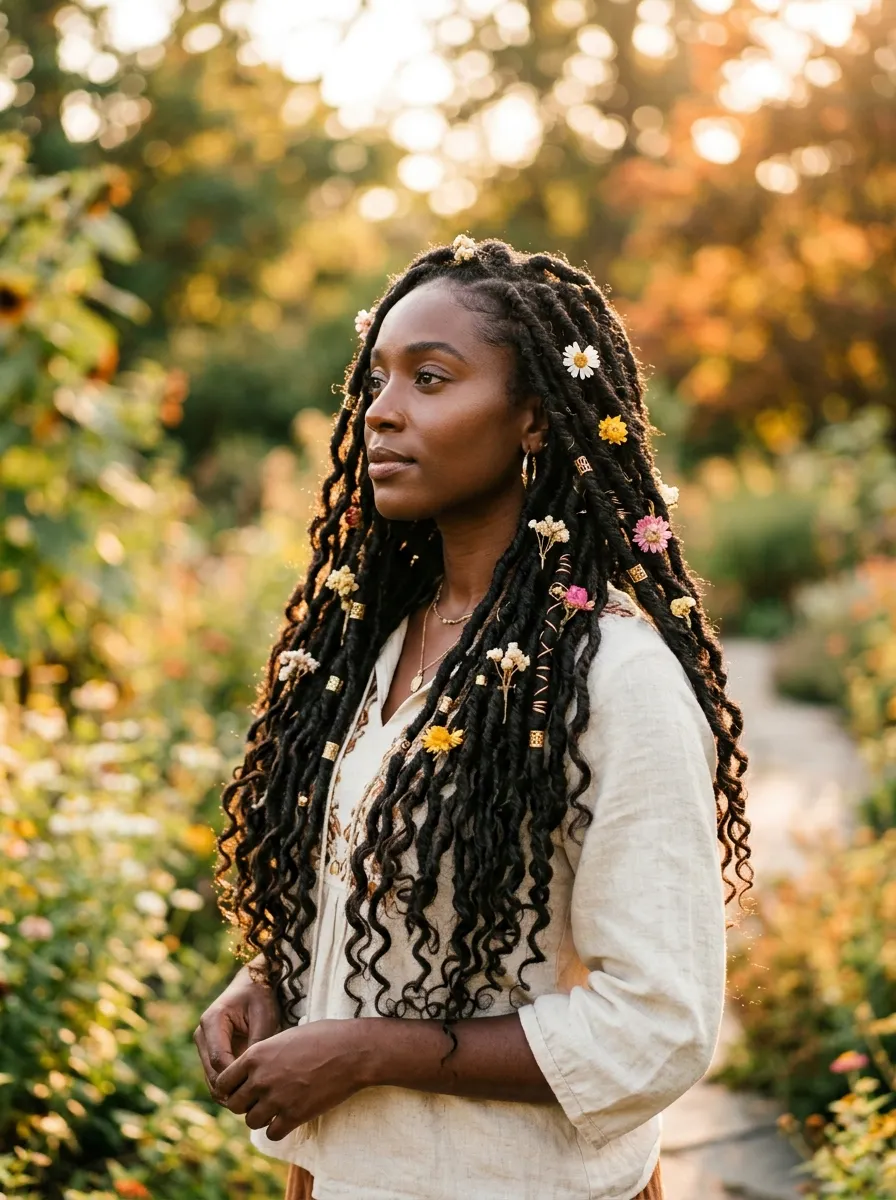
8. Goddess Locs
Goddess locs are a softer, more textured version of traditional faux locs.
The ends are left intentionally curly or wavy, giving the style a free-spirited, boho finish.
They look stunning with flowers, beads, or gold cuffs woven in.
How they are made:
Goddess locs are typically installed using a crochet method or by wrapping natural or synthetic hair around cornrow bases.
The wavy ends are created using water, a curling technique, or wavy synthetic hair.
Budget tip: Crochet installation is much more affordable than hand-wrapped locs. Pre-made crochet goddess loc packs cost around $7 to $12 per pack. Two to three packs is usually enough for a medium installation.
The style lasts four to six weeks with proper care.
At night, wrap your locs with a satin scarf and keep them off your face to prevent frizz.
Spritz with water and a light oil to refresh the curly ends every few days.
This style works beautifully for outdoor weddings, music festivals, vacations, or any event where you want to feel effortlessly beautiful.
9. Faux Locs
Faux locs give you the look of traditional dreadlocks without the long-term commitment.
They are a popular protective style that can last four to eight weeks.
Two main installation methods:
Crochet faux locs are faster and less expensive. Hand-wrapped faux locs are more detailed and last longer.
Both look great when maintained properly.
What you will need for a DIY crochet install: Marley or wavy loc extension packs, a crochet needle, and a rattail comb for parting.
YouTube tutorials make this beginner-accessible with patience.
Budget tip: Crochet faux loc packs cost around $7 to $10 each. A full head usually needs three to five packs.
Installing at home can cut your total cost to under $50 including supplies.
Keep your scalp moisturized throughout the install period. Use a light oil in a nozzle bottle to reach the roots easily.
Sleep with a satin bonnet to prevent unraveling and frizz.
Avoid getting faux locs overly wet, as the extensions take a long time to fully dry and can develop odor.
This is one of the most popular styles because it works for every setting, every age group, and every natural hair texture.
10. High Puff
The high puff is one of the simplest and most beautiful styles for natural hair.
All you need is a hair tie, some edge control, and your own natural texture.
It works best on wash day or day two hair when your coils are still defined and moisturized.
How to get the perfect puff:
Apply a leave-in conditioner or curl cream to damp hair. Smooth your edges down with edge control gel and a soft brush.
Gather all your hair to the top of your head and secure with a thick elastic hair tie.
Fluff the puff with a pick comb for maximum volume.
Budget tip: This style costs almost nothing if you already have your basic natural hair products at home.
The entire process takes five to ten minutes, making it ideal for mornings when time is limited.
Variation ideas: Try a low puff for a more relaxed vibe. Add a headband or silk scarf around the base for a polished finish.
A puff also works at any length, from a short TWA to longer natural hair.
It is one of those styles that looks effortless while actually being completely intentional.
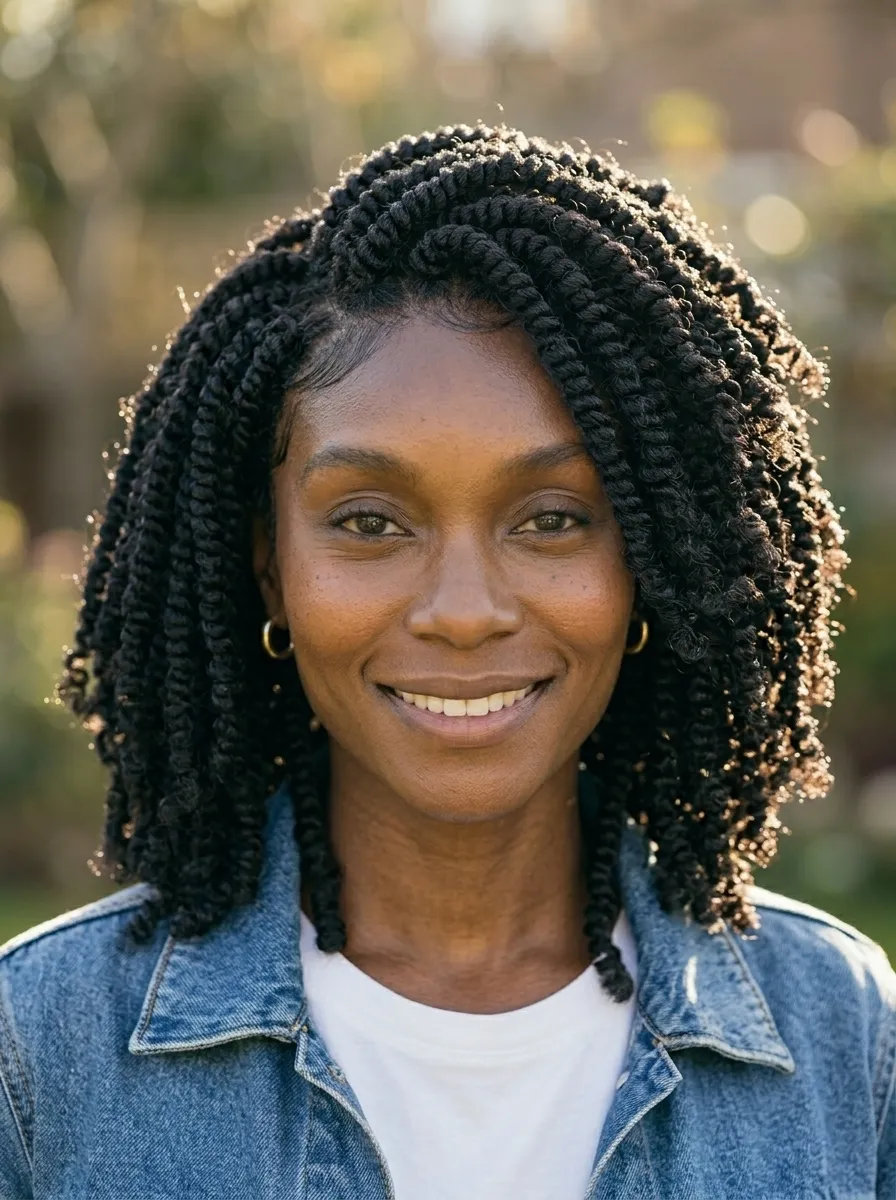
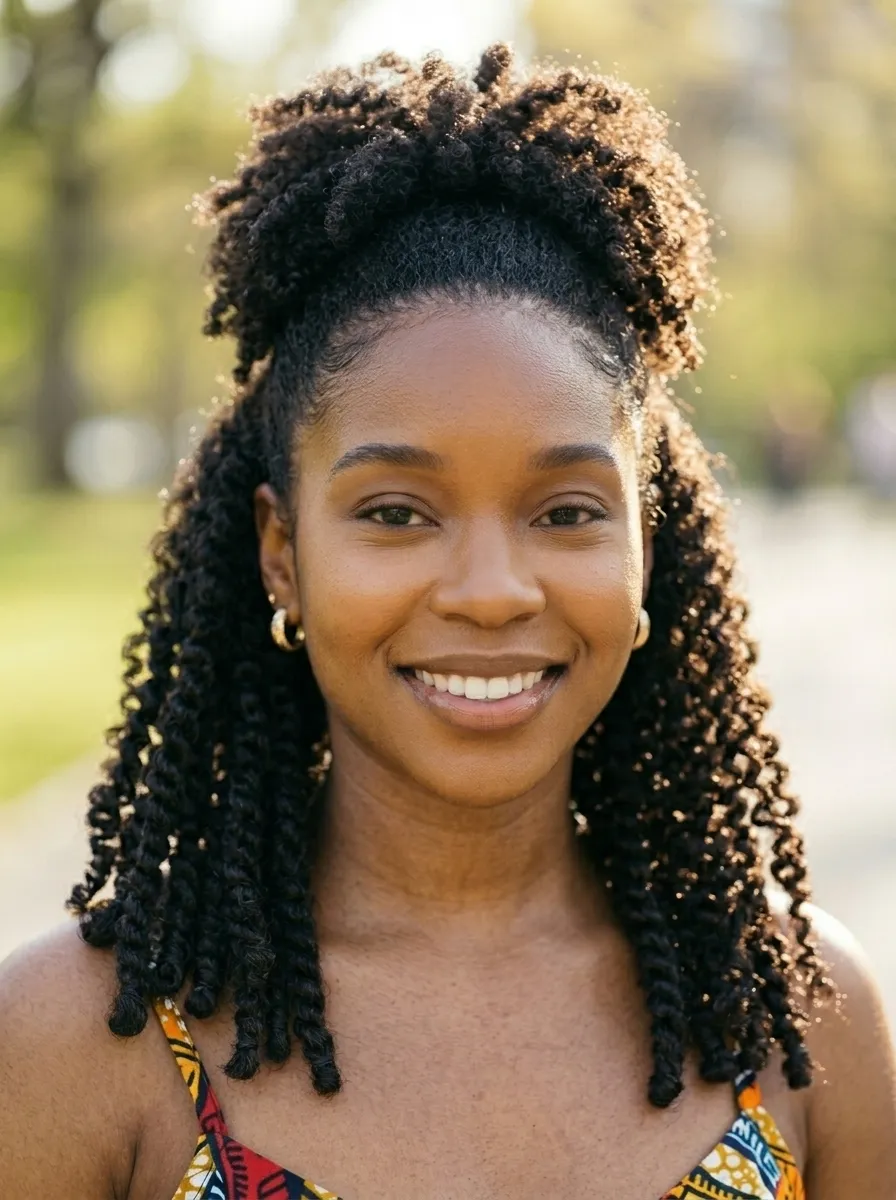
11. Passion Twists
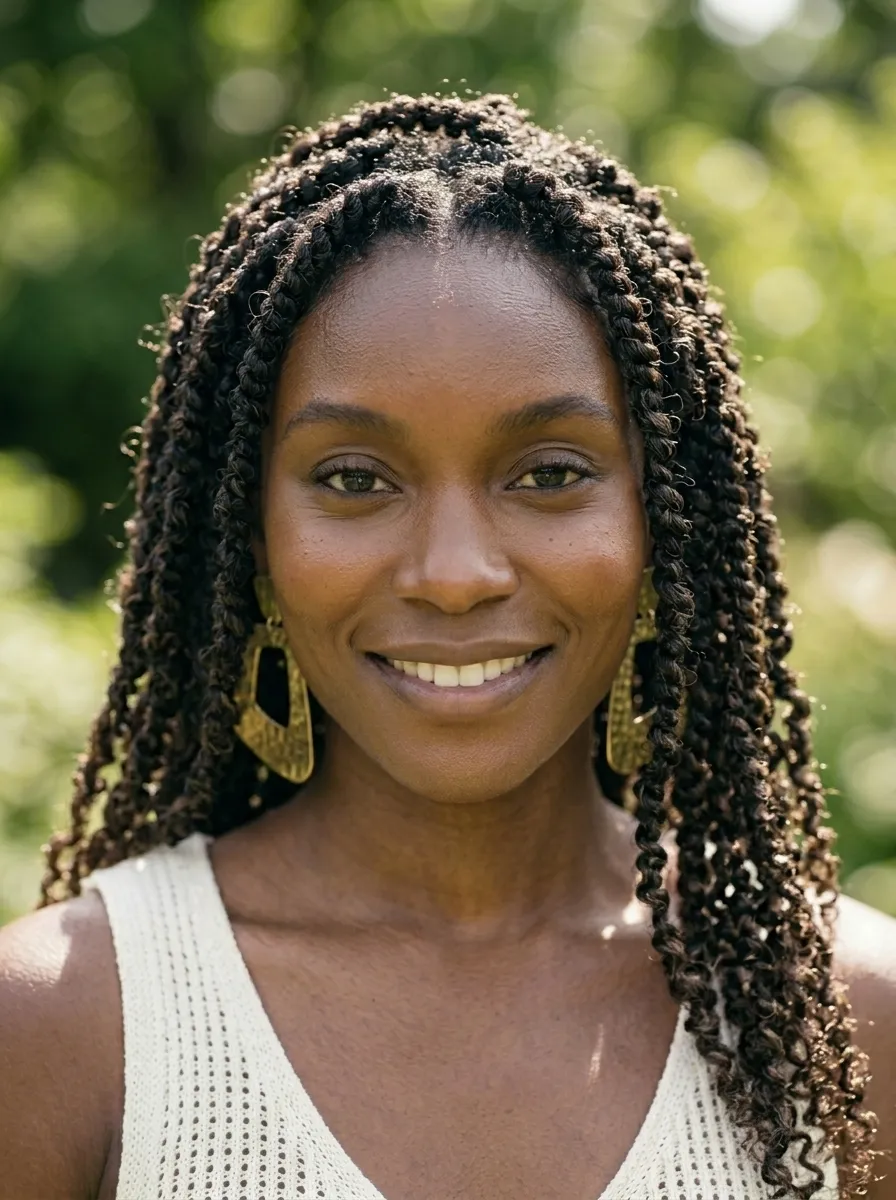
Passion twists are the perfect mix between Senegalese twists and faux locs.
They have a springy, coily texture that mimics natural hair beautifully.
What makes them special:
The texture is softer and less stiff than traditional twists. They move naturally with your body, giving a very organic, lived-in look.
They were created by Miami-based stylist Kailyn Rogers and quickly went viral for good reason.
Installation: Passion twists can be done using the crochet method or by hand using water wave hair and a two-strand twist technique.
The crochet method is much faster and beginner-friendly.
Budget tip: Water wave crochet hair packs cost around $5 to $8 each. You will typically need four to six packs.
With crochet installation at home, your total cost can stay under $50.
To maintain the style, keep your scalp moisturized and refresh the ends with water spray when they feel dry.
Use a satin bonnet every single night.
Passion twists last four to six weeks and continue to look beautiful even as they age.
This is a great option for women who love the freedom of twists but want something with a bit more texture and personality.
12. Crochet Braids
Crochet braids are one of the most budget-friendly ways to get a full, dramatic look.
The technique involves cornrowing your natural hair flat to the scalp, then using a crochet needle to loop extension hair through each cornrow.
Why they work so well:
You can achieve almost any look, curly, wavy, braided, or loc’d, just by changing the type of extension hair you use.
The style takes a few hours to install at home with practice.
What you need: A crochet needle (usually comes in the hair pack), the extension hair of your choice, and a rattail comb.
Budget tip: One to two packs of extension hair is often enough depending on the style and fullness you want.
Most packs cost between $5 and $12, keeping the total investment very affordable.
Crochet braids are gentle on your natural hair because it is tucked away under the cornrows.
Moisturize your natural hair underneath by applying a diluted leave-in conditioner to your scalp regularly.
Remove them carefully after four to six weeks to avoid tangling or matting your natural hair underneath.
This is one of the most accessible styles for beginners who want protective styling without spending big money at a salon.
13. Twist Out

A twist-out is one of the most beloved styles in the natural hair community.
It gives you defined, stretched curls without using any heat.
How it works:
You apply a moisturizer or styling cream to damp sections of hair, then twist each section into a two-strand twist.
Let the twists air dry completely or sit under a hooded dryer.
Once dry, untwist each section carefully with oiled fingers, separating the coils gently.
The result is a full, defined curl pattern that lasts two to four days with proper nighttime care.
Budget tip: Any moisturizing cream or butter works for twist-outs. You do not need specialty products. Shea butter, a dime-store holding cream, or even a conditioner can work depending on your hair type.
Tips for a great result:
Twist on almost-dry hair rather than soaking wet for less shrinkage. Use the shingling method on each section before twisting for more definition.
At night, put your hair in large twists or a pineapple and cover with a satin bonnet.
A well-executed twist-out looks like a professional blowout without any heat damage.
14. Braid Out
A braid-out is similar to a twist-out but gives you a slightly different texture.
Instead of twisting sections, you braid them in three-strand braids.
The result:
A more defined, crinkle-wave pattern that tends to last longer than a typical twist-out.
It also stretches the hair more, which is great if you want your natural hair to look longer.
How to do it:
Apply your styling product on damp, detangled hair. Divide into sections, then braid each one from root to tip.
Let dry overnight or under a dryer. Unravel each braid with oiled fingers and fluff gently.
Budget tip: The smaller the braid, the tighter the curl. Start with larger braids while you practice to avoid spending too much time on installation.
This style works beautifully on all natural hair types from 3a to 4c.
Night care is the same as a twist-out: pineapple your hair or rebraid loosely and cover with a satin bonnet.
The style can be refreshed the next morning with a small amount of water and oil on your palms.
A braid-out is a wonderful style for weekends, events, and everyday natural hair wear without a single drop of heat.
15. Sleek Low Bun
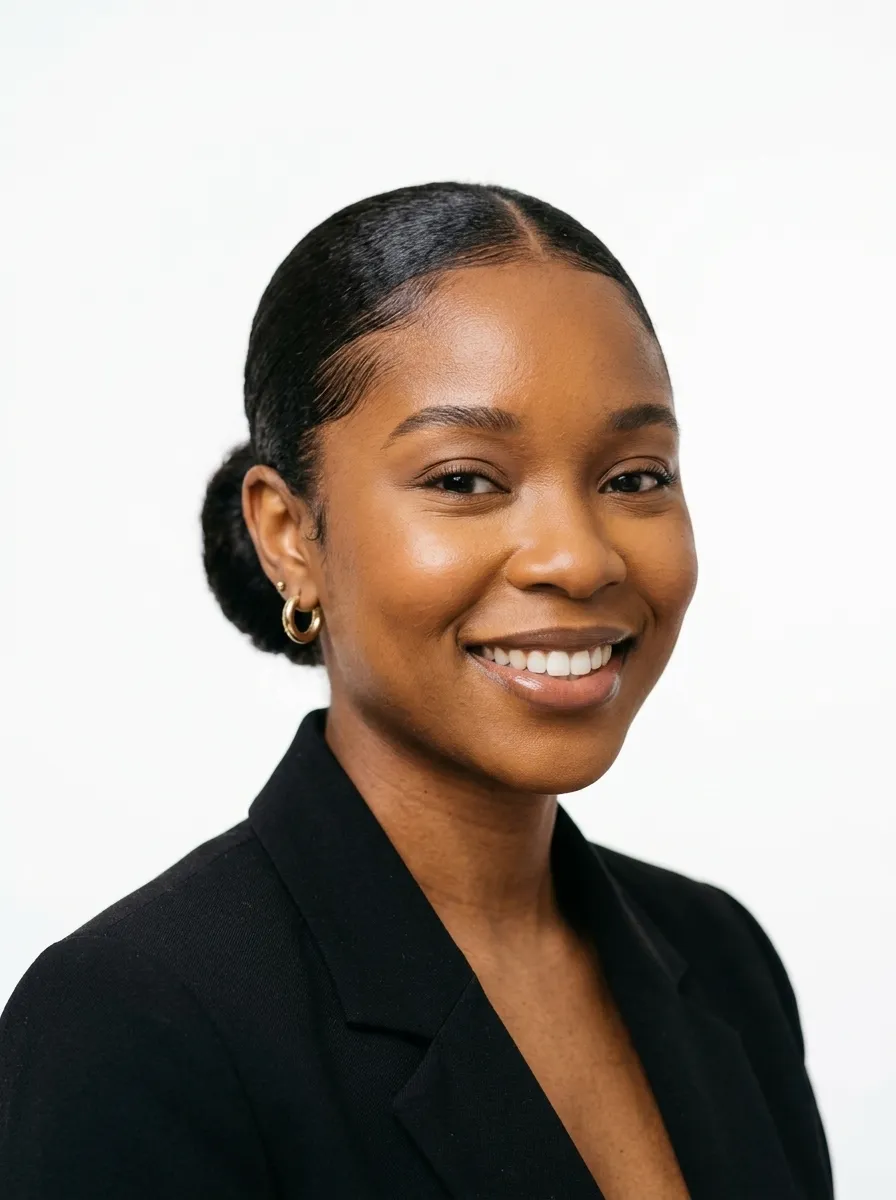
The sleek low bun is timeless, elegant, and completely office-appropriate.
It works on both natural and relaxed hair and can be achieved in under ten minutes with the right products.
What you need: A fine-tooth comb, edge control gel, a strong-hold mousse or smoothing cream, and a hair tie.
Step by step:
Apply your smoothing product all over your hair while it is slightly damp. Comb from roots to ends for a smooth finish.
Gather at the nape of your neck and secure with an elastic.
Smooth any flyaways with gel and a toothbrush.
Wrap a small piece of hair around the elastic to hide it and pin underneath.
Budget tip: Edge control products from your local beauty supply store work just as well as salon brands.
ECO Styler Gel is under $3 and gives an excellent hold for sleek styles.
For extra shine, apply a light pomade or hair serum over your bun.
This style is also great for women transitioning from relaxed to natural hair, since it works for all textures.
Try pairing with bold earrings or a sleek middle part to make the look feel more editorial.
16. Lace Front Wig Styling
A lace front wig is one of the most flexible hair options available to Black women.
It allows you to change your look completely without touching your natural hair.
Why women love them:
You can wear a different length, color, or texture every week. Your natural hair stays tucked away and protected underneath.
And with practice, the installation looks completely undetectable.
Budget tip: High-quality affordable wigs are available on Amazon and from brands like Outre, Freetress, and Zury starting at around $30 to $50.
Human hair wigs cost more but last significantly longer.
At-home installation basics:
Braid or flat-twist your natural hair close to the scalp. Use a wig cap to flatten everything.
Apply got2b glued or a wig adhesive tape along your hairline. Press the lace down and hold for a few seconds.
Trim the lace carefully with small scissors.
Use a small toothbrush and edge control to lay baby hairs for a natural-looking finish.
Proper wig care extends the life of your unit. Wash it every four to six wears using wig-safe shampoo.
With the right approach, a $40 wig can look like a $400 install.
17. Flat Twist Updo
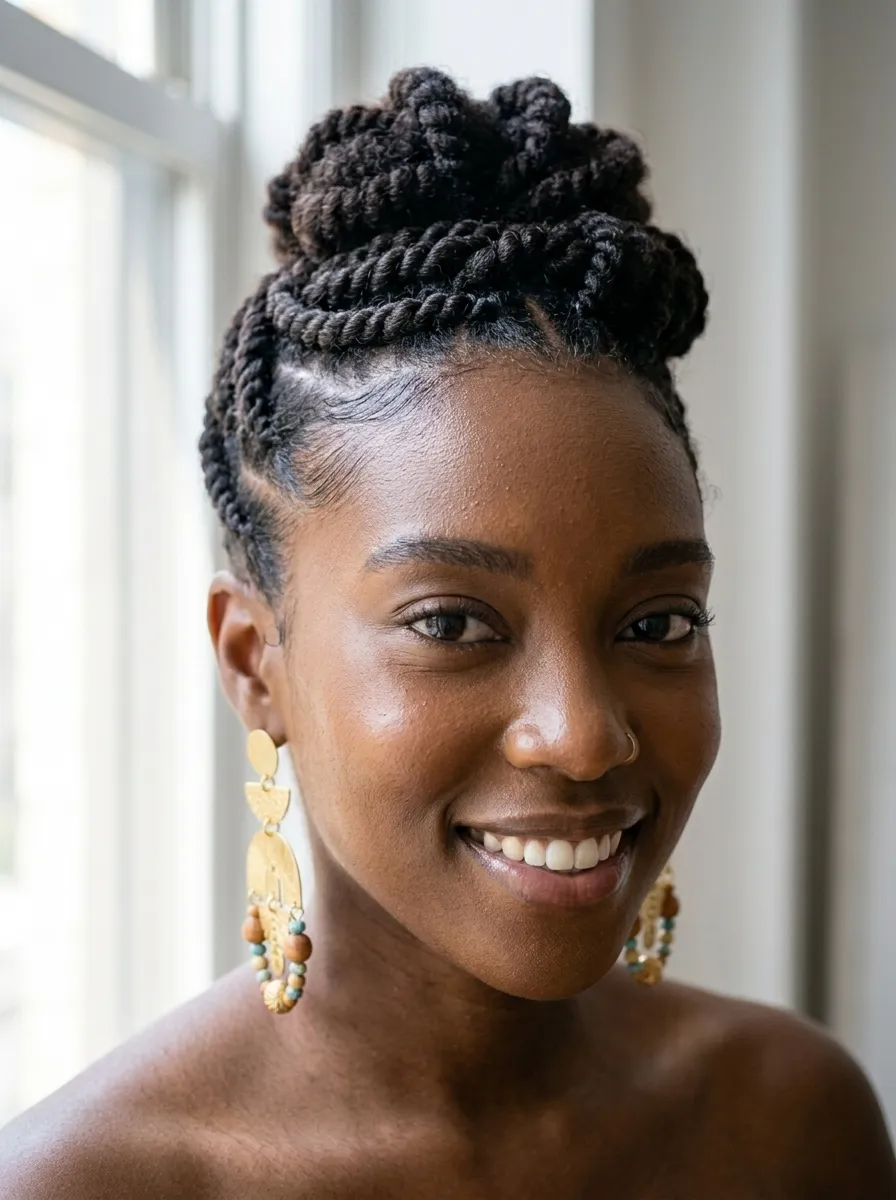
A flat twist updo is a clean, protective style that looks polished without much effort.
Flat twists lie flat against the scalp, similar to cornrows, but are done using a two-strand twist technique instead.
This means:
They are gentler on hair that is prone to breakage. They also look incredibly neat and are easier for beginners to learn than cornrows.
Simple style idea:
Create four to six large flat twists going toward the crown of your head. Gather the ends into a puff or bun at the top.
Apply a holding cream or gel before twisting for a sleek finish.
Use edge control and a soft brush to lay your hairline.
Budget tip: You do not need a stylist for this. Many beginner tutorials walk you through the technique on YouTube with just a comb and a holding product.
The style works beautifully on both short and medium-length natural hair.
It protects your ends, keeps your hair stretched, and holds up well throughout a full work or school day.
Refresh the edges each morning for a consistently polished look.
This is a go-to style for women who want something simple but clearly deliberate.
18. Blowout with Pick Comb
A blowout stretches your natural curls with heat to create a fluffy, voluminous look.
It is not the same as a silk press. The goal here is volume and texture, not straight hair.
How it works:
Apply a heat protectant to damp, detangled hair. Use a blow dryer with a comb attachment on medium heat.
Work in sections, stretching each piece as you dry.
Finish with a large pick comb to shape the hair into a round, full silhouette.
Budget tip: A basic blow dryer with a comb attachment costs around $15 to $25 at most drugstores.
Heat protectant spray is available from most natural hair brands for under $8.
Important care notes:
Do not use high heat directly on your roots. Keep the dryer moving to avoid heat damage.
Try to limit blowouts to once or twice a month to protect your curl pattern over time.
Deep condition before any heat styling session to keep your hair strong and moisturized.
A blowout makes your natural hair look dramatically longer and fuller.
It is also a great base for other styles like braid-outs or twist-outs because the stretched hair is easier to section and work with.
19. Silk Press
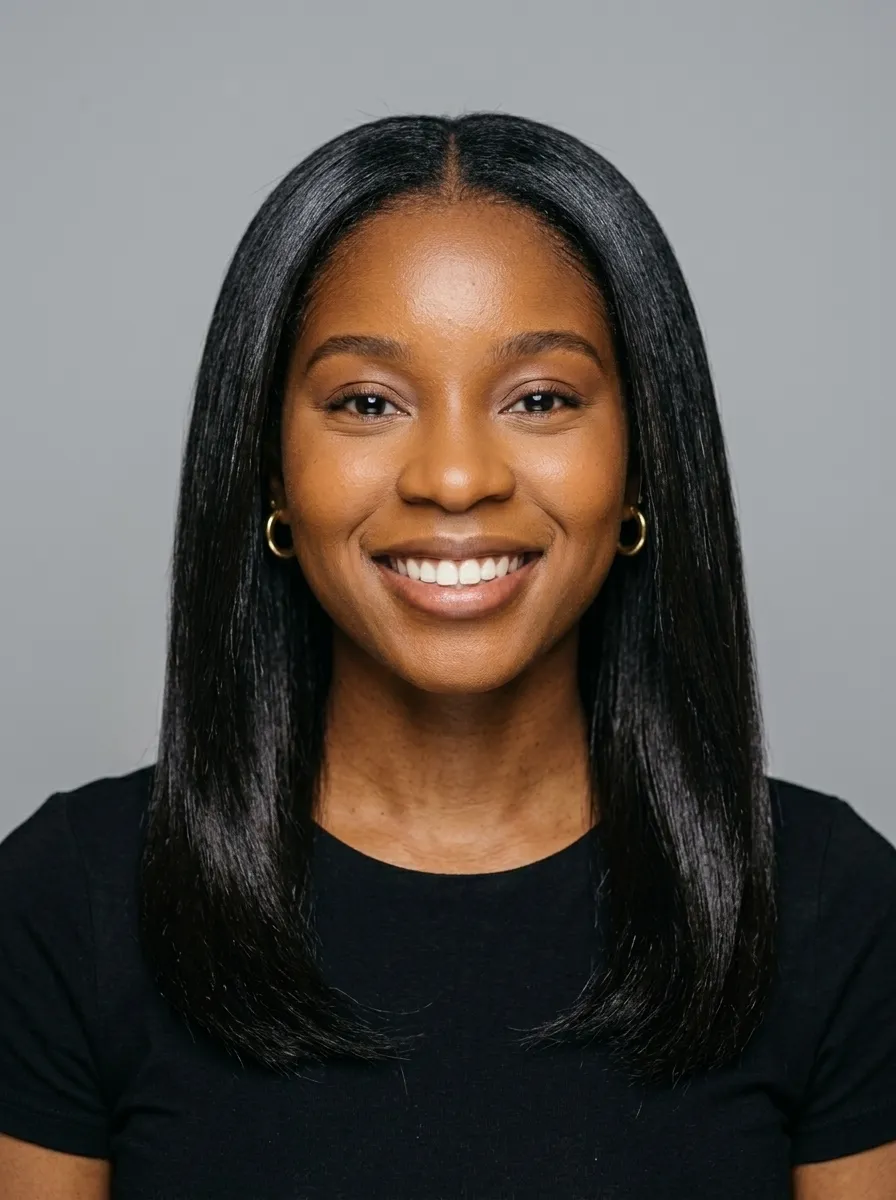
A silk press is one of the most requested salon styles among Black women.
It uses heat to temporarily straighten natural hair while keeping it soft, shiny, and full of movement.
The result looks like relaxed hair but without any chemicals.
What makes it different from a regular flat iron:
A silk press involves a specific multi-step process. Shampoo, deep condition, blow dry, and then flat iron in small sections using a high-quality flat iron.
At-home tips:
Use a flat iron with ceramic or tourmaline plates for the smoothest results.
Apply a heat protectant from roots to ends before using any heat.
Work in very small sections for a polished, smooth finish.
Budget tip: A decent flat iron can be found for $25 to $40 from brands like Remington or Conair. Paired with a $5 heat protectant spray, you can achieve salon-quality results at home.
To maintain the silk press, keep hair wrapped in a silk scarf at night.
Avoid sweating, humidity, and water, as these will cause your natural curl pattern to revert.
A well-done silk press lasts one to two weeks depending on your activity level and the humidity in your environment.
20. Jumbo Twists
Jumbo twists are bold, easy to maintain, and incredibly stylish.
Unlike smaller twists, jumbo twists use bigger sections of hair, which means faster installation and a more dramatic look.
They work as both a style and a protective style.
Your natural hair is tucked into the twists, allowing it to rest and retain length.
DIY at home:
Divide your hair into large sections. Moisturize each section well. Add extension hair if you want extra length, then twist in a two-strand technique from root to tip.
Kanekalon or Marley hair both work well.
Budget tip: Two packs of braiding hair are usually enough for jumbo twists. That is approximately $10 to $14 in hair supplies.
Installing at home saves you the full salon cost.
Keep your scalp moisturized underneath throughout the wear period.
Sleep with a satin bonnet and re-moisturize the twists every few days with a light mist.
Jumbo twists can last three to five weeks and look great styled as a bun, half-up, or left completely loose.
This is one of the easiest protective styles for beginners to master at home with just a little practice and patience.
21. Spring Twists
Spring twists have one of the most beautiful textures of any protective style available.
They are fluffy, bouncy, and incredibly lightweight on the scalp.
What they actually are:
Spring twists are pre-made crochet twists made from a combination of Freetress Water Wave and springy fiber that gives them their signature puffy look.
Installation:
Cornrow your natural hair close to the scalp in any pattern. Use a crochet needle to loop spring twist packs through each cornrow.
The style installs in two to four hours depending on your speed.
Budget tip: Spring twist packs cost around $5 to $8 each. A full head usually requires six to eight packs.
Purchasing your hair before your salon appointment (if using a stylist) can cut your total cost significantly.
For a DIY install, practice your cornrows first so the base is clean and even.
Maintenance:
Mist your hair lightly with water and seal with a small amount of oil every few days.
Avoid heavy products that cause buildup on the twists.
Wear a satin bonnet nightly.
Spring twists last four to six weeks and look increasingly natural as they settle in.
22. Pin Curls on Natural Hair
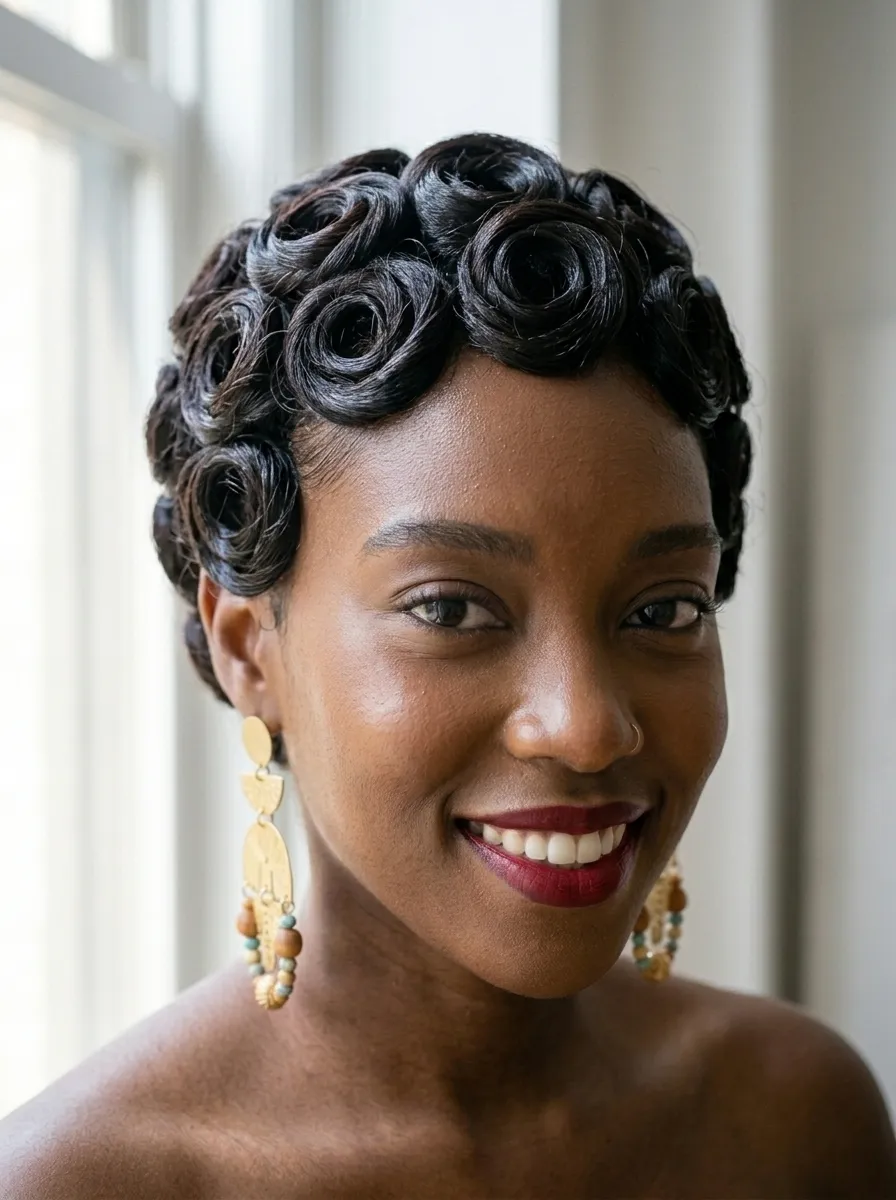
Pin curls are a stunning style that gives your natural or relaxed hair a vintage, glamorous look.
They work especially well for special events, photoshoots, or any occasion where you want something dramatic and beautiful.
How to create them at home:
Take a small section of damp hair. Apply a holding gel or setting lotion. Wrap the hair around your finger to form a circle and press it flat against your scalp. Secure with a bobby pin.
Repeat until your whole head is done. Sit under a hooded dryer or let air dry.
Once completely dry, remove the pins carefully and gently separate each curl.
Budget tip: Bobby pins cost almost nothing. A bottle of setting lotion is under $5 at most beauty supply stores.
The only real time investment is the drying process.
Key tips:
Work in very small sections for tighter, more defined curls. Larger sections give a looser wave.
Do not rush the drying process. Pin curls must be completely dry before removal or they will fall flat.
This style is completely heat-free and can last two to three days with a silk scarf at night.
23. Loc Styles
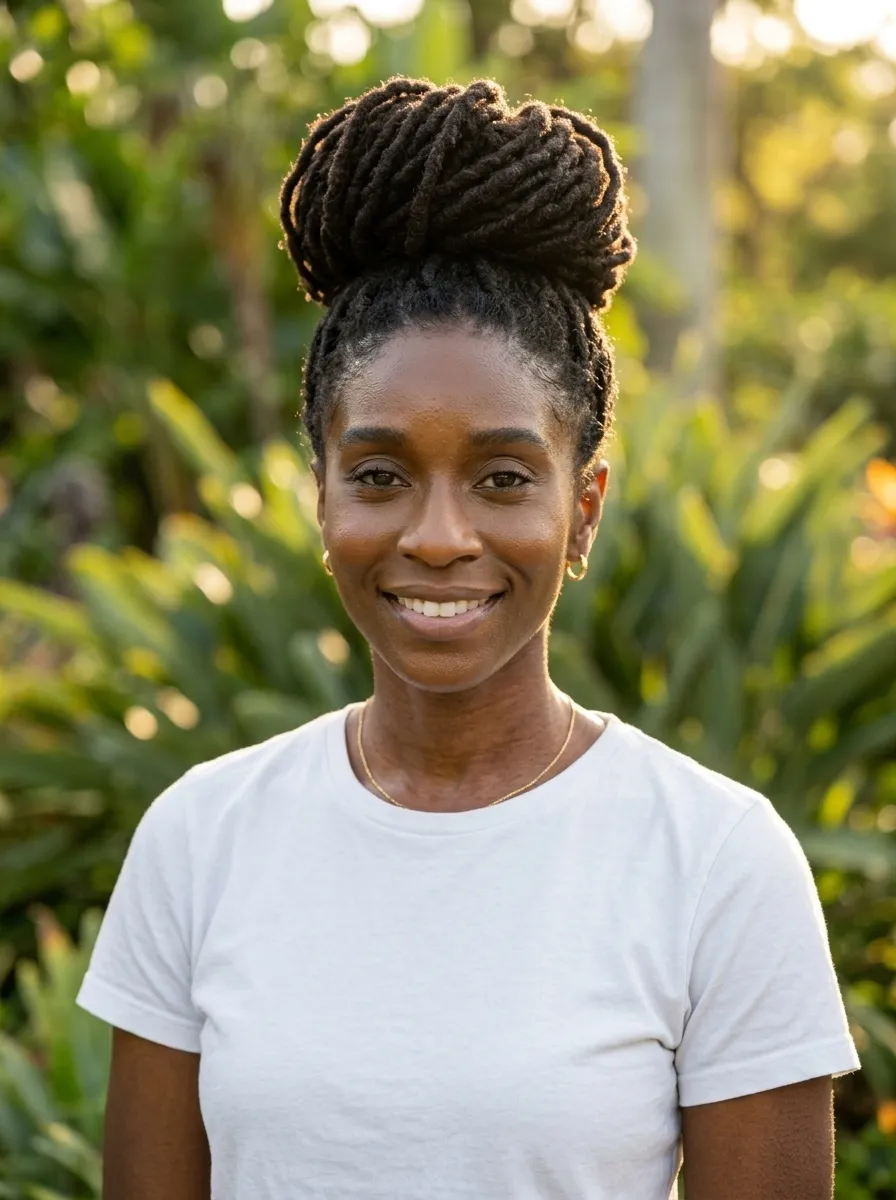
Dreadlocs are a permanent protective style that continues to grow and evolve over time.
They come in many forms: traditional locs, sisterlocks, interlocks, and freeform locs.
Why so many women choose them:
Once mature, locs require very little daily styling. They are strong, healthy, and deeply connected to cultural identity for many women.
Starting your loc journey:
Locs can be started with braids, two-strand twists, or a comb coil method depending on your hair texture and preference.
Sisterlocks are the finest, most uniform option and require a trained consultant for proper installation.
Budget tip: You can start traditional locs using the two-strand twist method at home. It only requires your natural hair, a moisturizing cream, and patience.
Maintenance costs depend on how often you visit a loctician for retwisting. Some women retwist at home to cut costs.
The general rule is to retwist every four to six weeks using a locking gel.
Keep your scalp moisturized with a light oil between appointments.
Locs are a long-term commitment, but many women describe them as the most liberating hair decision they have ever made.
24. Space Buns
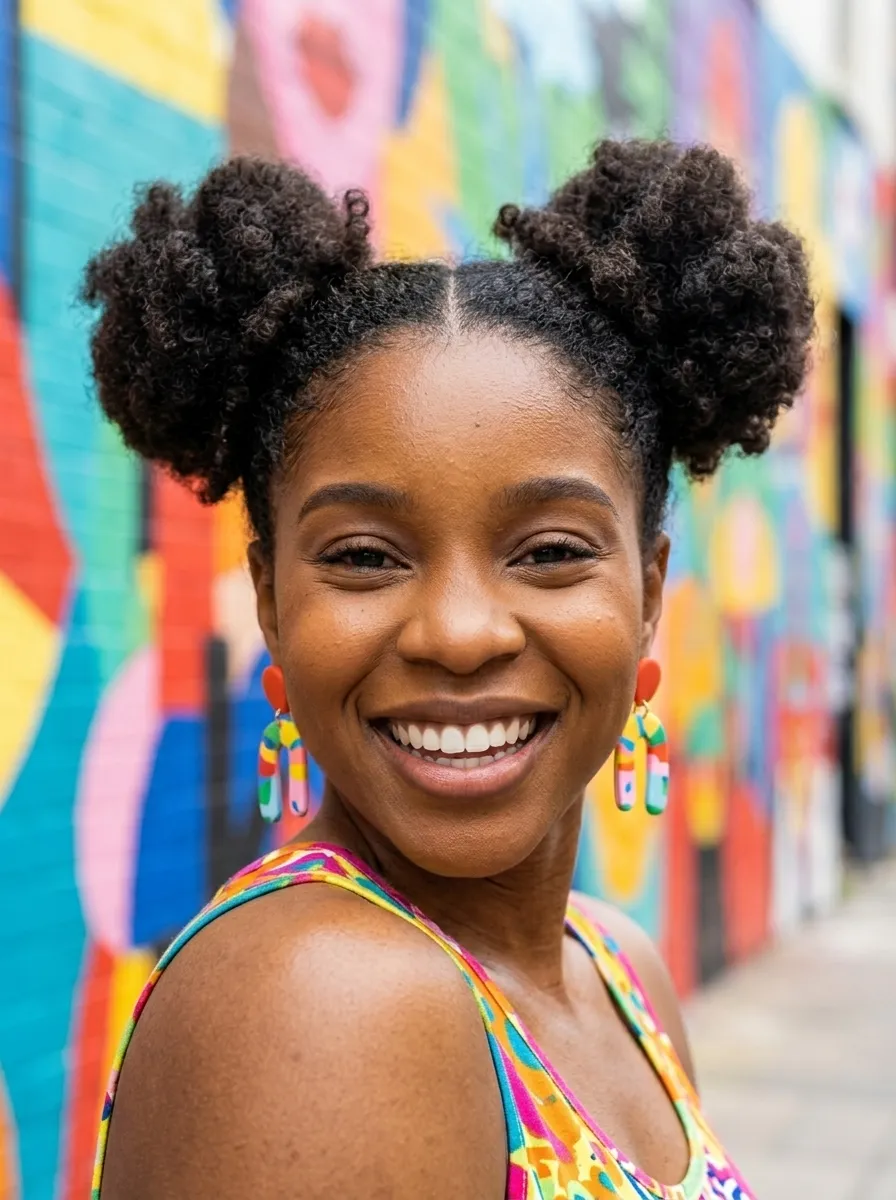
Space buns are fun, youthful, and surprisingly easy to create on natural hair.
They work best on stretched or defined natural hair that has enough volume to form a full bun on each side.
How to get the look:
Part your hair down the middle from front to back. Gather each half into a high ponytail. Wrap and pin into a bun shape using bobby pins.
For a puffier look, leave the bun slightly loose and fluff with a pick comb.
Variation idea: Use two-strand twists or flat twists as the base before bun-ning to add texture and interest.
Wrap a colorful headscarf or ribbon around each bun for a playful finish.
Budget tip: This style requires zero products beyond what you already own for basic natural hair care.
Edge control and a couple of hair ties are all you truly need.
Space buns are popular for music festivals, casual outings, and even kids’ hairstyles.
They are also a clever option for wash day when you want to keep your hair out of your face while your product sets.
Try adding beads or gold cuffs to the buns for a more elevated, editorial look at events.
25. Half-Up, Half-Down Natural Style
The half-up, half-down style is one of the most effortlessly beautiful ways to wear natural hair.
It combines the clean look of an updo with the freedom of wearing your hair down.
Why it works so well:
It keeps hair off your face and neck while still showing off your natural length and curl pattern.
It also takes less than five minutes to achieve once your hair is already moisturized and defined.
How to do it:
Take the top section of your hair, from ear to ear across the crown, and gather it into a high puff or twisted bun.
Secure with a thick elastic. Fluff the puff with a pick for volume.
Leave the bottom half of your hair loose to show off your natural curls.
Budget tip: No new products are needed for this style. It works as a second or third-day hairstyle when your curl definition from wash day is still intact.
Add a decorative hair clip or scrunchie to the secured section for a polished touch.
Try using a Bantu knot, braided bun, or twisted updo for the top section to mix things up.
This style works on all curl types and natural hair lengths from chin-length and above.
26. Colored Natural Hair
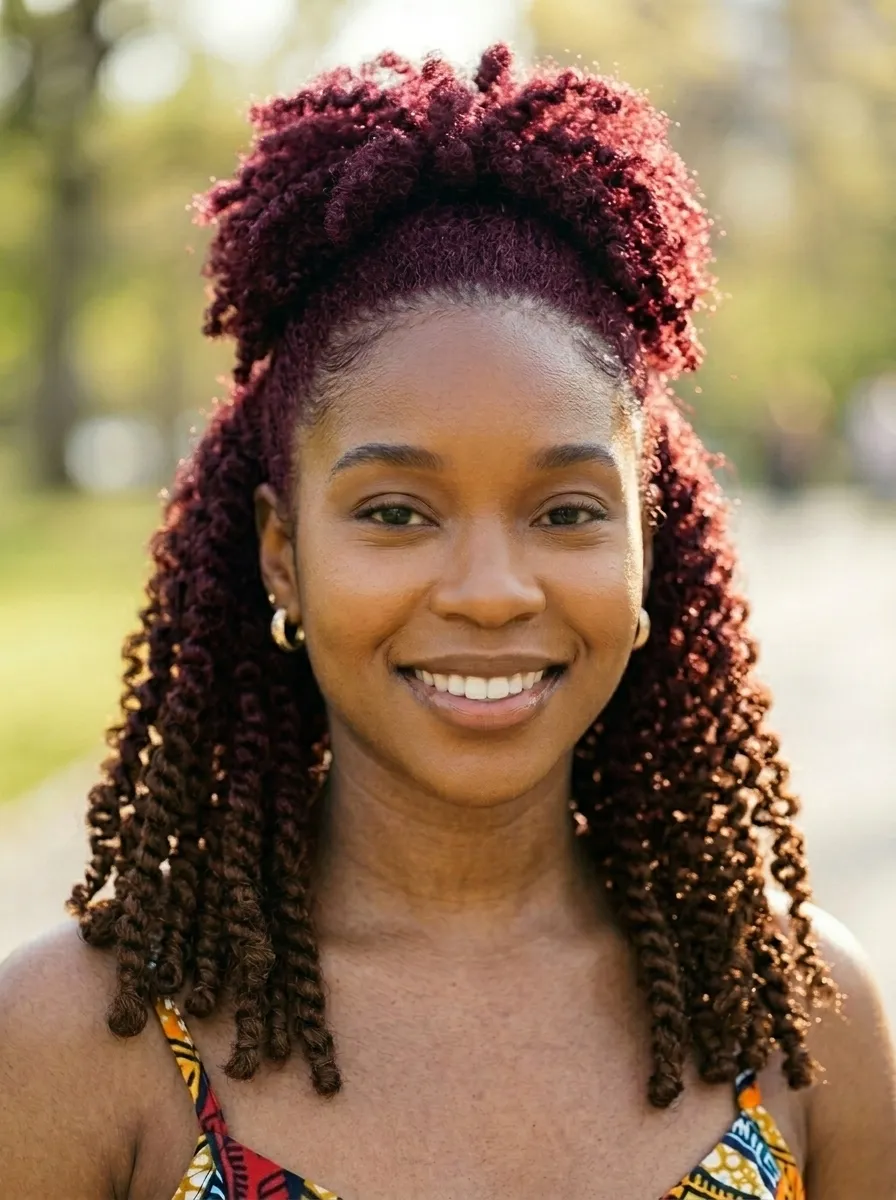
Adding color to natural hair is one of the most exciting ways to refresh your look.
Whether you go bold with a fashion color or subtle with highlights, color completely changes the energy of your hair.
Popular color choices for Black women:
Honey blonde. Burgundy. Copper brown. Deep red. Caramel highlights. Bold blues and purples for those who want to go dramatic.
At-home coloring tips:
Box dye can work on natural hair, but results vary by hair texture and existing color.
Henna is a completely natural option that adds a reddish tint while conditioning the hair. It is safe, affordable, and has no harsh chemicals.
Budget tip: A box of henna or a semi-permanent dye costs around $5 to $15 and can give beautiful results without bleaching.
For women with darker hair who want lighter colors, professional bleaching is required and is best left to a professional to avoid damage.
Always deep condition after any coloring treatment.
Colored natural hair needs extra moisture, so adjust your routine by adding more moisture-focused products.
A satin bonnet at night is non-negotiable to preserve both your color and curl definition.
27. Bridal and Updo Natural Styles
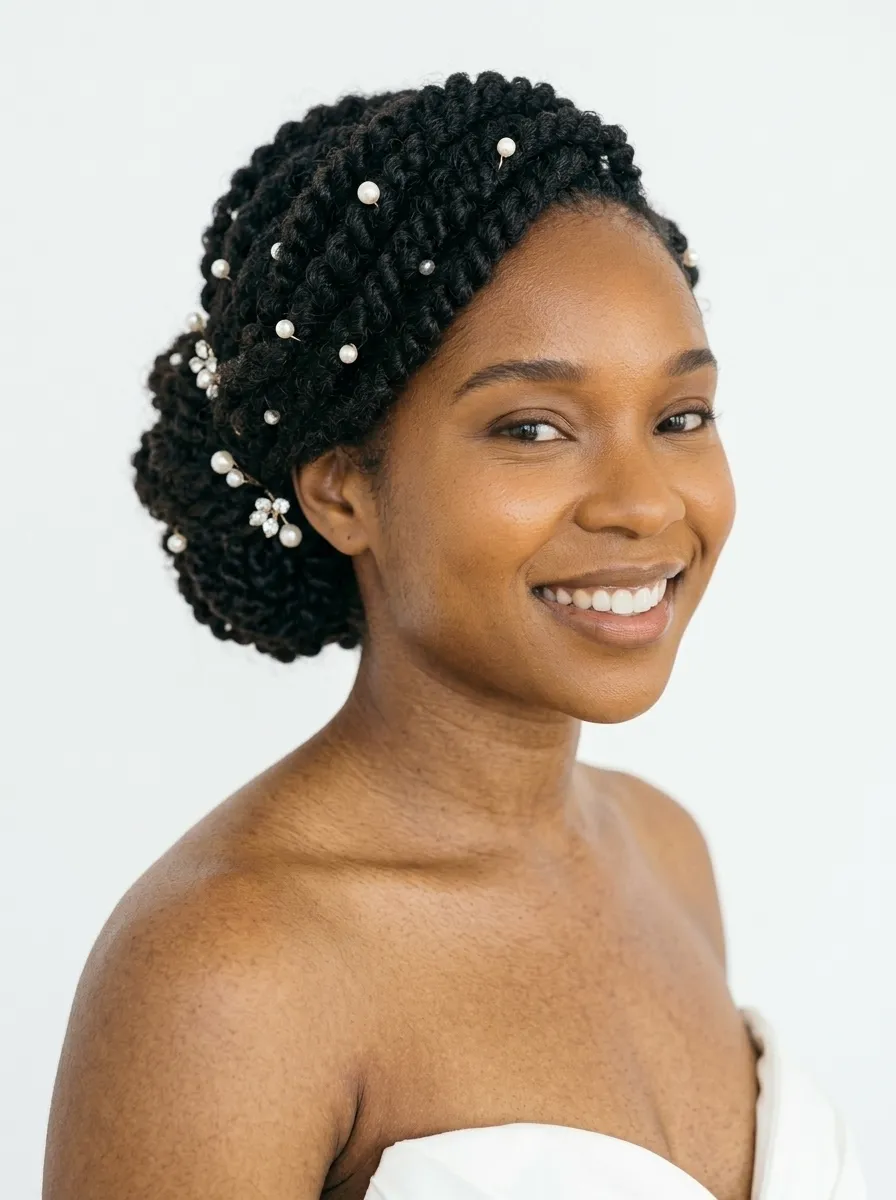
Natural hair deserves to shine on your most important days.
Bridal styles for Black women have become more celebrated and beautifully documented than ever before.
Popular options for weddings and formal events:
Low chignon with defined coils pinned in place. High updo with tendrils framing the face. Flat-twisted crown with a floral accessory. Bantu knot updo for a bold, cultural statement.
At-home prep for a bridal natural style:
Wash and deep condition your hair two days before the event. This gives your hair time to dry fully while remaining soft and manageable.
Define your curls on the day before and let them set overnight in a twist-out or braid-out.
The morning of the event, gently unravel and shape into your chosen updo.
Budget tip: Hiring a natural hair specialist for your wedding day is worth every dollar, but practice the style yourself at least twice beforehand so you know what works for your hair.
Bobby pins, small hair elastics, edge control, and decorative pins are the only supplies you typically need.
Pearl pins, gold cuffs, and fresh flowers are affordable ways to make any natural updo look completely bridal and special.
Your natural hair is worthy of the most beautiful occasion in your life.
Final Thoughts
Your hair is an extension of your identity, your culture, and your creativity.
Whether you are rocking a simple high puff on a Tuesday morning or installing goddess locs for a vacation, every style you choose is a form of self-expression.
The 27 ideas in this guide cover a wide range of textures, budgets, and lifestyles because there is no single right way to wear your hair as a Black woman.
Start with what feels manageable. Practice at home when you can. Invest in your basic products and tools over time.
Most importantly, remember that the best hairstyle is always the one that makes you feel most like yourself.
Pick one style from this list this week, gather your supplies, and get started. Your crown is already beautiful. All it needs is the right style to bring it to life.
Leave a Reply