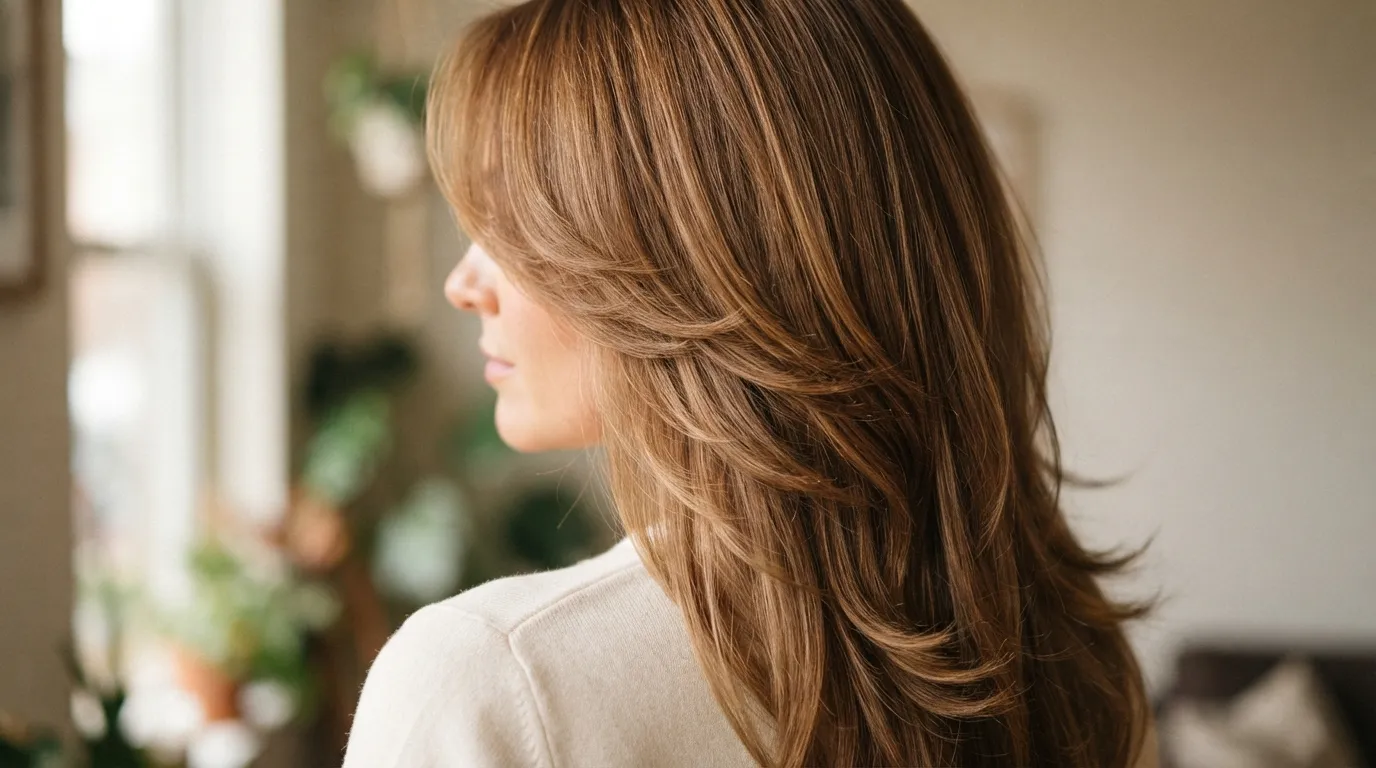
Thin hair does not have to feel flat or lifeless. The butterfly cut has become one of the most requested styles at salons because it adds shape, bounce, and the illusion of thickness without cutting off length. This cut works by removing weight in layers around the face and through the mid lengths, which lets hair fall in soft, feathered pieces instead of one heavy sheet. Below are 26 ways to wear the butterfly cut long hair ideas, styled and tweaked for different hair types, budgets, and daily routines. Each idea includes a simple tip you can try at home, even if you are working with a small budget and basic tools. If you’re also exploring Long Curtain Bangs With Layers Ideas, this combination can beautifully complement a butterfly cut by adding face-framing softness, extra movement, and a fuller appearance that helps thin hair look more voluminous and dynamic.
1. Classic Face Framing Butterfly cut long hair ideas

This is the version most people picture when they hear butterfly cut. Layers start around the cheekbone and get longer as they move down the back. The shortest pieces frame your face and open it up. The rest of the hair keeps its length. If you have thin hair, ask your stylist to keep the layers a bit longer rather than short and choppy. Shorter layers on fine hair can look sparse at the ends. A budget tip: bring a photo to your appointment and point out exactly where you want the shortest layer to hit, usually around the chin or collarbone. This avoids miscommunication and a costly redo. At home, you can keep this style full by air drying with a light mousse instead of heavy product, which can weigh fine strands down. Flip your head upside down for thirty seconds while drying to lift the roots before finishing the rest of your hair.
2. Curtain Bangs Butterfly Blend
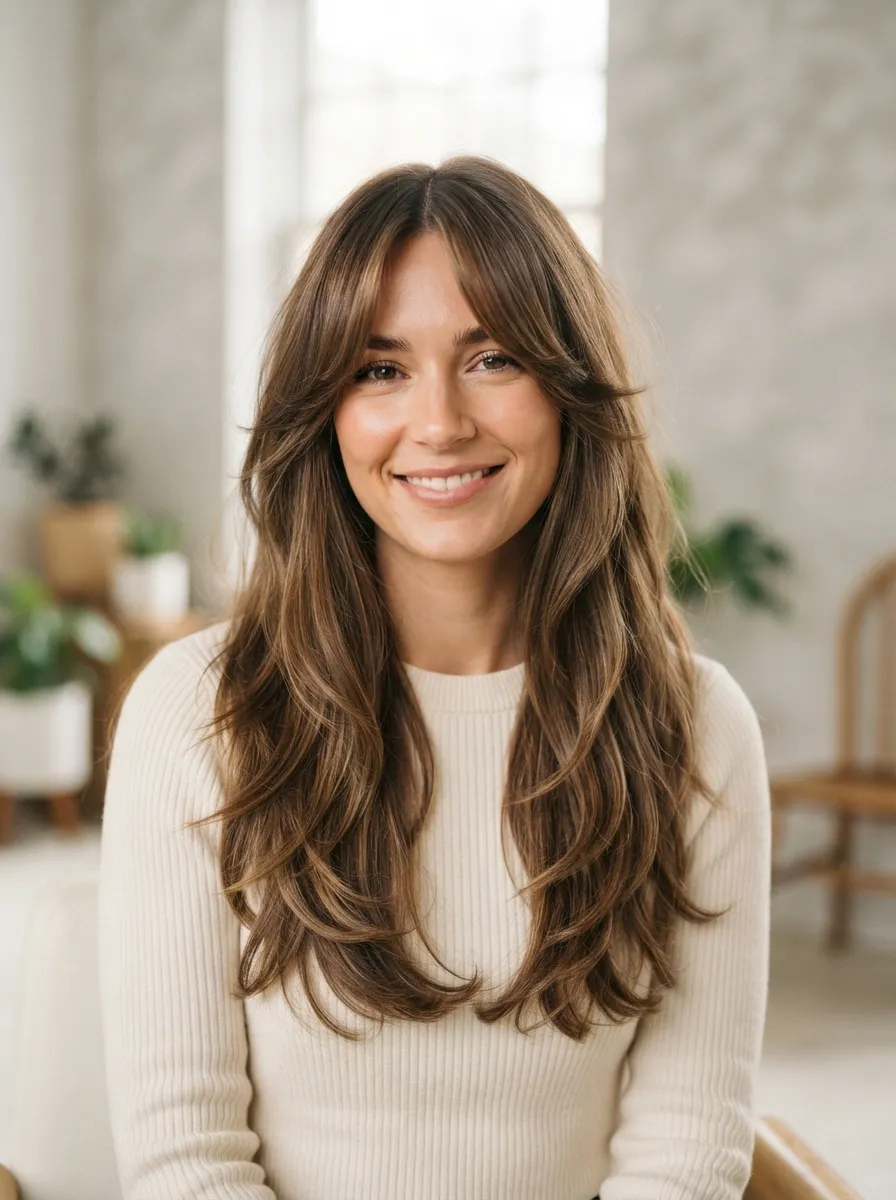
Curtain bangs paired with a butterfly cut create a frame around your whole face. The bangs split in the middle and sweep to each side, connecting smoothly into the longer layers. This combination hides a fine hairline and adds fullness right where people look first. If you are nervous about commitment, ask your stylist to cut the bangs long enough to tuck behind your ears until you grow used to them. A simple home trick is using a small round brush while blow drying to curve the bangs outward, giving them shape without a flat iron. For a low cost option, some drugstore heat protectant sprays under ten dollars work just as well as salon brands for this quick styling step. Trim the bangs yourself every few weeks with small hair cutting scissors, snipping tiny amounts at a time to keep the shape without an extra salon visit.
3. Wispy Ends for Extra Movement
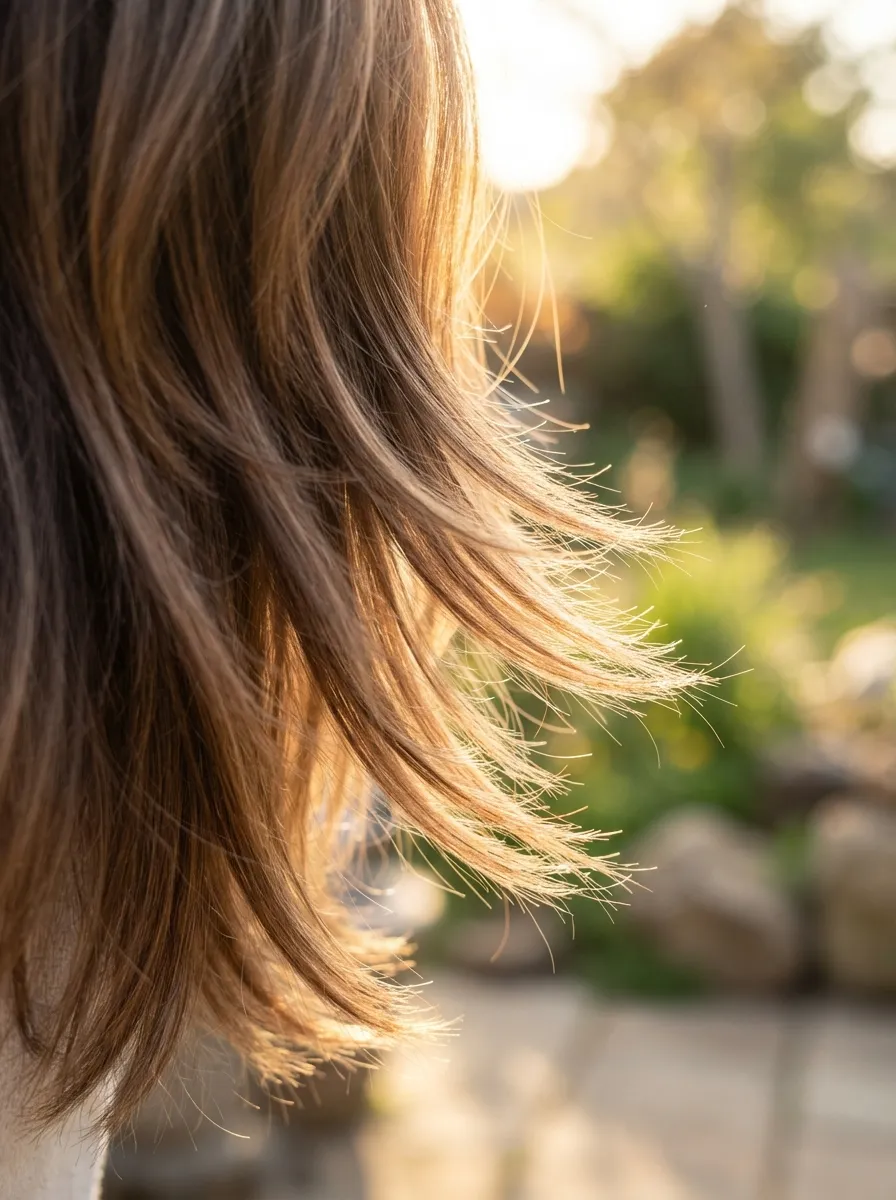
Wispy ends are created using point cutting, where the stylist snips into the hair at an angle instead of straight across. This technique removes bulk without shortening the overall length. For thin hair, wispy ends can trick the eye into seeing more layers and more movement than actually exists. Ask your stylist specifically for point cutting or feathering at the ends during your next trim. If you cut your own hair at home, try twisting small sections and snipping straight up into the twisted ends rather than across. This mimics the wispy effect safely. Keep your scissors sharp, since dull blades can cause split ends that make thin hair look even thinner. A texturizing spray applied to dry ends before styling can also fake this wispy look between haircuts without spending anything extra.
4. Butterfly Cut with Balayage Highlights
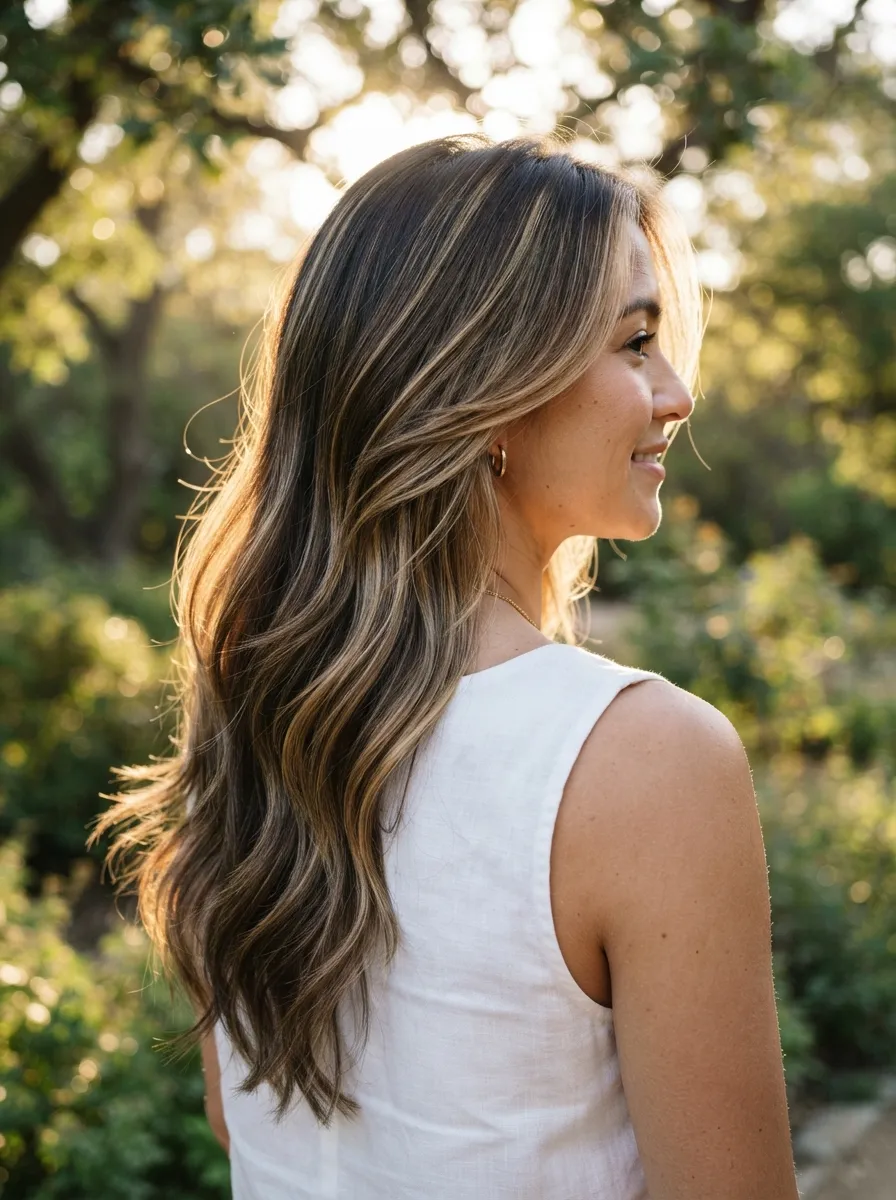
Balayage highlights placed through the layers of a butterfly cut add depth that makes hair look thicker from every angle. The color is painted on freehand, so lighter pieces land right where the layers separate, drawing attention to the shape of the cut. This works especially well for thin hair because contrast between shades creates visual texture even when the strand count stays the same. If salon balayage is out of budget right now, ask about a partial version that only covers the top layers around your face, which costs less and still gives the same lifting effect. At home, a temporary highlighting mascara or root touch up wand can mimic a few extra pieces of dimension for special events. Always use a color safe shampoo once you do invest in highlights, since fading color can flatten the contrast that made the cut look full in the first place.
5. Soft V Layers for Volume
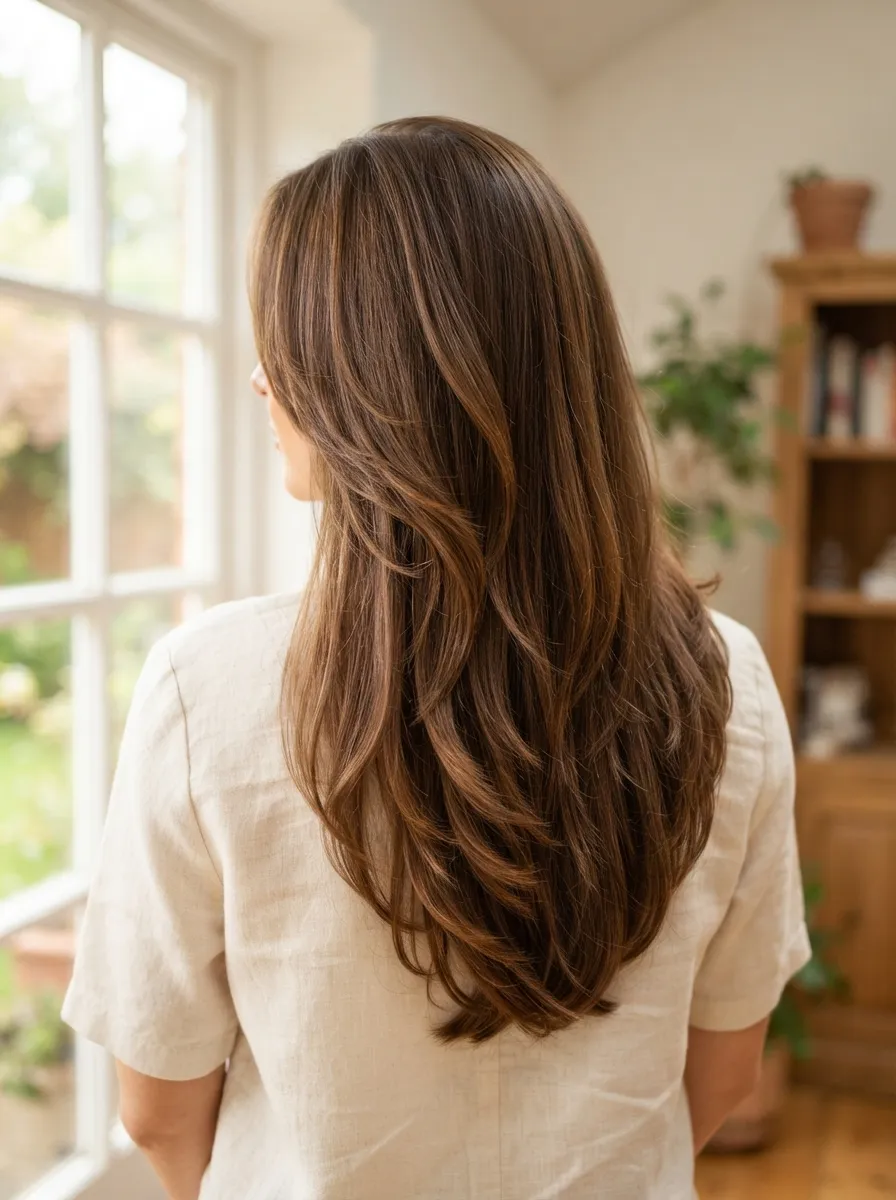
The soft V layer is a variation of the butterfly cut where the back sections form a gentle V shape instead of a blunt line. This shape naturally pushes volume toward the crown, which is often where thin hair needs the most help. The layers taper gradually so there is no harsh line, keeping length while still building shape. Ask your stylist to keep the V subtle rather than deep, since a deep V can leave very short pieces at the very bottom. For styling at home, blow dry your roots first with your head tilted forward, then finish the ends with a cool air setting to lock in lift. A small amount of dry shampoo at the roots, even on freshly washed hair, adds grip and texture that helps this shape hold its volume through the day.
6. Butterfly Cut on Straight Hair
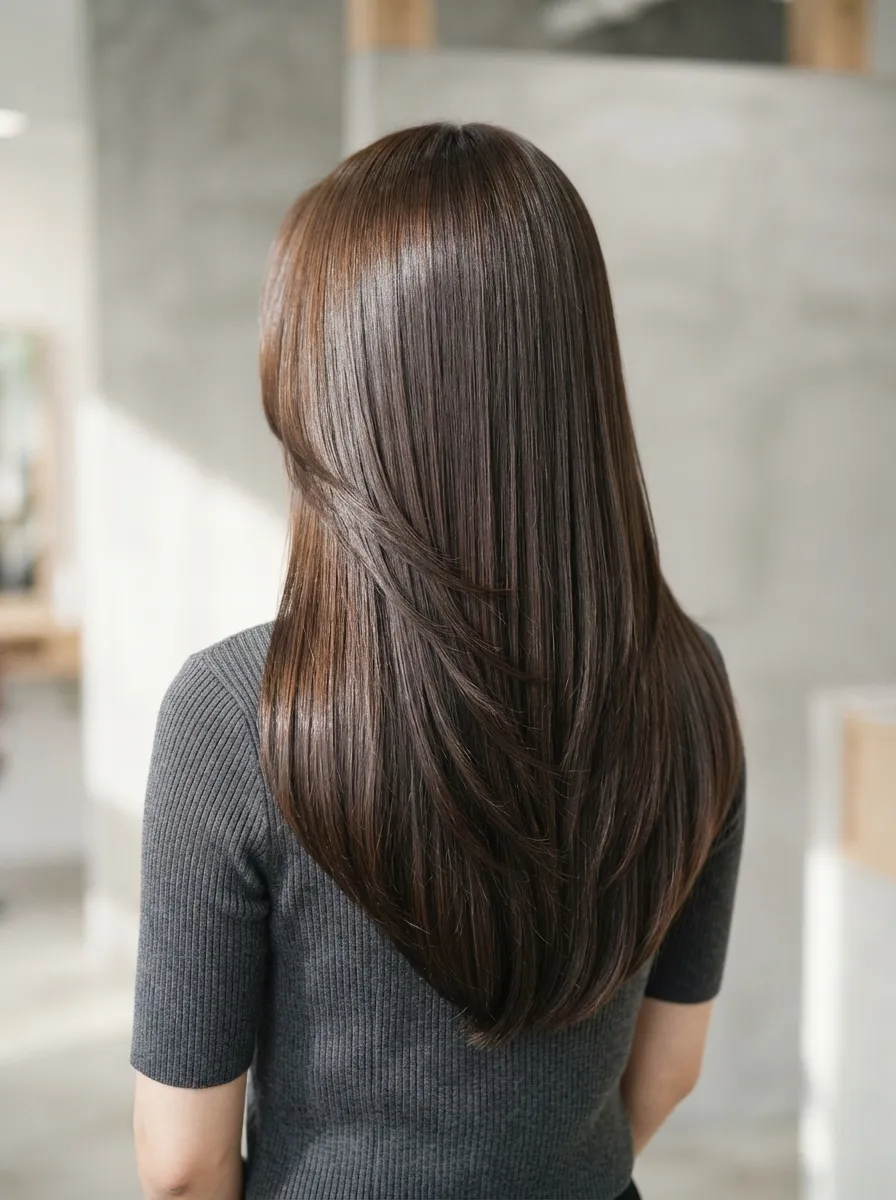
Straight hair can sometimes look flat, but the butterfly cut solves this by building shape into the layers themselves rather than relying on curl or wave. The layers move independently, catching light differently at each length, which creates the appearance of texture. For thin straight hair, ask your stylist to avoid cutting layers too close together, since straight strands show every line clearly. Spaced out layers look more natural. At home, a flat iron with a slight bend at the ends, rather than a fully straight pass, keeps the layered movement visible instead of pressing it flat. A lightweight volumizing spray on damp roots before blow drying gives straight thin hair a base to hold onto. Avoid heavy serums through the roots, since they can make straight fine hair look greasy and reduce the lift the cut provides.
7. Beachy Waves Butterfly Style
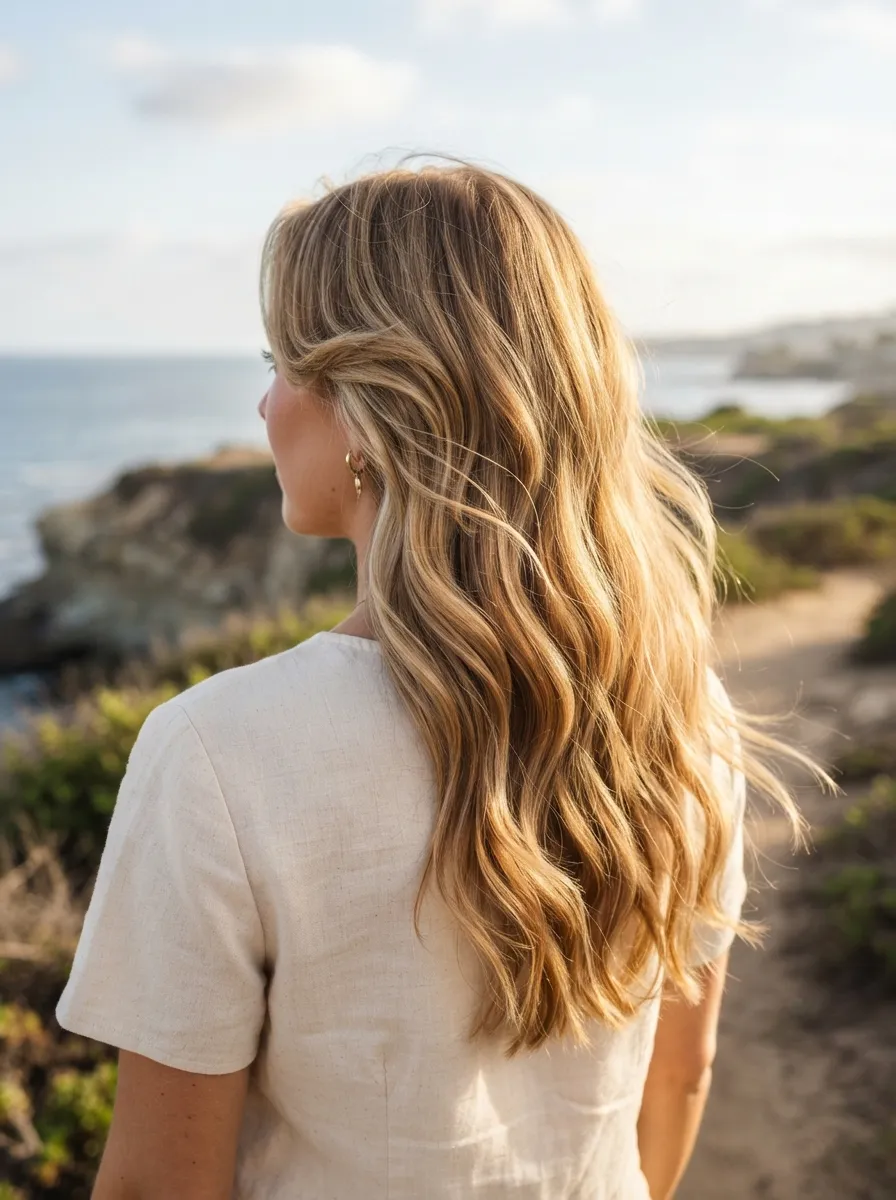
Loose waves add texture that pairs naturally with the layered structure of a butterfly cut. The waves catch on each layer, creating separation that makes hair look fuller without any extra length removed. You do not need an expensive curling wand for this look. A basic one inch curling iron, wrapping small sections away from your face and leaving the very ends untouched, creates the same relaxed wave. Let the curls cool completely before running your fingers through them, which breaks up the shape into looser, more natural waves. For a no heat version, braid damp hair into two loose braids overnight and unravel them in the morning. Finish with a light touch of sea salt spray scrunched into the mid lengths, focusing on the layered pieces around your face where the texture shows the most.
8. Butterfly Cut with Money Piece Highlights
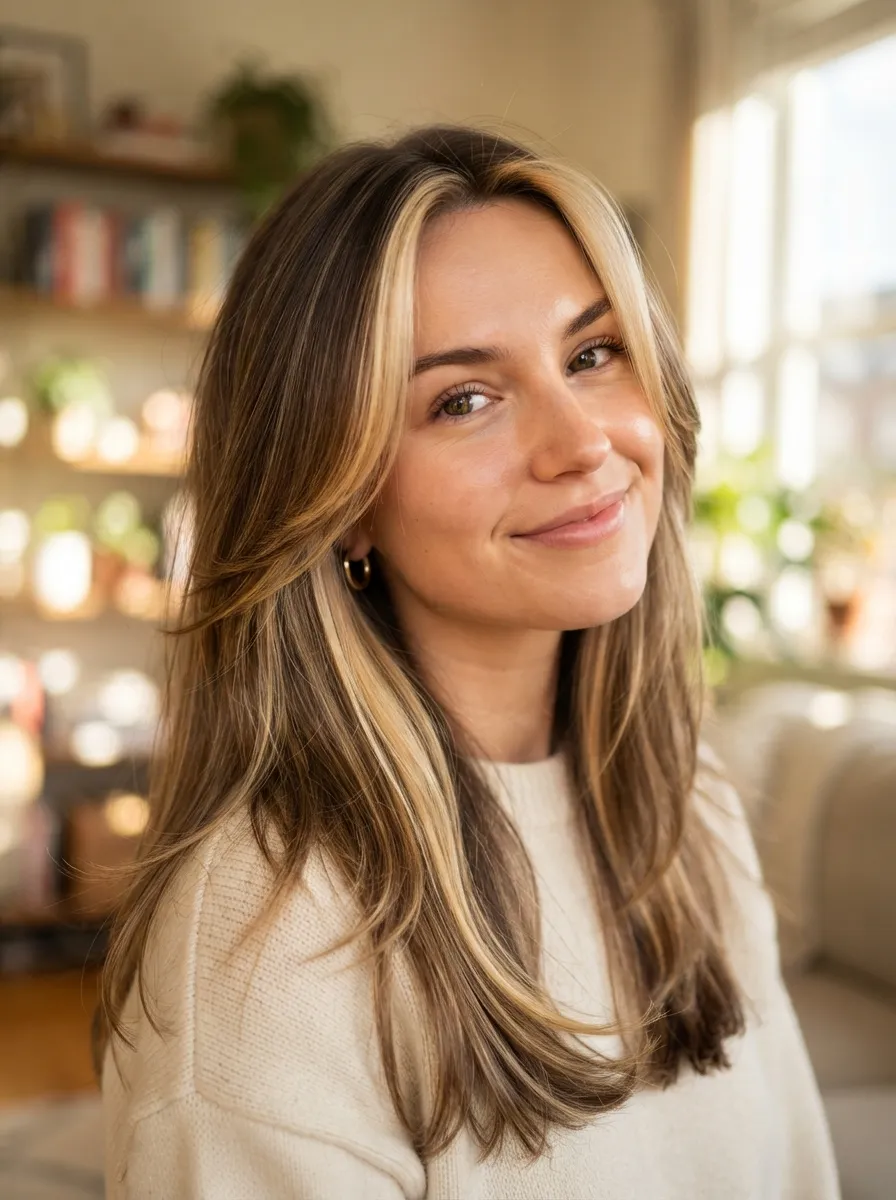
Money piece highlights are placed only around the front pieces of hair that frame your face, usually the shortest layers in a butterfly cut. Because these pieces already sit forward and catch the most light, adding color there creates a bright, dimensional effect without highlighting the entire head. This is a budget friendly way to get a noticeable color change, since it uses far less product and processing time than full highlights. Ask your colorist for two to four face framing pieces rather than a full head service to keep costs down. If you prefer to try this without commitment, temporary hair chalk or a root concealer in a lighter shade can be brushed onto the front layers for a single event. Keep these pieces trimmed regularly, since lightened hair can become more prone to breakage and dryness at the ends over time.
9. Long Layers with Feathered Tips
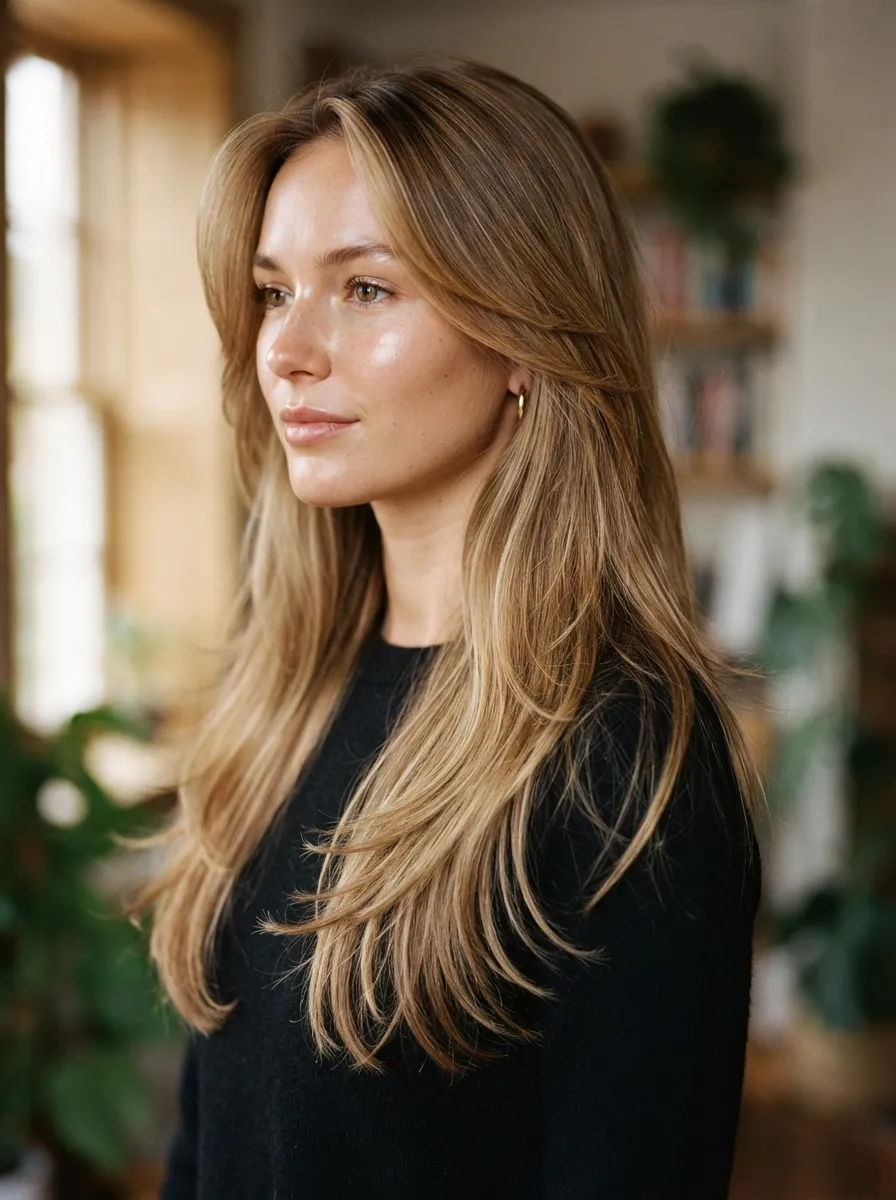
Feathered tips take the ends of each layer and thin them out slightly so they taper rather than end bluntly. This technique keeps the overall length intact while removing just enough bulk to prevent thin hair from looking stringy or heavy at the bottom. Ask your stylist to feather only the last inch or two of each layer so you keep as much length as possible. At home, a texturizing shear, sold at most beauty supply stores for a reasonable price, lets you maintain this feathered look between salon visits. Hold small sections vertically and snip lightly into the ends rather than cutting straight across. A leave in conditioner focused on the tips, rather than the roots, keeps feathered ends soft and prevents them from looking wispy in an unflattering way. This small step protects the shape you paid for.
10. Butterfly Cut for Fine Hair Density
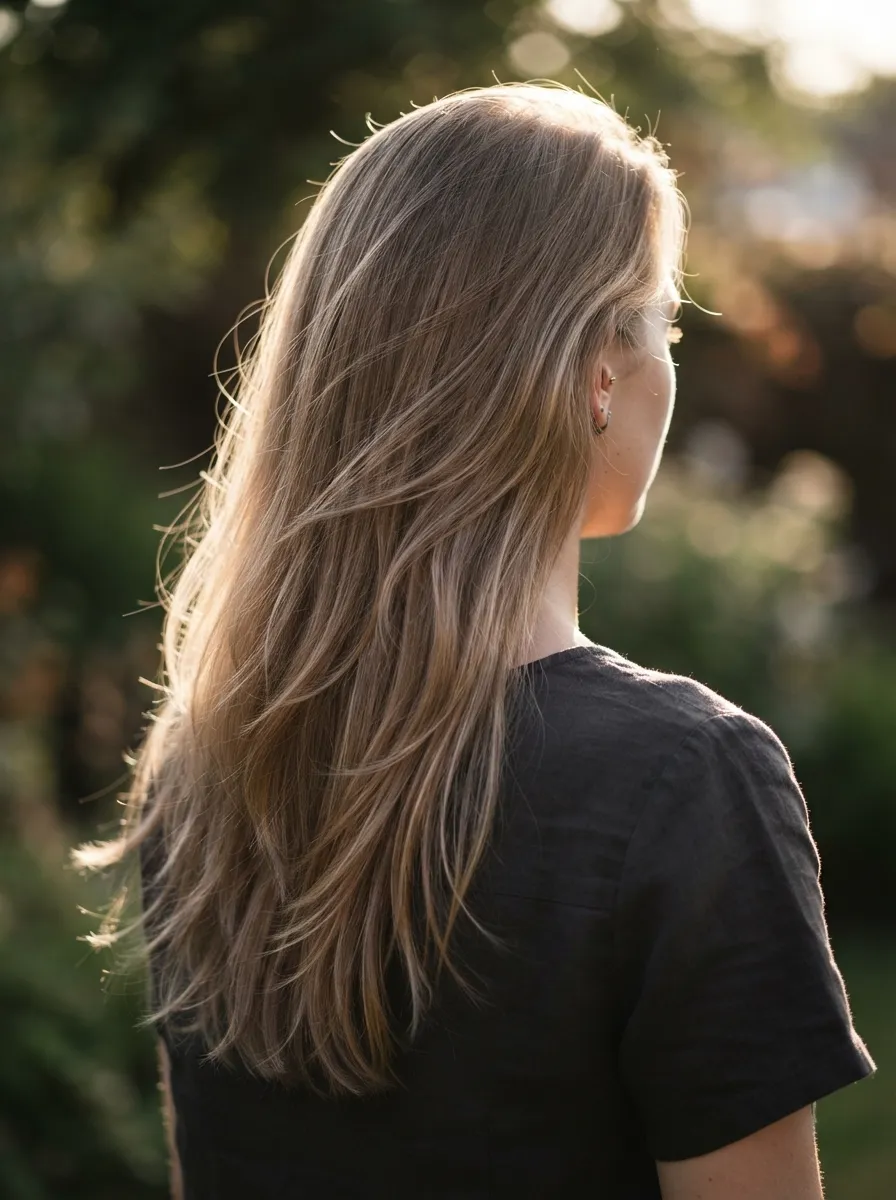
Fine hair density means each individual strand is thin, which is different from having less hair overall. For this hair type, the butterfly cut works best when layers are kept longer and less aggressive, since removing too much weight can expose the scalp in certain lighting. Ask your stylist to point cut rather than slide cut, since sliding the scissors along the hair can thin it out too much for fine strands. A protein based conditioner used once a week can temporarily thicken the feel of each strand, making the layered shape hold its form longer through the day. Avoid brushing fine hair too often, since repeated friction can cause breakage that thins the ends further. Instead, use a wide tooth comb starting from the bottom and working upward in small sections to prevent unnecessary strand loss.
11. Side Swept Butterfly Layers
![[Image Prompt: A photograph of long hair swept to one side with visible butterfly layering, soft natural light from a window, hair falling asymmetrically across the shoulder, shot on a high end camera, no text or words in the image.]](https://boldtress.com/wp-content/uploads/2026/07/11_202607061414_11zon-1.webp)
Sweeping your layers to one side changes how the shortest pieces sit against your face, often creating more visible volume on one side than a centered part would. This works well for thin hair because it concentrates the layered pieces in one area, making that section look noticeably fuller. Ask your stylist to cut your face framing layers slightly asymmetrically if you know you always part your hair the same way. At home, blow dry your roots in the opposite direction of your usual part before brushing the hair over to one side. This lifts the base and keeps the swept look from falling flat by midday. A bobby pin tucked just behind the ear on the heavier side can hold the shape in place during humid weather or long days without needing extra product.
12. Butterfly Cut with Blunt Ends
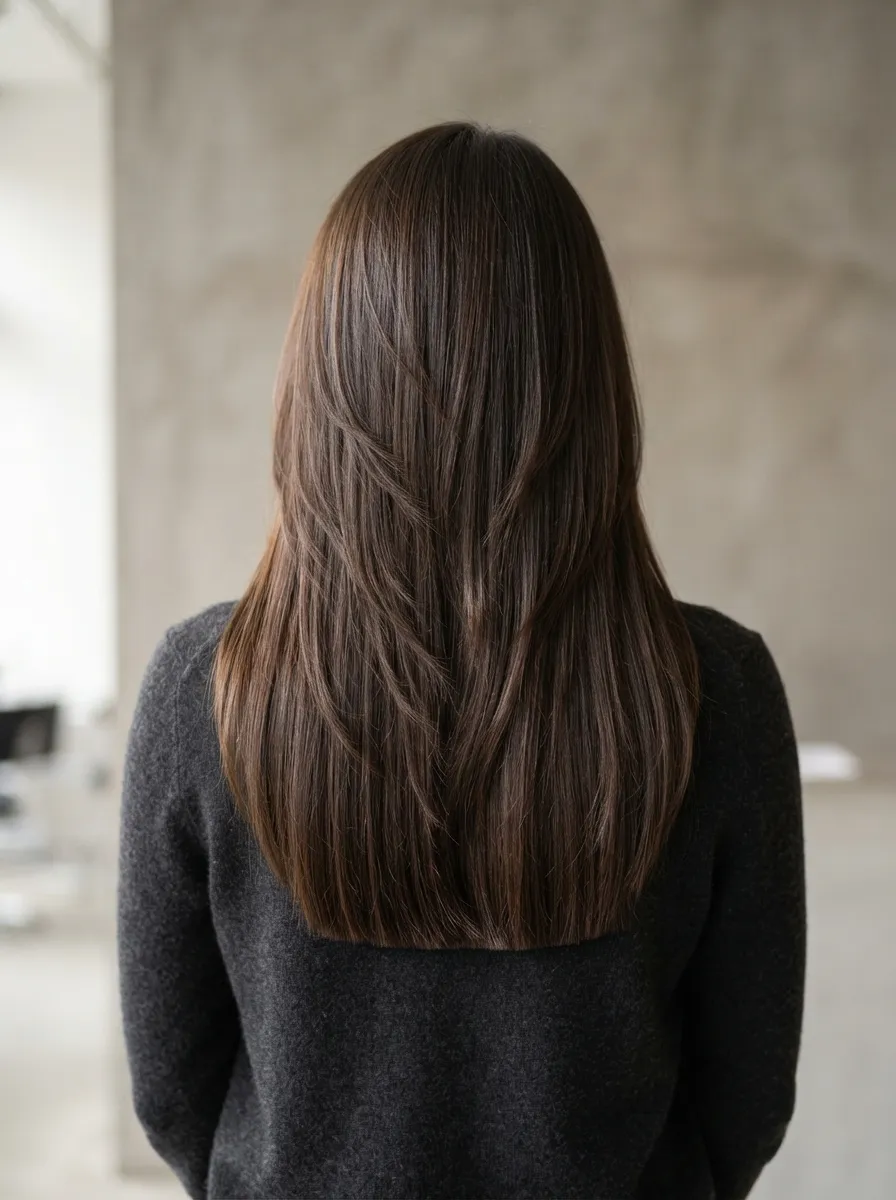
Pairing softer butterfly layers up top with a blunt cut at the very bottom creates a style that looks both textured and thick at the same time. The blunt line adds the appearance of density at the ends, which is often the area where thin hair looks the sparsest. Ask your stylist to keep the top layers soft while cutting the bottom two inches straight across for this contrast. At home, you can maintain the blunt line yourself between visits by pulling hair into a low ponytail and trimming just below the hair tie in small, careful sections. This method keeps the line even without needing a mirror behind you. Regular trims, even tiny ones every six to eight weeks, keep the blunt ends looking crisp rather than ragged, which is what gives this style its fuller appearance.
13. Butterfly Cut and Root Volume Spray
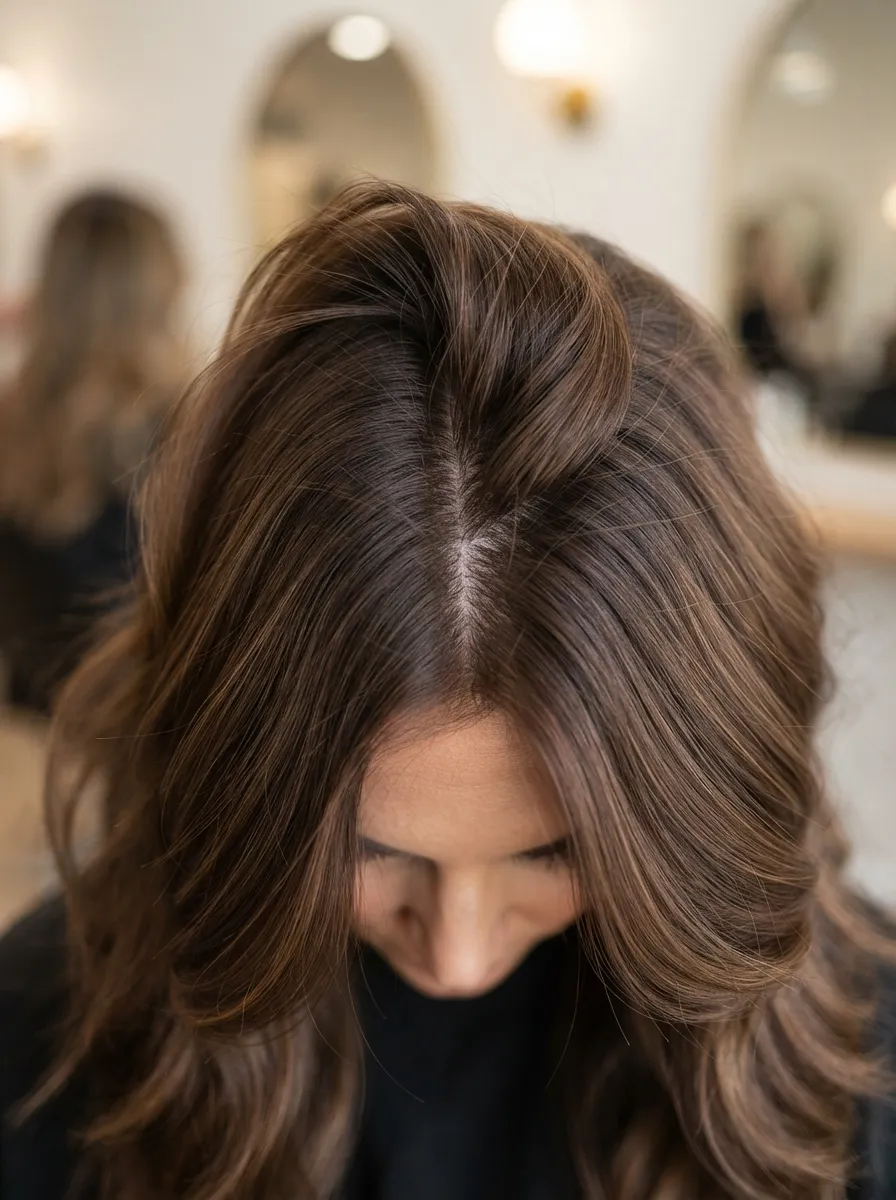
Root volume spray is applied at the base of the hair before blow drying to create lift that lasts through styling. When paired with the layered structure of a butterfly cut, this lift travels down through each layer, making the whole style look thicker from root to tip. Apply the spray in small sections while hair is still damp, focusing directly on the part line and crown area. Flip your hair upside down while blow drying on a medium heat setting to let gravity work in your favor. Budget drugstore volumizing sprays often perform just as well as premium salon versions for this purpose, so there is no need to overspend here. Avoid applying the spray too close to your scalp in large amounts, since buildup can weigh hair down over several days and reverse the lifting effect you are trying to achieve.
14. Butterfly Layers with Face Framing Curls

Curling just the face framing layers of a butterfly cut, rather than the entire head, saves time and still delivers a noticeable change in shape. These shorter pieces curl quickly since there is less length to wrap, and the curl draws attention right to the face. Use a small barrel curling iron, around three quarters of an inch, and hold each section for only a few seconds since finer hair heats up faster than thicker hair. Curl away from your face for a classic look or toward your face for a softer, more rounded frame. Finish with a light hold hairspray only on these curled pieces to avoid stiffness through the rest of your hair. This technique is a fast way to refresh your look before a video call or quick outing without committing to a full curling session.
15. Butterfly Cut Ponytail Trick
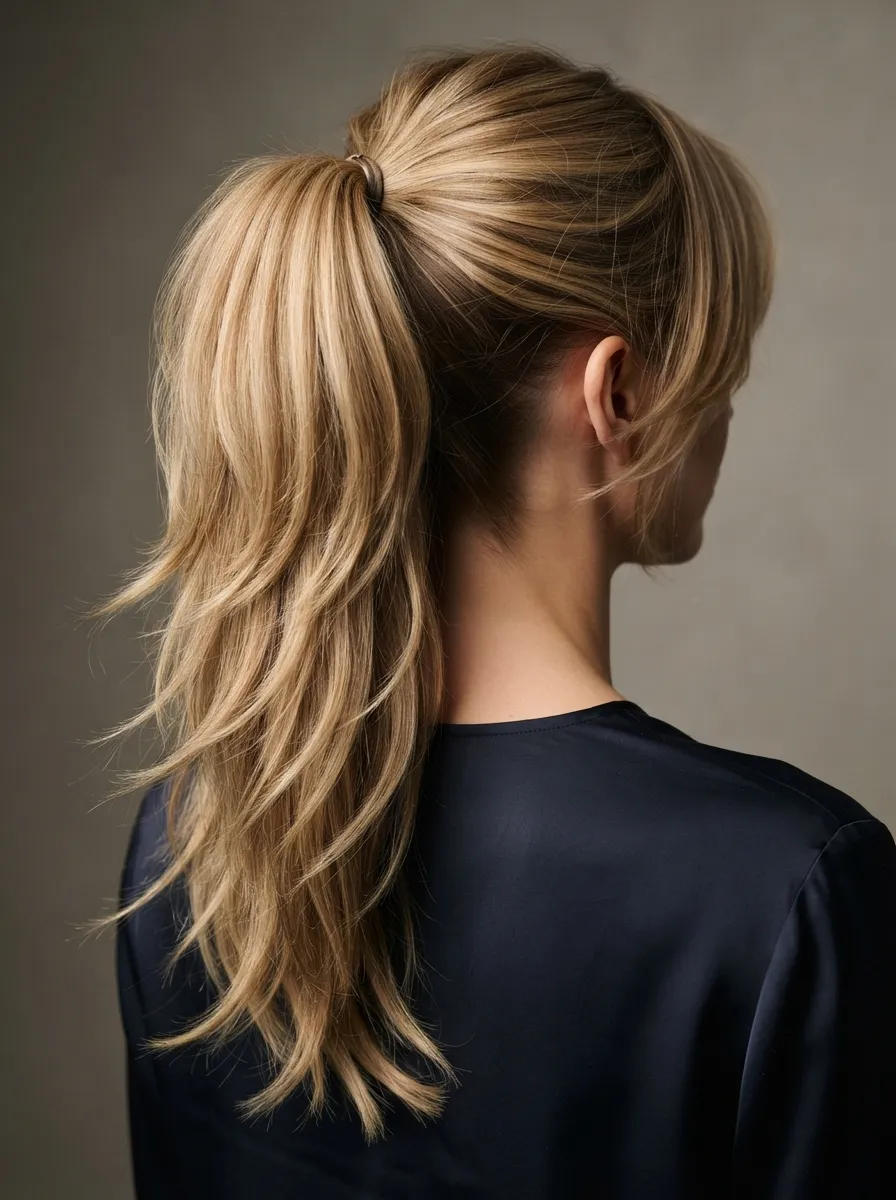
A butterfly cut adds natural texture to a ponytail because the shorter layers frame your face while the rest gathers smoothly into the tie. To make a thin ponytail look thicker, backcomb a small section at the crown before pulling your hair back, then smooth the top layer over it to hide the teasing. Wrap a small strand of your own hair around the elastic to hide it completely, which gives the ponytail a more polished, salon finished look at no cost. If your layers are shorter around the face, clip them back temporarily with small bobby pins while you finish the rest of the style, then release them once you are done for a soft framing effect. This trick works for both casual days and dressier occasions since it takes only a few extra minutes.
16. Butterfly Cut with Half Up Style
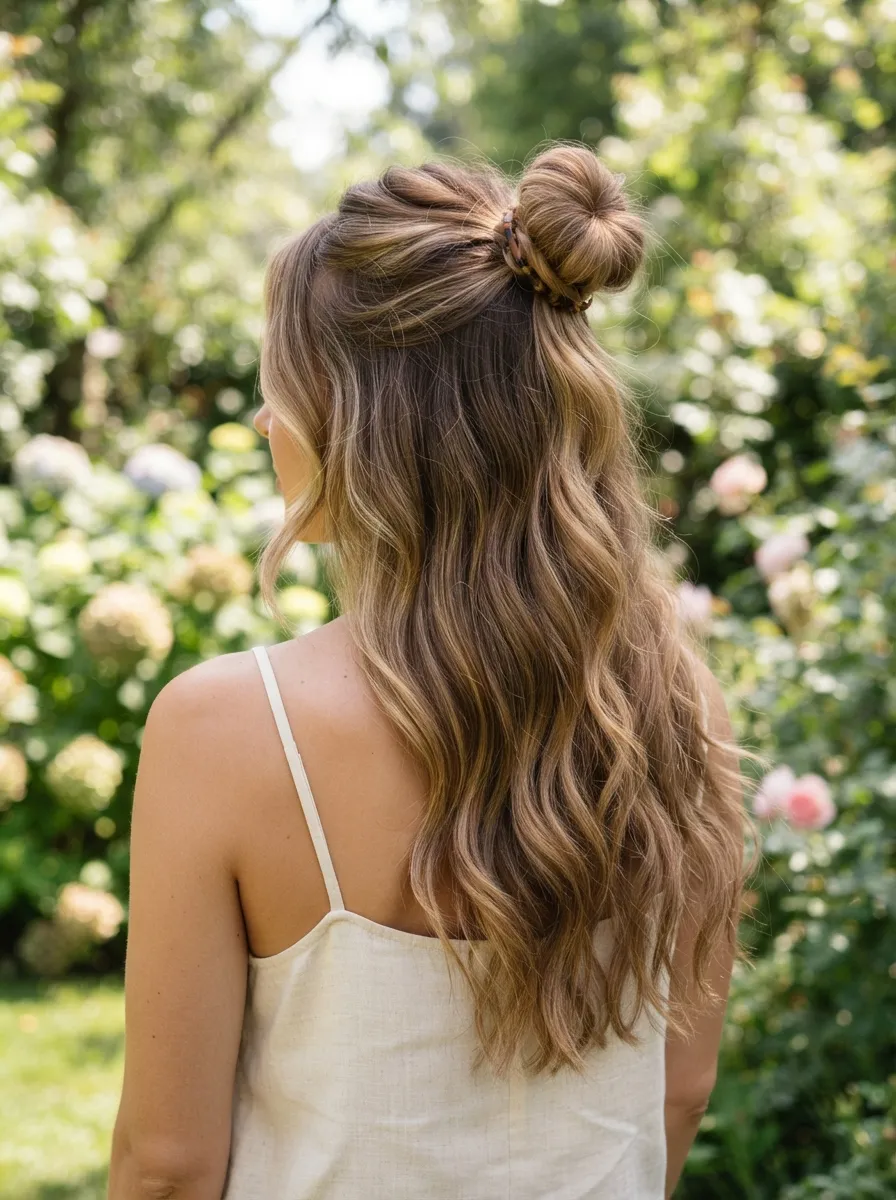
The half up style shows off the layered movement of a butterfly cut while keeping hair out of your face. Gather the top section, right where your shortest layers begin, and secure it with a small elastic or clip. The layers below fall freely, showing their shape and texture. For added fullness, tease the gathered section slightly at the crown before securing it, then pull a few face framing pieces loose around your temples. This style photographs well and works for both daily wear and special occasions without needing any heat styling if your hair already has natural texture. A decorative clip instead of a plain elastic can dress up the same simple style for an evening event, giving you two looks from one basic technique.
17. Textured Butterfly Layers for Movement
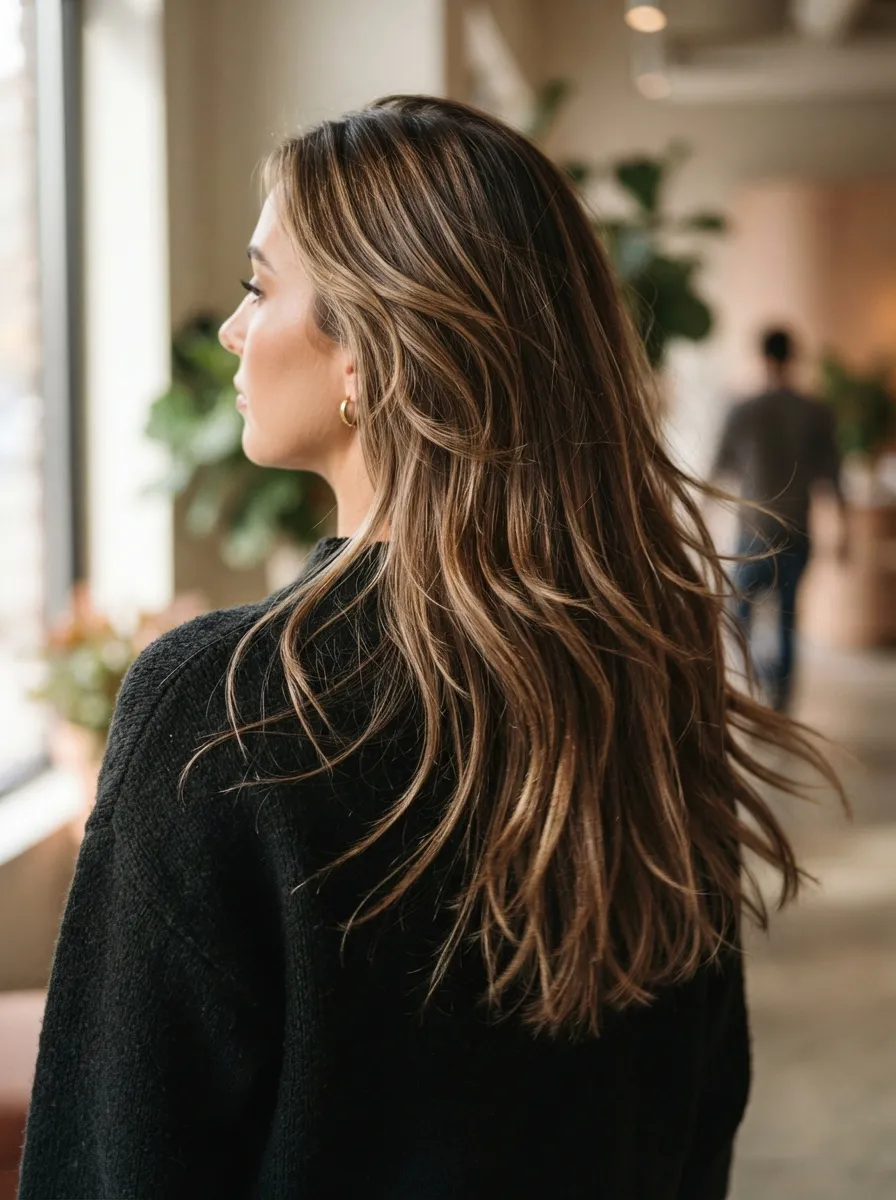
Texture is created by adding slight waves, twists, or a light touch of product that separates strands instead of letting them fall in one smooth sheet. For a butterfly cut, texture through the mid lengths and ends highlights each individual layer, making the overall style look denser. A texturizing paste, used sparingly and worked only through the ends between your palms, can create this separation without any heat tools. If you prefer heat styling, loosely waving random sections rather than every piece keeps the texture looking natural instead of overly styled. Avoid applying texturizing products too close to the roots, since this can make fine hair look greasy rather than textured. This look works especially well for second or third day hair, since natural oils help the texture hold its shape longer.
18. Butterfly Cut with Color Melt
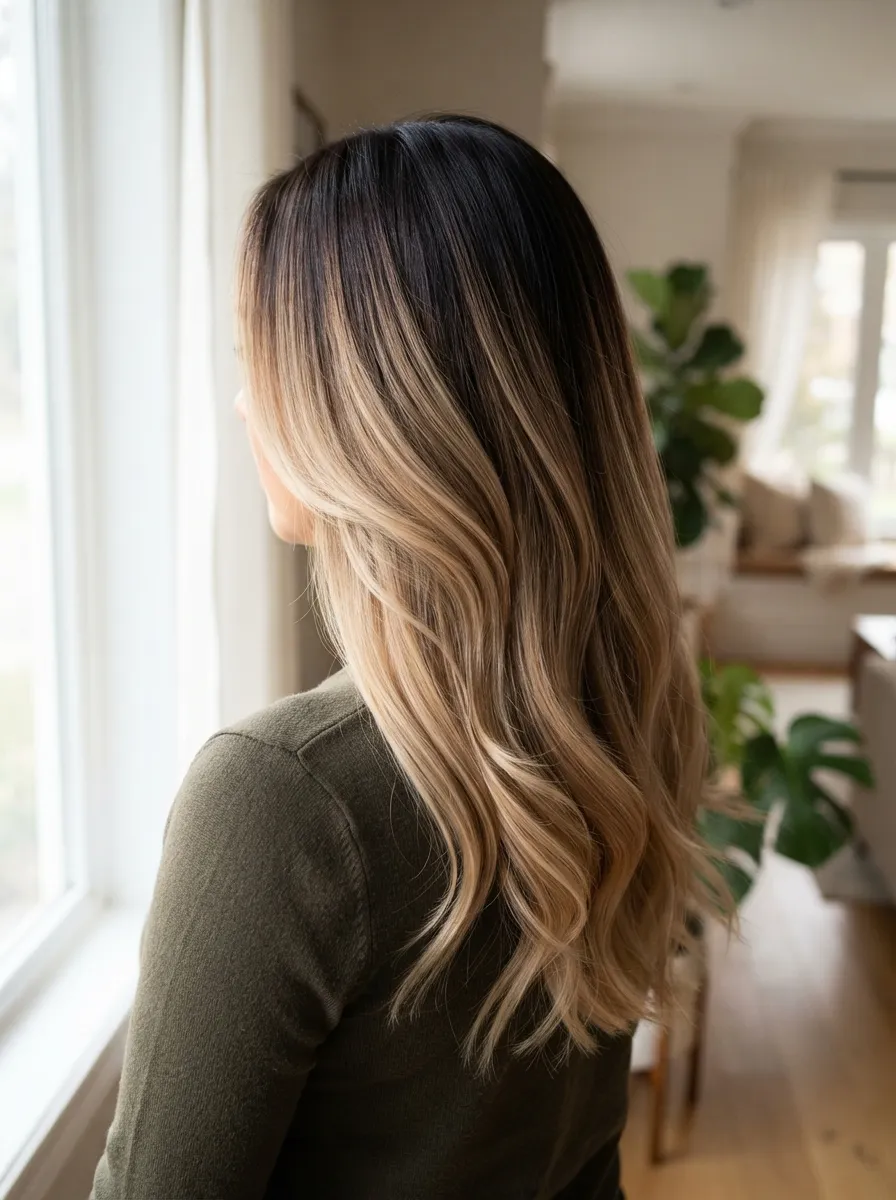
A color melt blends two or three shades smoothly from root to tip, with no harsh line between them. When applied to a butterfly cut, this gradual color shift follows the layers, making each one stand out slightly differently depending on where it catches the light. This technique also grows out more gracefully than traditional highlights, which can save money on frequent touch up appointments. Ask your colorist about a low maintenance melt using shades close to your natural color if you want a subtle change rather than a dramatic one. At home, a color depositing conditioner used every few washes can help maintain the tone of a color melt between salon visits without the cost of a full color treatment. This keeps the blended effect looking fresh for longer.
19. Butterfly Cut Blowout Technique
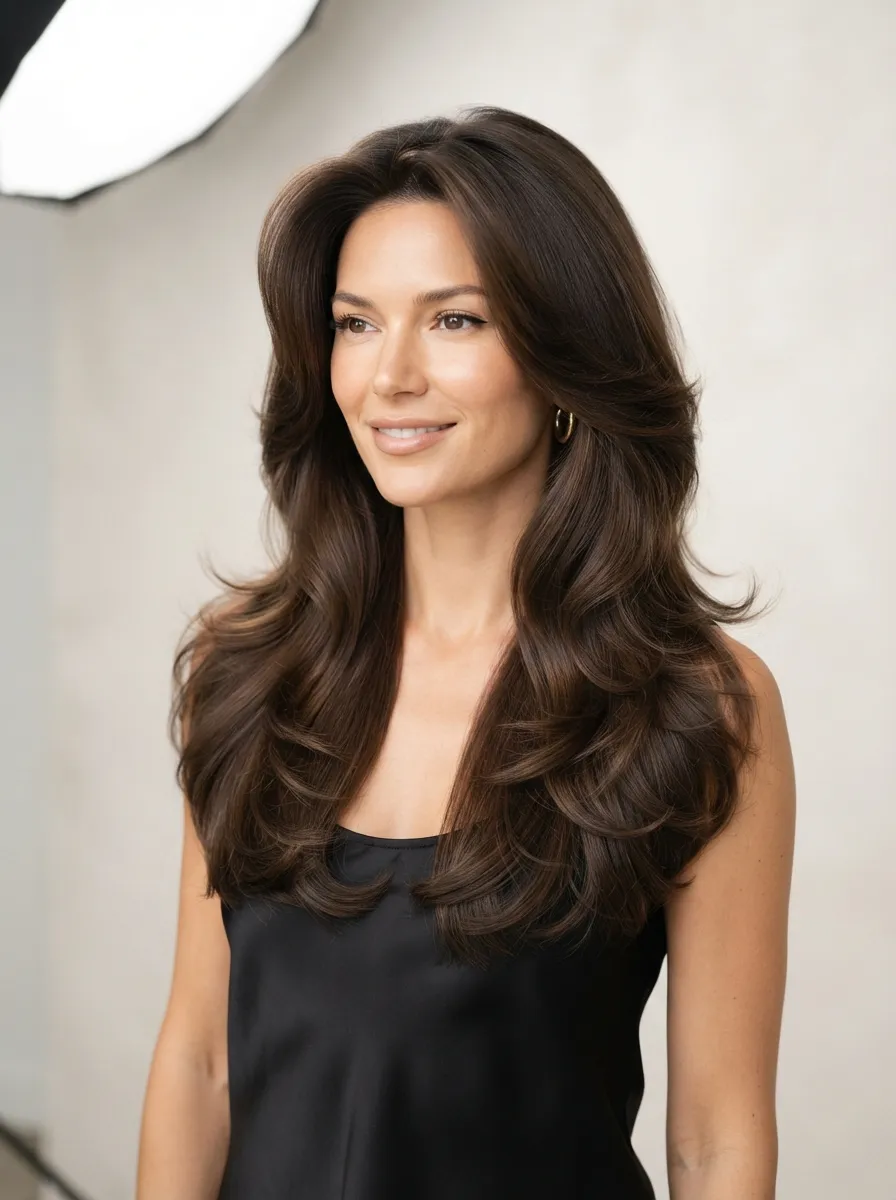
A blowout uses a round brush and blow dryer to add shape and volume without any heat styling tools beyond the dryer itself. For a butterfly cut, direct the round brush along each layer separately, rolling the ends under or away from your face depending on the look you want. Start at the roots with the dryer pointed downward to smooth the cuticle, then move to the mid lengths and ends. This technique adds shine and body that makes thin hair appear thicker, and it costs nothing extra if you already own a basic round brush. A cool shot button, found on most hair dryers, locks the shape in place once you finish each section. This style typically holds for a day or two, especially if you sleep with your hair loosely wrapped in a silk scarf to reduce friction overnight.
20. Butterfly Cut with Braided Crown
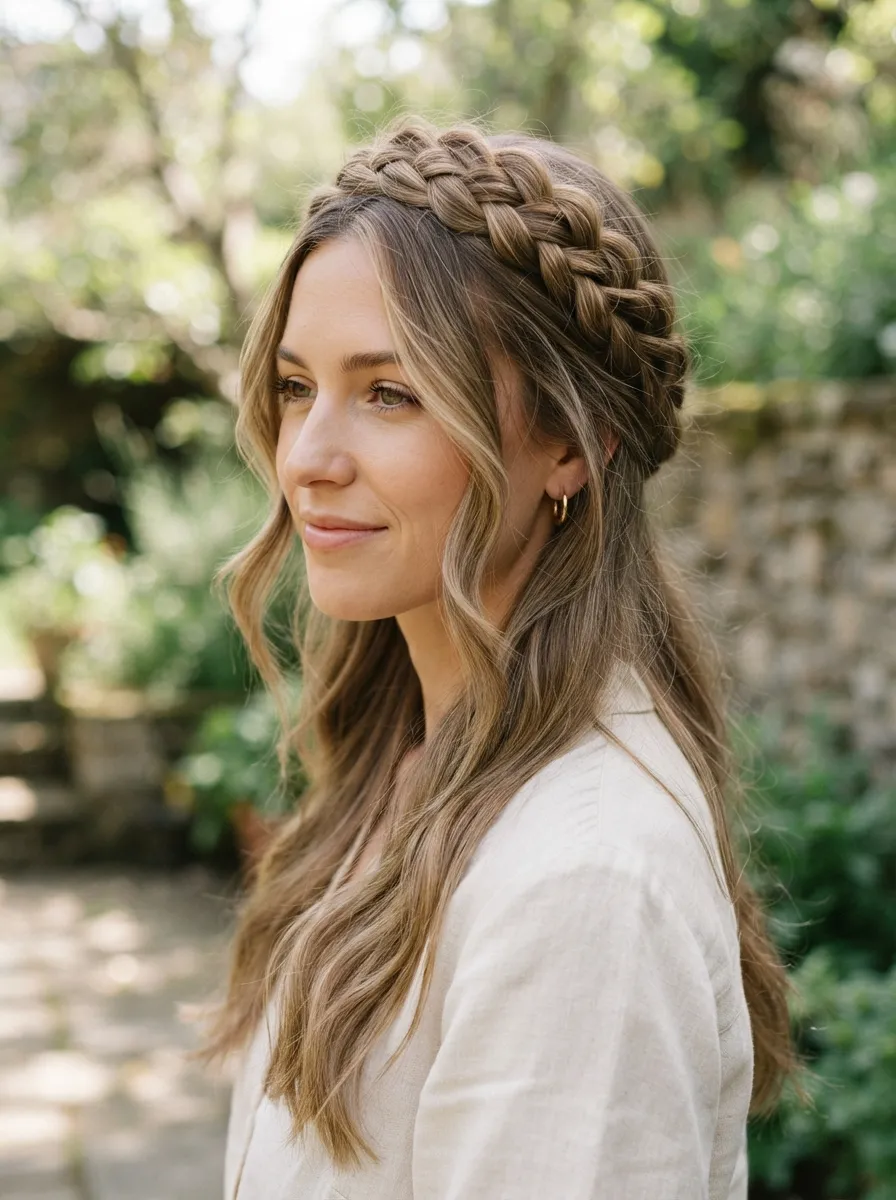
A braided crown pulls a small section of hair back from each side and braids it across the top of your head, securing at the back. This style adds structure at the roots, which naturally lifts the appearance of thin hair, while the layers below remain loose and visible. Practice a simple three strand braid on each side before attempting this look if you are new to braiding, since starting with basic sections makes it easier to keep the braid even. Pull the braid slightly apart with your fingers after securing it to make it look fuller and less tight. This style requires no special tools beyond a couple of small elastics and works well for keeping hair out of your face during warm weather while still showing off the shape of your cut.
21. Butterfly Cut for Wavy Hair Types
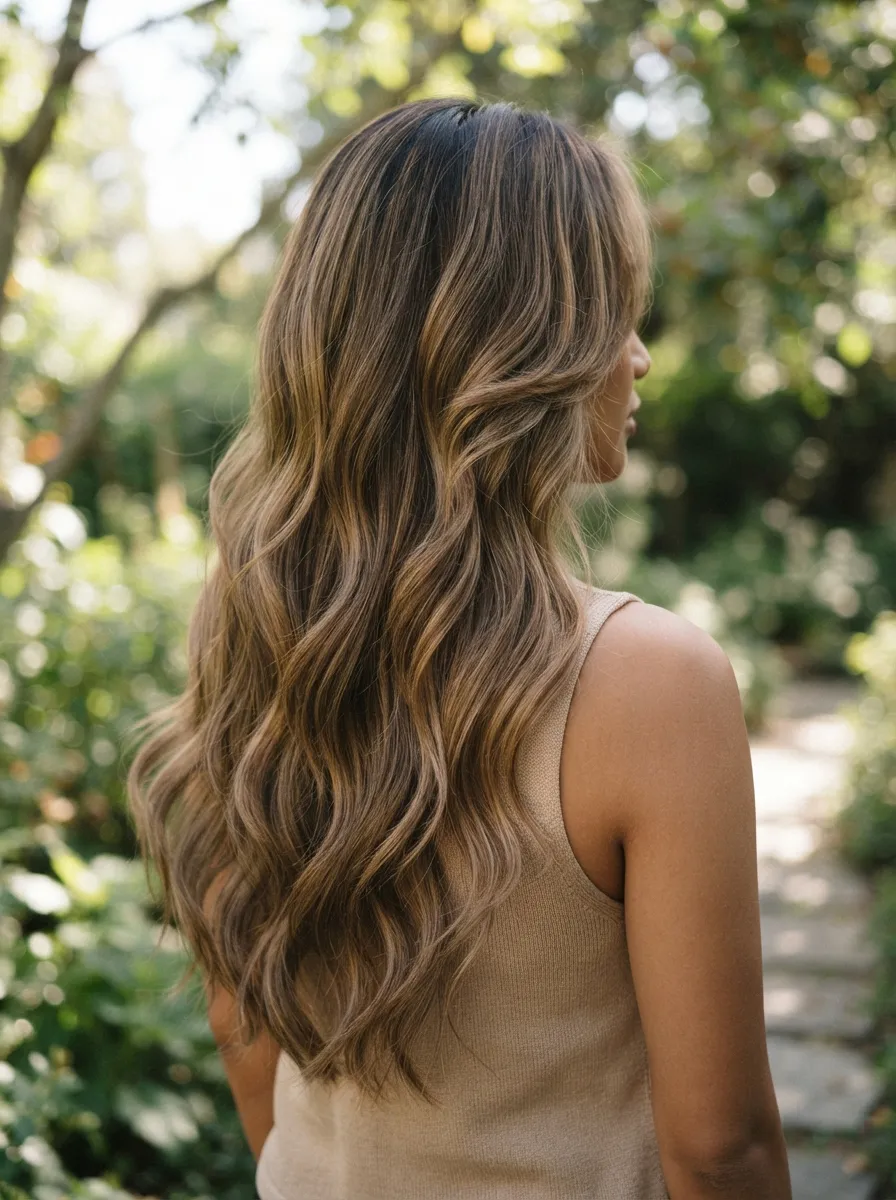
Natural waves and butterfly layers work well together because the waves already create separation between sections, and the layers give that separation a defined shape. If your hair waves naturally, ask your stylist to cut while your hair is dry rather than wet, so they can see exactly how each layer will fall once it dries. This prevents layers from looking uneven once your natural texture returns. At home, scrunching a lightweight curl cream into damp hair and air drying, rather than brushing it out, preserves the wave pattern and keeps the layered shape looking full. Avoid brushing wavy hair once it is dry, since this can create frizz and flatten the wave pattern that gives the style its volume. A microfiber towel used to scrunch out excess water also reduces frizz compared to a regular cotton towel.
22. Butterfly Cut with Low Maintenance Styling

Not every day allows time for styling, and the butterfly cut is designed to look good even without much effort. The layers naturally fall into place as hair dries, so air drying alone often gives a soft, shaped look without any tools. Apply a small amount of leave in conditioner or curl cream to damp hair before letting it air dry to help define the natural layers as they set. If you are short on time in the morning, a quick finger comb through damp hair, rather than a full brush out, keeps the layered texture intact. This low effort routine also reduces heat damage over time, which helps thin hair stay healthier and look fuller for longer. Keeping styling simple most days makes special occasion looks feel more effective by comparison.
23. Butterfly Cut Layers Around the Face
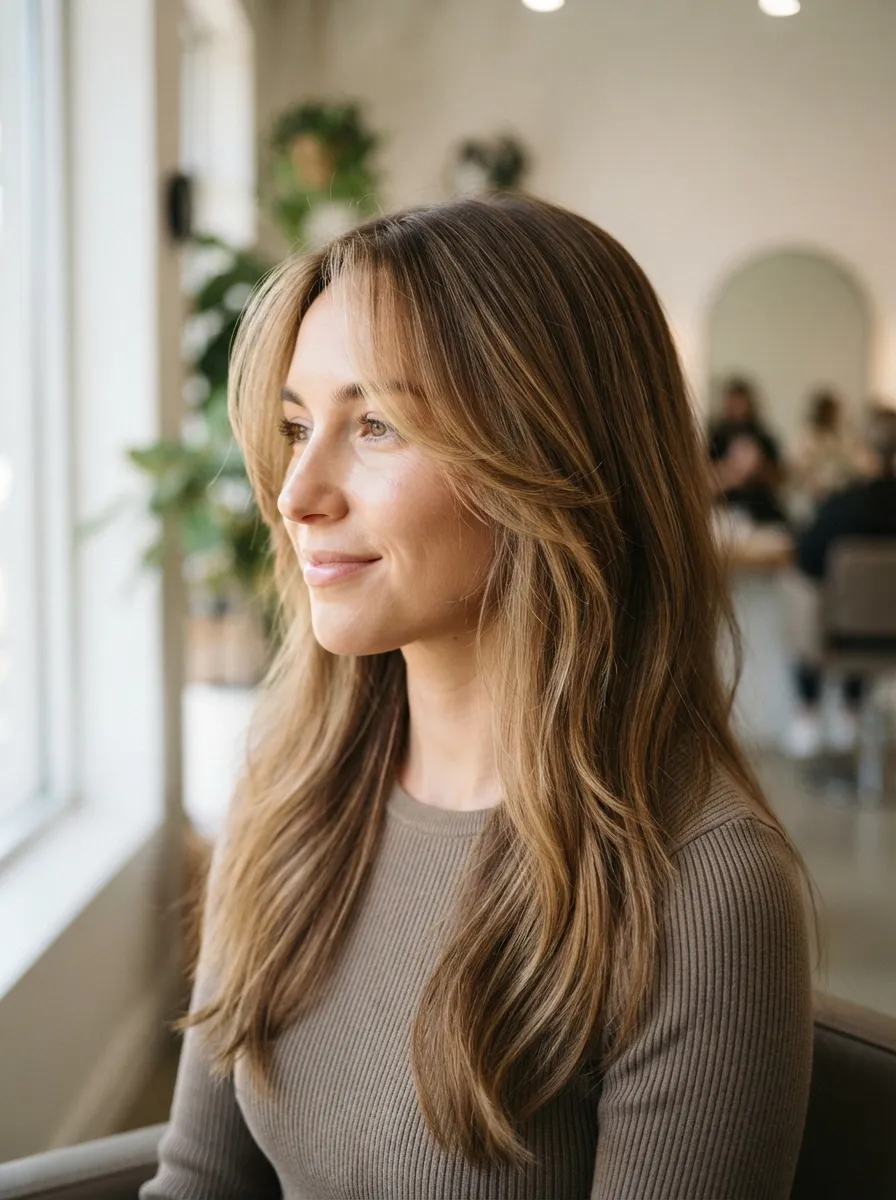
The layers closest to your face are the most defining part of a butterfly cut, and getting their length right makes a noticeable difference for thin hair. Layers that are too short can look sparse, while layers that are too long may not frame the face at all. A safe starting length for most face shapes is around the chin to just below it. Bring reference photos to your appointment and discuss your face shape with your stylist before committing to a specific length. At home, these shorter layers can be curled or waved quickly since there is less hair to work with, making them a fast way to refresh your entire look. Trimming these pieces yourself every few weeks with sharp small scissors, taking off only a quarter inch at a time, keeps them from growing out and losing their frame.
24. Butterfly Cut with Soft Bangs
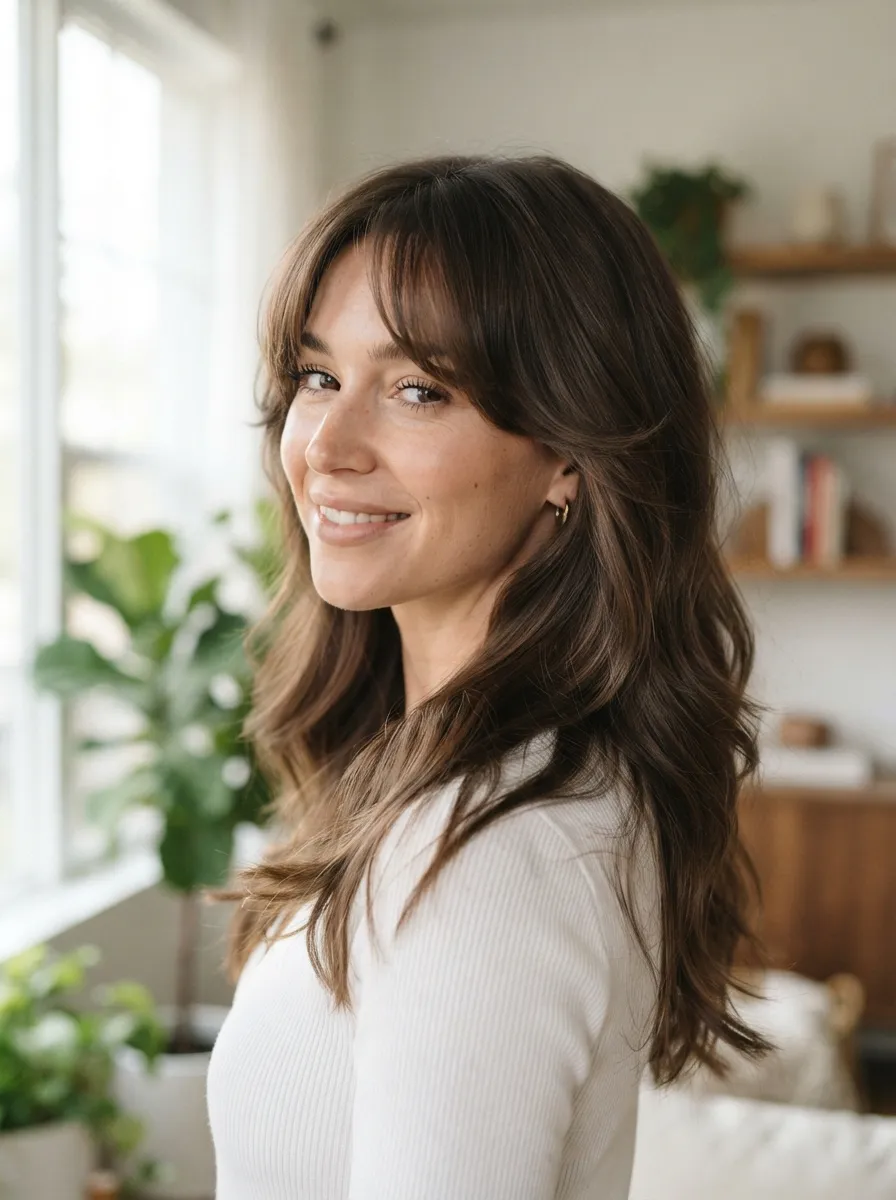
Soft, wispy bangs that blend into the layers of a butterfly cut add fullness right at the hairline, an area that often looks thin first. Unlike blunt bangs, soft bangs are cut with a razor or point cutting technique so they taper gradually into the rest of the hair rather than forming a solid line. Ask your stylist to keep these bangs long enough to sweep to the side on days you want them out of your face. A small round brush and low heat setting on your dryer keeps soft bangs from looking flat, curving them gently away from your forehead. If you decide bangs are not for you later, their gradual blend into the layers makes the grow out process far less awkward compared to blunt bangs, since there is no harsh line to wait out.
25. Butterfly Cut for Special Occasions
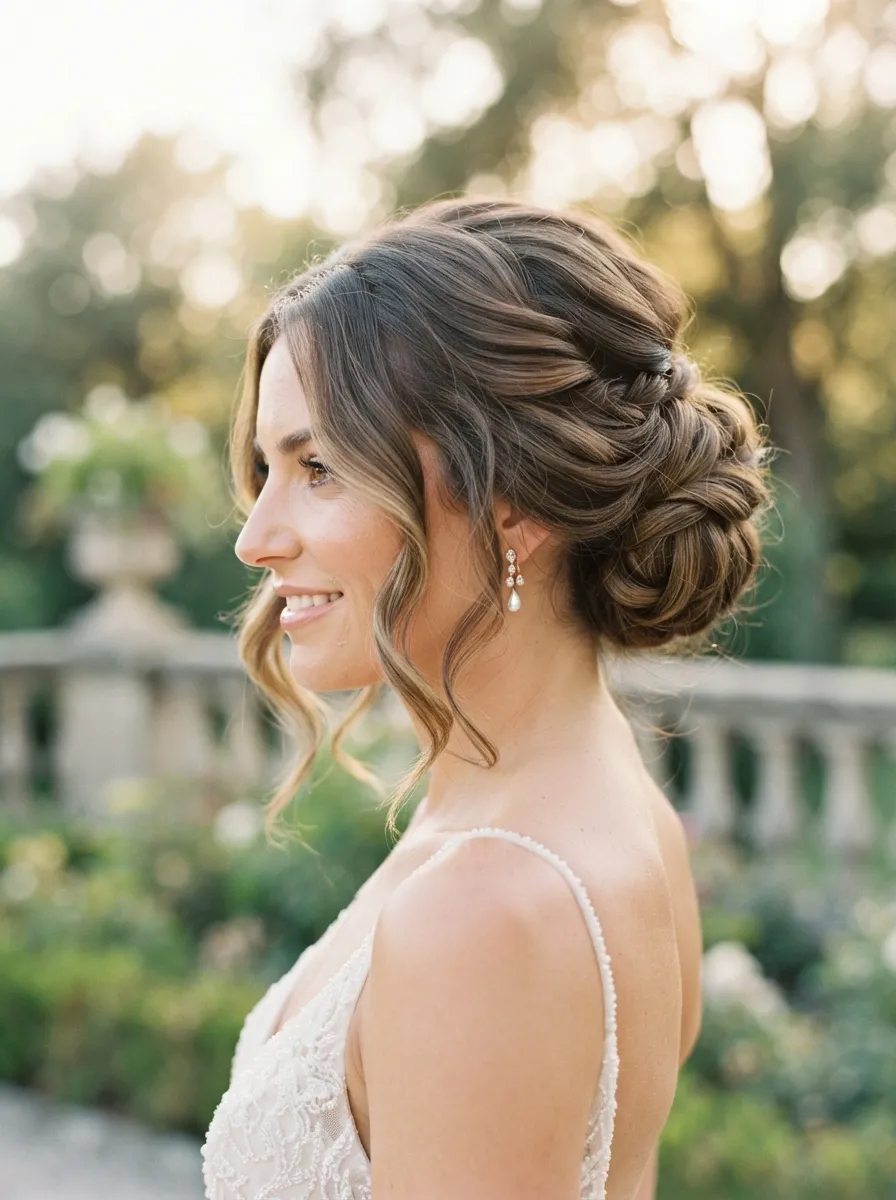
For weddings, parties, or formal events, the layers in a butterfly cut make updos look more intentional and full. Loose face framing pieces can be pulled out of an updo to soften the overall look, using the shortest layers as a natural guide for where to leave hair free. Curl these loose pieces lightly before securing the rest of your hair up, so they frame your face with movement rather than falling flat. A few strategically placed bobby pins, hidden underneath the top layer of hair, can hold an updo in place without needing professional styling tools. This approach lets you create a polished, special occasion look at home, saving the cost of a salon updo appointment while still using the shape your cut already provides.
26. Butterfly Cut Home Trim Tips
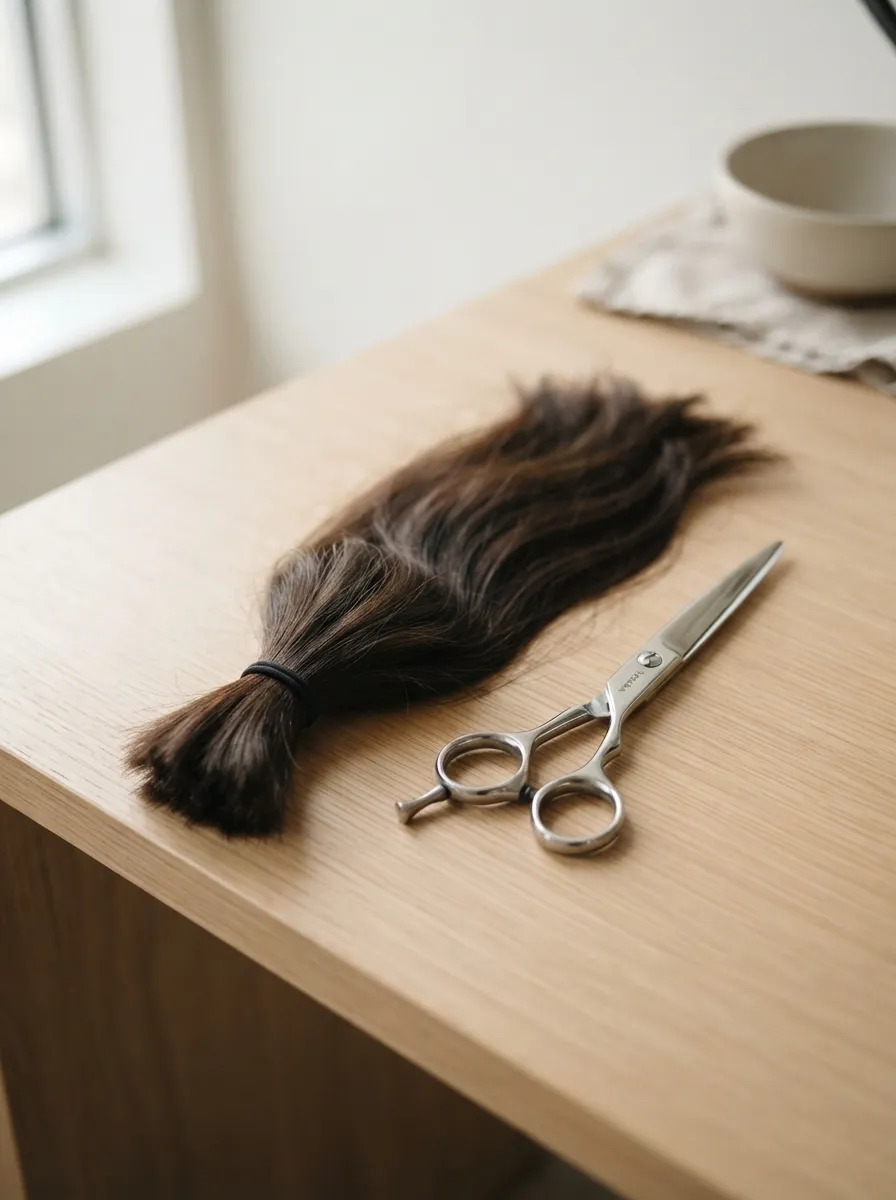
Maintaining a butterfly cut between salon visits does not have to mean expensive trips every few weeks. Small at home trims, focused only on split ends and the shortest face framing layers, can extend the life of your cut. Use sharp hair cutting scissors, never household scissors, since dull or improper blades can cause fraying that makes thin hair look rougher. Section your hair the same way your stylist would, working in small parts, and only remove tiny amounts at a time. Focus on symmetry by checking both sides in a mirror before finishing. This simple habit keeps your layers looking fresh and prevents the shape from growing out unevenly, saving money on frequent professional visits while still keeping the fuller, textured look the butterfly cut is known for.
Conclusion
The butterfly cut proves that thin hair can still look full, textured, and shaped without expensive treatments or constant salon visits. From face framing layers to simple home styling tricks, each idea above offers a way to build volume, add movement, and highlight the natural shape of your hair. Try starting with just one or two of these techniques, like a root volume spray or a low cost trim between appointments, before adding more into your routine. Small, consistent changes often make the biggest difference over time. Whichever version of this cut you choose, the goal stays the same: layers that work with your hair, not against it, giving thin strands the fuller look they deserve.
Leave a Reply