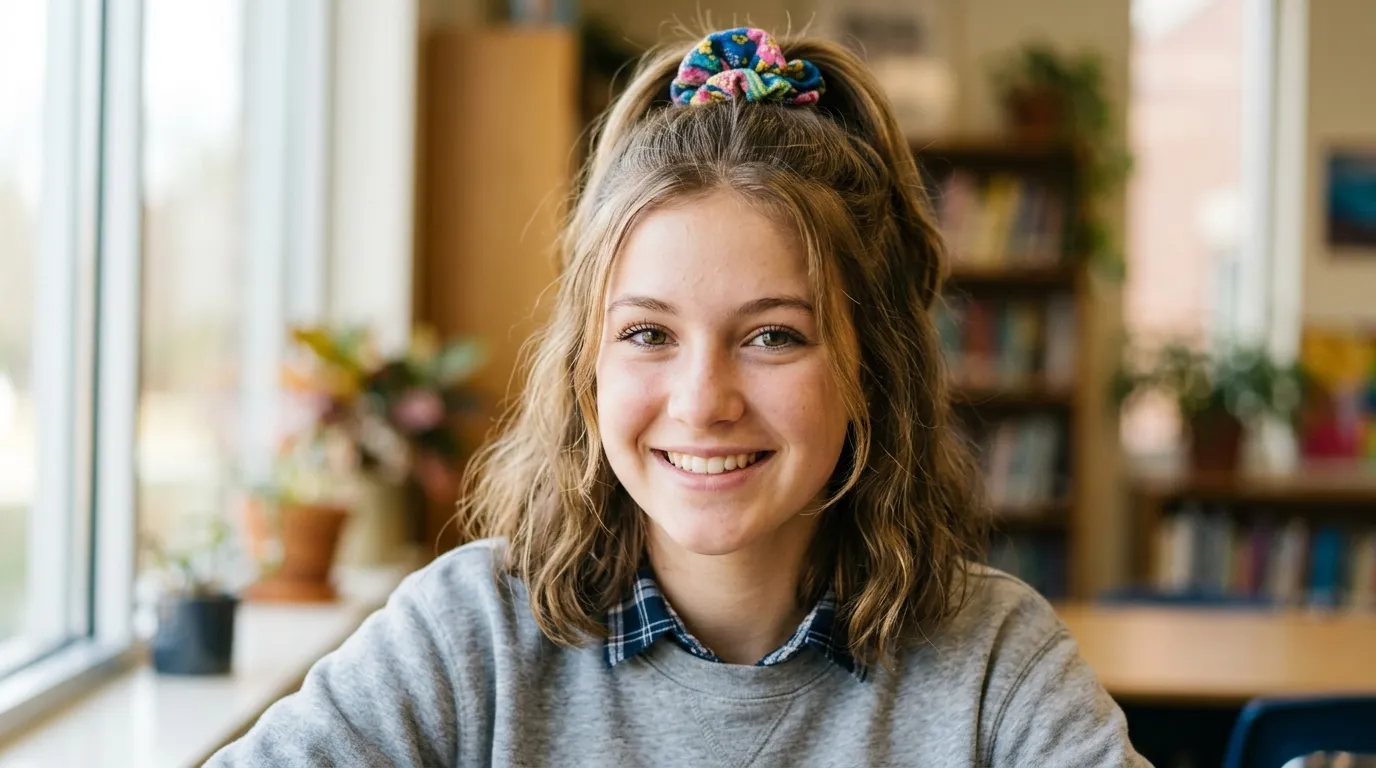
1. Back to School Hairstyle Ideas Five-Minute High Ponytail
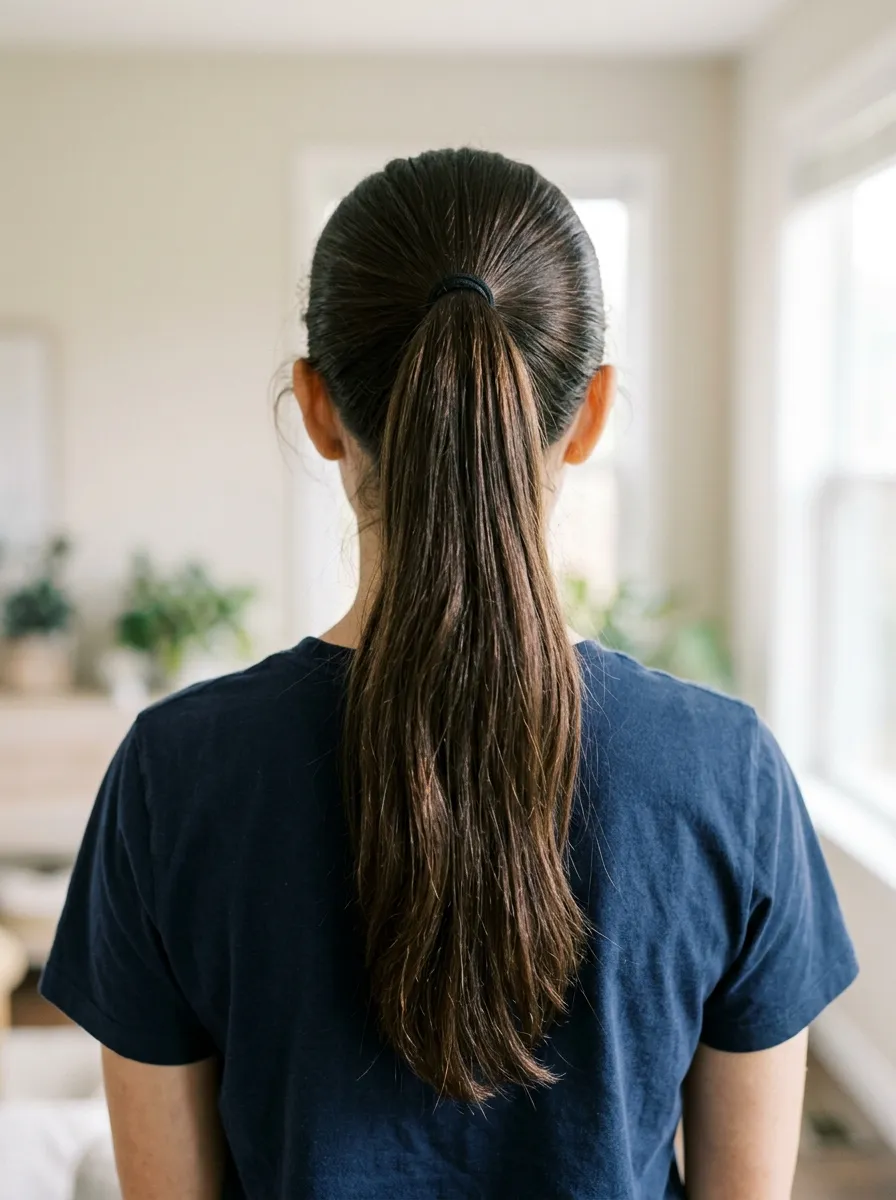
The high ponytail is one of the fastest and most reliable back to school hairstyles. It keeps all the hair off the face and neck, stays in place through an entire school day, and can be done in under two minutes with practice.
Gather all the hair to the crown with your fingers and secure with a strong elastic. If the top looks bumpy, use the tail of a comb to smooth the sections before the elastic goes in.
Wrap a thin piece of hair from the ponytail around the elastic and pin underneath to hide the band and make the style look more polished. This takes thirty seconds and significantly changes the finished quality.
A smooth, high ponytail suits every face shape. The height creates a natural lift and keeps everything clean.
For second or third day hair, a dry shampoo at the roots before gathering adds volume and makes the ponytail look freshly washed.
Budget tip: A pack of strong hair elastics costs under $3 at any drugstore. Keep a few in your backpack for mid-day touch-ups. A silk scrunchie from a dollar store can replace the wrapped piece for a slightly more casual but equally polished look.
2. The Easy Low Bun
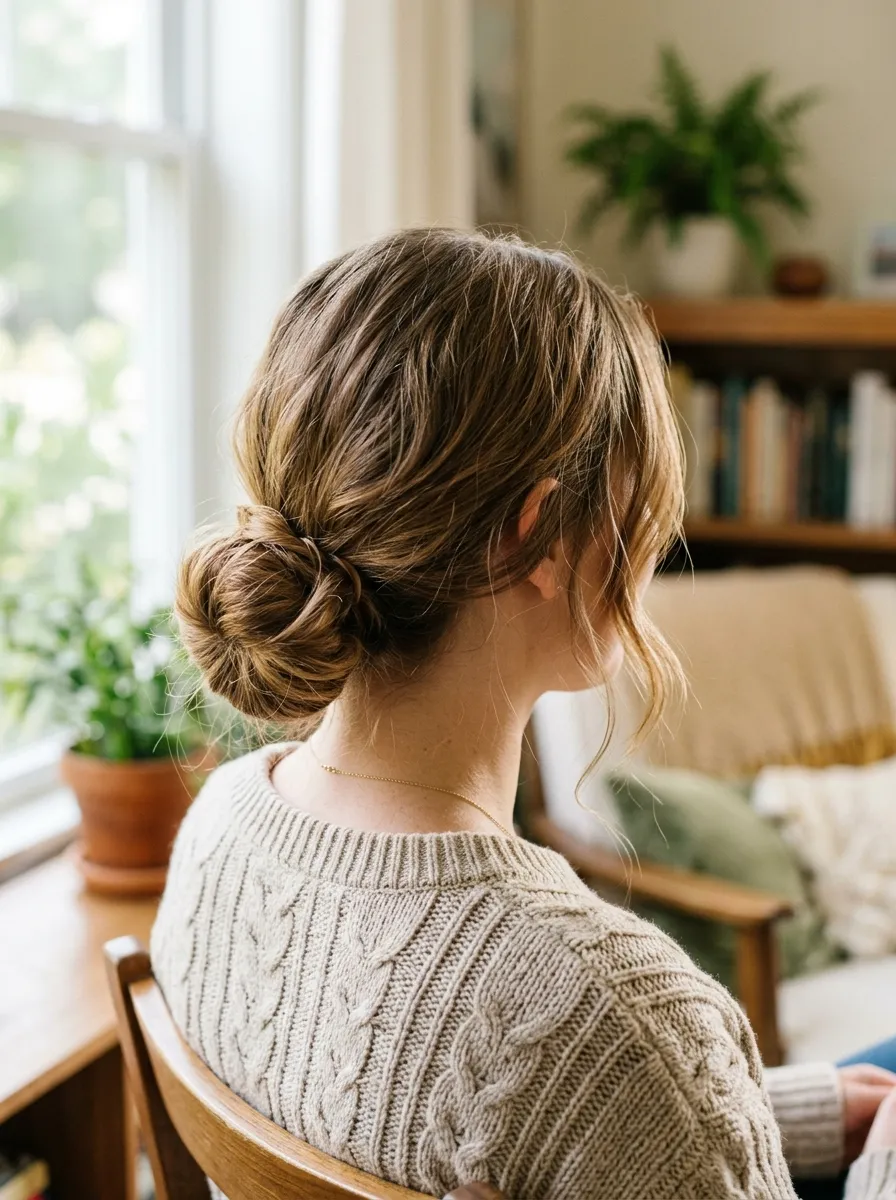
A low bun is a school morning classic for good reason. It is fast, stays put all day, and looks intentional even when it took less than three minutes.
Gather all the hair into a low ponytail at the nape. Twist the ponytail around its base and secure the coiled bun with bobby pins and the original elastic.
Do not over-tighten or over-pin. A slightly loose, casual bun looks better than a rigidly tight one and is also more comfortable to sit in a classroom chair for six hours.
Let a few face-framing pieces fall forward naturally. If your hair does not have natural face-framing layers, pull a few strands out intentionally from the front after securing the bun.
This works on all hair lengths from shoulder to very long. For shorter hair, the bun will be small but no less effective.
A claw clip can replace the bobby pins entirely. Just gather, twist, and clip. Done in under sixty seconds.
Budget tip: A large claw clip costs under $2 at a dollar store. It is genuinely one of the most practical school bag accessories you can own. Grab a few in neutral colors and one or two fun patterns.
3. Dutch Braid Pigtails
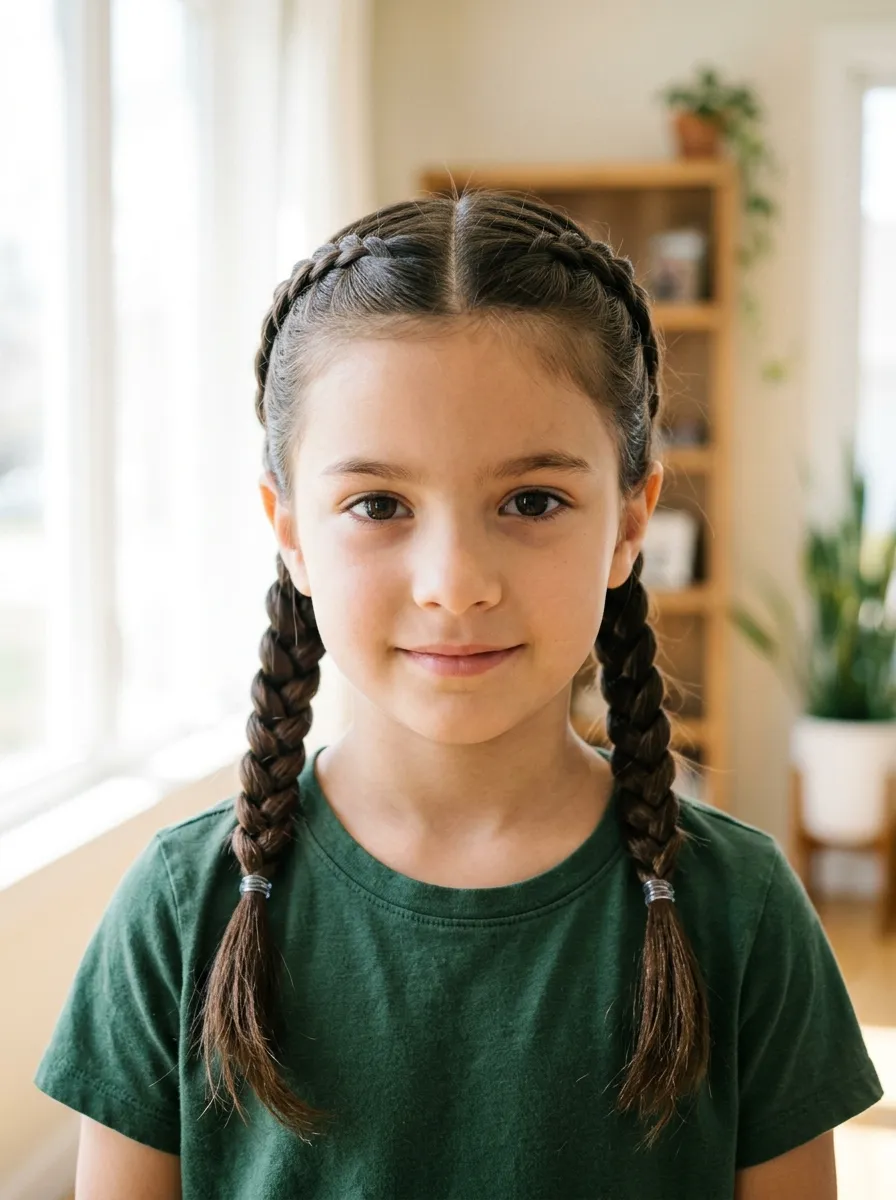
Dutch braid pigtails are a favorite for school because they last the entire day, keep hair completely under control, and look deliberately styled. The raised Dutch braid pattern makes this look far more detailed than a plain braid with almost no extra time once you know the technique.
Part the hair down the center. Work on one side at a time. Start a Dutch braid at the front hairline and work toward the nape, crossing sections under rather than over.
The under-crossing is what makes a Dutch braid sit raised above the head rather than flat against it. Secure each braid at the end with a small elastic.
This style holds up through PE class, outdoor activities, and windy school walks. The Dutch braid grips the scalp securely.
For young children, a parent can complete both braids in about five minutes once comfortable with the technique. Practice during a less rushed evening rather than learning it on a school morning.
Budget tip: Small colored elastics are widely available in bulk packs at dollar stores and craft stores for very little money. Let younger children choose their own colors to make the morning routine more fun.
4. Quick Fishtail Side Braid
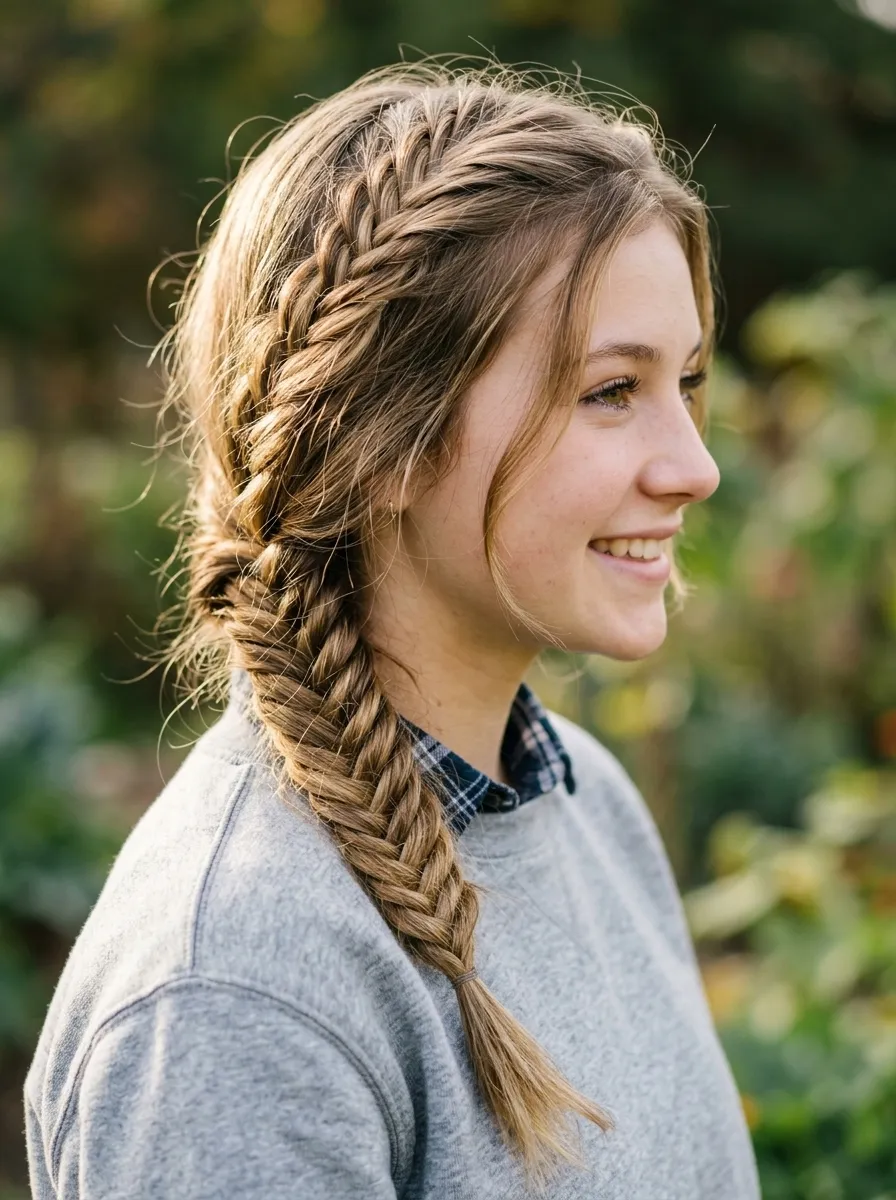
A fishtail braid looks much more complex than it is once you understand the two-section pull-through technique. Divide the hair into two sections. Pull a thin piece from the outer edge of the right section and add it to the left. Repeat from the left side to the right.
Keep pulling from the outer edges only and the fishtail pattern forms automatically as you work down to the end.
Widen the braid after securing by gently pulling each section outward from bottom to top. This adds fullness.
The fishtail side braid holds beautifully through a school day. The two-section technique is naturally self-locking.
This works on medium to long hair and suits all hair textures. Wavy hair creates a particularly beautiful fishtail because the natural texture adds dimension to each section.
A small amount of texturizing spray or dry shampoo on the hair before braiding adds grip and prevents the sections from slipping.
Budget tip: No tools or products are needed for a fishtail braid. Just two hands and a single elastic at the end. This style costs absolutely nothing to create.
5. Half-Up Scrunchie Bun
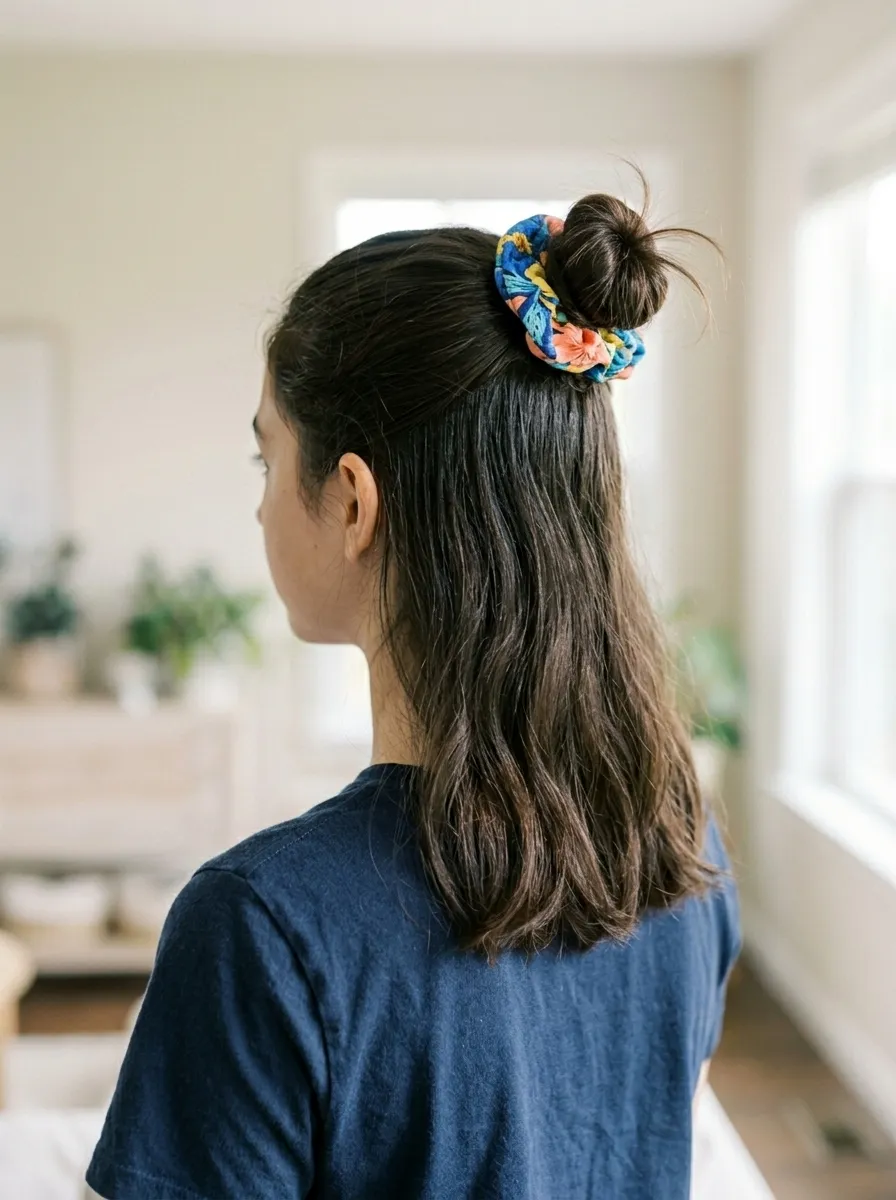
The half-up scrunchie bun is one of the most popular school hairstyles because it takes about forty-five seconds, looks casual and put-together at the same time, and works on literally any hair length.
Gather the top half of the hair from the temples upward. Twist it loosely into a small bun and secure with a scrunchie. Do not tighten the scrunchie all the way through the last loop. Leave the hair in a loop to create the bun shape.
The looser the bun, the more relaxed and intentional it looks. A too-tight half-up scrunchie bun looks like a practical decision. A loose one looks like a style choice.
Leave the bottom half completely natural. Whether it is wavy, curly, or straight, it works.
This style suits all hair textures and lengths. For very short hair, even a tiny scrunchie bun at the crown looks intentional.
Scrunchies are one of the most affordable hair accessories available. A set of ten in different colors and patterns typically costs under $5. Having a collection means matching the hair accessory to the outfit every morning.
Budget tip: Dollar stores consistently carry scrunchie sets at very low prices. Stock up at the beginning of the school year.
6. The Classic French Braid
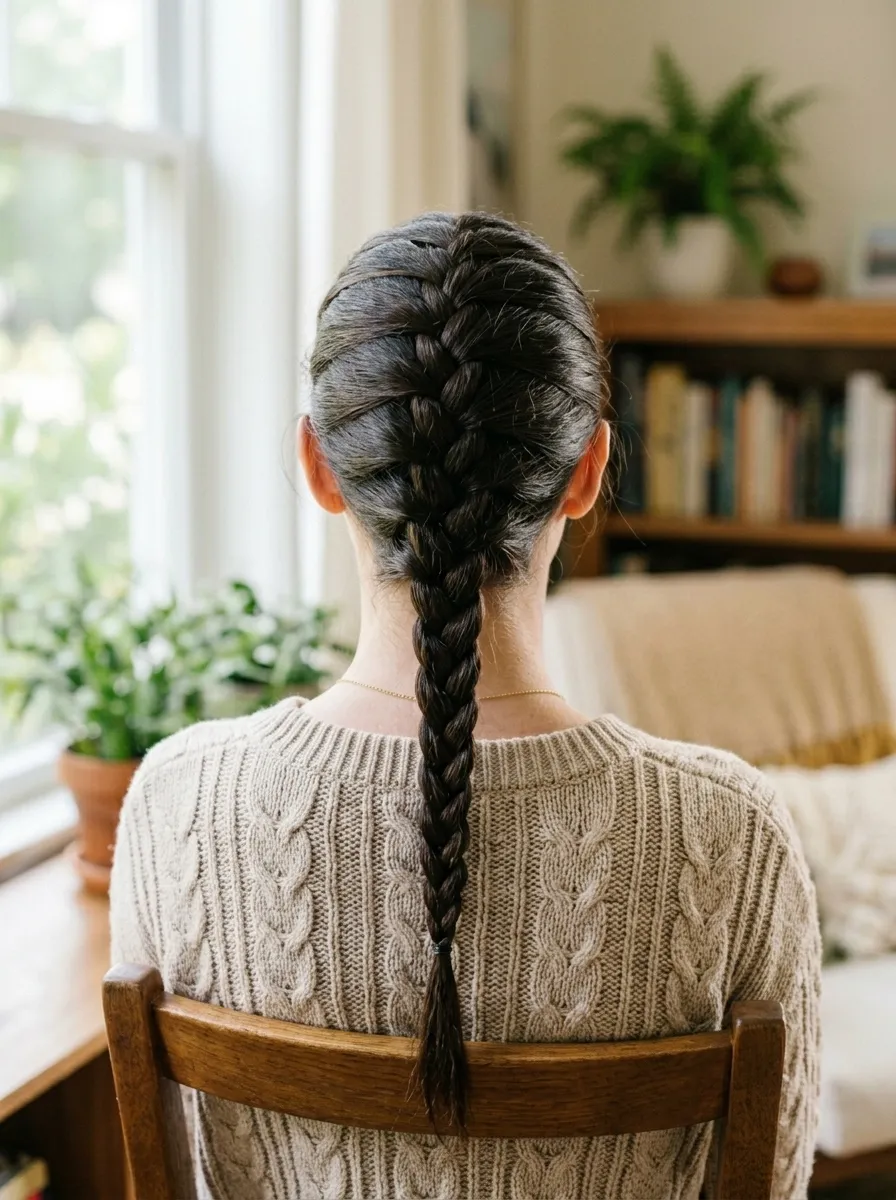
The French braid is a school morning staple that looks polished, keeps hair completely under control, and holds up through an entire school day without a touch-up.
Start at the crown with a small three-strand section. As you braid, add a thin piece of hair from each side before crossing each outer section over the middle.
Work with consistent tension throughout. Inconsistent tension creates bumps and loosens the braid before the day is done.
The French braid suits all hair lengths down to the shoulder. Below shoulder length, a proper French braid can be done with enough hair to work with.
Practice this on a weekend before needing to do it on a school morning. The technique becomes fast and easy once the muscle memory is there.
For younger students, a parent can complete a French braid in three to four minutes with practice. It is a reliable style for school photos, sports days, and regular school weeks alike.
Budget tip: No products or tools are needed. Just hair and two hands. Add a small colored elastic at the end to match a school outfit or backpack color.
7. The Bubble Ponytail
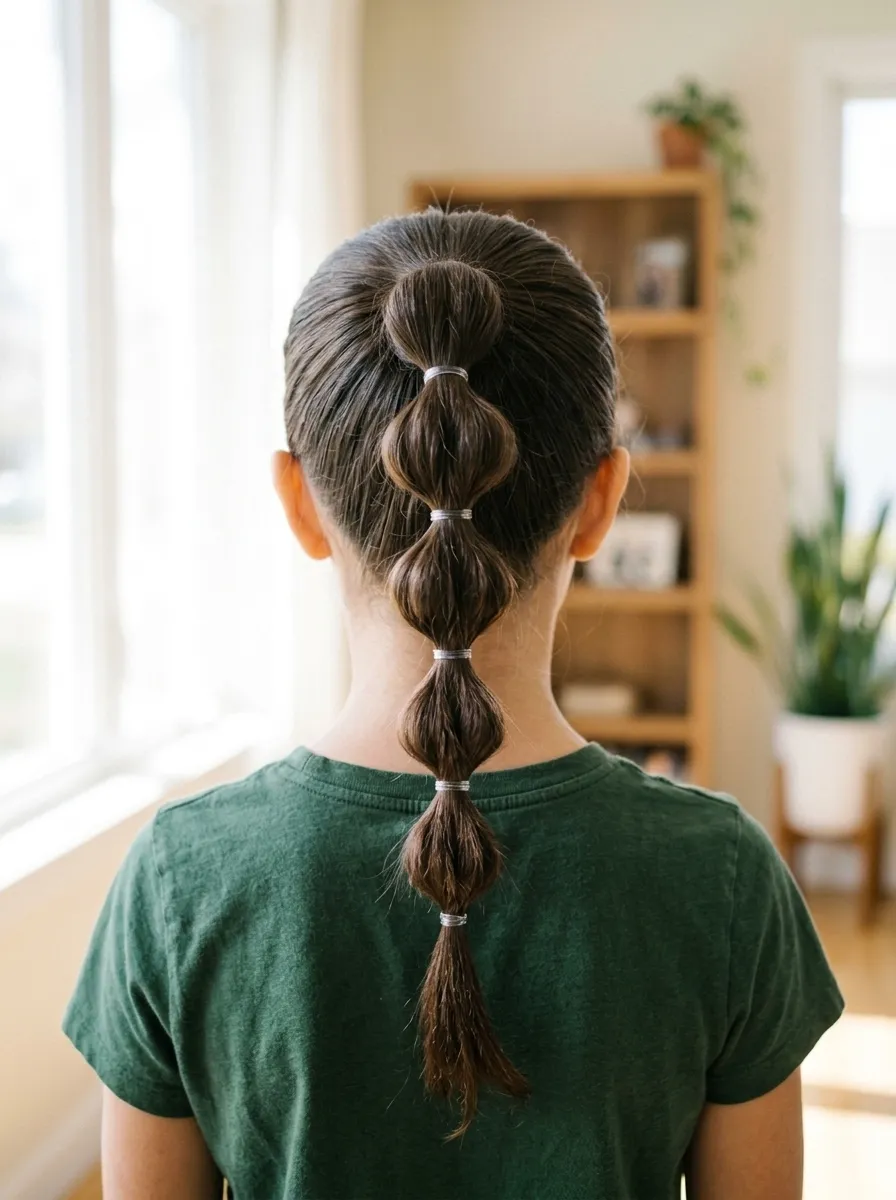
The bubble ponytail is a fun and eye-catching school style that requires no skill and only a handful of small elastics. Pull all the hair into a basic high or low ponytail. Add a second elastic two inches below the first. Puff the section between them outward to form a rounded bubble. Continue adding elastics and puffing down the entire length.
Three to five bubbles is the right amount for most ponytail lengths. Too many small bubbles look cluttered. Three or four full, rounded ones look deliberate and fun.
Use matching elastics for a clean look or alternate colors for a playful, expressive result.
This style is excellent for days when the hair is slightly wavy or textured from sleeping. The bubbles disguise any unevenness and actually look better with some natural texture.
Budget tip: A bag of small clear elastics costs under $2 and contains enough for months of bubble ponytails. If using colored elastics for a patterned effect, a mixed-color pack from a dollar store works perfectly.
This is one of the most popular back to school hairstyles on social media right now and it genuinely takes under three minutes.
8. Two-Minute Twisted Half-Up
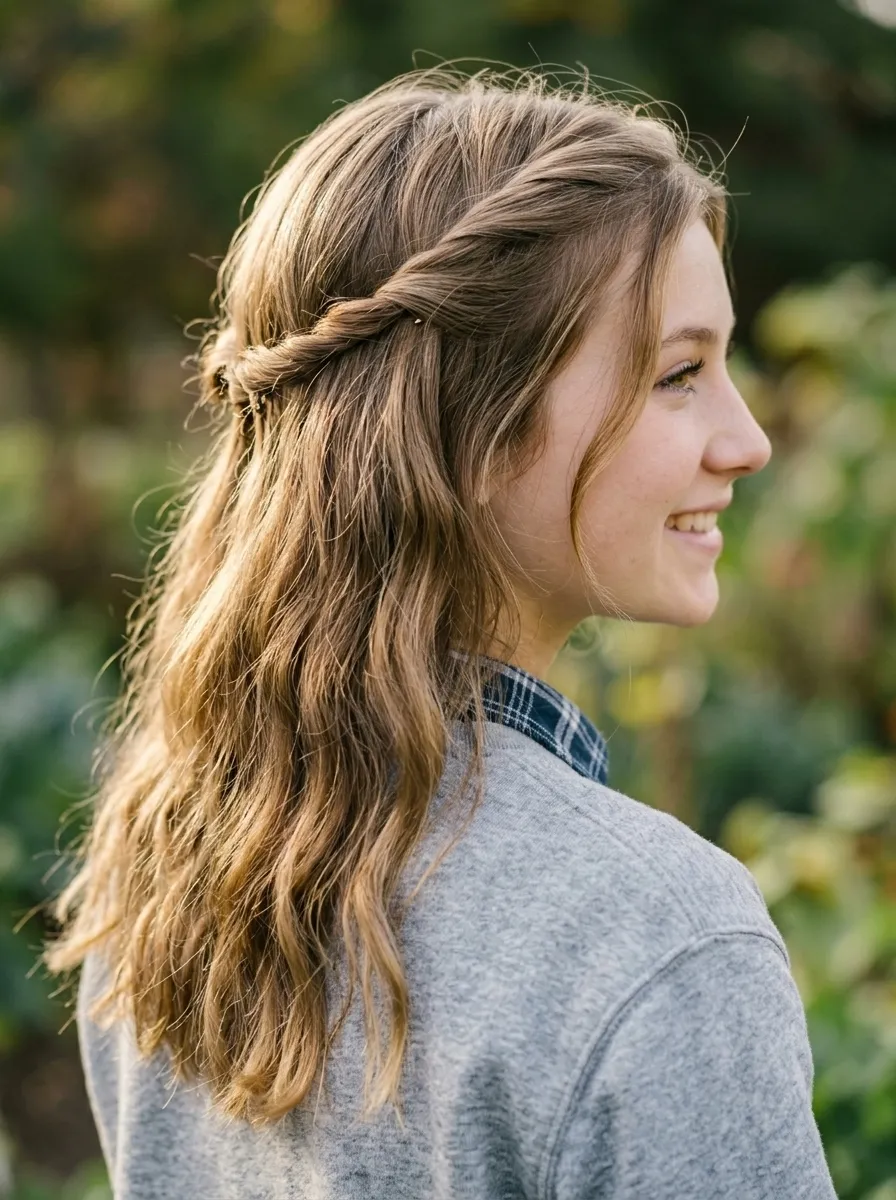
The twisted half-up takes two sections of hair from each side of the front, twists each one back, and pins them together at the center back of the crown. It is a thirty-second style that creates the appearance of a delicate half-up without any braiding or advanced technique.
Take a section from the right temple. Twist it back toward the center. Repeat from the left side. Overlap the two twisted sections at the center and pin with two crossed bobby pins.
Use bobby pins that match your hair color so they disappear into the style. This is the one detail that separates a casual pin from a polished look.
The rest of the hair falls completely free below the twist.
This is an excellent style for wavy or naturally textured hair. The waves in the free-falling sections look beautiful against the neat twisted top.
It also works on straight hair where the contrast between the twisted top and the smooth falling sections creates a clean, deliberate effect.
Budget tip: A pack of twenty bobby pins in a hair-matching color costs about $1 to $2 at any drugstore or dollar store. Keep them in a small dish near the bathroom mirror for easy access on school mornings.
9. The Sleek Low Ponytail
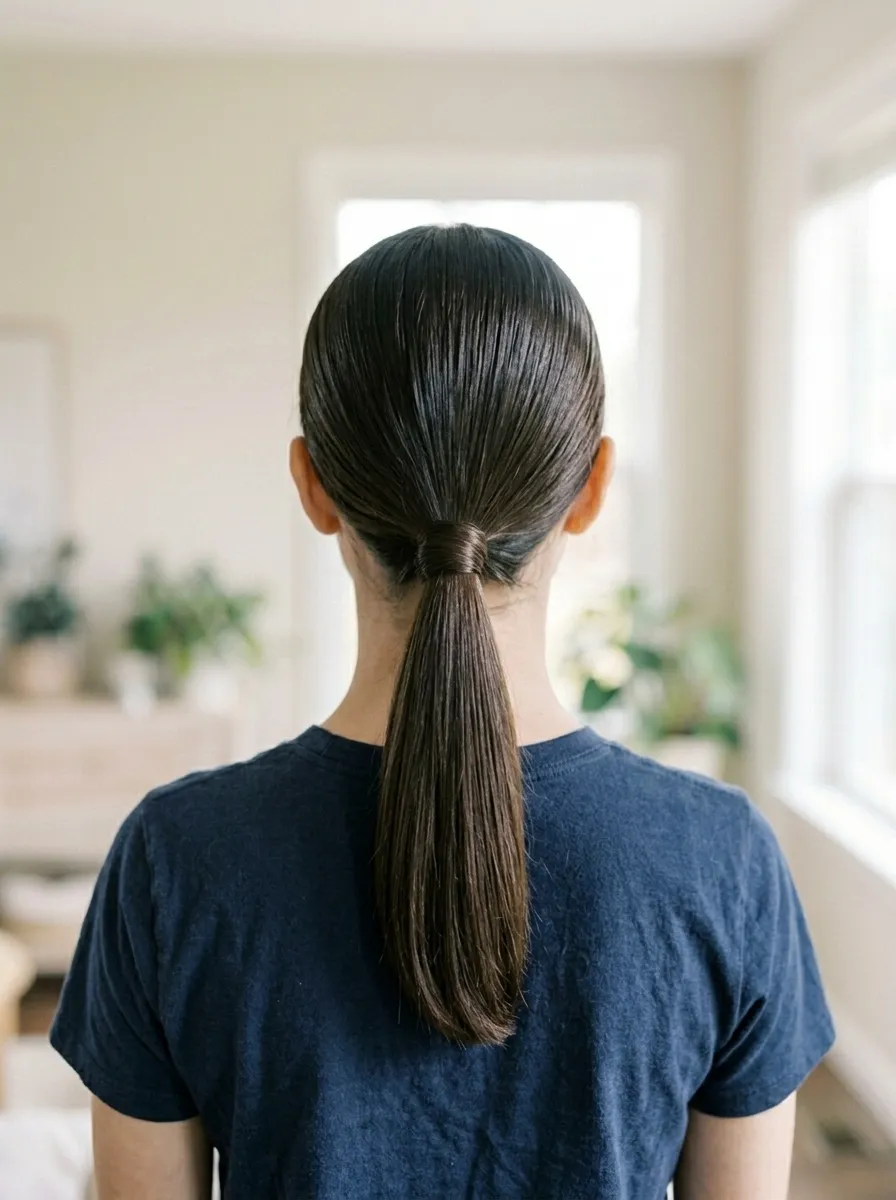
A sleek low ponytail creates a polished, mature look that is equally appropriate for school presentations, photo days, and regular class days. It communicates effort even though it takes almost none.
Smooth the hair with a boar bristle brush or a fine-tooth comb before gathering. Apply a small amount of edge control or smoothing gel to any flyaways along the top and sides.
Gather at the nape and secure with a strong elastic. Wrap a thin piece of hair from the ponytail around the elastic and pin underneath. Smooth the wrapped piece with a bit of gel for a seamless finish.
This style works best on straight and slightly wavy hair. Very curly hair can achieve a sleek ponytail with a gel and smooth-down technique but requires slightly more product.
A silk or satin-lined elastic reduces breakage at the ponytail base for people who wear this style regularly.
Budget tip: Edge control gel is available at beauty supply stores and drugstores for around $4 to $6 and lasts months with daily use. It is one of the most cost-effective styling products for this type of look.
10. Easy Space Buns
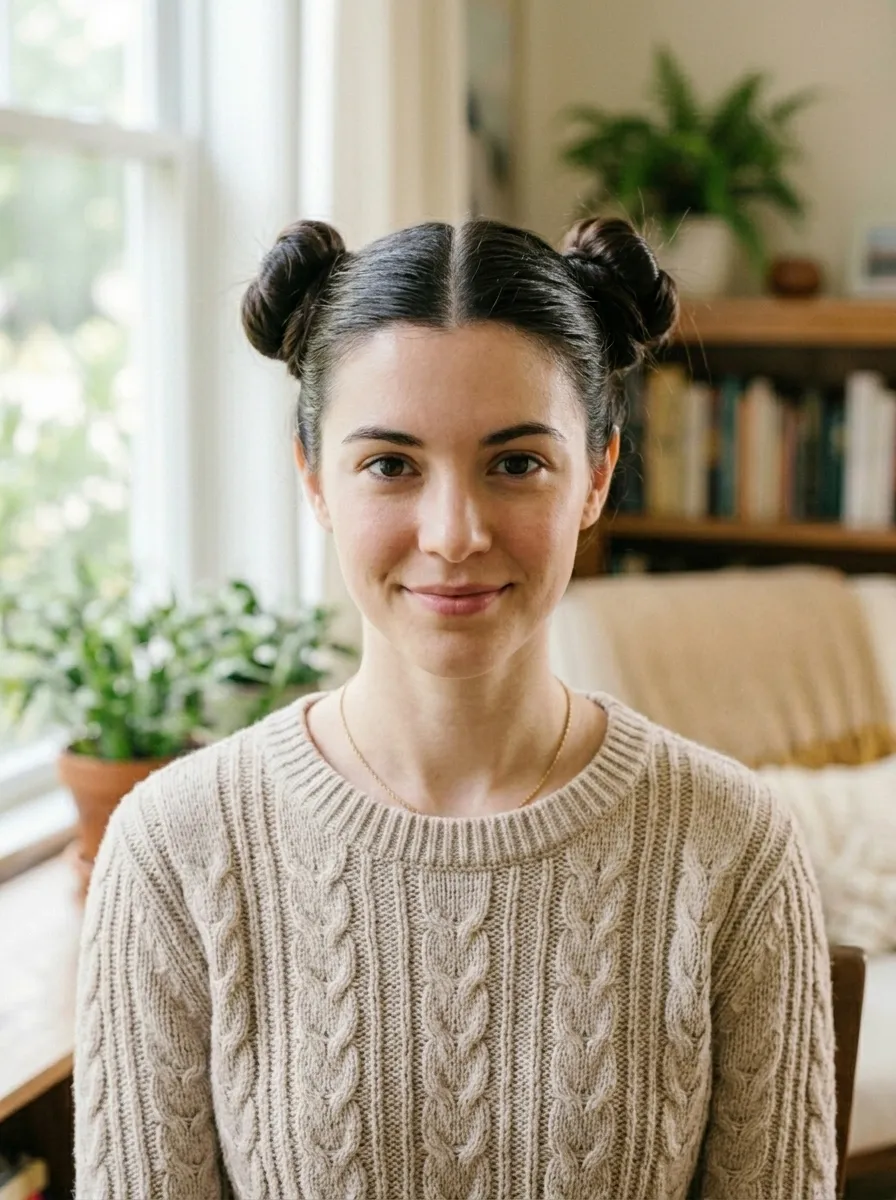
Space buns are a consistently popular back to school style because they are playful, expressive, and very fast to create. Part the hair down the center. Gather each side into a ponytail at the upper side of the head. Twist each ponytail and wrap it into a small bun. Secure each bun with an elastic and a few bobby pins.
Position both buns at the same height for a symmetrical result. Use the center part as a reference guide.
This takes about two minutes total. The first few attempts may take longer as you figure out the right placement and size, but it becomes very quick with practice.
Space buns work on all hair textures. On curly hair, the buns have a particularly full, rounded quality. On straight hair, they look clean and neat.
Decorate each bun with a colorful scrunchie or a small clip for a fun, personalized detail.
This style holds well through a full school day because each bun is independently secured with an elastic. Even if one becomes slightly loose, the overall look stays intact.
Budget tip: Two small elastics and four bobby pins are all you need. Both are available cheaply at any drugstore.
11. The Overnight Braid for Morning Waves
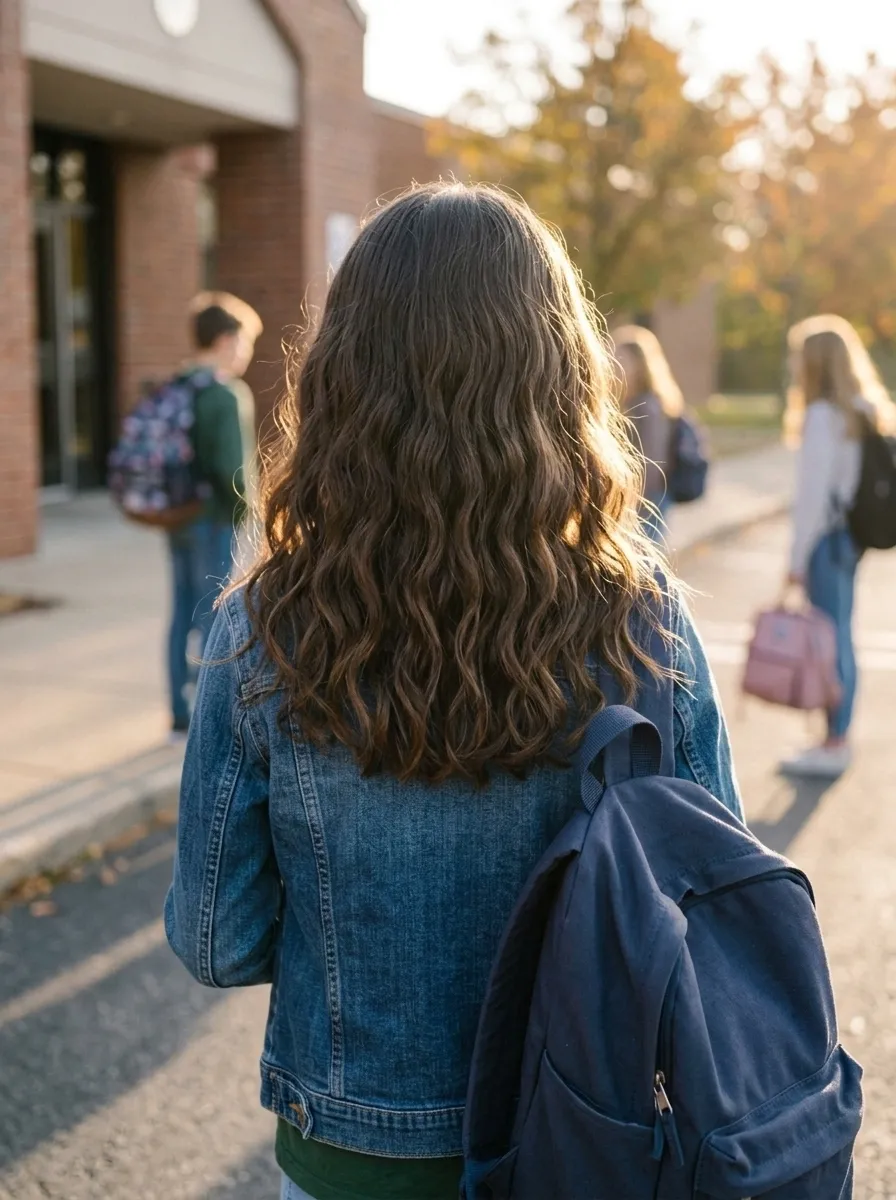
This is a zero-morning-effort technique that produces beautiful waves for school without any heat tools. Braid the hair the night before and release in the morning.
Braid damp hair before bed for the most defined waves. Divide into two sections for larger, looser waves. Divide into three or four sections for smaller, more defined waves.
Use simple three-strand braids. Secure each with a small elastic at the end. Sleep in them and release in the morning.
Run fingers lightly through the released waves for separation. A tiny amount of light-hold cream smoothed through the hands and over the surface reduces frizz.
The wave pattern from overnight braids lasts all day. It requires zero morning effort because the prep happens the night before.
This works on straight, slightly wavy, and naturally textured hair. Very curly hair produces a different result but can still use this technique for a stretched, elongated curl pattern.
Budget tip: This technique costs absolutely nothing. No heat tools, no products needed. The only investment is two minutes the night before.
For school mornings when time is extremely tight, this preparation trick changes everything. Wake up, release, and go.
12. Simple Side Braid
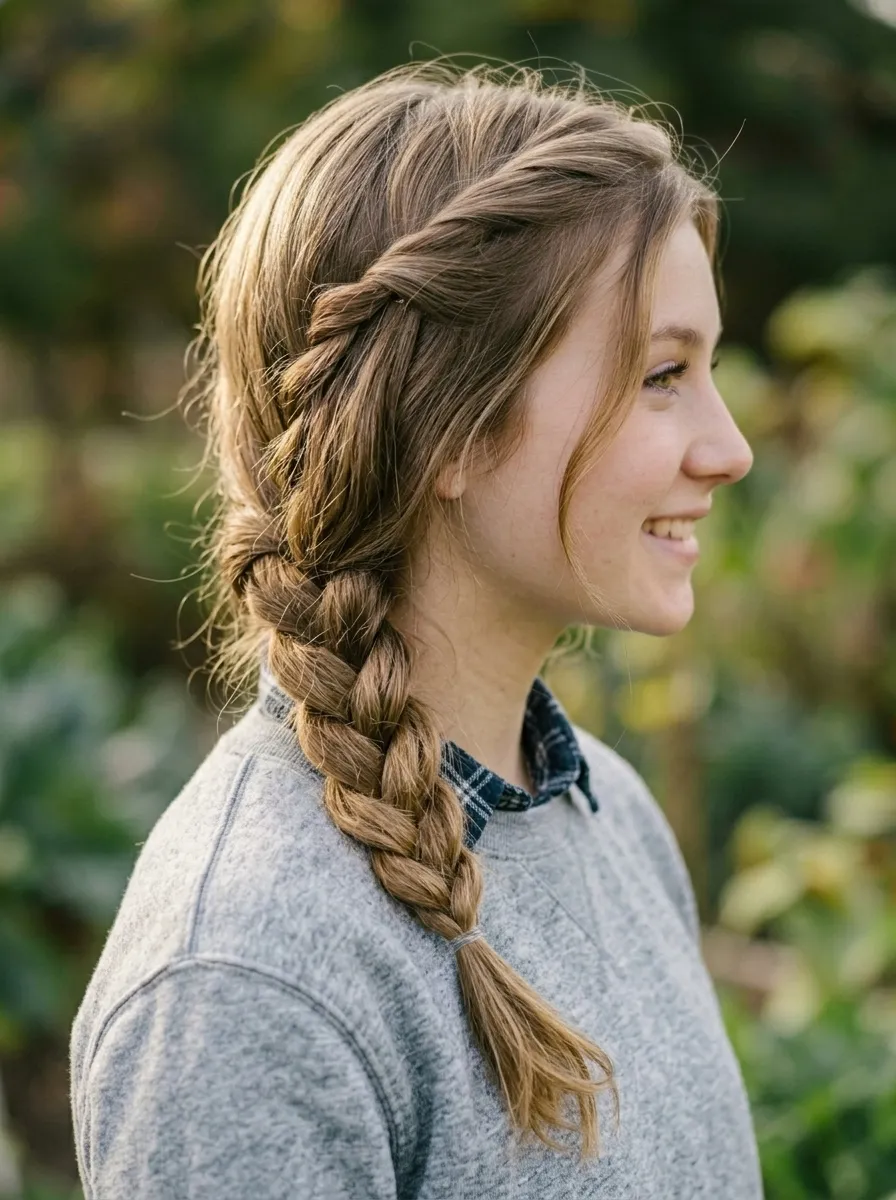
A simple three-strand side braid is one of the most reliable and fast school hairstyles available. Sweep all the hair to one side, gather below the ear, and braid straight down to the end. Secure with a small elastic.
After securing, gently pull each side of the braid outward from bottom to top to widen it. This makes the braid appear fuller and more deliberate.
Leave a few face-framing pieces loose at the front before starting the braid.
The side placement is what separates this from a standard center braid. The asymmetric drape over one shoulder is both more flattering and more visually interesting.
This works on shoulder-length and longer hair. For medium-length hair, a shorter side braid reaching the collarbone still looks intentional.
Add a small colorful elastic at the end to personalize the style. Or wrap a thin ribbon around the elastic for a more dressed-up look on photo days or special school events.
Budget tip: No products needed. Zero cost beyond the elastic. A three-strand braid takes approximately ninety seconds with any practice at all.
13. Knotted Half-Up Style
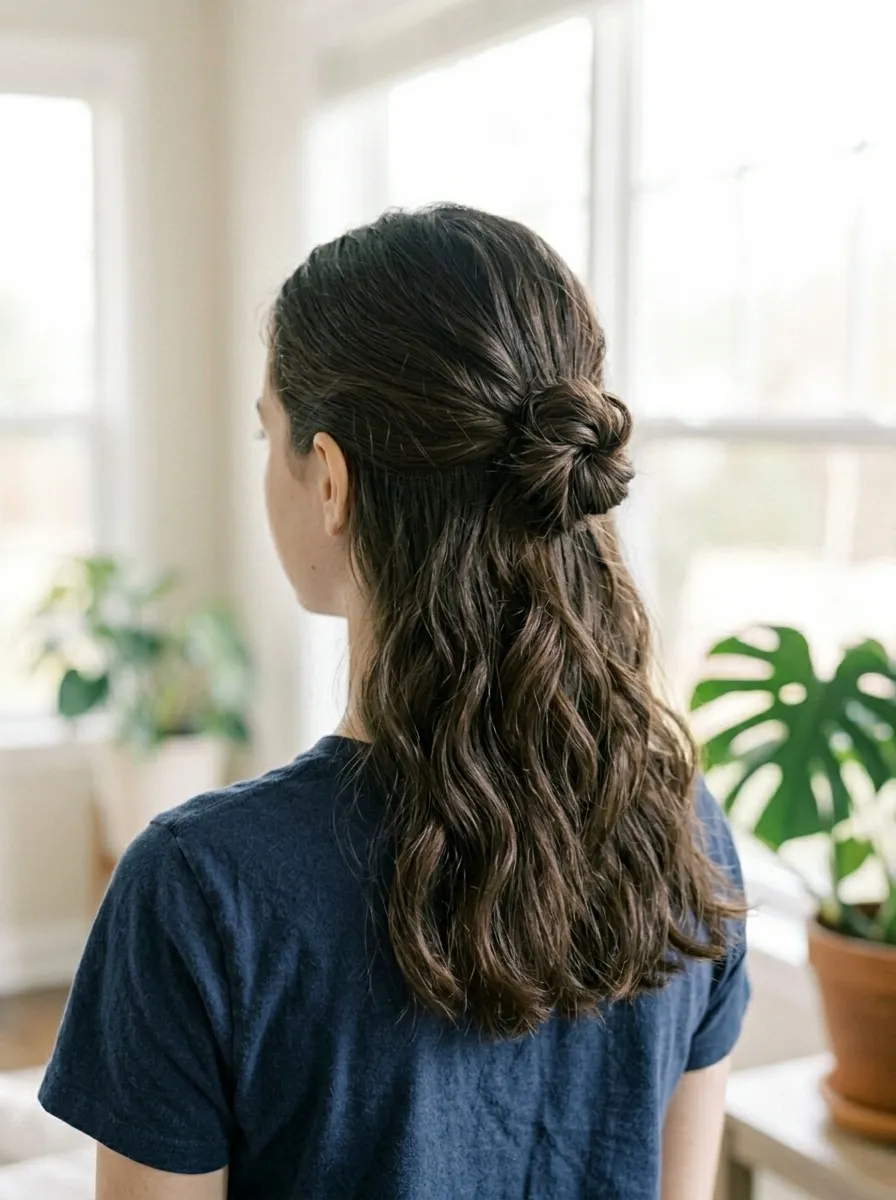
The knotted half-up is a quick style that looks more creative than a standard half-up ponytail. Gather the top section of hair as if making a ponytail but instead of securing with an elastic, tie the gathered section into a simple knot and pin the ends under with bobby pins.
The knot should be loose and relaxed rather than tight and formal. A tight knot looks awkward and is less comfortable. A loose knot looks styled.
Pull the knotted section slightly forward after pinning to give it a rounded, full appearance.
The rest of the hair falls completely free below the knotted section.
This style works on medium to long hair with enough length in the top section to form a knot. Very short top sections may not have enough length. In that case, use a claw clip instead of pins.
This style suits wavy and naturally textured hair particularly well because the texture adds dimension to the knotted section.
Budget tip: Only two to four bobby pins needed. If the hair is thick, use a small elastic to secure the knot before pinning for extra hold.
14. The Polished Top Knot
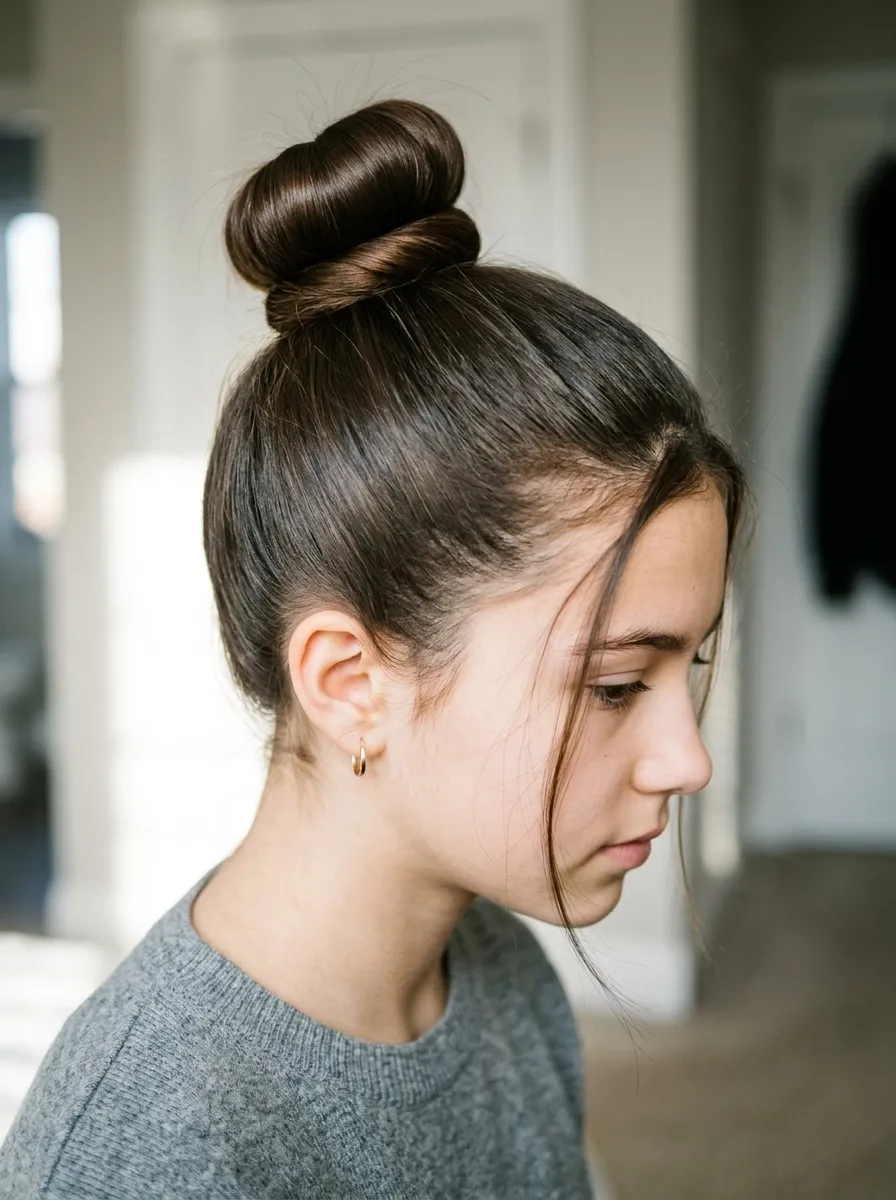
A polished top knot sits at the very crown of the head and creates a clean, elegant look that works for school presentations, photos, and regular days alike. The height of the bun elongates the face and neck.
Gather all the hair to the very top of the head. Secure with a strong elastic. Twist the ponytail and wrap it around the base in a tight coil. Secure with bobby pins.
Smooth the gathered section with a boar bristle brush before securing to reduce surface frizz and give the top knot a polished finish.
For a fully smooth result, apply a small amount of edge control or light gel through the gathered section before wrapping.
Wrap a thin piece of hair from the base around the elastic to hide it before starting the coil wrap.
This style holds very well through a full school day because the bun sits high on a sturdy base.
For shorter hair that does not create a very large bun, a small neat top knot looks equally intentional. A smaller bun is not a lesser style.
Budget tip: A strong elastic and a few bobby pins are the only requirements. Both cost almost nothing.
15. The Rope Braid Ponytail
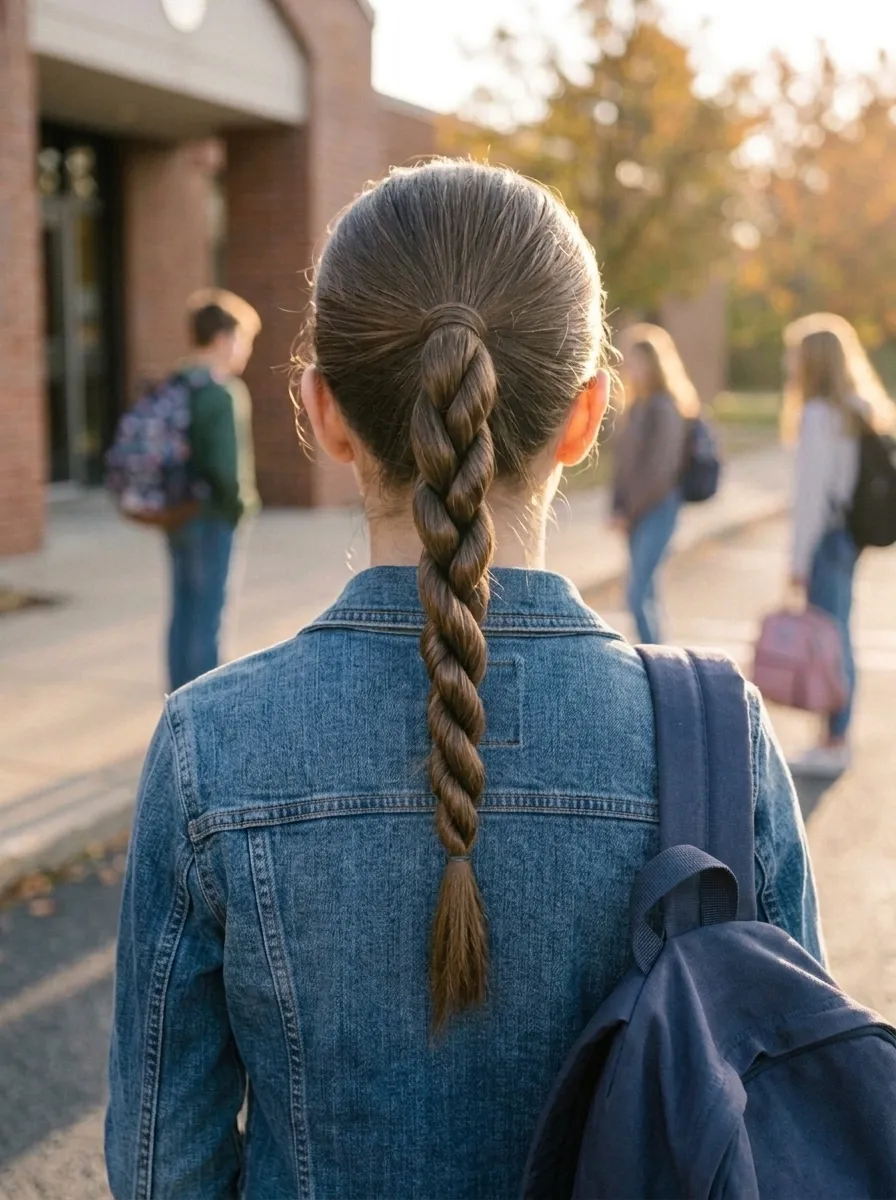
A rope braid ponytail adds a textured detail to a basic ponytail in about thirty extra seconds. Pull the hair into a ponytail first, then divide the ponytail into two sections. Twist each section in the same direction and then wrap them around each other in the opposite direction.
The opposing twist directions lock the rope braid in place. If both the twists and the wrap go the same direction, it unravels.
Secure the end with a small elastic.
The spiral rope texture looks much more detailed than a standard braid while being easier and faster to create.
This style works on ponytail lengths from short to very long. Even a shorter ponytail creates a noticeable rope texture.
For school, this style is excellent because the rope structure is self-locking and does not loosen throughout the day.
Wrap a thin piece of hair around the base elastic before doing the rope braid for a cleaner, more polished ponytail base.
Budget tip: Two elastics and two hands. Total cost is essentially zero. No additional tools or products needed.
16. Box Braids Styled Up for School
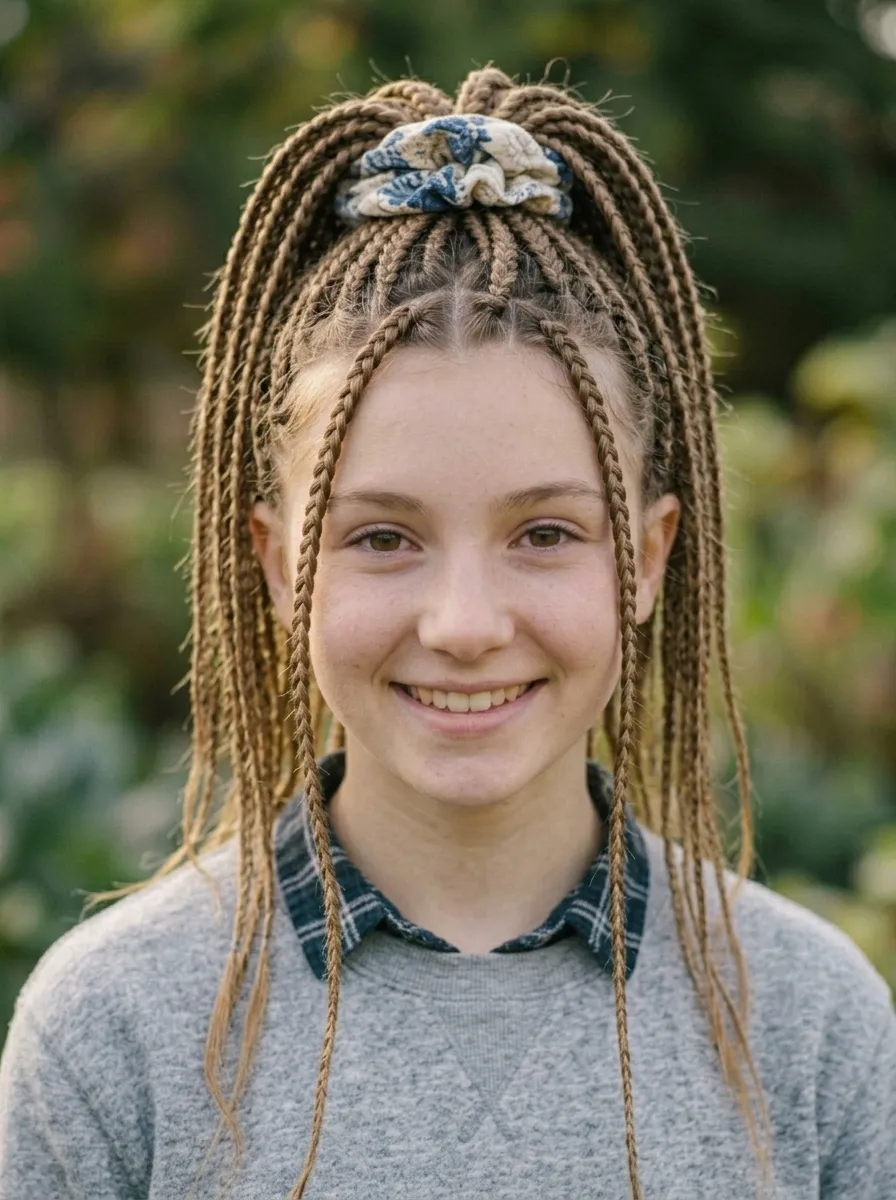
If you have box braids, cornrows, or other protective braided styles, school mornings become genuinely easy. The braids themselves do the style work. The only question is how to arrange them for school.
A high ponytail of box braids secured with a large scrunchie or a decorative elastic is one of the fastest school looks possible. Gather all the braids up to the crown and secure. Leave a few braids falling forward around the face.
This takes about thirty seconds and looks completely put-together.
Other fast options include two low buns made from the braids, a half-up gathered with a scrunchie, or all the braids pulled back and secured at the nape.
Protective styles like box braids are one of the most school-friendly hair choices because they require almost zero daily styling. The braids look neat throughout the school day with no touch-ups needed.
Decorate with colorful beads at the ends for a personalized look. Beads are affordable at beauty supply stores and add a fun detail to any braid arrangement.
Budget tip: Once the braids are installed, daily styling costs nothing. The investment is upfront in the installation.
17. The No-Heat Curls Trick
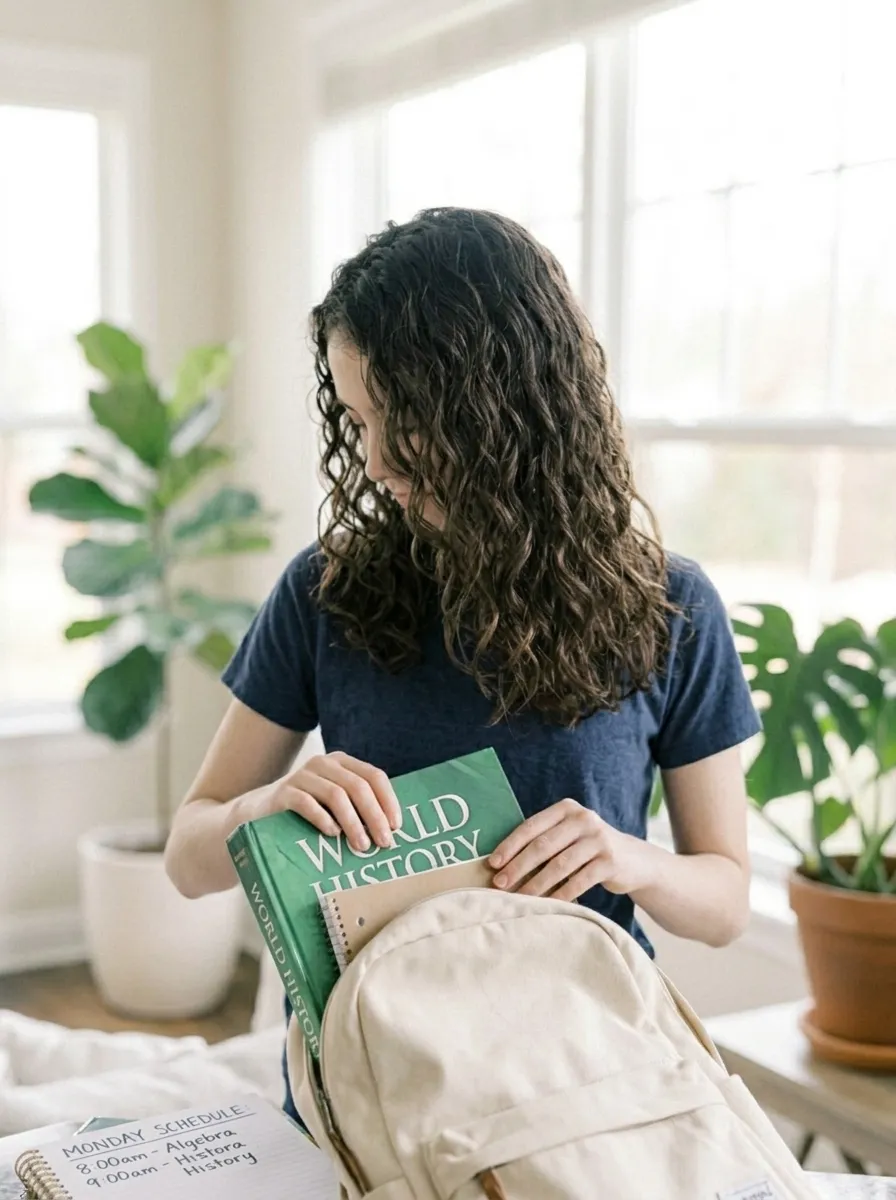
The heatless curl method uses a foam roller, a silk ribbon, or even a sock to create defined curls overnight without any heat. The result is a full, bouncy curl set that holds through a school day and costs nothing if you use household items.
The sock curling method is the most accessible. Cut the foot off a clean sock to create a tube. Place the sock on top of the head and wrap small sections of damp hair around it, rolling down toward the scalp. Secure at the base. Sleep in it and release in the morning.
For a looser wave, use a larger fabric piece or a silk ribbon tied around the top of the head with hair wrapped around it in a spiral pattern.
Release in the morning, apply a tiny amount of curl cream, and scrunch lightly.
This technique requires zero morning time because all the prep happens the night before.
Budget tip: A clean sock from your drawer is the only material needed. Total cost: zero. Alternatively, foam curling rods cost around $3 for a pack at any dollar store or drugstore.
18. Pull-Through Braid Ponytail
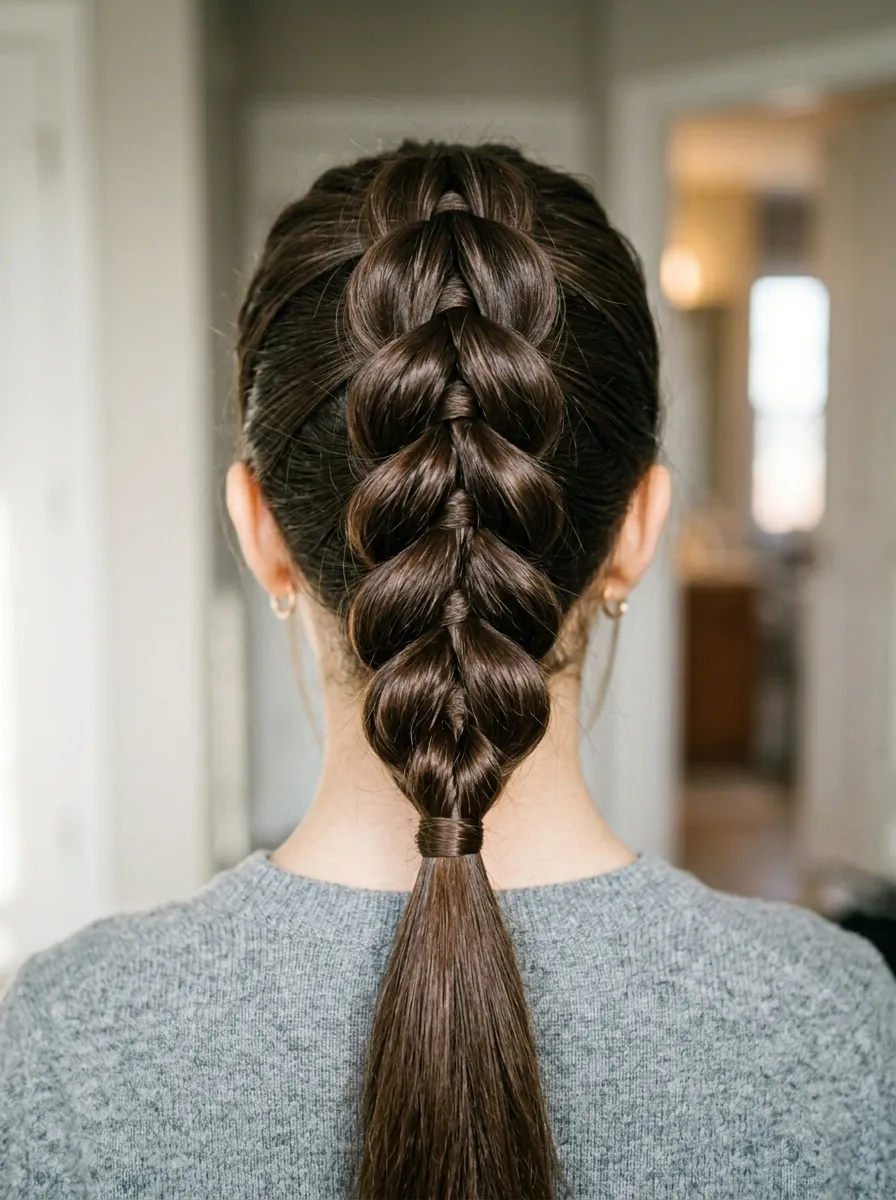
The pull-through braid creates the appearance of a complex, thick braid with no actual braiding technique. It uses only small ponytails pulled through each other to create the illusion of a detailed braid.
Start with a small ponytail at the crown. Add a second ponytail just below it. Split the first ponytail and pull the second one through the split. Continue adding ponytails and pulling each through the split of the one above.
After completing all the sections, gently pull each loop outward to widen the braid and add volume. This step transforms a thin, tight structure into a full, dramatic braid.
This style is excellent for beginners because it requires no braiding skill. Just multiple small elastics and a comb.
It holds up very well through a school day because each section is independently secured with an elastic.
On medium to long hair, three to four sections create a generous braid. On shorter hair, two sections still create a noticeable pull-through detail.
Budget tip: A bag of small clear elastics costs under $3 and is the only purchase needed.
19. Secure Athletic Braid for Active Days
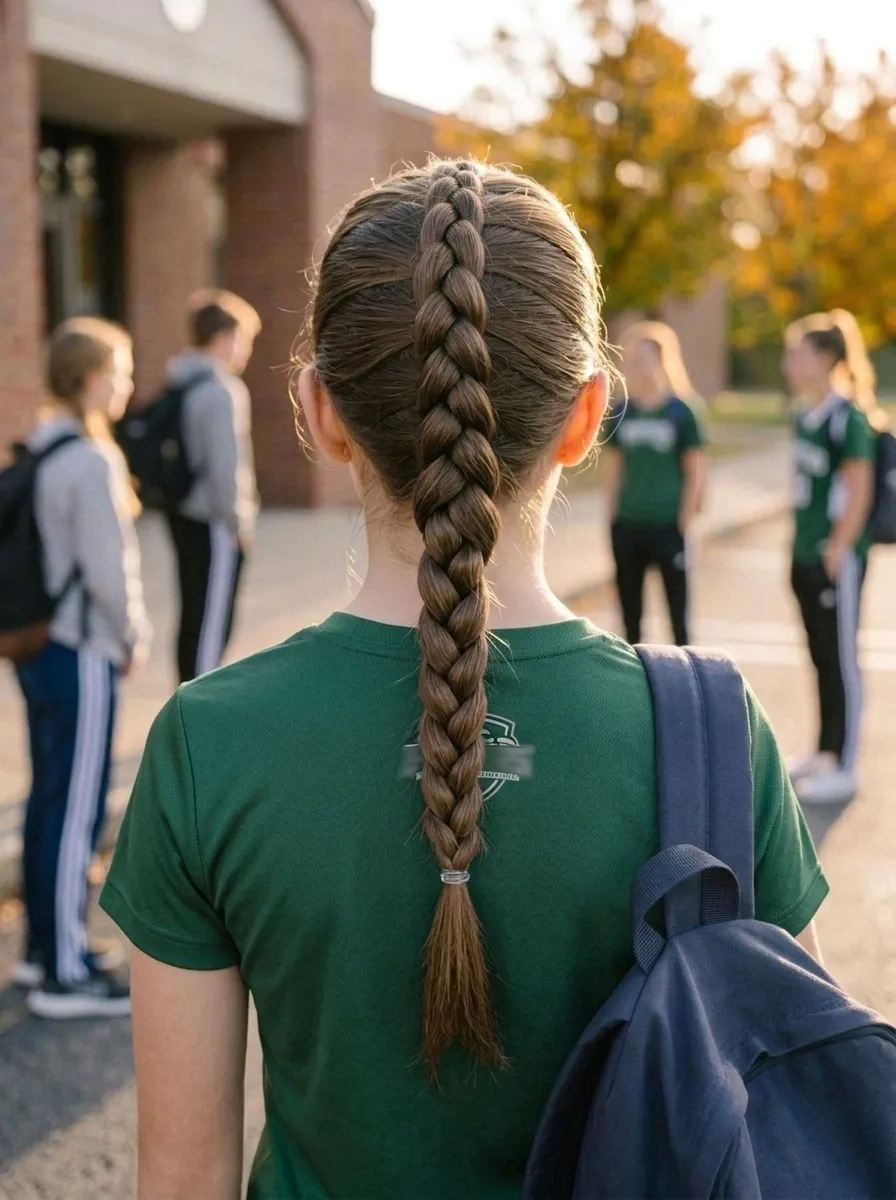
On PE days, outdoor activities, or any day that involves a lot of movement, hair security becomes a priority. A tight Dutch braid down the center of the back is one of the most secure hairstyles possible for active school days.
Start a Dutch braid at the crown, crossing sections under rather than over. Work straight down the back of the head with firm, consistent tension.
Tight, consistent tension is what keeps this braid secure through intense physical activity. Loose tension means the braid shifts and loosens during exercise.
Secure the end with a small elastic. Apply a light-hold hairspray over the entire braid for extra hold during PE.
This braid lies flat against the back of the head, making it comfortable for wearing a backpack and for lying on a gym mat.
For students with very active school days, this style can be worn for multiple school days in a row with simple re-securing at the end each day.
Budget tip: A light-hold hairspray from a drugstore costs around $4 to $6. Spray once in the morning and the braid stays secure through the most active school day.
20. The Claw Clip Half-Up
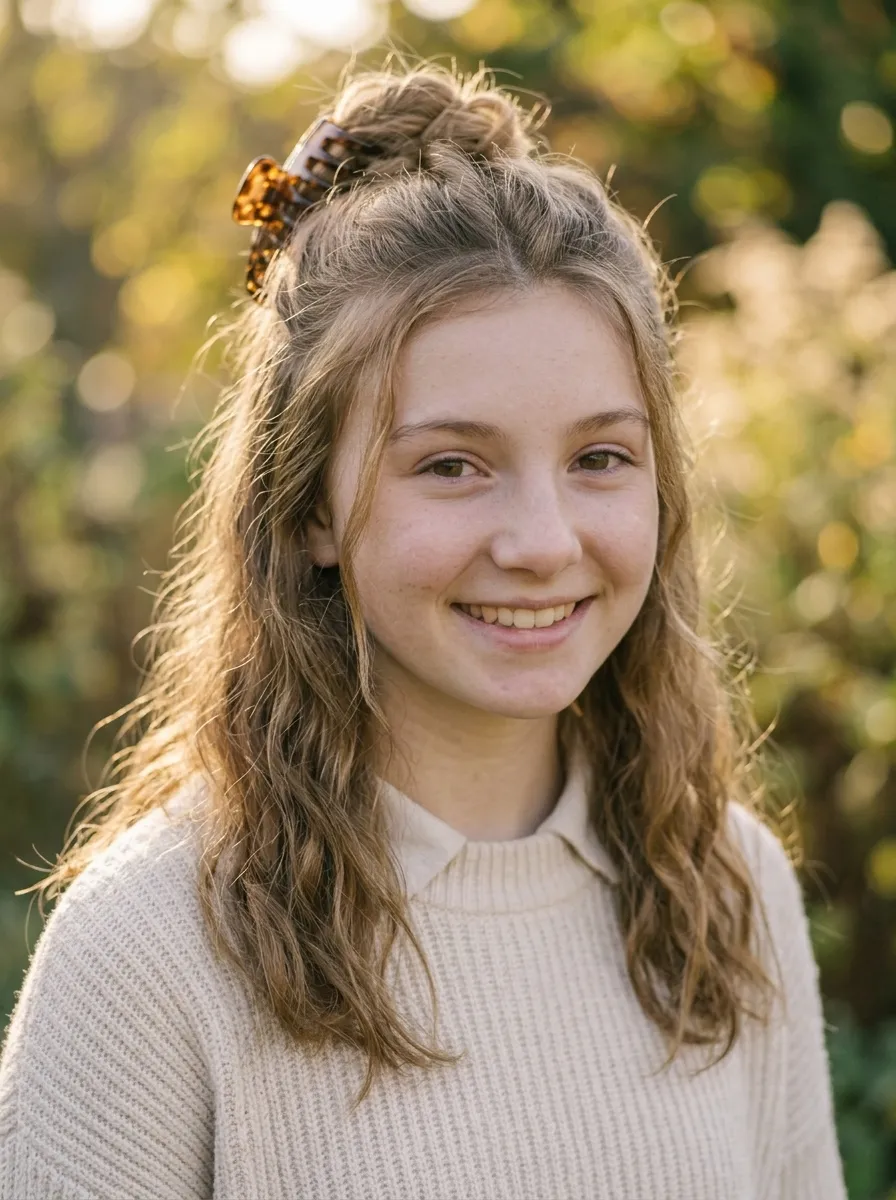
The claw clip half-up is the absolute fastest back to school hairstyle on this list. Gather the top half of the hair. Clip it with a large claw clip. Done.
This takes approximately fifteen seconds with no mirror required.
Choose a claw clip large enough to hold all the gathered hair securely without slipping. A clip that is too small will fall out during the school day.
For naturally wavy or curly hair, this style looks particularly beautiful. The free-falling waves or curls below the clip create natural movement and texture.
For straight hair, a slightly looser clip with some pieces falling forward creates a more relaxed, stylish look rather than a purely functional clip.
Claw clip styles are currently one of the most popular hair trends among students of all ages. Owning a small collection of clips in different sizes and finishes means matching them to different outfits.
Budget tip: Large claw clips are available for under $2 each at dollar stores and drugstores. A set of four or five in different colors and finishes covers a full school week of styling variety for under $10 total.
21. Braided Headband on Natural Hair
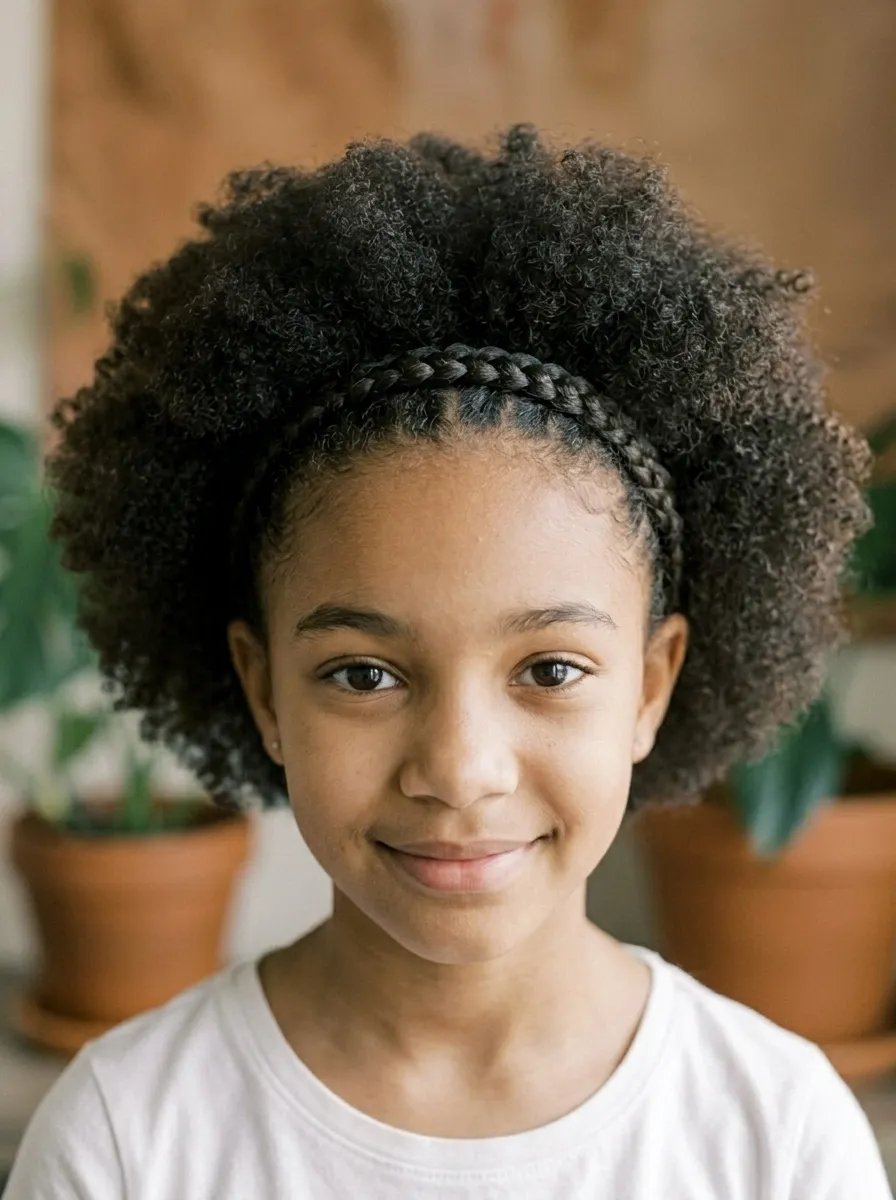
A cornrow or flat braid running along the front hairline creates a natural headband effect that keeps hair off the face all day without any accessories. It works beautifully on natural afro-textured hair and provides a neat, defined front section while the rest of the natural hair sits full and free behind it.
Cornrow a thin section right at the hairline from one temple to the other. Secure the end at the opposite temple with a small elastic or bobby pin.
This single cornrow keeps the front section neat and controlled while the rest of the natural hair remains completely free. No products needed on the free section unless you prefer definition.
This is a quick style for natural hair that avoids manipulation of the full head of hair on school mornings.
For younger children with natural hair, this is one of the most practical school week styles. The front braid holds in place all day and reduces daily styling time significantly.
Budget tip: The braided headband requires no products or accessories beyond a small elastic. It is a completely free style on natural hair.
22. Simple Pin-Back for Short Hair
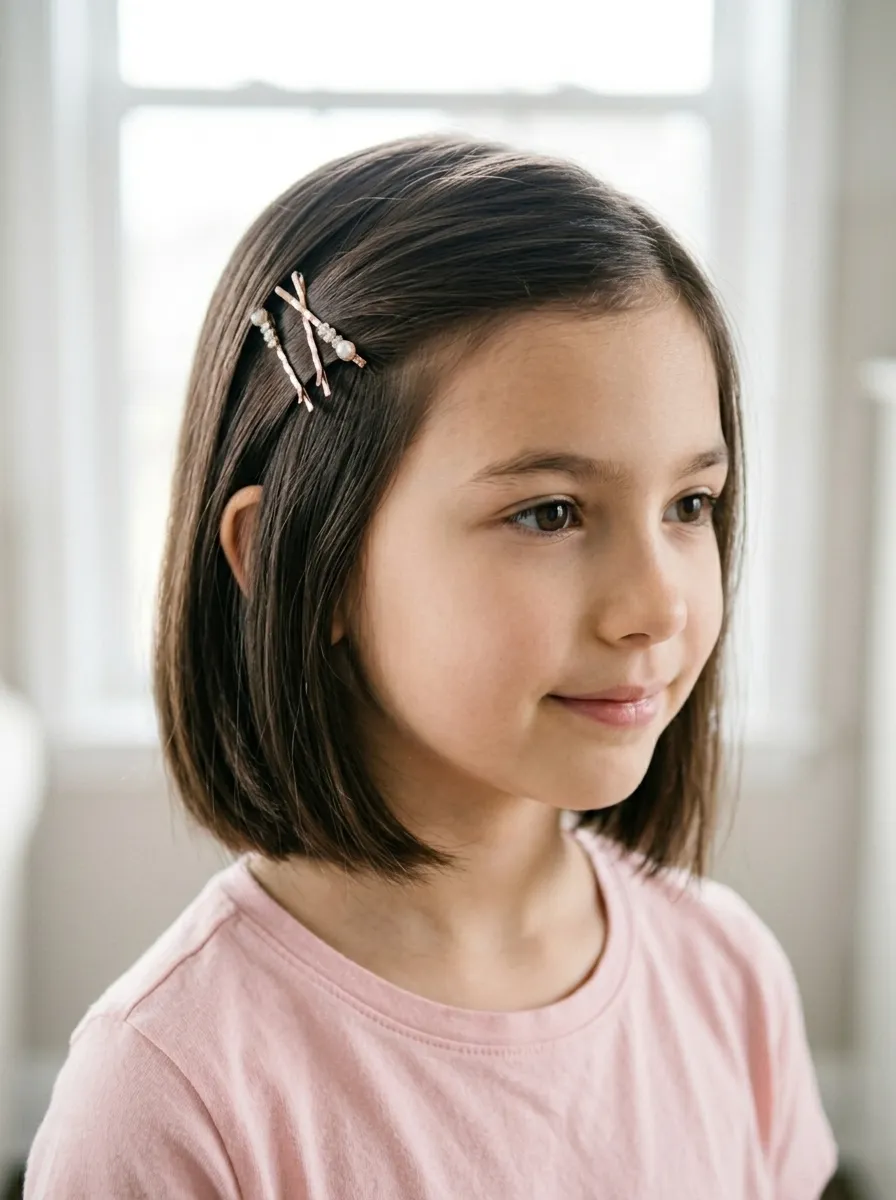
Short hair does not have many updo options but it does not need them. A simple pin-back using one or two decorative bobby pins at the temple is one of the most effective and effortless school styles for shorter hair.
Take a small section from the front or temple area. Slide it back and secure with one or two bobby pins pushed through at a slight angle. Crossed pins hold better than parallel ones.
A decorative bobby pin with a small gem, pearl, or metallic finish adds a subtle detail that makes the pin-back look like a considered choice rather than just a functional fix.
This works on pixie cuts, short bobs, and any length where a full updo is not possible.
Different pin placements create different looks. Temple pin-back creates asymmetry. Two matching pins on each side creates a symmetrical, tidy look. A single pin at the top creates a small gathered accent.
Budget tip: Decorative bobby pins are available at dollar stores in sets of six to twelve for under $2. Pearl pins, metallic pins, and gem-tipped pins all work and create a finished look without effort.
23. The Textured Top Bun
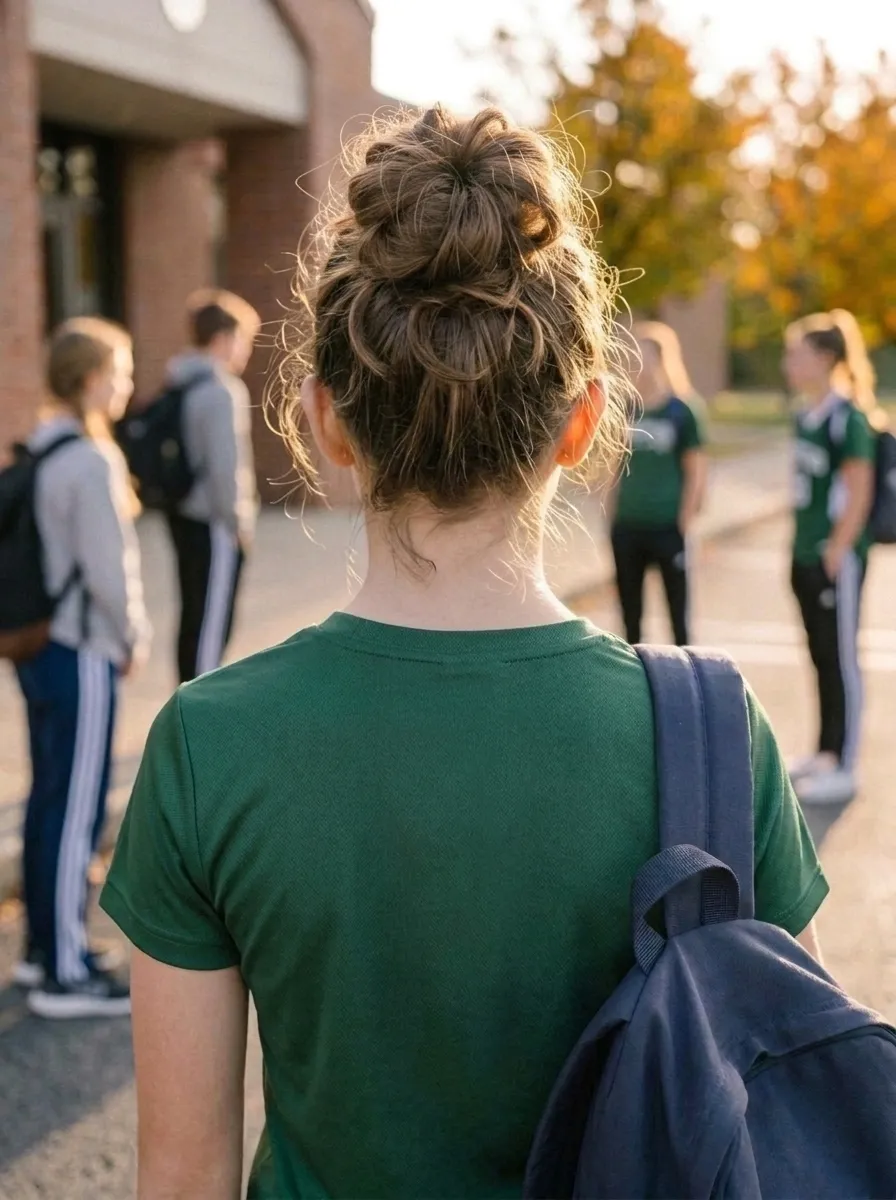
The textured top bun embraces imperfection. Unlike the polished top knot, this bun is intentionally loose, full, and slightly undone. For school mornings with zero time, this is the perfect style because it actually looks better the less effort you put in.
Gather all the hair into a high ponytail at the crown. Do not smooth the surface. Twist the ponytail loosely and wrap it around the base. Secure with an elastic and a few pins.
Intentionally pull several sections of the bun outward to create volume and loose texture. Pull pieces in different directions for a natural, undone quality rather than a uniform shape.
Let pieces fall naturally at the nape and around the ears.
Day-two or day-three hair is actually better for this style than freshly washed hair. Natural oils add grip and texture that makes the messy bun hold its shape more effectively.
A light-hold hairspray keeps the loosened sections from falling completely out through the day.
Budget tip: No products are needed for day-two hair. The natural texture does all the work.
24. The Front Twist with Natural Hair Down
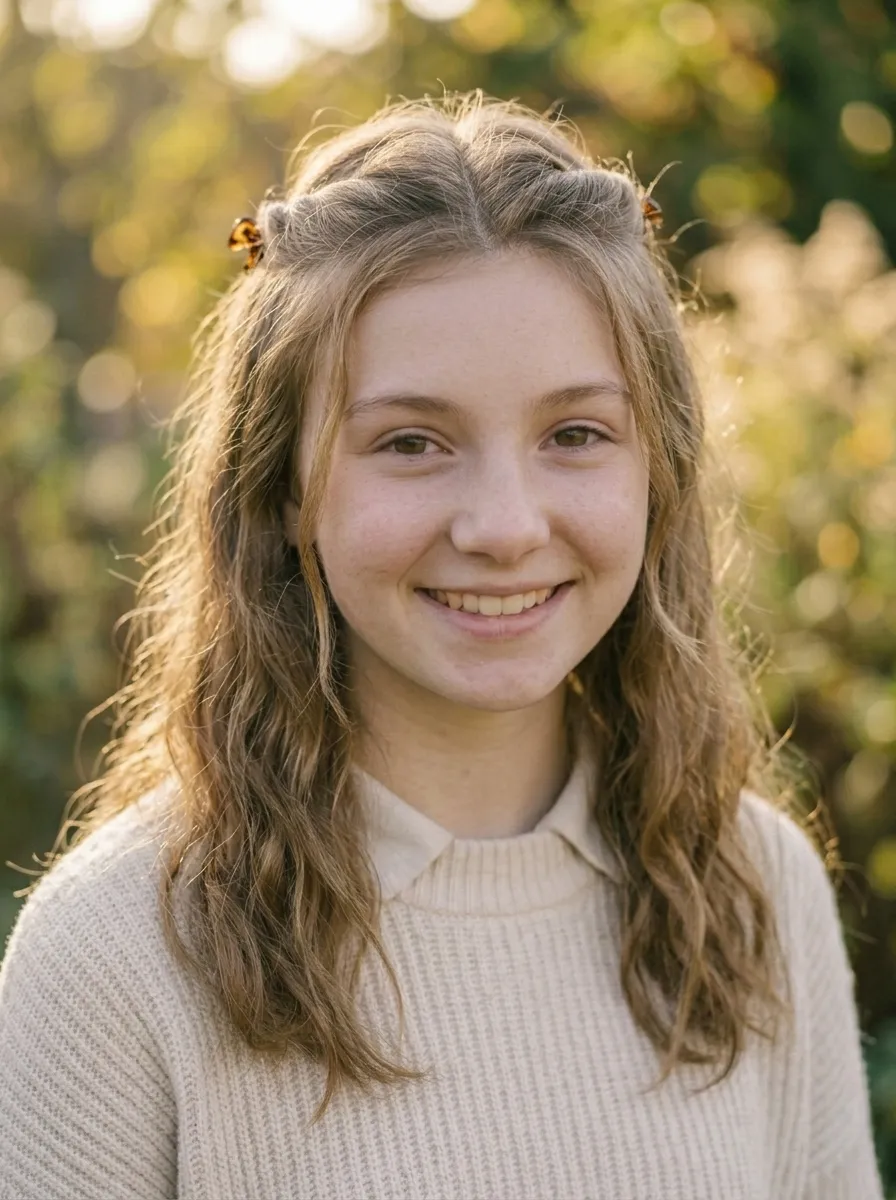
The front twist keeps hair out of the face during class without requiring a full updo. Take two small sections from each side of the front hairline. Twist each section back toward the crown and secure both together with a small clip or elastic.
The rest of the hair falls completely free.
This works especially well on natural, curly, or wavy hair where keeping the front sections out of the face while letting the natural texture shine is the goal.
It takes approximately sixty seconds and requires only a small clip or elastic. There is nothing else to do.
This style is particularly practical for students who find their hair falls in their face during reading, writing, or computer work. The front twist solves the problem with minimal disruption to the rest of the hair.
On straight hair, the twist creates a cleaner, more deliberate look. On curly or wavy hair, the slight visual looseness of the twisted front sections matches the free texture below naturally.
Budget tip: A single small claw clip or two crossed bobby pins are all that is needed. Total cost is essentially zero.
Conclusion
School mornings do not have to be stressful hair days. Every style on this list proves that looking put-together takes seconds rather than minutes when you know what you are doing. The key is to pick two or three styles from this list that work for your hair type and length and practice them once or twice before the school year starts. By the time the first day arrives, you will be able to execute any of them without thinking. Keep your basic tools within easy reach: a few elastics, a small collection of claw clips, bobby pins, and a single can of dry shampoo. That handful of affordable accessories covers every style on this list. School mornings feel entirely different when your hair is handled quickly and you like how it looks. Start with the easiest idea on this list and build from there.
Leave a Reply