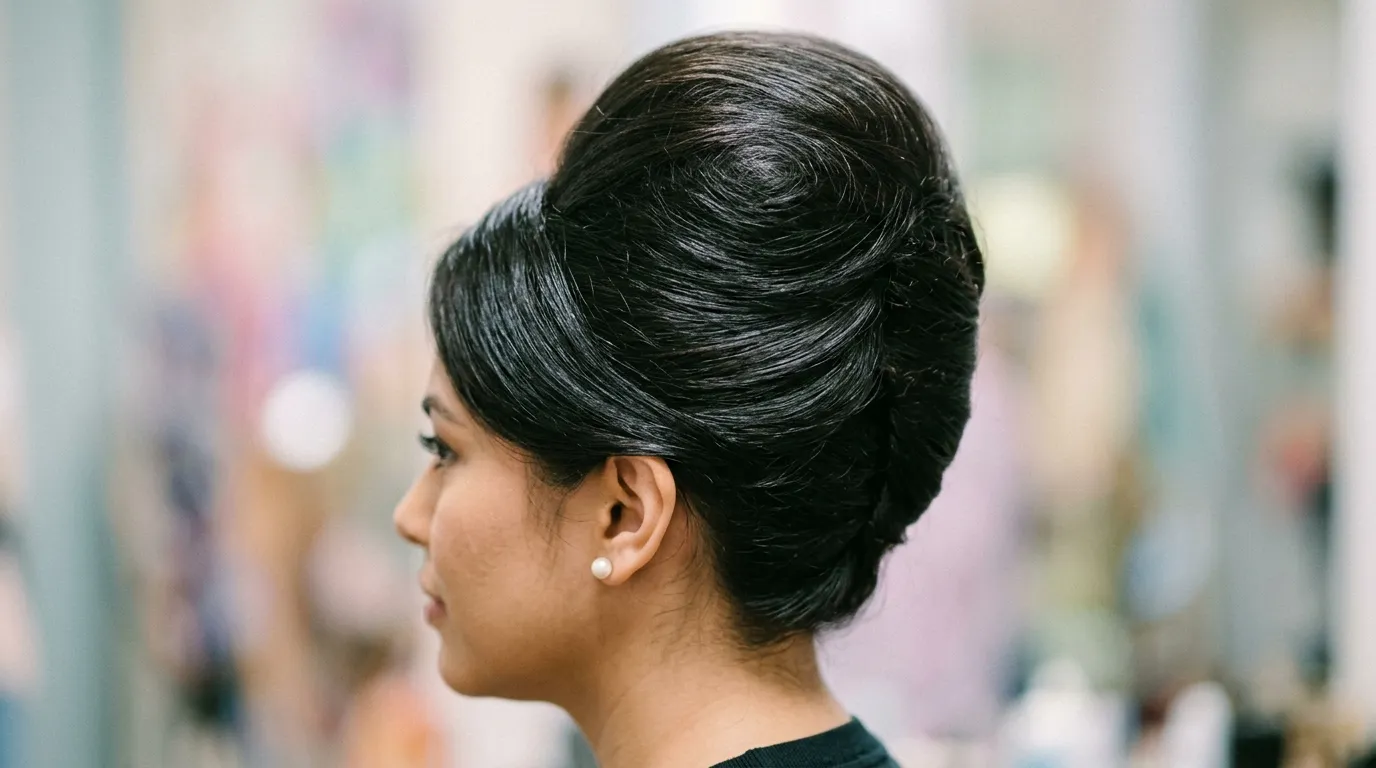
The beehive hairstyle ideas has stuck around for decades because it turns an ordinary hair day into a statement. It’s tall, it’s bold, and it still feels glamorous every time someone wears it out. Whether you’re getting ready for a wedding, a themed party, or just want to bring back a look your grandmother rocked in old photos, this style has room for every hair type and budget. Below you’ll find over twenty ways to wear the beehive, from teased classics to modern twists you can try at home with tools you probably already own. Grab your comb, some bobby pins, and a can of hairspray, because retro glam is closer than you think. If you’re also interested in Gypsy Shag Hairstyle Ideas, this layered and textured haircut offers a relaxed, effortless look with plenty of movement, making it a stylish choice for anyone who loves volume, versatility, and easy everyday styling.
1. The Classic Rounded Beehive Hairstyle Ideas
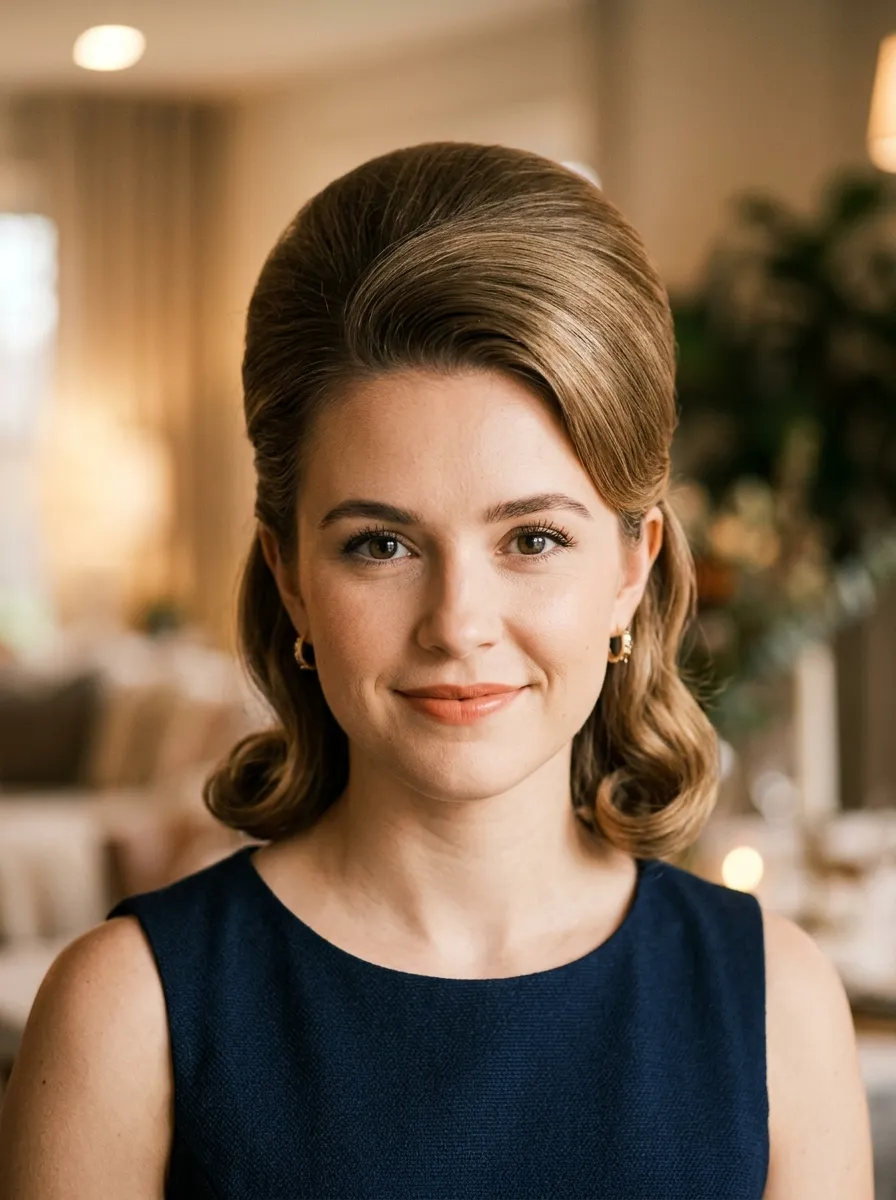
This is the beehive most people picture first. Hair gets teased at the crown, smoothed over the top, and pinned into a round dome shape. It looks fancy but it doesn’t take a salon visit to pull off. Start with clean, dry hair and a bit of texturizing spray for grip. Section the crown, tease with a fine-tooth comb, then smooth the top layer over the teased base. Pin it in place and set with hairspray. Budget tip: a $5 rat-tail comb and a drugstore hairspray are honestly all you need. If your hair is thin, tuck a hairnet or a bit of tissue paper inside the base for extra height without buying a hair pouf. This look works for weddings, prom, or a Sunday brunch when you want to feel a little extra. Practice on a night in before the big event so pinning feels natural. Once you get the teasing technique down, this becomes a five-minute style you can repeat anytime.
2. The Bouffant Beehive Blend
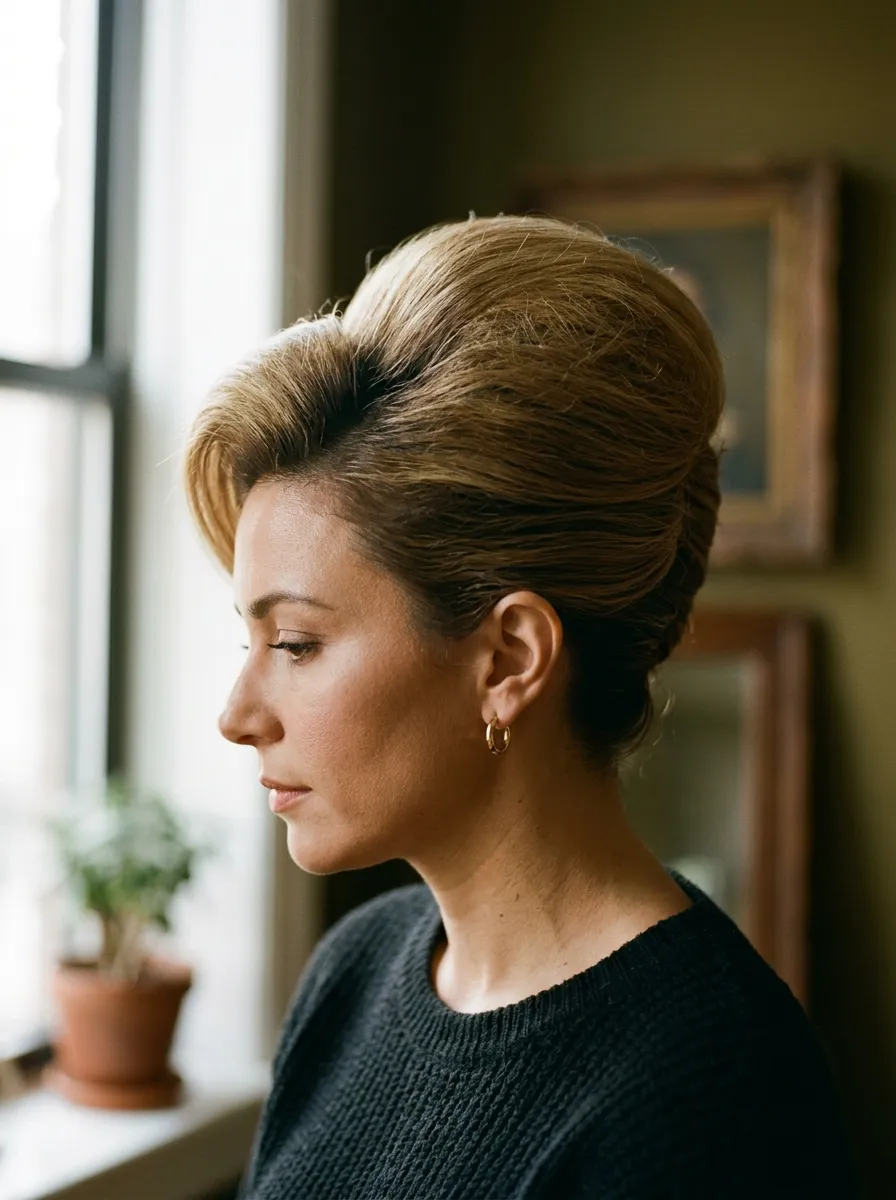
This version pairs the lifted front of a bouffant with the rounded back of a beehive. It gives extra height right above the forehead while keeping the classic shape everywhere else. Tease the front section first, smooth it back, then move to the crown and repeat the same teasing and smoothing process. Pin as you go so the shape holds. DIY tip: roll a small section of hair around a foam roller before styling to build lift without heavy teasing. This softens the look while still giving that retro silhouette. It suits medium to long hair best, but shorter hair can join in with a few clip-in extensions from a discount beauty store. Set with a light-hold spray first, then a stronger one on top to lock everything in place. This style photographs beautifully from every angle, which makes it a favorite for portrait sessions or themed parties where you want a dramatic silhouette without spending on a stylist.
3. Half-Up Beehive with Loose Ends
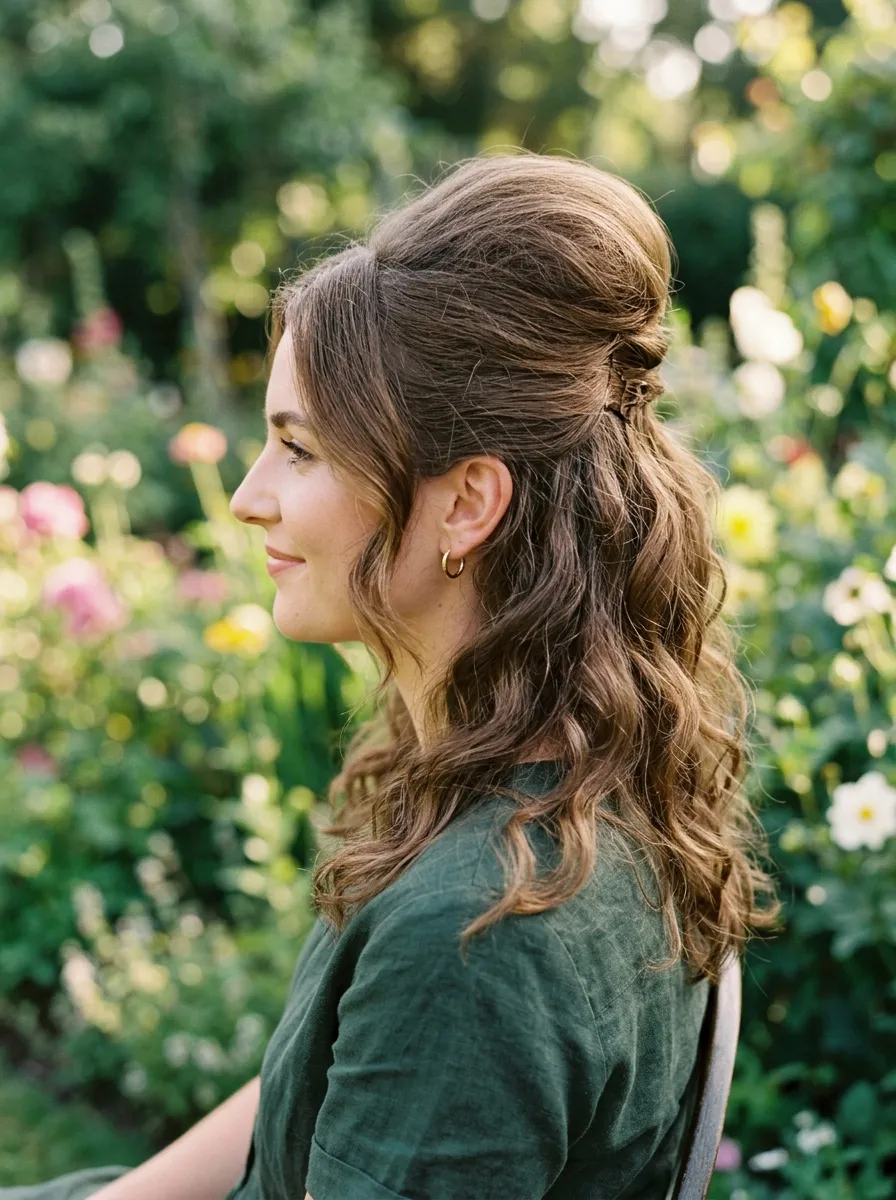
If a full beehive feels like too much, this half-up option keeps things playful. Only the top section gets teased and shaped into a small beehive, while the rest of your hair stays down in soft waves or curls. It’s a gentler way to try the trend without committing to a full updo. Curl the bottom half first with a wand or foam rollers, then set that aside. Tease the crown section, shape it into a rounded mound, and pin it at the back. Let a few face-framing pieces stay loose for softness. Budget tip: foam rollers cost very little and work overnight, so you can wake up with curls already done before adding the beehive top. This look works well for casual gatherings, date nights, or daytime events where you want retro flair without the full formal feel. It also holds up longer through the day since less hair is pinned tightly in place.
4. Micro Beehive for Short Hair

Short hair doesn’t have to sit out of the beehive trend. A micro version adds a small teased mound right at the crown while the rest of your hair stays close to its natural length and shape. This works especially well on bobs and lobs. Tease just the top few inches of hair at the crown, smooth the surface, and pin lightly so it holds without looking stiff. DIY tip: a little dry shampoo at the roots before teasing gives extra grip and texture, especially if your hair is fine or freshly washed. This style pairs nicely with winged eyeliner and a bold lip for a full retro moment. It’s quick, usually under ten minutes, and doesn’t require any extra hair pieces. Because it’s smaller in scale, it also holds up well in humid weather or during long events like weddings, since there’s less hair fighting gravity throughout the day.
5. Two-Tone Beehive for Color Lovers
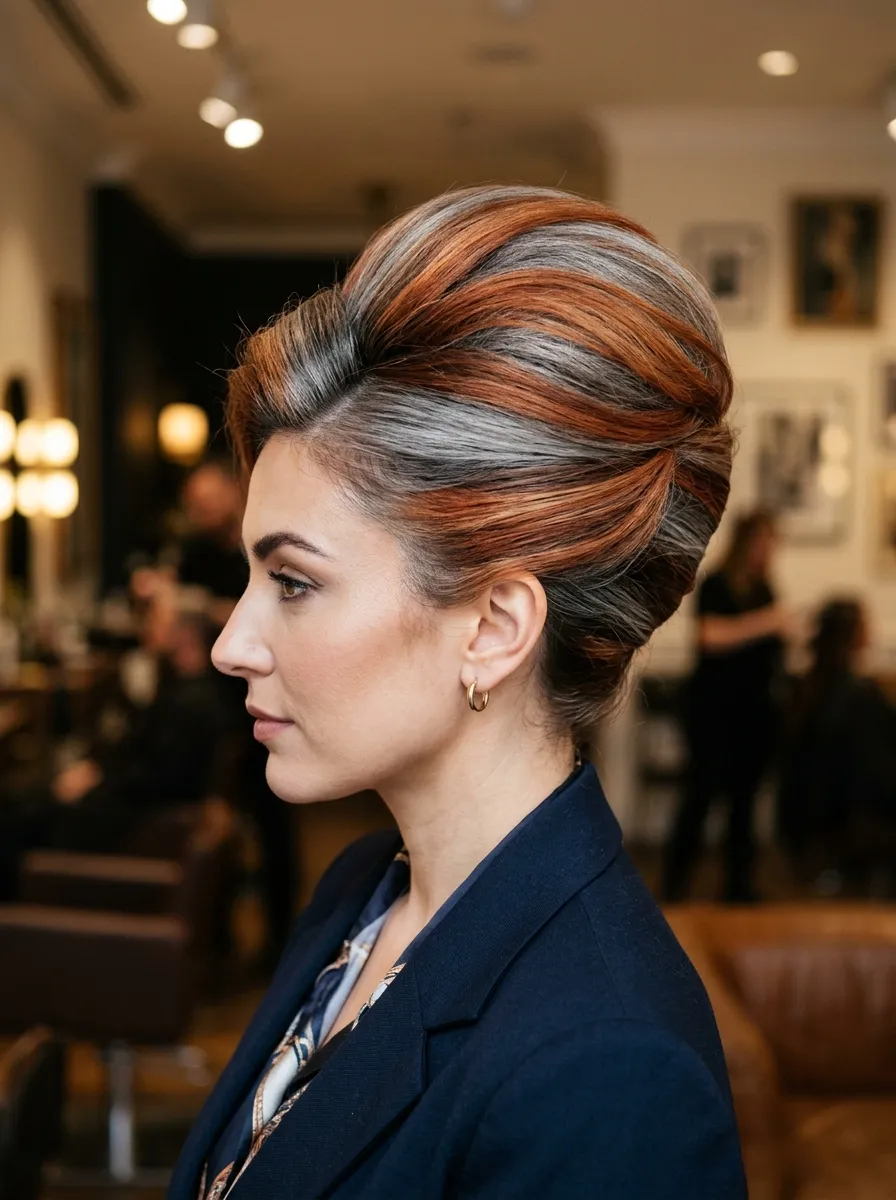
If you already have highlights, balayage, or a color-block dye job, a beehive shows it off beautifully. The rounded shape catches light from different angles, so contrasting colors peek through as you move. Tease and shape your hair as you would for a classic beehive, but pay attention to how you part sections so both colors show on the outside of the dome, not hidden underneath. Budget tip: if you don’t have colored hair yet, temporary color sprays or chalk from the drugstore let you test this look before committing to a dye job. Apply the color to sections before teasing so it blends into the shape naturally. This works great for costume parties, themed shoots, or anyone who wants their color work to get real attention for once. Just remember that heavy teasing can be rougher on color-treated hair, so use a leave-in conditioner beforehand to keep strands from drying out.
6. Beehive with a Center Part
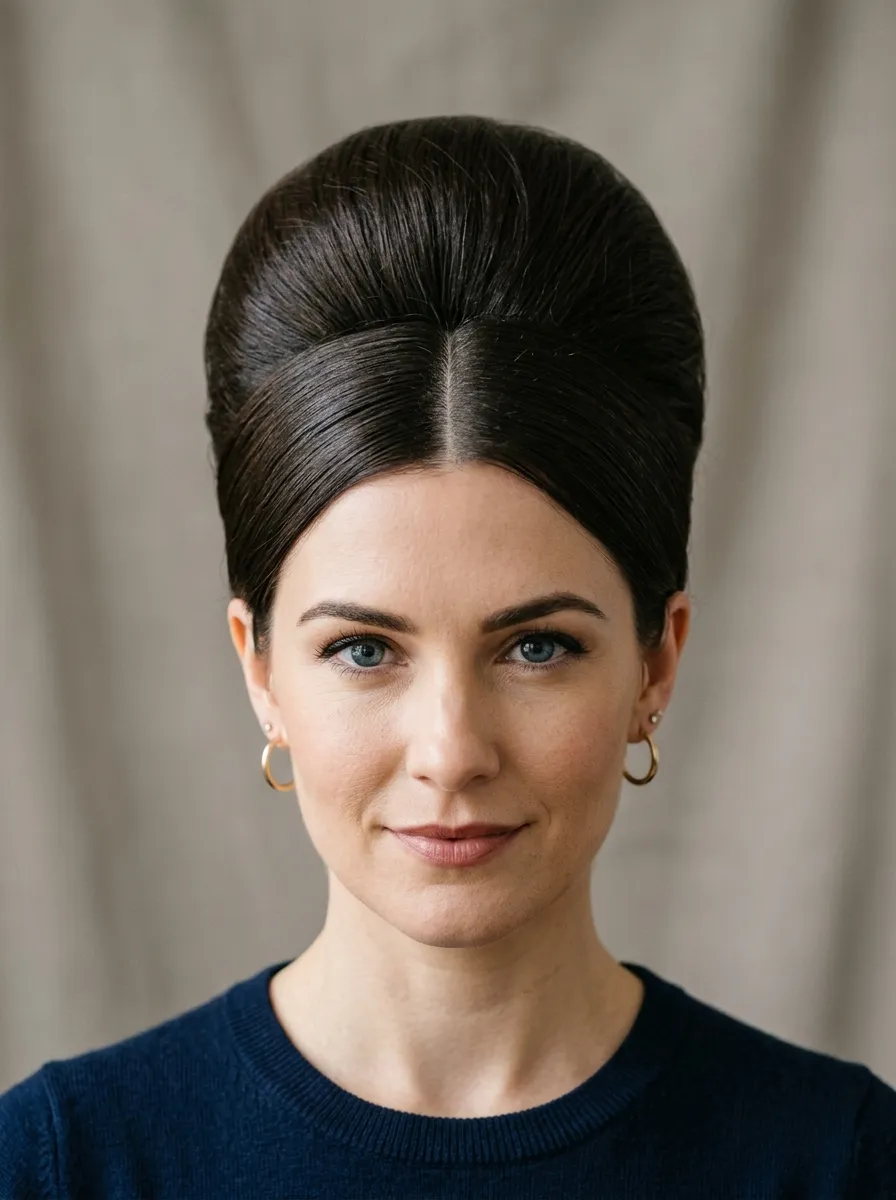
A center part changes the whole feel of a beehive, giving it a softer, more balanced look. Instead of sweeping everything back from the forehead, hair parts down the middle and smooths to each side before joining into the rounded shape at the crown. This flatters round and square face shapes especially well. Comb a straight part with a fine-tooth comb, then smooth each side flat before teasing the crown behind it. Pin the base and shape the dome as usual. DIY tip: a bit of gel on your fingertips before smoothing the front sections keeps flyaways down without needing extra product layers. This version feels a little less costume-like and more wearable for everyday occasions, like office parties or dinners out. It also pairs nicely with a simple gold hoop earring and a matte lip for a look that feels dressed up but not overdone.
7. Textured Beehive with Face-Framing Curls
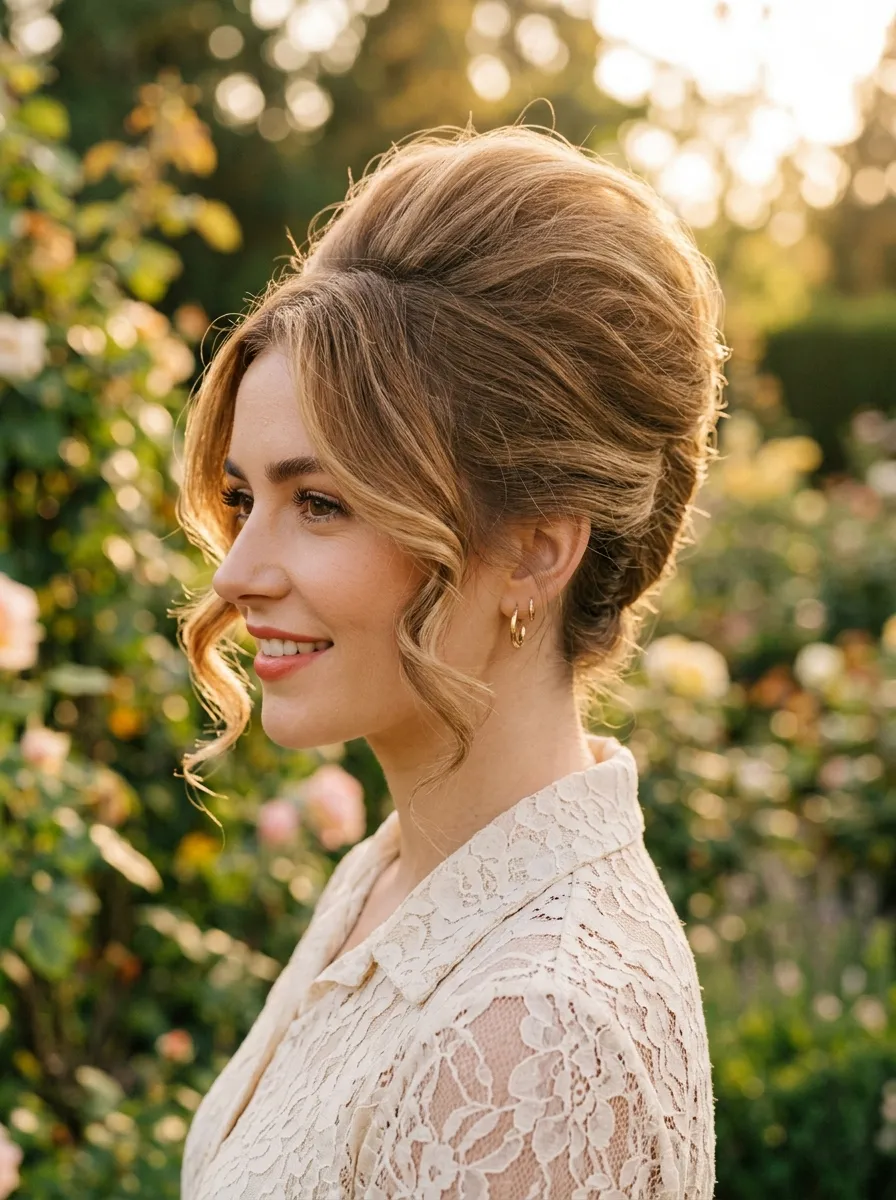
Adding curled pieces around the face softens the structured look of a beehive. Instead of pulling every strand back, leave a few sections loose near your temples and cheeks, then curl them with a small barrel iron or foam roller. Shape the rest into your beehive as usual. Budget tip: if you don’t own a curling iron, twist small sections around a straw or pencil and hold with a bobby pin overnight for heatless curls the next morning. This softer framing works well for anyone who feels a full beehive is too severe for their face shape. It brings a more romantic feel, ideal for anniversary dinners or vintage-themed photo sessions. Keep the curls loose rather than tight ringlets, since a looser wave matches the relaxed elegance of the era this style comes from. Finish with a light-hold spray on the curls so they keep their shape without turning stiff or crunchy by the end of the night.
8. The Wrapped Ponytail Beehive
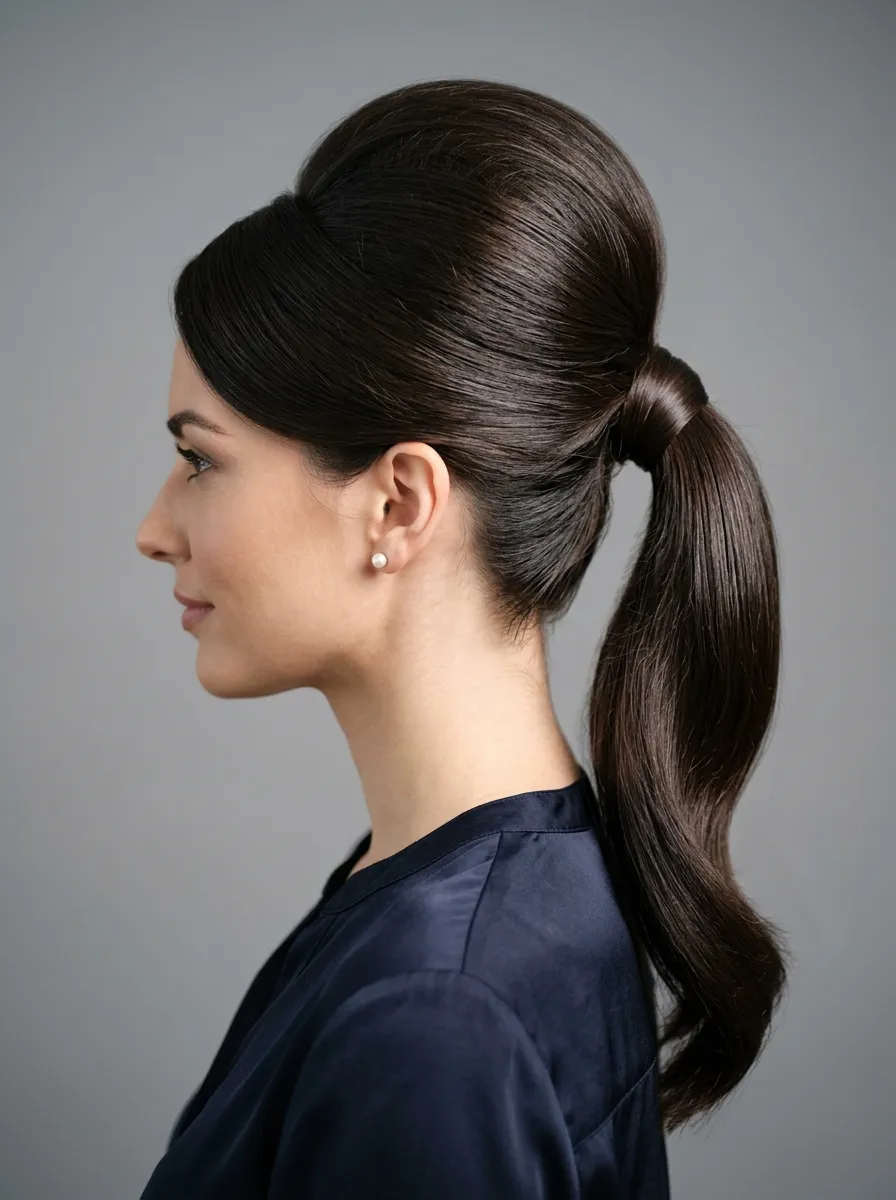
This style starts with a high ponytail, then wraps a small section of hair around the base to hide the elastic completely. The ponytail itself gets teased and shaped into the rounded beehive silhouette, giving you the look of an updo with the practicality of a ponytail underneath. Gather hair at the crown, secure with an elastic, then take a one-inch section to wrap around the base and pin it down. Tease the rest and shape into the dome. DIY tip: use bobby pins that match your hair color so the wrap looks seamless with no visible metal. This method holds up longer than a fully pinned beehive because the ponytail base gives it structure. It works well for people who move around a lot during events, like dancing at a wedding, since the ponytail keeps things secure even after hours of activity.
9. Vintage Pin-Curl Beehive
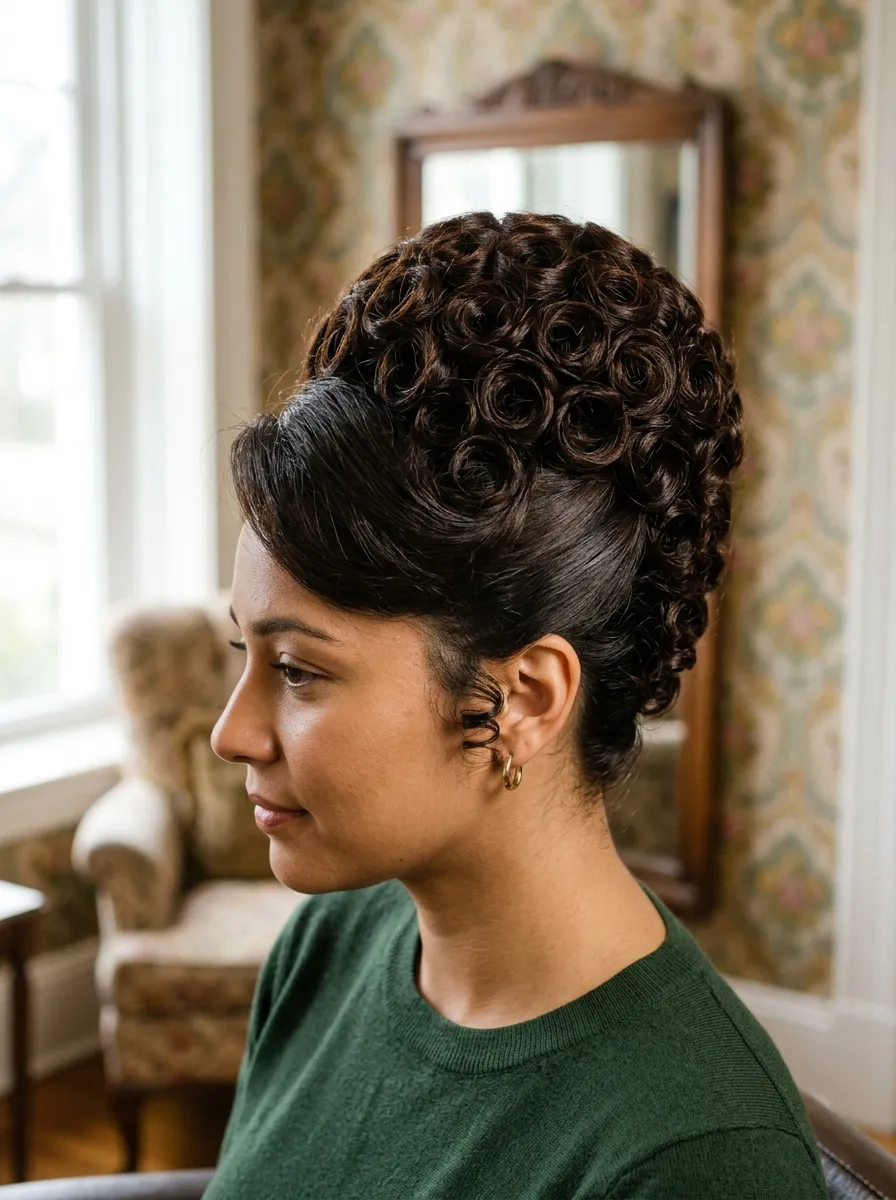
This take skips teasing altogether and instead builds height using small pin curls set close together at the crown. Once dry, the curls get combed out slightly and shaped into the rounded beehive form, giving a smoother, glossier finish than a teased version. Set damp hair in small pin curls overnight or with a low-heat dryer, then comb through gently before shaping. Budget tip: flat metal pin curl clips cost very little and can be reused for years, making this one of the cheapest ways to build volume without heat damage. This method suits people who want to avoid daily teasing, since pin curls create lasting texture that holds shape naturally. It’s a slower process than a quick tease-and-pin beehive, so plan for it the night before an event rather than same-day styling. The payoff is a smoother, more polished dome once everything comes together.
10. Beehive with a Bandana Wrap
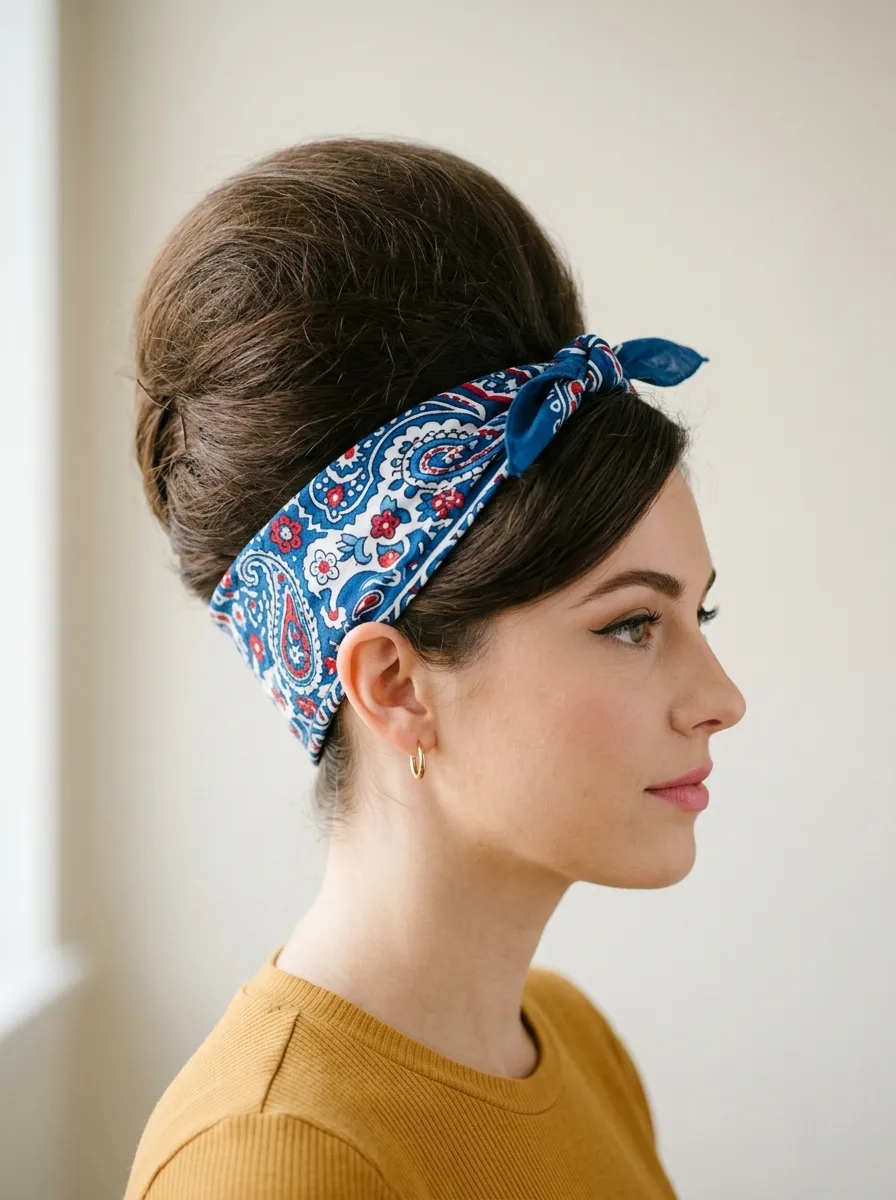
Wrapping a bandana or scarf around the base of your beehive adds a playful, pin-up feel to the look. It also hides any uneven teasing or bobby pins underneath, which makes this a forgiving option for beginners. Shape your beehive as usual, then fold a bandana into a triangle and tie it around the base, knotting it at the front or side. Budget tip: any square scarf from a thrift store works fine, so there’s no need to buy anything designer for this. Choose a print that matches your outfit or go with a solid color for a cleaner finish. This style pairs naturally with rockabilly or diner-themed outfits, red lipstick, and cat-eye sunglasses. It’s also a great fix for a second-day beehive, since the scarf covers roots or flattened sections from the day before without needing to redo the whole style.
11. The Modern Sleek Beehive
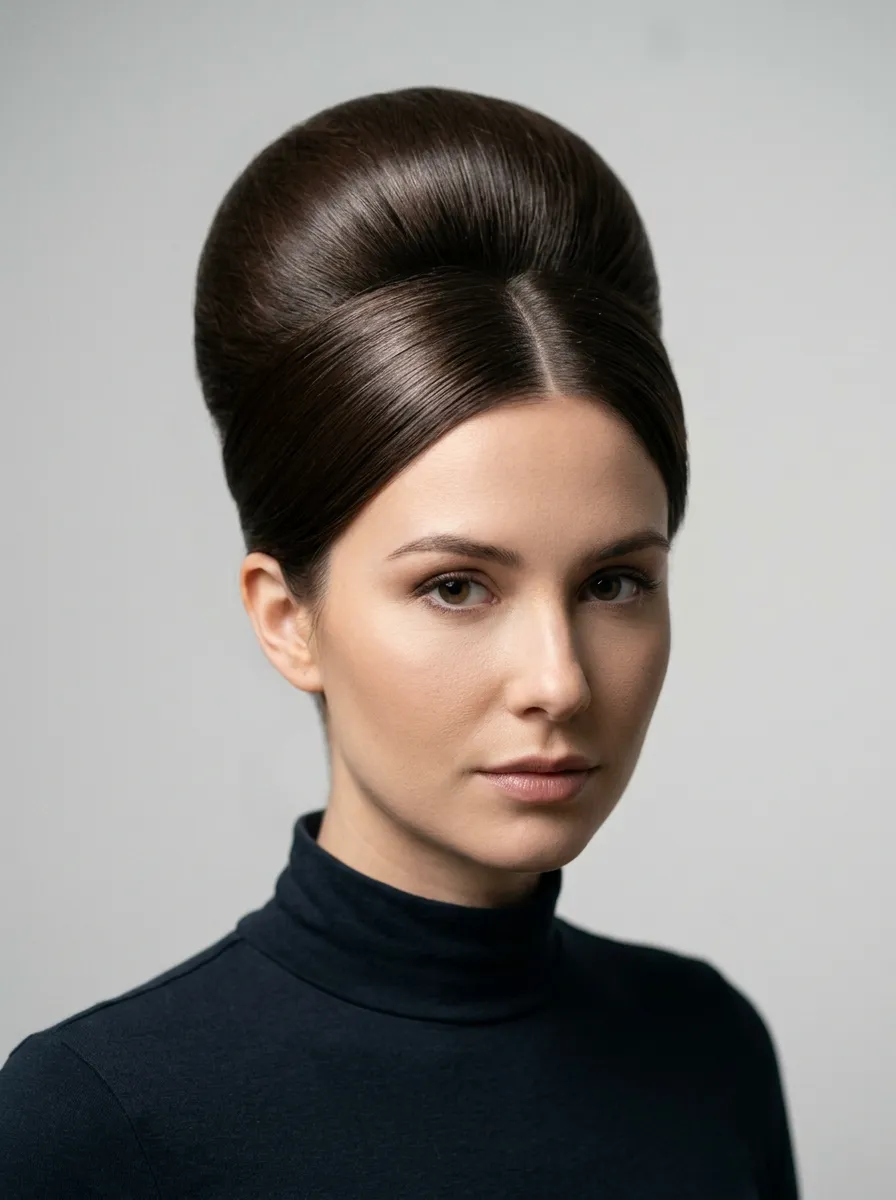
This version trades heavy teasing for a smoother, glassier finish using smoothing serum and light backcombing. It gives the same rounded silhouette but with a more modern, polished look that fits current beauty trends better than the bigger, fluffier versions. Apply a smoothing serum before styling, tease lightly only at the base for lift, then use a boar bristle brush to smooth the surface completely flat and shiny. DIY tip: a small amount of hair gel on a fine-tooth comb helps tame frizz while shaping, without needing a separate anti-frizz product. This look works well for professional settings, like a work event with a retro dress code, since it feels less costume-like. It also photographs cleanly under bright lighting, since there’s less texture to catch shadows. Pair it with simple jewelry and a neutral makeup look for a balanced, put-together outfit from head to toe.
12. Beehive with Braided Base
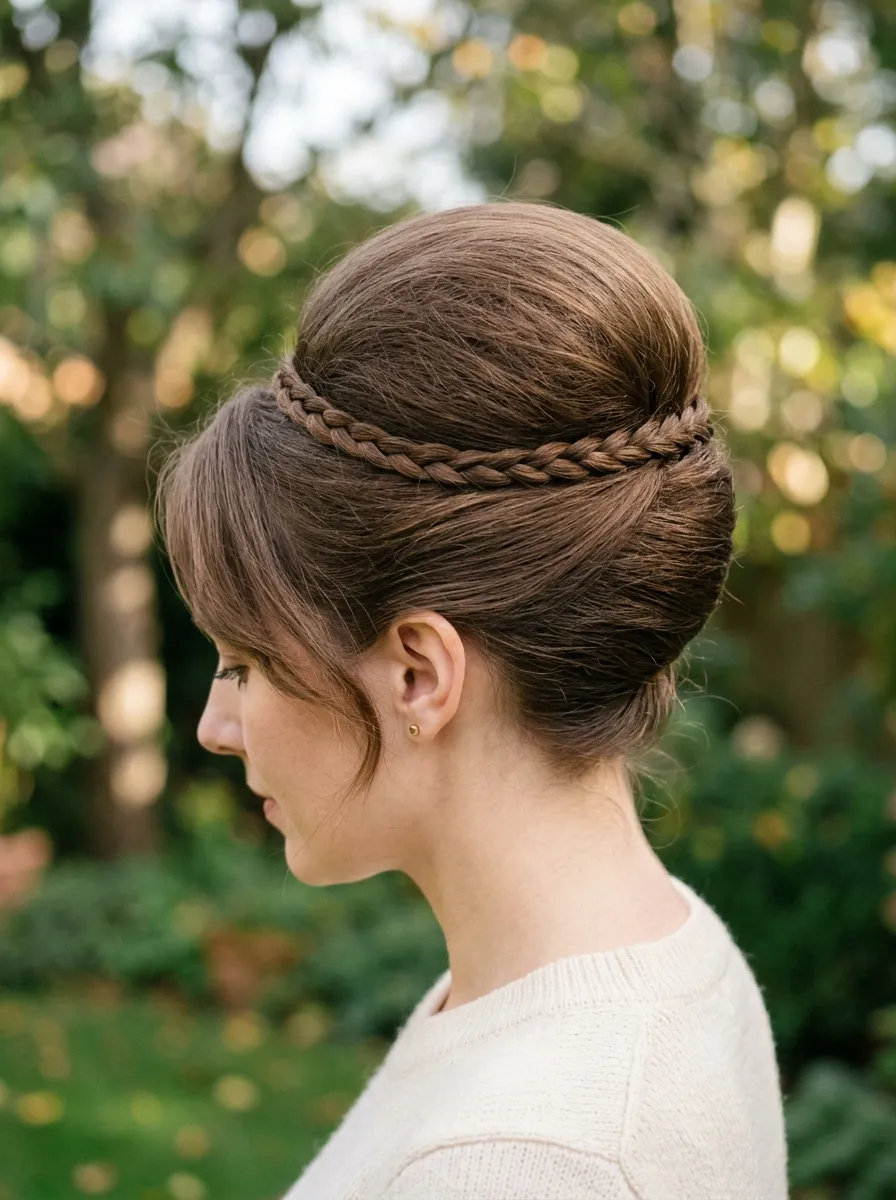
Adding a thin braid around the base of your beehive gives the style a small handmade detail that feels personal and a little different from the usual smooth or teased base. Section a thin strip of hair at the nape, braid it, then wrap it around the base of your teased crown and pin it in place. Budget tip: practice the braid separately a few times before your event so your fingers get used to the motion, since a shaky first attempt can look messy. This detail works especially well for outdoor weddings or garden parties where a slightly softer, bohemian touch fits the setting better than a fully polished look. It also adds grip, helping hold the beehive shape longer through wind or movement. Finish with a few loose strands pulled from the braid for texture, then set everything with a flexible-hold spray so it moves naturally instead of feeling stiff.
13. Beehive with Flower Accents
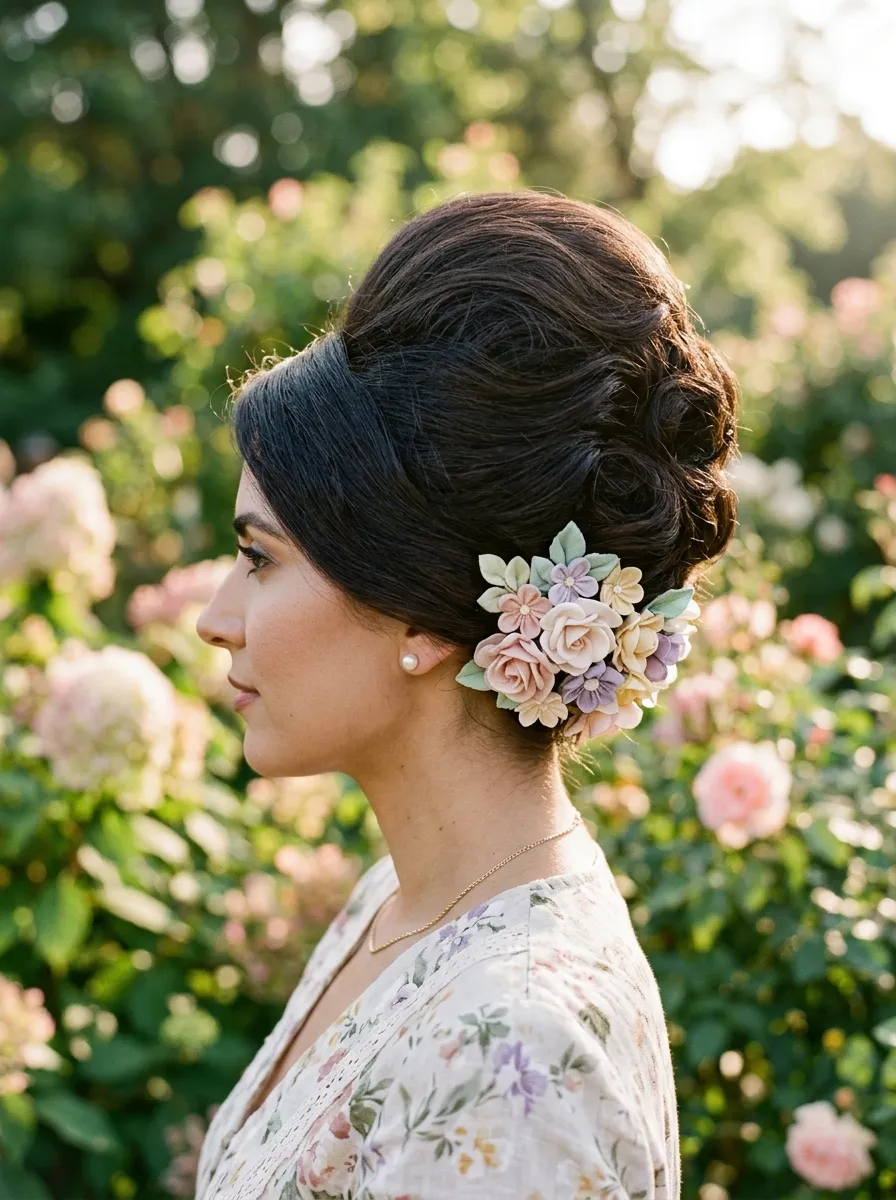
Small flowers tucked into the base of a beehive turn a simple style into something festival or wedding ready. Fabric or silk flowers work best since they hold their shape all day without wilting like fresh ones can. Shape your beehive first, then tuck two or three small flowers along the base using bobby pins hidden underneath each bloom. Budget tip: craft store flower stems can be cut apart into single blooms for a few cents each, giving you plenty to experiment with different placements. Keep the flowers small and grouped rather than scattered, since one or two clusters look more intentional than flowers spread randomly across the style. This works beautifully for spring weddings, garden parties, or costume events with a vintage theme. If you want fresh flowers instead, choose sturdy varieties like baby’s breath that hold up without heavy watering needs throughout the day.
14. Beehive with a Statement Headband
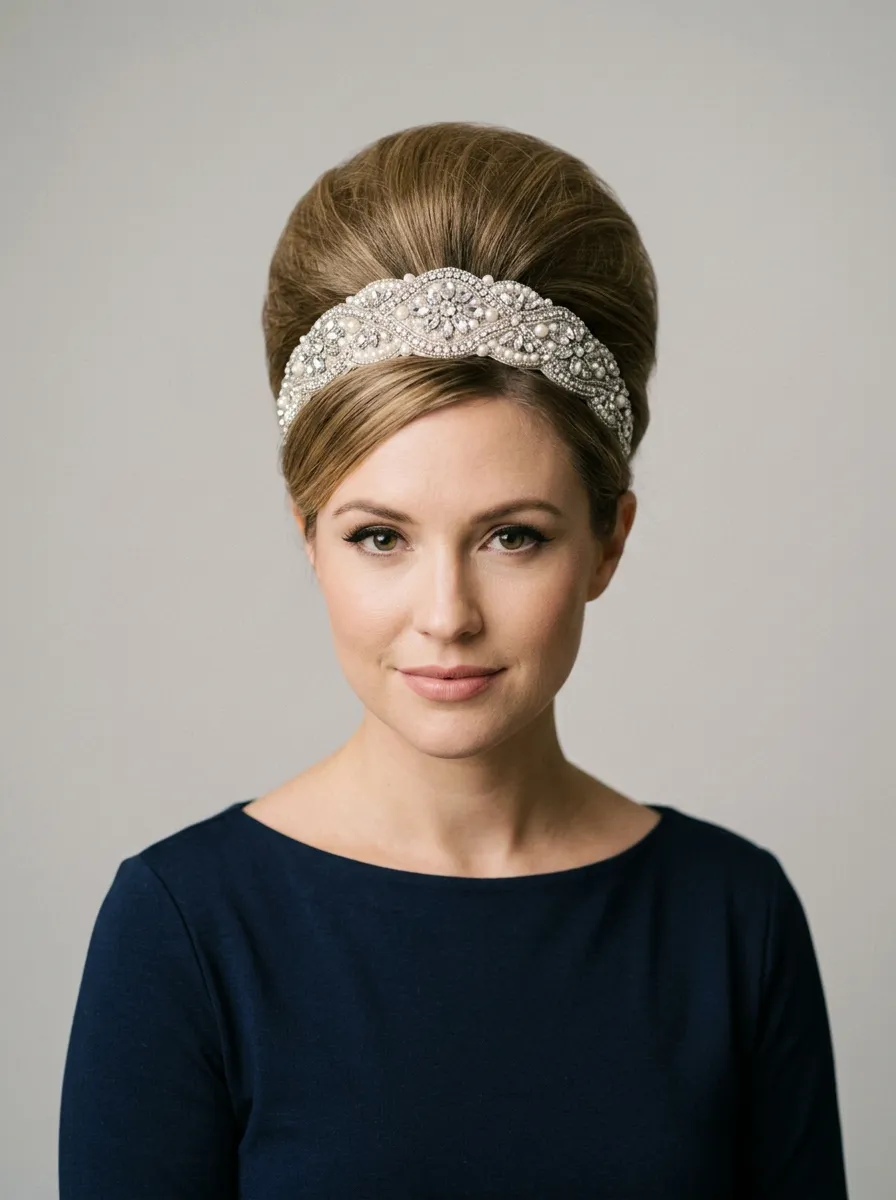
A wide headband placed just behind the hairline adds sparkle and structure to a beehive without much extra styling work. It also helps hide the base of the tease, which is useful if your teasing isn’t perfectly even. Shape your beehive as usual, then slide a headband into place right where the crown height begins, pushing any loose hairs back underneath it. Budget tip: thrifted or discount store headbands work just as well as expensive ones, especially once they’re tucked partly into the hairstyle. Choose a headband with some texture, like rhinestones or fabric, since a plain one can look flat against a voluminous style. This combination suits holiday parties, prom, or any event where you want a bit of sparkle without adding a full accessory like flowers or a scarf. It’s also one of the fastest ways to dress up a beehive in under a minute.
15. Beehive with Winged Side Pieces
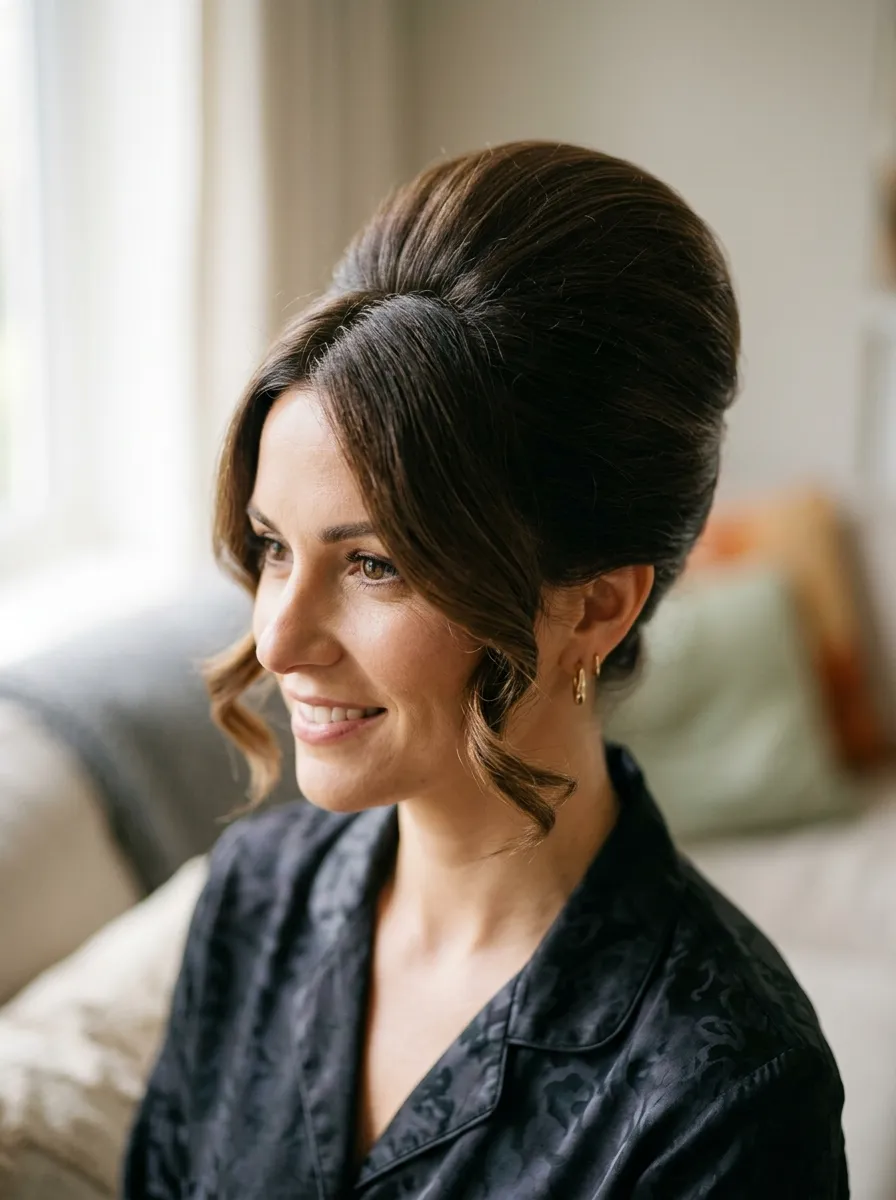
This variation leaves two small sections near the temples out of the main beehive shape, curling them forward toward the cheekbones for a winged effect. It softens the face and adds a bit of drama on either side of the style. Shape the main beehive first, then curl the two side sections separately and pin them forward, close to the cheek. DIY tip: finger-curl the sections around a curling wand set to a lower heat to avoid frizz, since these pieces are meant to look smooth, not textured. This works particularly well for people with round or square face shapes, since the winged pieces help create the appearance of more angles. It’s a popular choice for pin-up photoshoots or themed events where a dramatic silhouette matters. Pair it with winged eyeliner to match the shape of the hair for a coordinated, styled-from-head-to-toe look.
16. Beehive Ponytail Combo
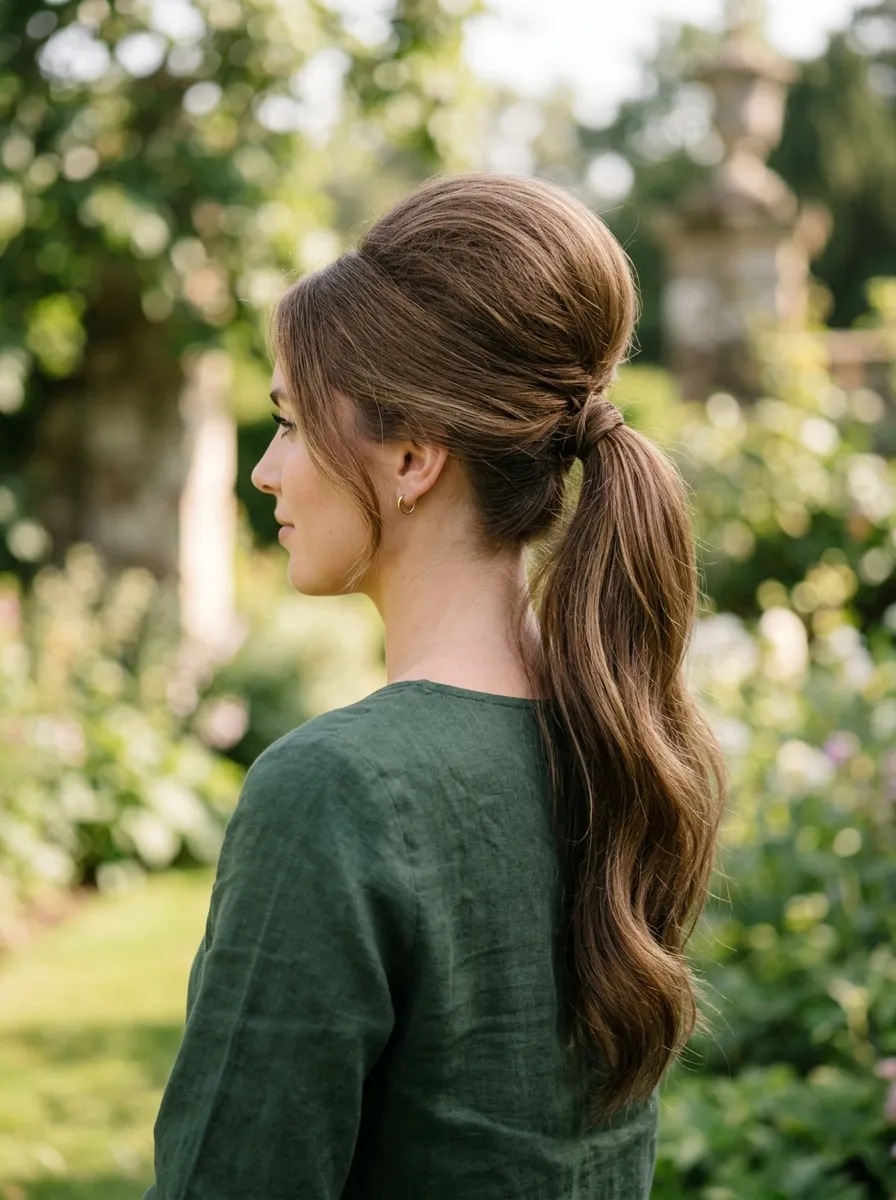
This combo keeps the classic rounded height at the crown but skips pinning the rest of the hair up, letting it flow into a long ponytail instead. It’s a practical choice for anyone who wants the beehive look without the full commitment of an updo. Tease and shape just the top section into the dome shape, then gather the remaining hair into a ponytail at the base and secure with an elastic. Budget tip: a claw clip can stand in for an elastic if you want a quick, adjustable option that’s easy to remove later without tugging on your hair. This style works well for daytime events, casual outings, or anyone new to the beehive trend who wants to ease into it. It also takes less time overall since only the top section needs careful shaping, making it a good option for busy mornings.
17. Beehive with a Bold Middle Bump
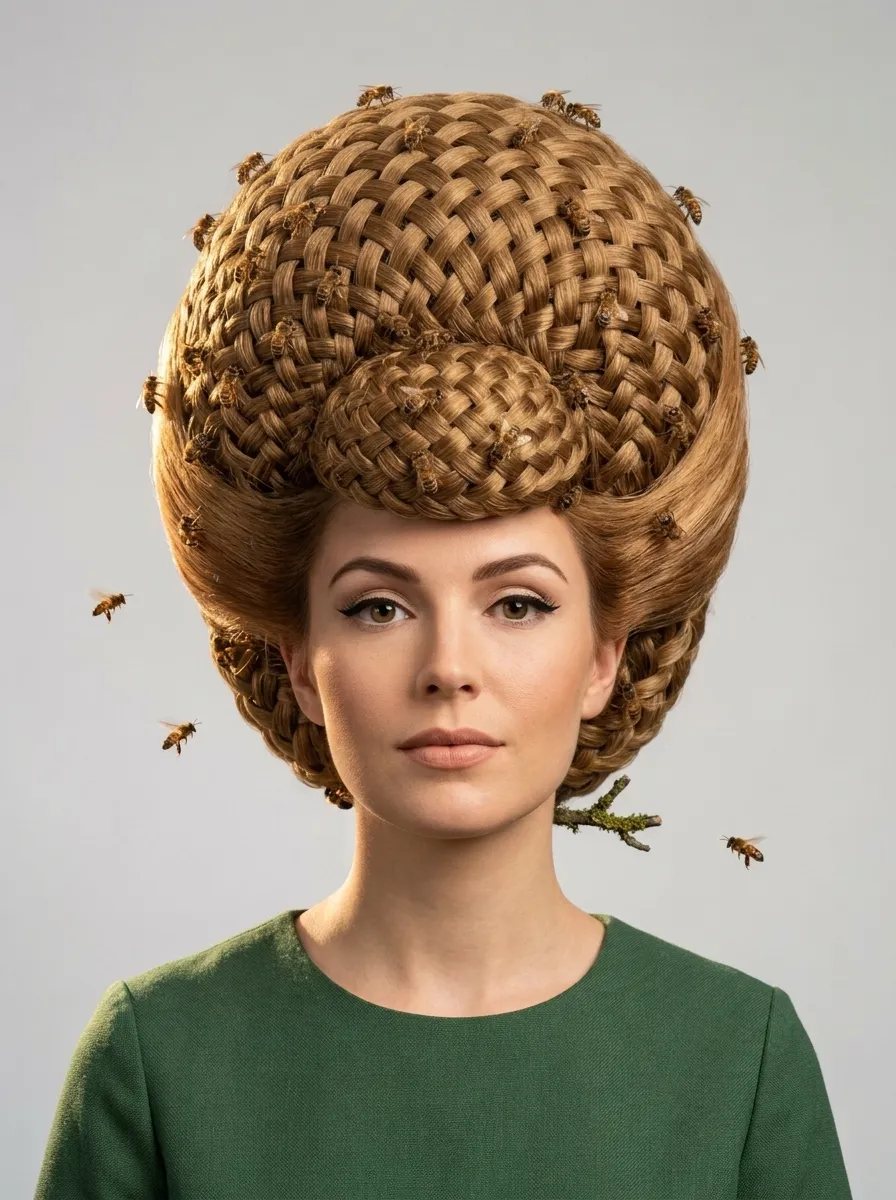
This version puts most of the volume right above the forehead in a single dramatic bump, rather than spreading height evenly across the crown. It creates a strong, graphic silhouette that stands out in photos. Tease a small section right at the hairline, shape it into a rounded bump, then smooth the rest of the hair back into the main beehive shape behind it. DIY tip: a bump-it insert, which costs very little at most drugstores, can help hold this shape without needing heavy teasing that might damage your hair over time. This look suits people who want a bold, retro statement for a themed party or performance, since it reads clearly even from a distance. Keep the sides smooth and simple so the bump stays the main focus, rather than competing with texture elsewhere in the style.
18. Low Beehive for Subtle Height
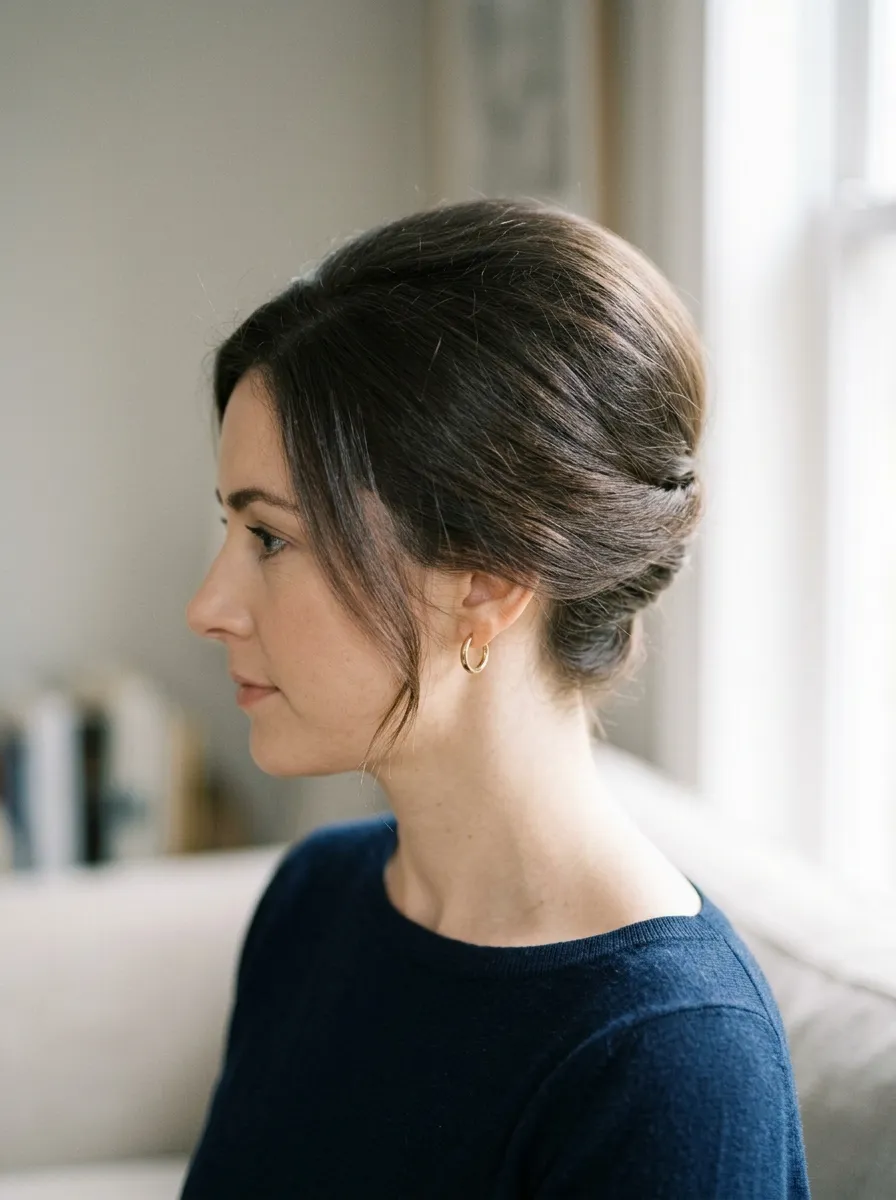
Not every beehive needs to reach dramatic heights. This lower, gentler version keeps the classic rounded shape but with far less volume, making it wearable for everyday settings like work or school events. Tease lightly, just enough to create a small rounded mound, then smooth and pin without building excessive height. Budget tip: a small amount of mousse applied to damp hair before drying can add natural lift, reducing how much teasing you need to do afterward. This style holds up well through a full day without needing touch-ups, since there’s less structure that can collapse or shift. It’s a good starting point for anyone nervous about trying a full beehive for the first time, offering a taste of the retro look without feeling like a costume. Pair it with simple, everyday makeup for a look that fits naturally into daily life.
19. Beehive with Metallic Hairpins
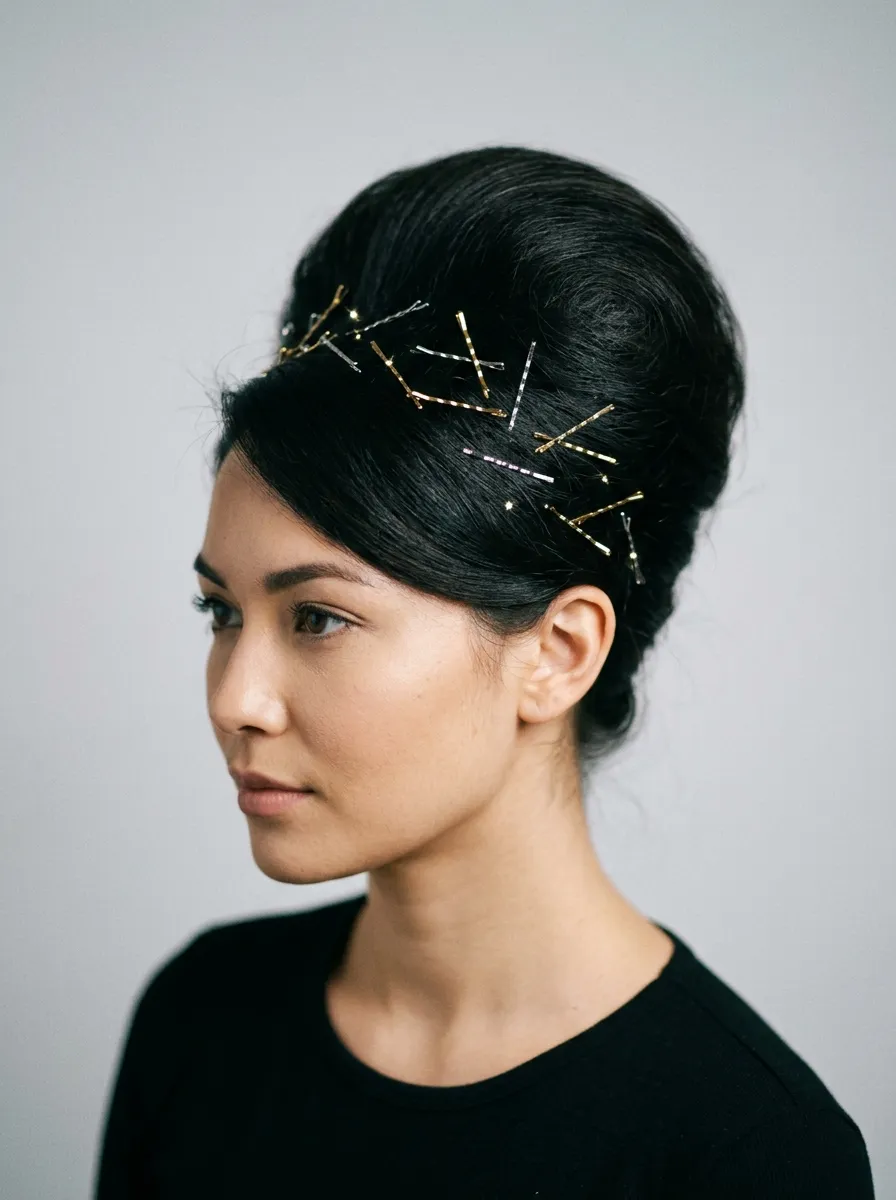
Small decorative hairpins scattered across the base of a beehive add sparkle without needing a bigger accessory like a headband or flowers. They catch the light as you move, giving subtle shine throughout the day or evening. Shape your beehive, then tuck two to four decorative pins into the base at different angles, spacing them so they look scattered rather than lined up in a row. Budget tip: basic gold or silver bobby pins from a discount store work as decorative pins too, especially if you angle a few slightly outward instead of pushing them flat against the head. This detail works well for New Year’s parties, anniversary dinners, or any evening event where a bit of shine feels appropriate. It’s also an easy way to personalize a beehive without changing the overall shape, since the pins add detail rather than bulk to the style.
20. Beehive with a Deep Side Part
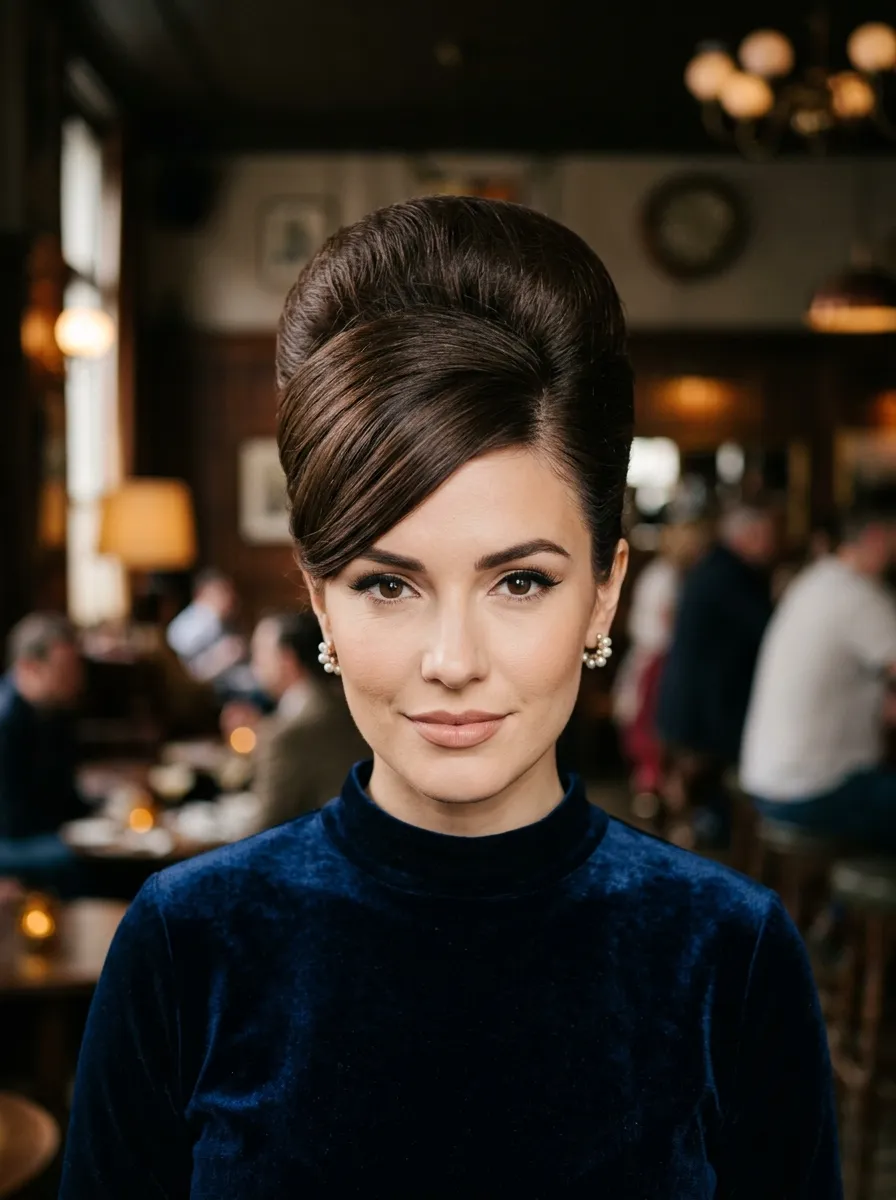
A deep side part changes the front of a beehive into something a little more dramatic and asymmetrical. Instead of an even part or a fully swept-back front, hair dips deeply to one side before joining the rounded shape at the crown. Comb a deep part on one side, smooth the heavier section across the forehead, then tease and shape the crown as usual behind it. DIY tip: a bit of pomade along the parted section keeps it smooth and defined without flaking or looking greasy by the end of the night. This version flatters heart-shaped and oval faces especially well, since the asymmetry balances a narrower chin. It works nicely for red carpet-style events or portrait photography, where a strong side profile matters. Pair it with a single statement earring on the side without the sweep of hair for a balanced overall look.
21. Beehive with Ribbon Accent
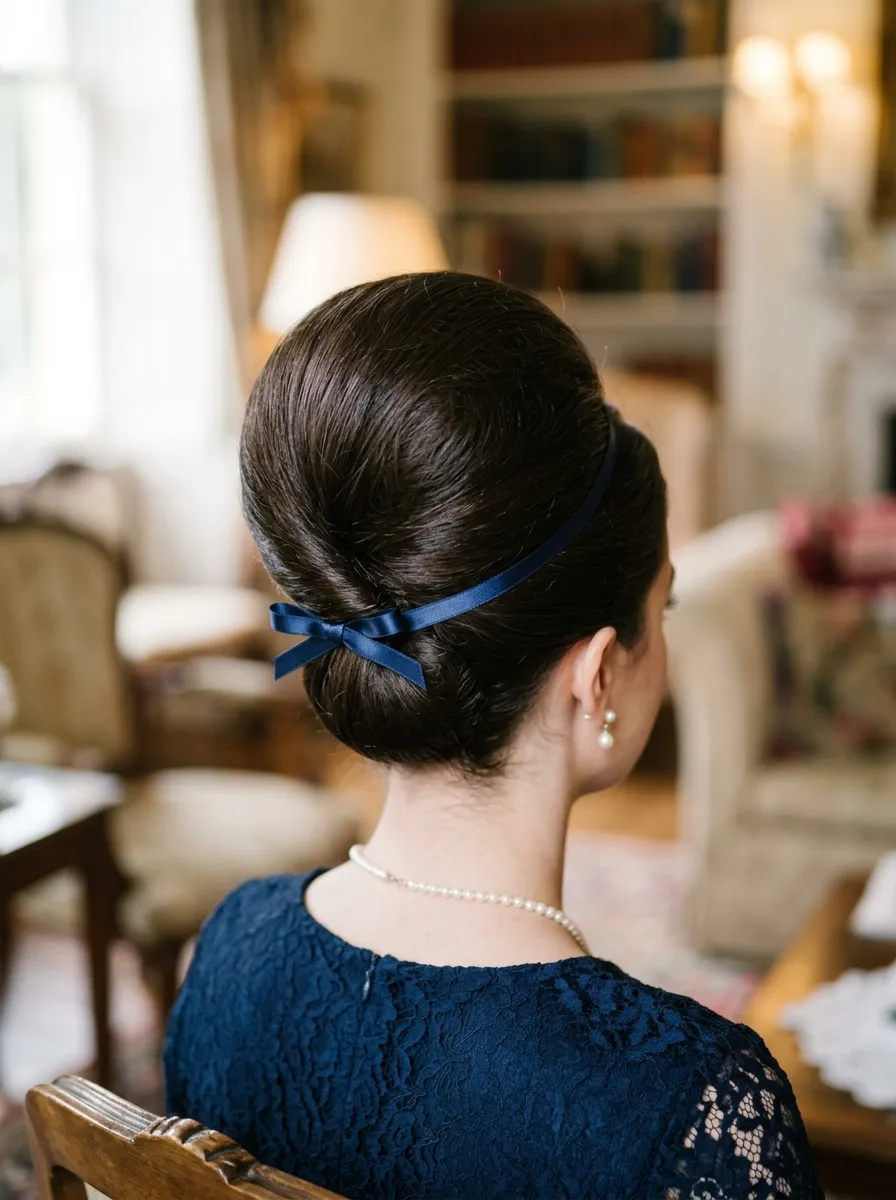
A thin ribbon wrapped around the base of a beehive, finished with a small bow, adds a sweet, feminine detail that works well for birthdays, garden parties, or costume events with a pin-up theme. Shape your beehive first, then wrap a thin ribbon around the base, tying it into a small bow at the back or side. Budget tip: ribbon spools cost very little at craft stores and one spool can be reused across many different hairstyles, not just this one. Choose a ribbon color that matches your outfit for a coordinated look, or go with a classic black or red for a timeless pin-up feel. This detail is light enough that it won’t add bulk or weight to your style, and it can be removed easily if you want to switch the look partway through an event without redoing your whole hairstyle from scratch.
22. The Full Glam Beehive with All the Extras
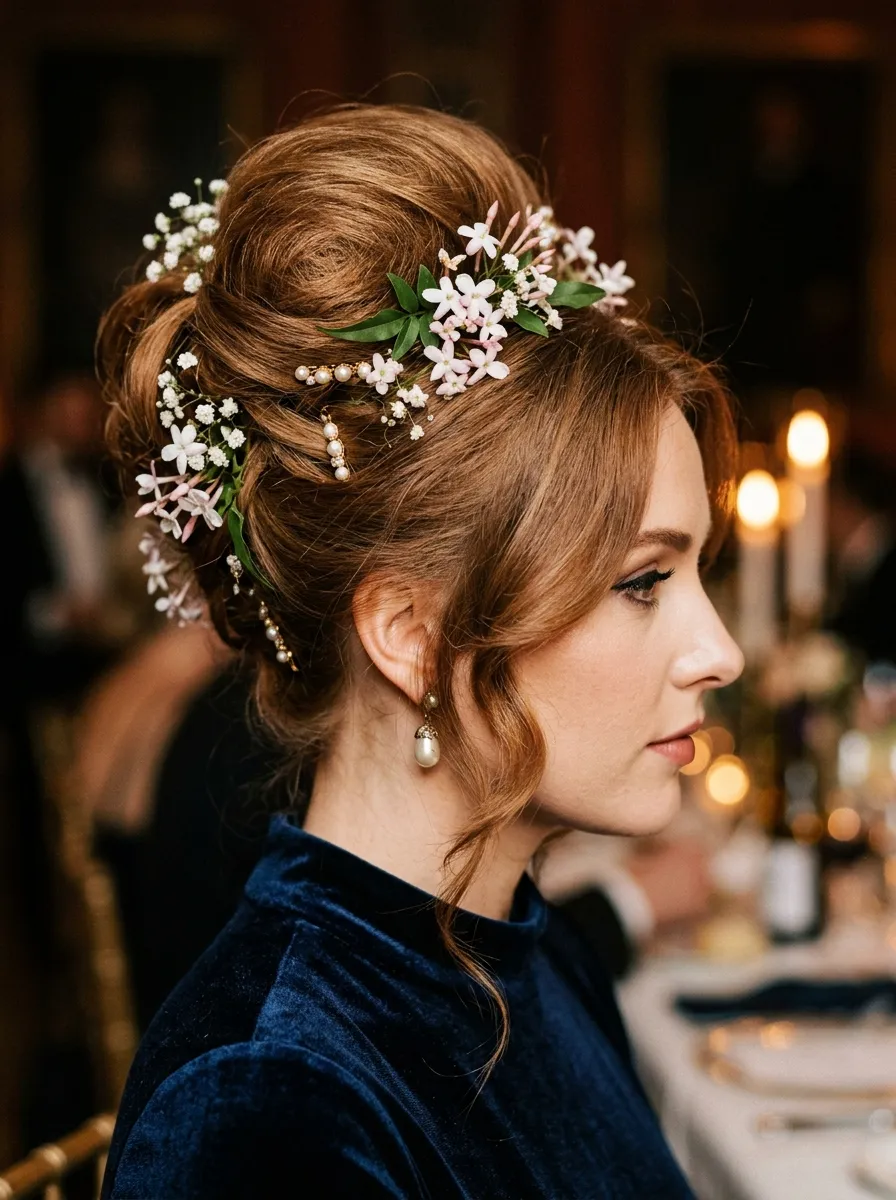
For anyone who wants the full retro experience, this version combines several elements from earlier on this list into one dramatic style. Build a tall, rounded beehive base first, then layer in a curled face-framing piece, a few decorative pins, and one or two small flowers along the base. Take your time layering each detail so nothing looks crowded or competes for attention. Budget tip: gather all your accessories ahead of time, ribbon, pins, and flowers, from craft and discount stores rather than a salon, since the individual pieces add up to real savings compared to a styled updo from a professional. This combination works best for big events like weddings, galas, or milestone birthdays where you want maximum impact. Practice building the layers a few days ahead so you feel confident on the actual day, since this is the most involved style on the list.
Conclusion
Twenty-two ways to wear a beehive prove there’s no single right way to bring this retro style back into your routine. Some versions call for a full evening of prep, while others take five minutes with a comb and a can of hairspray. What matters most is picking a version that fits your hair length, your event, and how much time you actually want to spend getting ready. Start small with a micro beehive or a half-up version, then work your way toward the bigger, more layered looks once you feel comfortable with teasing and pinning. Every tool mentioned here, from foam rollers to craft store ribbon, costs very little and can be reused again and again. Retro glam doesn’t need a big budget or a salon appointment. It just needs a little patience, a few household tools, and a willingness to try something a little bold with your hair.
Leave a Reply