Spring is the perfect time to shake up your hair routine. Medium-length hair sits in a sweet spot where it gives you enough length to play with but stays easy to manage. You do not need a salon appointment or expensive products to look amazing. Whether your hair is straight, wavy, or curly, there are so many ways to style medium hair that feel light, fun, and ready for warm weather. This list covers 22 easy ideas that real people can actually pull off at home with minimal effort and maximum payoff. If you’re also exploring Spring Haircut Ideas, soft layers, airy bobs, curtain bangs, and textured shoulder-length cuts can help create a fresh, effortless look that feels perfect for the brighter and lighter energy of the season.
1. Loose Beachy Waves
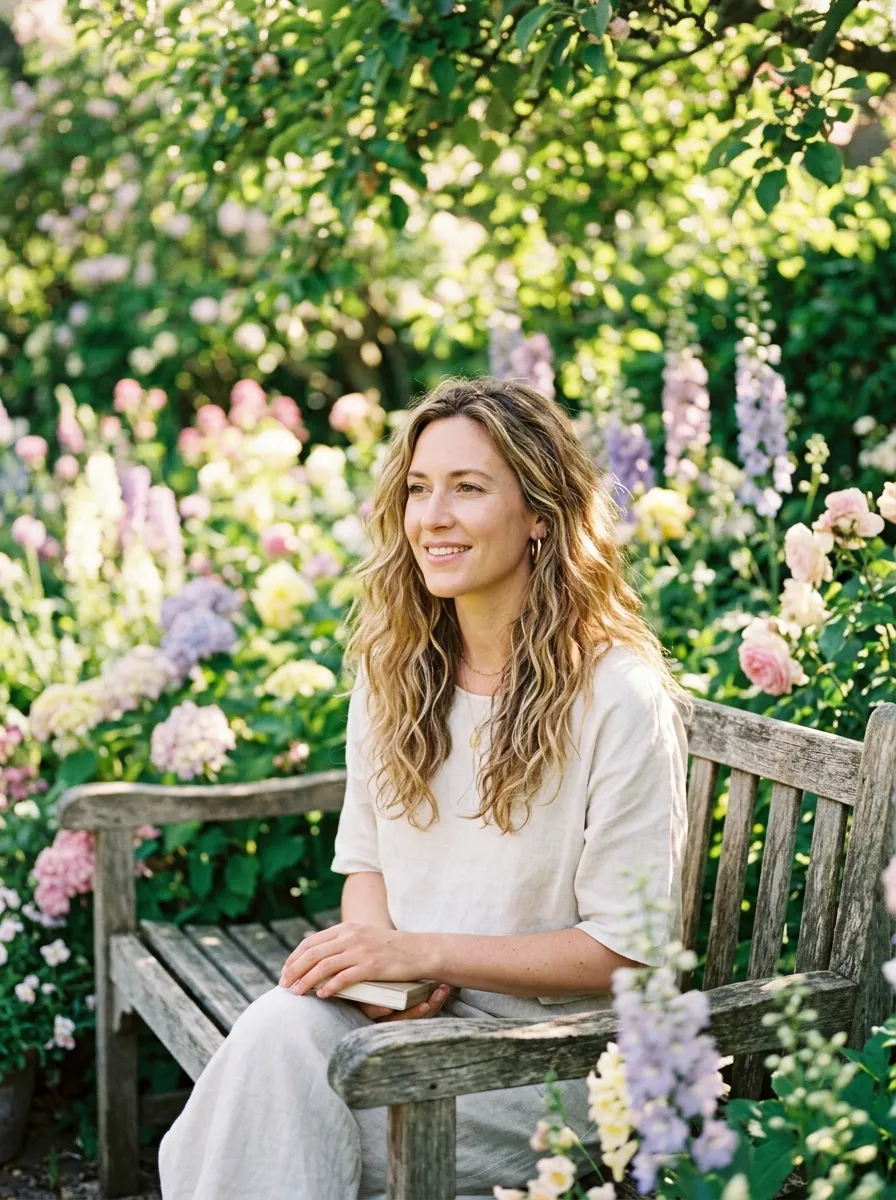
Beachy waves are one of the easiest looks you can create at home. You do not need a beach or expensive products to pull this off.
Start with damp hair. Apply a small amount of sea salt spray or even a little mousse. Scrunch your hair gently from the ends up. Let it air dry or use a diffuser on low heat.
If you want a more defined wave, twist small sections of hair into loose ropes. Let them sit for 20 minutes. Then shake them out with your fingers.
The result looks effortless and light. It works perfectly for spring because the texture feels airy and easy.
You can also sleep with your hair in two loose braids overnight. Wake up, shake them out, and you have soft waves ready to go. No heat required.
This style works on straight, wavy, and slightly curly hair. The key is not over-brushing after you create the waves. Use your fingers instead of a brush to keep the texture intact.
Finish with a light hold spray to keep things in place without making your hair stiff. This look pairs well with casual spring outfits and takes less than 10 minutes.
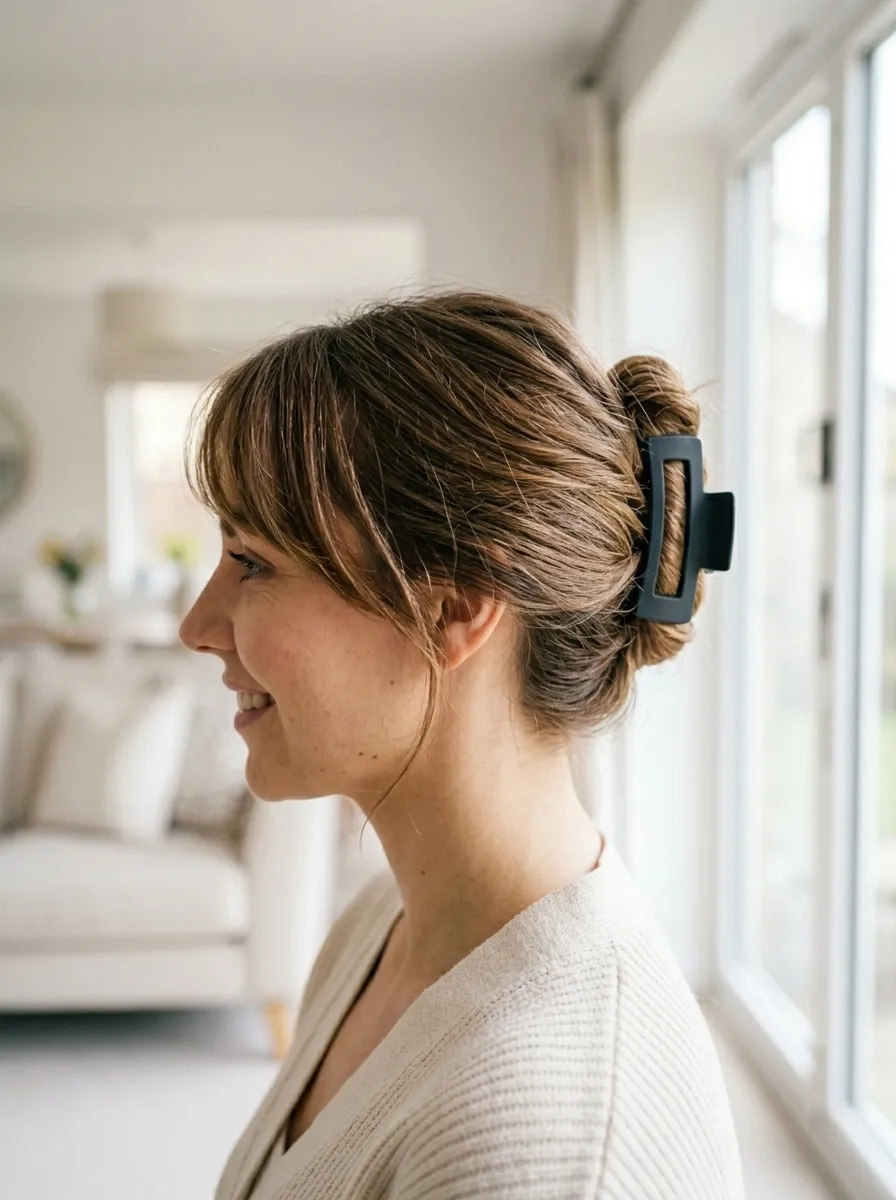
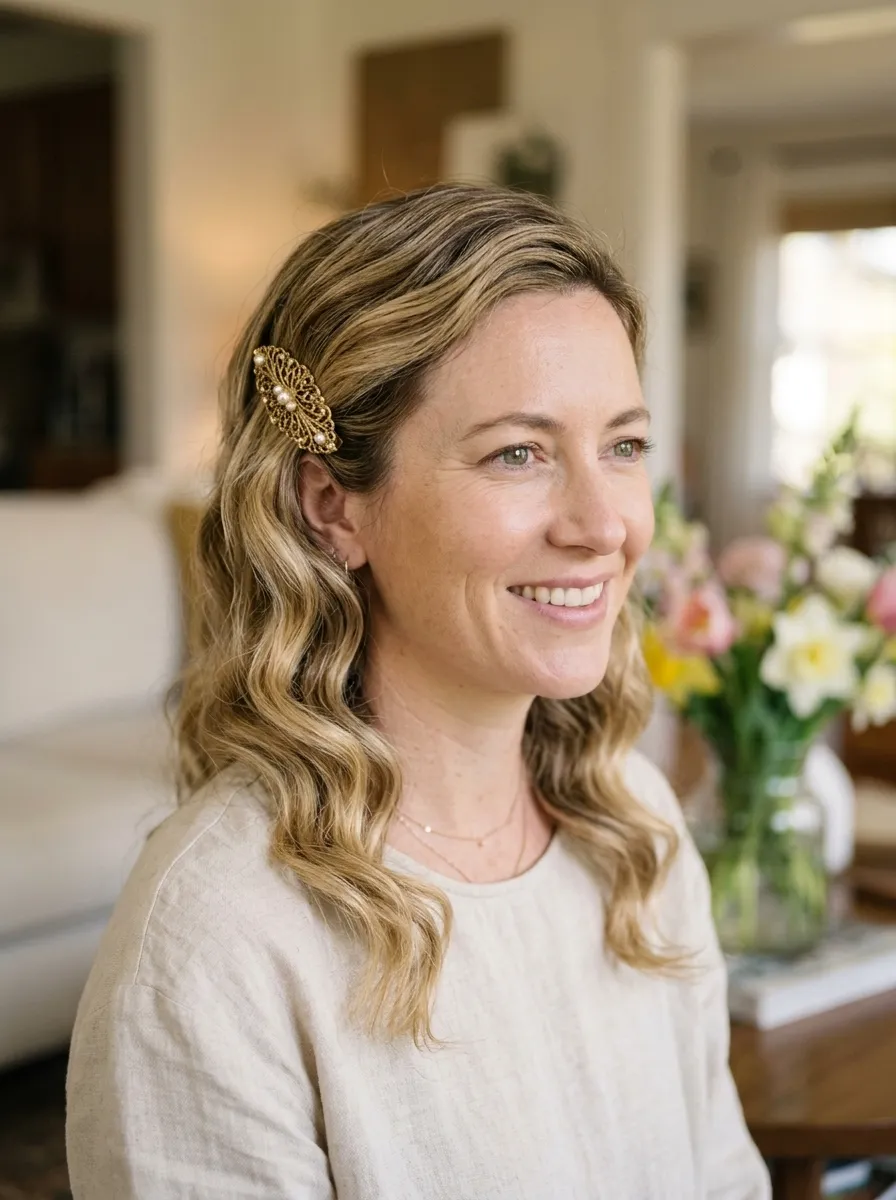
2. Half-Up Butterfly Clip Style
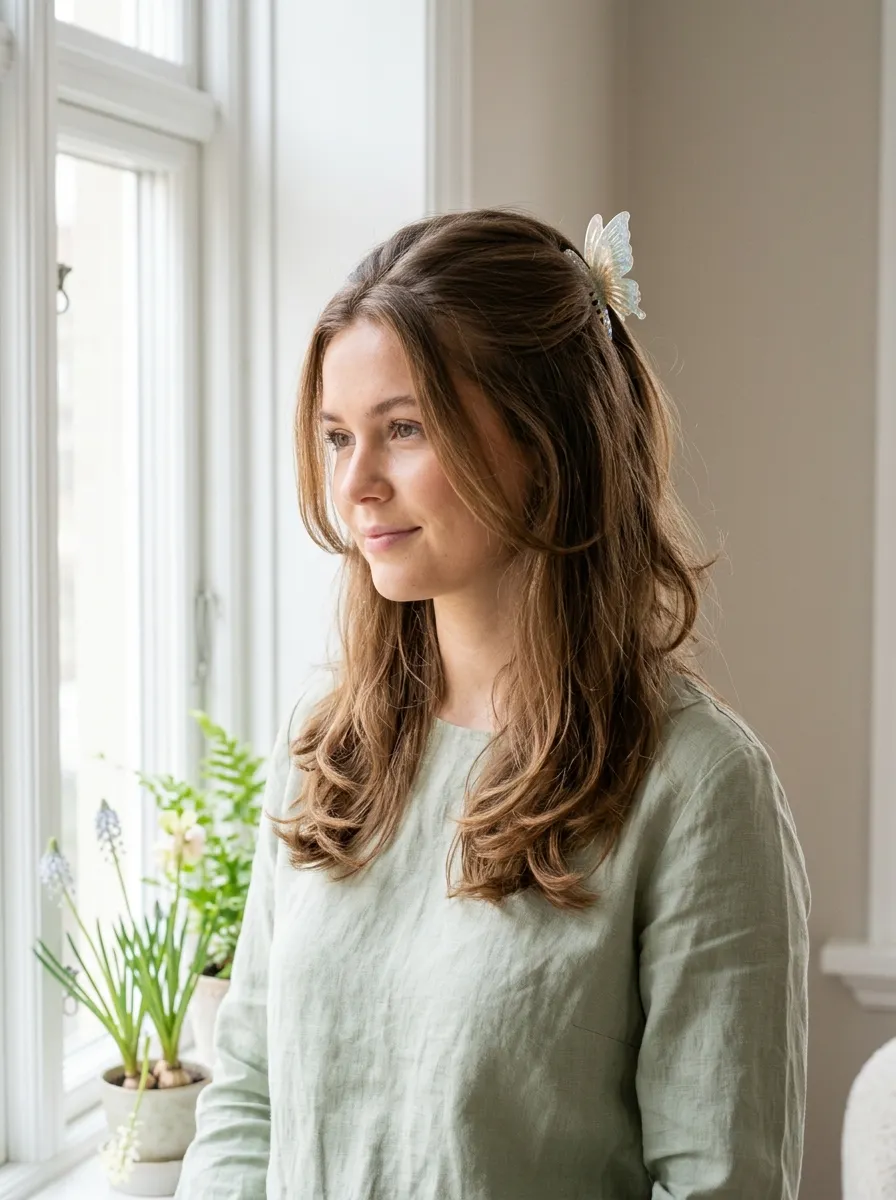
The half-up butterfly clip look is having a major moment and it could not be easier to do. All you need is a large claw clip or butterfly clip from any drugstore. They usually cost just a few dollars.
Grab the top section of your hair, from your temples to the crown. Twist it loosely or just gather it back. Secure it with the clip.
Let the rest of your hair fall naturally around your shoulders. That is genuinely it.
This style looks polished but takes under two minutes. It keeps hair out of your face on warm spring days without fully pulling everything back.
You can play with the placement of the clip to change the vibe. Placing it higher gives a sleeker look. Placing it lower feels more relaxed and casual.
For extra texture, pull a few face-framing pieces loose after clipping. This softens the style and makes it feel more lived-in.
This look works great on medium hair because you have enough length to show off the flowing bottom section. It is the kind of style that looks like you tried without really trying.
Great for school, work, errands, or a casual spring brunch with friends.
3. Soft Low Ponytail With Face-Framing Layers

A low ponytail sounds basic but a few small tweaks make it look really intentional and put-together. The secret is the face-framing pieces.
Pull your hair back into a low ponytail at the nape of your neck. Do not pull it too tight. Let it sit loosely so it has some volume at the crown.
Then pull out two small sections of hair from either side of your face. These frame your face and instantly soften the whole look.
You can curl those front pieces slightly with a small barrel iron or even wrap them around your finger and hold for a few seconds with a blow dryer.
Use a clear elastic or a ribbon hair tie to add a subtle style detail. Silk scrunchies are great for this and they are gentle on your hair too.
If your hair has layers, this ponytail lets them peek out and add movement. Medium hair is ideal for this because the ponytail is full enough to look intentional.
This style is great for warmer spring days when you want hair off your neck. It works from morning to evening without any touch-ups needed.
A little dry shampoo at the roots before styling gives extra grip and volume without adding weight.
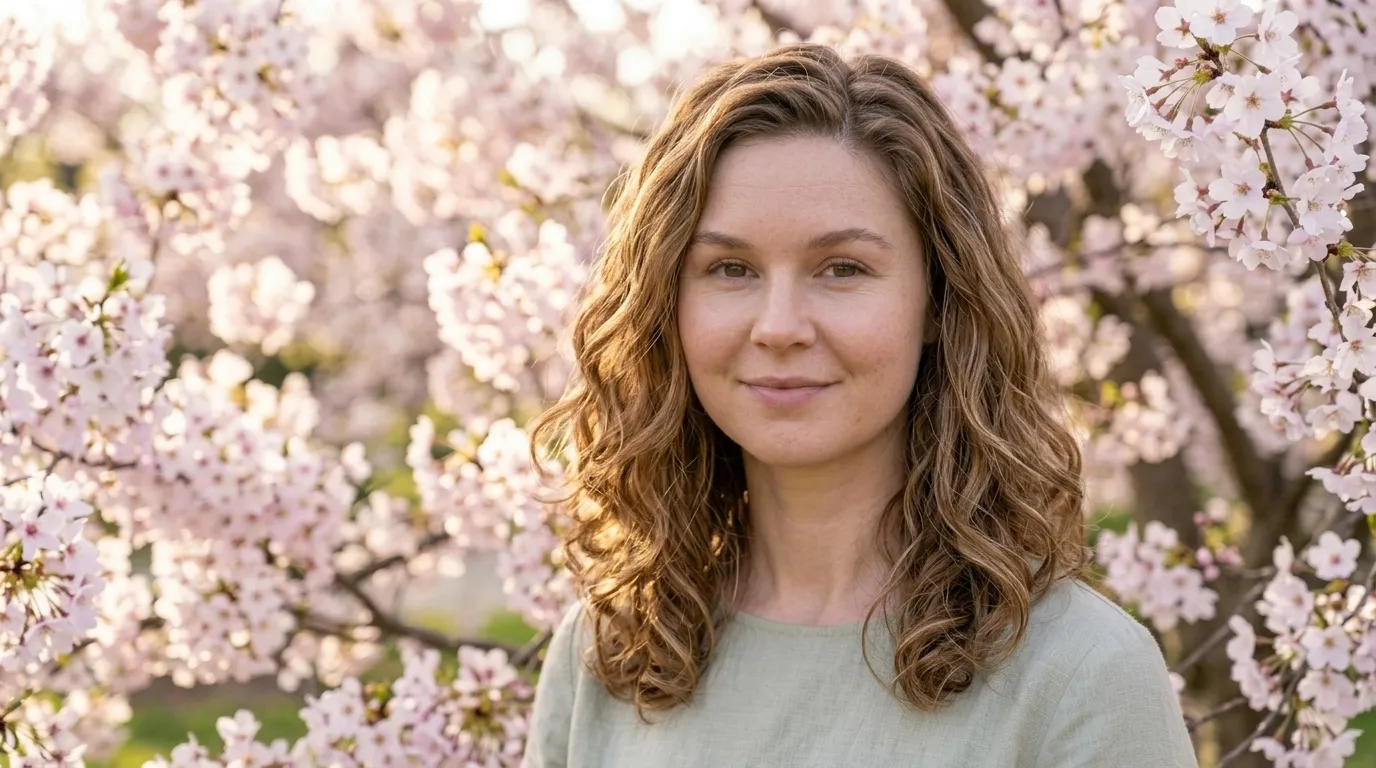
4. Textured Curtain Bangs With Open Hair

Curtain bangs continue to be one of the most flattering bang styles for medium hair. They frame your face without covering your forehead completely and they grow out beautifully.
If you already have curtain bangs, spring is the perfect time to style them in their most natural form. Let them air dry after washing and gently sweep them to each side with your fingers.
For extra shape, take a round brush and blow dry the bangs outward from the center. This gives them that signature soft, swept look.
You do not need to trim them constantly. As they grow, curtain bangs just blend into your layers which makes them low maintenance.
Wearing your medium hair down and open with curtain bangs is one of the most effortless spring looks. The rest of your hair can be air dried or lightly styled with a texturizing spray.
If your hair tends to get flat, flip your head upside down while blow drying the roots. This adds volume without requiring any styling tools.
Curtain bangs work especially well with medium hair because the length helps the bangs blend naturally into the rest of the style. The overall effect looks soft, casual, and season-appropriate.
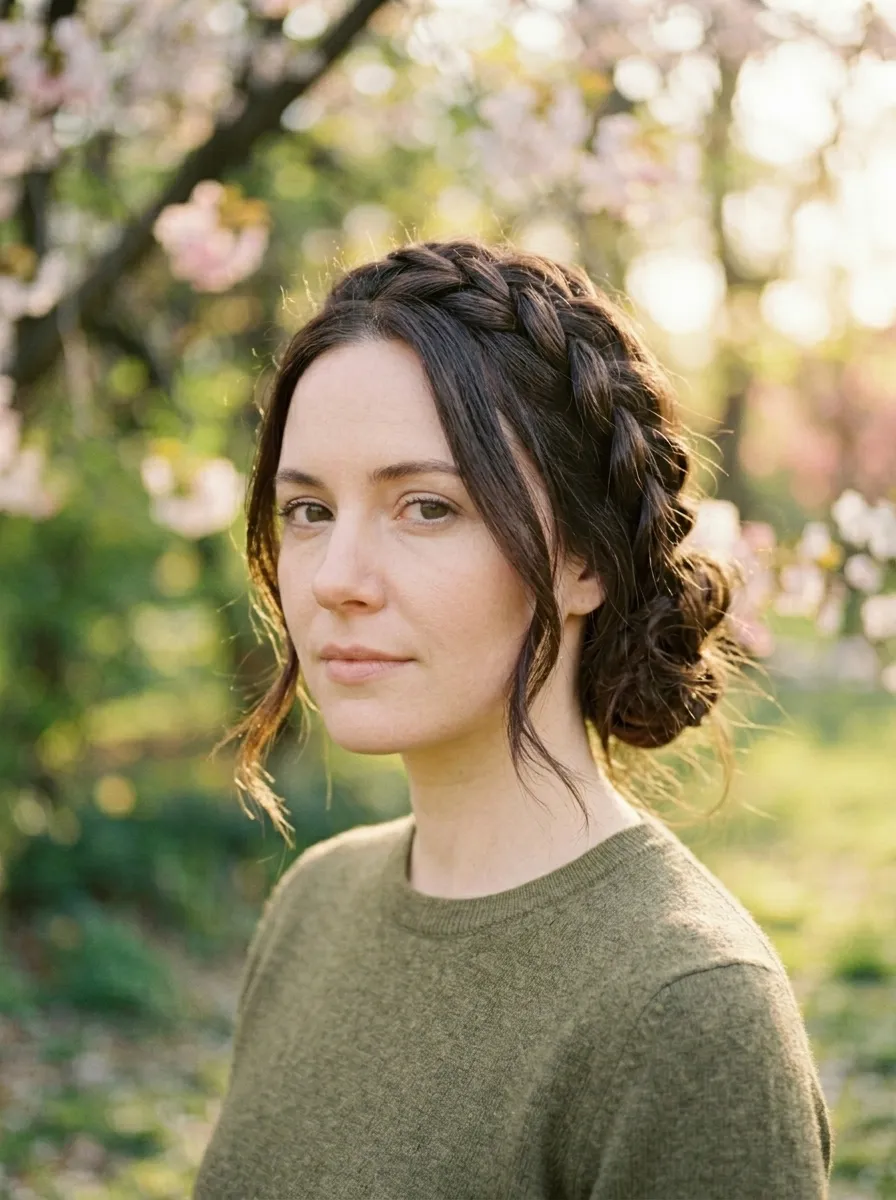
5. Braided Crown Headband
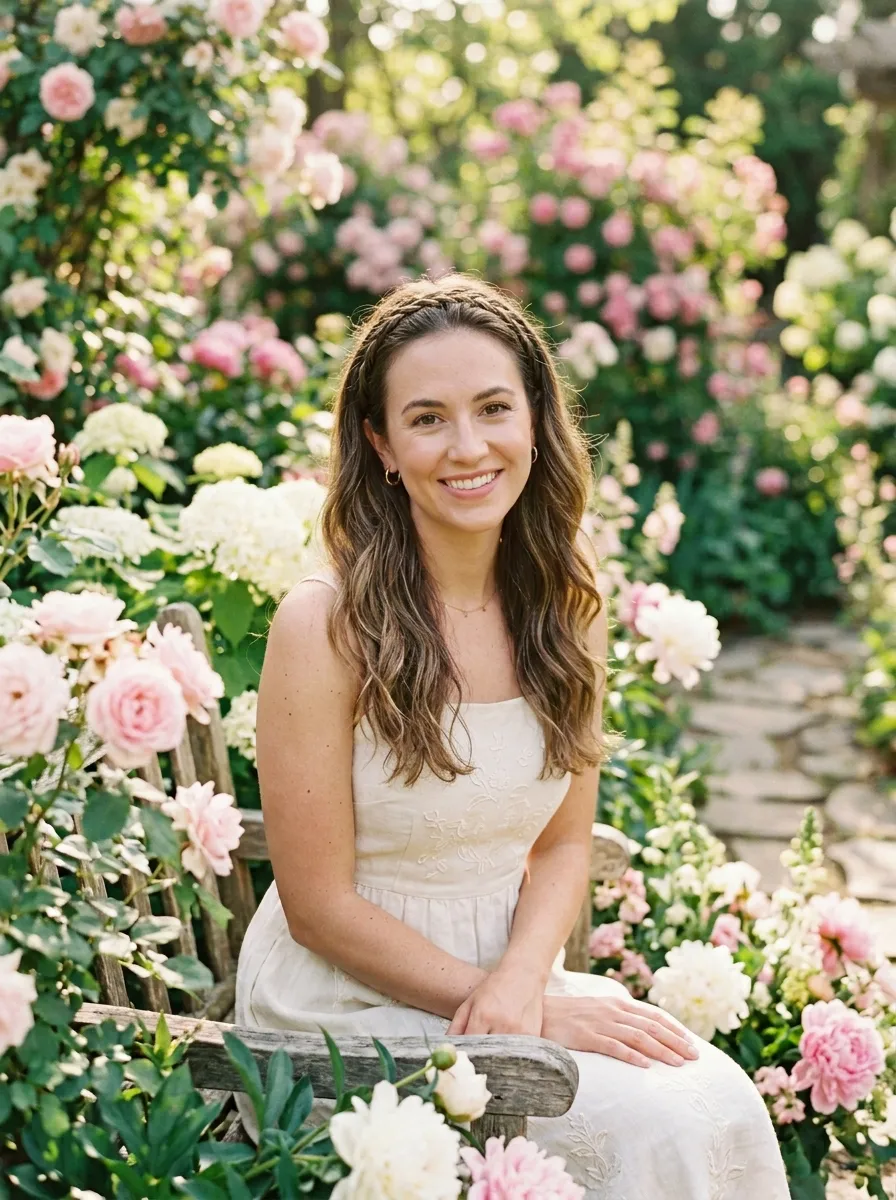
A braided crown headband is a simple way to add something special to your medium hair without doing a full updo. It looks like you spent a lot of time but it only takes a few minutes.
Take a small section of hair from just above one ear. Braid it loosely all the way to the end. Secure with a small clear elastic.
Bring that braid across the top of your head like a headband. Pin it in place on the opposite side using a few bobby pins that match your hair color.
The rest of your hair stays down and loose. The little braid adds a decorative touch that is perfect for spring occasions.
You can make the braid as simple or detailed as you like. A basic three-strand braid works perfectly. If you want more texture, a fishtail or rope braid looks lovely too.
This style is great for outdoor spring events, picnics, or any day you want to look a little more put together without doing much.
It also keeps hair off your face on breezy days, which is a practical benefit. The style holds well throughout the day with minimal touch-ups.
Medium hair is perfect for this look because the braid sits nicely across the head without looking too thin or overpowering.
6. Messy Bun With Wispy Pieces
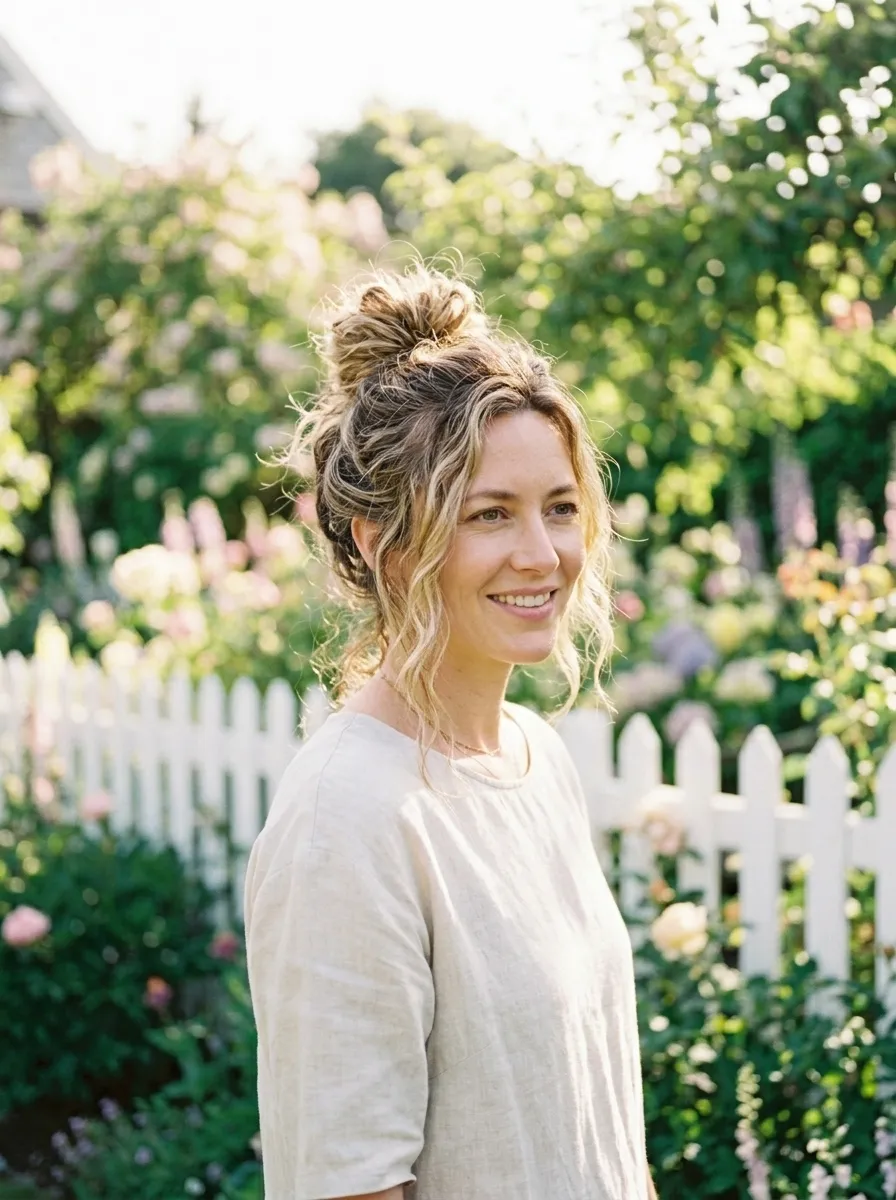
The messy bun is a spring staple for a reason. It is quick, practical, and looks great on medium hair when done with the right amount of looseness.
Start with hair that has a little texture. Day-two or day-three hair actually works better than freshly washed hair for this style. A little dry shampoo helps if your hair is too fresh.
Gather all your hair into a high or mid ponytail. Instead of pulling it all the way through the elastic on the last wrap, leave a loop. That loop becomes your bun.
Fan the loop out slightly and wrap any excess hair around the base. Secure with another elastic or a few bobby pins.
Now the important part: pull it apart gently. Tug at the sides and top of the bun to loosen it and create volume. Let a few pieces fall around your face and at the nape of your neck.
These wispy pieces are what make the bun look intentionally undone rather than accidentally messy. They soften your face and give the whole look a more romantic, effortless quality.
Medium hair gives you just enough length for a satisfying bun with pieces left over to frame your face. It is the ideal length for this style.
7. Side-Swept Waves With a Deep Part
A deep side part completely changes the shape of your medium hair and adds instant glamour with zero effort.
Start by parting your hair deeply on one side, further than you normally would. Even if you typically part in the middle, push your part all the way over to one eyebrow.
Let the heavier side fall across your forehead and over your shoulder. This creates a naturally dramatic sweep that looks polished.
If you want more defined waves, use a large barrel curling wand on sections of hair. Curl all sections in the same direction, away from your face. Then let them cool completely before running your fingers through them.
This technique creates loose, romantic waves that sit beautifully with a deep part. The waves fall forward and create that classic side-swept effect.
For a no-heat version, twist damp hair onto one side before bed. Sleep on it. In the morning, release it and the waves will be there naturally.
A little smoothing serum on the top of your hair keeps flyaways down and makes the style look sleek at the roots while textured at the ends.
This look works for both casual and dressy spring occasions. It is one of those styles that looks intentional and elegant without requiring a lot of skill.
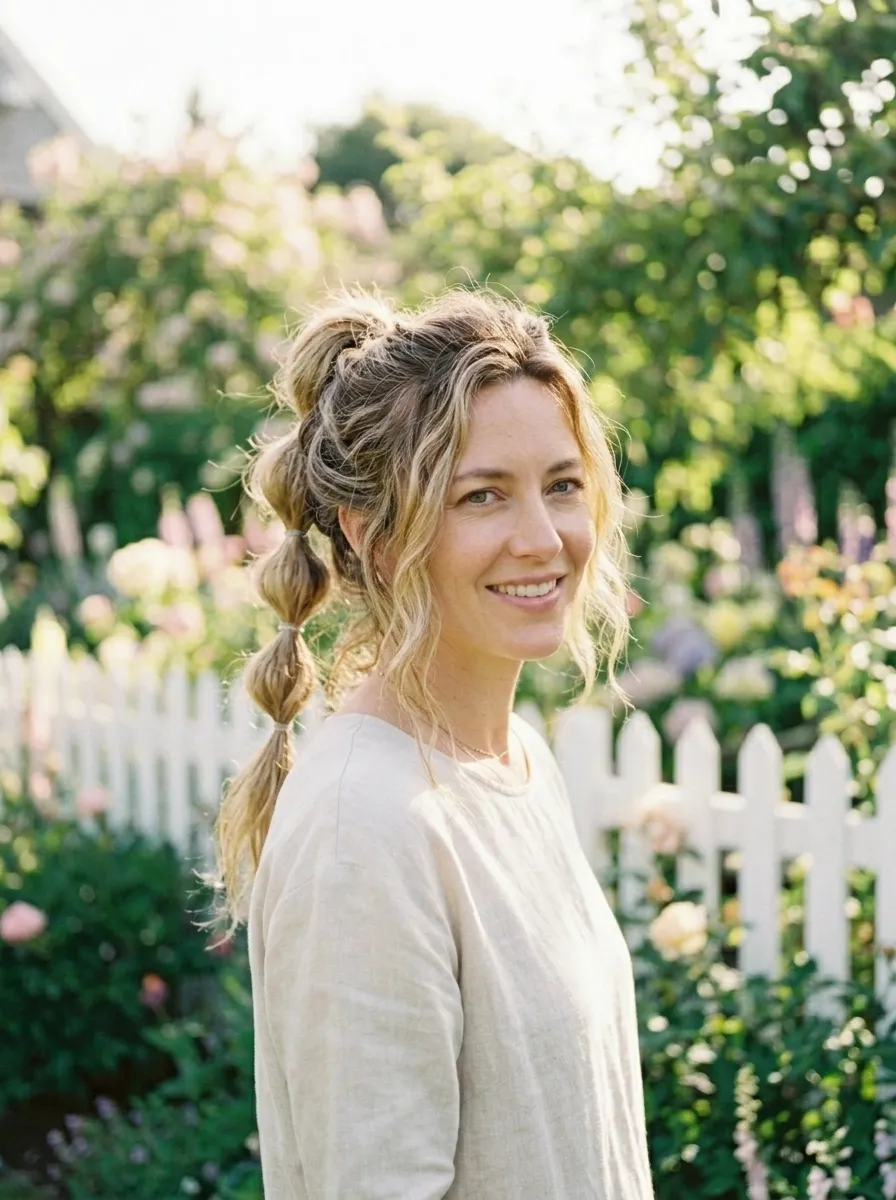
8. Dutch Braid Into Low Bun
This style is a step up from the average bun but it is much easier than it looks. The Dutch braid gives you an interesting detail at the top while the low bun keeps things practical and secure.
Start at your crown and begin a Dutch braid by crossing sections under each other instead of over. This creates a braid that pops out from the surface of your hair.
Braid down to about the nape of your neck. Then gather the rest of your hair together with the braid and twist everything into a low bun. Pin it loosely.
You do not need it to be perfect. A slightly undone bun actually looks better here. Let a few pieces escape at the sides and back.
Medium hair handles this style really well. The braid does not have to be very long before it reaches the bun, which means less technique required.
After pinning the bun, use your fingers to gently pull and loosen the braid. This adds texture and makes the braid look fuller and more detailed.
This is a great style for spring outdoor events, weekends, or even a casual workday. It keeps your hair fully secured without needing multiple hair ties or pins.
Practice the braid a few times on a weekend morning and it becomes a quick everyday option.
9. Simple Twist and Clip Updo
This is the easiest updo you will ever do. It takes about 30 seconds and looks genuinely stylish on medium hair.
Gather all your hair at the back of your head as if you are about to make a low ponytail. Then twist the whole bunch upward. As you twist, the hair will fold up onto itself.
Use a large jaw clip to secure the twist against the back of your head. The twist creates a casual knot-like shape that is more interesting than a plain ponytail.
Let a few pieces fall loose at the front or sides. This makes the style feel relaxed instead of severe.
The beauty of this look is that it works on second or third day hair perfectly. Slightly oily roots actually help the twist hold better.
You can adjust the tightness depending on how formal you want to look. A tight, neat twist feels more polished. A looser, messier version feels casual and effortless.
This style is ideal for hot spring days because it gets all your hair up and off your neck quickly. It is also a great option when you are running late and need something that looks intentional fast.
Jaw clips in neutral tones like black, brown, or cream work with any outfit and are very affordable.
10. Air-Dried Natural Texture

Sometimes the best spring hairstyle is simply letting your natural hair texture do its thing. Air drying is free, heat-free, and genuinely good for your hair.
The key to a great air-dry result is how you handle your hair when it is wet. Do not rub it with a towel. Instead, gently squeeze out excess water with the towel or an old cotton t-shirt.
Apply a small amount of leave-in conditioner or a light styling cream while your hair is still damp. Work it through from mid-length to ends.
Scrunch your hair upward gently to encourage your natural texture. Then leave it alone.
Fighting the urge to touch your hair while it dries is the biggest challenge. Every time you touch it, you disrupt the texture and create frizz.
If your hair tends to look flat when air dried, flip your head upside down once it is about 80 percent dry. This adds root volume.
For wavy hair, scrunching in a little mousse before air drying defines the waves more clearly. Curly hair benefits from a curl cream applied in sections.
Spring weather with its lighter humidity compared to summer is ideal for air drying. Your hair dries faster and the results look more natural and polished.
This is the ultimate low-effort spring style. Zero heat, zero styling time, and your hair thanks you for it.
11. Bubble Ponytail
The bubble ponytail is a fun and playful style that takes medium hair to a new level with almost no skill required.
Pull your hair into a regular ponytail at whatever height you like. Secure it with an elastic.
Then take another elastic and wrap it around the ponytail about two inches below the first. Before pulling it all the way through, puff out the section of hair between the two elastics. This creates the first bubble.
Keep adding elastics down the length of the ponytail with a little puffing between each one. You will probably get three or four bubble sections with medium hair.
The bubbles do not need to be perfect. Slightly uneven bubbles actually look more playful and casual, which works perfectly for spring.
You can use matching elastics for a clean look or mix small ribbons and scrunchies for a more decorative style.
This look works great for outdoor activities, spring picnics, or a fun weekend errand run. It is practical enough to keep hair out of your face while still looking like you made an effort.
Kids love this style too, making it a great option for moms doing their own hair and their kids’ hair at the same time with the same technique.
12. Loose Fishtail Braid
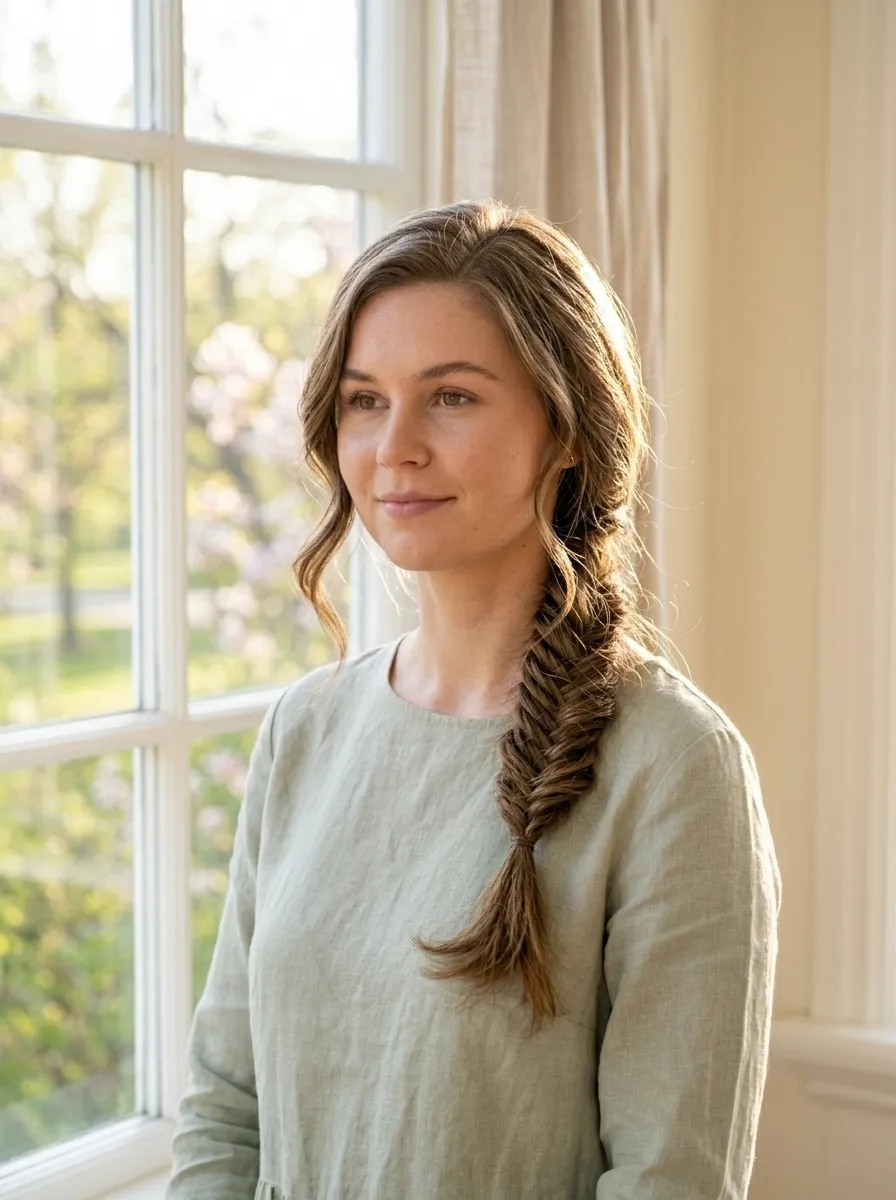
A fishtail braid sounds complicated but a loose version is actually quite easy once you get the rhythm. And on medium hair, it looks especially full and detailed.
Gather all your hair over one shoulder. Divide it into two equal sections.
Take a tiny piece from the outside of the right section and cross it over to join the left section. Then take a tiny piece from the outside of the left section and cross it over to join the right section.
Keep repeating this simple cross-over pattern all the way down. The smaller the pieces you take, the more intricate the braid looks.
The key word here is loose. Do not braid tightly. A loose fishtail has more texture and movement.
Once you reach the end, secure it with a small elastic. Then the fun part: use both hands to gently pull apart the braid from the outside edges. This makes it look bigger and messier in the best way.
A loose fishtail braid is perfect for spring because it looks beautiful on outdoor occasions, spring weddings, or casual weekend styling.
It is also a great protective style that keeps your hair contained without requiring heat or heavy products.
13. High Pony With a Silk Scarf
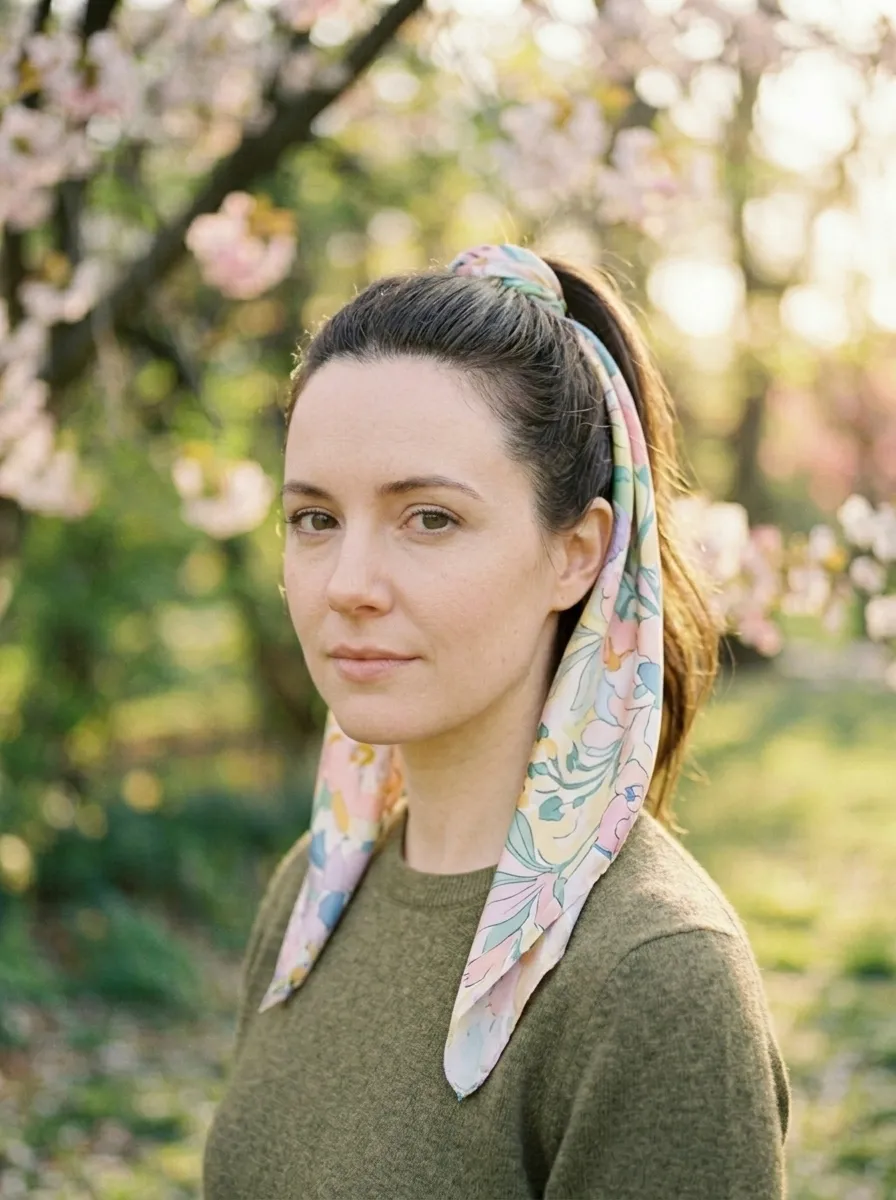
A high ponytail alone is classic. But wrapping the base with a silk scarf turns it into a spring-ready style with a fashion-forward edge.
Pull your hair into a high ponytail on top of your head. Secure it tightly with an elastic so it has a smooth, polished base.
Take a lightweight scarf or a ribbon and wrap it around the base of the ponytail several times. You can tie it in a bow at the front, the side, or the back depending on the look you want.
Let the ends of the scarf trail down alongside the ponytail for extra length and movement.
Silk or satin scarves are ideal because they do not absorb moisture from your hair. They also feel gentle on the elastic area and reduce breakage.
You do not need an expensive scarf for this. A simple hair ribbon, a strip of fabric from an old scarf, or even a printed bandana works perfectly.
For a sleeker version, use a paddle brush and a little smoothing serum to pull the roots flat before tying the ponytail. This creates a clean, groomed look at the crown.
For a more casual version, pull the ponytail loose and messy before adding the scarf. The contrast of a soft scarf against tousled hair is a great combination.
14. Face-Framing Braid Detail

Adding a small braid at the temple is one of the quickest ways to make your everyday hair look intentional and spring-ready.
Take a small section of hair from just above your temple on one side. Braid it loosely. It does not need to be long, just a few inches.
Bring the braid back behind your ear and secure it with a bobby pin or a small elastic. The rest of your hair stays down and natural.
This tiny detail changes the whole look. It frames your face, keeps hair out of your eyes, and gives your style a finished quality without doing a full updo.
You can do this on both sides for a symmetrical look or just one side for something more casual and effortless.
Medium hair is perfect for this because you have enough length for the rest of the hair to look full and flowing after the small braid is done.
This style works whether your hair is straight, wavy, or has natural texture. The braid detail reads well on all hair types.
It is also a great way to grow out a haircut gracefully. If you have layers or sections that are in-between lengths, a face-framing braid tucks them away neatly.
15. Low Side Bun With Loose Strands
A low side bun is elegant, practical, and takes just a couple of minutes to put together. It works for everything from casual spring mornings to garden parties.
Gather your hair to one side, just below the ear. Twist it loosely into a bun and pin it in place with bobby pins. You do not need it perfectly round or symmetrical.
Leave a few pieces loose around your face. These loose strands are key to the style looking soft rather than severe.
If you want more texture in the bun, twist your hair before wrapping it. The twisted base adds visual interest.
For a more polished version, smooth the top section of your hair with a brush before gathering it to the side. This creates a clean crown with a romantic, tousled bun.
Medium hair is a great length for this because the bun sits at a satisfying size without being too big or too small.
Decorate with a small flower pin or a pearl-tipped bobby pin for an extra spring detail. These are available at drugstores for very little money and make a big visual difference.
This style is especially great for spring events where you want to look put together but stay comfortable throughout the day. It holds well without needing a lot of products or pins.
16. Pinned Back Retro Waves
Retro waves look incredibly polished on medium hair and the technique is simpler than the result suggests. This style is having a comeback and spring is the perfect season for it.
Use a medium-barrel curling iron to create large, defined S-shaped waves through your hair. Curl all sections in the same direction.
After curling, do not shake the waves out right away. Let them cool completely while still in their coil shape. This sets the wave more firmly.
Once cooled, use a fine-tooth comb or a wide-tooth comb to gently smooth and connect the waves into one flowing pattern.
Take the hair on one side and pin it back behind your ear with a vintage-style barrette or a pearl clip. This classic pin-back detail defines the retro look.
A little shine serum applied before styling keeps the waves looking glossy and smooth rather than frizzy.
This style works beautifully for spring lunches, brunch outings, or any occasion where you want to look a little more dressed up without going too formal.
Medium hair is ideal here because the waves have enough length to show their shape without being so long that they lose definition. It is a sweet spot for this style.
17. Two Strand Twist Out
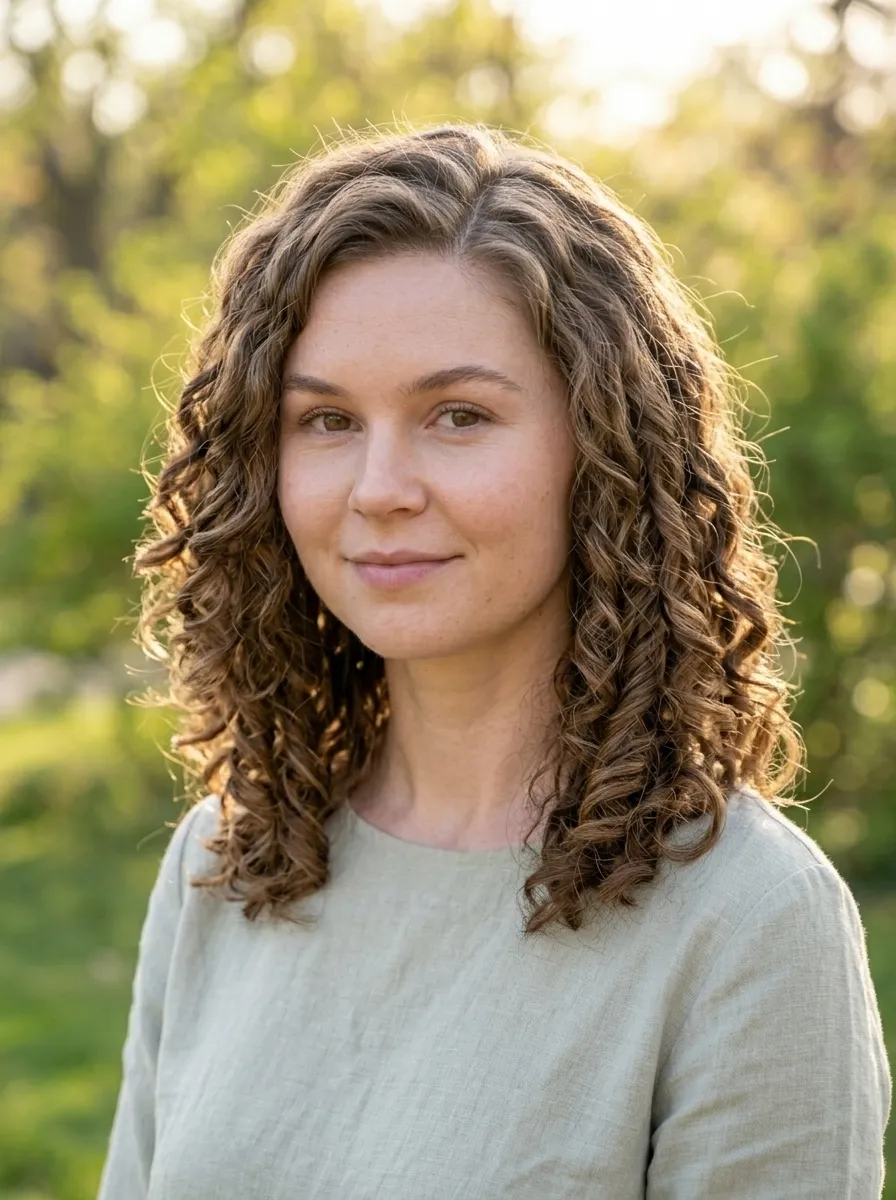
For naturally textured or curly medium hair, a twist-out is one of the most beautiful and practical spring styles. It celebrates your natural texture while giving a defined, deliberate look.
Start on freshly washed and conditioned hair. While still damp, apply a curl cream or light butter product throughout.
Divide your hair into sections. Take each section and twist two strands around each other all the way to the end. Secure with a small elastic.
Let your hair dry completely before untwisting. Air drying overnight works best. Untwisting before your hair is fully dry leads to frizz.
Once dry, carefully untwist each section and use your fingers to gently separate and fluff the twists. Do not use a comb or brush.
The result is beautiful, defined waves or coils depending on your hair texture. The pattern holds for several days with light refreshing.
To refresh on day two or three, lightly mist your hair with water and scrunch lightly. A tiny bit of curl cream on your palms smoothed over the surface tames any frizz.
This style is protective, heat-free, and showcases the natural beauty of textured medium hair. Spring is a wonderful time for twist-outs because the milder weather means less frizz than summer.
18. Sporty Headband Half-Up
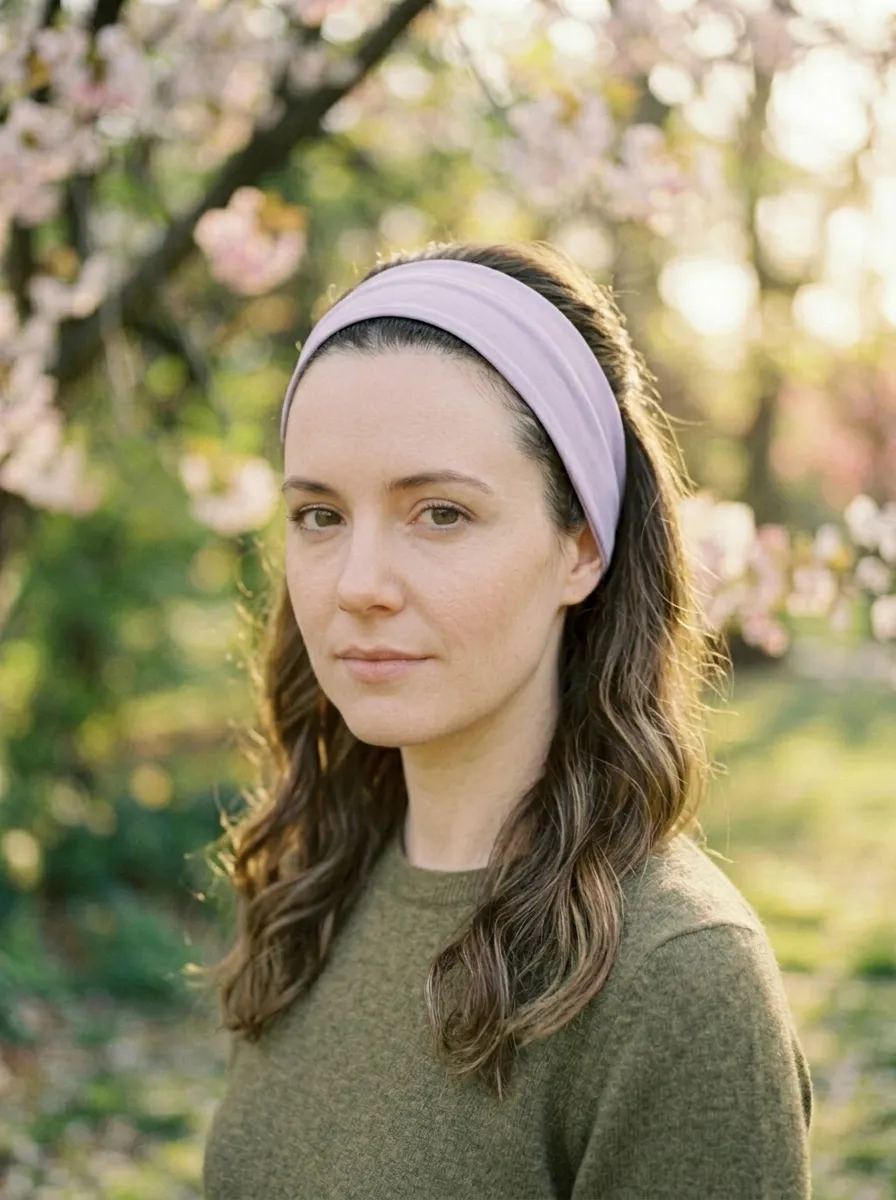
A sporty headband does double duty in spring. It keeps your hair out of your face on active days and gives your look an effortlessly put-together quality.
Choose a wide fabric headband in a pastel or neutral tone. Place it over your head with the band sitting a couple of inches back from your hairline.
Tuck the front sections of hair back behind the band. This creates a half-up style without any pins or elastics.
The back of your hair stays fully down and flowing. This combination of structured front and loose back is really easy and really pretty.
You can wear your hair naturally wavy underneath or even add light waves before putting the headband in. Either way works.
Wide headbands are incredibly affordable and come in every color and material imaginable. Ribbed fabric, velvet, braided cotton, and satin are all popular for spring.
This is a go-to style for walking in the park, running errands, yoga, light hikes, or any spring outdoor activity where you want your hair secure but still looking nice.
It is also a great option when you skipped washing your hair. The headband covers the roots and makes the overall style look intentional and clean.
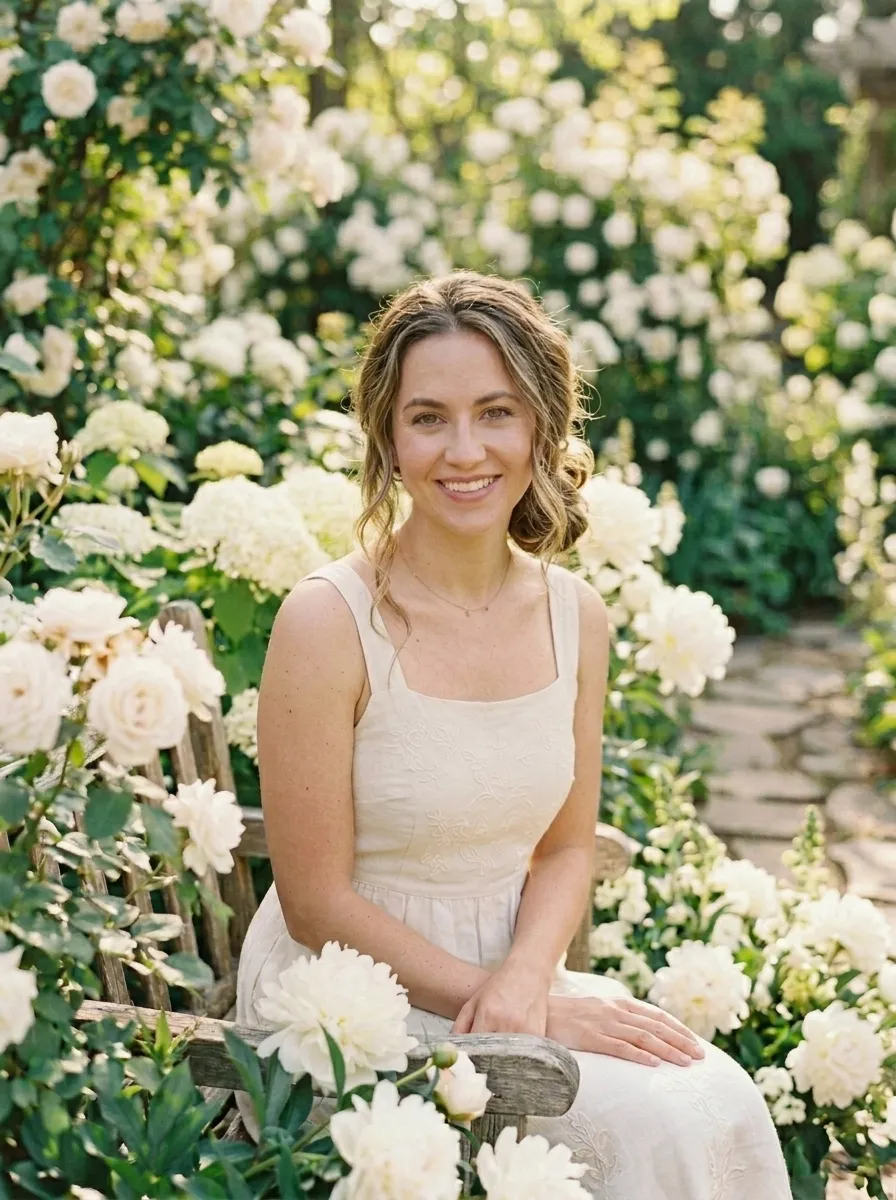
19. Wispy Updo With Tendril Pieces
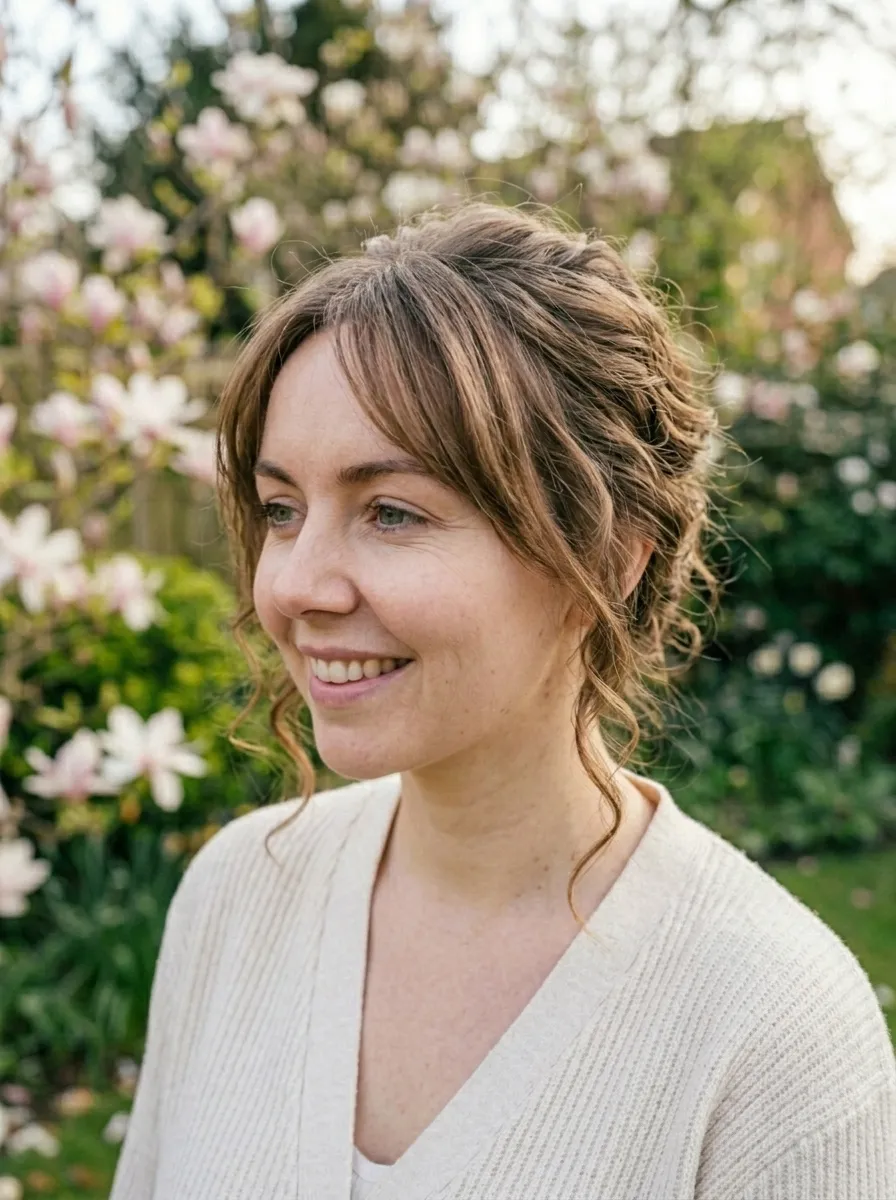
A wispy updo with tendril pieces is the go-to style for spring occasions like outdoor weddings, garden parties, or brunch gatherings. It looks romantic and deliberate while requiring very little effort.
Gather your hair loosely at the back of your head in a low or mid-height position. Pin it up with bobby pins without making it too neat or structured. The looseness is intentional.
Before pinning, pull out a few small sections near your temples and at the nape of your neck. These are your tendrils.
Use a small barrel iron or a curling wand to curl these pieces into soft, loose ringlets. Curl them away from your face.
These curled tendril pieces are what make the style look deliberately styled rather than hastily thrown together.
The body of the updo stays loose and pinned softly, so it looks like a romantic, slightly undone knot rather than a structured style.
A light-hold hairspray misted over the whole style keeps things in place without making the tendrils stiff.
Accessorize with small floral pins or delicate pearl hair clips tucked into the updo for a spring garden aesthetic that requires minimal effort.
Medium hair is perfect for this because you have just enough length for the updo and enough left over for the tendril pieces to look defined.
20. Braided Space Buns
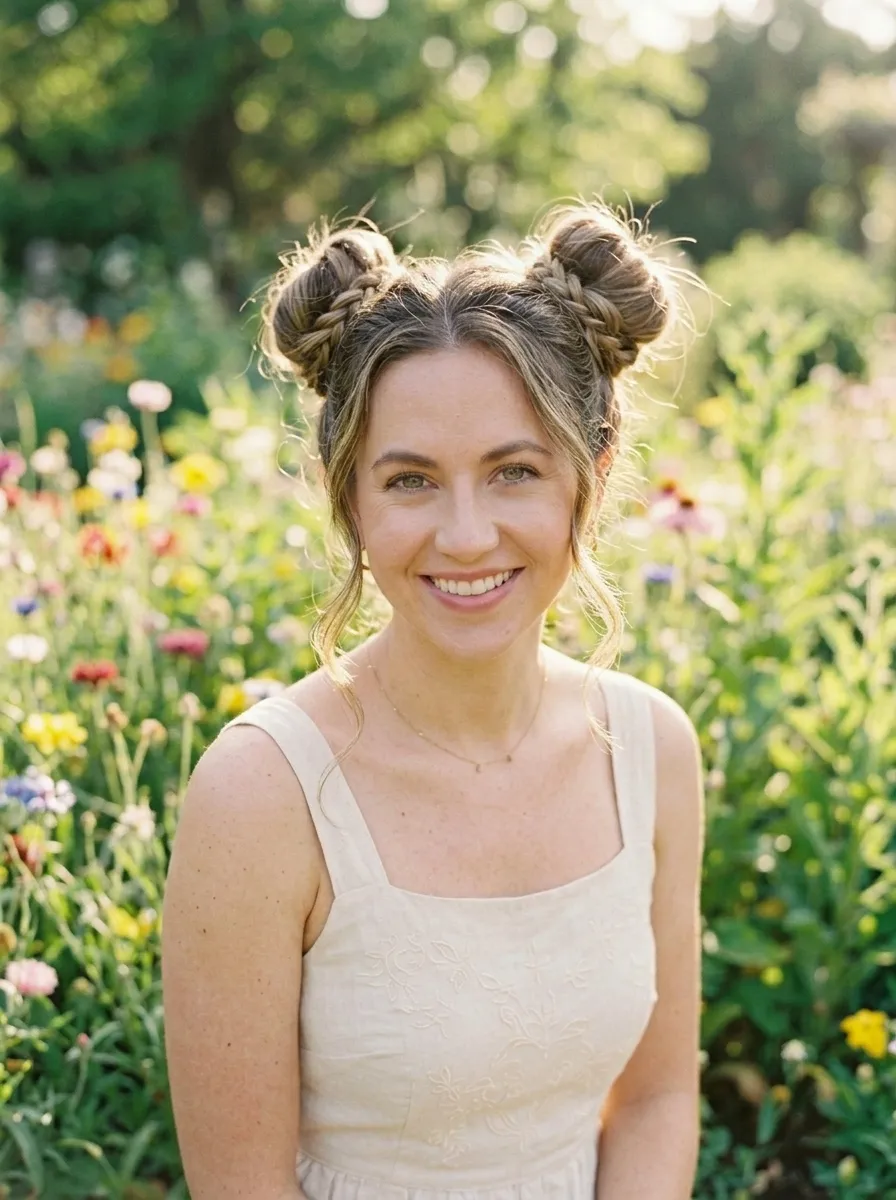
Space buns got a braided upgrade and it is one of the most playful spring styles you can do on medium hair. It is fun, practical, and completely free to achieve.
Part your hair down the middle from front to back. Section your hair into two equal halves.
On one side, take a small section near the front and braid it loosely. Set it aside. Then gather the rest of that side’s hair into a high ponytail.
Wrap the small braid around the base of the ponytail. Pin it with bobby pins. Then wrap the ponytail itself into a bun and pin that.
Repeat on the other side.
The result is two buns that each have a braided detail wrapped around their base. It looks much more detailed than the effort involved.
Pull the buns out slightly after pinning to make them look bigger and fluffier. A little fullness goes a long way.
This is a great style for spring festivals, casual days out, or when you just want something fun and different. It also keeps your hair completely out of your face.
Medium hair handles space buns well because you have enough volume for each bun to look substantial without requiring extra padding or hair accessories.
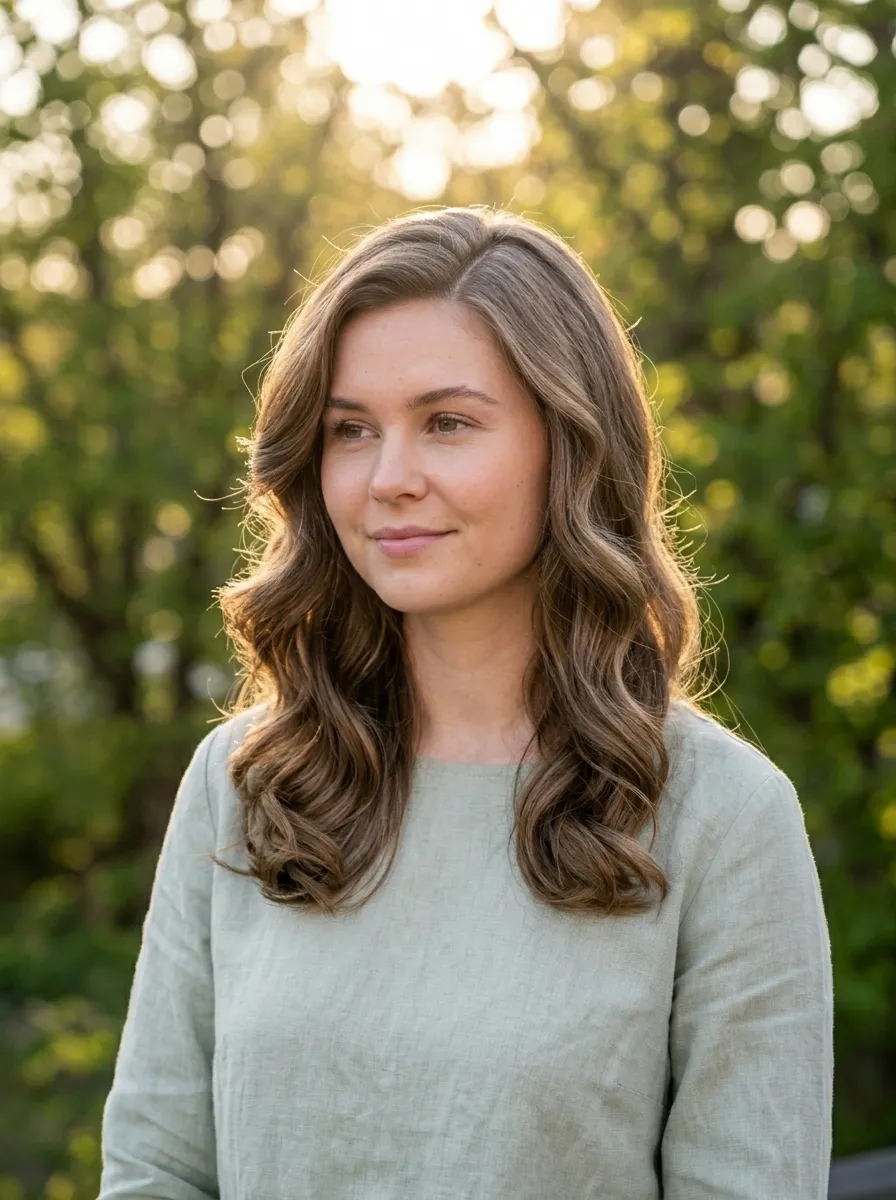
21. Cascading Side Part Layers

If your medium hair has layers, spring is the perfect time to show them off by simply wearing your hair down and parted to the side.
Layers in medium hair create natural movement and dimension. When worn down with a side part, they cascade forward and create that full, flowing look.
The styling here is minimal. After washing, apply a small amount of light styling cream or mousse to damp hair. Let it air dry or blow dry on a low setting.
As it dries, use a round brush to gently direct the layers forward and around your face. This enhances the cascading effect.
A little light oil or serum applied to the ends adds shine and definition to the layers without making them look greasy.
This style does not require curling or straightening. Natural texture in the layers looks beautiful and is much gentler on your hair.
If you do not have layers yet, spring is a wonderful time to ask for a light layer cut. It does not need to be dramatic. Even subtle layers change how medium hair moves and behaves completely.
This is one of the most low-maintenance spring styles because you are working with what your hair naturally does rather than fighting against it.
22. Quick Wrap Scarf Style
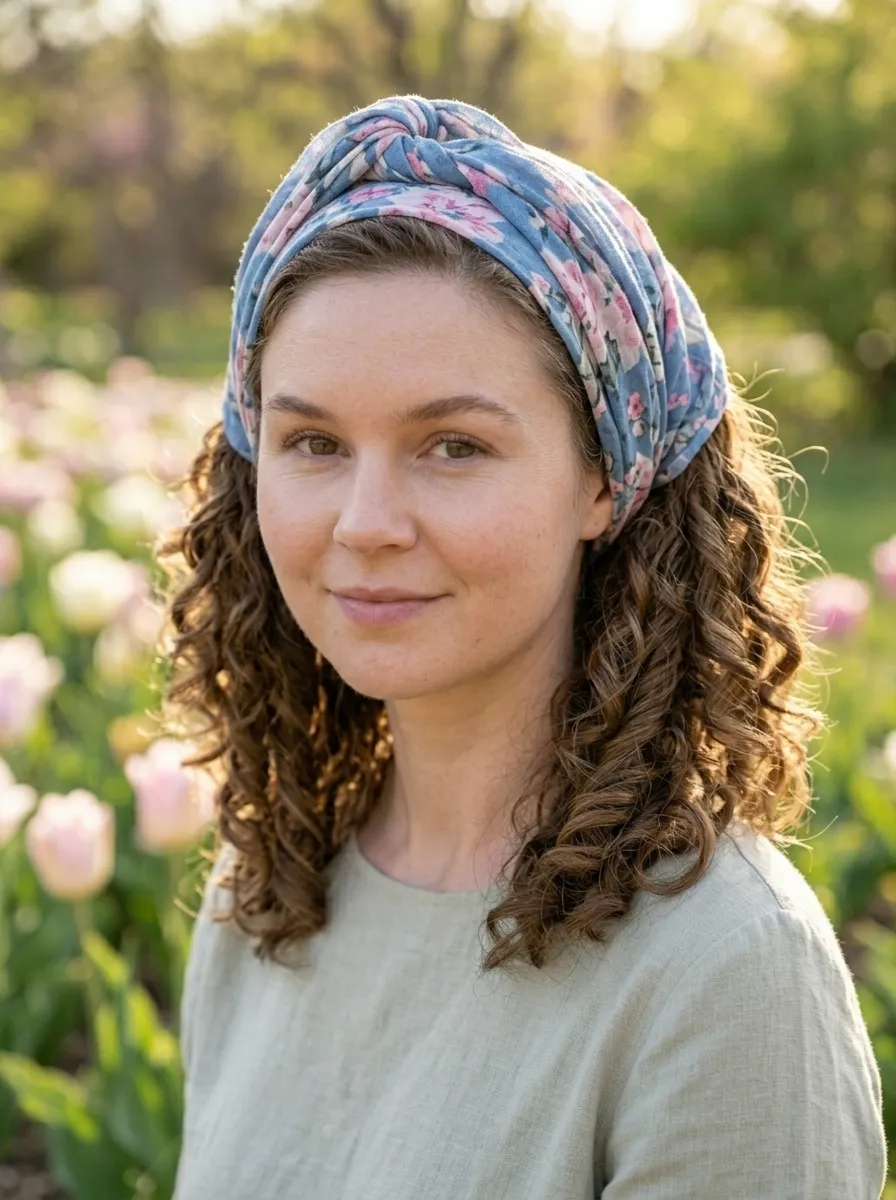
Wrapping a scarf through your hair is one of the most affordable and creative spring styling tricks. It works on any hair type and takes under a minute.
Fold a lightweight scarf or bandana into a long strip. Place the center of the scarf at the back of your head.
Bring both ends forward over the top of your head. Twist them around each other once, then bring them back toward the back of your head and tie them into a simple knot or bow.
Your hair flows naturally below and around the scarf while the scarf itself acts as a decorative headband with a tied finish.
You can adjust where you position the tie. On top of the head gives a 70s-inspired look. At the nape gives a more tucked-back style.
Cotton scarves in florals, stripes, or pastel prints are perfect for spring and can be found at thrift stores, markets, or discount shops for almost nothing.
This style is particularly great for days when your hair just is not cooperating. The scarf draws the eye upward and creates a put-together appearance regardless of what the rest of your hair is doing.
It also protects your hair from wind and sun during outdoor spring activities without requiring a full hat.
Conclusion
Spring hairstyles for medium hair do not have to be complicated or expensive. The 22 ideas in this list prove that simple styling choices like a butterfly clip, a loose braid, or a silk scarf can completely change how your hair looks and feels. The most important thing is to try styles that match your lifestyle and your natural hair texture. Start with one or two ideas that feel easy and gradually explore more. Your medium hair is already the perfect canvas for all of these looks. All you need is a little time, a few affordable tools, and the confidence to experiment. Spring is here, your hair is ready, so pick a style and go for it.
Leave a Reply