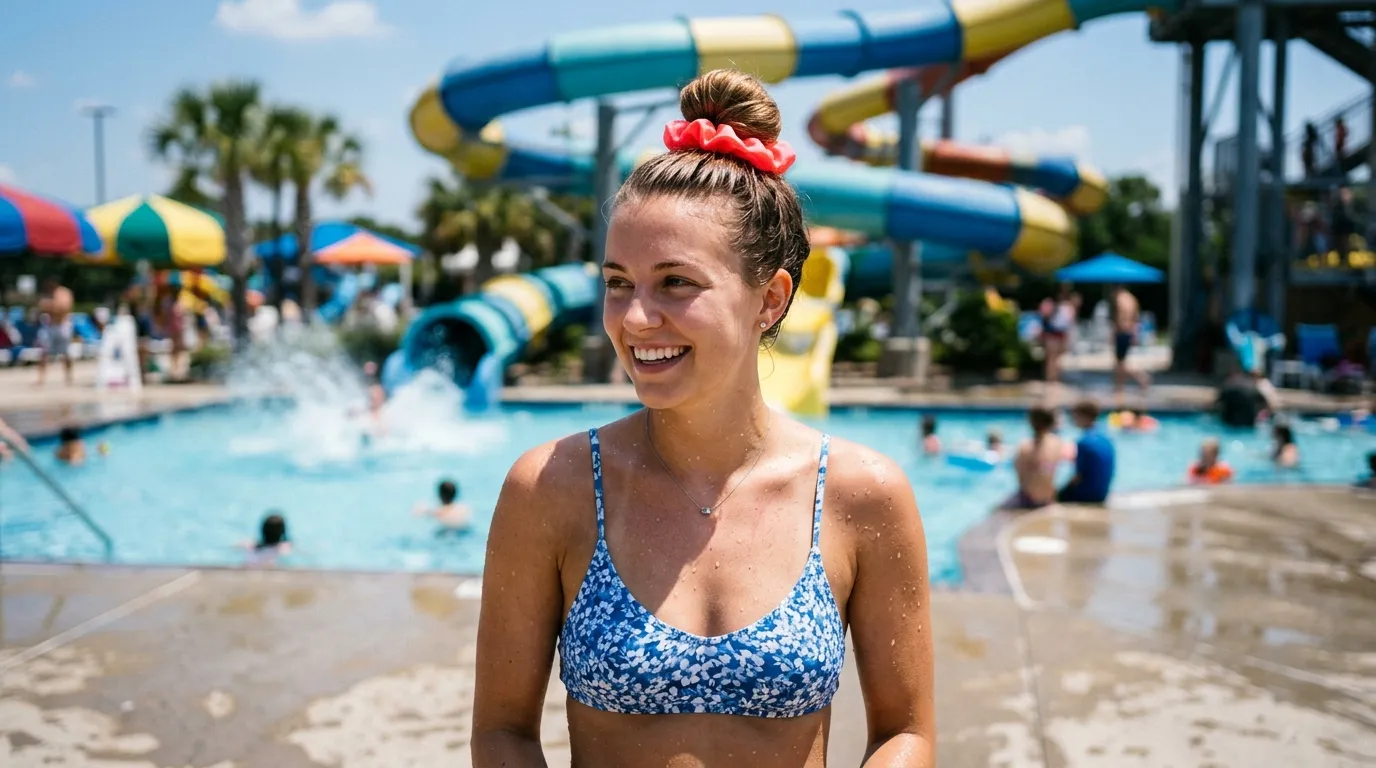
1. The High Tight Bun
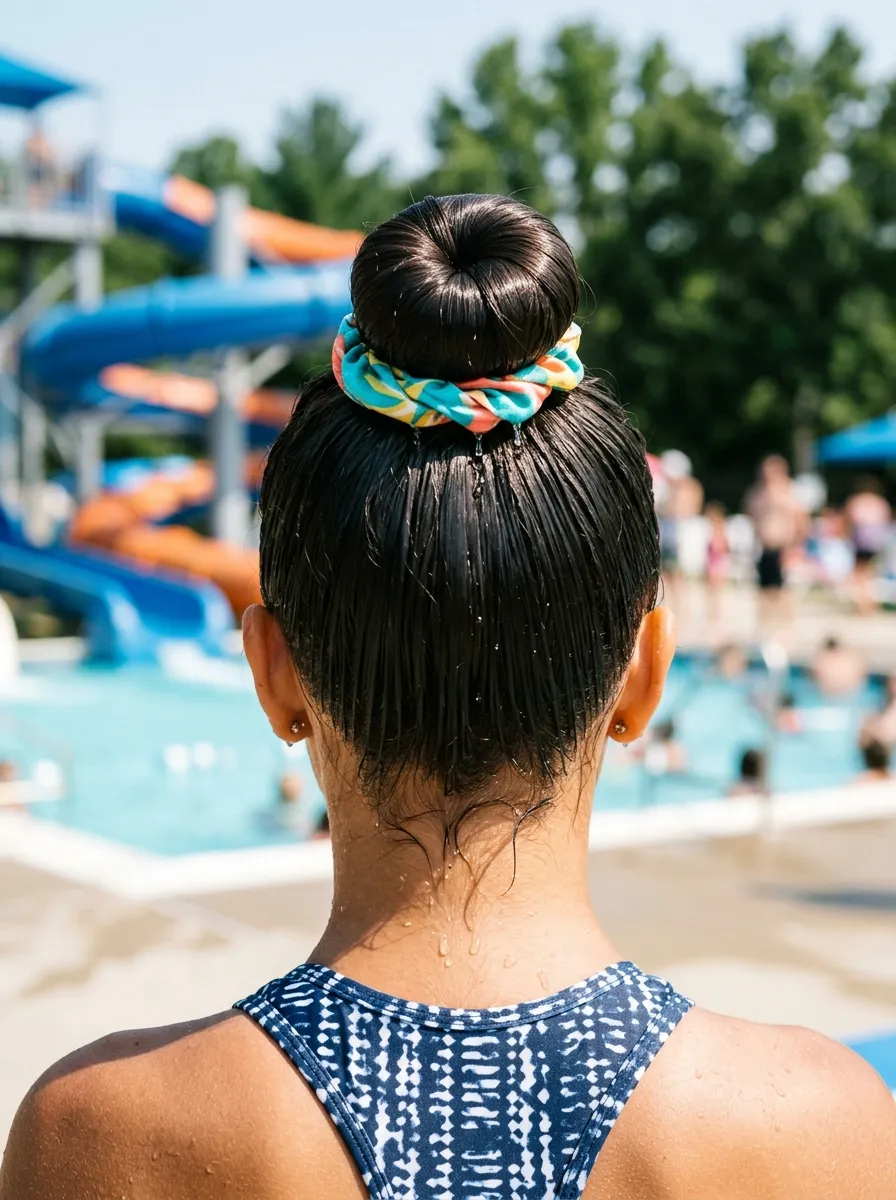
The high tight bun is the single most practical waterpark hairstyle. It sits completely above water level on most slides and in wave pools, keeps all the hair off the face and neck, and looks just as good soaking wet as it does dry.
Gather all the hair to the very top of the head and secure with a strong elastic. Twist the ponytail and wrap it around the base. Secure the coiled bun with another elastic and several bobby pins.
The higher the bun sits, the less likely it is to get fully submerged. A bun at the very crown rather than at the back of the head stays above water during most waterpark activities.
A waterproof or water-resistant elastic holds the bun far more securely than a standard fabric elastic. Silicone elastics and spiral hair ties both hold wet hair better than standard cotton elastics.
Add a brightly colored waterproof scrunchie around the base of the bun. This looks great in photos and stays in place through water exposure.
Budget tip: A pack of spiral hair ties or silicone-coated elastics costs under $5 at most beauty supply stores and makes a noticeable difference in how well the bun survives the water.
2. Double Dutch Braids
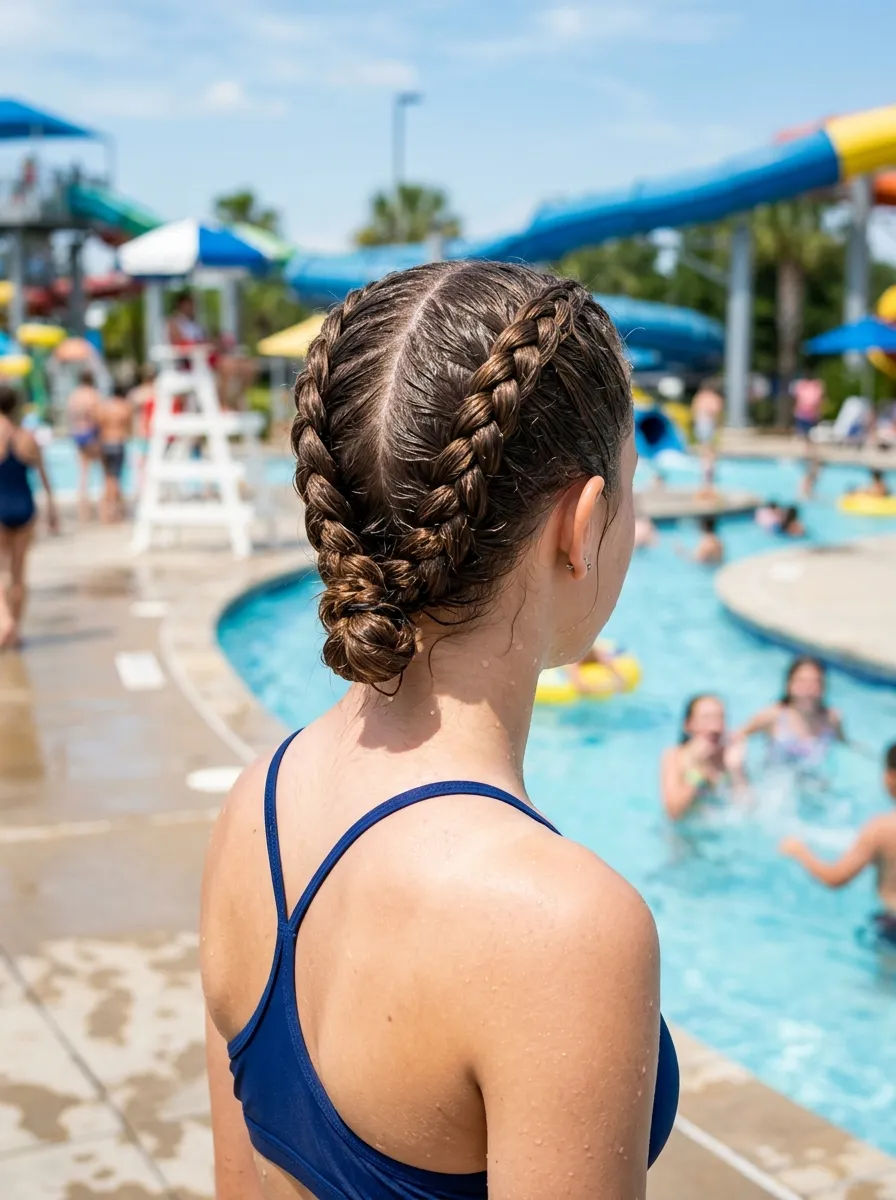
Double Dutch braids are one of the most secure hairstyles you can wear at a waterpark. The braids lie flat against the scalp, hold through every ride, and actually look more defined when wet because the water makes the braid pattern stand out clearly.
Part the hair down the center. Dutch braid each side by crossing sections under rather than over, starting at the front hairline and working toward the nape.
Braid with tight, firm tension throughout both braids. Loose tension on Dutch braids means they loosen and shift when submerged. Firm tension means they hold all day.
Secure each braid at the end with a waterproof or silicone elastic.
Before going to the waterpark, apply a leave-in conditioner or a protective hair oil to the hair. Chlorine damages hair over repeated exposure. A coating of oil before swimming creates a barrier.
Double Dutch braids suit all hair textures. On curly or afro-textured hair, they provide a protective function as well as a practical styling one.
Budget tip: Leave-in conditioner from a drugstore costs around $5 to $8 and significantly reduces chlorine damage. Apply before you go, not at the park.
3. Space Buns for Water Rides
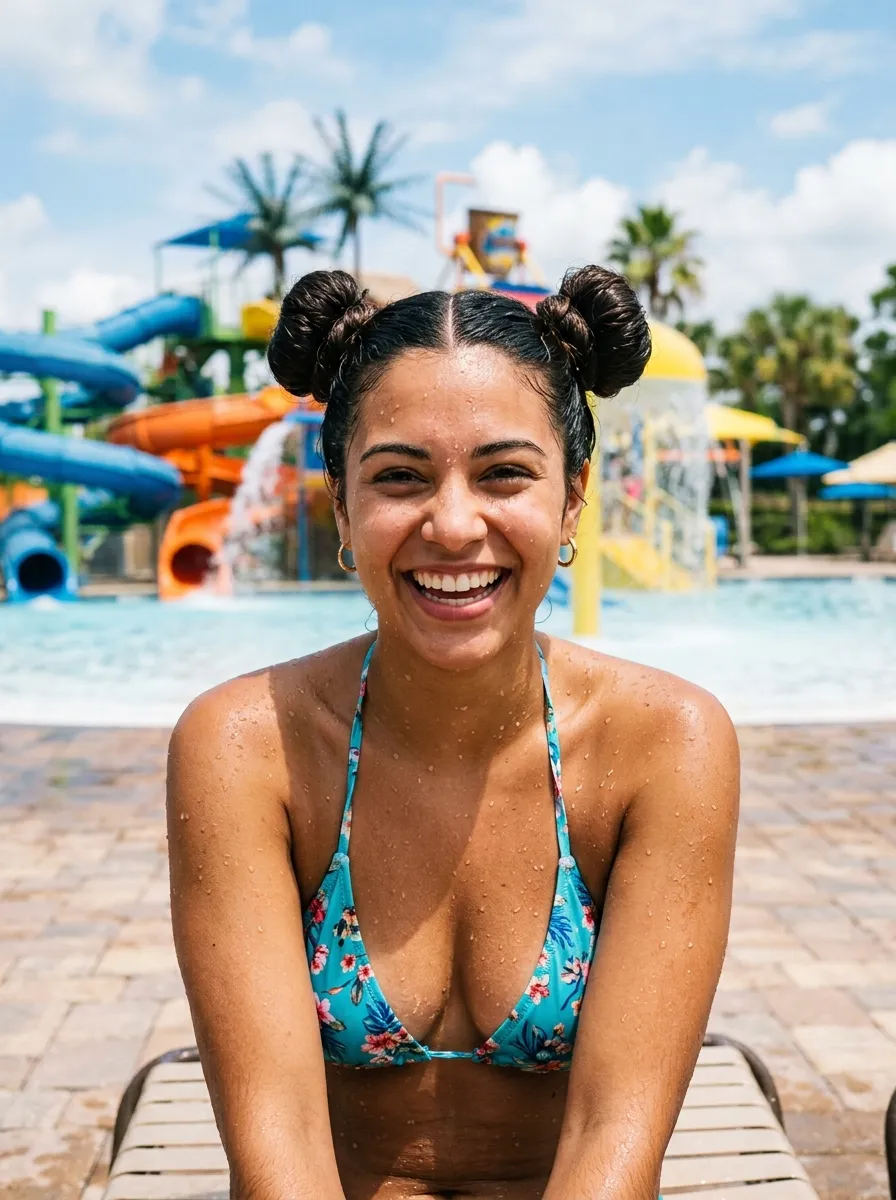
Space buns are a waterpark favorite because they are playful, practical, and look adorable in every photo. Two independently secured buns mean that even if one loosens, the other stays in place.
Part the hair down the center. Gather each side into a high ponytail. Wrap each ponytail around its base and secure with an elastic and bobby pins.
Position the buns high on the head rather than at mid-height. High space buns clear the waterline on most pool activities and stay above the spray on most rides.
Use silicone elastics rather than standard fabric ones. Silicone grips wet hair much better and the buns stay secure through repeated water exposure.
A brightly colored elastic or scrunchie around each bun adds personality without adding any styling time.
For added security on big rides, push two crossed bobby pins through each bun from the outer edge toward the base. This anchors each bun independently.
Space buns suit medium to long hair most naturally. On shorter hair, two small buns still work and look equally intentional.
Budget tip: Silicone elastics are available in multi-packs at beauty supply stores and online for under $5. They are worth the small investment for any water activity.
4. The Protective Braid Crown
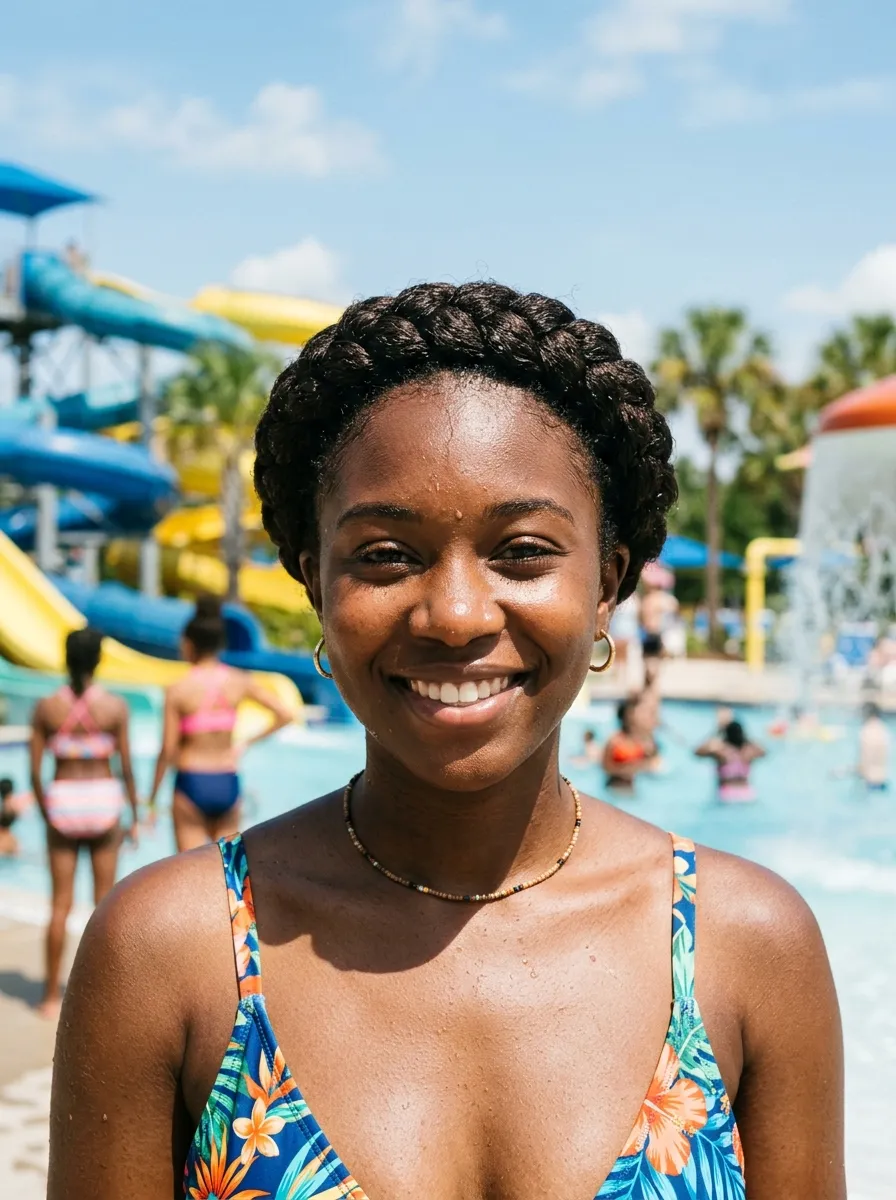
A crown braid wraps around the entire head, sits flat against the scalp, and stays completely secure through water exposure. It also protects the hair from direct chlorine contact better than styles that leave the hair loose or hanging.
Create two Dutch or French braids starting at the nape on each side and work them upward around the head, pinning them flat as you go. Bring each braid across the top of the head in opposite directions and pin the ends under the opposite braid.
Flat, scalp-level braids are the key to the crown braid surviving waterpark conditions. Any sections that sit away from the scalp get displaced by water pressure.
Apply a light hair oil or leave-in conditioner before braiding to create a protective barrier against chlorine.
This style suits any hair length that is long enough to wrap around the head. It is especially practical for natural and afro-textured hair because the crown braid is also a protective style.
After the waterpark, rinse the hair thoroughly with clean water to remove chlorine from the braided sections.
Budget tip: The crown braid requires no products and no accessories beyond a few bobby pins. These cost almost nothing at any drugstore.
5. The Wet Bun with Flyaway Control
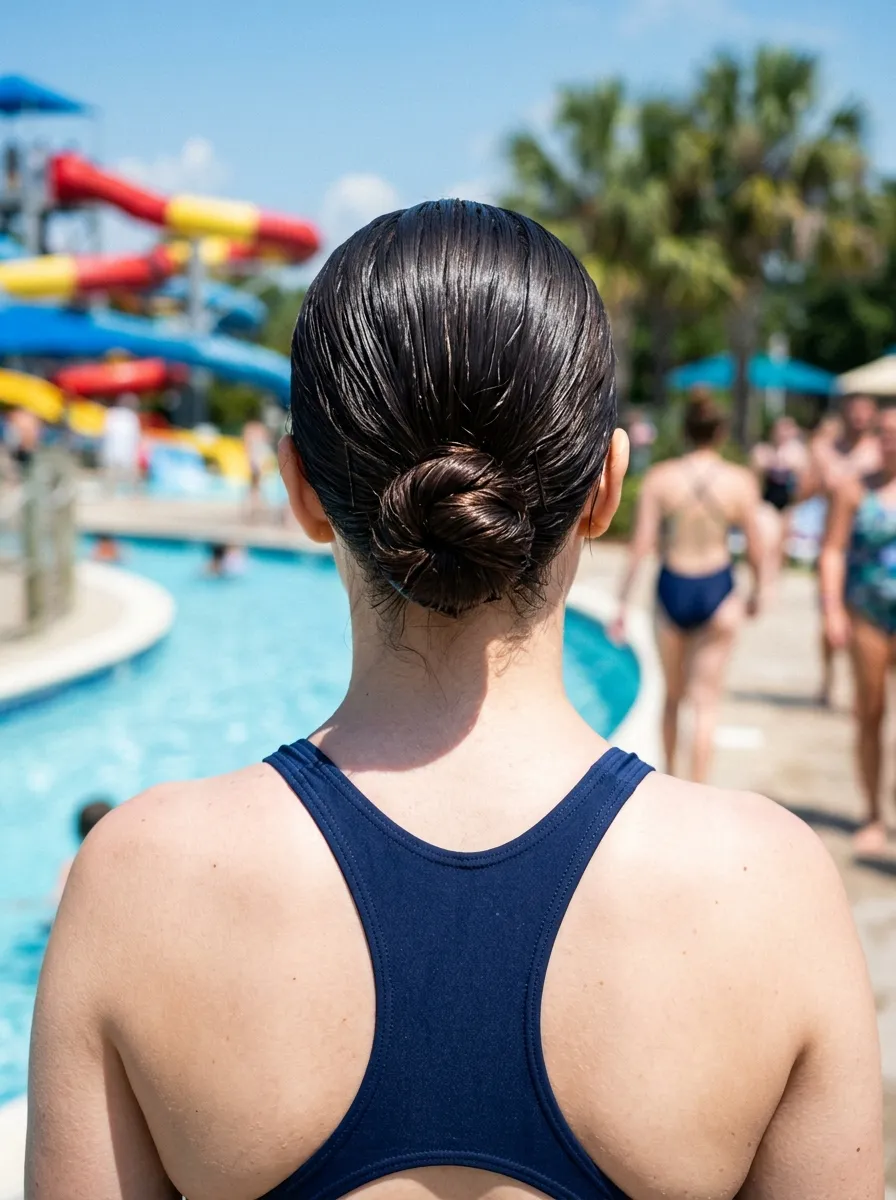
Leaning into the wet hair look rather than fighting it is one of the smartest waterpark strategies. The wet bun intentionally slicks the hair back smooth and gathers it into a neat bun at the nape, turning the wet look into a deliberate style choice.
After getting wet, comb all the hair straight back from the hairline using your fingers or a wide-tooth comb. Smooth down any flyaways with a small amount of hair gel applied to the surface.
Gather the smoothed hair into a low bun and secure with a strong elastic. The gel keeps the surface flat and prevents the wet hair from frizzing as it begins to dry.
This style looks polished and intentional even on the fourth time you have done it after a pool entry.
A small travel-size gel in your waterpark bag makes this style easy to redo quickly at any point during the day.
Budget tip: A travel-size strong-hold gel costs around $2 at most drugstores. Keep it in your bag for quick touch-ups between rides. It is the most useful product you can bring to a waterpark.
6. The Fishtail Braid for the Water
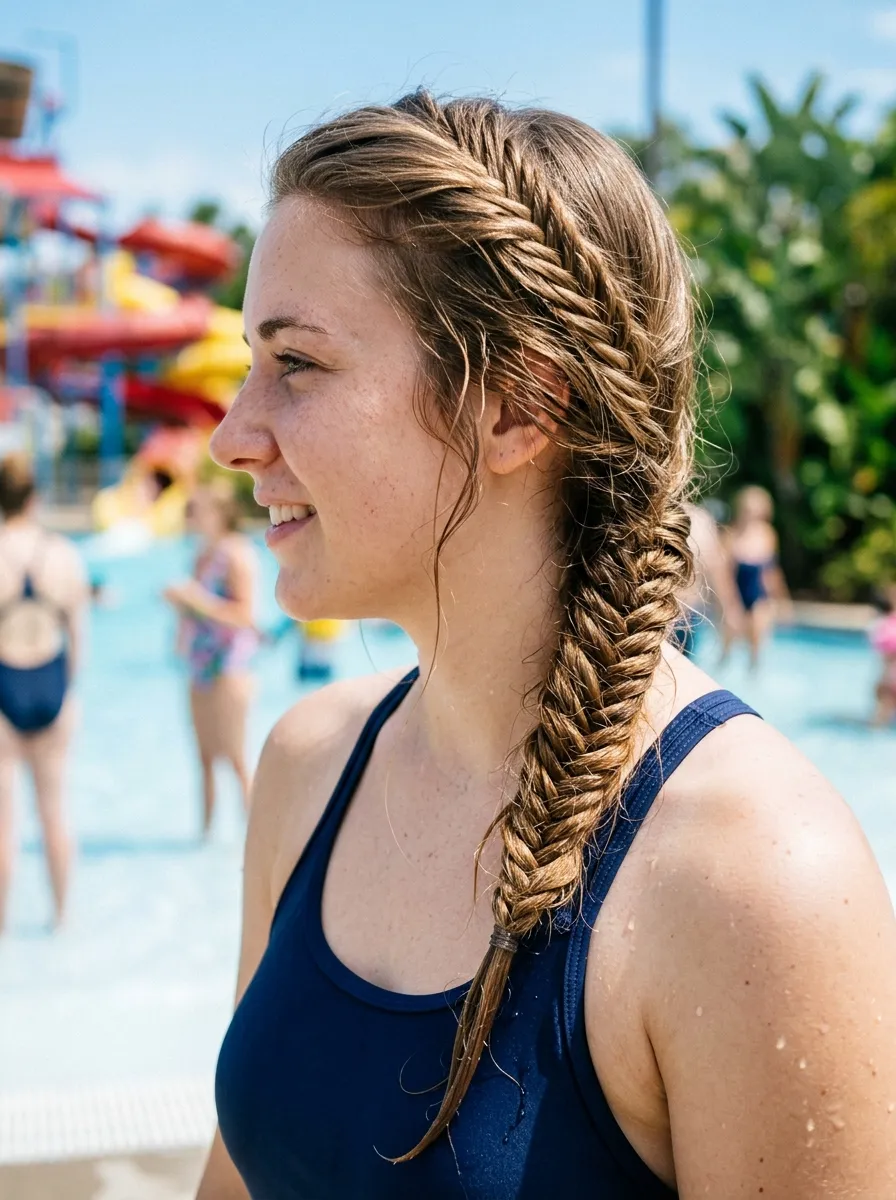
A fishtail braid at a waterpark looks impressive, holds together well when wet, and the fishtail pattern actually becomes more visible and defined when wet because water separates the sections.
Divide all the hair into two sections. Pull a thin piece from the outer edge of the right section and cross it to the left. Repeat from the left to the right. Continue all the way to the end.
Braid with very thin individual pieces for a finer, more detailed pattern that survives water exposure better than a loose fishtail with thick sections.
Secure the end with a waterproof elastic. Widen the braid slightly by pulling each side outward before entering the water so it has room to settle rather than pulling tight.
A fishtail braid worn over one shoulder stays more secure than one hanging down the back because it is less likely to get caught on water ride structures.
Apply a leave-in conditioner to the hair before braiding to minimize chlorine damage.
Budget tip: A wide-tooth comb for post-swim detangling costs under $2. Keep one in your bag. Detangling a fishtail braid after chlorine exposure is much easier with the right comb.
7. The Twisted Top Knot
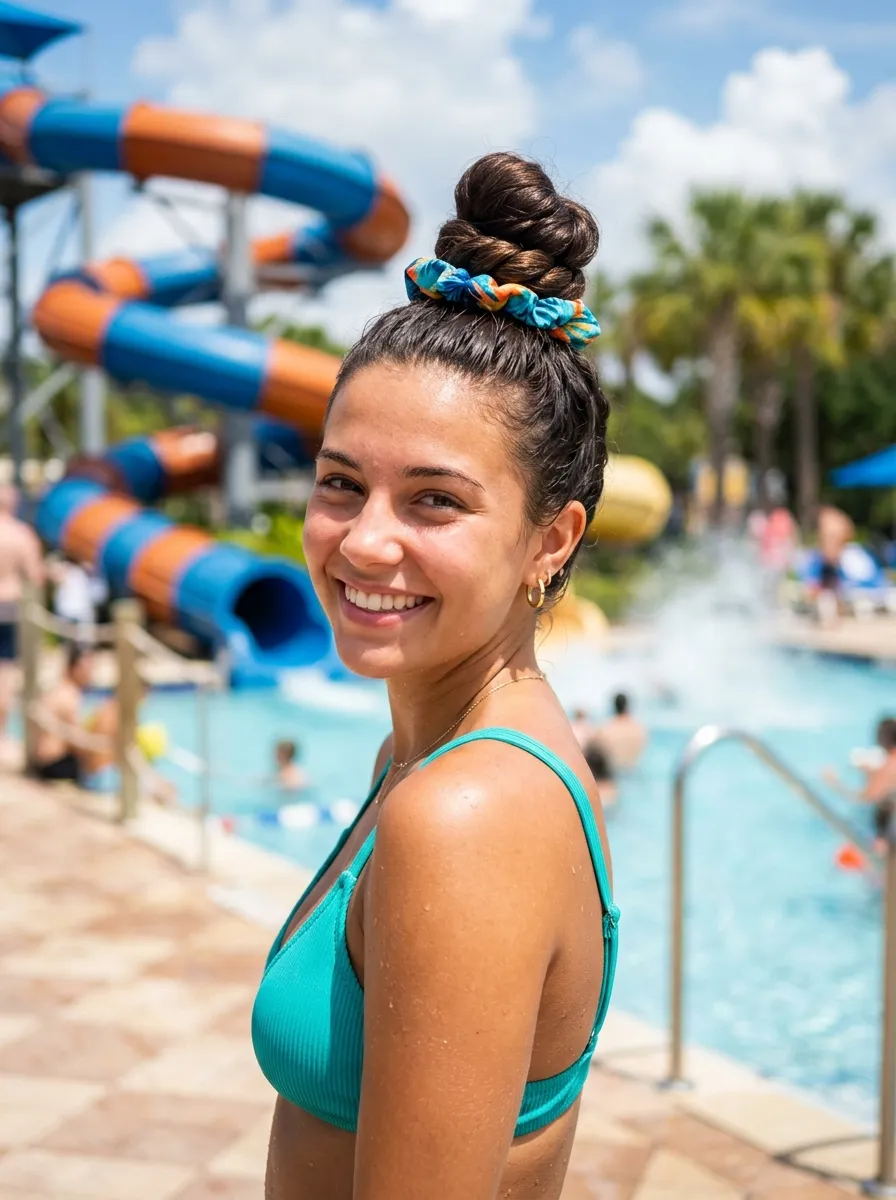
A twisted top knot adds texture to the standard high bun by incorporating a twist into the bun structure. Gather the hair into a high ponytail at the crown. Twist the entire ponytail tightly. Then wrap the twisted ponytail around the base in a coil rather than just wrapping the plain ponytail.
The twist creates a visible rope-like texture in the bun that looks more intentional than a plain wrapped bun, even when wet.
Secure the twisted bun with both a strong elastic and several bobby pins pushed through the outer coil at different angles. This double-securing technique handles the extra bulk of the twisted bun.
A bright waterproof scrunchie around the base adds color and covers the elastic.
This style holds particularly well because the twist structure locks the bun in place more than an untwisted wrap. The bun is less likely to fall apart even after repeated water exposure.
Twisted top knots suit all hair lengths from medium to very long. Shorter hair produces a smaller bun but the twisted texture still shows.
Budget tip: A colorful set of waterproof or water-resistant scrunchies costs around $5 to $8 for a full pack. They are far more fun and more practical than standard elastics for waterpark days.
8. The Four-Strand Braided Bun
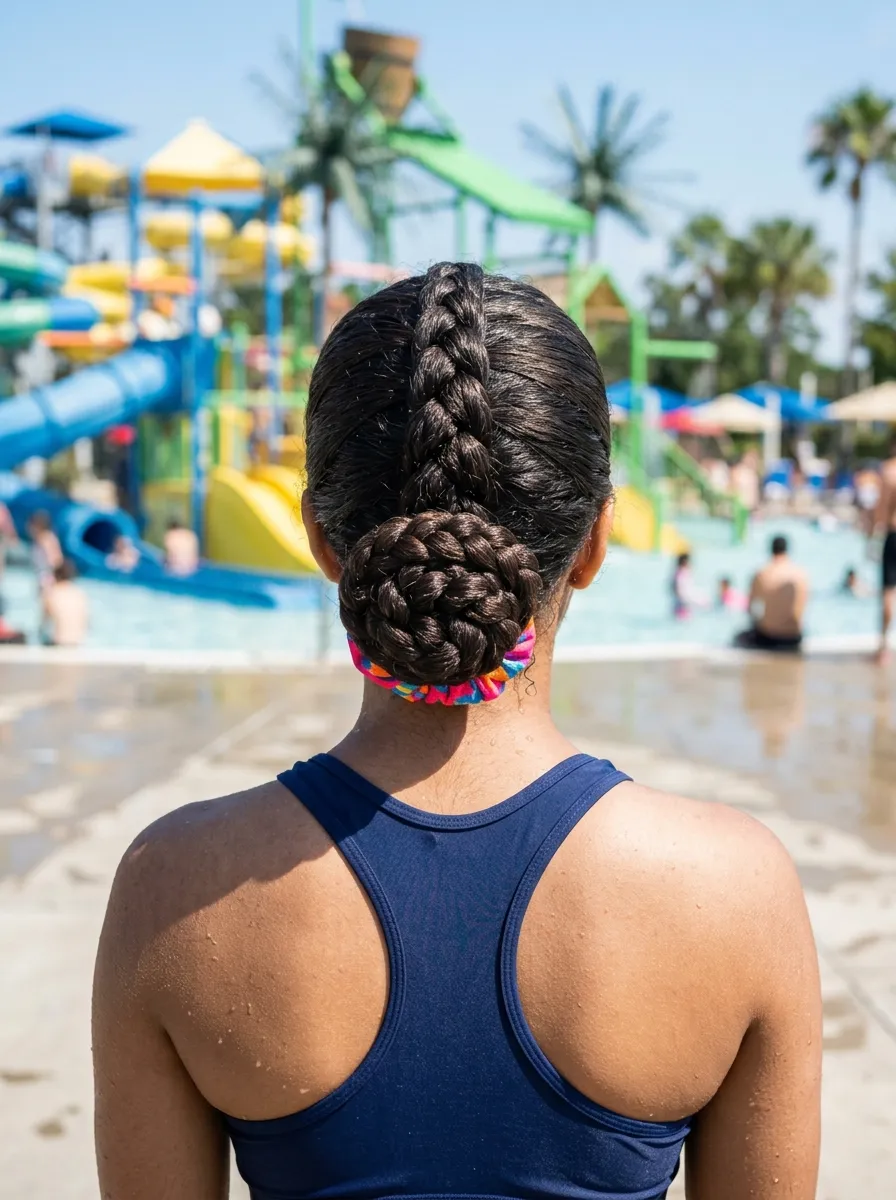
A braided bun takes a regular braid and coils it into a bun at the nape or crown. The braid texture within the bun makes it look more deliberate than a plain twisted bun, and the braided structure makes the bun hold together better when wet.
Braid all the hair in a simple three-strand braid all the way to the end. Secure with an elastic. Coil the entire braid around the base of the ponytail and pin the coiled braid flat with multiple bobby pins.
Push bobby pins through the outer coil of the braid diagonally toward the center rather than just pinning the surface. Diagonal pins through the braid structure hold more securely than surface pins.
The braided bun sits flat and compact against the head, making it comfortable for all rides including ones where you lie flat.
This style can be redone in about two minutes if it loosens after heavy water exposure. The technique is simple and fast with practice.
Works on all hair textures and all lengths from shoulder to very long.
Budget tip: A regular three-strand braid needs only one elastic and a handful of bobby pins. Everything else needed is already in your hands.
9. The Rope Braid Ponytail
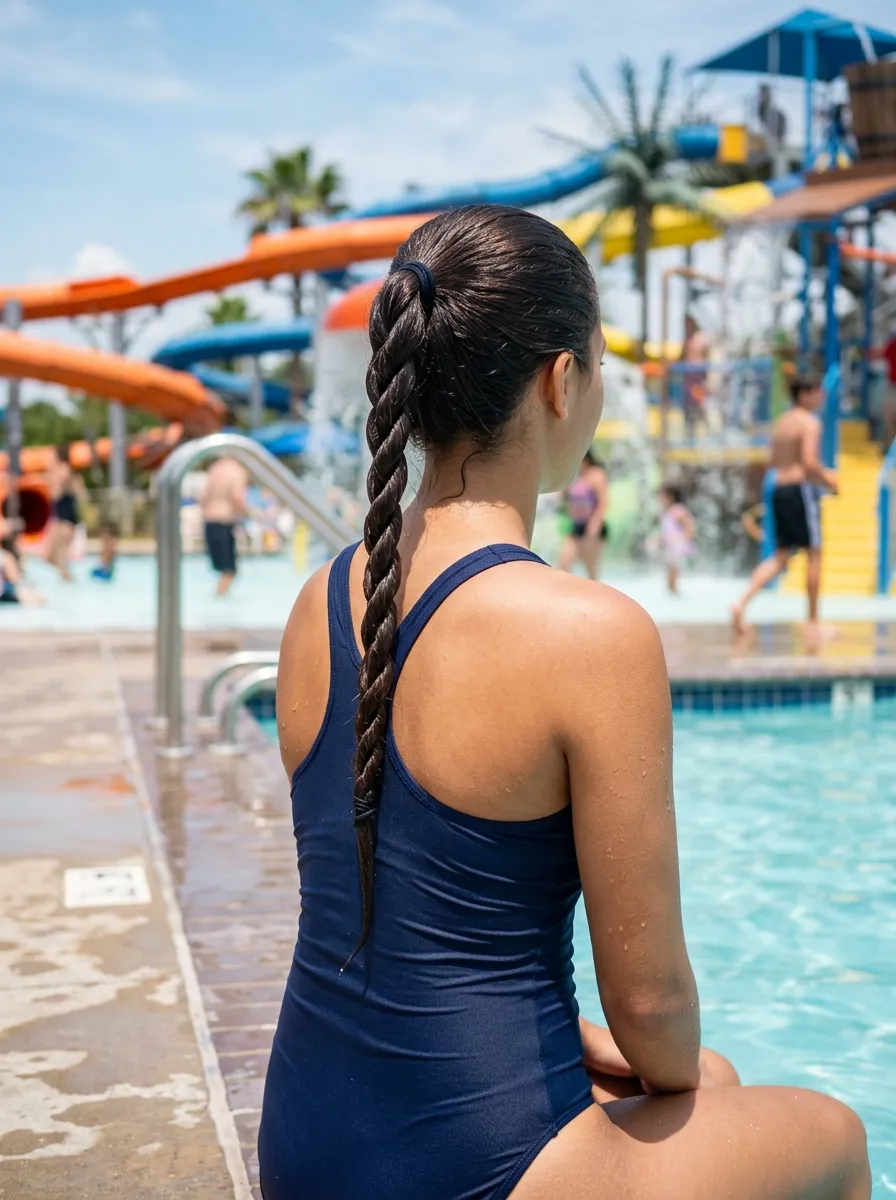
A rope braid ponytail starts with a high ponytail and adds a rope-twist braid to the tail for texture and hold. Divide the ponytail into two sections. Twist each section in the same direction and then wrap them around each other in the opposite direction.
The opposing twist directions create a self-locking braid that stays together well through water exposure without needing any additional pins or products.
Secure the end of the rope braid with a waterproof elastic.
The rope braid texture becomes more visible when wet because the individual strands separate and define the spiral pattern.
A high ponytail base keeps the braid elevated on most rides. Wrap a colorful scrunchie or waterproof elastic around the ponytail base for a fun, coordinated look.
This style is quick to redo after heavy water exposure. The rope braid takes about sixty seconds to recreate if the end comes loose.
Rope braid ponytails work on shoulder-length and longer hair. The longer the ponytail, the more impressive the rope braid looks.
Budget tip: Two waterproof elastics are the only requirement. No products or tools needed at the waterpark itself.
10. The Low Braided Bun
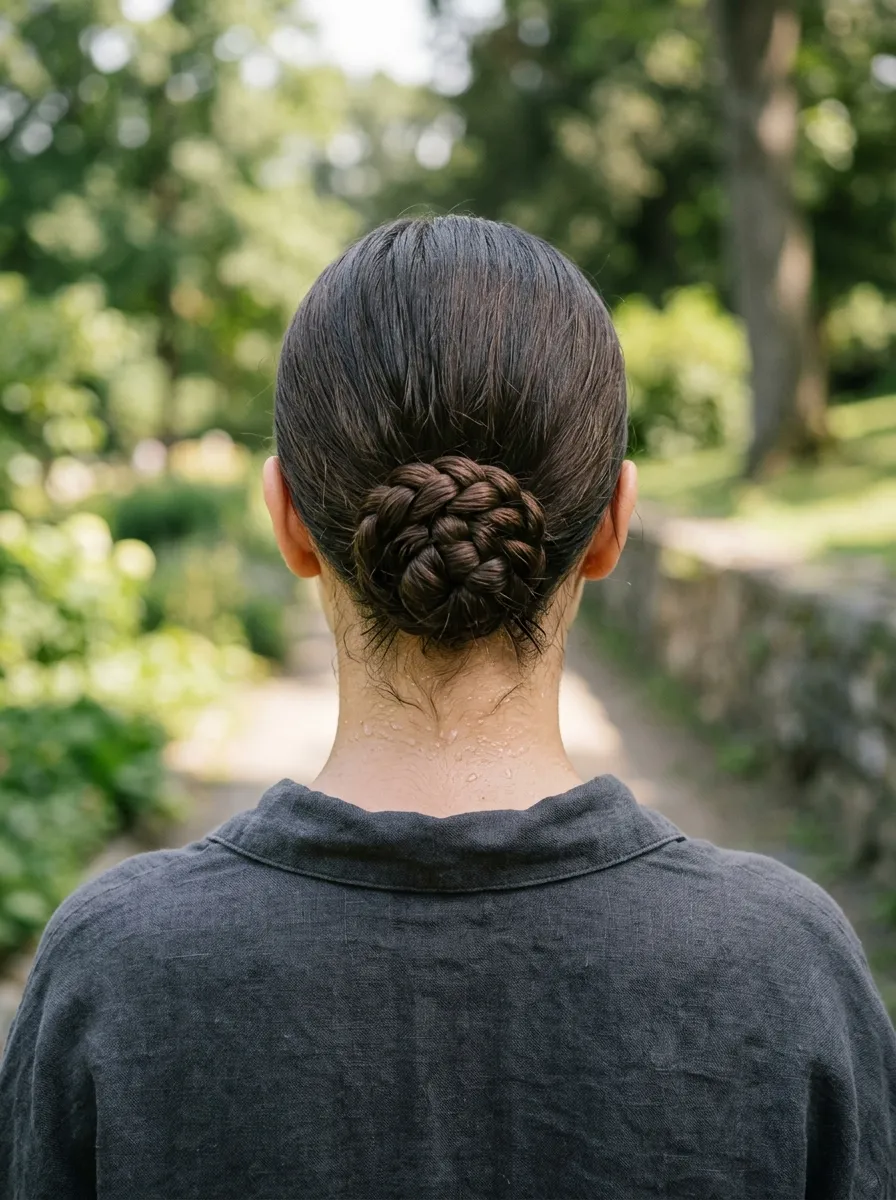
A low braided bun sits at the nape, stays below the spray zone on most rides, and remains secure through wave pools and lazy rivers. It is one of the most comfortable waterpark styles because it sits flat against the nape rather than sticking up above the head.
Braid a three-strand braid starting from the gathered hair at the nape. Coil the braid flat against the nape and secure with bobby pins pushed diagonally through the braid.
A flat, low bun at the nape is comfortable for lying on water ride mats and sitting in float tubes in a way that a high bun is not. This is a practical advantage on lazy river days.
Smooth the sides with a wide-tooth comb before gathering to reduce frizz at the nape area.
Apply a small amount of leave-in conditioner to the hair before braiding to protect against chlorine.
Wrap a waterproof elastic around the nape before braiding to pre-set the gathering point.
This style suits all hair lengths from shoulder to very long. Shorter hair produces a smaller flat bun that still holds well.
Budget tip: Bobby pins and a single elastic are the only requirements. Apply a $5 leave-in conditioner beforehand for added protection.
11. The Boxer Braid Buns
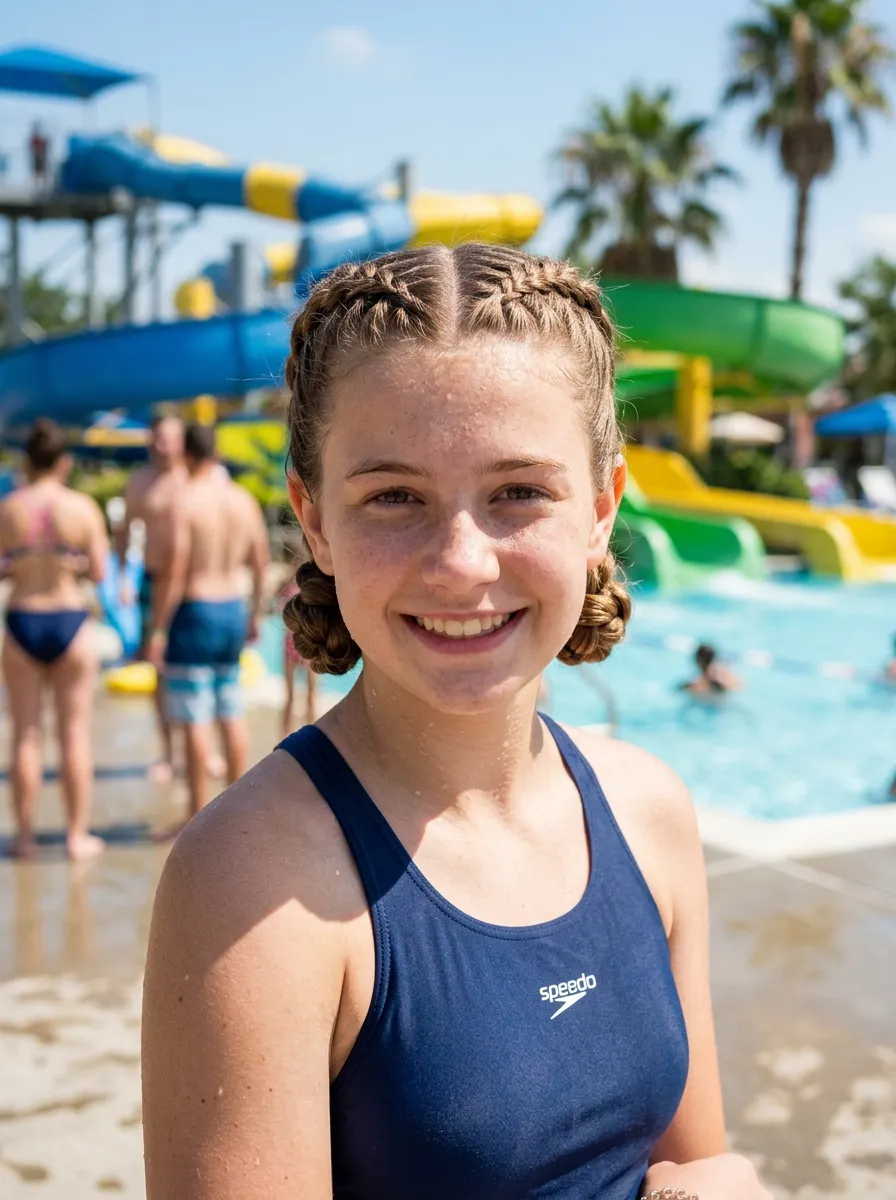
Boxer braid buns combine the security of Dutch braids with the containment of buns. Each Dutch braid runs from the front hairline to the nape on each side and ends in a small bun rather than a loose braid tail.
Dutch braid each side tightly from the hairline toward the nape. When the braid runs out of hair to add, continue a regular three-strand braid to the end. Coil the end of the braid into a small bun and pin flat at the nape.
Each side is independently secured so even if one bun loosens, the other stays in place. This independence makes boxer braid buns significantly more waterpark-reliable than a single updo.
This style keeps hair off the face and neck completely, suits high-speed rides, and holds through wave pool activity.
The double Dutch braid structure means the braids are gripping the scalp from the hairline, which is the most secure anchor point possible for a waterpark hairstyle.
This takes slightly longer to create than a simple bun but holds significantly better through a full day of water activity.
Budget tip: Prepare the braids before leaving home where you have more time. The braids will hold for the entire waterpark day without needing redoing.
12. The Colorful Scrunchie High Pony
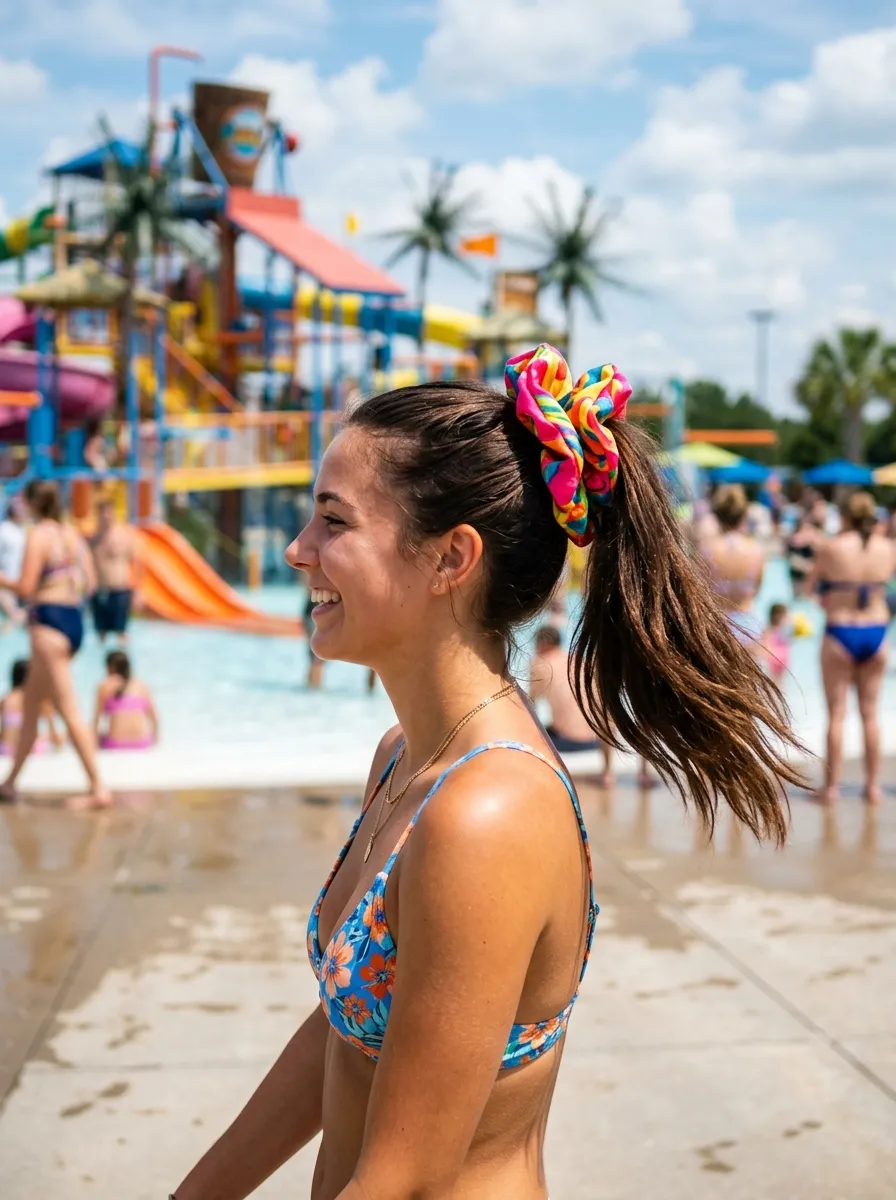
A high ponytail with an oversized colorful scrunchie is the fastest waterpark hairstyle possible and one of the most photogenic. The scrunchie is the star of the look. The ponytail is just the structure it sits on.
Gather all the hair to the crown and secure with a strong elastic first. Then add the large decorative scrunchie over the base for both security and visual impact.
Two elastics rather than one significantly improves how well a ponytail holds wet hair. The first elastic grips. The second provides backup. Together they handle repeated water exposure far better than a single elastic.
The high placement means the ponytail clears most ride water levels and wave pool activity.
Leave the ponytail itself completely natural. Whether it air-dries straight, wavy, or curly, a ponytail looks intentional either way.
This works on all hair lengths from a short bob’s ponytail stub to very long hair. The scrunchie looks good at every ponytail length.
Budget tip: A set of large colorful scrunchies costs around $5 to $8 for a ten-pack at most stores. Owning several means matching the scrunchie to your swimwear color throughout the day.
13. The Wet Slicked Ponytail
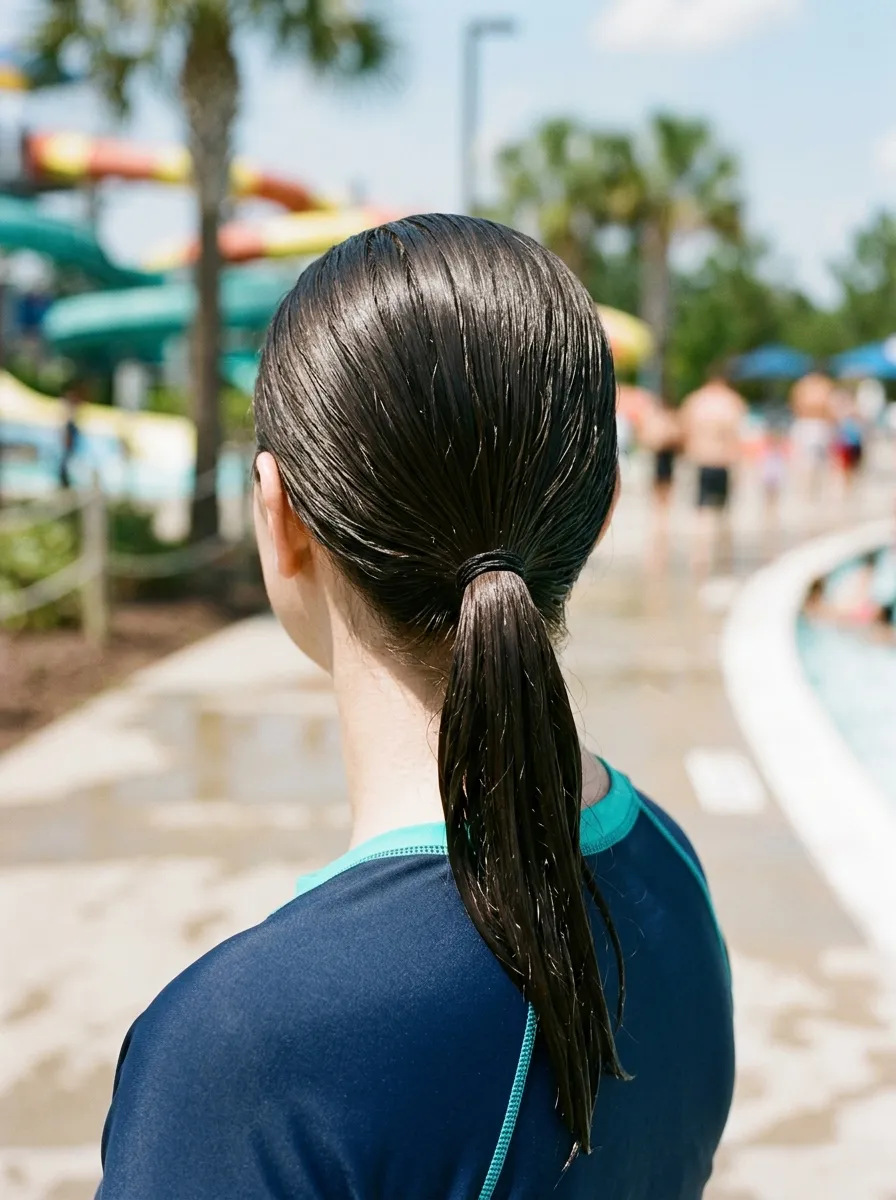
The wet slicked ponytail is the waterpark version of the sleek low pony. After getting wet, comb all the hair straight back with a wide-tooth comb and gather it into a ponytail at the nape.
The wet hair naturally slicks flat against the head, creating the sleek, smooth look without any additional product. Water does the styling work.
After combing back and gathering, apply a small amount of strong-hold gel to the surface before the hair starts to dry. This keeps the surface flat and prevents frizz from forming as the hair transitions from wet to damp.
Secure with a waterproof elastic. Wrap a scrunchie over the elastic for a more styled look.
This ponytail can be redone in about thirty seconds at any point during the day after any water exposure. Comb back, gather, elastic, and you are done.
The wet slicked ponytail is the ultimate low-effort, high-practicality waterpark hairstyle for people who do not want to think about their hair at all during the day.
Budget tip: A wide-tooth comb costs under $2 and is the most practical tool to keep in a waterpark bag. Combined with a travel-size gel, these two items handle all hair emergencies.
14. The Bow Bun
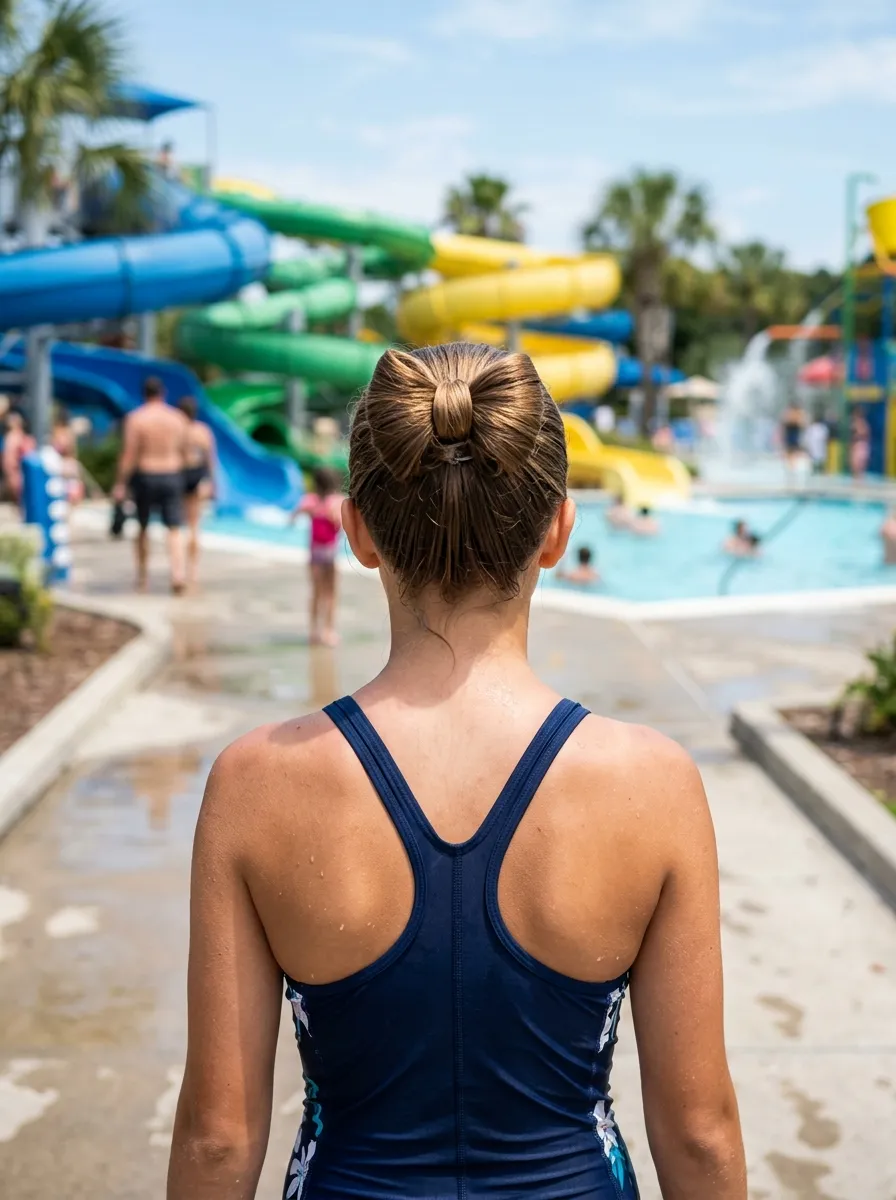
The bow bun is a fun, high-impact style that gets maximum compliments for the amount of effort it takes. Create a high ponytail and pull the last loop of the elastic through only halfway, creating a looped bun. Split the loop into two sections to form the bow ears. Take the ponytail tail and pull it down and over the center, wrapping it around to cover the elastic and create the bow knot. Pin the tail underneath.
The bow bun looks complicated but takes only about two to three minutes once you have done it once or twice.
It holds reasonably well through moderate water exposure. For higher-intensity water rides, reinforce with additional bobby pins pushed through each bow ear.
The bow shape is visible from the back in photos and videos, making this one of the most photogenic waterpark hairstyles.
Style it with a brightly colored elastic or scrunchie at the base for added personality.
This works on medium to long hair. Very short hair does not have enough length for the bow loops.
Budget tip: No accessories beyond an elastic and two or three bobby pins. The bow itself is formed from the hair.
15. Mini Braids Throughout Loose Hair
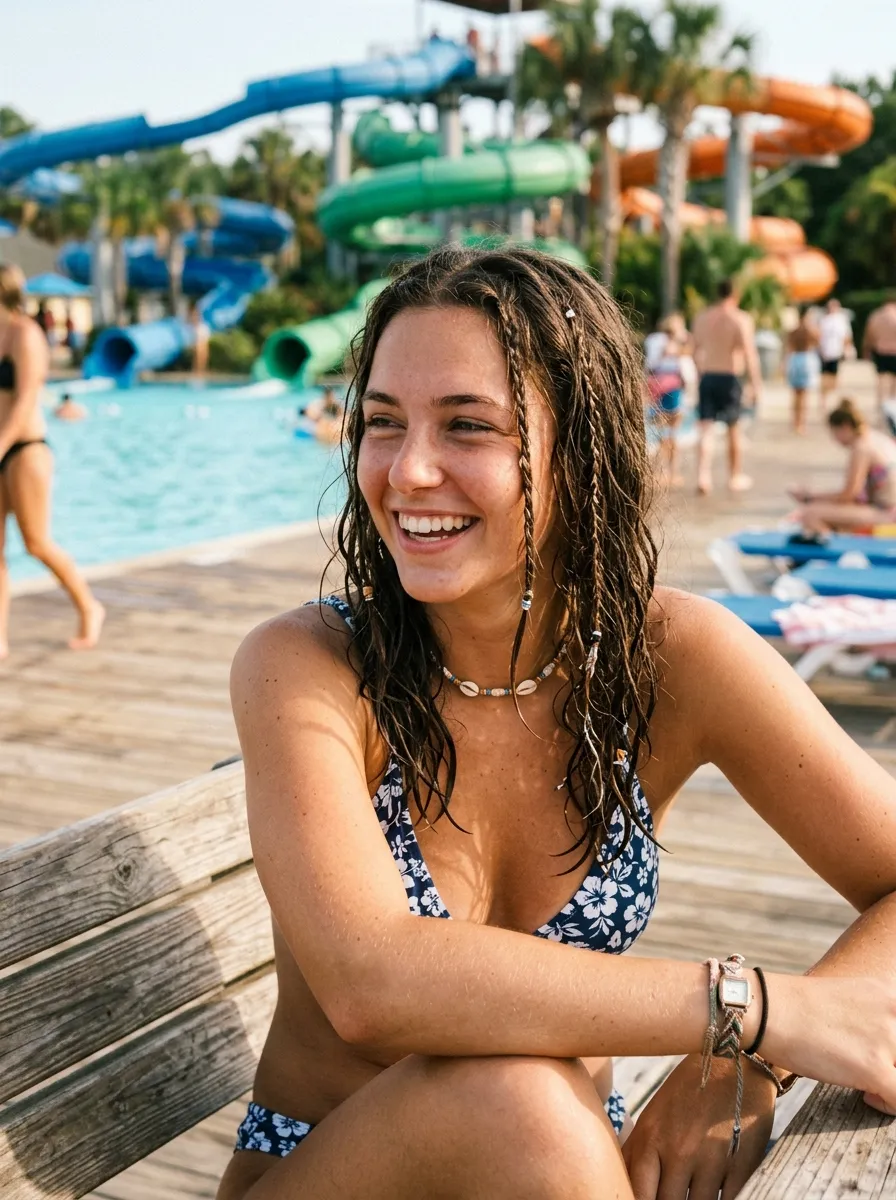
Scattering several mini braids through otherwise loose or loosely pulled-back hair creates a textured, boho look that actually improves in wet conditions. Each braid becomes more defined when wet and the loose surrounding hair develops natural wave texture from the water.
Take five to eight small sections throughout the hair. Braid each one in a simple three-strand braid to the ends and secure with a tiny clear elastic.
The mini braids do not need to be in a specific pattern. Scattered randomly throughout the hair looks more natural and genuinely boho than a perfectly arranged set.
Leave the rest of the hair loose or gather it into a loose half-up. The mini braids add enough structure and visual interest to the loose hair.
This style gets better throughout a waterpark day. As the loose hair dries in waves after repeated water exposure, the mini braids become more visible against the textured surrounding hair.
Remove the mini braids in the evening by simply undoing each one. The natural wave texture they leave behind is beautiful.
Budget tip: Tiny clear elastics cost under $2 for a full pack. This style requires nothing else.
16. The Butterfly Clip Updo at the Waterpark
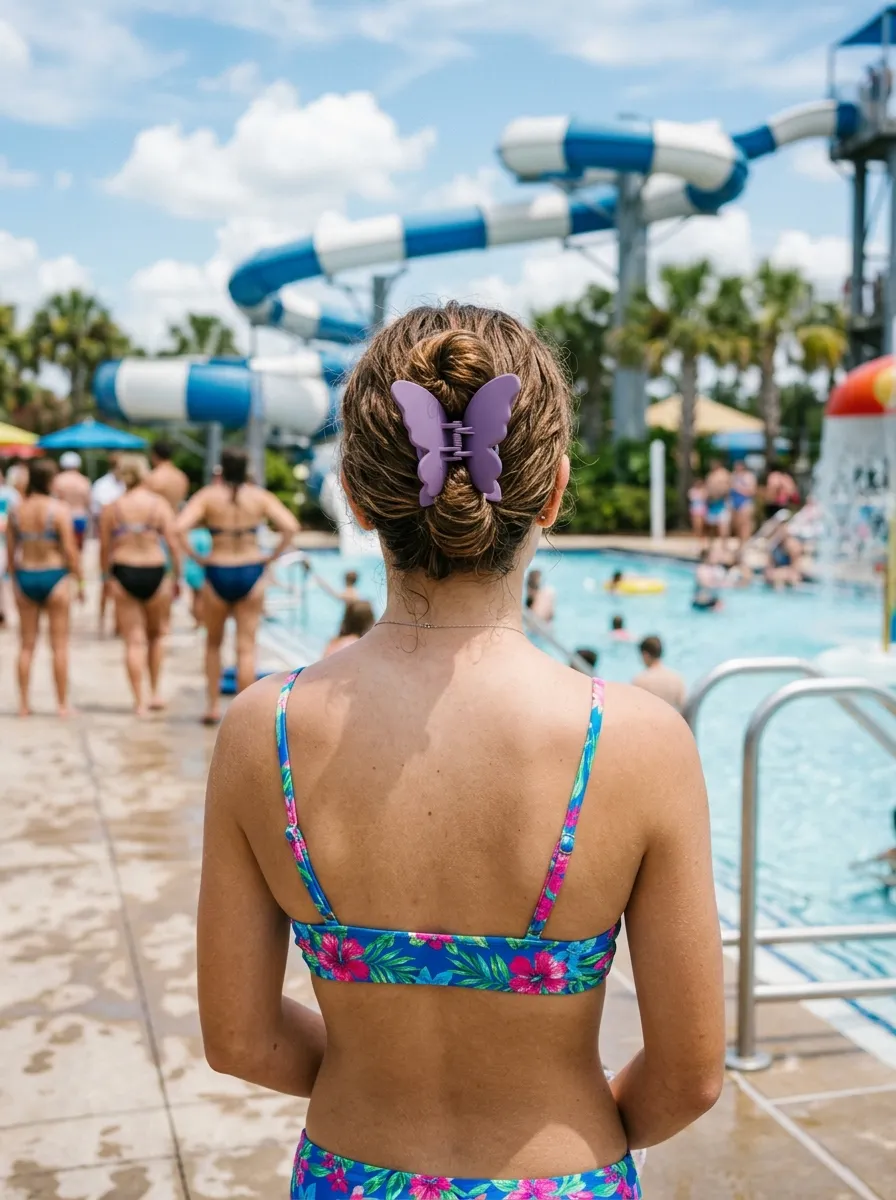
A large butterfly clip gathers all the hair at the center back and fans it slightly above and below the clip. At a waterpark, the key is using a large, strong clip rather than a small decorative one.
Gather all the hair to the center back. Hold the gathered section and clip with a large strong butterfly clip.
Choose a clip that is wide enough to hold all the hair securely without the clip springing open under the weight of wet hair. Cheap small clips fail. A large, strong clip holds.
This is the fastest waterpark hairstyle possible. Literally one motion from loose hair to gathered updo.
After each ride, the clip may shift slightly. Press it back into place with one hand. It takes two seconds.
Butterfly clips that are made from a single heavy-duty piece of plastic rather than a lightweight version hold wet hair the most reliably.
This style suits all hair lengths from short bobs to very long hair. The clip size may need to adjust based on hair volume and length.
Budget tip: Large strong butterfly clips are available at dollar stores for under $2 each. Buy three or four in different colors to coordinate with different swimwear.
17. The Knotted Ponytail
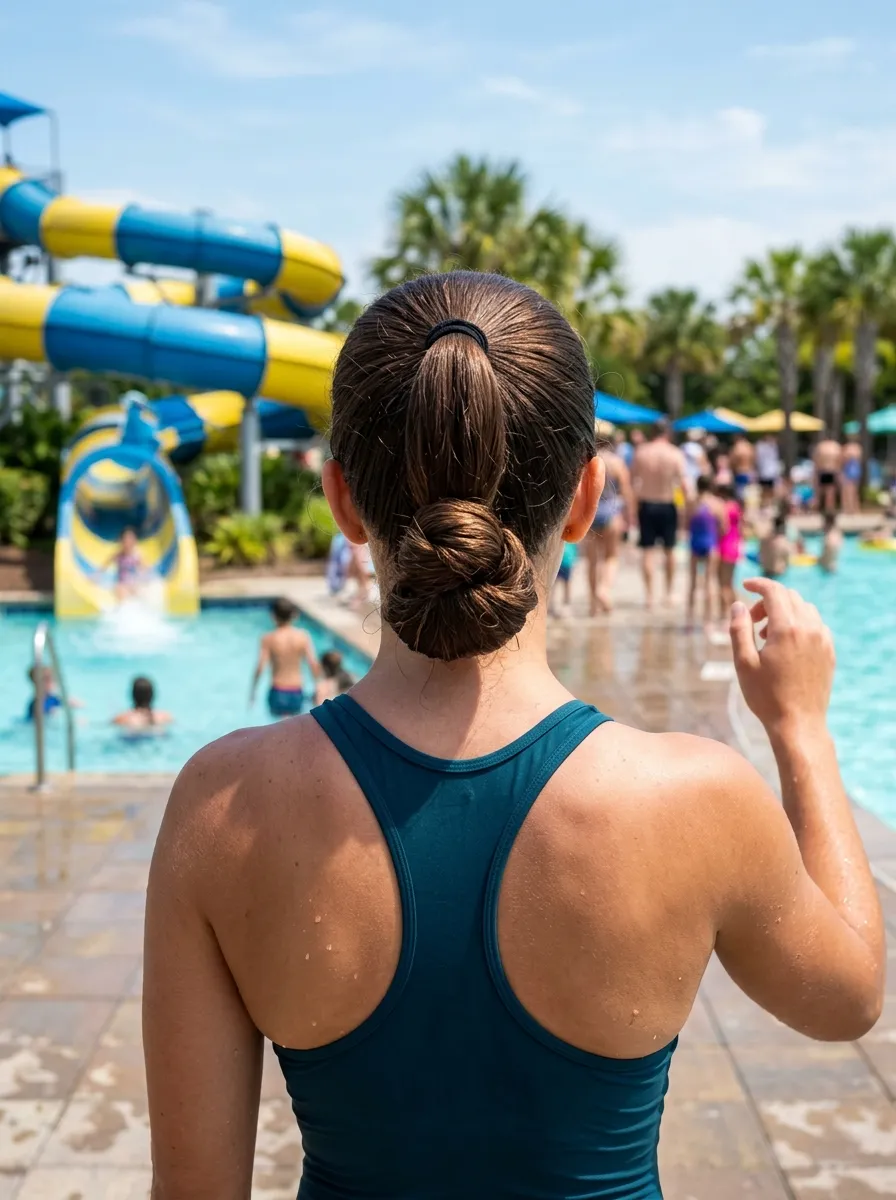
The knotted ponytail pulls the hair into a high ponytail and then ties the ponytail tail into a single large knot. The knot adds volume and visual interest while also keeping the ponytail from swinging excessively on rides.
Gather all the hair into a high ponytail. Divide the tail into two sections. Cross the right over the left and pull through to tie a single loose knot. Tighten the knot enough to hold its shape but not so tight that it is uncomfortable.
The knot adds structure to the ponytail tail and prevents it from getting tangled or whipped around on high-speed water rides more than a free-swinging ponytail would.
The knot is easy to undo and redo if it loosens after water exposure.
This style works on ponytail lengths of at least six to eight inches for enough length to knot.
Use a brightly colored elastic at the ponytail base for a pop of color. The knotted detail looks intentional and styled in photos.
Budget tip: No additional products or accessories needed beyond the elastic already at the ponytail base. Zero extra cost.
18. The Low Pony with a Silk Scarf Wrap
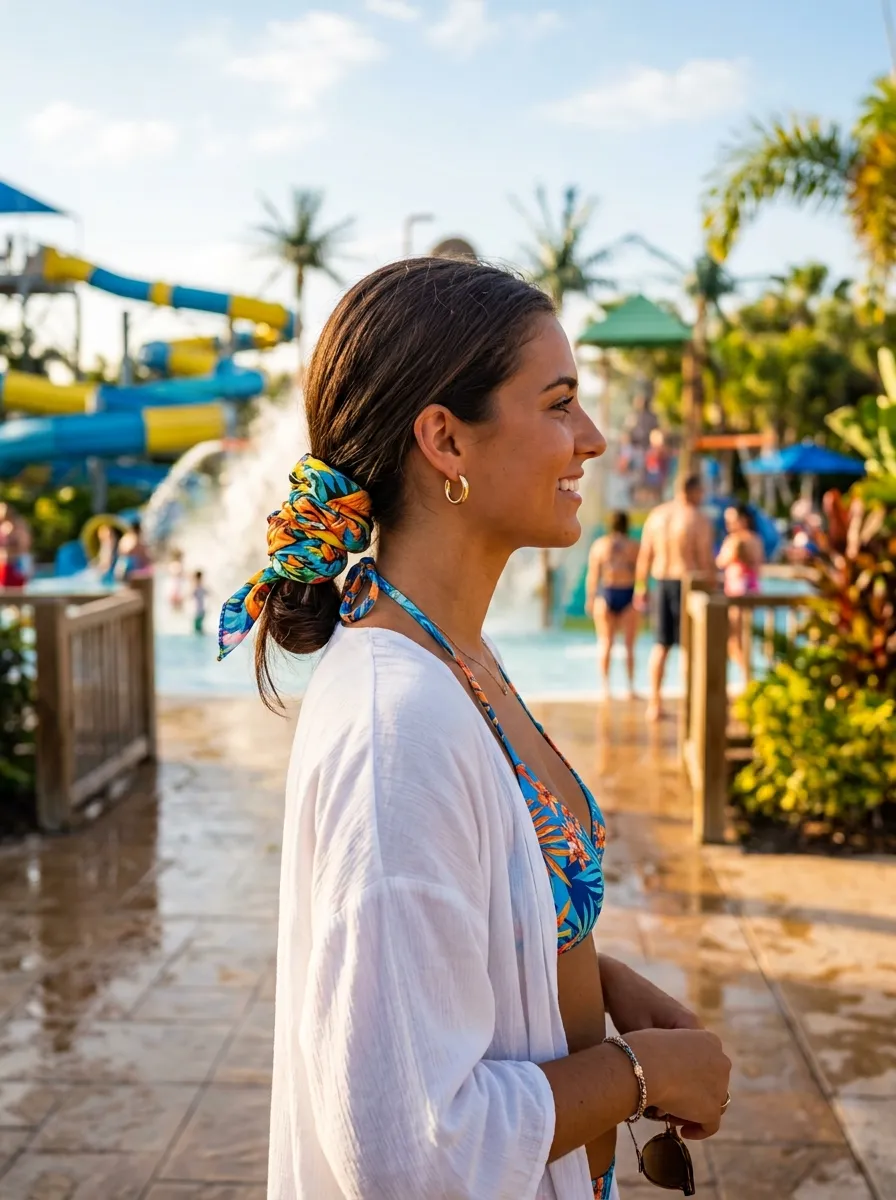
A low ponytail wrapped with a colorful scarf or fabric strip at the base turns the most basic hairstyle into something that looks intentionally styled. The scarf adds a bright, tropical quality that suits the waterpark environment.
Pull all the hair into a low ponytail at the nape and secure with an elastic. Fold a thin scarf or fabric strip into a long band. Wrap it around the ponytail base twice and tie it in a bow or knot.
Use a synthetic or nylon scarf rather than a pure silk one at a waterpark. Nylon and polyester fabrics dry faster, hold their color better when wet, and cost significantly less than silk.
The wrapped scarf sits over the elastic, hides it completely, and adds color and personality in one step.
Choose a scarf in a tropical print, bright solid, or pattern that matches your swimwear for a coordinated look that photographs well.
The ponytail tail below the scarf can be braided, left loose, or knotted for additional styling variation.
Budget tip: A thin printed scarf or fabric ribbon from a dollar store or thrift shop costs under $3. One scarf works for many waterpark visits.
19. Pre-Set Cornrows for the Day
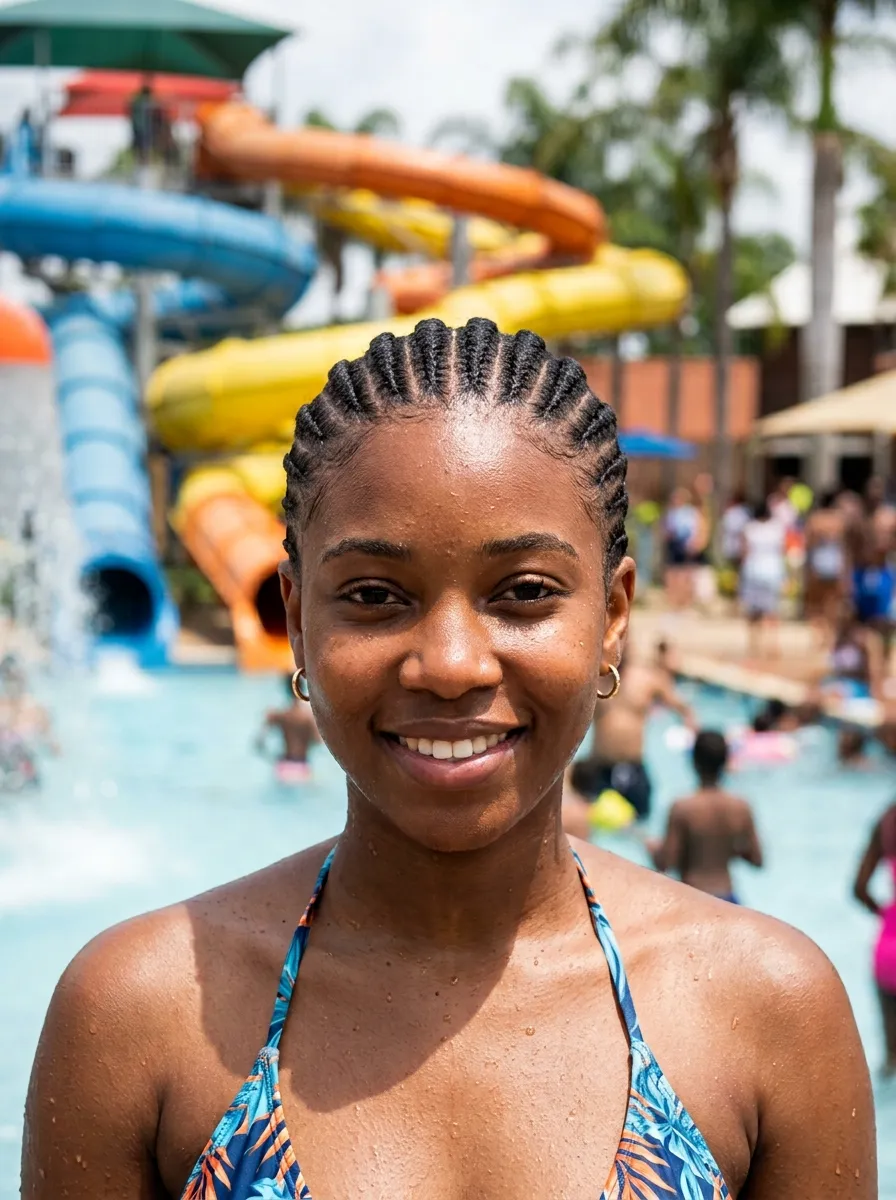
Pre-set cornrows before the waterpark day are one of the most genuinely practical waterpark hairstyle strategies. Cornrows lie flat against the scalp, hold completely through every ride and pool entry, protect the hair from chlorine exposure, and require zero maintenance throughout the day.
Get the cornrows done the evening before the waterpark visit rather than the morning of. This gives them time to set properly and means no rushing on the day.
Straight-back cornrows running from the front hairline to the nape are the most practical direction for waterpark activity. They sit flat in all positions including lying down on ride mats.
Apply a light hair oil to the scalp before cornrowing for protection and to keep the scalp from drying out from chlorine exposure.
After the waterpark, rinse thoroughly with clean water to remove chlorine from the scalp and braid sections.
This style suits afro-textured and natural hair primarily. It provides protective benefits as well as practical waterpark styling.
Cornrows can stay in for multiple days, making them excellent value for a waterpark vacation rather than just a single-day visit.
Budget tip: Home cornrowing by a family member who knows the technique costs nothing. A professional cornrow service at a braiding salon is an affordable service compared to most styling appointments.
20. The Half-Up Waterfall Look
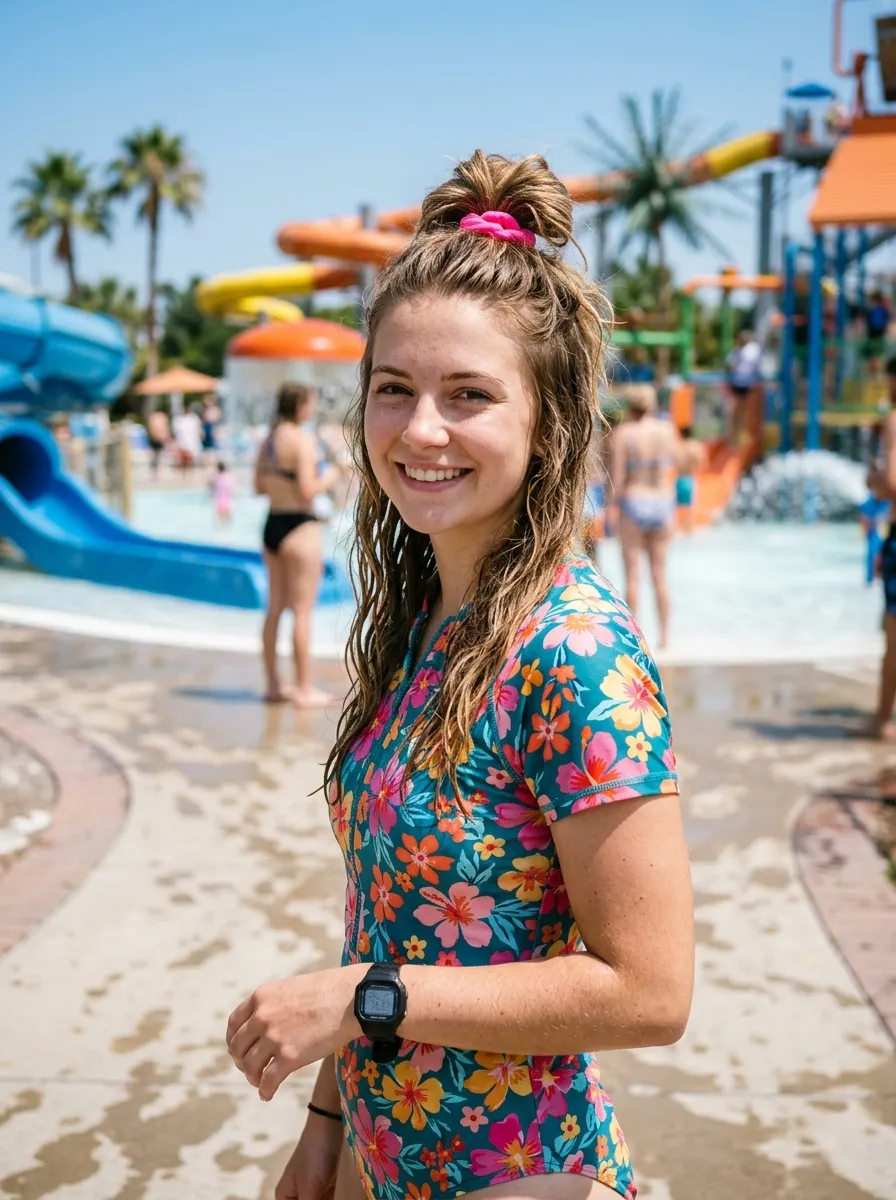
The half-up style at a waterpark embraces the natural wave texture that develops from repeated water exposure throughout the day. Gather the top half of the hair and secure with a strong elastic or colorful scrunchie. Let the bottom half fall completely loose.
The bottom sections will naturally wave and texture as they go through repeated wet-dry cycles throughout the waterpark day. Rather than fighting this, let it happen. By the afternoon, the loose sections look beautifully wavy without any product.
Secure the top section tightly enough that it does not fall loose on rides. Use a second elastic as backup if the hair is thick or slippery.
This style works best on medium to long hair where the bottom loose section has enough length to show the natural wave texture.
The half-up placement keeps hair off the face during active rides while letting the natural texture develop in the loose bottom section.
Refresh the half-up at any point during the day by just re-securing the elastic. The loose bottom section does not need any attention.
Budget tip: Two elastics or a scrunchie are the only requirements. Zero products or tools needed at the park.
21. The Textured Waves and Bun Combo
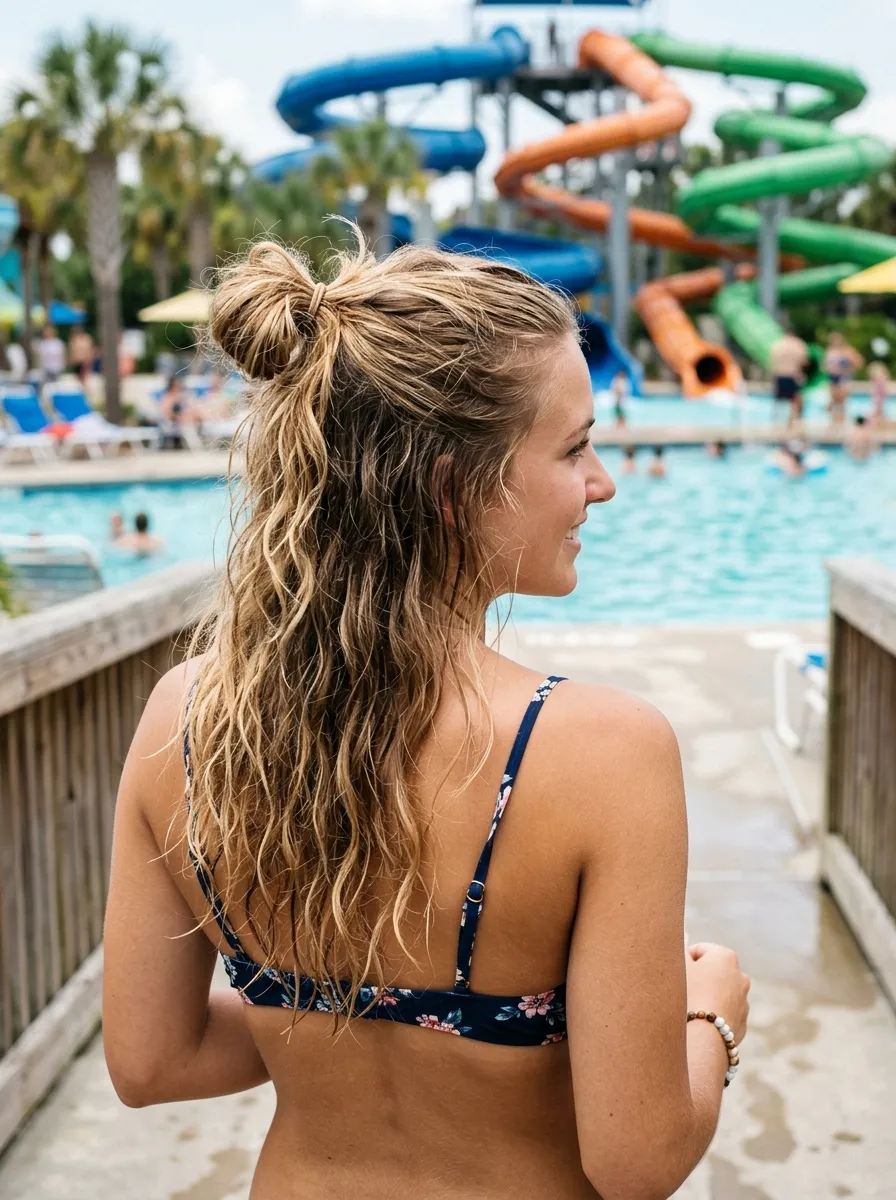
The textured bun and wave combo gathers the top section into a loose bun at the crown while leaving the bottom section to air-dry naturally into waves from water exposure. This combination looks completely intentional and is genuinely the most effortless waterpark look on this list.
Gather the top section from the temples upward into a loose bun at the crown. Secure with an elastic. Leave the bottom section completely free.
The loose bottom section will develop natural wave texture from going in and out of the water throughout the day. The first entry produces the wave texture. Each subsequent entry refreshes it. By mid-afternoon, the natural waves are fully set.
The top bun keeps hair out of the face during rides. The bottom waves look better as the day goes on.
Apply a leave-in conditioner to the entire hair before the waterpark visit. This is the one product preparation that makes the most difference. It reduces chlorine damage and encourages the bottom sections to wave rather than frizz.
This style suits all hair textures that develop natural wave or curl when wet.
Budget tip: A leave-in conditioner applied before the visit costs around $5 to $8 at any drugstore and covers multiple waterpark days from a single bottle.
Conclusion
Looking great at a waterpark is genuinely about preparation rather than skill. The right style choice before you arrive, a handful of affordable waterproof-friendly accessories in your bag, and a leave-in conditioner applied before you leave the house will take you through an entire waterpark day without a single hair-related crisis. Every style on this list works in real waterpark conditions, not just in photos taken at poolside. Pick the one that suits your hair length and texture, practice it once at home so it takes under two minutes to create or recreate, and pack two spare elastics and a small claw clip as backup. Your hair will be the last thing you think about at the waterpark, which means you can focus on the rides, the sun, and the people you are with. That is exactly how a waterpark day should go.
Leave a Reply