Valentine’s Day calls for a hairstyle that matches the mood of the moment. Whether you are heading to a candlelit dinner, a cozy date at home, or a fun Galentine’s gathering with friends, your hair deserves some extra love too. The good news is that you do not need a salon appointment or expensive tools to look stunning. Many of these styles can be done in under 30 minutes with basic supplies you already own. From soft romantic curls to braided crowns and sleek buns, this list covers 25 gorgeous looks that suit all hair types, textures, and lengths. Each style comes with easy tips and budget-friendly advice so you can feel confident without the stress. Let’s get into the looks. If you’re also exploring Valentine Hairstyle Ideas for Kids, playful braids, heart-shaped parts, cute ponytails, and ribbon or clip accents can help create adorable, festive looks that are comfortable, easy to manage, and perfect for a fun Valentine’s celebration.
1. Soft Romantic Curls
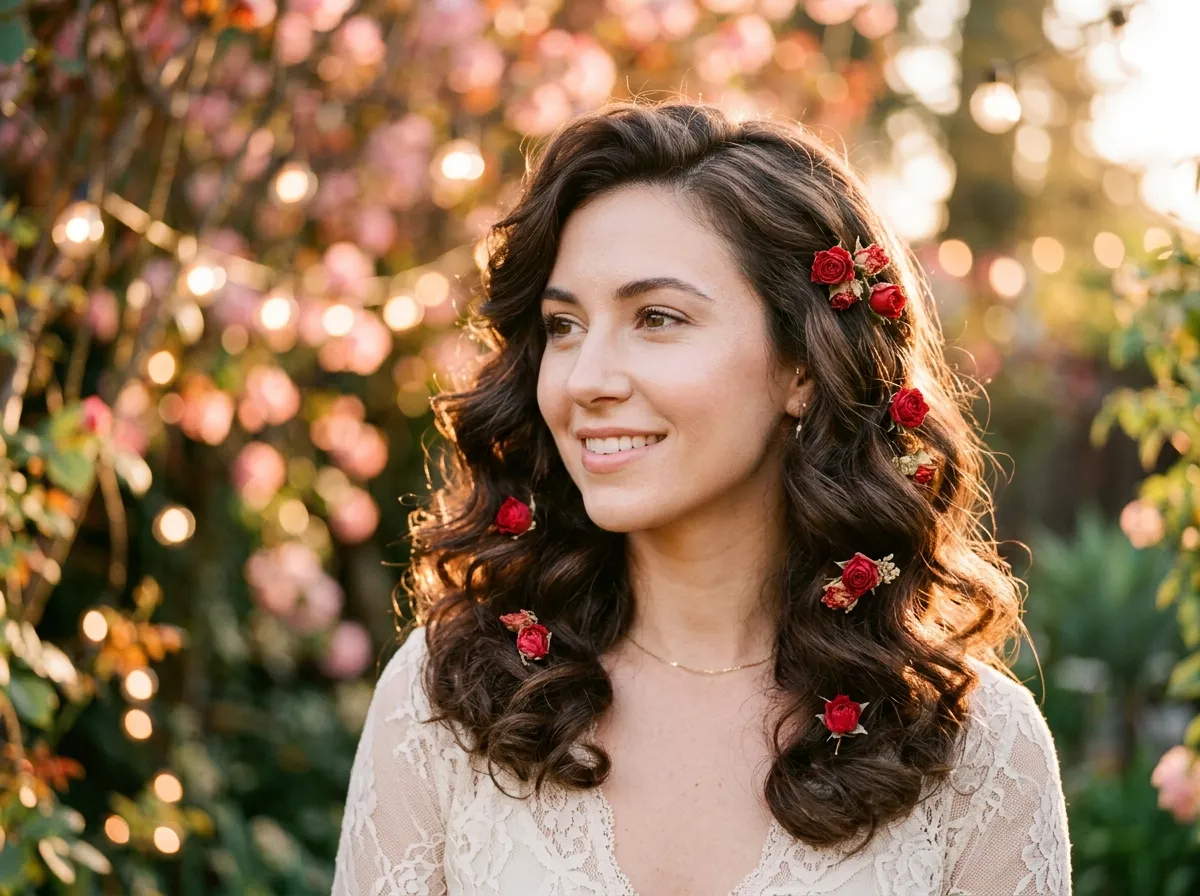
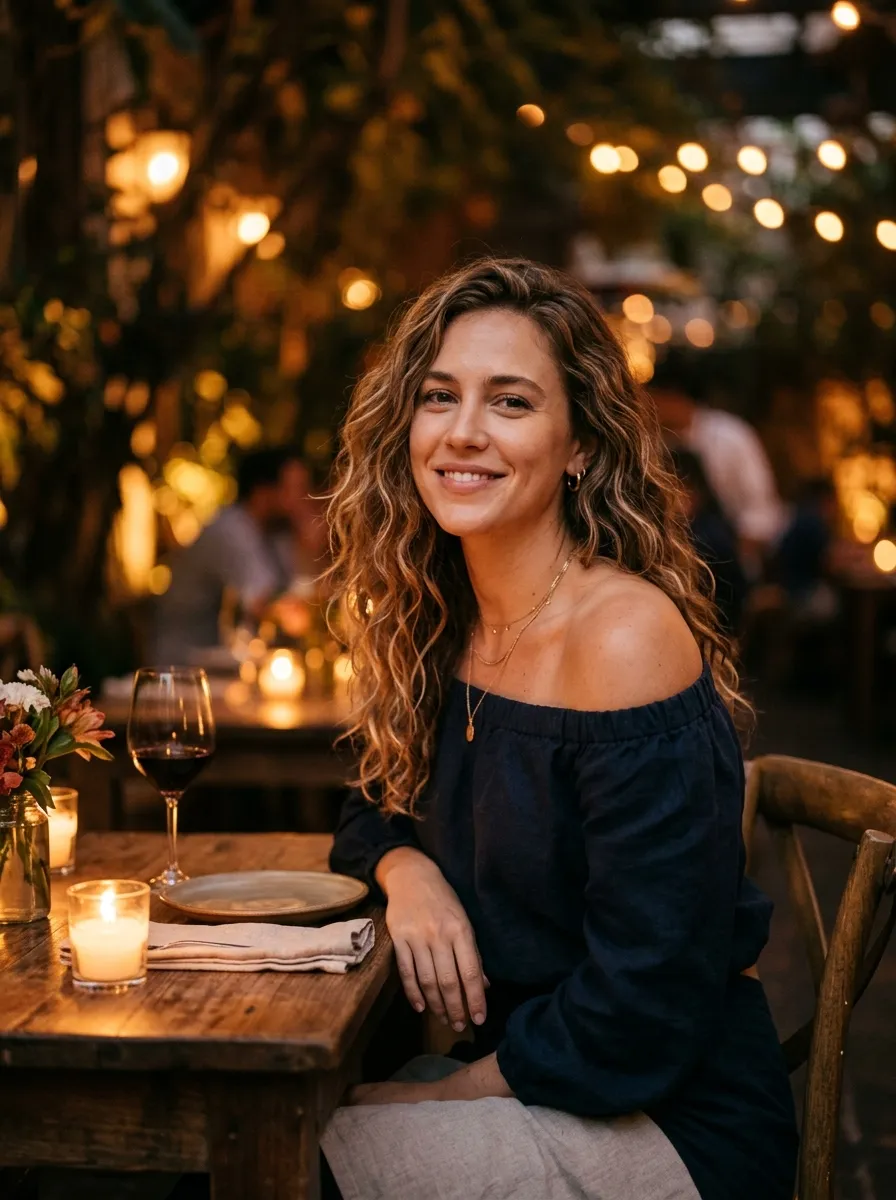
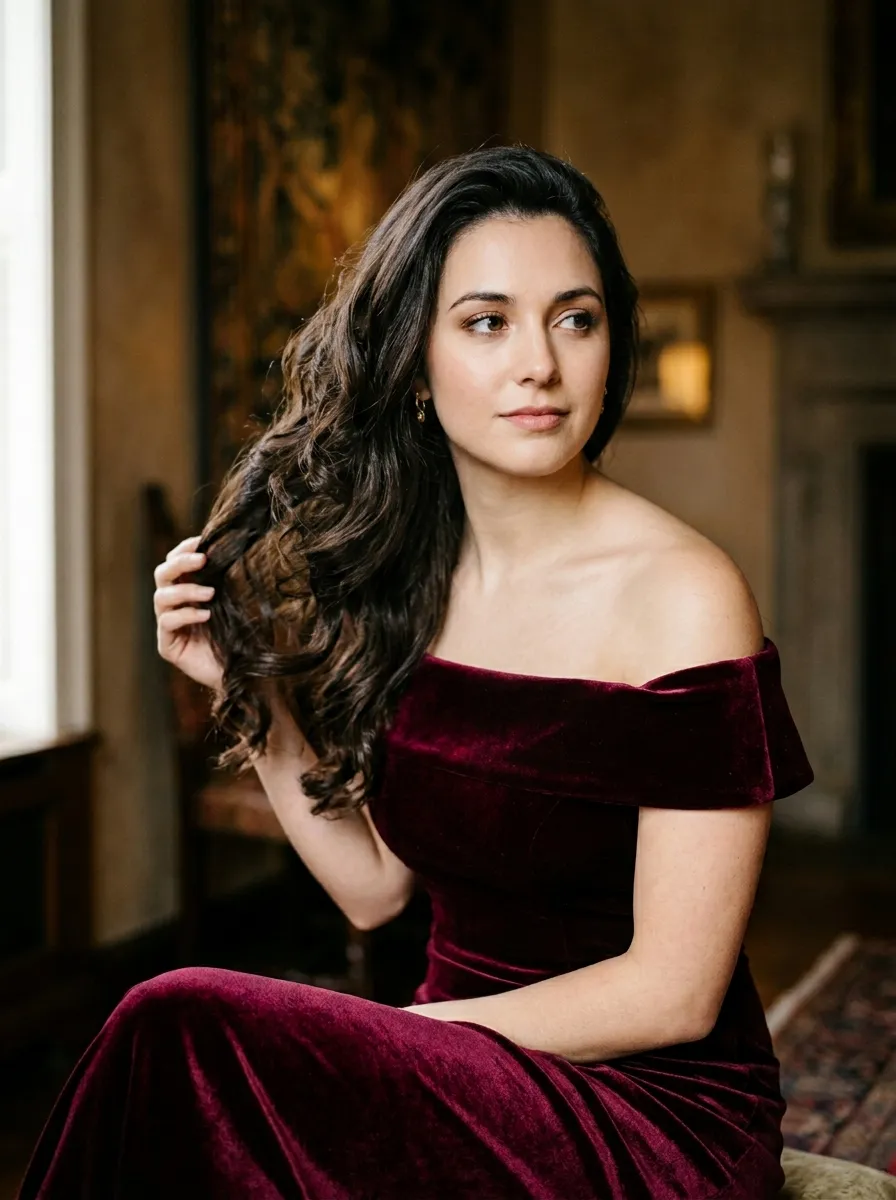
Soft curls are one of the most timeless looks for Valentine’s Day. They feel effortless but still look polished and put together.
You can create this style with a 1.5 inch curling wand. Wrap each section of hair away from your face. Hold for about 8 seconds and then let the curl drop.
Once all curls are done, run your fingers through them gently. This breaks the curl apart and gives a more natural, lived in finish.
Finish with a light hold hairspray to keep things in place without making the hair stiff.
Budget tip: You do not need an expensive wand. A basic drugstore curling iron works perfectly fine. Look for one under $20 at any pharmacy or beauty store.
If your hair is naturally wavy, you can skip the iron altogether. Apply a curl defining cream to damp hair and scrunch. Let it air dry and you have soft waves with zero heat.
Add a small clip or pin near one ear for a sweet touch. This tiny detail makes the whole look feel more intentional and romantic without any extra effort.
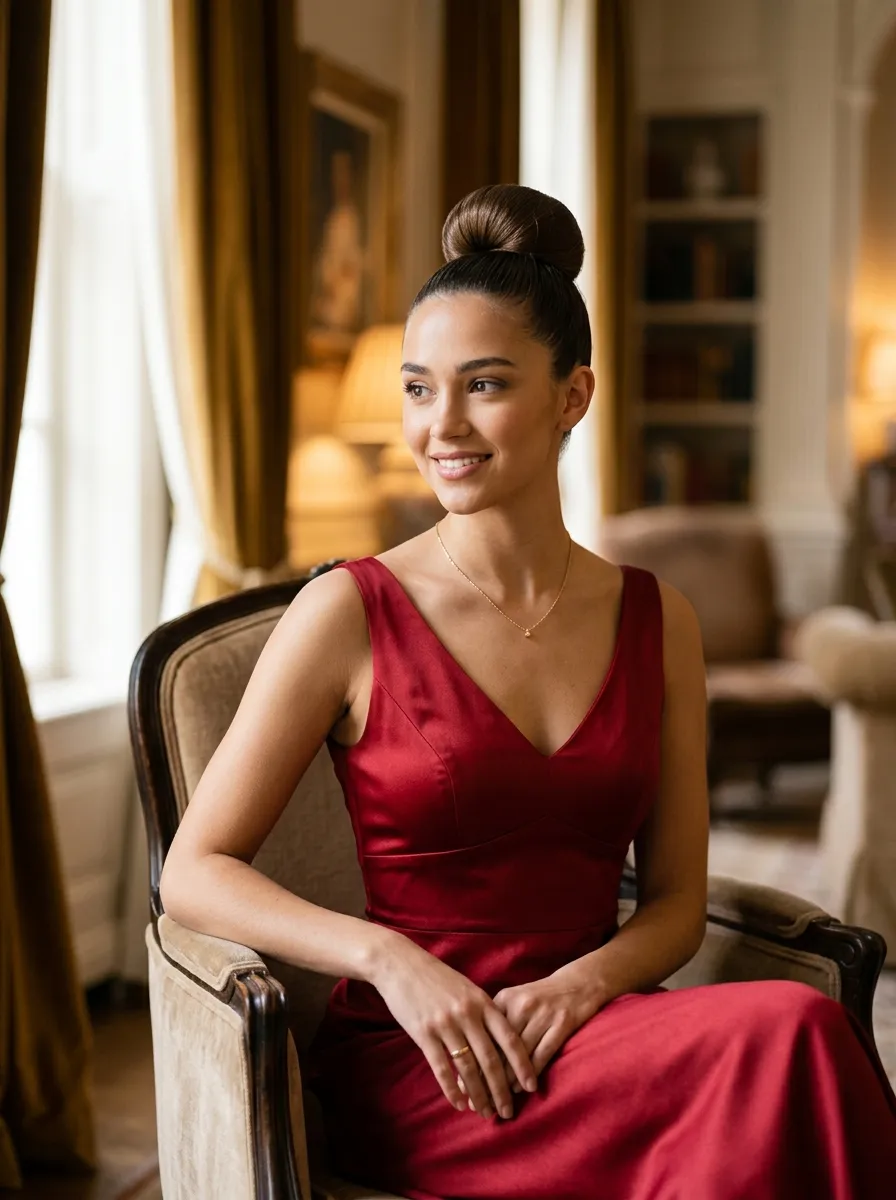
2. Classic French Twist Updo
The French twist is a true classic. It looks elegant, takes about 10 minutes to do, and works beautifully for both casual and formal Valentine plans.
Start by gathering your hair at the nape of your neck. Twist the ponytail upward and tuck it into itself against your head. Use bobby pins to secure it in place.
Smooth out any bumps with a fine tooth comb or your fingers. A little shine serum on top makes the style look super clean and polished.
Budget tip: Skip the fancy hair clips. A pack of basic bobby pins is all you need and they cost about $2 at the dollar store.
You can make it softer by pulling out a few strands near your face before securing the twist. These loose pieces frame your face beautifully.
For extra charm, tuck a small red or white flower into the twist. A real flower works, but a fabric one from a craft store is just as pretty and stays in place all night.
This look works best on medium to long hair but can also be adapted for shorter hair using more pins to hold everything in place.
3. Braided Crown
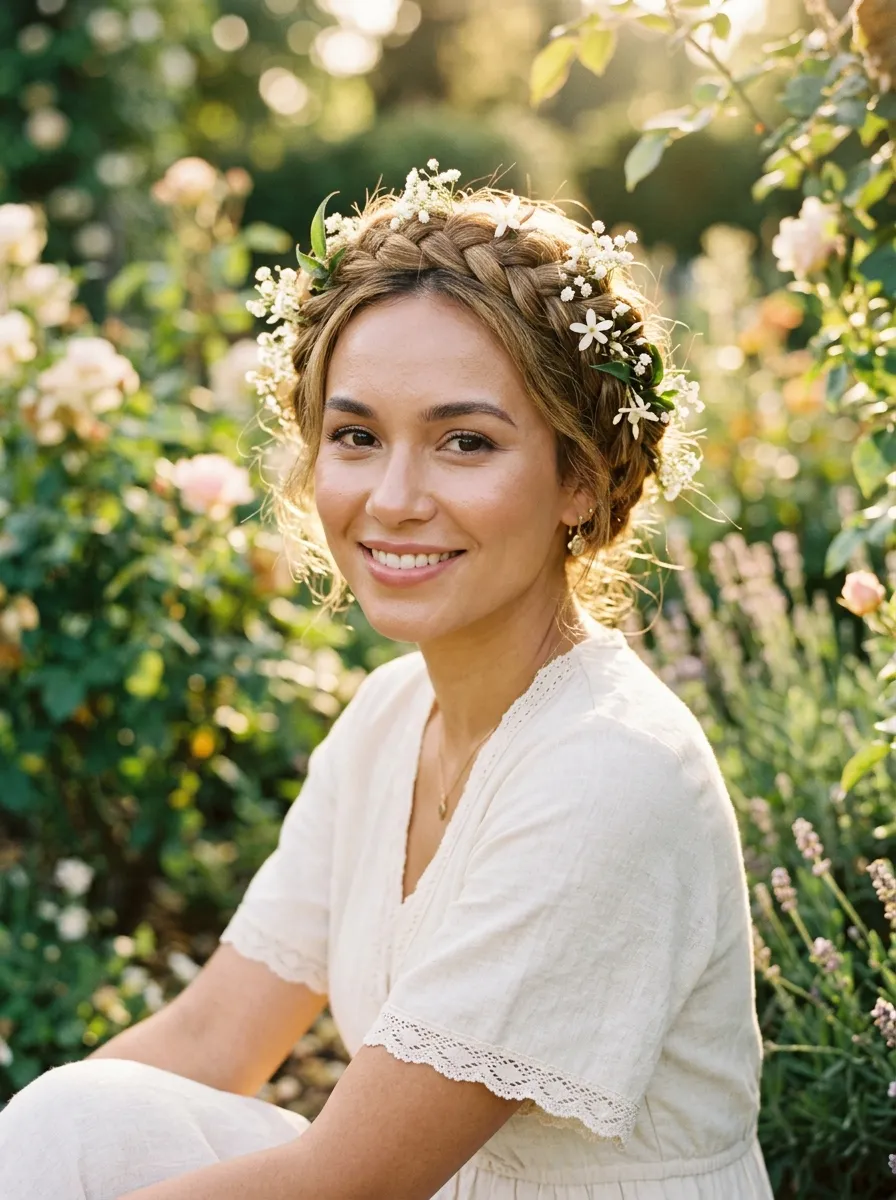
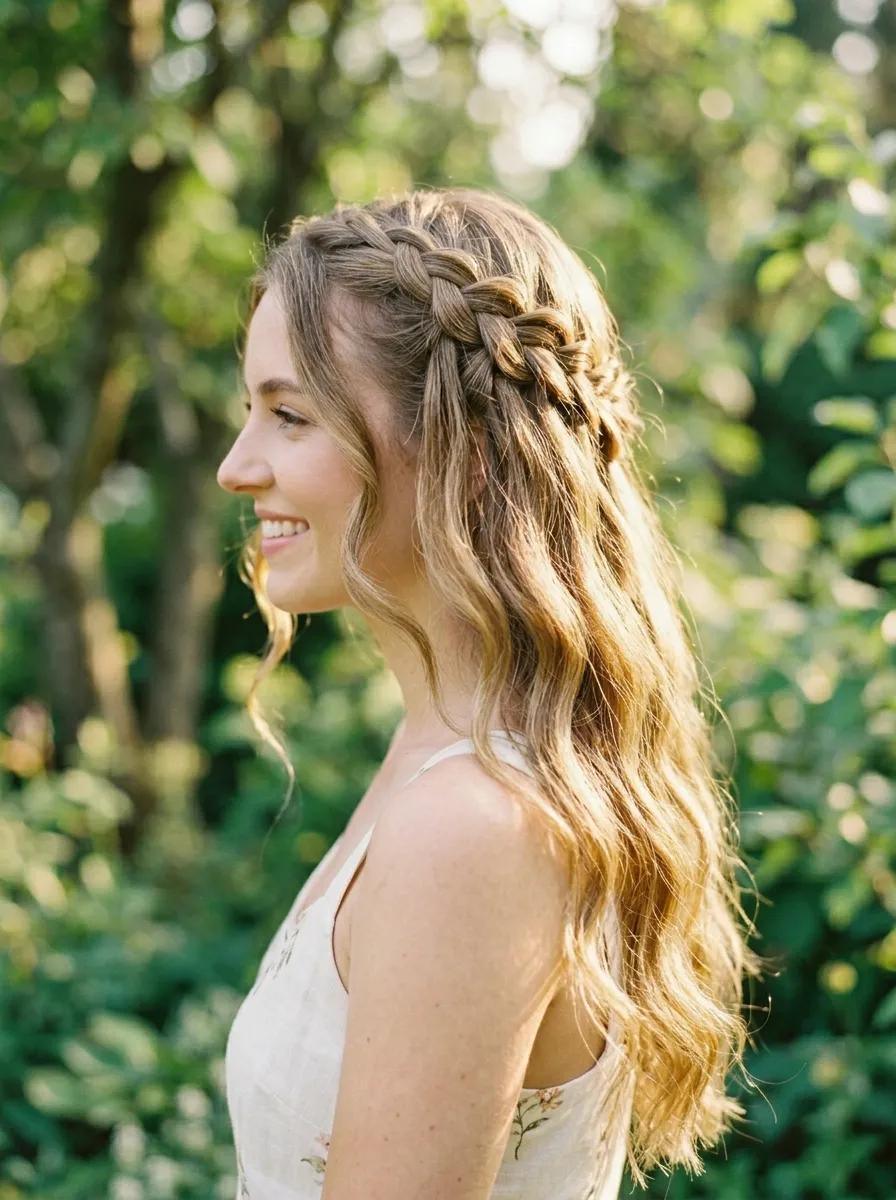
A braided crown looks like it took hours but it is actually one of the easier romantic styles once you get the hang of it.
Start by parting your hair down the middle. Braid each side into a simple three strand braid. Wrap each braid up and over your head like a headband. Pin them securely at the opposite side.
Pull the braids slightly apart to make them look fuller. This technique is called pancaking the braid and it creates a gorgeous thick crown effect.
Budget tip: If your braids look thin, add a small clip-in extension piece to each braid before you start. You can find clip-in pieces at beauty supply stores for under $5.
Weave in small fabric flowers or tiny baby’s breath as you secure the braids. This makes the crown look like something from a fairytale.
Leave a few face-framing pieces out for softness. Without them, the look can feel too severe.
This style works on all textures. Natural hair, wavy hair, and straight hair all look stunning in a braided crown. Just adjust the braid size and technique to match your texture.
4. Loose Beachy Waves
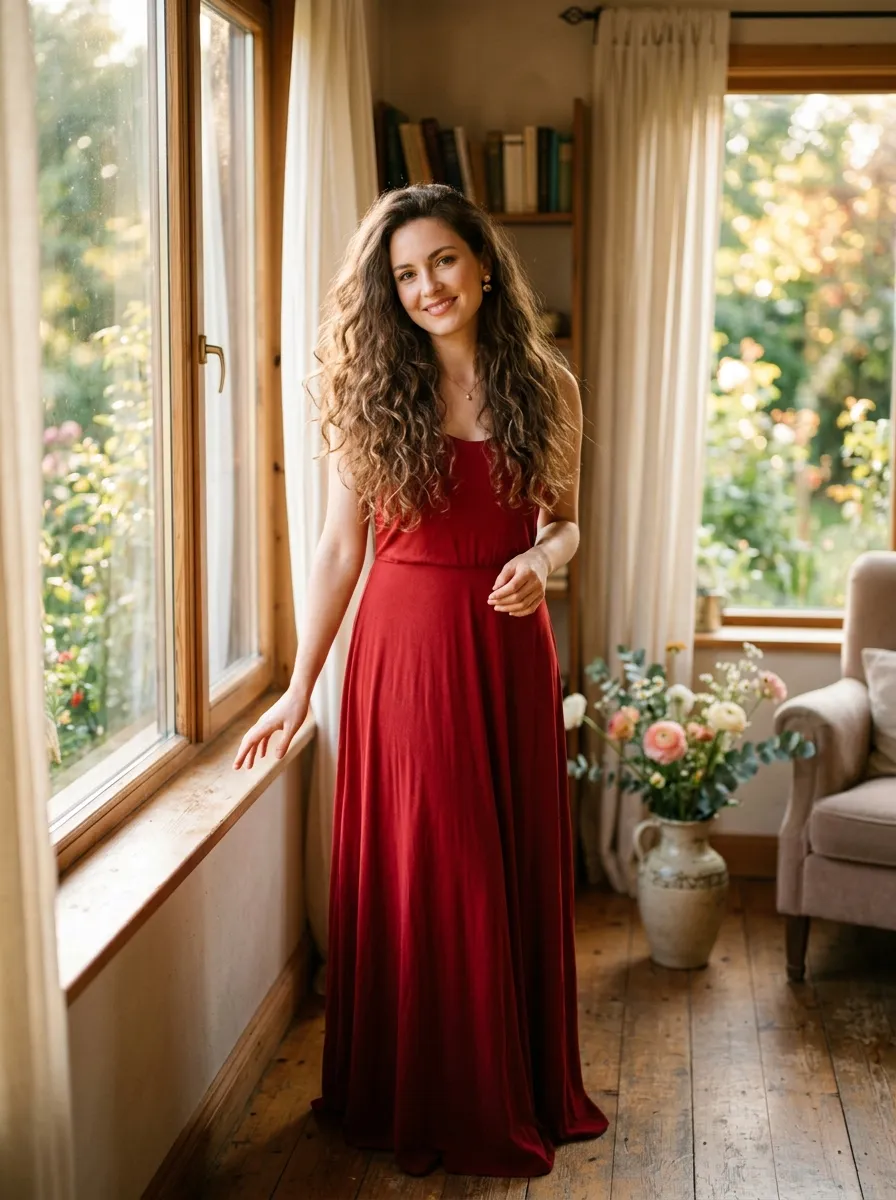
Loose waves are effortless, romantic, and work for literally every Valentine’s Day occasion. They are also one of the easiest styles to recreate at home.
Use a flat iron for this look. Grab sections of hair and clamp the iron near the root. Twist the iron away from your face as you pull it down. The result is a soft, lived-in wave rather than a tight curl.
Alternate the direction of each section. Some waves facing in, some facing out. This creates dimension and makes the style look more natural.
Budget tip: No flat iron? Use a regular blow dryer with a round brush. Wrap sections of hair around the brush as you dry them. You will get a similar soft wave effect at no extra cost.
Spray a little sea salt spray on dry hair before styling. This adds texture and helps the waves hold their shape throughout the night.
Finish by scrunching the hair upward with your hands. This activates the wave and gives a slightly undone look that is genuinely beautiful.
A light hold spray at the end keeps everything in place without making the waves look crunchy or stiff.
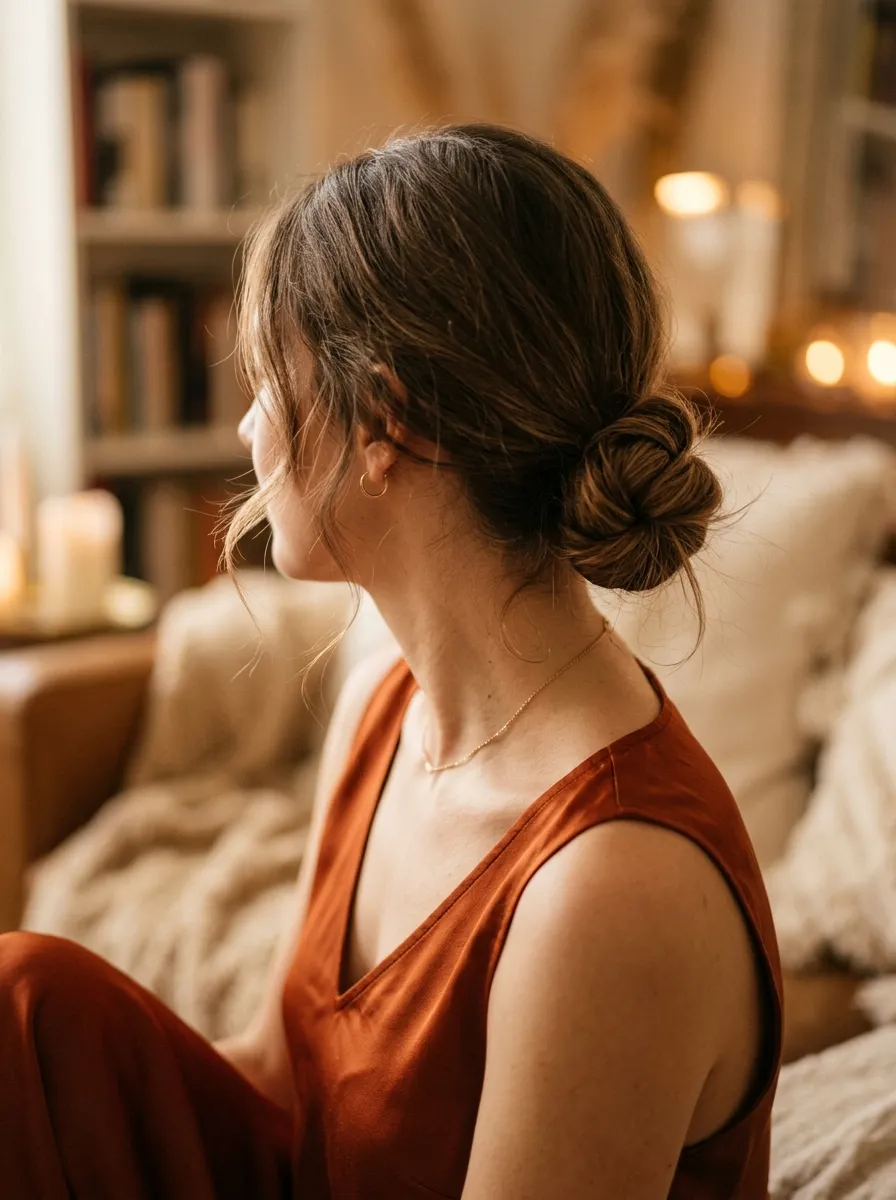
5. Low Chignon Bun
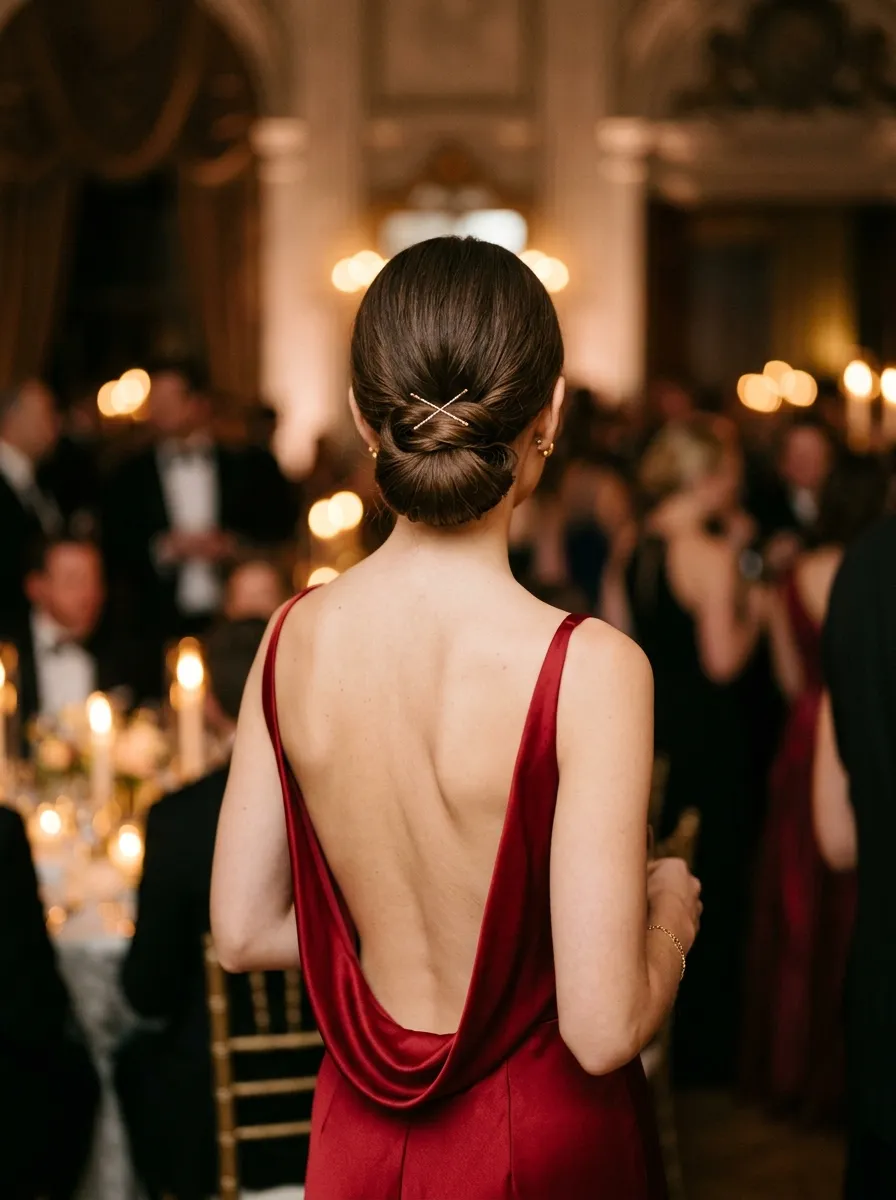
The low chignon is a sleek and sophisticated Valentine’s Day look that suits both short and long dinners. It keeps your hair out of the way while still looking intentional and beautiful.
Pull your hair into a low ponytail at the nape of your neck. Twist the ponytail into a loose coil and wrap it around the base. Tuck the ends under and secure with bobby pins.
The key is keeping it slightly loose. A too-tight chignon looks stiff. A slightly relaxed one looks chic and modern.
Budget tip: You do not need any special tools. A basic hair tie, a few bobby pins, and five minutes are all it takes.
Leave a few thin strands down near your temples. This keeps the look soft and romantic rather than severe.
A spritz of shine spray on the bun gives it a polished finish. You can make a DIY shine spray by mixing water with a few drops of argan oil in a small spray bottle.
Add two crossed gold pins or a simple jewel pin to the center of the bun. This small detail makes the chignon look like a professional salon style without the salon price.
6. Half Up Heart Bun
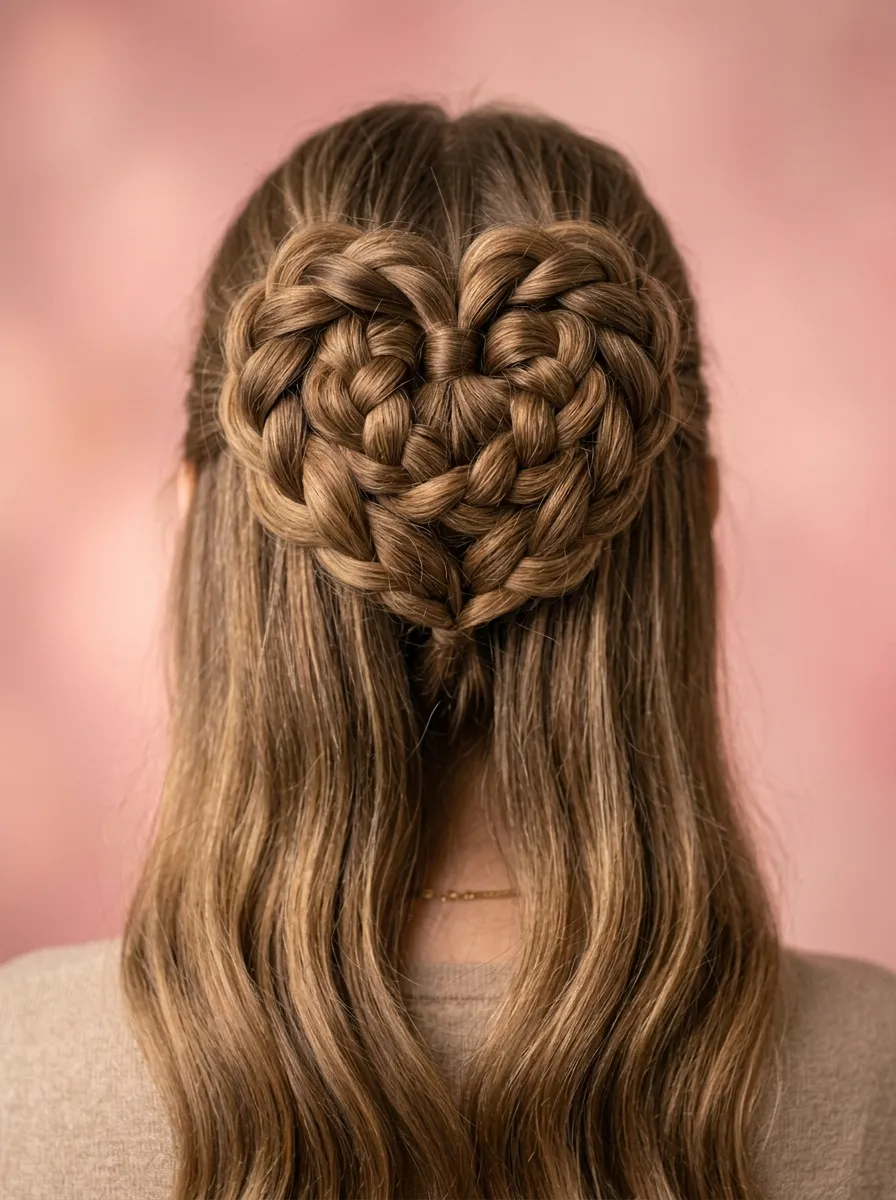
This playful and adorable style is perfect for Valentine’s Day. It literally puts a heart on your head and it is easier than you think.
Start by taking the top half of your hair and dividing it into two sections. Twist each section outward and fold it into a loop shape. Pin both loops together at the center so they form a heart shape.
Use your fingers to adjust the shape as needed. You might need to add a few extra pins to hold it perfectly.
Budget tip: No special tools required. Just bobby pins and a mirror. Practice once before the big day so you feel confident doing it.
The bottom half of the hair can be left loose, curled, or braided. Loose waves below the heart bun look especially romantic.
Spray a little strong hold hairspray on the heart shape once it is done. This helps the bun keep its shape and not fall flat throughout the evening.
This style photographs incredibly well. If you are taking photos together on Valentine’s Day, the heart bun adds a sweet detail that shows up beautifully from behind.
It works best on medium to long hair. For shorter hair, just make the heart smaller and use more pins to hold it together.
7. Sleek Ponytail with Satin Ribbon
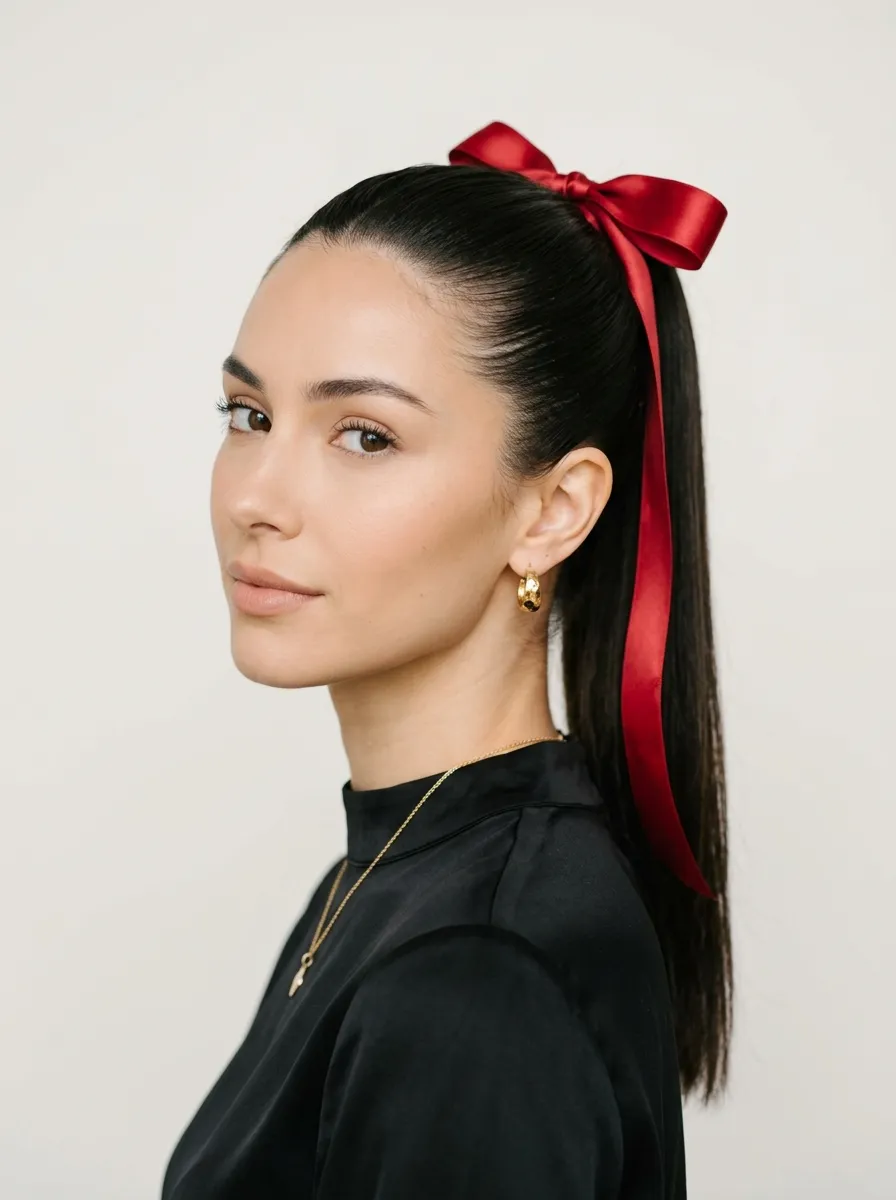
A sleek ponytail sounds simple but with the right ribbon and finish, it becomes genuinely stunning. This is one of the most underrated Valentine’s hairstyles.
Start by smoothing your hair back with a boar bristle brush or a regular paddle brush. Secure it into a ponytail at whatever height you prefer. High ponytails feel fun. Low ones feel more refined.
Wrap a long satin ribbon around the base of the ponytail. Tie it into a big bow and let the extra ribbon length hang down alongside your hair.
Budget tip: Satin ribbon is available at any craft store for about $1 per meter. Choose red, pink, or ivory for a Valentine’s Day feel.
Use a tiny bit of edge control or hair gel along your hairline to smooth down any flyaways. This gives the look a polished finish.
Take a small piece of hair from the ponytail itself and wrap it around the hair tie. Secure it underneath with a pin. This hides the elastic and makes the look much more elegant.
This style works on all hair types and lengths. Even shorter hair can pull off a small low ponytail with a ribbon. The bow does most of the work visually.
8. Side Swept Waves
Side swept waves are one of those classic romantic looks that never go out of style. They frame the face beautifully and add a glamorous feel to any Valentine’s Day outfit.
Curl all your hair using a large barrel curling iron. Once done, sweep all the curls to one side of your head. Use a few bobby pins hidden beneath the hair to secure the sweep near your ear.
Let the curls fall naturally over your shoulder on that side. The other side should be completely clear, showing off your neck and earring.
Budget tip: Use your regular round brush and blow dryer instead of a curling iron. Blow-dry the hair in sections using the brush to direct the wave toward one side.
A deep side part intensifies the swept look. If you naturally part your hair in the middle, just comb it over to the opposite side before styling.
Tuck a small flower or jeweled clip near the ear on the pinned side. This anchors the style and adds a pretty focal point.
Finish with a medium hold spray and gently scrunch the curls from the bottom. This refreshes the wave shape and keeps things bouncy through the night
9. Waterfall Braid
The waterfall braid is one of the most romantic looking styles you can do and it is much easier than it appears.
Start a regular three strand braid on one side of your head near your temple. Instead of crossing the bottom strand over, drop it down and pick up a new section from above to replace it. Repeat this process as you move across the head.
The dropped strands create the waterfall effect as they fall down through the braid. It is genuinely beautiful once you see it come together.
Budget tip: Watch a quick tutorial on your phone right before doing it. The technique clicks after seeing it done visually.
Once the braid reaches the back of your head, secure it with a small clear elastic or a few bobby pins. Leave the rest of your hair down in loose waves.
Pulling the braid loops apart gently after finishing makes it look fuller and more romantic. Do not skip this step.
This style works best on hair that is at least shoulder length. If your hair is layered, tuck the shorter pieces behind your ear before braiding to keep things tidy.
10. Messy Bun with Flower Pins
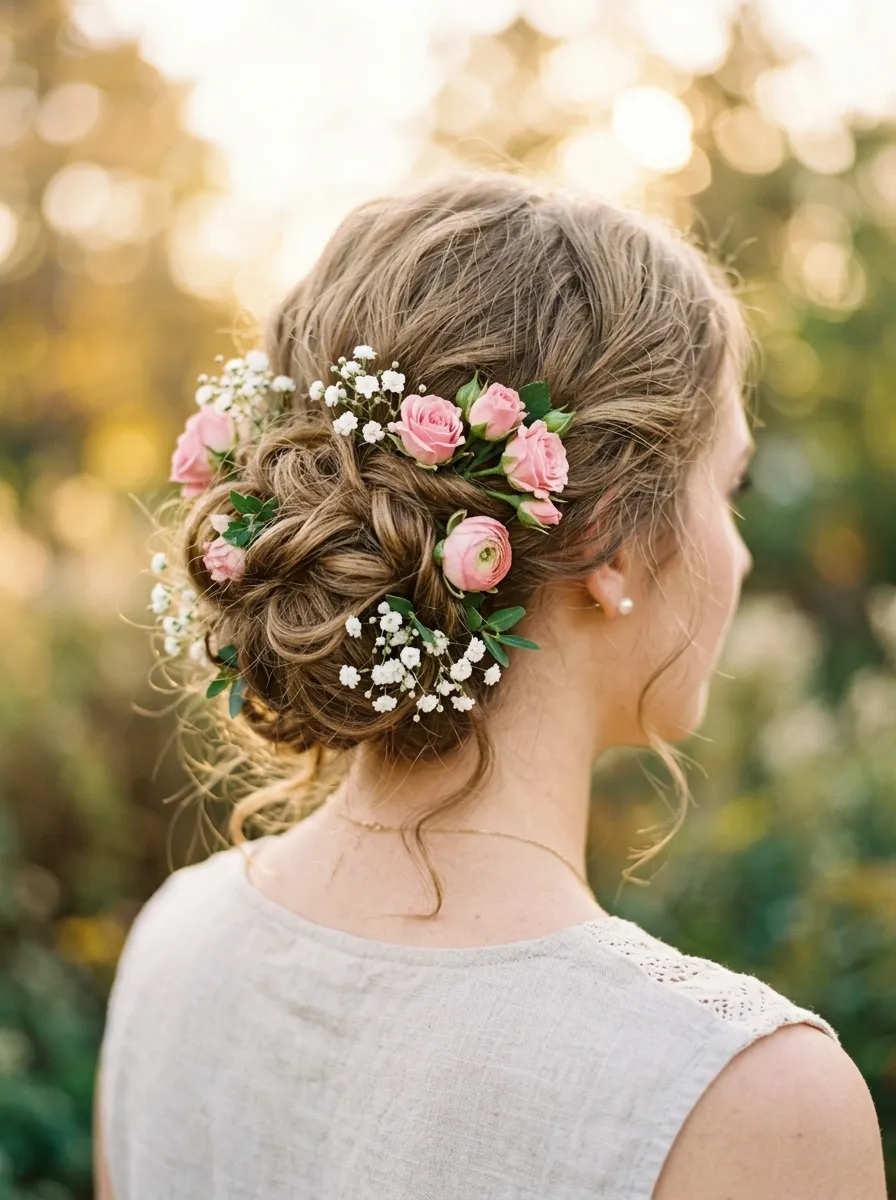
The messy bun with flower pins is the perfect mix of relaxed and romantic. It is ideal for a low-key Valentine’s Day date or a cozy night in.
Gather your hair into a high or mid-height ponytail. Twist it loosely and wrap it into a bun. Do not pull everything all the way through on the last wrap. Leave a loop for a messier texture.
Pull out a few strands around your face and near your ears. These pieces soften the look and make it feel intentional rather than sloppy.
Budget tip: Use fabric flower pins from a craft store for about $3. They last forever and you can reuse them for any occasion.
Push the flower pins into the bun in a scattered, organic arrangement. Three to five flowers looks great. More can start to look overdone.
Spray the whole style with a medium hold spray to keep the bun from falling apart during dinner.
If your hair is freshly washed and slippery, add a little dry shampoo before you start. This gives the hair grip and makes the bun hold much better without extra effort.
This look photographs beautifully and works for every hair type and length above shoulder.
11. Vintage Pin Curls
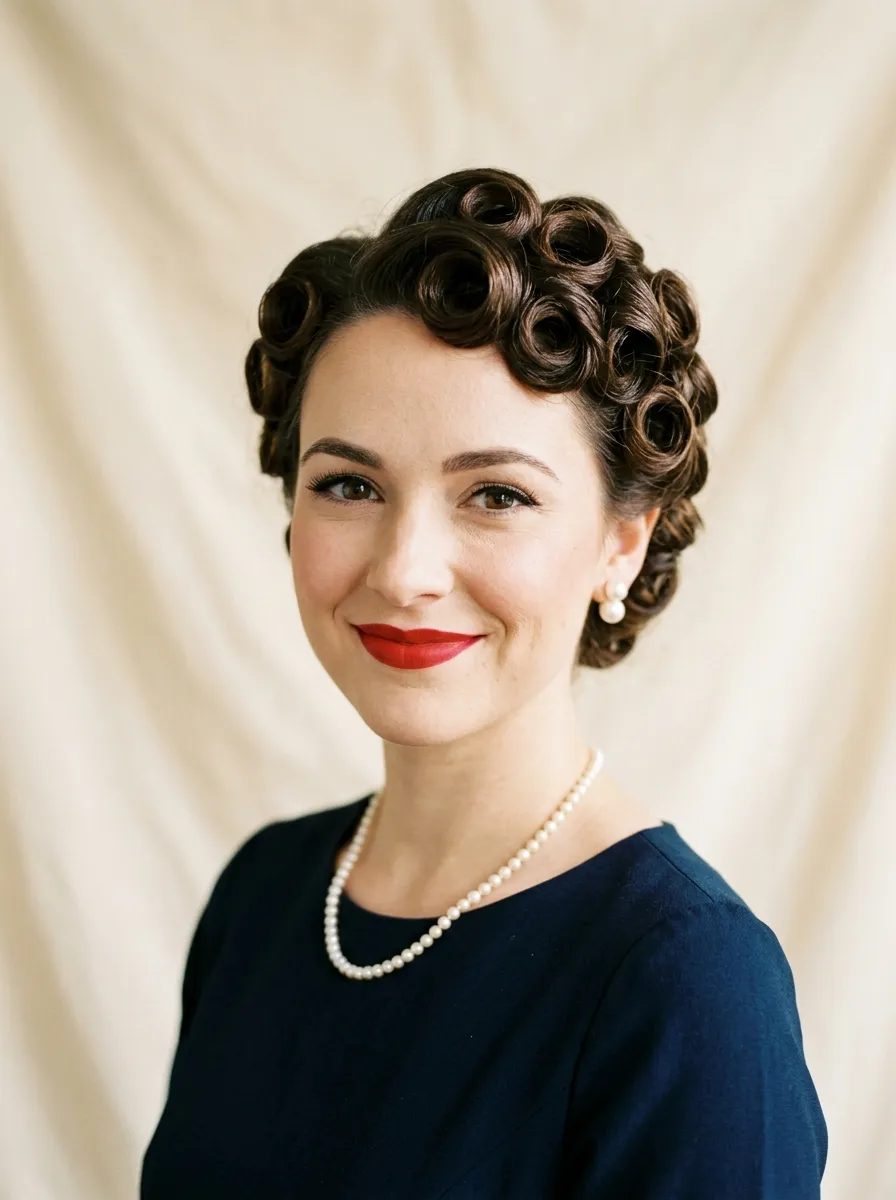
Pin curls bring old Hollywood romance straight to your Valentine’s Day look. They feel retro, glamorous, and surprisingly achievable at home.
Work with freshly washed hair that is about 80% dry. Take thin sections of hair and wrap each one tightly around your finger into a small coil. Slide the coil off your finger and pin it flat against your head with two crossed bobby pins.
Do this all over your head. Let the curls sit for at least an hour or overnight if possible.
Budget tip: Skip the heat entirely with this style. Air drying the curls overnight means zero damage and zero electricity costs.
When you are ready, remove the pins one by one. Do not brush the curls out aggressively. Use your fingers to separate them gently.
Finger comb the curls into a smooth, defined shape. Finish with a light holding spray.
For a full vintage look, sweep all the curls to one side or pin a section at the crown while leaving others down. Add a small jeweled clip or comb for extra retro glamour.
This style works best on hair that is between chin and shoulder length. Longer hair can still do pin curls but the curls will be looser due to the weight.
12. Rope Braid Low Updo
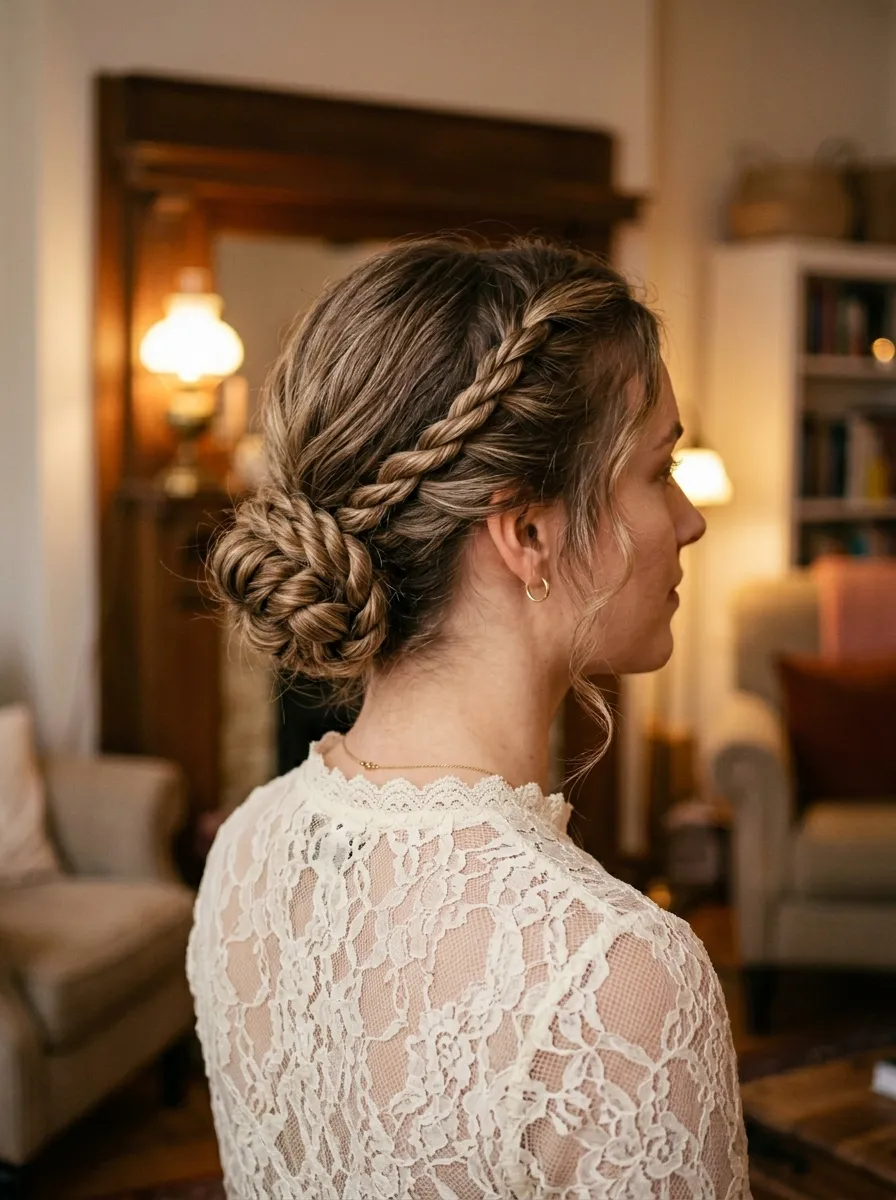
A rope braid updo looks incredibly detailed but is one of the simplest braiding techniques to learn. It requires no special skills, just two sections of hair.
Divide your hair into two sections. Twist each section in the same direction, then wrap them around each other in the opposite direction. That is the entire rope braid technique.
Keep braiding until you reach the end of your hair. Then coil the rope braid into a low bun and pin it securely.
Budget tip: This style needs no accessories to look beautiful. The braid texture itself is the statement.
Pancake the braid before coiling it. Gently tug each loop of the braid outward to make it appear fuller and more dramatic.
Tuck the end of the braid neatly under the coiled bun and pin it. A few bobby pins underneath hold everything in place.
Spritz with hairspray and smooth any flyaways with a light serum on your fingertips.
This look works on all hair types. Textured and naturally curly hair creates a rope braid with beautiful volume. Straight hair gives a sleeker, more polished result.
13. Twisted Half Up Style
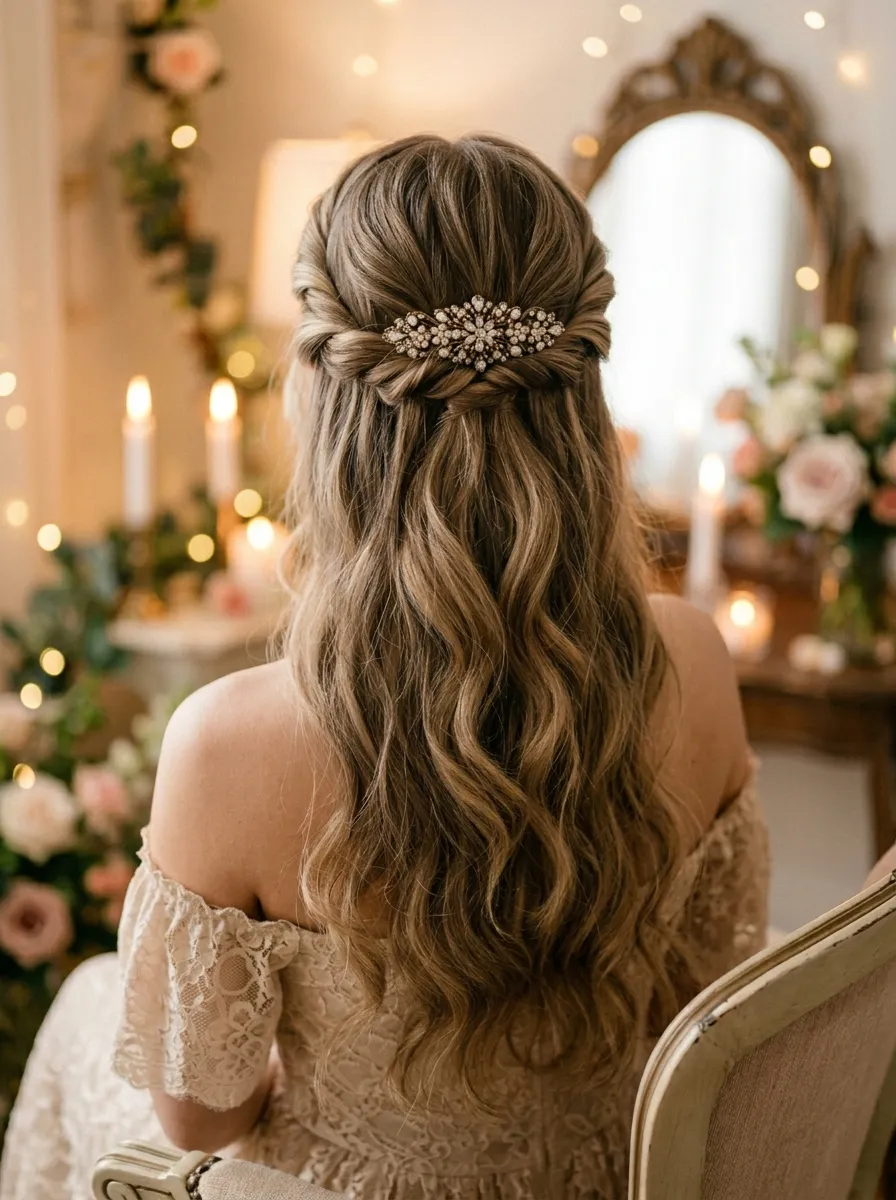
The twisted half up style is one of the fastest ways to look put-together on Valentine’s Day. You can do it in under five minutes.
Take a section from each side of your head near the temple. Twist each section back toward the center of your head. Cross them over each other and secure with a clip or pins.
It is that simple. The twist creates a beautiful detail at the crown while the rest of the hair falls freely behind it.
Budget tip: A basic claw clip or jeweled barrette from a discount store looks stunning in this style. You do not need anything expensive.
For extra romance, curl the hair that is left down before doing the twist. Loose waves below the twist look gorgeous.
Pull the twisted sections apart slightly to create a fuller, more relaxed look. A too-tight twist can look a little flat.
Leave a few strands out at the front to frame your face. This keeps the style soft and feminine.
This look works on short hair too. Even hair that falls just past the chin can do a small twisted section at the top for a sweet effect.
14. Hollywood Waves
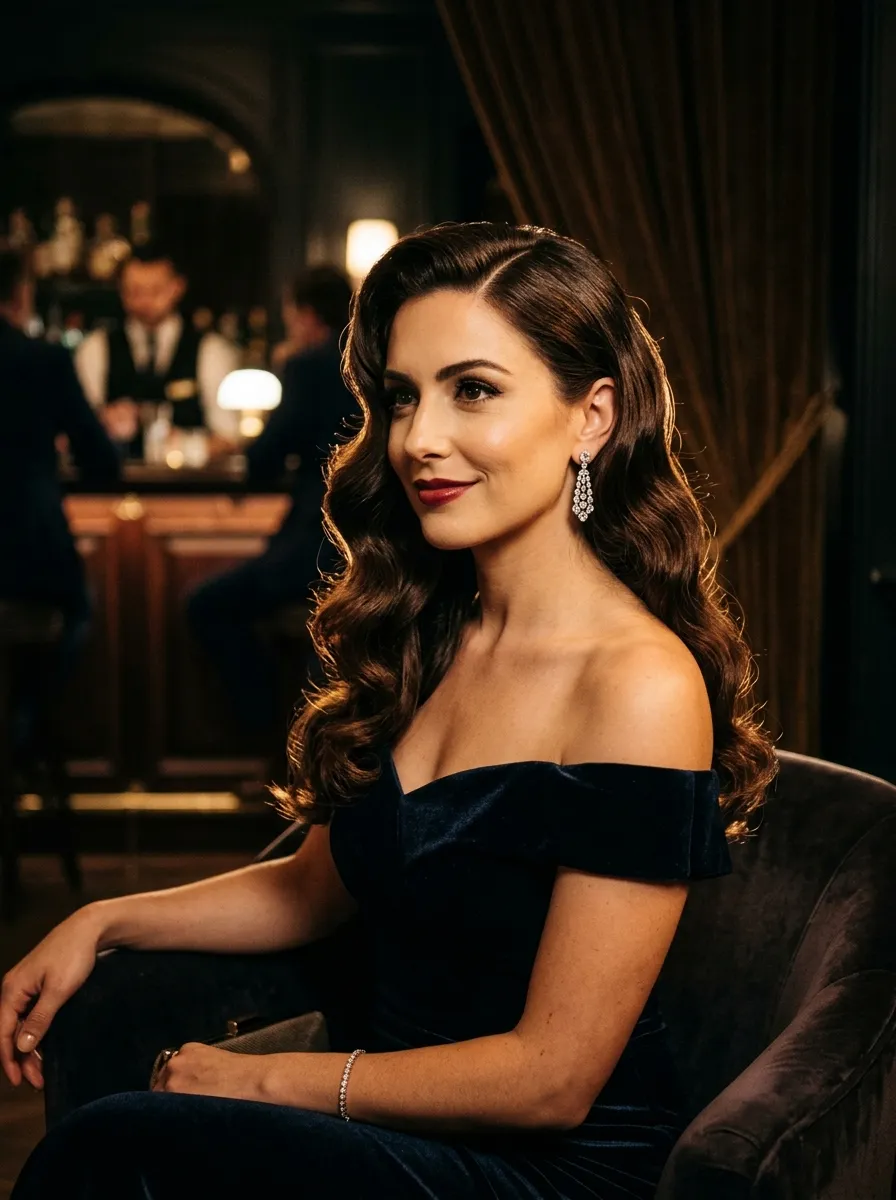
Hollywood waves bring serious glamour to your Valentine’s Day. This style is bold, confident, and genuinely showstopping.
Start with a deep side part. Use a large barrel curling iron to curl all your hair in the same direction. Once curled, brush through the curls with a paddle brush while the hair is still warm.
This brushing step is what transforms the curls into waves. It smooths the curl into a long, flowing S-shape.
Budget tip: A boar bristle brush from the drugstore works beautifully for this step and costs about $8.
Use your hands to shape the waves after brushing. Pinch the wave slightly to define the peaks and valleys of the S-shape.
A little pomade rubbed between your palms and smoothed over the surface of the waves gives them that glossy, old Hollywood shine.
Pin one side of the waves back behind your ear and secure with a jeweled clip for extra drama.
Finish with a strong hold hairspray to lock the waves in place. Hollywood waves can fall flat without enough product to support them, so do not skip this step.
15. Bubble Ponytail

The bubble ponytail is a playful and modern take on the classic ponytail. It is perfect for a fun Galentine’s Day outing or a casual Valentine’s date.
Pull your hair into a basic ponytail. Add another small hair tie about two inches below the first one. Gently pull the hair between the two ties outward to create a round, puffy bubble.
Keep adding ties every two inches down the length of the ponytail, bubbling out each section as you go.
Budget tip: Use matching colored hair ties for a put-together look. A pack of small ties in red or pink costs about $2.
The more you pull the sections outward, the bigger and bouncier the bubbles look. Do not be shy about pulling them wide.
Wrap a ribbon around the first tie at the base of the ponytail for a romantic detail. Let the ribbon ends hang down alongside the bubbles.
This style works best on thicker hair or if you add a hair extension to give the ponytail more volume. You can find clip-in ponytail extensions for under $10 at beauty supply stores.
16. Pearl Embellished Updo

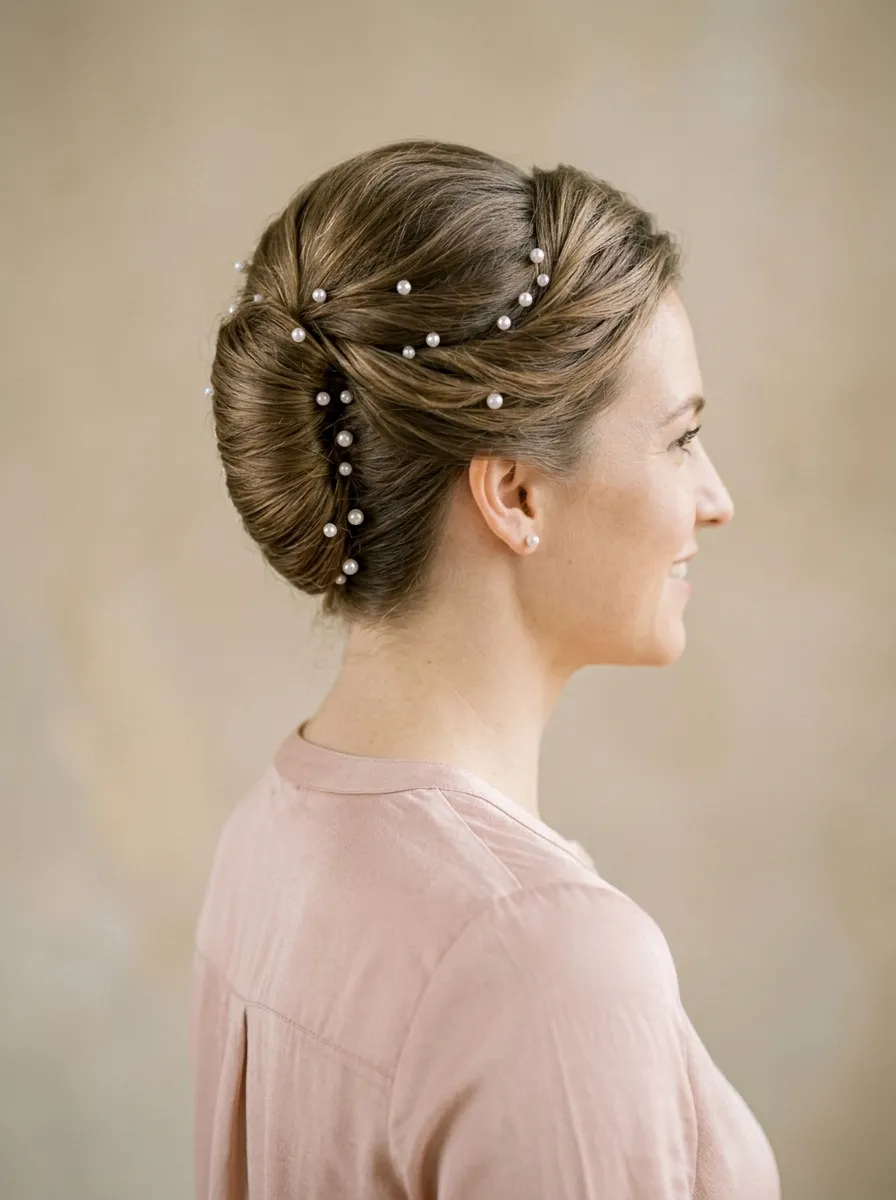
Pearl pins turn any basic updo into something that looks like it belongs at a Valentine’s Day dinner at a five-star restaurant.
Start with a simple twisted updo or chignon. Then push pearl-tipped bobby pins into the style in a scattered pattern. Some near the top, some in the middle, and a few near the nape.
The pearls catch the light beautifully at dinner and create a delicate, romantic sparkle throughout the style.
Budget tip: Pearl bobby pins are available online and at beauty supply stores for about $4 to $6 for a pack of 20. They are endlessly reusable.
Use about 10 to 15 pins spread across the updo for the best effect. Too few look sparse. Too many look cluttered.
You can do this style with literally any updo as your base. A low bun, French twist, braided updo, or even a simple ponytail can become special with a handful of pearl pins.
If you want an even more luxurious look, mix pearl pins with small crystal pins. The combination of textures adds depth and sparkle that reads as expensive without actually being expensive.
17. Boho Fishtail Braid
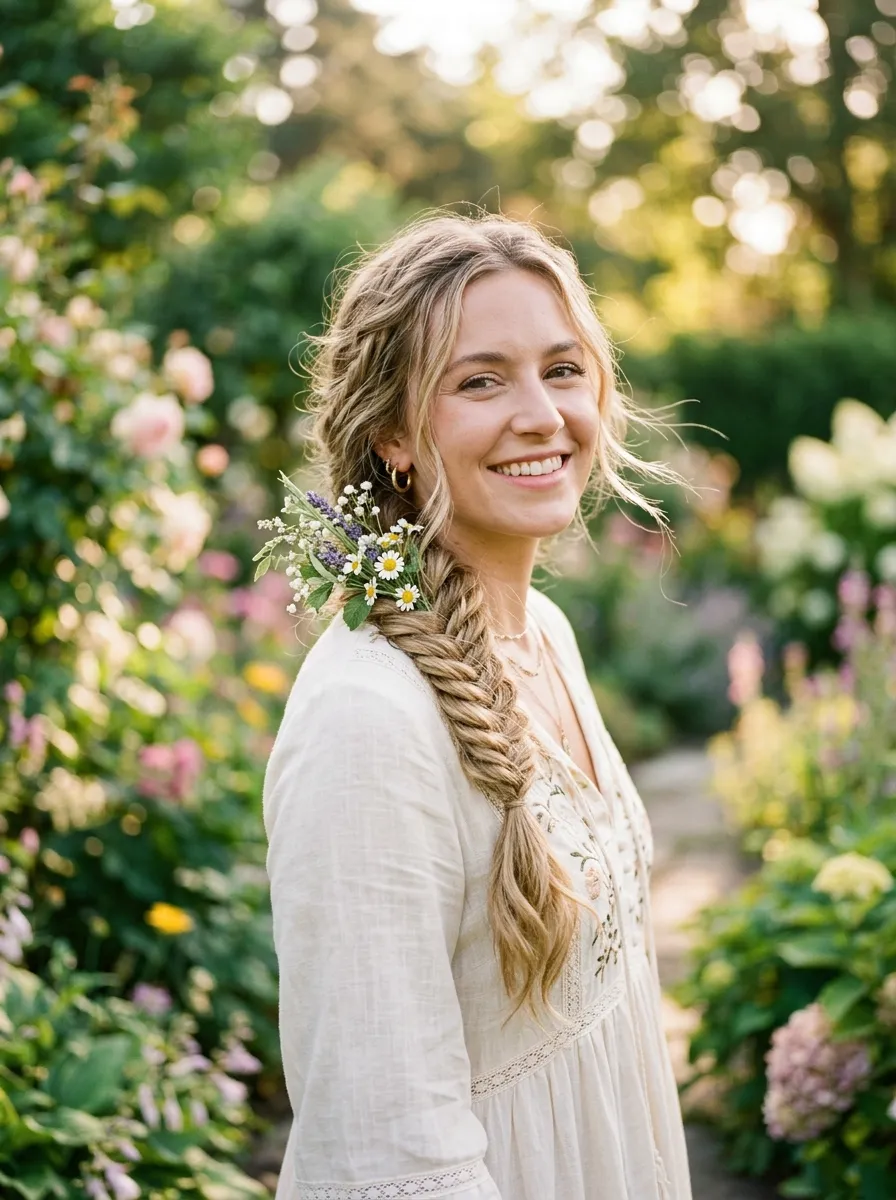
The fishtail braid looks impossibly detailed and romantic but is genuinely easy to do once you understand the pattern.
Divide your hair into two equal sections. Take a very thin piece from the outer edge of the left section and cross it over to join the right section. Then take a thin piece from the outer edge of the right section and cross it to join the left. Repeat all the way down.
The thinner the pieces you cross, the more intricate the braid looks at the end.
Budget tip: Fishtail braids look better on second or third day hair. The natural oils and texture give the braid something to grip, so skip the wash the night before.
Pancake the braid after finishing by gently pulling each section outward. This gives it that full, romantic boho look.
Drape the braid over one shoulder for a romantic asymmetrical effect. Secure the end with a small elastic.
Tuck a few tiny flowers or sprigs of baby’s breath along the top edge of the braid. This adds a whimsical, garden romance feel that is perfect for Valentine’s Day.
Pull a few strands out at the top near the face to keep the style feeling relaxed and soft.
18. Sleek Ballerina Bun
The ballerina bun is clean, polished, and effortlessly romantic. It shows off your neck and jawline beautifully, especially when paired with statement earrings.
Brush your hair straight up into a high ponytail at the very top of your head. Smooth every strand as flat as possible against your head using a brush and a small amount of gel or pomade.
Twist the ponytail tightly and wrap it around the base in a clockwise direction. Pin it flat with multiple bobby pins going in different directions for security.
Budget tip: Use a sock bun maker if your ponytail is thin. Cut the toe off an old sock, roll it into a donut, place it at the end of your ponytail, and roll the hair down over it. This creates a full bun shape with virtually no effort.
Smooth any bumps on the surface with a toothbrush dipped in a little hair gel. This professional technique gives the bun a perfectly even finish.
Spray with a strong hold spray and let it set for a minute before moving around.
Finish with a tiny spritz of shine spray over the entire surface. The bun should look almost lacquered, smooth, and deeply romantic in a quiet, understated way.
19. Vintage Victory Rolls
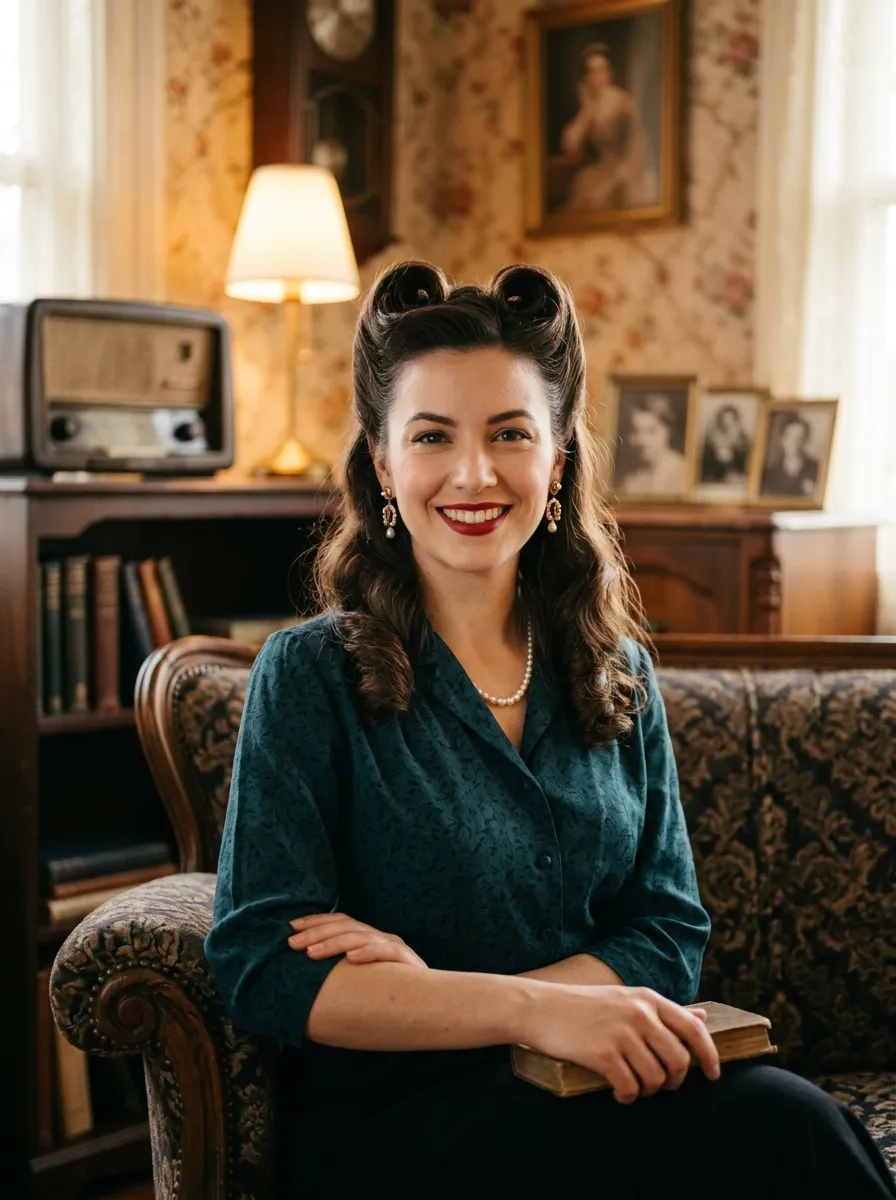
Victory rolls are a gorgeous retro style that bring an immediately romantic, old-world elegance to Valentine’s Day.
Take a section of hair from the front left side of your head. Curl it over a large barrel iron or your fingers toward your face. Roll it under and forward to create a tube-like curl. Pin it flat against your head near the hairline.
Repeat on the right side with another section of hair.
Budget tip: You can set victory rolls with no heat by using foam rollers overnight. Place the roller at the end of the section and roll upward toward the scalp. Pin and sleep on it. Unroll in the morning and pin into place.
The rest of your hair can be left in loose waves, tucked into a low roll, or pinned under at the nape of the neck.
Add a small jeweled comb or flower clip between the two rolls for a gorgeous vintage focal point.
Red lipstick pairs perfectly with this style. The combination of victory rolls and a bold lip creates a complete vintage Valentine’s Day look that feels genuinely special.
20. Curtain Bangs with Loose Waves
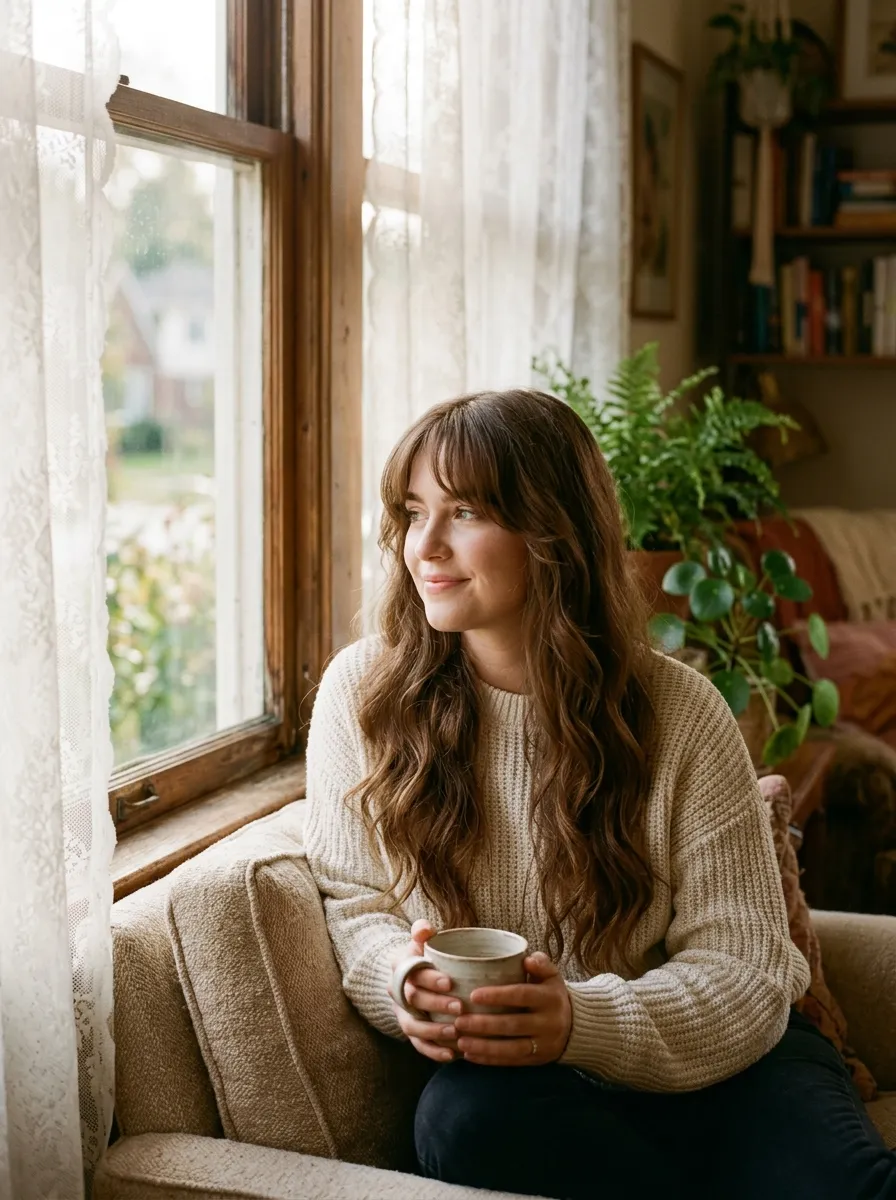
Curtain bangs with loose waves create the dreamiest, most effortlessly romantic look for Valentine’s Day. The bangs frame the face while the waves add softness and movement.
If you already have curtain bangs, style them by blow-drying them outward from a center part. Use a small round brush and direct the bangs toward each cheekbone.
Curl the rest of your hair in loose, wide waves using a large barrel iron.
Budget tip: No curling iron? Blow dry damp hair using a round brush. Focus the heat and tension in a circular motion to create volume and a soft wave shape.
The curtain bang effect naturally draws attention to your eyes, making this a great style for date nights where you want to look soft and approachable.
A small amount of texturizing cream worked through the bangs after blow-drying gives them a slightly undone, natural finish.
Tuck one side of the waves behind your ear and pin it with a small gold clip. This creates a pretty asymmetry that complements the curtain bang part beautifully.
Finish the whole look with a light hold spray and you are ready.
21. Knotted Low Bun
The knotted low bun is a refined and slightly unexpected take on the classic bun. It has a beautiful structural quality that looks polished without much effort.
Pull your hair into a low ponytail. Split the ponytail into two sections. Tie those two sections into a simple knot, just like the first step of tying your shoes.
Tuck both ends under the knot and pin them in place with bobby pins.
Budget tip: This style literally requires only a hair tie and a few bobby pins. It is one of the most low-cost high-impact hairstyles on this list.
The knot itself becomes the focal point of the style. Push a thin gold pin or a small jeweled clip into the center of the knot for extra sparkle.
Leave a few thin pieces out near your temples and around your ears. These pieces soften the overall look and give it a romantic rather than severe feel.
For extra texture, apply a small amount of mousse before pulling the hair back. This gives the style a little grip and stops the knot from sliding apart during the evening.
This style works wonderfully on medium length and long hair.
22. Braided Pigtails with Ribbon Bows
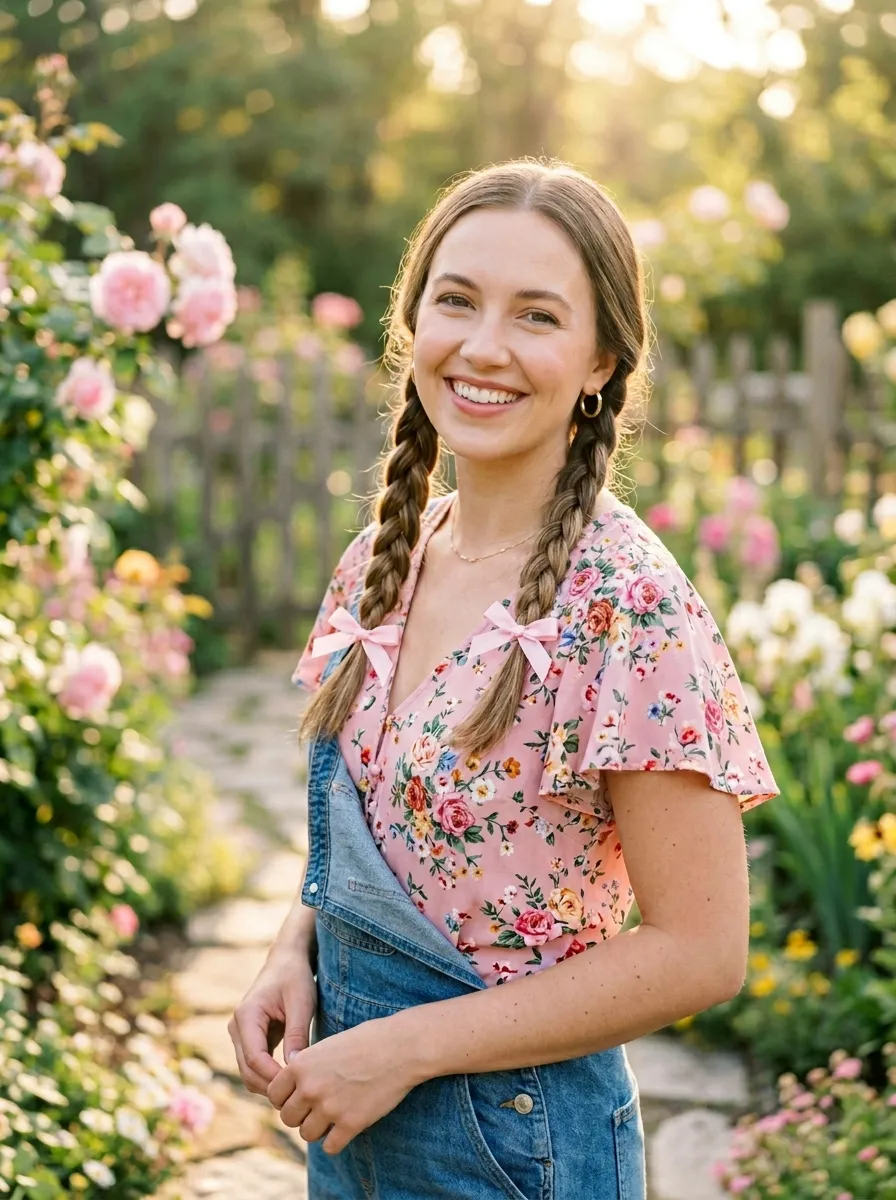
Braided pigtails are playful, sweet, and genuinely romantic in a youthful, fun way. They are a great choice for a casual Valentine’s Day outing or a Galentine’s celebration.
Part your hair down the middle. Braid each side into a simple three strand braid or a fishtail braid. Secure each end with a small elastic.
Tie a satin ribbon over each elastic and form it into a bow. Let the extra ribbon length hang alongside the braid.
Budget tip: Ribbon is incredibly affordable. A 2 meter piece in red or pink costs about $1 at craft stores and can make bows for multiple styles.
Pancake the braids after finishing to give them volume and a more feminine, full look.
Pull a few face-framing wisps out near your temples on each side. This softens the look and stops it from appearing too strict or girlish.
Try wearing one braid in front of each shoulder so they frame your face and chest. This small styling decision makes a big visual difference.
Add a tiny flower or pearl pin near the top of each braid for an extra romantic detail.
23. Floral Crown with Long Loose Hair
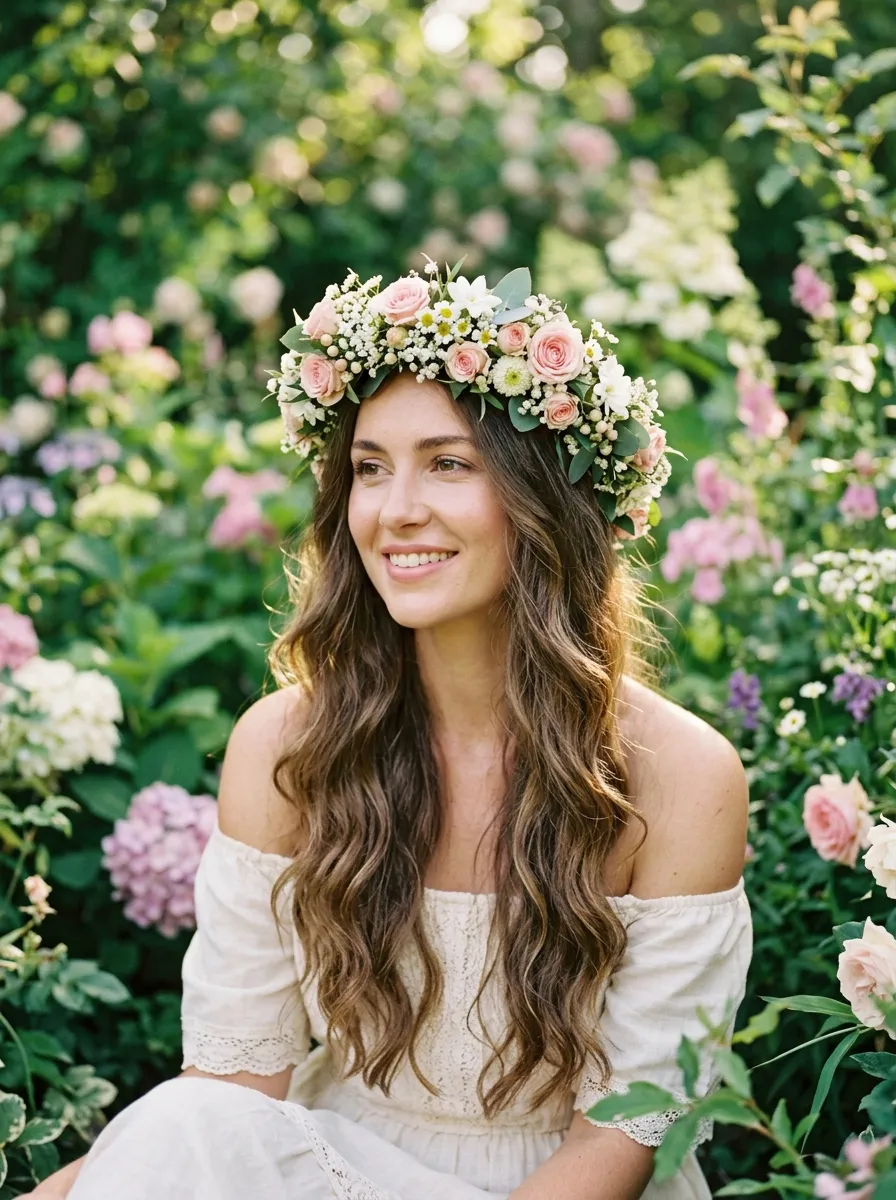
A floral crown with flowing hair is one of the most romantic looks for Valentine’s Day. It feels poetic, soft, and completely timeless.
Leave your hair down in its natural state or add a few loose waves with a curling iron. The hair beneath the crown does not need to be perfectly styled because the crown does the visual work.
Place the floral crown on your head and adjust it so it sits just behind your hairline.
Budget tip: Make your own floral crown using a wire headband from a craft store and small fabric flowers. Wrap the flowers around the wire with floral tape. The whole thing costs under $5 to make.
Real flowers smell incredible and look gorgeous in photos, but fabric flowers last all day without wilting. For a long evening, fabric is the practical choice.
Pull a few strands of hair to the front of the crown so it sits within the frame of the flowers. This small adjustment makes the crown look more integrated with the hair.
If your hair is short, a floral crown still works beautifully. Even a chin-length bob looks stunning beneath a delicate flower crown.
24. Glam Slicked Back Bun
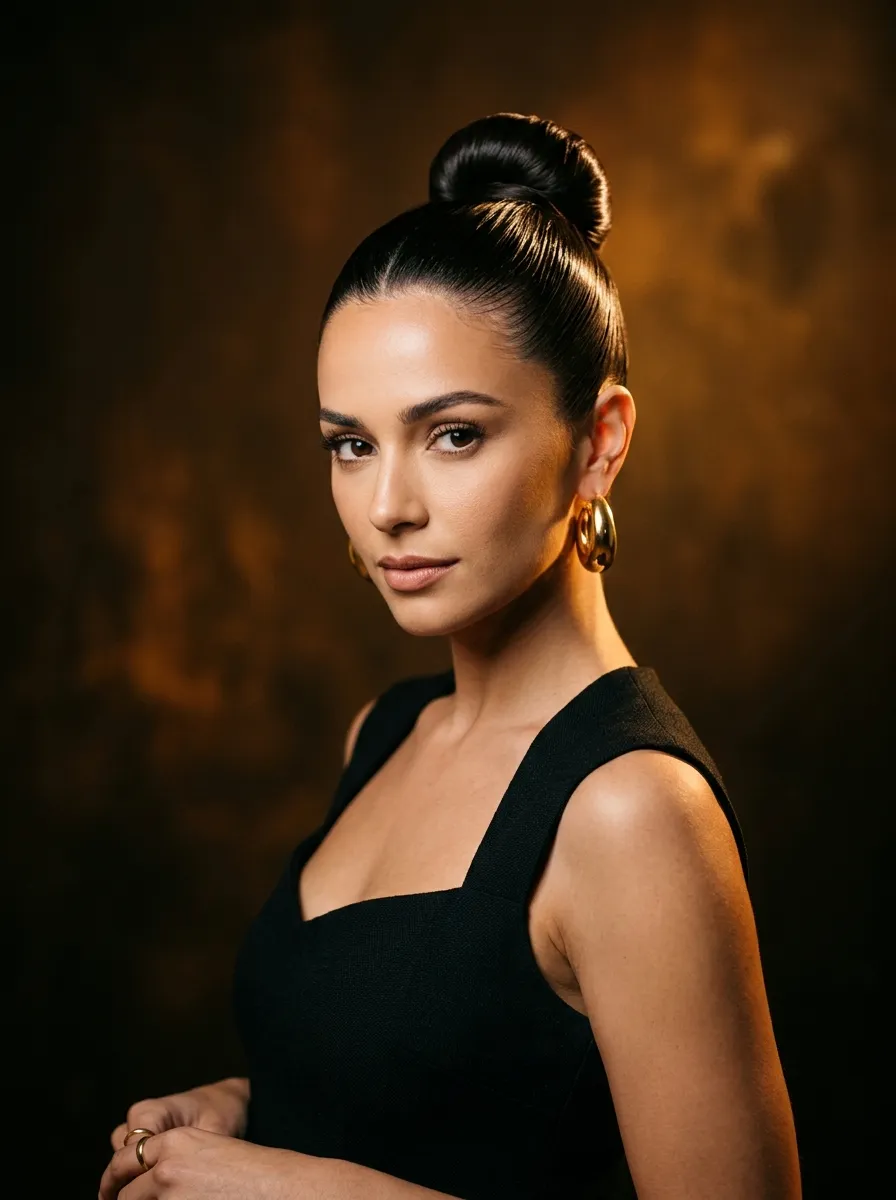
The slicked back bun is a bold, confident Valentine’s Day choice. It says you put in effort without trying to look like you put in effort, and it works beautifully for a more upscale date night.
Apply a generous amount of gel to your dry hair. Brush everything straight back toward the crown of your head. Smooth any lumps or ridges with a fine-tooth comb.
Gather the slicked hair into a high ponytail. Twist it into a tight bun and pin it flat.
Budget tip: Hair gel from the drugstore works perfectly for this style. You do not need a salon product.
Use a toothbrush or a clean mascara wand dipped in gel to lay down any flyaways or baby hairs along your hairline. This creates the super polished look that makes this style so striking.
Let the bun be relatively small and tight. A neat, compact bun looks more intentional than a large loose one in this particular style.
Pair this look with bold earrings. Hoops, chandeliers, or long drop earrings all complement the exposed neck and polished finish of the slicked back bun beautifully.
One coat of shine spray over the entire look ties it all together.
25. Natural Coil Crown Updo
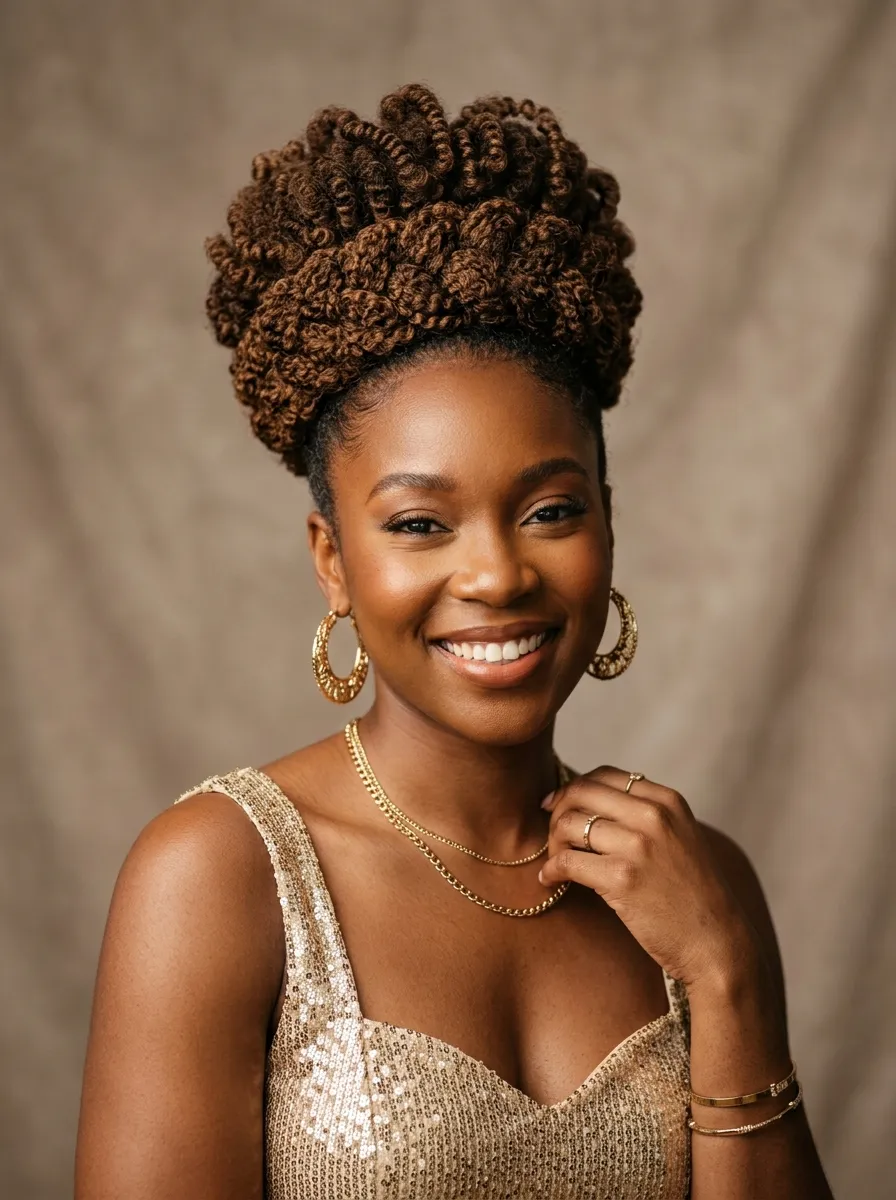
Natural coils deserve their own Valentine’s Day moment. The coil crown updo celebrates natural texture beautifully and looks genuinely regal.
Start by defining your coils with a good curl cream on freshly washed or refreshed hair. Let the curl pattern settle completely before styling.
Gather sections of your hair from around the sides and back of your head. Pin them upward toward the crown, letting the defined coils fan out at the top.
Budget tip: Use large bobby pins and hair-friendly pins that do not snag natural hair. Satin-coated pins are available online for about $4 and make a real difference in protecting your curl pattern.
Continue pinning sections upward until you have a full, beautiful coil crown at the top of your head. Leave a few face-framing coils loose at the front.
Fluff the top coils gently with a pick to add volume and height. The bigger the crown, the more dramatic and stunning the result.
Tuck small gold or pearl pins into the coils at the top for a gorgeous finish. The metallic detail against natural coils looks absolutely stunning.
Finish with a light hold curl spray or a small amount of shine oil worked through the fingertips to add definition and glow.
Wrap-Up: Your Perfect Valentine Look Is Ready
Valentine’s Day hair does not have to mean a stressful salon visit or a complicated routine. The 25 styles in this list prove that beautiful, romantic hair is completely within reach at home. Whether you go for the regal coil crown, the playful bubble ponytail, the classic Hollywood waves, or the sweet braided pigtails with ribbon bows, there is a look here for every person, hair type, and occasion.
Start with what you have. A simple ribbon, a few bobby pins, or a pack of flower pins can take any basic style from ordinary to genuinely special. Practice your chosen style once or twice before the actual day so you feel confident and relaxed when it matters.
Most of all, wear the style that makes you feel like yourself. The best Valentine’s Day hairstyle is the one you feel beautiful in. Go pick your favorite, get your supplies ready, and enjoy the process of creating something lovely for yourself or someone you love.
Leave a Reply