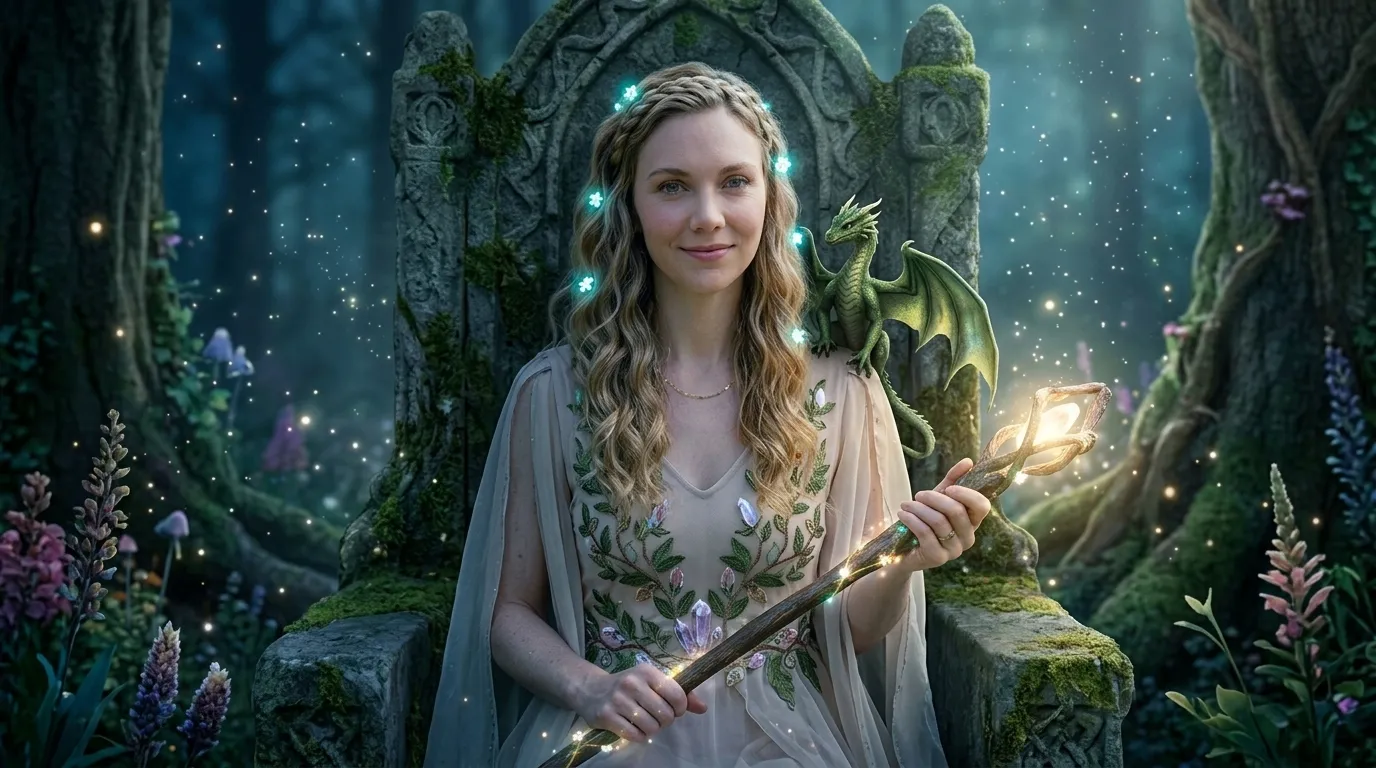
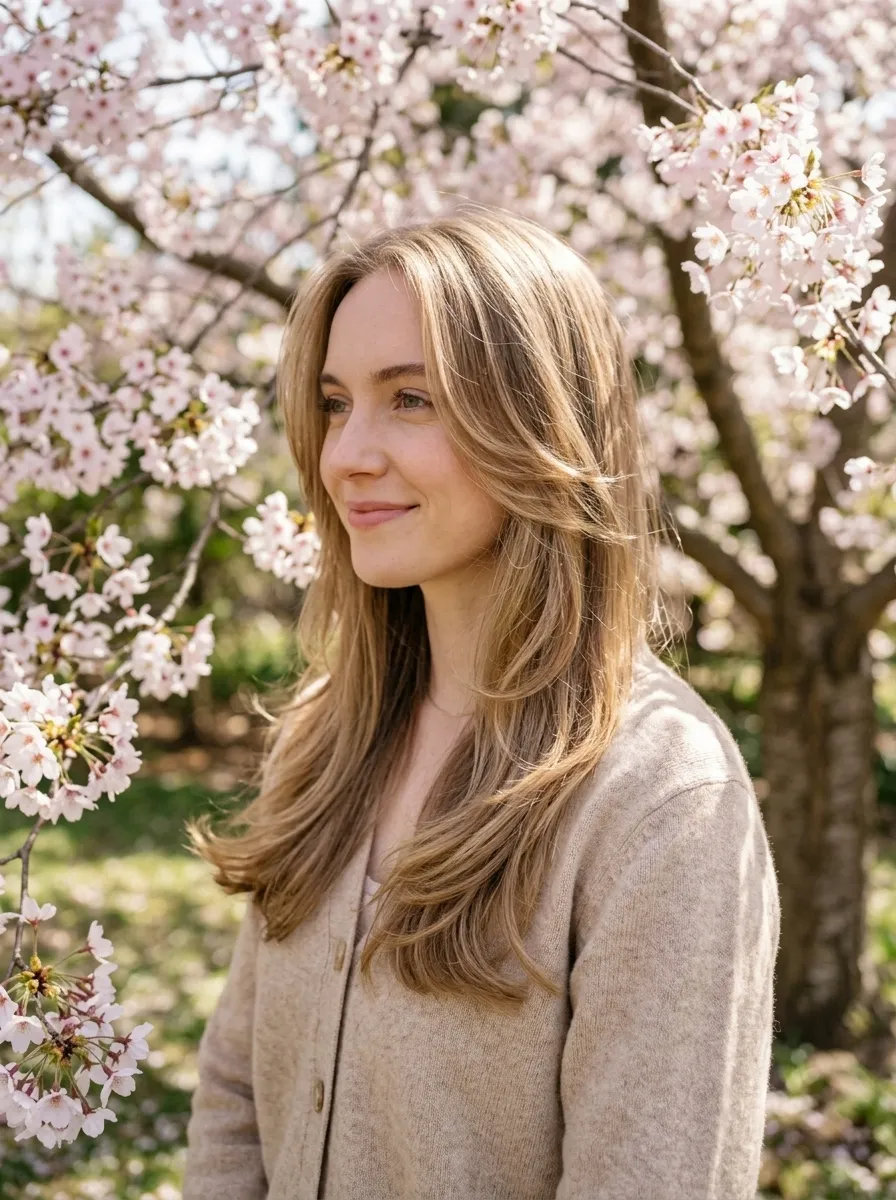
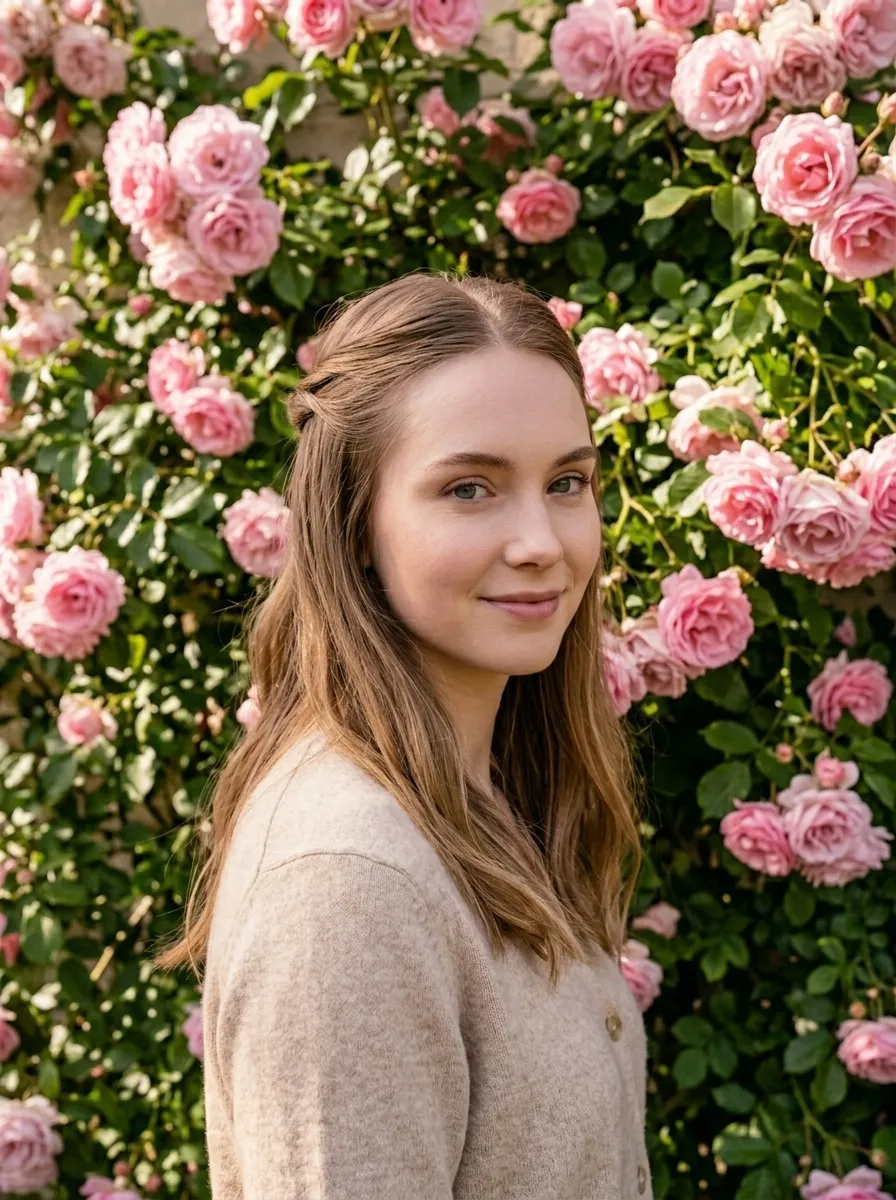
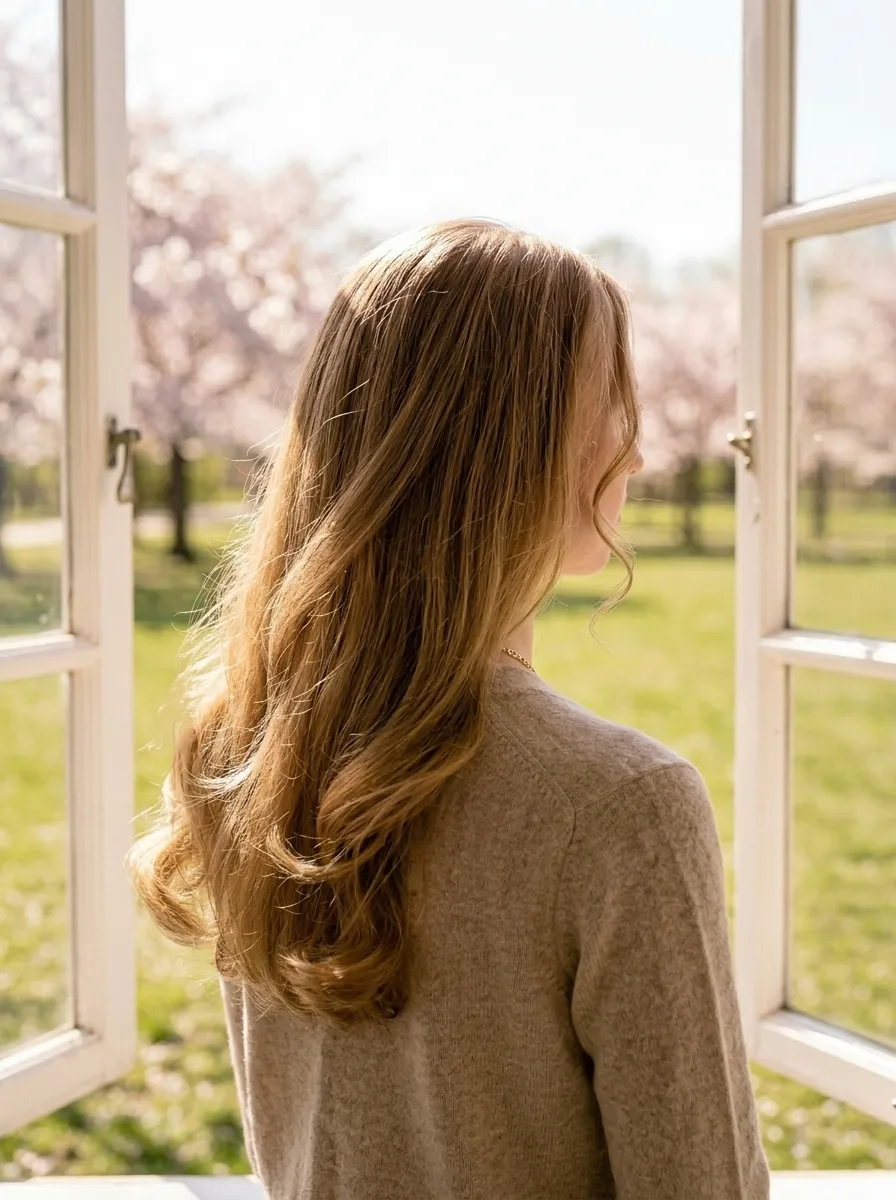
Spring is the perfect time to try something new with your hair. Whether you want something simple and low maintenance or a full style change, there are so many directions you can go. This list covers 26 hairstyle ideas that work for all hair types, textures, and lengths. Some are easy enough to do at home. Others may need one salon visit. Either way, you will find something here that fits your life, your budget, and your personal taste. If you’re also exploring Spring Hairstyle Ideas for Long Hair, soft layers, airy waves, braided accents, and lightweight updos can help create a fresh, effortless look that feels elegant, seasonal, and easy to manage while keeping long hair stylish and comfortable.
1. Soft Butterfly Cut
The butterfly cut is one of the most talked about styles right now. It works by adding layers that are shorter around the crown and longer toward the ends. This creates a lifted, airy look that flatters almost every face shape.
The best part is that it does not require major length to be cut off. Your stylist can create the effect by cutting internal layers while keeping the overall length intact.
At home, you can style this cut by scrunching in a lightweight mousse and letting your hair air dry. This naturally shows off the movement in the layers.
It looks great on both straight and wavy hair. If you have curly hair, the layers help reduce bulk and give your curls a better shape.
Budget tip: Ask your stylist to add soft butterfly layers during a regular trim appointment. Many stylists will not charge extra for this technique when done at the same time as your regular cut.
This style grows out beautifully too, so you do not need to worry about constant upkeep.
2. Loose Braided Crown
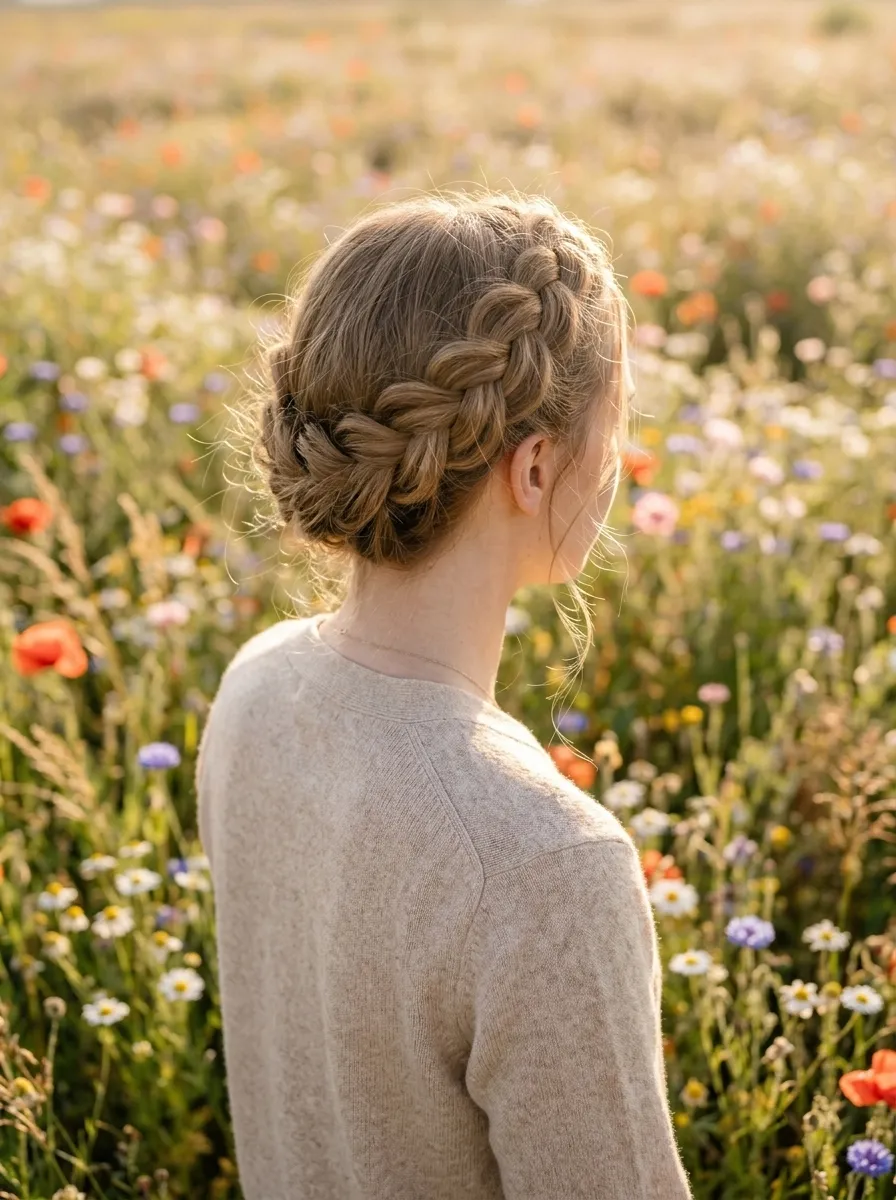
A braided crown instantly looks put-together without requiring a lot of skill or tools. You simply braid two sections from either side of your head and pin them across the top like a headband.
This style works best on medium to long hair. If your hair is on the shorter side, small bobby pins help secure any loose sections.
Texturizing spray is your best friend for this look. Spray it into your hair before braiding so the braid holds its shape and does not look too slick or stiff.
Pull out a few face-framing pieces to make it feel casual rather than formal. This small detail makes a big difference in how relaxed the final look appears.
This style keeps hair off your face, which makes it perfect for warmer spring days. It also works well for outdoor events, picnics, or casual brunches.
Budget tip: You need zero products to pull this off if your hair already has some texture from the previous day. Second-day hair is actually ideal for braided crown styles.
Try it once and you will be surprised how quickly you can master it.
3. Curtain Bangs with Layers
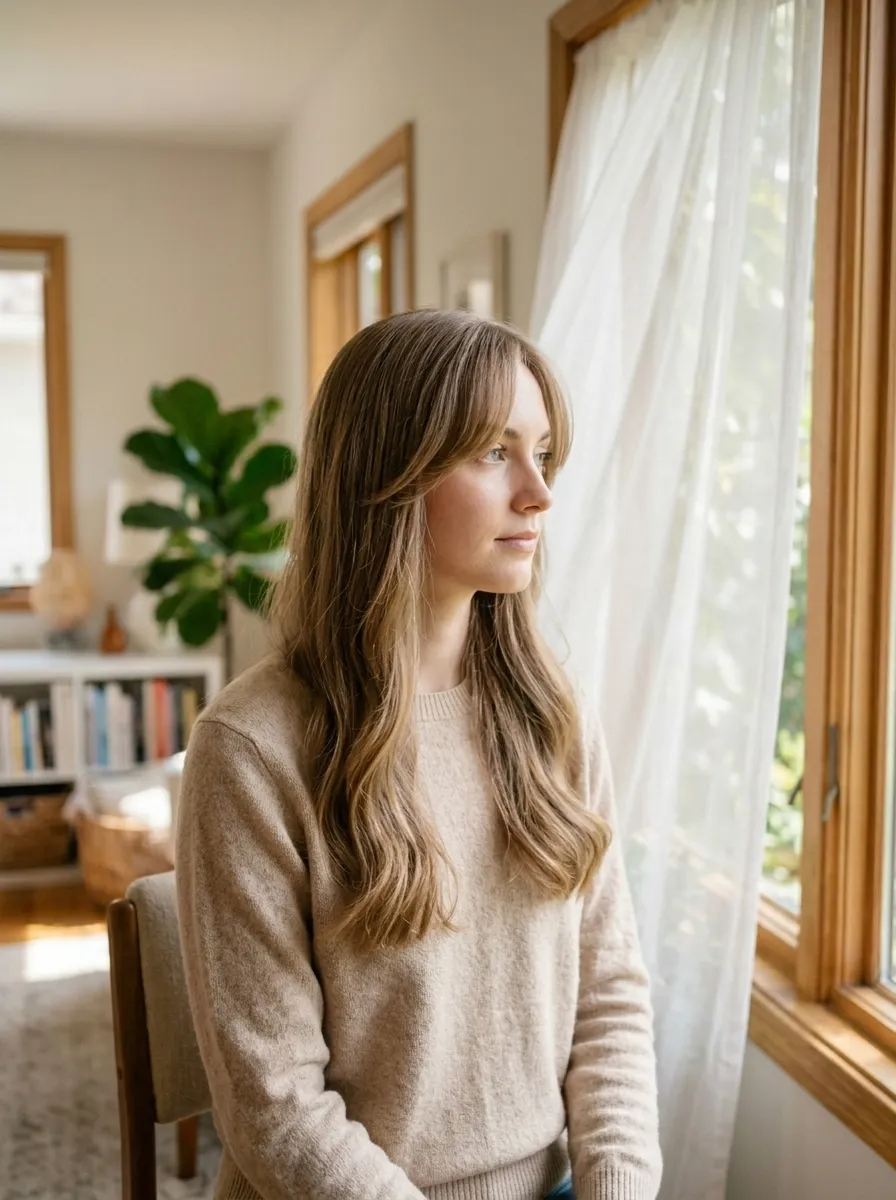
Curtain bangs are one of those styles that work on nearly every face shape. They part down the middle and sweep outward to frame the face on both sides.
Unlike blunt bangs, curtain bangs grow out gracefully. This makes them a lower-commitment option for people who want to try bangs for the first time.
When paired with layers throughout the rest of your hair, curtain bangs create a cohesive, styled-from-root-to-tip look.
You can blow-dry them with a round brush for a polished finish. Or simply let them air dry and use your fingers to guide them to either side of your face.
Budget tip: Some stylists charge separately for bangs. Ask if curtain bangs can be included in your regular cut cost since they are a small add-on that many stylists will do without extra charge.
Dry shampoo helps maintain curtain bangs between washes by absorbing oil at the roots. A small flat iron or round brush can also be used at home to reshape them in the morning quickly.
4. Textured Ponytail with Face Framing Pieces
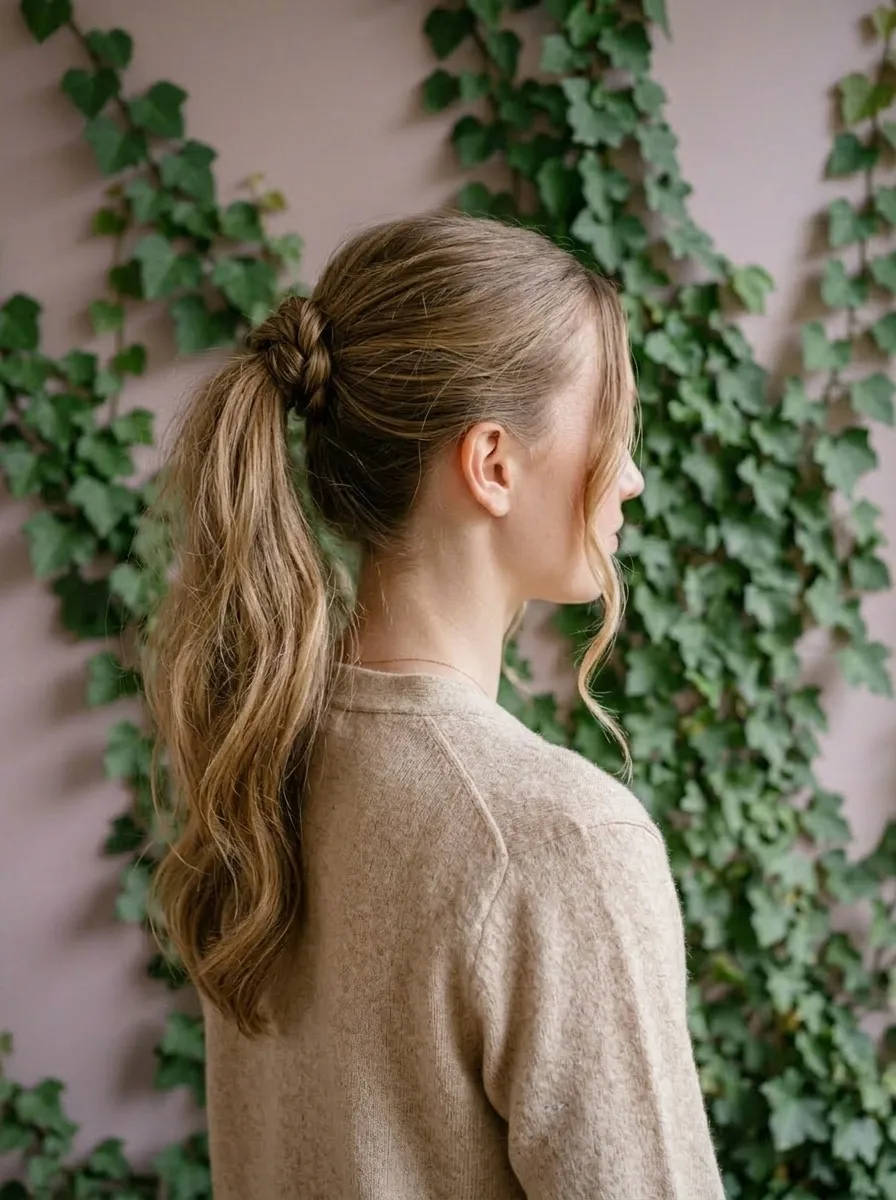
A ponytail does not have to be basic. With a few small changes, you can turn a simple ponytail into something that looks intentional and stylish.
Start by adding texture to your hair with a light curl or wave before pulling it back. A small barrel curling iron or even braiding your hair overnight works well.
Then pull it into a mid-height ponytail, leaving out two pieces at the front. These face-framing pieces are the detail that changes everything. Lightly curl or wave them and let them fall naturally.
You can also wrap a small section of hair around the ponytail base to hide the elastic. Secure the wrapped piece with a bobby pin underneath for a clean finish.
This look takes about 10 minutes once you get used to it. It is perfect for those mornings when you want to look put-together without spending a lot of time on your hair.
Budget tip: Skip the expensive styling tools. Braid your hair damp the night before and wake up with natural waves ready to use for this look at zero cost.
5. Blunt Bob with a Center Part
The blunt bob is making a major comeback this spring. It is clean, sharp, and works well on straight, wavy, or naturally smooth hair.
A center part gives this cut a modern, symmetric look. It frames the face evenly on both sides and gives the whole style a polished, intentional feel.
This cut usually falls between the chin and the collarbone. The exact length depends on your preference. A shorter version draws attention to the jawline. A longer version gives more styling options.
Flat-ironing the ends inward slightly helps the blunt bob look full and rounded at the bottom. This small styling step takes about five minutes and makes a noticeable difference.
Budget tip: The blunt bob is one of the easiest haircuts for a junior stylist or hairstyle student to execute well since it requires precise but simple technique. Many beauty school salons offer this cut at a fraction of regular salon pricing.
Maintain this look at home between cuts by trimming the very bottom of the hair with sharp hair scissors. This keeps the blunt line clean for weeks longer.
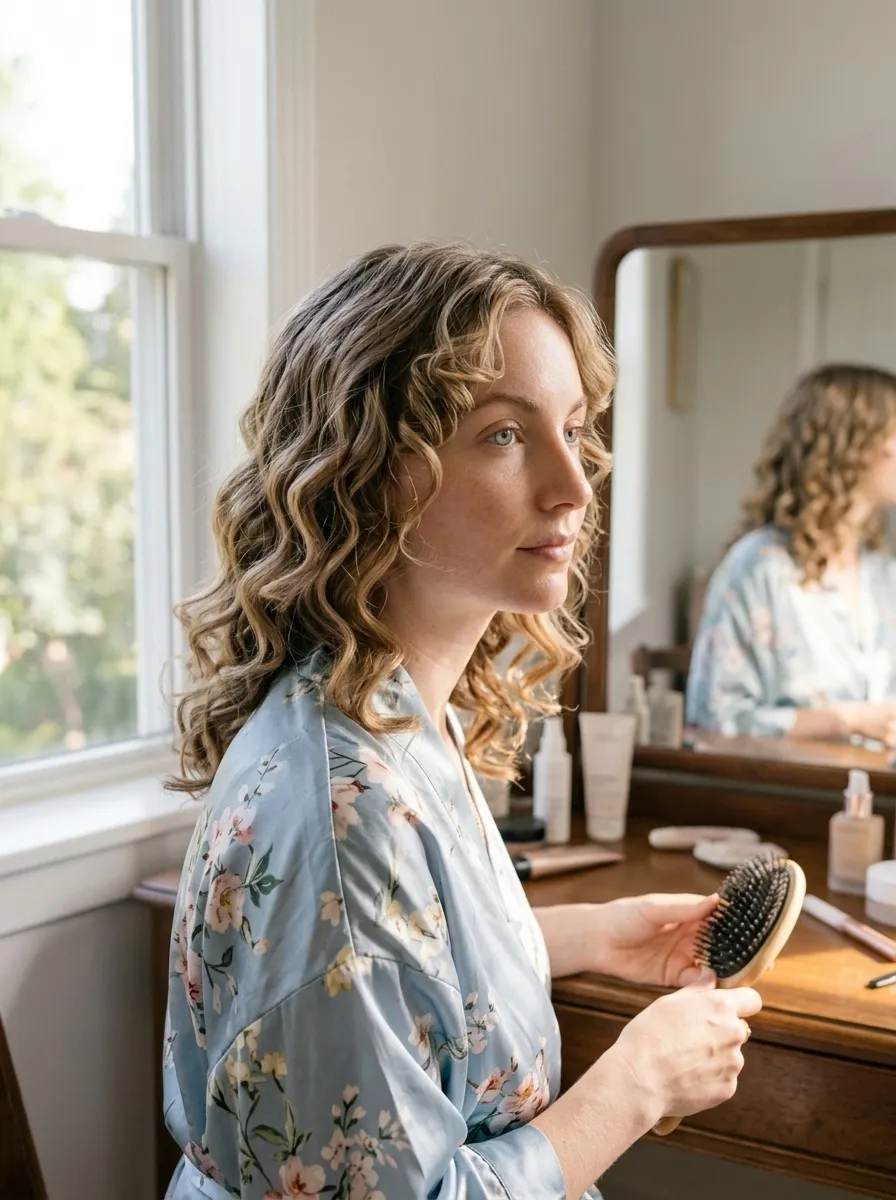
6. Natural Wash-and-Go Curls
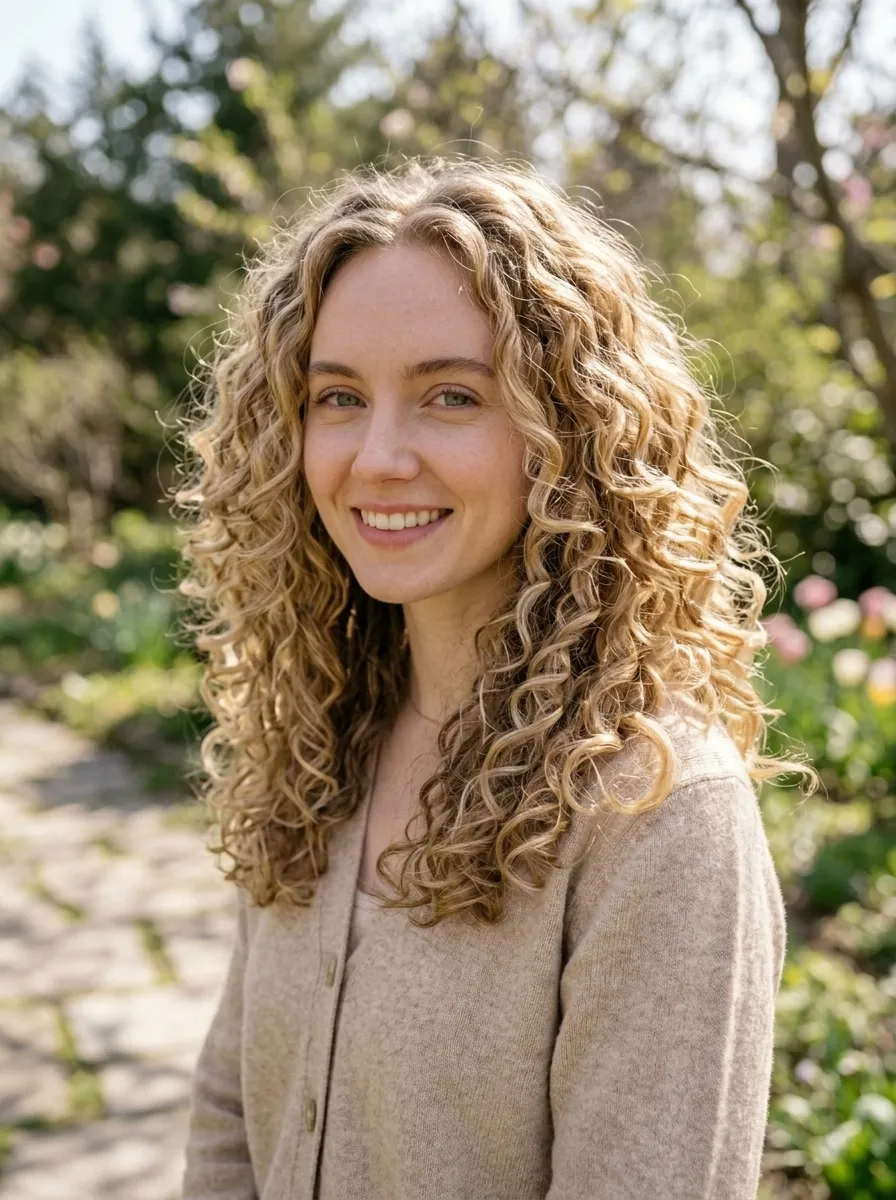
The wash-and-go is the most freeing style for anyone with naturally curly or coily hair. The idea is simple. You wash, apply product while wet, and let your curls form on their own.
The key is choosing the right products. A good leave-in conditioner followed by a curl-defining cream or gel gives curls moisture, shape, and hold without crunch.
Apply products in sections while your hair is soaking wet. This helps distribute the product evenly and prevents frizz as it dries.
Diffuse with a blow dryer on low heat if you want faster results. Otherwise, air drying gives the softest curl definition.
Budget tip: Drugstore brands like SheaMoisture, Cantu, and Aunt Jackie’s offer high-performing curl products at affordable prices. You do not need to spend a lot to get beautiful curl definition.
Pineapple your curls at night by loosely gathering them at the top of your head with a satin scrunchie. This protects the curl shape while you sleep and reduces frizz the next morning.
Spring humidity actually helps natural curls. Embrace it rather than fight it.
7. Space Buns with Wispy Ends

Space buns are playful, youthful, and incredibly easy to do at home. They involve splitting your hair into two sections and creating a bun on each side of your head.
The spring version of this style leans into imperfection. Instead of neat, tight buns, you want them slightly loose with wispy ends hanging down below each bun.
Start by sectioning your hair down the middle. Gather each section into a high ponytail, then loosely twist and coil it into a bun shape. Secure with bobby pins or a second elastic.
Pull out a few small sections around the face and at the nape of your neck. These wispy pieces soften the look and make it feel relaxed rather than childish.
Budget tip: No special tools are required. Two hair elastics, a few bobby pins, and your hands are all you need. Texturizing spray helps the buns stay fluffy if you have very fine or silky hair.
This style works beautifully on second or third day hair. The more texture you have, the better the buns hold their shape. Save this one for days when your hair feels a little too relaxed to wear down.
8. Sleek Low Bun

A sleek low bun is one of the most polished hairstyles you can wear with minimal effort. It works for casual days, work settings, and even dressed-up occasions.
To get a truly sleek finish, apply a small amount of edge control or a styling gel to the hair before pulling it back. Use a fine-tooth comb to smooth out any bumps along the hairline.
Gather all hair at the nape of your neck and secure with a strong elastic. Then twist the ponytail into a flat bun and pin it into place with bobby pins, tucking the ends underneath.
A light hold hairspray keeps everything in place throughout the day.
Budget tip: You do not need a special tool or expensive product for this look. A light gel from the drugstore works perfectly. Edge control is available for under five dollars at most beauty supply stores.
This style also works well with extensions or a hair donut ring if you want extra volume in the bun. Both options are widely available and affordable.
Wear this on days when your hair needs a rest from heat styling. It protects your ends and keeps your hair looking neat all day.
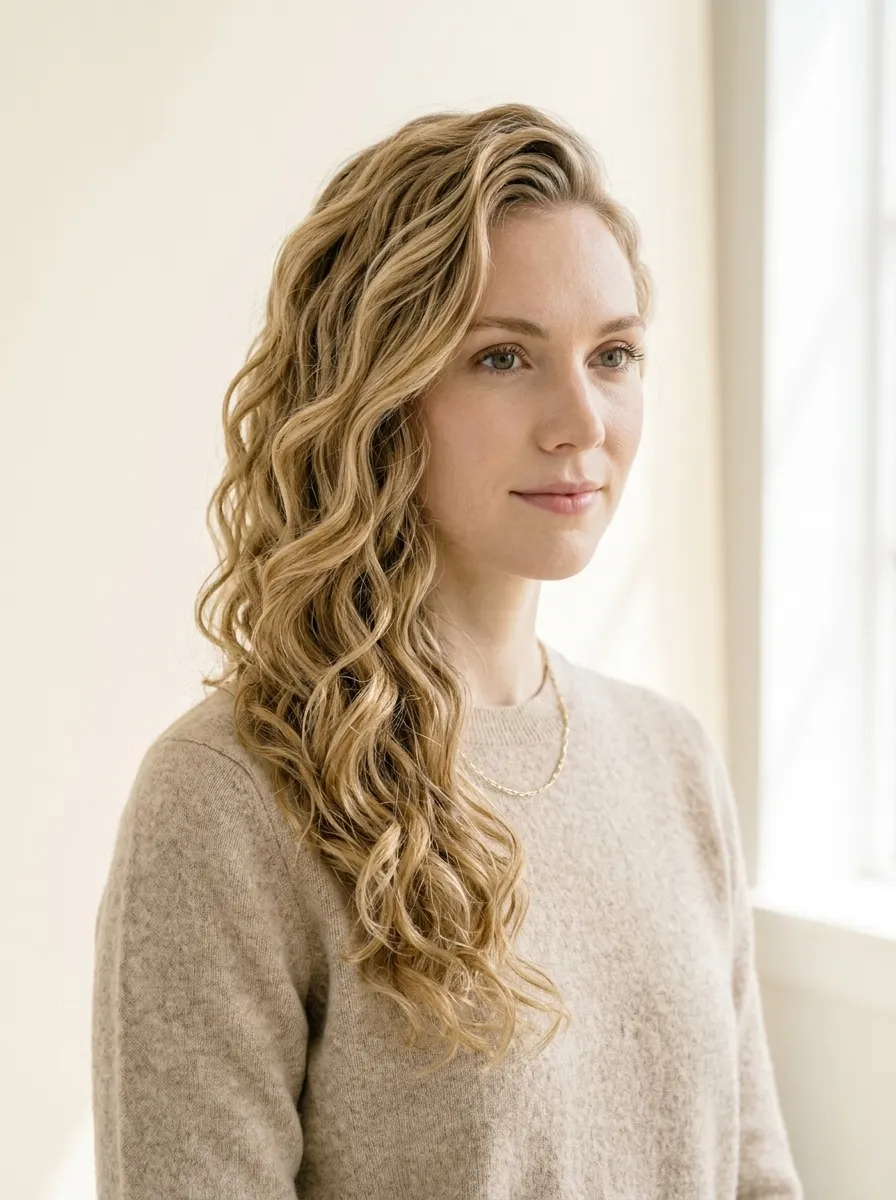
9. Beachy Waves
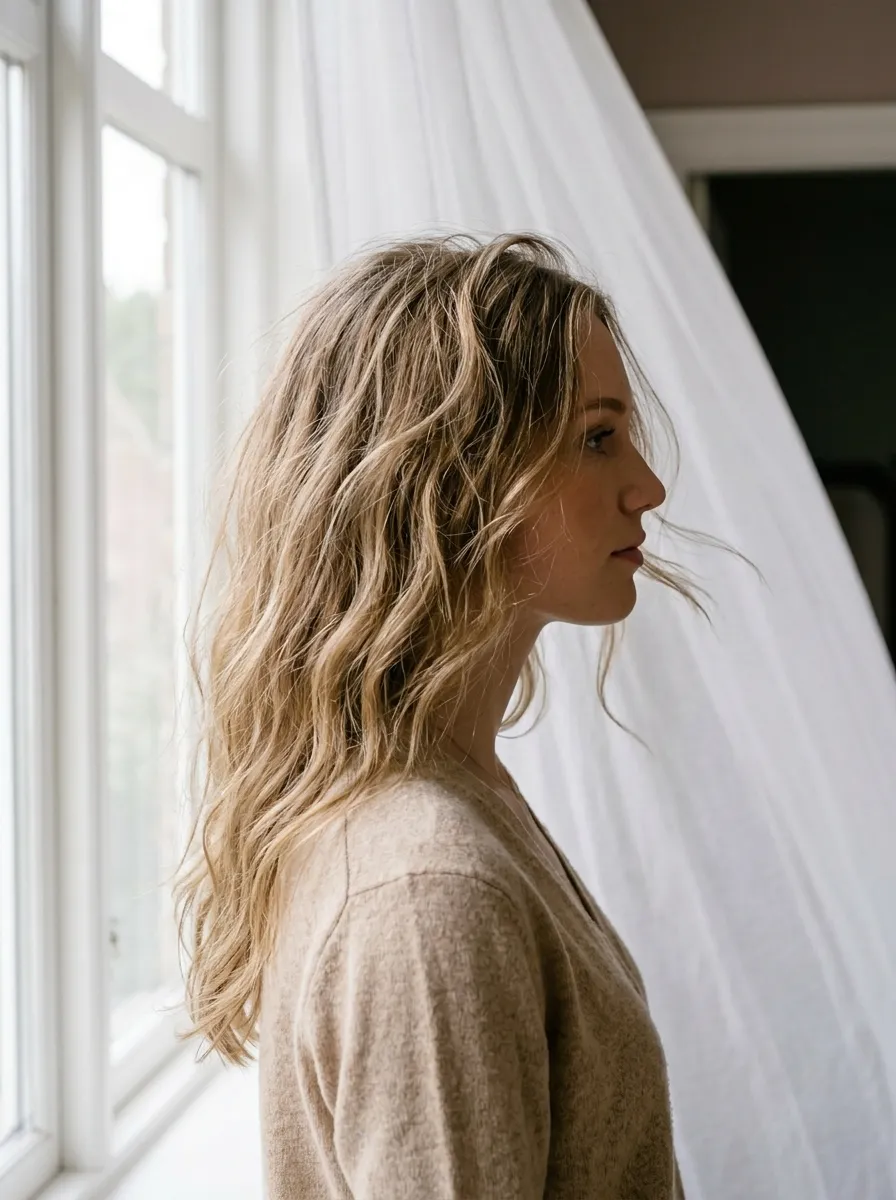
Beachy waves are the unofficial hairstyle of spring and summer. They look effortless but still feel styled.
The fastest way to create them is with a curling wand. Wrap random sections of hair around the barrel without clipping the end. Let the wave fall loose and do not brush it out.
After curling all sections, break the waves apart with your fingers. Then apply a texturizing spray or sea salt spray and scrunch your hair gently.
If you want to skip heat altogether, braid damp hair into several loose braids before bed. Sleep on it and undo the braids in the morning for natural waves with zero heat damage.
Budget tip: Sea salt spray is easy to make at home. Mix warm water, sea salt, and a small amount of conditioner in a spray bottle. This creates the same effect as store-bought products for almost nothing.
Beachy waves do not require perfection. Uneven waves are part of the appeal. The less precise you are with the curling wand, the more natural the final result looks.
10. Half-Up Half-Down Twist
The half-up half-down twist is one of those styles that looks much harder than it is. It involves twisting two front sections of hair back and securing them together at the crown.
Take a section from each side of your face, twist them gently back, and pin them together in the middle with a claw clip or bobby pins. Leave the rest of your hair down.
This style works beautifully on wavy, curly, or straight hair. Each texture gives the look a slightly different feel.
For wavy or curly hair, the twist adds structure to an otherwise loose look. For straight hair, it adds an element of interest without requiring heat styling.
Budget tip: A single claw clip is all you need. No hairpins, no elastics, no spray. Claw clips are widely available and cost under three dollars. They are also one of the most gentle hair accessories for preventing breakage.
This style takes about two minutes to do. It keeps hair off your face without fully putting it up. That makes it ideal for warm spring days when you want airflow but still want your hair to look intentional.
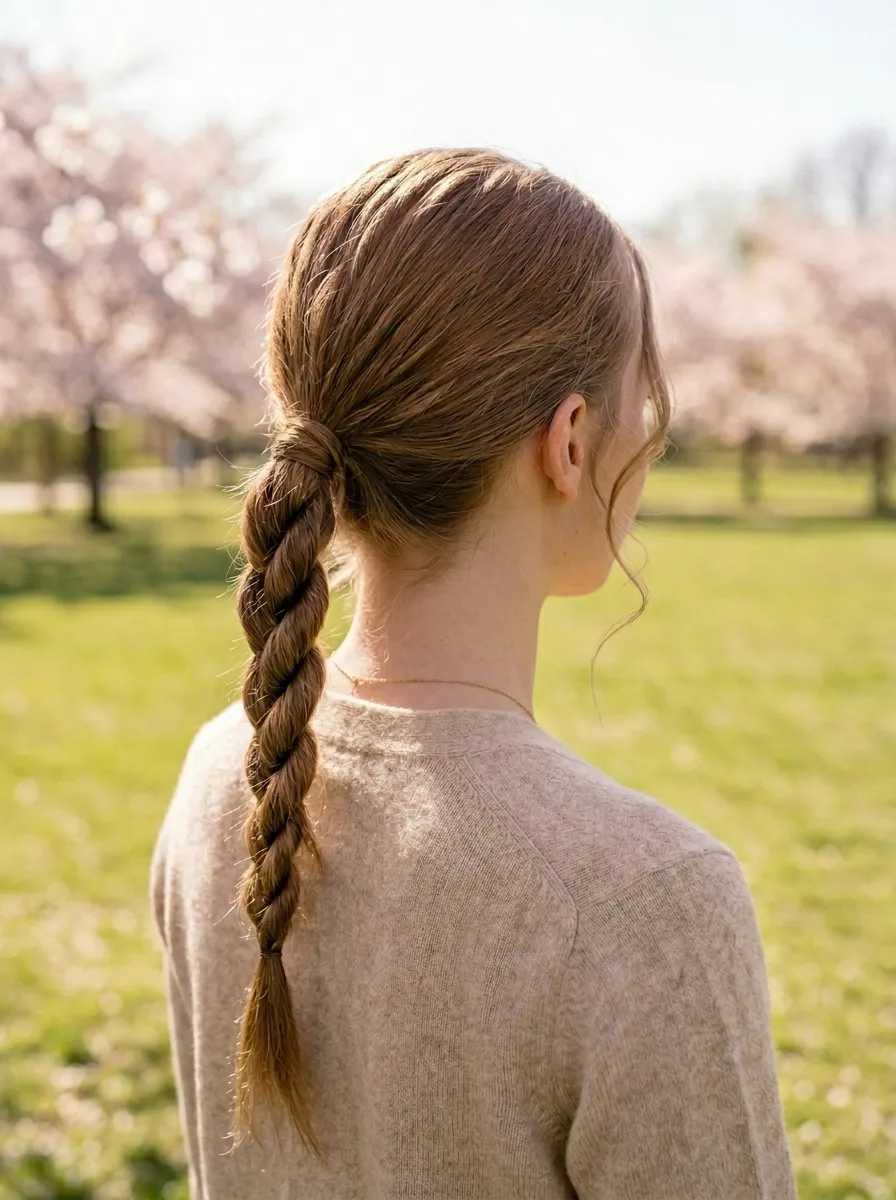
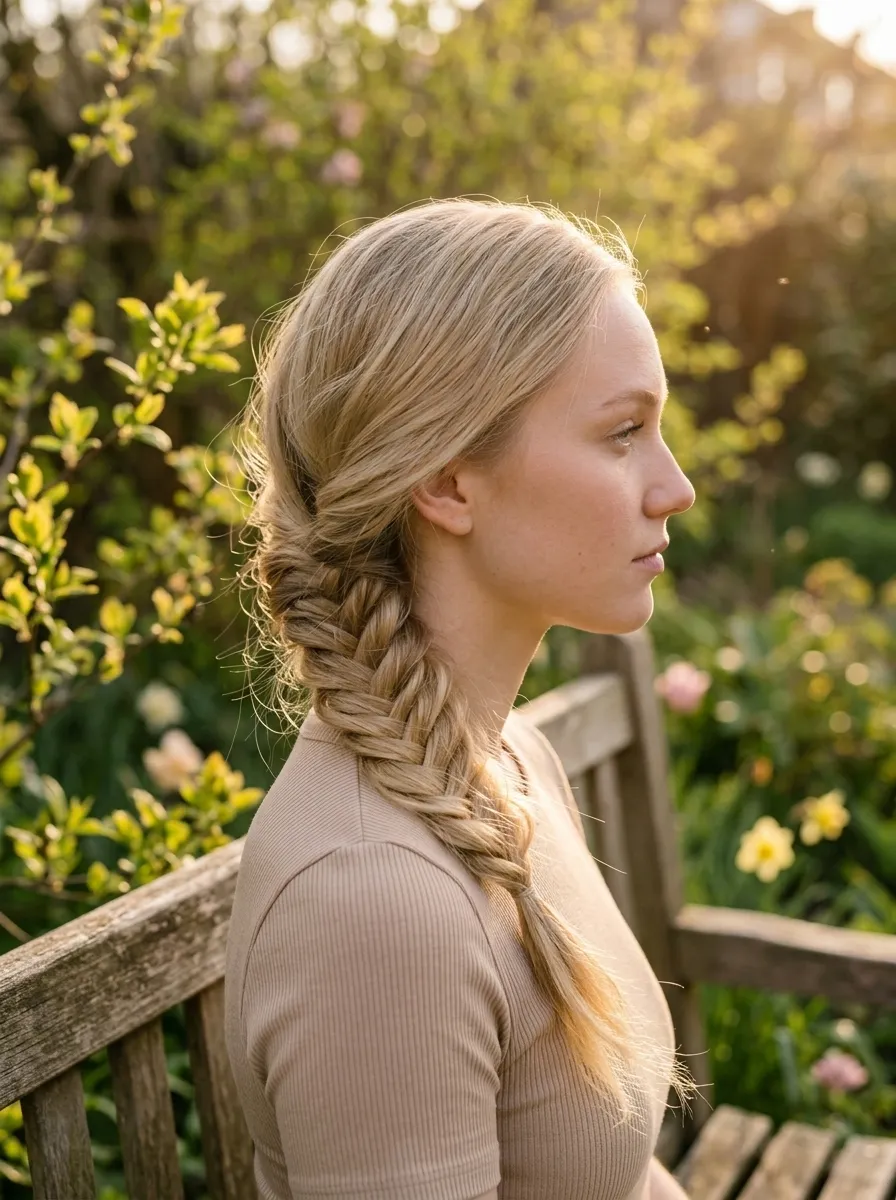
11. Twisted Rope Braid Ponytail
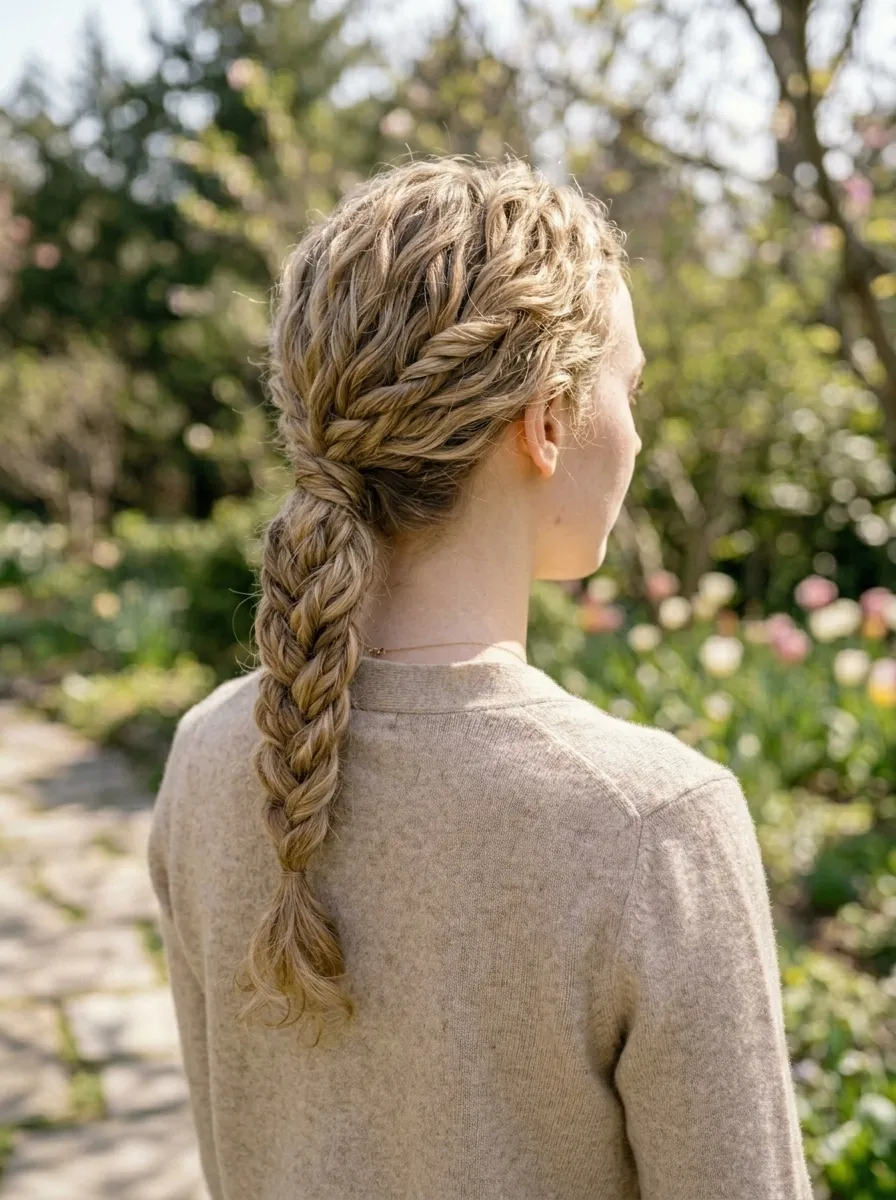
The rope braid is a simple two-strand twist that looks more complex than it actually is. It gives a ponytail style a structured, interesting finish.
Start by pulling your hair into a regular ponytail. Divide the ponytail into two equal sections. Twist each section in the same direction, then twist both sections around each other in the opposite direction.
This creates a rope-like braid that holds its shape well throughout the day.
Secure the end with a small clear elastic. You can also leave it slightly undone and loose for a more relaxed look.
Budget tip: No products or tools beyond two hair elastics are needed. The rope braid naturally tightens as you work it down the ponytail, so even beginners can do it on their first try.
This is a great protective style for spring outdoor activities. It keeps hair secure during walks, hikes, outdoor workouts, and even windy days.
Watch a two-minute tutorial video online to see the hand movement once. After that, you can do it without any reference. Most people master it within two or three attempts.
12. Shaggy Layers on Medium Hair
The shag cut gets its character from lots of layers cut throughout the hair. These layers give your hair movement, texture, and personality.
Unlike a structured haircut, the shag is meant to look a little undone. That actually makes it one of the easier styles to maintain at home between salon visits.
On straight hair, shaggy layers add body and keep the style from looking flat. On wavy or curly hair, the layers define the natural texture even more.
Styling a shag takes almost no effort. Let your hair air dry or diffuse it for volume. Run your fingers through it instead of brushing to preserve the tousled look.
Budget tip: Ask your stylist to add curtain bangs at the same time as a shag cut. Both are done with the same type of layering technique, so combining them often costs no more than a single cut appointment.
A small amount of texturizing paste or pomade applied at the ends adds definition and separation to the layers. Most styling products work. You do not need a specific brand.
This cut suits people who prefer easy, natural-looking styles over high-maintenance routines.
13. Floral Pinned Updo
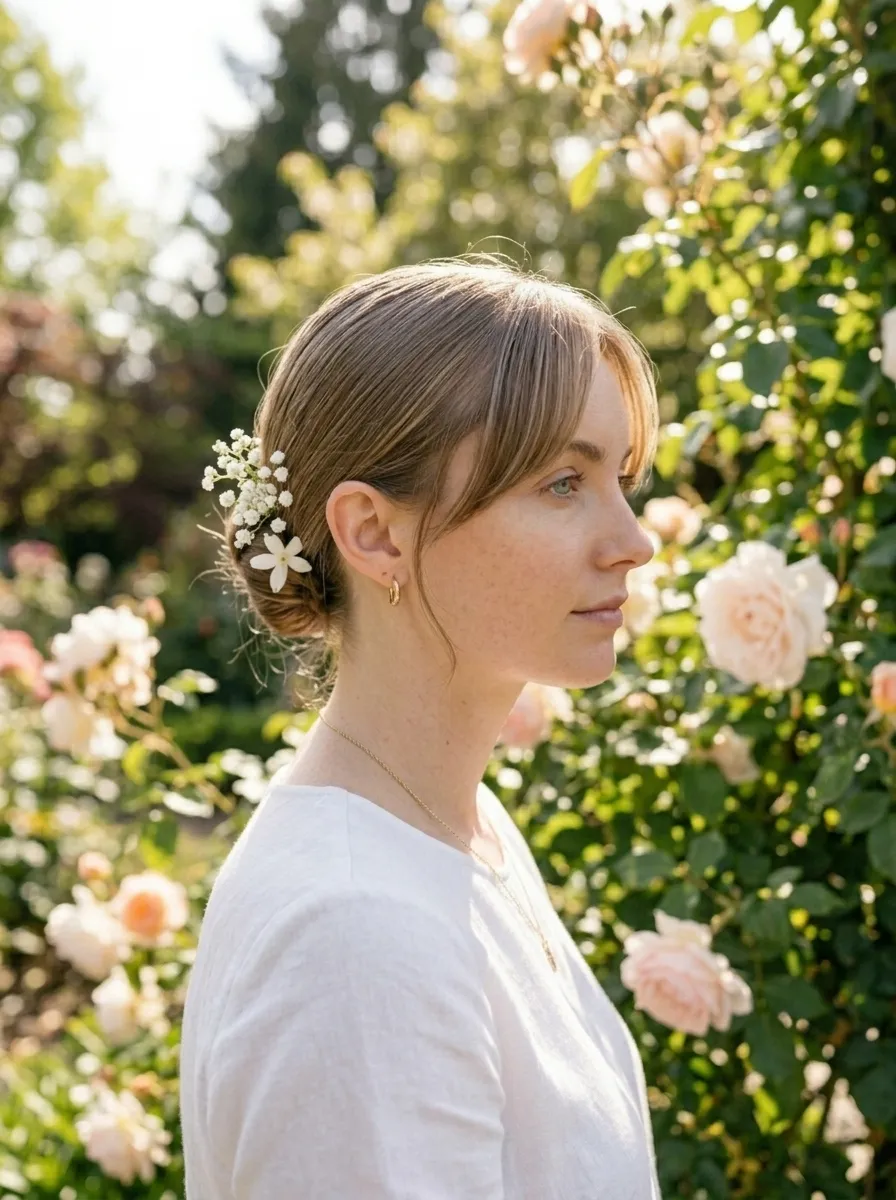
Wearing a few small flowers in your hair is one of the simplest ways to make any updo feel seasonal and special. You do not need a styled event to try this look.
Start with any updo you feel comfortable with. A low bun, a twisted updo, or even a simple high bun all work. Once the base style is in place, tuck small flower stems directly into the hair.
Fresh flowers like baby’s breath, tiny daisies, or jasmine stay fresh for several hours and look beautiful. Faux flowers from a craft store are also a great option if you want something reusable.
Bobby pins help secure flower stems against the style so they do not slip.
Budget tip: Baby’s breath is one of the most affordable flowers available at grocery stores and florists. A small bunch costs just a few dollars and provides enough blooms to decorate several hairstyles.
You can also press and dry small flowers at home and use them as permanent hair accessories. Attach them to bobby pins with a small dot of craft glue for a custom floral hair pin you can reuse.
This is a perfect look for spring brunches, garden parties, or a day when you simply want something beautiful.
14. High Bubble Ponytail
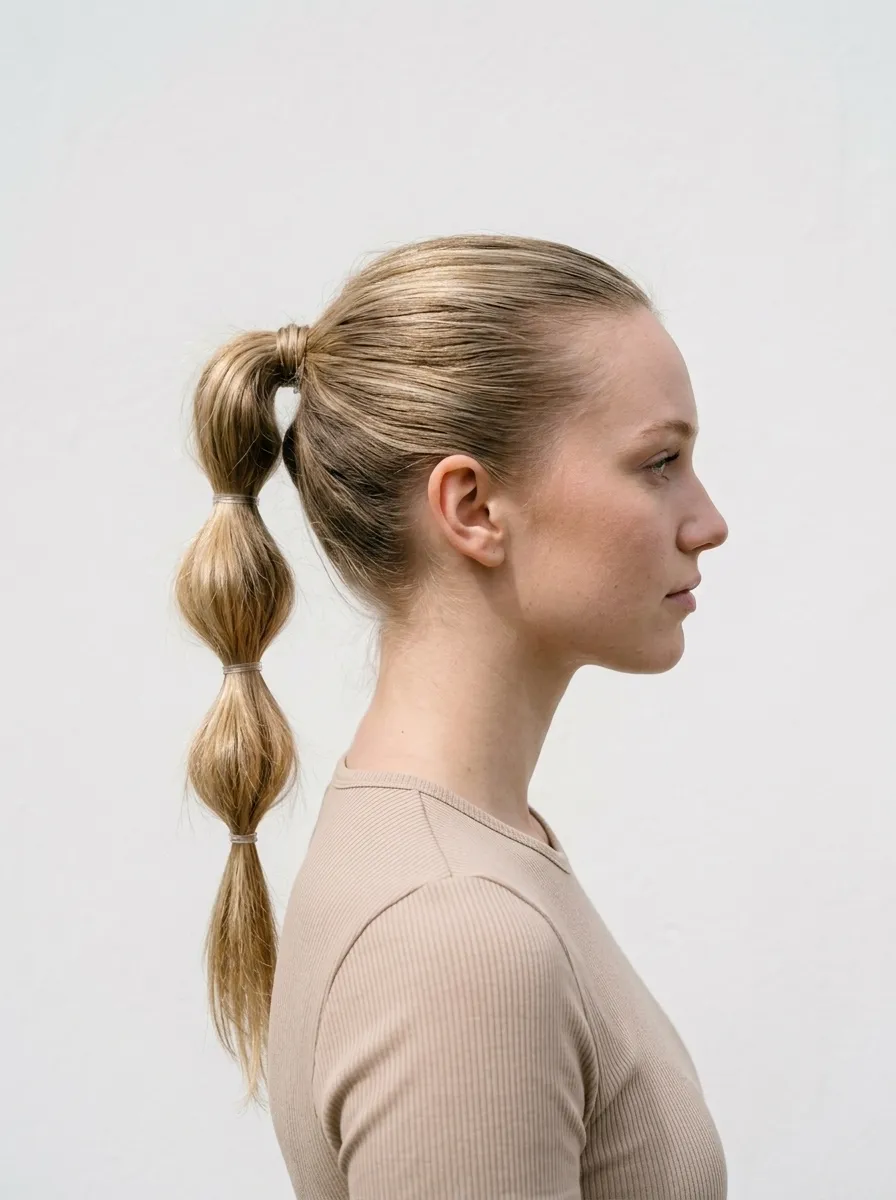
The bubble ponytail has been everywhere recently and for good reason. It is fun, graphic, and takes about five minutes to create.
Start with a high ponytail secured at the crown. Then add additional hair elastics every two to three inches down the length of the ponytail. After each elastic, gently pull the hair between each section outward to create a puffy, bubble-like shape.
The more elastics you add, the more bubbles you get.
This style works best on thick or medium-density hair. If your hair is fine, tease each section slightly before puffing it out to add extra volume.
Budget tip: A pack of small clear or matching hair elastics costs under two dollars. That is all you need for this entire look. No heat, no product, no special tools.
You can add extra visual interest by tying ribbon or a thin scarf between the elastics instead of standard hair ties. This gives the bubble ponytail a colorful, personalized twist.
The bubble ponytail also works lower on the head for a different feel. A mid-height or low version gives the same playful structure with a slightly more relaxed vibe.
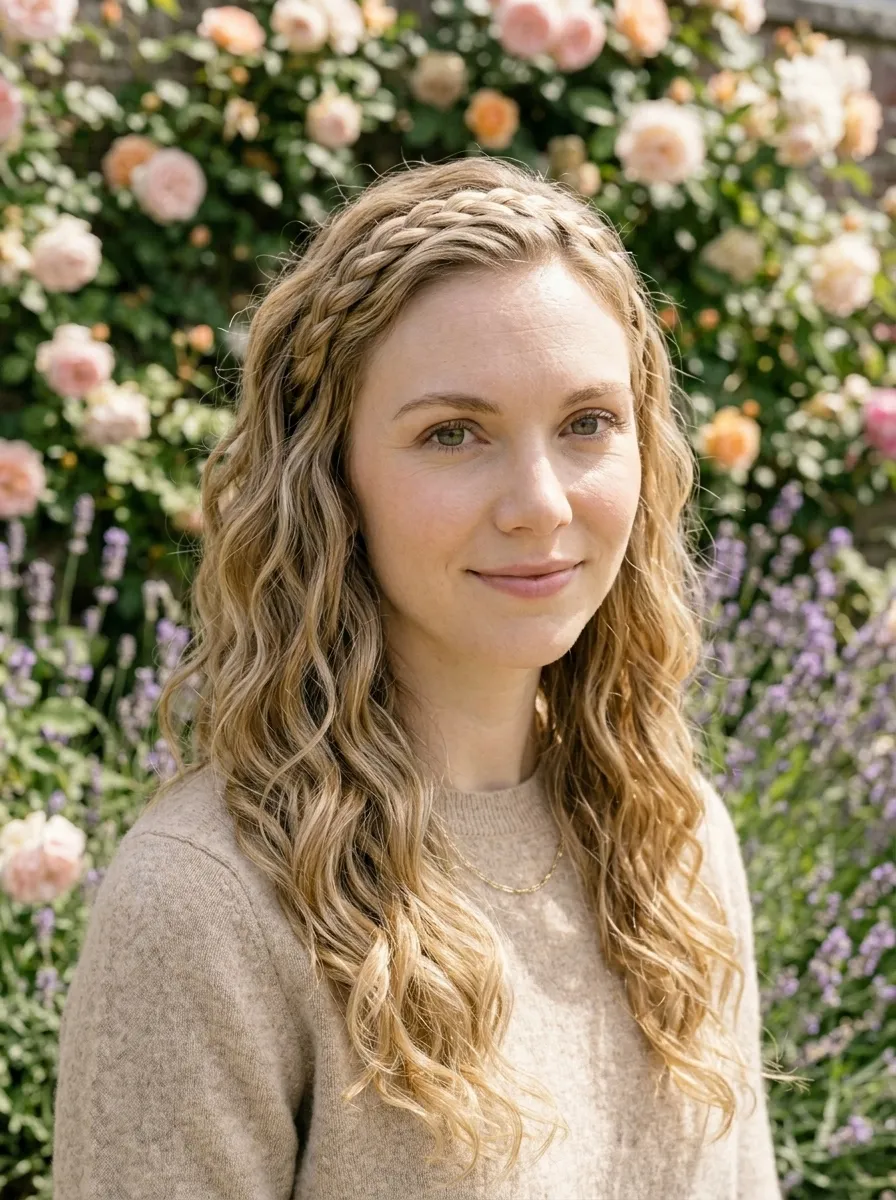
15. Wispy French Braid
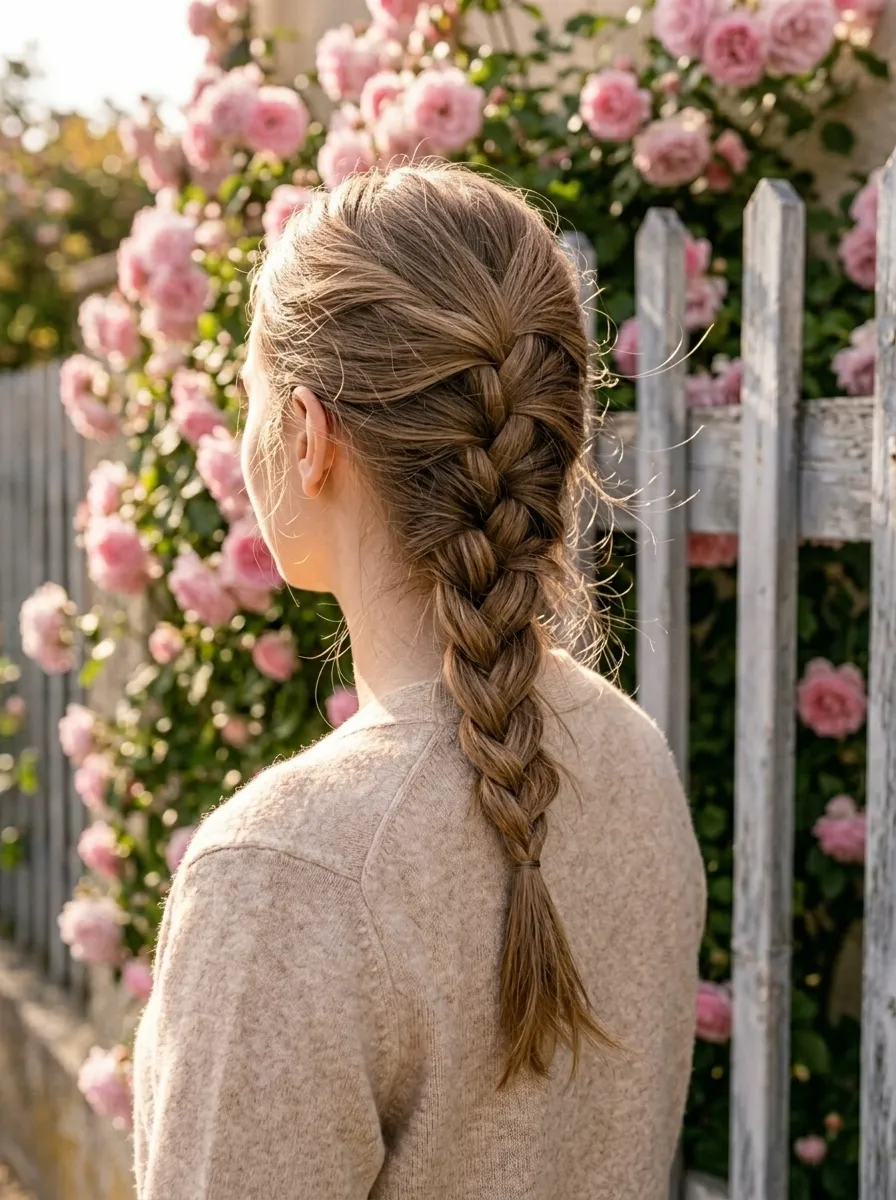
A French braid is a classic that never goes out of style. The spring version is all about making it look intentional but not stiff.
After finishing the braid, go back and gently tug on each section to loosen it slightly. This makes the braid appear wider, fuller, and more relaxed.
Pull out a few small pieces around the face before you start braiding. These loose pieces soften the look significantly and make the whole style feel more modern.
If your French braid skills are still developing, start with a Dutch braid instead. The Dutch braid is done the same way but braids under instead of over, which creates a more forgiving result for beginners.
Budget tip: A French braid requires nothing beyond two hair elastics, one for the middle if needed and one for the end. Practicing on second-day hair is easier since the texture gives you better grip.
Sleeping in a loose French braid after washing your hair is also a great way to wake up with natural waves already formed. Undo the braid in the morning and separate the waves with your fingers.
16. Claw Clip Updo

The claw clip updo is the easiest and most effortless-looking style you can wear. It looks like you spent five seconds on your hair and somehow it looks perfect.
Gather your hair into a loose bunch at the back of your head. Twist it slightly and clip a large claw clip around it. Let the ends splay outward from the top of the clip.
Do not overthink the placement. Mid-height gives the most wearable result. A high clip placement gives more of a retro feel.
Leave out pieces around the face for a softer, more flattering result. This small step makes a big difference in how polished the look appears.
Budget tip: Claw clips come in packs of multiple pieces for under five dollars. Tortoise-shell, clear, and black clips are the most stylish and work with virtually every outfit.
The claw clip updo protects your hair from heat and environmental damage. It is also one of the kindest styles for reducing breakage since it does not pull or stress individual strands.
This look works equally well for a casual coffee run or a more put-together day at the office.
17. Voluminous Blowout
A voluminous blowout makes your hair look full, healthy, and put together. It works on straight, wavy, and even slightly curly hair.
The key to a great blowout is blow-drying your hair in sections. After washing, apply a heat protectant and a small amount of volumizing mousse or spray. Then section your hair and dry each section with a round brush, rolling the brush under as you dry.
The round brush lifts the root and smooths the mid-shaft and ends at the same time.
Once dry, flip your hair upside down and shake it at the roots for extra lift. Then flip back and shape with your hands.
Budget tip: A quality round brush costs around ten to fifteen dollars and lasts for years. Pair it with a drugstore heat protectant and volumizing spray for a full-cost investment of under twenty dollars.
A blowout on freshly washed hair can last two to three days. Use a satin pillowcase to sleep and avoid touching your hair too much to extend the life of the style.
This is a great style to do on a Sunday so your hair looks great for the beginning of the work week.
18. Heatless Ribbon Curls
Heatless curls are a spring favorite because they give you styled hair without any damage from heat tools.
The ribbon method uses a satin ribbon or soft fabric strip tied to the top of your head. You wrap damp sections of hair around the ribbon on each side, alternating as you go down.
Leave it in overnight and unwrap in the morning for soft, even curls with almost no effort.
This method works best on hair that is damp, not soaking wet. If your hair is too wet, it will not dry fully by morning.
Budget tip: You do not need a special ribbon. Cut a strip from a soft old t-shirt or use a long satin scrunchie cord. Both work just as well as a purchased heatless curling ribbon.
The results are different from heat curls. They are softer, more natural-looking, and stay in throughout the day without any product.
Apply a tiny amount of curl cream or leave-in conditioner before wrapping your hair to enhance the curl definition and reduce frizz when you unwrap in the morning.
This method requires zero electricity, zero heat tools, and virtually zero dollars once you have the ribbon.
19. Low Twisted Chignon

The low twisted chignon is a more refined alternative to the standard low bun. It involves folding or twisting the hair before pinning it at the nape of the neck rather than simply coiling it.
To create this style, gather your hair into a low ponytail. Then fold the hair back up toward the elastic, creating a loop or tuck. Pin the folded section flat against the base with bobby pins.
The result is a flat, structured bun that looks more sophisticated than a basic bun with very little extra effort.
Budget tip: This style looks most polished on smooth hair. A few drops of serum applied before pulling your hair back adds shine and controls flyaways without any additional cost beyond the product.
Adding a simple decorative pin or small barrette at the base of the chignon adds a detail that elevates the overall look. Decorative hair pins are widely available for under three dollars.
This is an ideal hairstyle for spring job interviews, formal lunches, or any occasion that calls for a polished, put-together appearance. It also keeps hair secure and off the neck on warmer days.
20. Petal-Pink Highlight Ribbons
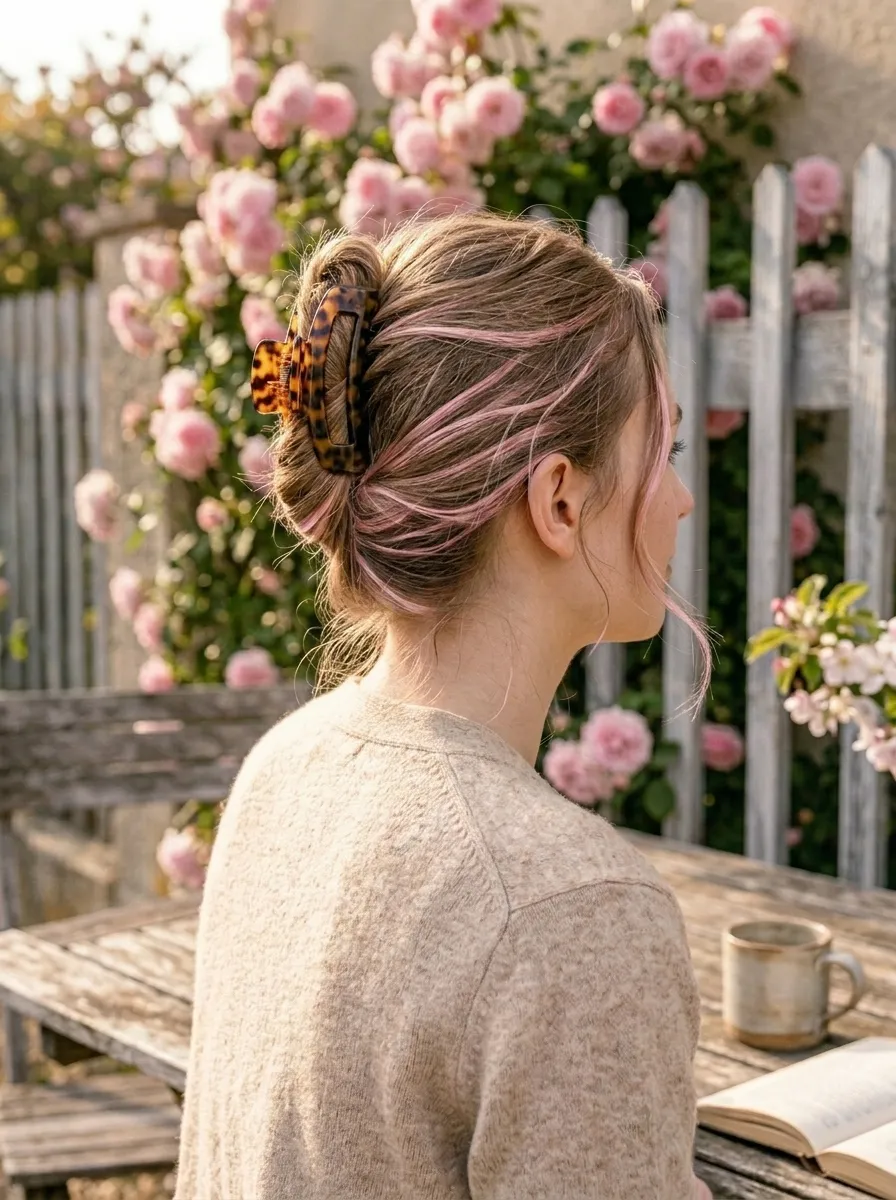
Adding a soft pop of color to your hair does not have to mean a full dye job. Ribbon-style highlights involve placing thin streaks of color in just a few strategic sections.
Petal pink is one of the most popular spring color choices because it reads as warm and playful without being too bold. On lighter hair, it shows up clearly. On darker hair, it creates a subtle tinted effect in certain lighting.
Semi-permanent color or hair chalk are both options you can do at home. Hair chalk is especially beginner-friendly and washes out easily.
Budget tip: Hair chalk is available online and in beauty supply stores for around five to ten dollars. It applies directly to the strand without any mixing, developer, or processing time. It is also fully temporary.
If you want something more lasting, ask a colorist about adding pink ribbons using a direct dye technique. This is simpler and less damaging than balayage or full highlights.
Touch up the color every two to three weeks depending on how much it fades. Cooler water when washing your hair helps the color last longer.
This is a fun option to try for the spring season without committing to permanent change.
21. Side-Swept Waves with Volume at the Root
Side-swept waves bring an undeniably romantic quality to any look. The volume at the root gives lift while the waves create softness through the length.
Start by blow-drying your roots with a round brush for volume. Then use a large-barrel curling iron to create loose waves throughout the length, directing all the curls in the same direction toward one side.
Finger-comb the waves and sweep them over one shoulder. Mist with a light-hold hairspray to keep the sweep in place throughout the day.
A small amount of volumizing powder or dry shampoo pressed into the roots before styling adds extra lift that lasts longer.
Budget tip: A large-barrel curling iron creates wide, loose waves quickly. These irons are available at drugstores for under twenty dollars. Wide waves also require fewer passes through the hair, which saves time and reduces heat exposure.
This style works particularly well for spring events like weddings, garden parties, or outdoor celebrations. It looks styled and intentional but does not require a professional appointment.
22. Knotless Box Braids
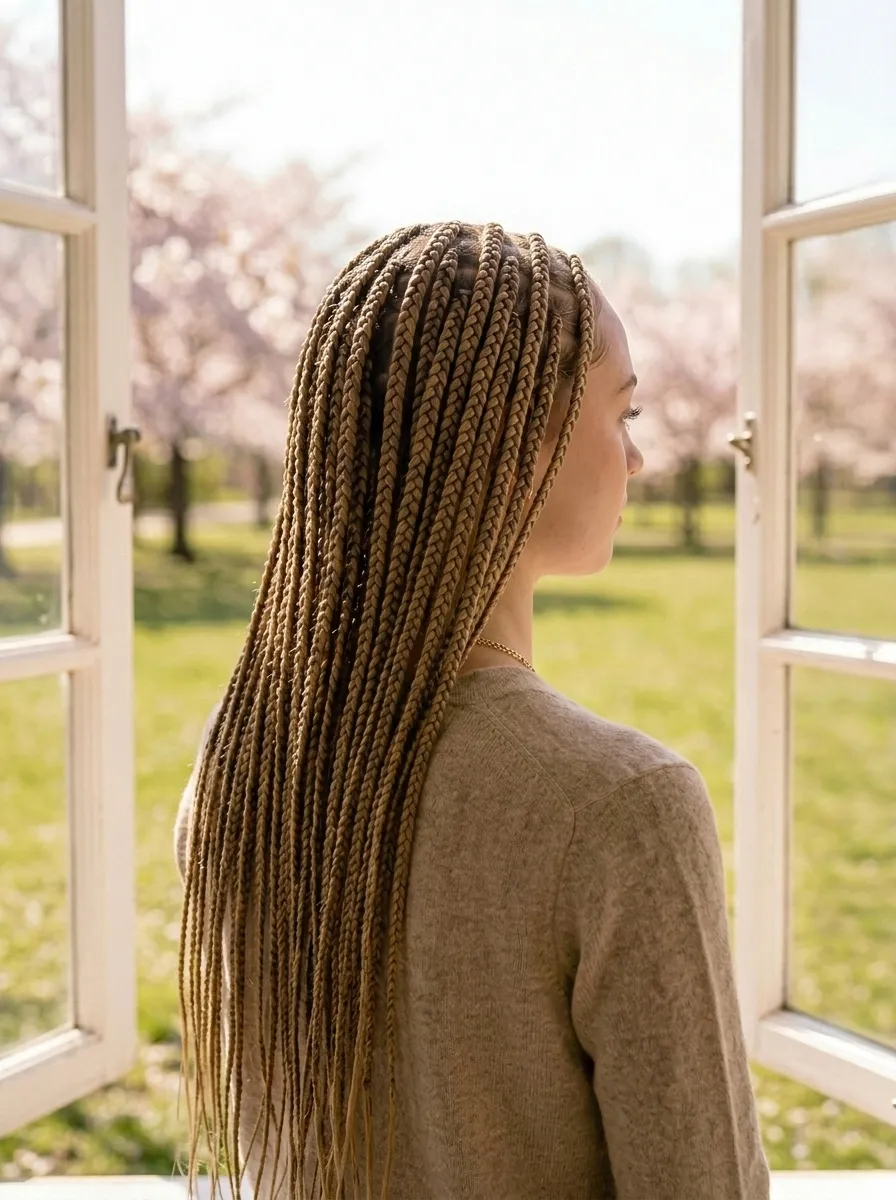
Knotless box braids are one of the best protective styles for spring. They use a feed-in technique that starts with your natural hair before gradually adding extension hair, creating a flat and comfortable start rather than a bulky knot at the root.
This technique puts less tension on your edges and scalp. That makes knotless braids significantly more comfortable than traditional box braids, especially during the first few days after installation.
Knotless braids can last four to eight weeks with proper care. Keep your scalp moisturized using a lightweight oil like jojoba or sweet almond oil applied directly at the roots.
Budget tip: Knotless braids take longer to install than traditional braids, so the salon cost reflects that time. Booking with a braider who works from home often costs less than a full salon appointment without any sacrifice in quality.
Sleep with a satin bonnet or on a satin pillowcase to reduce frizz and preserve the style for longer.
You can style knotless braids in multiple ways including half-up styles, high ponytails, and side-swept looks, which gives you a different hairstyle every day without touching your natural hair.
23. Textured Pixie Cut
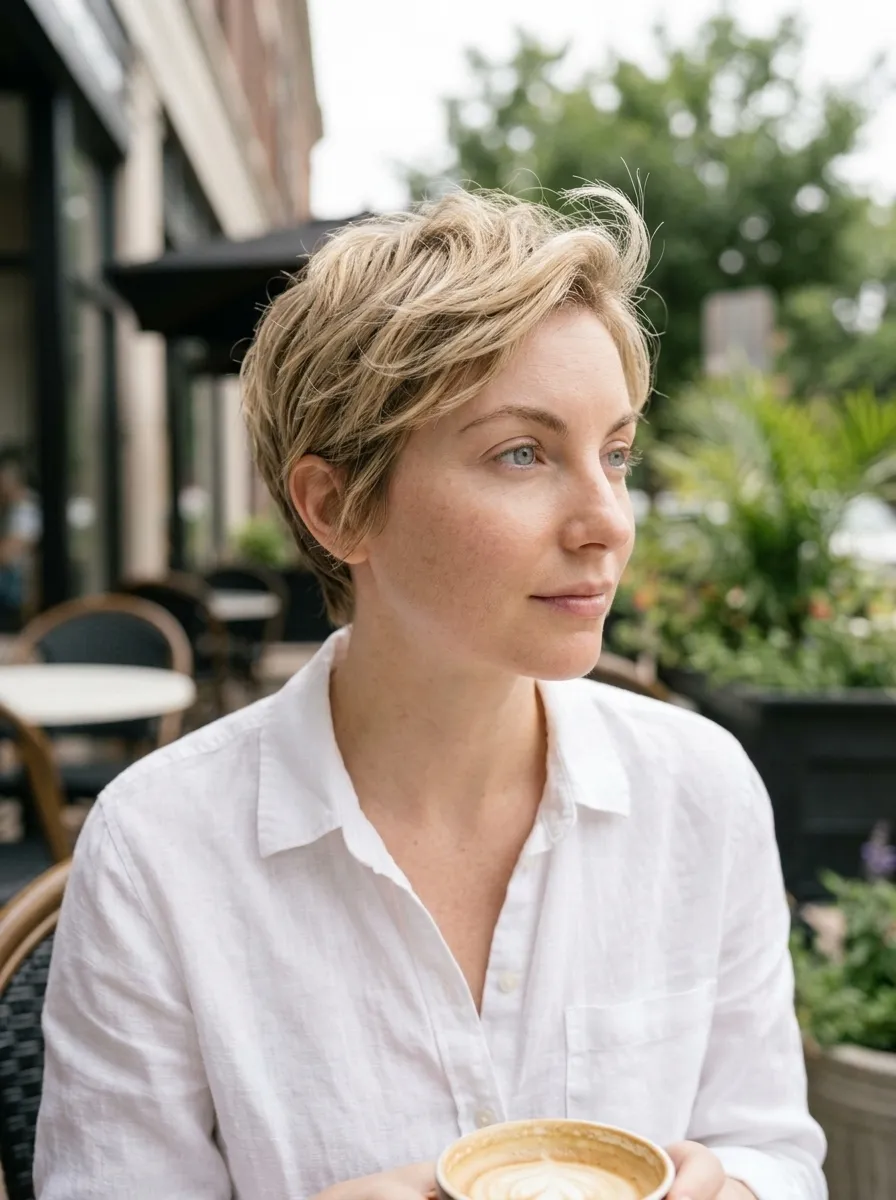
A textured pixie cut is a bold and beautiful choice for spring. It is short, low maintenance, and looks polished on any texture.
The textured version differs from a classic pixie in that the top is left longer and styled with movement. Instead of lying flat, the hair on top is styled upward or forward to create dimension.
A small amount of pomade or wax worked through the top sections creates the texture and helps the style hold its shape. This takes about two minutes in the morning.
Budget tip: Ask your stylist to cut the sides and back very short while leaving the top at a length you can work with. This contrast is the foundation of the style and does not require frequent trims to maintain.
The sides and back only need reshaping every three to four weeks. The top can grow out for several months before it needs cutting, which keeps overall salon visits minimal.
Short hair is also one of the most heat-friendly styles. Your blow-dry takes under two minutes and a curling iron is entirely optional.
This is a great style for people who want beautiful hair without spending time on it every morning.
24. Loose Fishtail Braid
A fishtail braid looks complicated but requires only two sections and a bit of patience. The result is a braid with a woven, intricate-looking texture.
Divide your hair into two sections. Take a thin piece from the outer edge of one section and cross it over to join the other section. Repeat on the other side. Continue this pattern down the length of your hair.
The thinner the pieces you take, the more detailed the braid looks. Thicker pieces create a looser, more casual style.
Once finished, pull each section of the braid gently to loosen and widen it. This gives the braid a full, messy look that feels much more modern than a tight version.
Budget tip: The fishtail braid requires two hair elastics and nothing else. Practicing on a friend’s hair first makes learning the technique easier than practicing on your own.
This braid looks beautiful on all hair lengths but works best when hair is at least shoulder-length. It also holds up well through the day without needing any products or pins to maintain it.
25. Lob with Invisible Layers
The lob, or long bob, has been a popular cut for years. Adding invisible layers to it keeps the exterior line intact while removing weight from the interior of the hair.
This gives the lob more movement and bounce without visually changing the silhouette. The hair still looks like a blunt lob from the outside, but it behaves with more life and lightness.
This technique works especially well on thick, heavy hair. Without those interior layers, thick hair can look blocky and sit flat. Removing the interior weight allows the natural movement to come through.
Budget tip: Tell your stylist you want a lob with point-cut or sliced layers through the interior only. This is a standard technique that most stylists do within the same appointment as a regular cut at no extra charge.
Styling the lob is straightforward. Blow-dry with a round brush, use a large-barrel curling iron for soft waves, or simply let it air dry for a natural finish.
The lob is one of the most adaptable cuts for spring. It works with all hair textures and grows out gracefully into a medium-length style over several months.
26. Braided Headband Using Your Own Hair
This style uses a section of your own hair to create a braided band across the top of your head. It works on medium and long hair and requires no special accessories.
Take a small section of hair from just above one ear. Braid it all the way to the end and secure with a tiny elastic. Then pull the braid gently across the top of your head to the other side and pin it behind the opposite ear with bobby pins.
Leave the rest of your hair down. The braid sits like a delicate headband made entirely from your own hair.
This look works beautifully on wavy or textured hair because the looseness of the base style balances the defined line of the braid.
Budget tip: You need only a few bobby pins and one small elastic. Both are available in bulk packs for under three dollars. No additional products are needed.
This is an excellent style for keeping hair off your face on windy spring days. It looks delicate and intentional while taking under five minutes to create.
It also works on hair with curtain bangs. Simply start the braid behind the bangs so they fall naturally in front while the rest of the hair is swept back.
Spring is full of opportunities when it comes to your hair. Whether you go with a bold new cut, a playful braid, a protective style, or something as simple as a claw clip updo, the goal is to find something that works with your real life. The best hairstyle is one that fits your routine, your budget, and your personality. Many of these looks cost nothing to create and take only a few minutes. Others require a single salon visit. Either way, there is no reason to wait for the perfect moment to try something new. Your hair grows back, clips come out, and braids undo. So pick one style from this list, give it a try this week, and see how good it feels to switch things up.
Leave a Reply