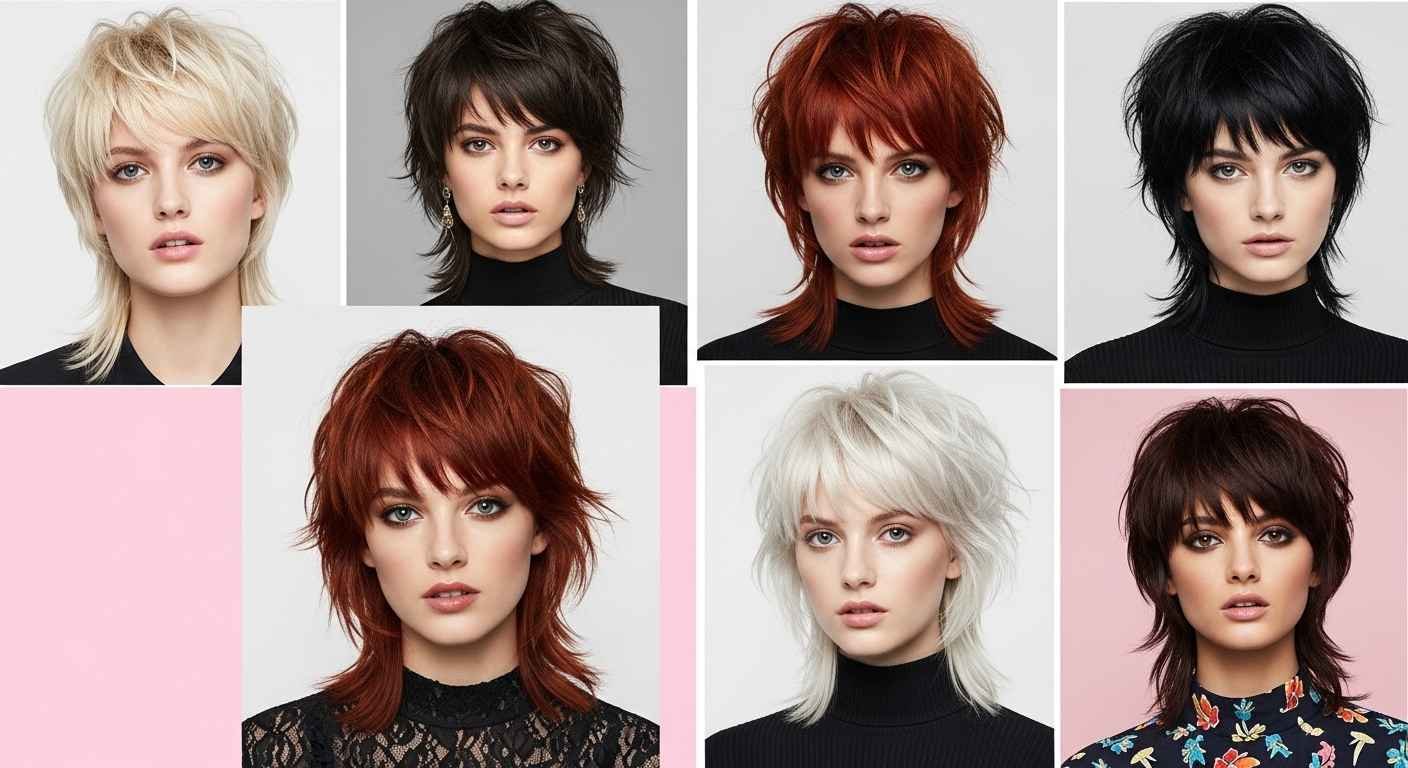
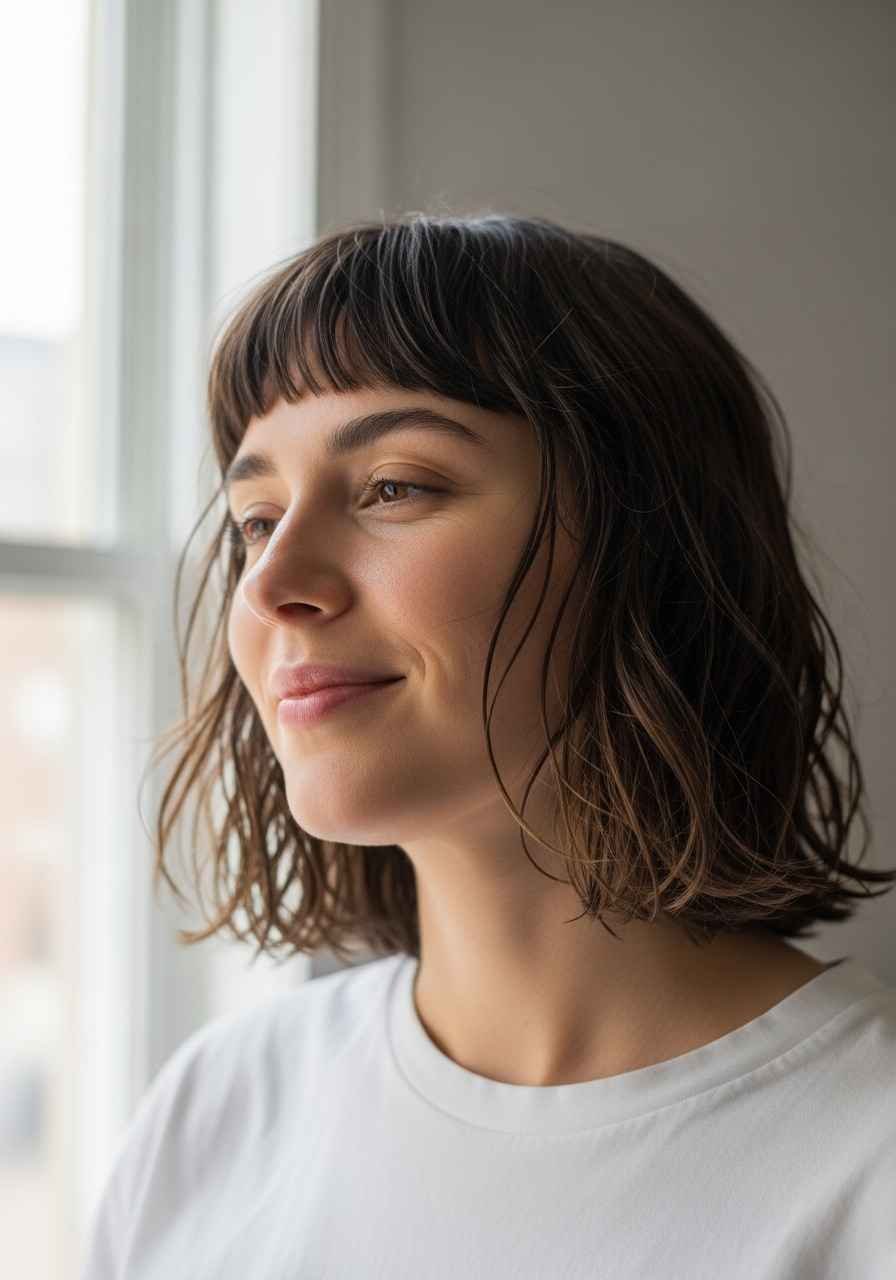
1. The Classic Choppy Shag
The choppy shag is where it all started. It has uneven layers, jagged ends, and a relaxed shape that never looks too polished.
This cut works on almost every hair type. Fine hair gets body. Thick hair gets lightened up. Wavy hair gets definition.
Ask your stylist for point-cut ends. That means they cut into the tips at an angle instead of straight across. It creates that raw, textured look automatically.
At home, scrunch in a little sea salt spray after washing. Let it air dry. That is all you need.
You do not need expensive products. A drugstore salt spray works just as well as a salon one.
The choppy shag grows out beautifully too. You can stretch your appointments by a few weeks without the cut looking messy or outdated.
If you want to DIY trim it between cuts, use sharp hair scissors, not craft scissors. Snip just the very tips pointing downward for that jagged finish.
This is the most low-maintenance shag on this list. It is the perfect starting point if you are trying the shag for the first time.
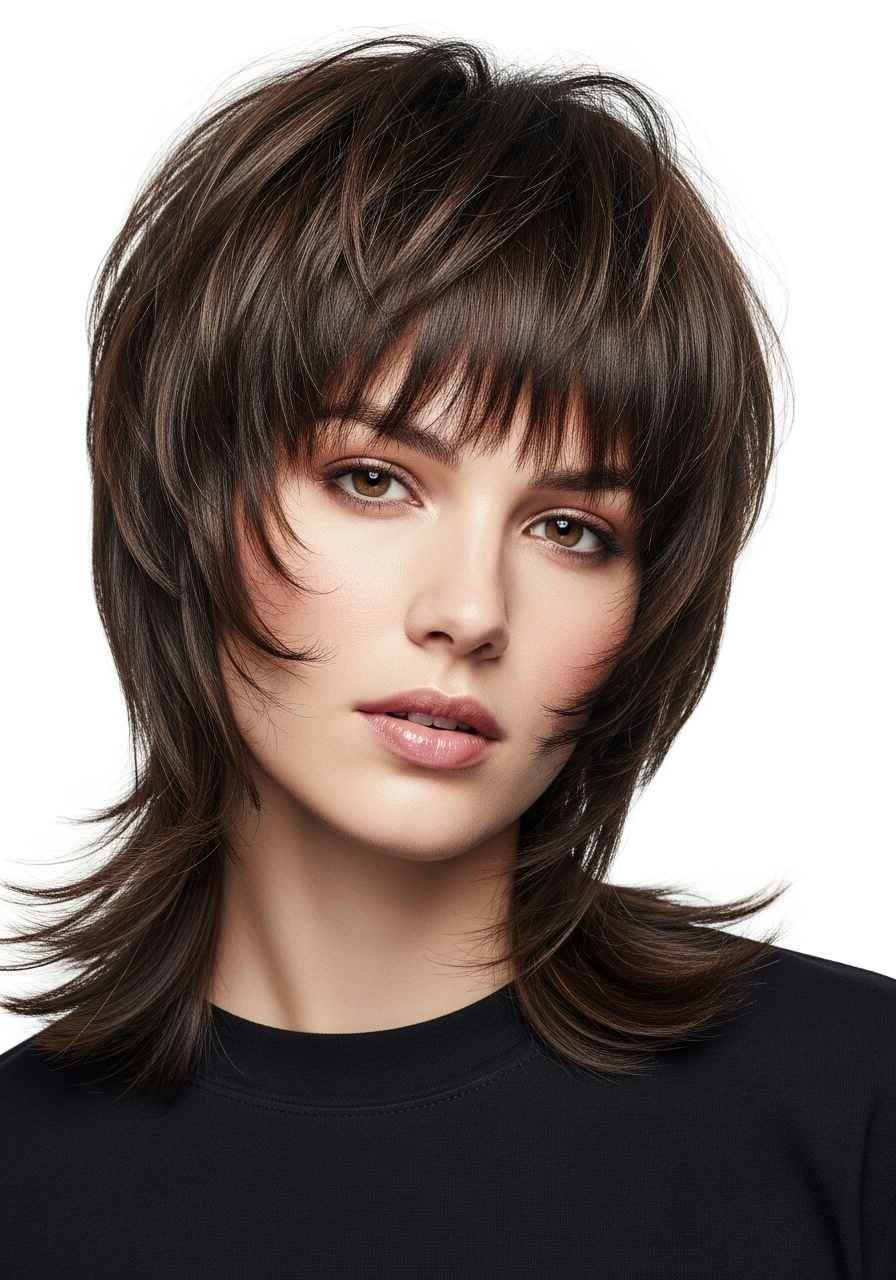
2. The Curtain Bang Shag

Curtain bangs change everything. They frame the face in a way that is soft but still edgy.
Paired with a short shag, they create a retro 70s feel that looks very current right now.
The key to curtain bangs is the part. They should split down the middle and sweep slightly outward. They should not be too blunt or too thin.
You can style them with just your fingers. After washing, push them to each side while damp and let them dry naturally. They fall into place on their own.
If they get a little frizzy, a tiny amount of smoothing serum on your fingertips is enough. You do not need a blowout.
Curtain bangs also grow out gracefully. Unlike blunt bangs that look awkward mid-grow, curtain bangs just get longer and blend into the rest of the shag.
At your appointment, bring a photo. Curtain bangs mean different things to different stylists. A photo removes all guesswork.
This style suits oval, heart, and square face shapes especially well. It softens a strong jawline and adds width to a narrow forehead.
Budget tip: if you already have a shag, adding curtain bangs is usually a quick add-on trim, not a full new cut.
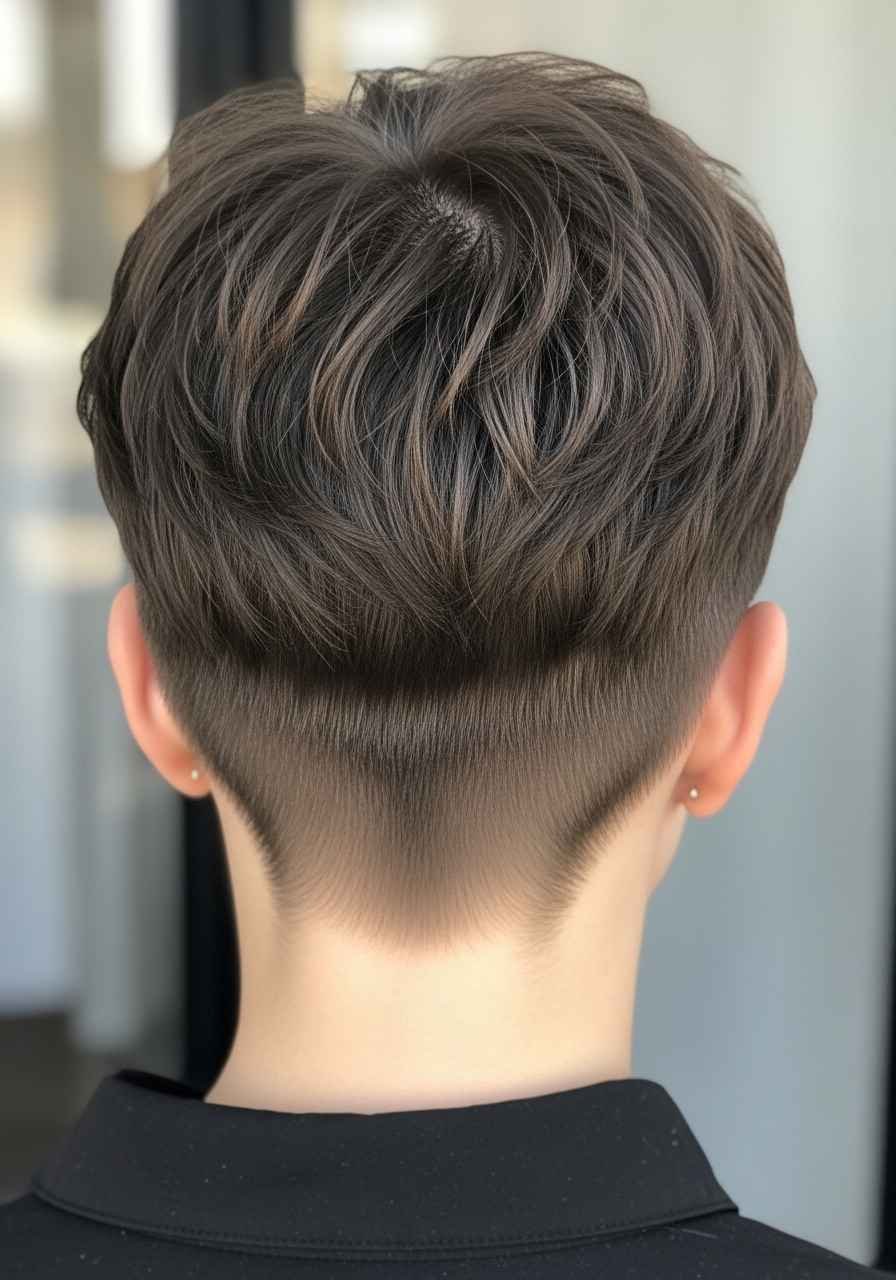
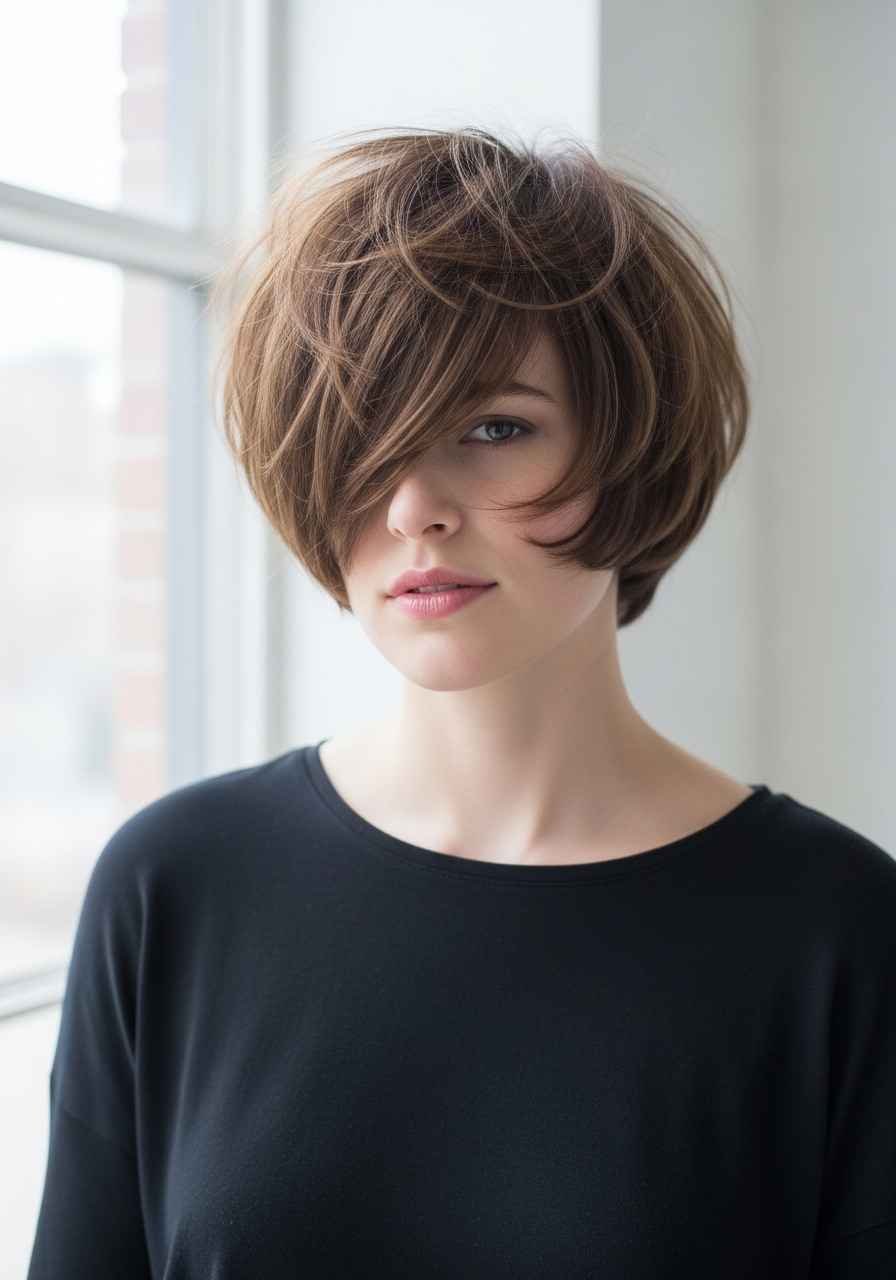
3. The Pixie Shag
The pixie shag sits between a pixie cut and a full shag. It is short in the back and sides but has soft, layered pieces around the face and crown.
This cut is bolder than a regular shag. It takes confidence to wear. But it is also one of the most low-maintenance options on this list.
Wash, scrunch, go. That is basically the entire morning routine.
It works beautifully on fine hair because the layers create the illusion of volume and thickness without needing any product.
For thick hair, this cut removes weight strategically. You will feel like you have half the hair on your head in the best possible way.
The pixie shag looks incredible with a little tousling at the crown. Run your fingers through the top and push it slightly forward. That gives it a slightly undone, cool-kid energy.
At home, touch-ups are easier with this cut than most. The nape and sides can be cleaned up with a small trimmer if you have one.
Ask your stylist to keep the top longer if you want more styling options. Shorter on the sides, longer on top, gives you flexibility.
This is a great cut for anyone who wants something bold but still professional.
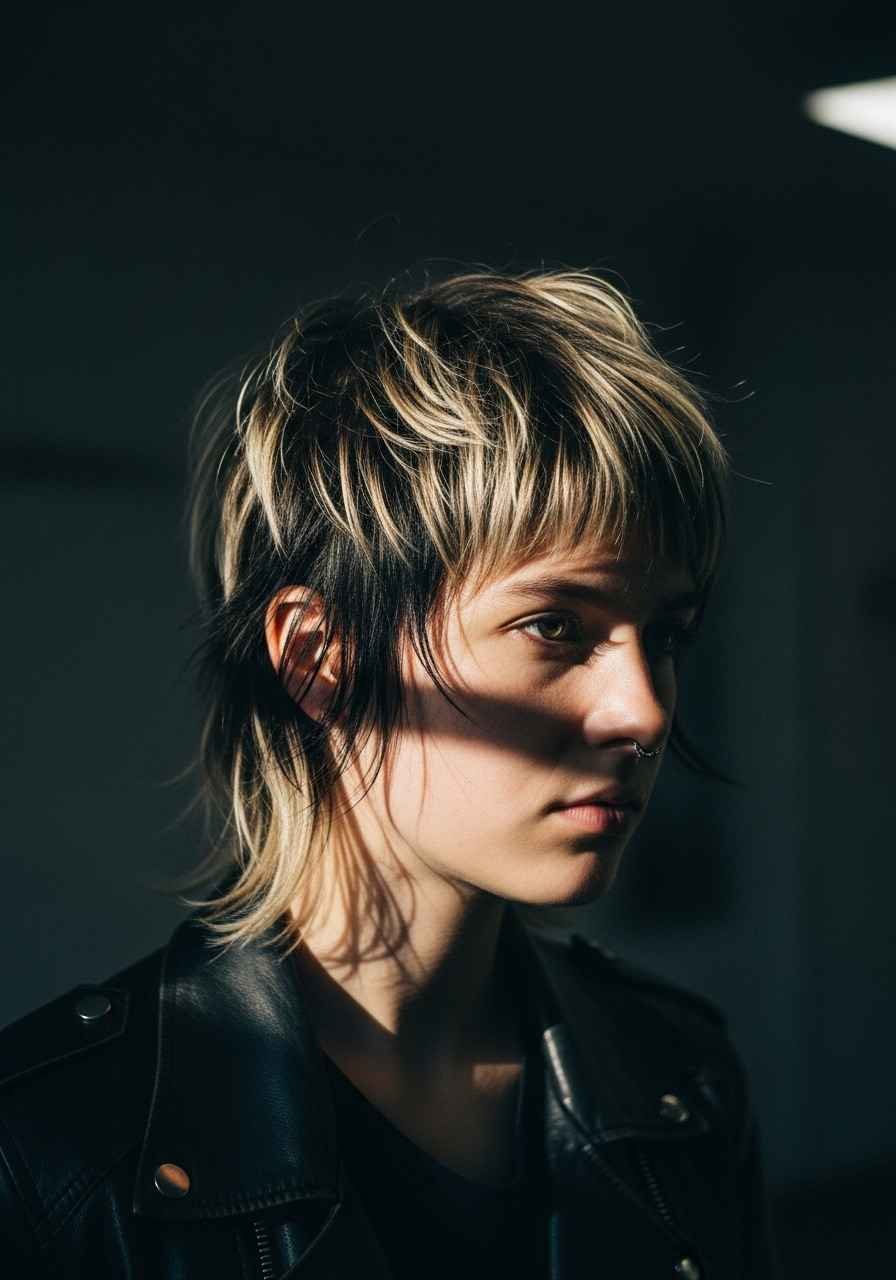
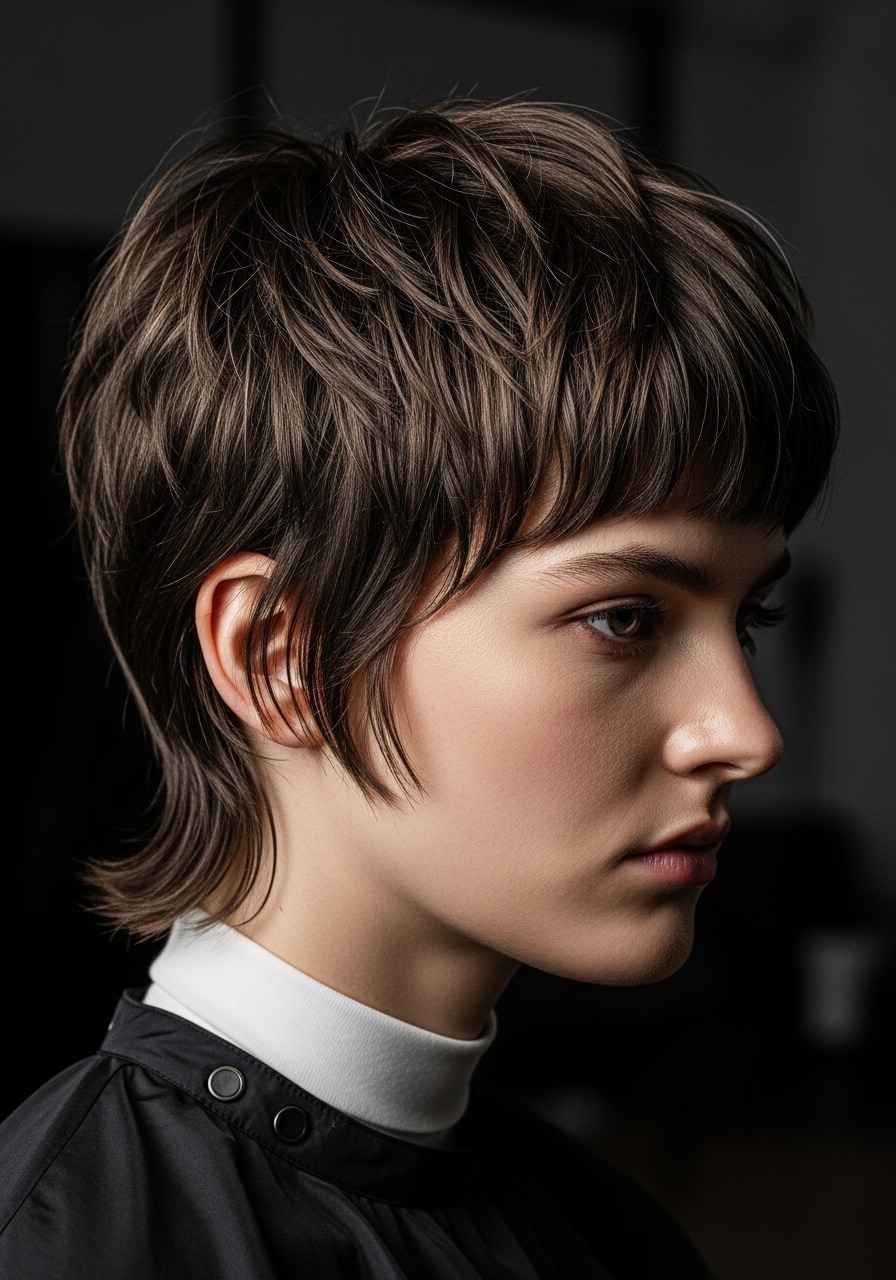
4. The Wolf Cut Shag
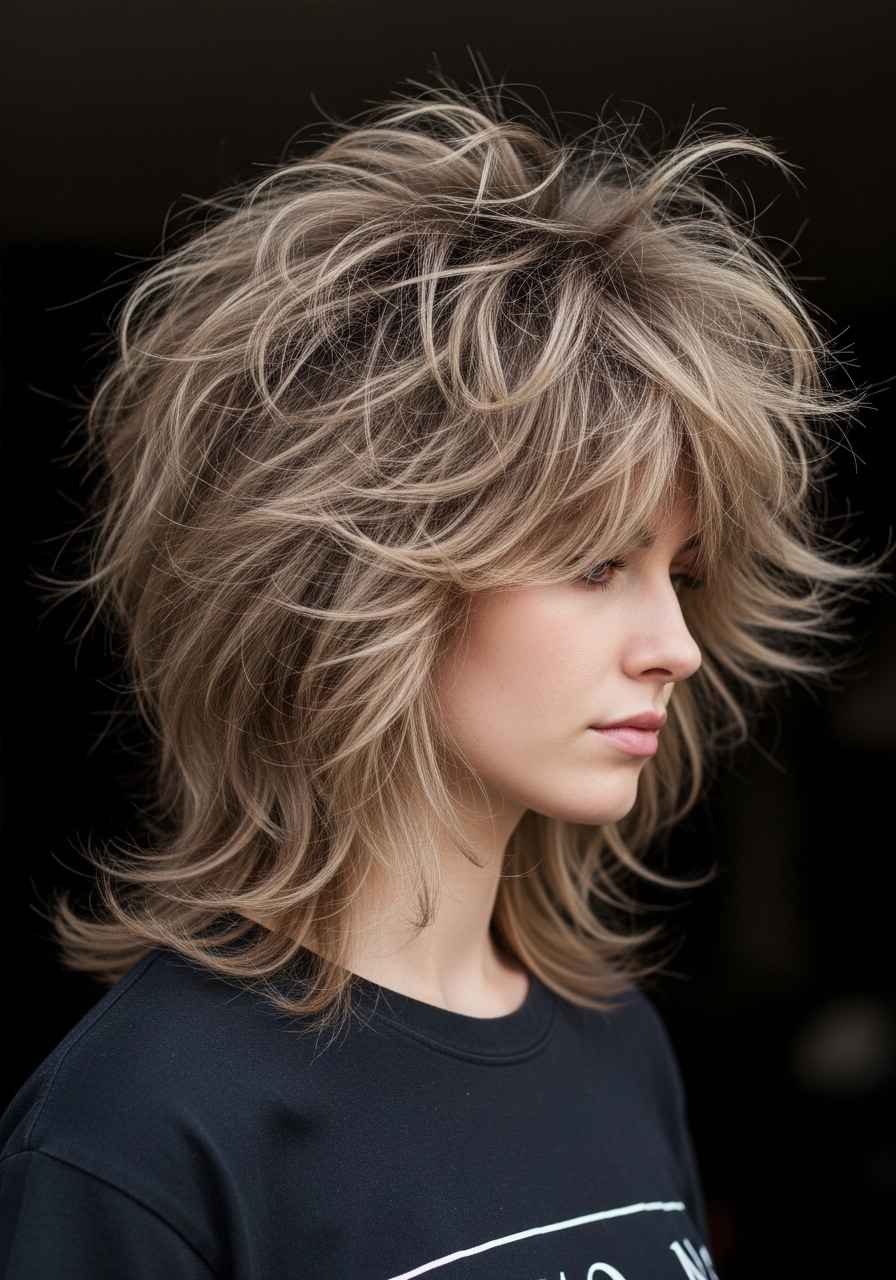
The wolf cut went viral for a reason. It combines the volume of a shag with the drama of a mullet-inspired silhouette.
On short hair, it looks fierce. The crown puffs up. The ends stay wispy and light.
The wolf cut is all about contrast. Heavy volume on top, soft and airy at the ends.
To get this look at home without heat, scrunch in a mousse while your hair is soaking wet. Flip your head upside down and let it dry. The root volume happens naturally.
If you use a diffuser, use it on low heat. High heat flattens the texture you are trying to create.
This cut works especially well on wavy and curly hair. The natural texture does the heavy lifting. Straight hair needs a little more product to hold the shape.
Ask your stylist for a “disconnected layer” at the crown. That is what creates that dramatic poof that defines the wolf cut.
On a budget? This cut actually looks better when it is slightly grown out. You do not need frequent trims to keep it looking intentional.
The wolf cut is the most rock-and-roll option on this list. If you want people to notice your hair, this is it.
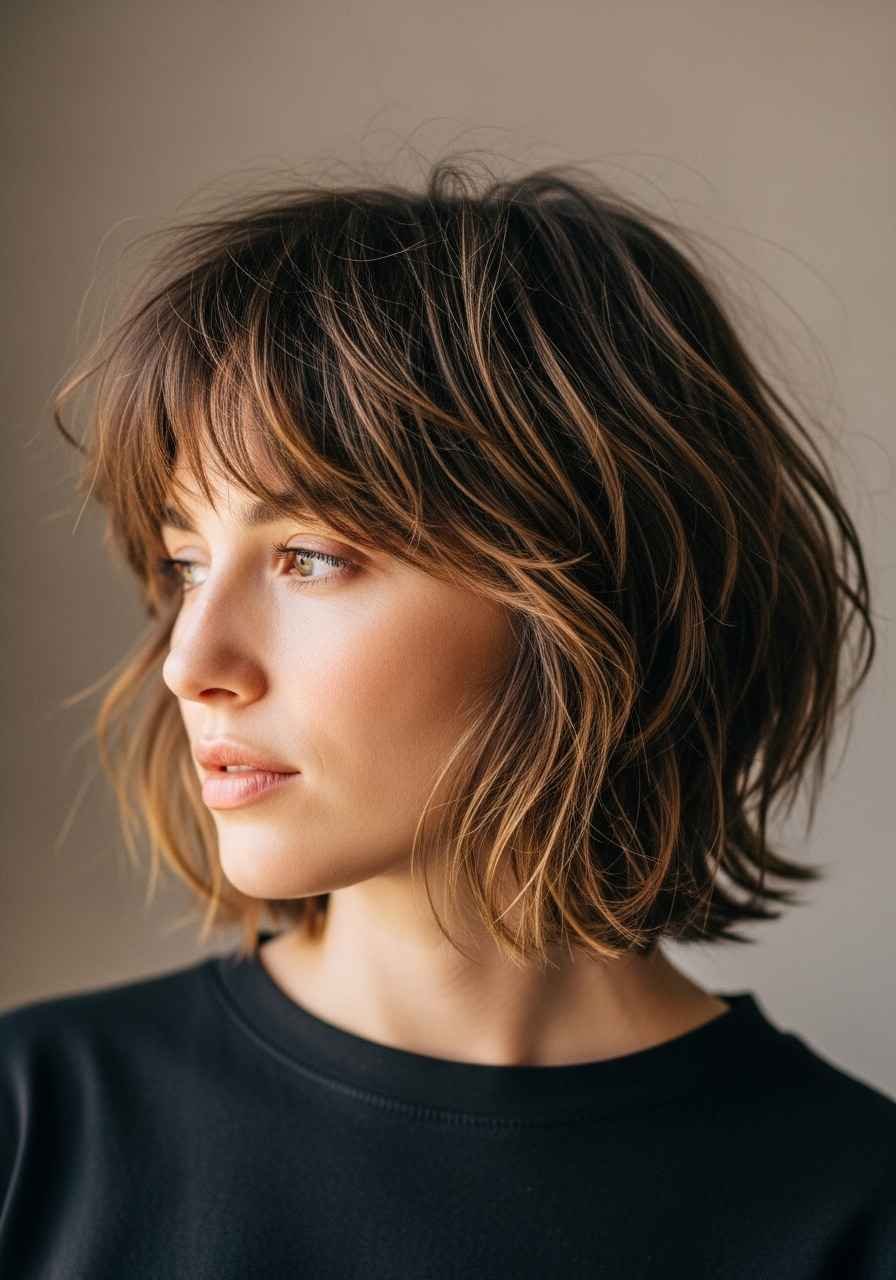
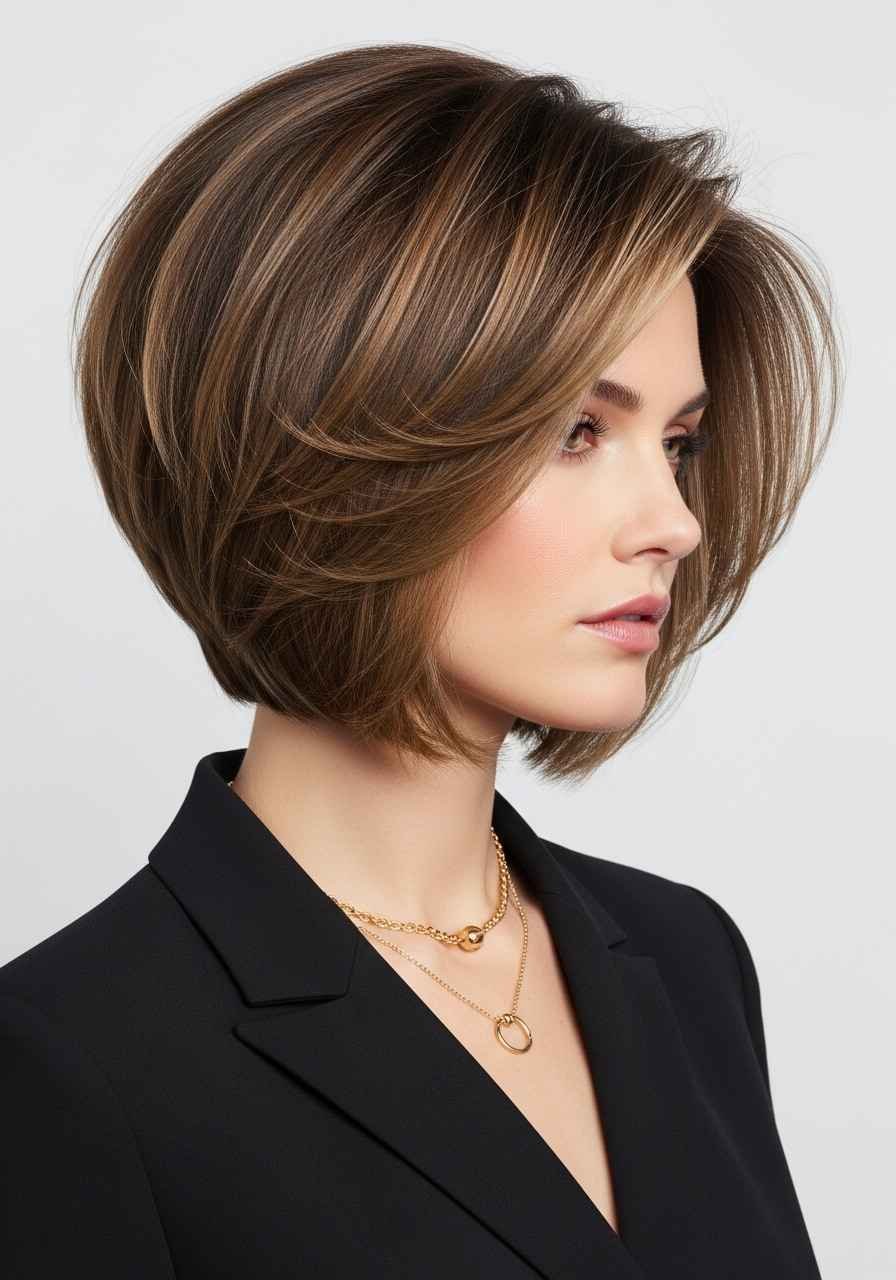
5. The Shaggy Bob

The shaggy bob is the perfect middle ground. It is not too short, not too long. It is approachable but still has edge.
The ends are choppy and textured instead of blunt and clean. That one difference changes the entire personality of the haircut.
A shaggy bob suits literally every face shape. It can be worn tucked behind one ear or left loose. Both look great.
For a casual day, air dry with a bit of texture spray. For something more polished, add a quick blowout with a round brush at the ends.
You do not need to go full volumizing routine. Just a light flip at the ends with a brush is enough to dress this cut up.
The shaggy bob is also one of the easiest cuts to maintain yourself between salon visits. If the ends start looking too clean, use texturizing scissors to snip lightly into the tips.
This is a great first step if you are cutting from long hair. It is not as dramatic as a pixie but still a significant, exciting change.
Pair it with curtain bangs for a very popular combination right now. Or keep it bang-free for a cleaner, slightly more modern look.
Budget tip: A shaggy bob typically costs less than a complex layered cut because the technique is simpler.
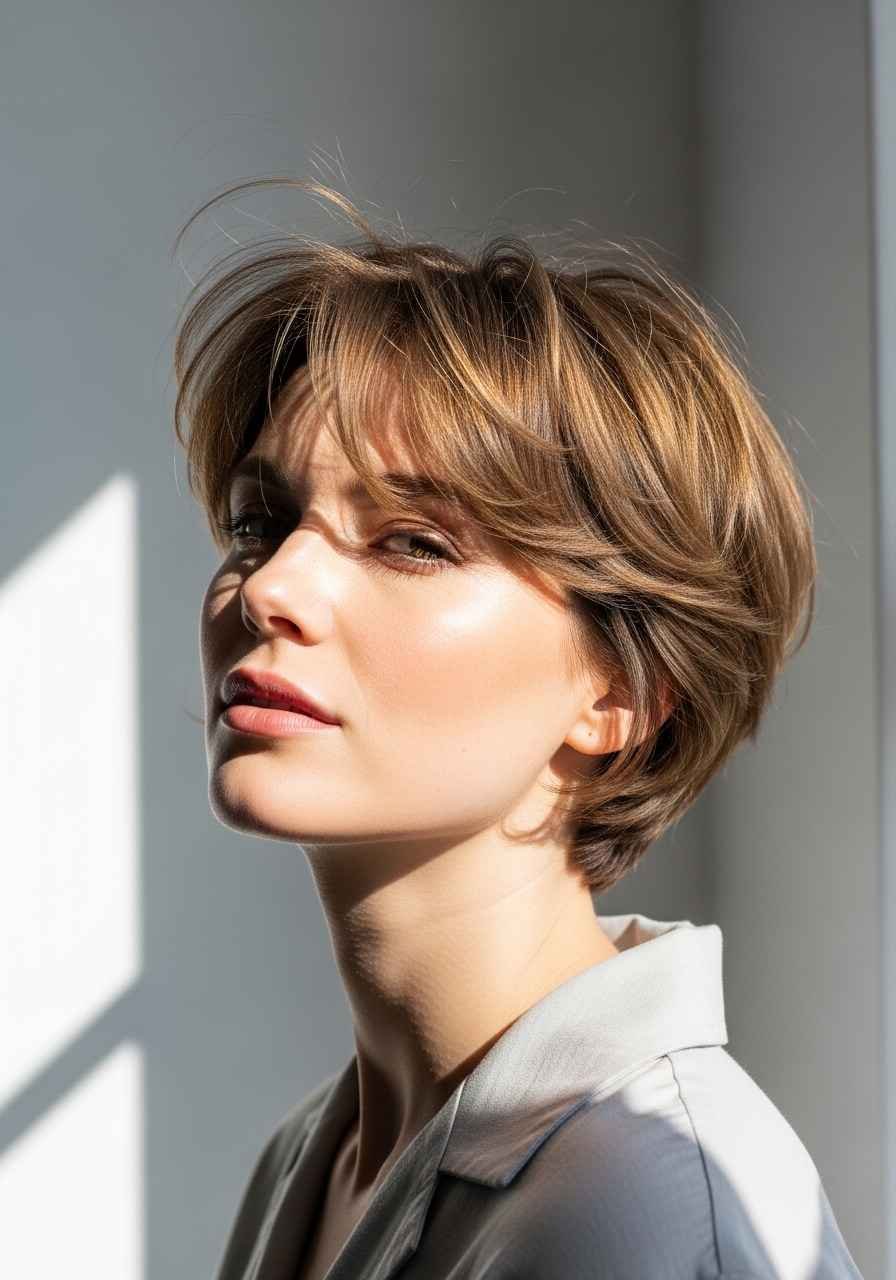
6. The Textured Crop Shag
The textured crop shag is the cool, low-key cousin of the wolf cut. It is short, controlled, and surprisingly easy to style.
This cut keeps volume close to the head. The layers create texture without adding excessive height or drama.
It is a great option for people who want edgy hair that still looks office-appropriate.
To style it, work a small amount of matte clay or paste through dry hair. Separate pieces with your fingers. Do not comb. Combing will destroy the texture.
This look does not need to be perfect. In fact, the messier it looks, the better it tends to work.
For fine hair, this cut adds the appearance of density. For thick hair, it removes bulk without removing length in a drastic way.
Ask your stylist for “piecy texture” when describing what you want. That phrase communicates the separated, defined look clearly.
At home, the best way to touch up the texture is with dry shampoo at the roots and a bit of paste on the ends. Takes about 90 seconds.
The textured crop shag is one of the most wearable edgy haircuts on this list. You can dress it up or down completely depending on the day.
7. The Shag With Undercut
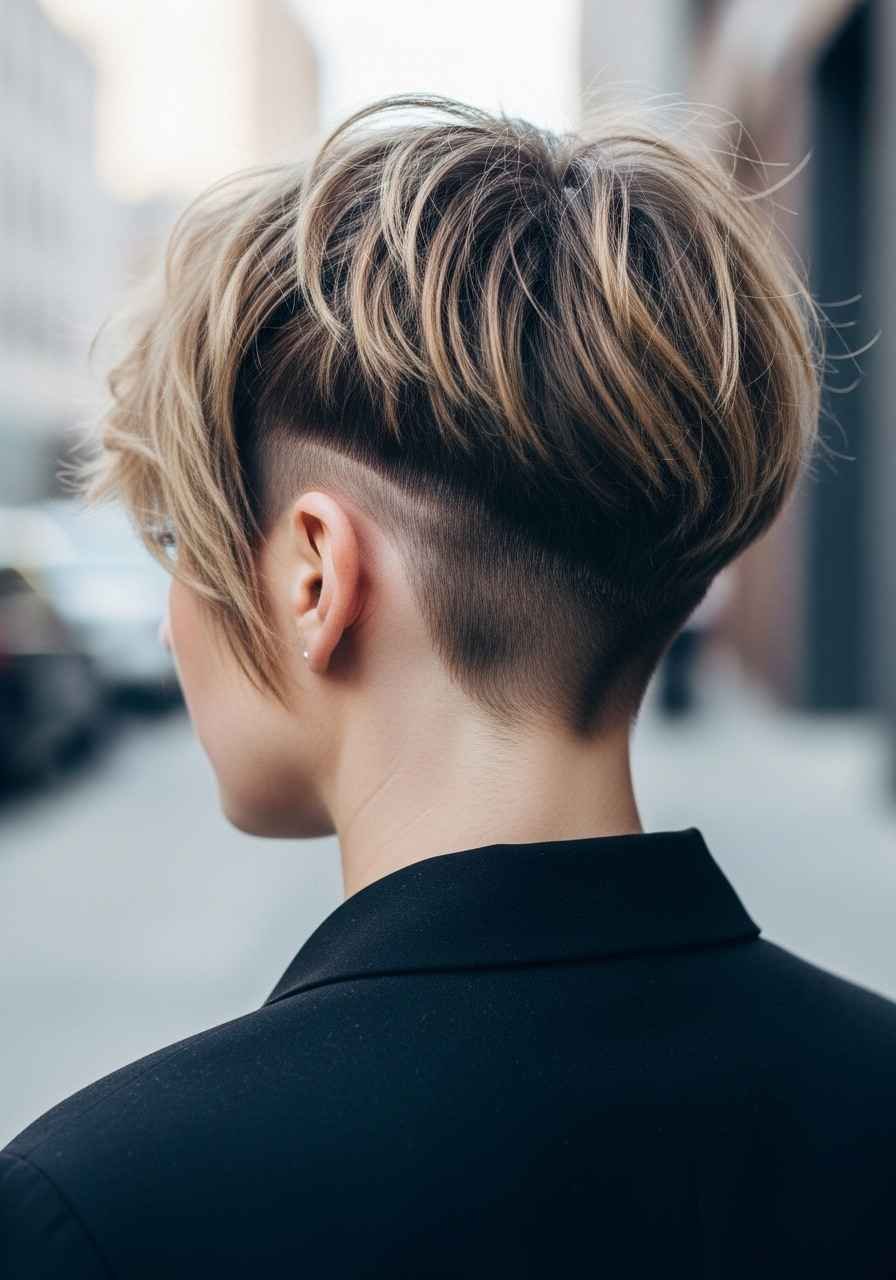
Adding an undercut to a shag creates a hidden surprise element. The top layers fall over it. The shaved or short section underneath peeks out when you tuck your hair or tie it up.
This is one of the most customizable combinations out there. You can have the undercut be razor-thin or go quite high.
Nobody needs to see it if you do not want them to. That is part of the appeal.
The undercut also removes weight from thick hair dramatically. If you have dense hair that feels heavy, this is an instant solution.
At a barbershop, an undercut is usually very affordable. You can often get it done separately from your shag trim to save money.
Maintaining an undercut at home between visits is doable with a small clipper. Keep the same guard size your stylist used.
For styling, wear the shag loose and let it cover the undercut for everyday looks. For evenings or special occasions, push the top section back so the contrast shows.
This combination also looks amazing in color. If you dye your undercut a different shade, the contrast becomes a real statement when the layers part.
8. The Asymmetrical Shag
One side longer, one side shorter. The asymmetrical shag breaks the rules in the best way.
It gives a regular shag a strong, directional energy that feels very intentional and modern.
This is a bold choice. But it is also very flattering because it creates movement that draws attention to your best facial features.
The longer side usually falls toward the cheekbone, which frames the face beautifully. The shorter side exposes the ear and jaw.
To style it, let it air dry and then push the longer side forward. That is all the styling it usually needs.
This cut is higher maintenance than a standard shag because the asymmetry is obvious when it grows out unevenly. Plan on trims every 6 to 8 weeks.
Ask your stylist to keep the difference between both sides subtle the first time. A dramatic difference can feel overwhelming. You can always go more extreme on the next trim.
This works especially well on straight and wavy hair where the length difference is very visible and clean.
Budget-friendly tip: on your trim visits, ask the stylist to just re-establish the asymmetry rather than doing a full restyle. It takes less time and costs less.
9. The 70s Inspired Feathered Shag
The 70s feathered shag is back. It has that Fleetwood Mac, rock goddess energy that feels timeless.
The layers are swept back from the face and styled outward, almost like wings. It is dramatic but wearable.
A round brush and blow dryer are your best friends for this look. Wrap sections outward as you dry. That creates the feathered sweep.
This cut looks best on medium-density hair. Very fine hair may struggle to hold the shape all day without a light-hold hairspray.
A budget alternative to salon products: a basic drugstore round brush and a medium-hold spray from any grocery store will work perfectly well.
The feathered look softens with humidity. If you live somewhere hot and humid, lean into the natural texture instead of fighting it.
Ask your stylist to cut the face-framing layers long enough to sweep back comfortably. Layers that are too short will just stick out instead of sweeping.
For a true 70s vibe, pair this with wide-leg trousers or a flowy top. The hair and the outfit complement each other and the whole look comes together effortlessly.
This is a great choice if you want shaggy hair that feels a little more glamorous than the typical undone version.
10. The Wavy Shag With Bangs
Wavy hair and a shag cut are basically made for each other. The natural wave pattern adds instant texture and volume to every layer.
Adding a short blunt bang gives it an extra punch of personality.
If your hair is naturally wavy, this is the easiest shag to maintain because your hair does most of the styling work on its own.
To enhance your waves, apply a curl cream or wave-enhancing gel while your hair is soaking wet. Scrunch it in gently. Let it air dry without touching it.
The crunch will soften as it dries and the waves will look natural and defined.
Bangs with wavy hair can be a little tricky because the waves may cause them to curl or flip. If that happens, a quick swipe with a flat iron on just the bangs solves it in 30 seconds.
Ask your stylist to cut the bangs very slightly longer than you think you want them. Wavy hair tends to spring up as it dries, making bangs look shorter than expected.
This is a very popular look right now. It photographs beautifully and works for all occasions from casual to semi-formal.
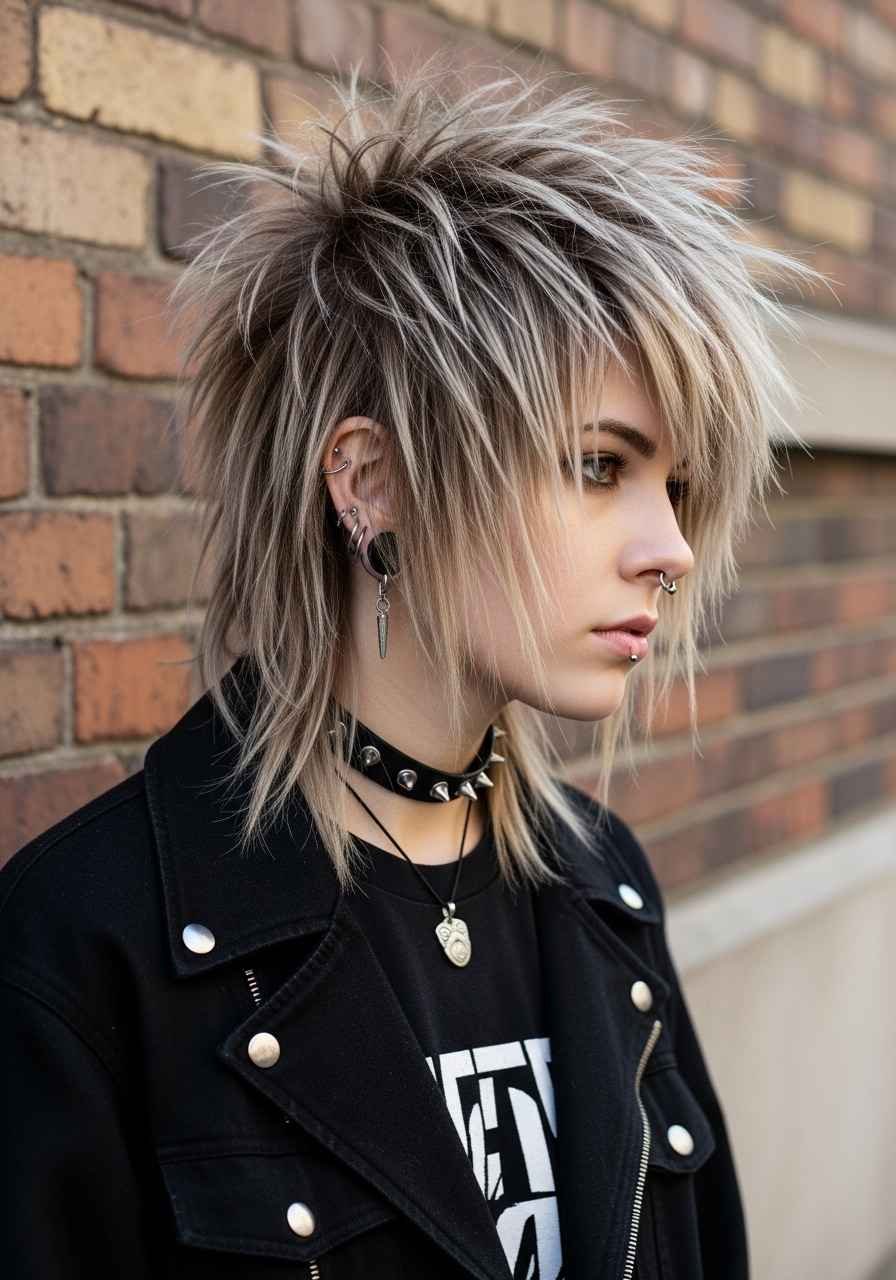
11. The Grunge Shag
The grunge shag is intentionally imperfect. Think Courtney Love or early 90s alt-rock. Choppy. A little rough around the edges.
This is the haircut for people who want to look like they do not care, while actually caring quite a bit.
The grunge shag looks best when it is slightly grown out. New roots, faded color, uneven ends. All of that adds to the vibe.
To style it, rough dry your hair with a towel and add nothing. Or add a texturizing paste and scrunch it in aggressively.
Do not smooth. Do not brush. The messier the better.
This cut pairs perfectly with dark or faded hair color. Grown-out highlights, dark roots with light ends, or a single allover dark shade all work.
The beauty of the grunge shag is that it requires almost zero upkeep. You are actually aiming for it to look like you forgot about your hair.
If you color your hair at home, embrace the grow-out between appointments. It only adds to the character of this cut.
Budget-wise, this is one of the cheapest looks to maintain. Less trips to the salon, fewer products, and a style that improves with neglect.
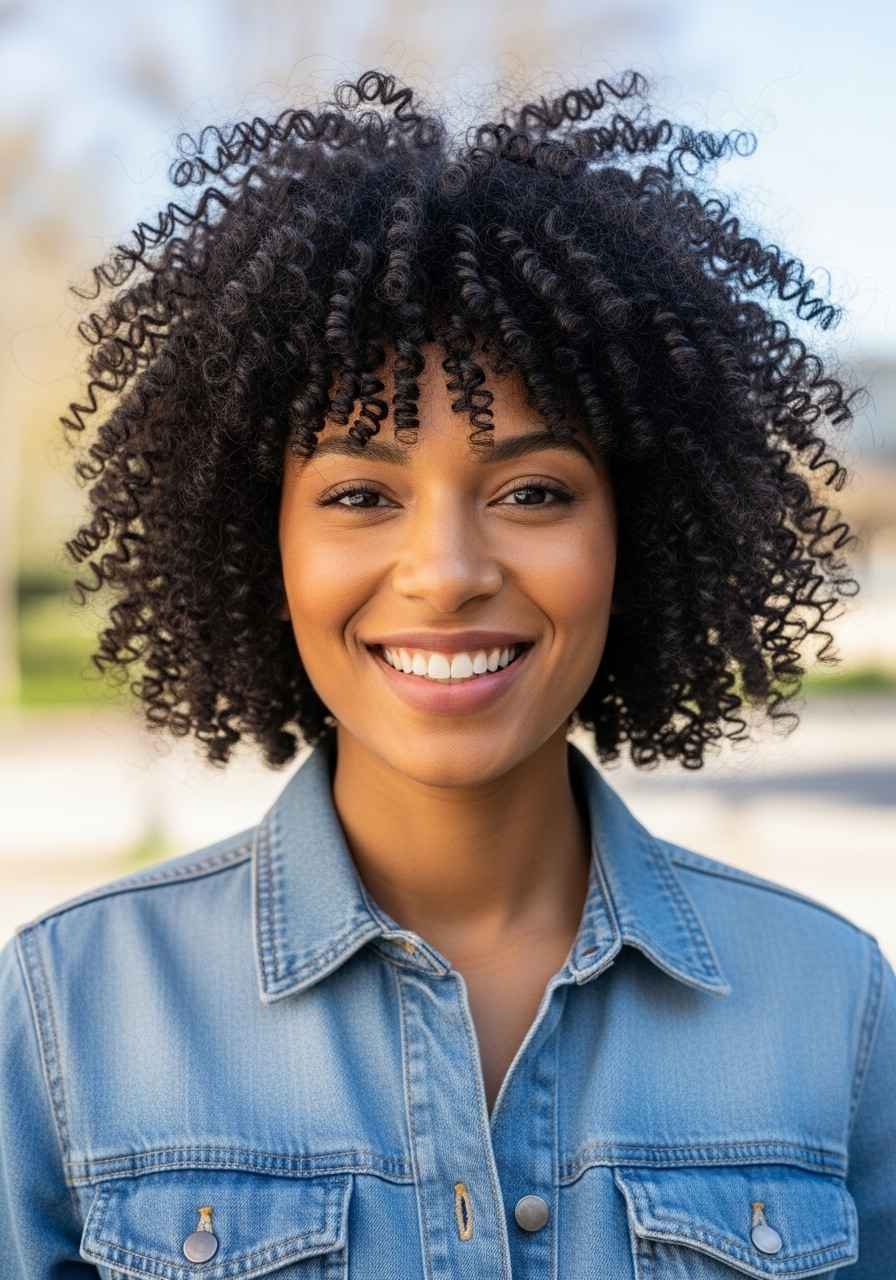
12. The Curly Short Shag

Curly hair and shag cuts are a match that makes so much sense. The natural curl pattern creates the texture and movement that straight-haired people spend all morning trying to achieve.
A short curly shag removes bulk and weight while letting each curl spring up and define itself.
Ask for a “dry cut” if your curls are tight. Cutting curly hair while dry lets the stylist see exactly how each curl falls and layer the cut accordingly.
At home, the curly girl method works beautifully with this cut. Use a sulfate-free shampoo, a rich conditioner, and a curl cream or gel. Scrunch while soaking wet. Diffuse or air dry.
No brushing. Brushing curly hair after it is dry creates frizz, not texture.
This cut is liberating for people with curly hair who have felt limited in styling options. A shag gives curls shape and intention.
The layers help curls spring up instead of pulling down under their own weight. This is especially helpful for looser wave patterns.
Budget tip: curly hair does not need expensive salon products to look good. Many drugstore curl creams are excellent. Experimentation is free.
13. The Shag With Micro Bangs
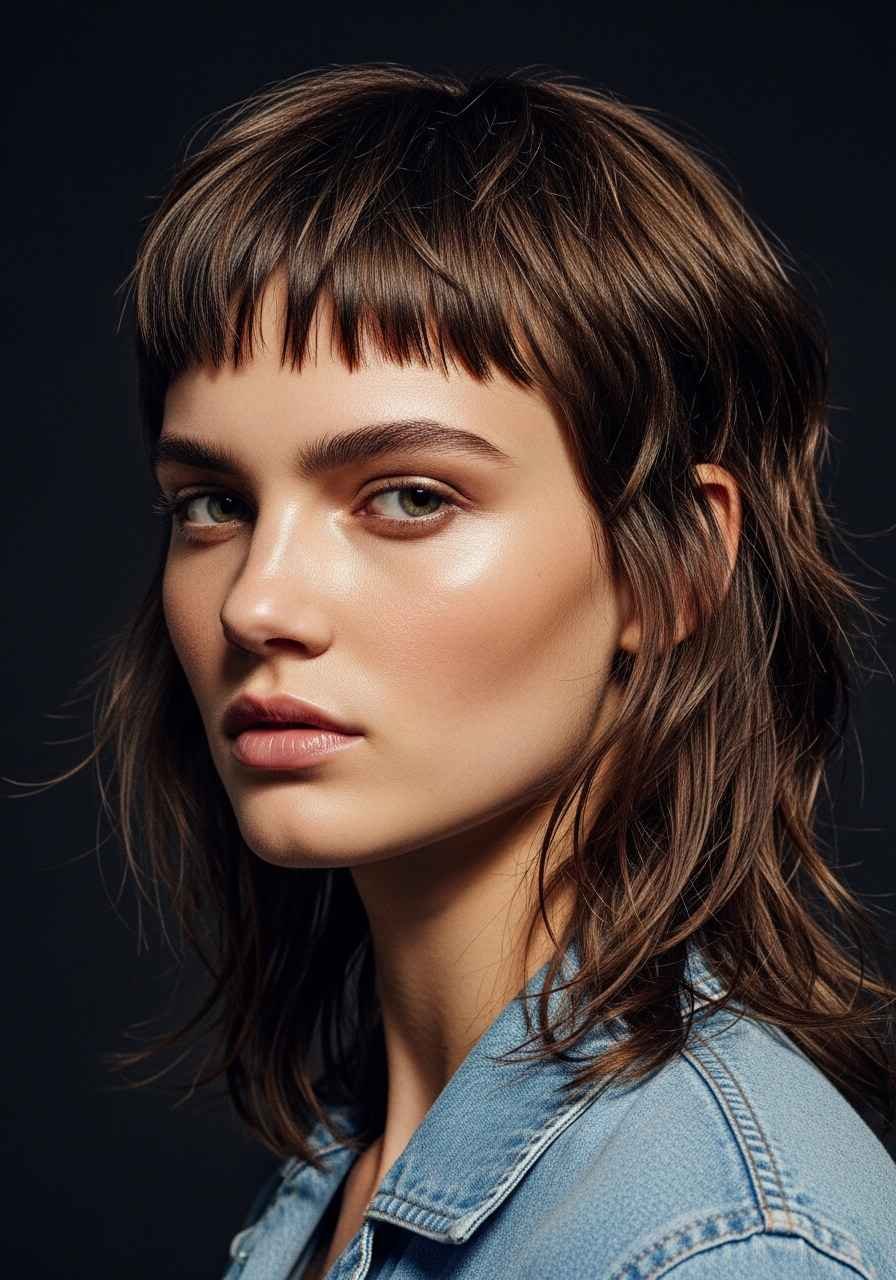
Micro bangs are not for everyone. They sit very high on the forehead, just below the hairline. They are short, blunt, and unapologetically bold.
Paired with a shag, they create one of the most striking haircuts possible. It reads as completely intentional and very cool.
This is a commitment. Micro bangs change your face significantly. Look at photos before you commit.
The good news is that they grow out relatively quickly. In about two months, they become a standard short bang that is much easier to wear.
To style micro bangs, just push them straight down after washing. They are so short that they do not have room to misbehave much.
If they start lifting or separating, a tiny bit of pomade on one finger smoothed across the surface solves it instantly.
This look works best on oval and round face shapes. Long face shapes may feel like micro bangs cut the face too severely.
Ask your stylist to start them slightly longer than you think you want. You can always go shorter. You cannot go back once they are cut.
This haircut is the most avant-garde option on this list. If you want a conversation starter, this is it.
14. The Low-Maintenance Shag

Not everyone wants a haircut that requires a 20-minute styling routine. The low-maintenance shag is designed for wash-and-go living.
The cut itself does all the work. The layers fall into place naturally as hair dries.
The secret is asking your stylist to work with your natural texture, not against it. If your hair dries wavy, ask for a cut that enhances waves. If it dries straight, ask for a cut that adds volume at the roots.
At home, towel dry gently, add a lightweight leave-in conditioner or a spritz of sea salt spray, and go about your morning. Your hair styles itself.
This works especially well for people with a little natural wave or texture. Completely straight and very fine hair may need a quick blowout for best results.
The low-maintenance shag also grows out well. Because it is not a precision cut, a few extra weeks between appointments is not noticeable.
Products to keep on hand: a good sea salt spray, a lightweight leave-in, and dry shampoo for day two or three hair. That covers everything.
Total spending for this routine could be under $25 at a drugstore. It is the most budget-friendly option on this list by a significant margin.
15. The Shag With Color Melt
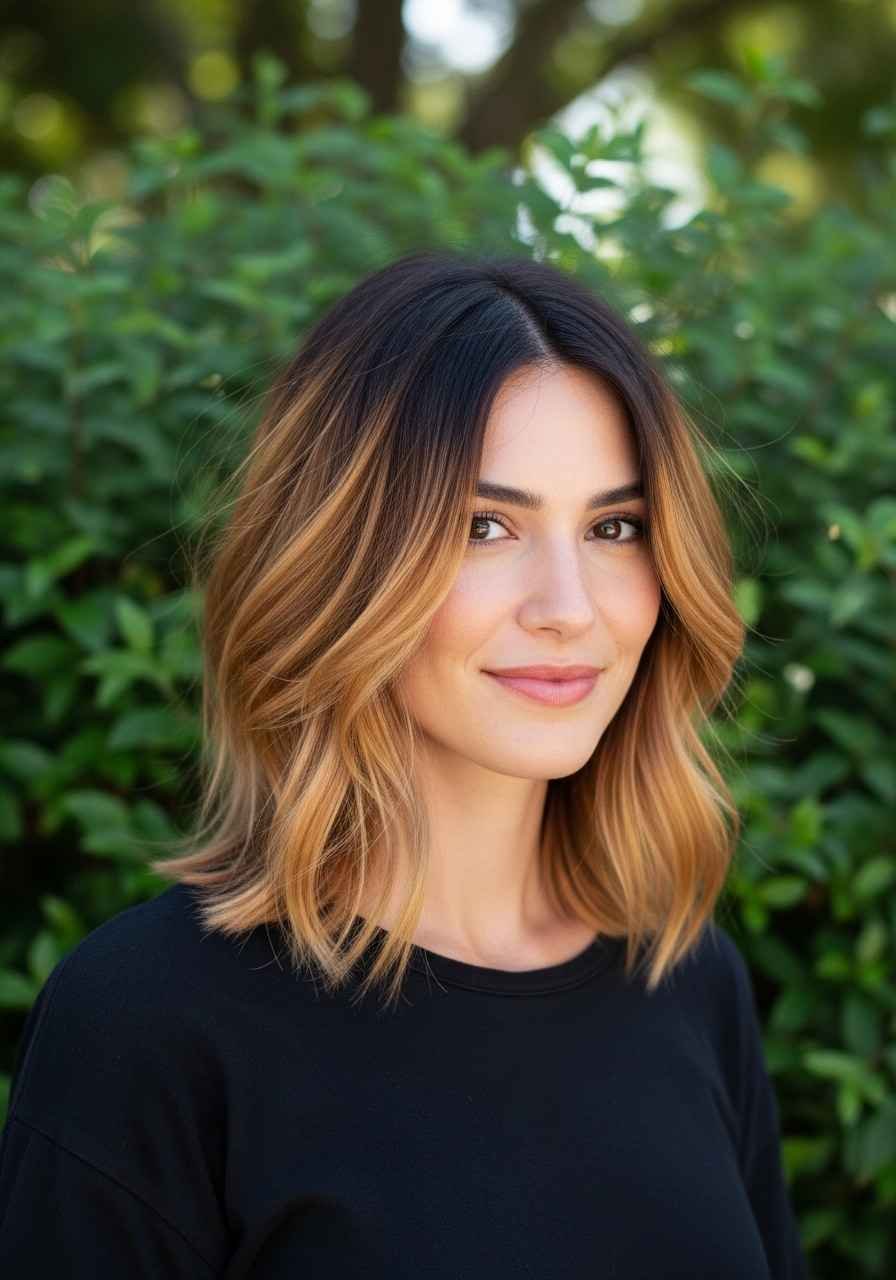
A color melt transforms a shag from a great cut to a complete look. The color blends from one shade to another across the layers, creating a dimensional, almost natural effect.
The shag is the ideal cut for color melts because the layers show off the different tones. You see the full color story with every movement.
Popular combinations right now include dark brown to caramel, black to chocolate, and deep auburn to copper. Soft, warm, and natural-looking.
At a salon, color melts are an additional service that adds to the cost. But they last much longer than a standard single-color dye because the grow-out blends naturally.
At home, color melts are possible with box dye. Apply a lighter shade only to the mid-lengths and ends. Leave the roots your natural color or a darker shade. Blend where they meet with a brush.
Watch a tutorial first if you are new to DIY coloring. It is simpler than it sounds.
Use a color-safe shampoo to preserve the tones. Purple or blue toning shampoo once a week keeps brassy tones in check if you have any lightened ends.
The color melt plus shag combination works on every hair length in the short category, from pixie shag to shaggy bob.
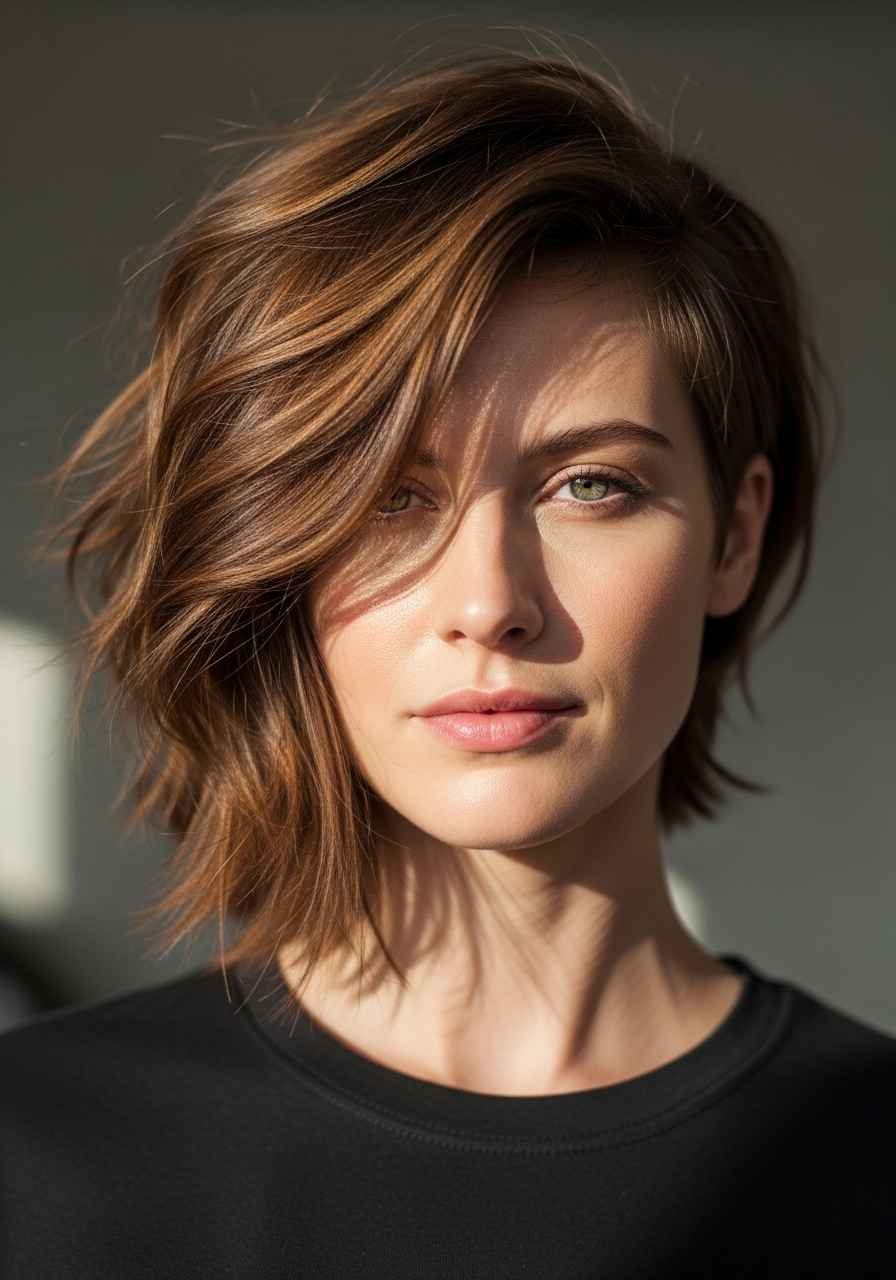
16. The Side-Swept Shag
The side-swept shag plays with direction. Instead of layers falling symmetrically, everything sweeps to one side.
It creates a dramatic, asymmetric look without actually cutting the hair asymmetrically. You get the drama with an easier grow-out.
Styling this is simple. After washing, part your hair on the side and push all the layers in that direction while damp. Let them dry that way.
You can reinforce the sweep with a light-hold hairspray once dry. Or use a flat iron to add a slight bend in the direction of the sweep.
This works on almost every hair length in the short category. Shaggy bobs, pixie shags, and choppy crops all look great with a side sweep.
The side-swept style is a great way to cover a larger forehead or bring attention to a strong cheekbone. The swept layers create a diagonal line that is very flattering.
At a salon, ask for face-framing layers that are specifically cut to sweep in your preferred direction. Not all stylists do this automatically.
For evening occasions, a bobby pin or barrette holding the swept layers in place adds a polished finishing touch to an otherwise casual cut.
17. The Shag With Disconnected Layers
Disconnected layers mean there is a visible, intentional gap between different sections of the cut. Unlike blended layers that flow seamlessly, disconnected layers create contrast.
It is an edgier, more architectural approach to the shag.
This look is for people who want their haircut to make a statement. It is very modern and very intentional-looking.
The contrast between very short pieces and longer sections creates a multi-dimensional effect that catches the eye.
Ask your stylist specifically for “disconnected layering” and show a photo. It is a specific technique and not all stylists offer it unprompted.
Styling this cut requires a product with separation ability. A matte paste or fiber wax works well. Apply to dry hair, work through piece by piece, and let the layers fall where they naturally want to.
Do not brush this cut. Brushing blends the layers together and defeats the entire purpose.
This cut is slightly higher maintenance in terms of styling because you need to deliberately separate and define the pieces each day.
On the positive side, the disconnection means uneven grow-out is less obvious. You have more time between appointments before it looks like it needs a trim.
18. The Blunt Shag
The blunt shag sounds like a contradiction. A shag is usually all about uneven, textured ends. But adding a clean, blunt perimeter line to the outside of the cut creates a really interesting tension.
The inside of the cut is layered and textured. The outside edge is clean and precise.
This combination gives you the best of both worlds. Edgy texture with a polished finish.
It is a great option for workplaces that skew more conservative but where you still want some personality in your haircut.
The blunt perimeter holds up well as the cut grows out. The outer line remains clean even when the interior texture starts to soften.
For styling, a quick blowout smooths the perimeter while you can still scrunch or tousle the interior for texture. Two minutes with a round brush at the ends makes a real difference.
Ask your stylist to trim the outside line straight before texturizing the interior. Some will do it in the opposite order. The sequence matters for precision.
On fine hair, the blunt perimeter adds a visual weight that makes hair look thicker. This is one of the rare cuts where fine-haired people actually benefit from the clean line.
19. The Piece-y Shag
The piece-y shag takes the textured shag one step further. Individual strands are separated and defined, almost like each section has its own personality.
It looks like very controlled chaos. Every piece is intentional.
This look requires a product with hold and separation ability. A light-hold gel, a glossing cream, or a fiber wax all work.
Apply to damp or dry hair. Separate pieces with your fingers. Pull individual sections apart to create definition. Step back and assess. Add a little more product only where needed.
The pieced look does not survive humidity well. If you live somewhere very humid, a light-hold hairspray over the top helps set the pieces in place.
This style looks particularly striking on dark hair, where you can see the separation clearly. On lighter hair, a slightly glossier product helps define the pieces against the overall color.
At home, practice makes perfect. The first time you try to create this look it might not be exactly right. By the third attempt, you will have the hang of it.
Keep styling time short. Overworking the product creates a greasy look instead of the separated, matte finish you want.
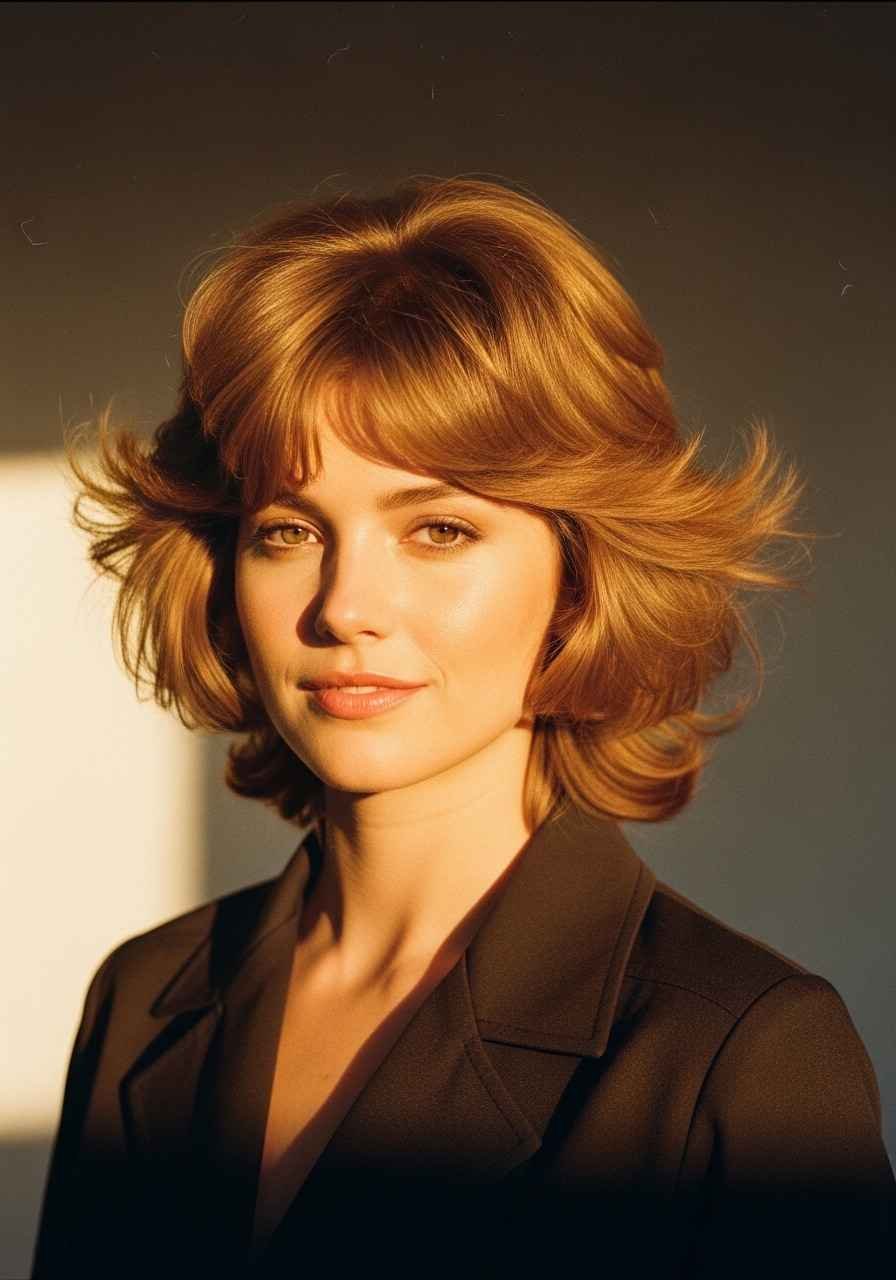
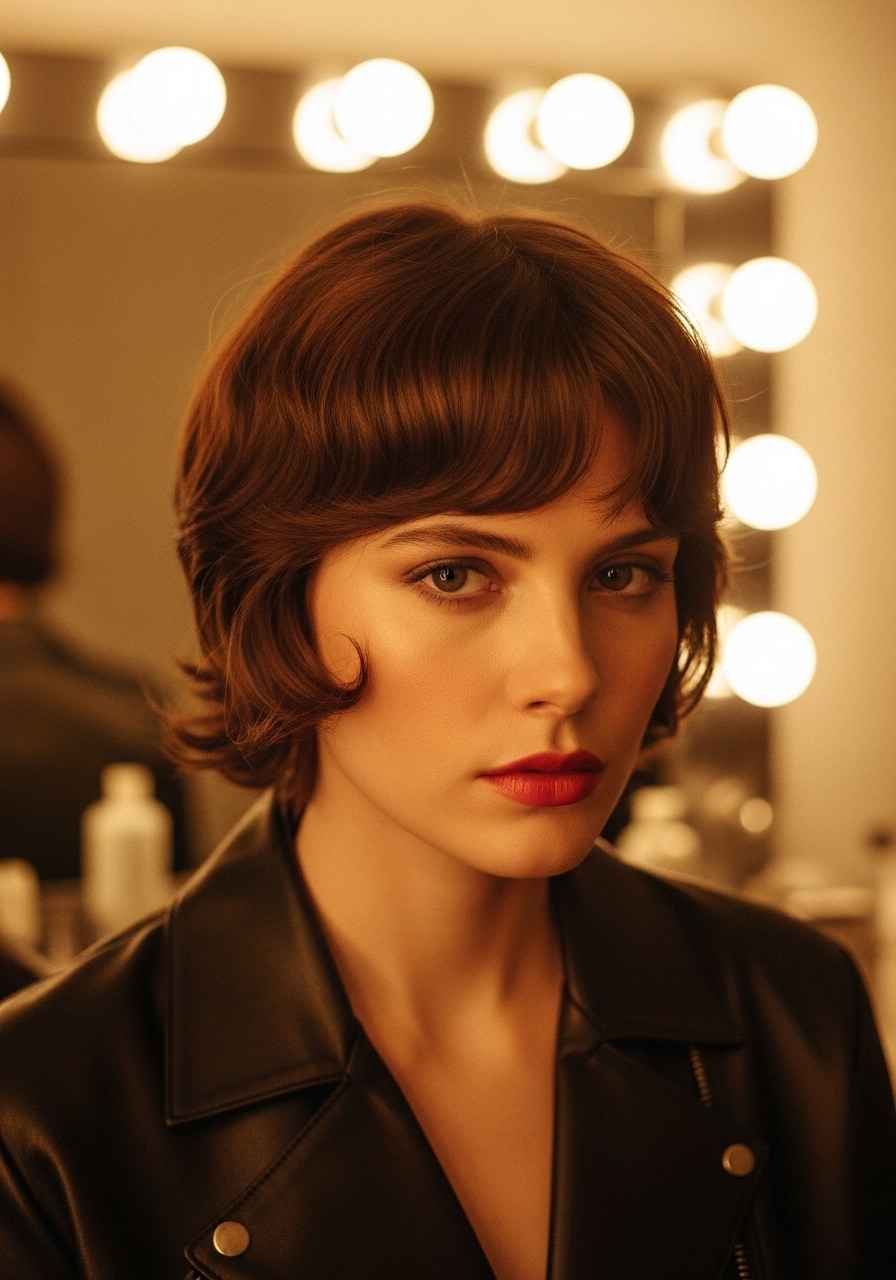
20. The Vintage Shag

The vintage shag pulls from old Hollywood glamour but keeps the roughness of a modern shag. It is polished chaos.
Think Brigitte Bardot meets the Ramones. Soft set waves inside a choppy, layered cut.
To create this look at home, use pin curls or a curling wand on the individual layers. Set them, let them cool, then break them up with your fingers instead of a brush.
Breaking up the curls keeps them looking soft and effortless rather than overly done.
The vintage shag suits warm hair colors especially well. Think auburn, honey blonde, rich brown, or warm black. Cool tones work too, but warm tones amplify the retro quality of the cut.
A light-hold hairspray sets the style without making it look stiff. Apply from a distance for an even, airy coat.
This is one of the most photogenic cuts on this list. It catches light beautifully and photographs incredibly well at events and gatherings.
Ask your stylist to keep the layers soft and rounded rather than razor-sharp. Softer layers are easier to wave and style in this romantic way.
For a budget-friendly version of this look, foam rollers from a drugstore work just as well as a professional curling wand for creating the base waves.
21. The Scene-Inspired Shag
The scene shag brings back early 2000s energy but with a more grown-up, refined execution. Heavy layers, dramatic side parts, and a slightly theatrical volume at the crown.
This is unabashedly fun hair. It is meant to be noticed.
The scene shag involves layers that are more extreme in their variation. Very short pieces at the crown, longer dramatic layers falling down.
To style it, flat iron sections to smooth them, then use your fingers to push the crown up and back. A little teasing at the roots adds lift that the whole look is built on.
A strong-hold hairspray keeps the volume in place through the day. Apply before and after styling.
This cut requires more frequent trims than some others because the dramatic layers look less intentional as they grow out at different rates.
For people who grew up in the scene era, this is a fun nostalgic homage. For younger people discovering it for the first time, it feels entirely original.
Budget tip: this cut involves significant layering which means a more involved salon appointment. Bring photos and be specific about the length variation you want to save back-and-forth time.
22. The Natural Texture Shag
The natural texture shag celebrates whatever your hair does on its own. No heat. No product overload. Just your natural pattern enhanced by a great cut.
This is the most honest version of the shag. It works with you instead of against you.
The most important thing is asking for a stylist who specializes in your hair texture. A stylist who regularly works with curly, coily, or wavy hair will cut it differently than someone who mostly works with straight hair.
A good texture-aware cut can completely change how your natural hair behaves. Many people spend years fighting their texture only to discover a good cut resolves everything.
At home, the simpler the routine the better for natural texture shags. A gentle cleanser, a rich conditioner, and one styling product is usually enough.
Resist the urge to add more product when things are not working. Often the issue is technique rather than product quantity.
This style looks incredibly healthy and full of life because it reflects your hair in its natural state. No damage from heat. No coating from heavy products.
The natural texture shag is a genuine long-term investment in hair health. It is also one of the most individually unique haircuts on this list because no two people’s natural texture is the same.
23. The Shag With Baby Lights
Baby lights are extremely fine highlights that look like natural sun-lightening rather than traditional foil highlights. On a shag, they add a gorgeous dimensional quality to the layers.
Every time you move your head, different tones catch the light. The effect is subtle but striking.
Baby lights are a salon-only service. The technique requires precision that is very difficult to replicate at home. But they last a long time, which spreads the cost over many months.
The most natural-looking approach is to place baby lights only in the top layers and around the face where the sun would naturally lighten hair first.
Maintain them with a color-safe shampoo and a weekly toning treatment if needed. This keeps the highlights fresh between salon visits.
For the most budget-friendly version of this idea, ask for just face-framing baby lights instead of a full head. It costs less and still creates the luminous framing effect around your face.
On dark hair, baby lights show up as soft warmth rather than a dramatic contrast. On medium brown hair, they create that natural sun-kissed look immediately.
Pair baby lights with the choppy shag or the natural texture shag for the most effortless, summer-ready combination on this list.
24. The Edgy Mullet Shag
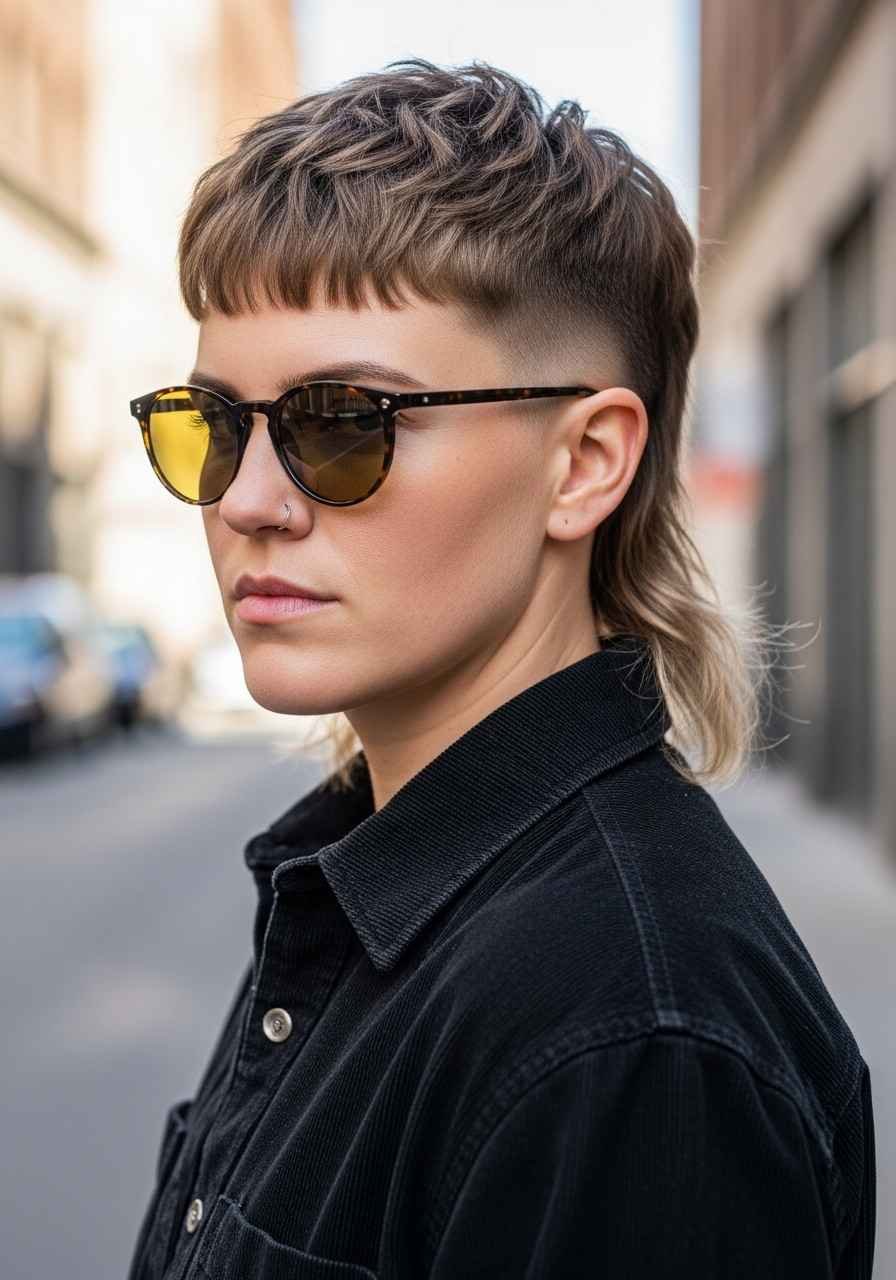
The mullet is back. But the modern version is not what your dad wore in 1987. It is sharper, more layered, and undeniably cool.
The mullet shag combines the cropped front and sides of a mullet with the layered, textured quality of a shag. The result is surprisingly wearable.
The length at the back does not need to be extreme to qualify as a mullet shag. Even a subtle difference between front and back creates the silhouette.
From the front, this cut looks like a short textured crop. From the side and back, you see the length. The surprise of it is part of the appeal.
Ask your stylist to keep the back layers soft and textured rather than blunt and heavy. A blunt back on a mullet reads as old-fashioned. Layers make it modern.
To style the front, a matte product gives it that cool, intentional look. The back can be left to air dry naturally.
This cut is especially popular right now in alternative and creative communities. It is a strong statement cut that signals confidence.
For a more subtle version, keep the length difference between front and back to about two inches. You get the shape without going full rock star.
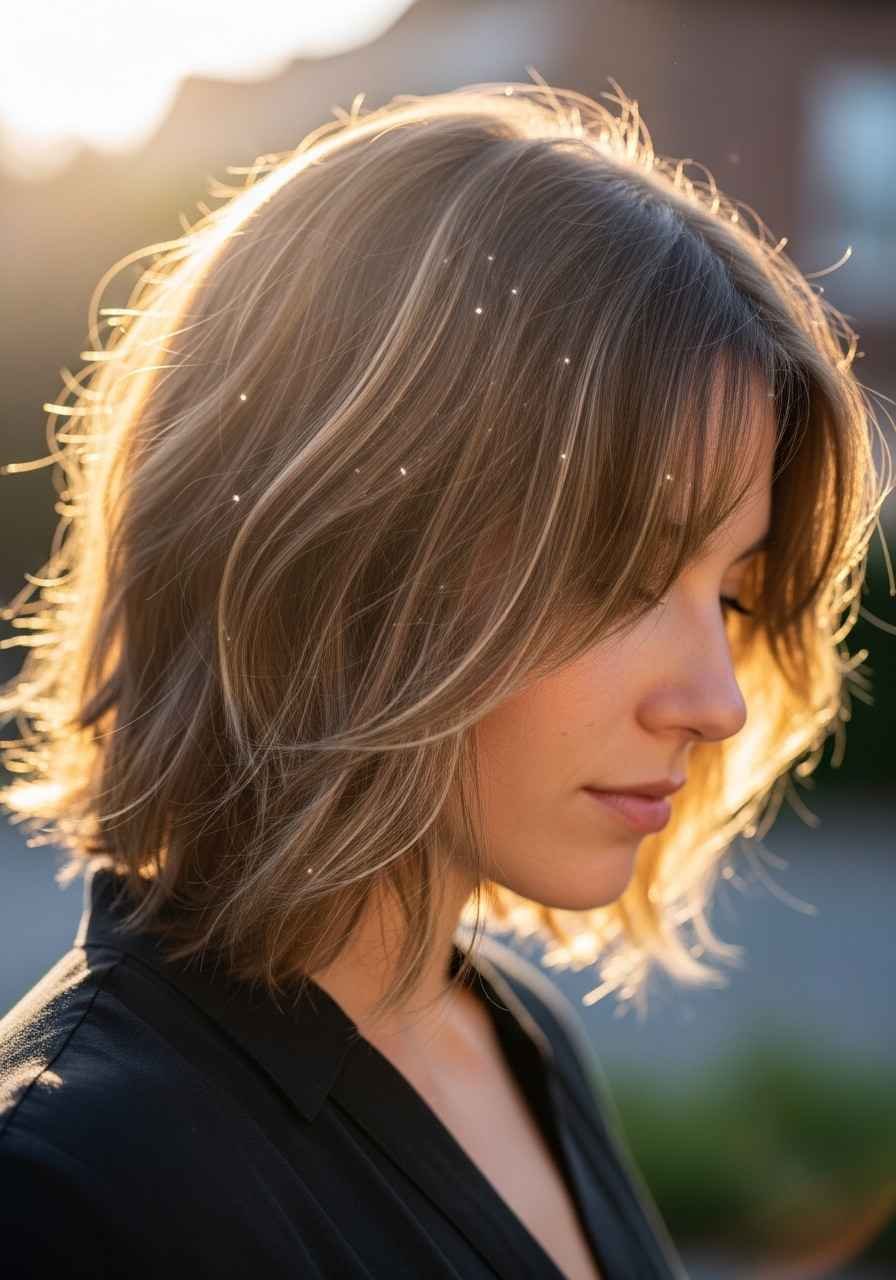
25. The Sleek Shag
Not every shag needs to be deliberately messy. The sleek shag blows out the layers to a smooth finish while keeping the layered shape visible through the shine.
It is the most polished version of the shag available—Boardroom-ready with personality.
The shape of the cut is what makes it a shag. Even when you smooth the texture, the layer structure still shows through the silhouette.
To achieve this at home, use a medium-sized round brush and a blow dryer with a concentrator nozzle. Work section by section from the nape upward. Keep the brush moving and follow with the dryer for a smooth result.
Finish with a light serum or glossing spray for shine. Apply to dry hair after styling is complete.
This style is excellent for hair that naturally dries wavy, but you prefer a smoother look. The shag layers are already cut in, so they work with the blow-dry rather than against it.
For fine hair, a volumizing mousse applied before blow drying adds body that the cut alone cannot fully create.
The sleek shag is one of the best examples of how the shag is not just one look. It is a foundation that you style differently depending on the occasion.
26. The Bold Color Shag
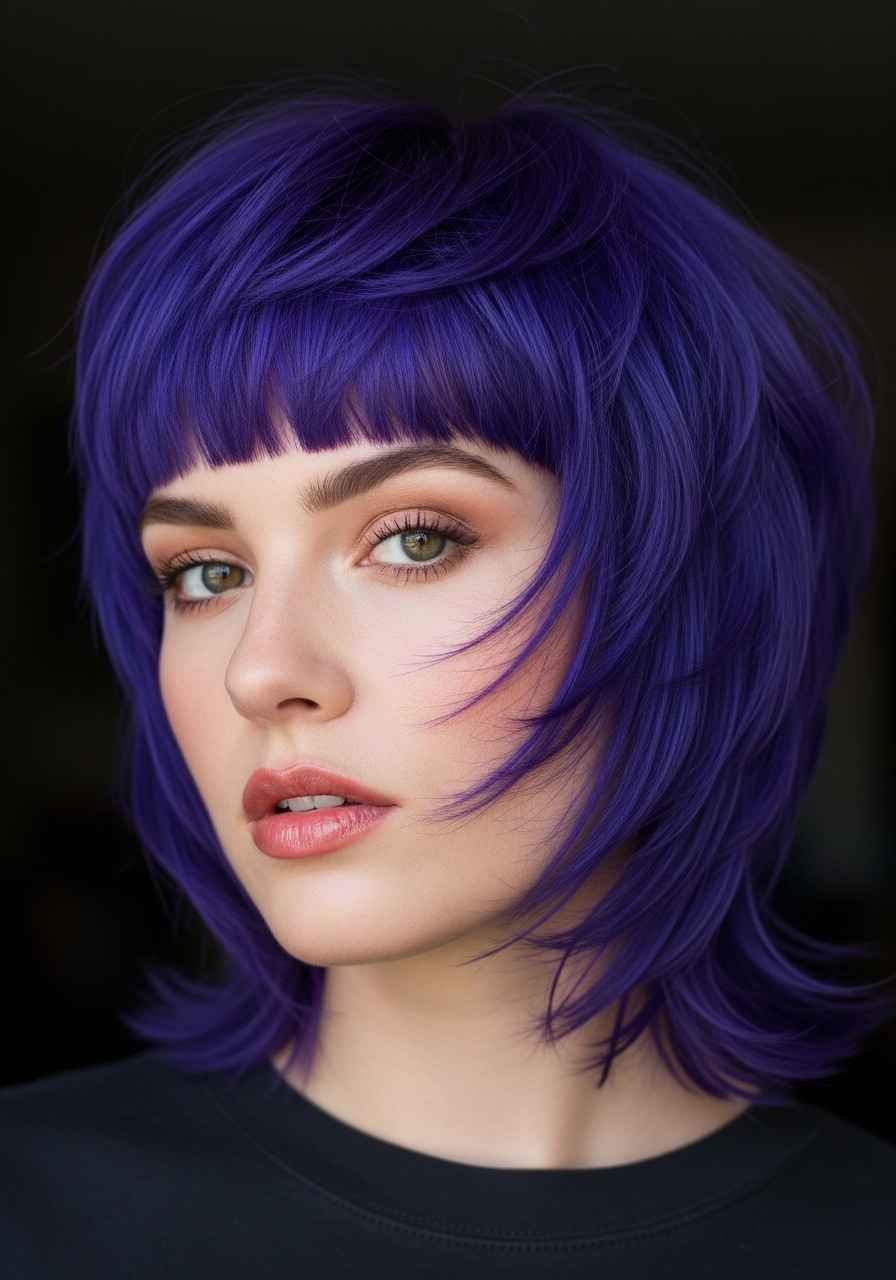
A bold color takes any shag cut and turns the volume up entirely. Think deep violet, cobalt blue, cherry red, or forest green.
The shag’s layers catch the color differently in different light. The visual dimension that layering creates is especially beautiful with saturated color.
Bright colors require bleaching on darker hair first, which adds time and cost. But the result is worth it.
At home, bold colors from brands like Arctic Fox or Manic Panic work well on pre-lightened hair. They are semi-permanent, meaning they gradually fade and do not damage hair the way permanent color can.
The fade of a bold color on a shag actually looks gorgeous. The color lightens gradually, creating a built-in color melt effect over time.
Maintain bold color with a color-safe shampoo in cold water only. Hot water opens the hair cuticle and bleeds the color out quickly.
Deep conditioning once a week is important when hair has been lightened for bold color. Keep the hair healthy and the color will last longer and look better.
This is the most maximalist option on this list. If you want your hair to be the loudest thing about you when you walk into a room, the bold color shag is exactly it.
Make Your Move
Short shaggy haircuts offer something genuinely rare in the world of hairstyling. They are adaptable, personal, and endlessly variable. From the sleek and polished to the deliberately rough-around-the-edges, from the quiet natural texture version to the full-volume wolf cut statement, there is a shag on this list for every personality and lifestyle.
The best part is that none of these looks require an enormous budget or a complex daily routine. Most shag styles are designed to work with your natural hair rather than demanding you fight against it every morning.
Pick the version that resonates with you right now. Bring a photo to your next appointment. Talk to your stylist about what your hair actually does naturally and which version of the shag will work best with your texture, thickness, and face shape. Start there. You can always go bolder on the next cut.
Leave a Reply