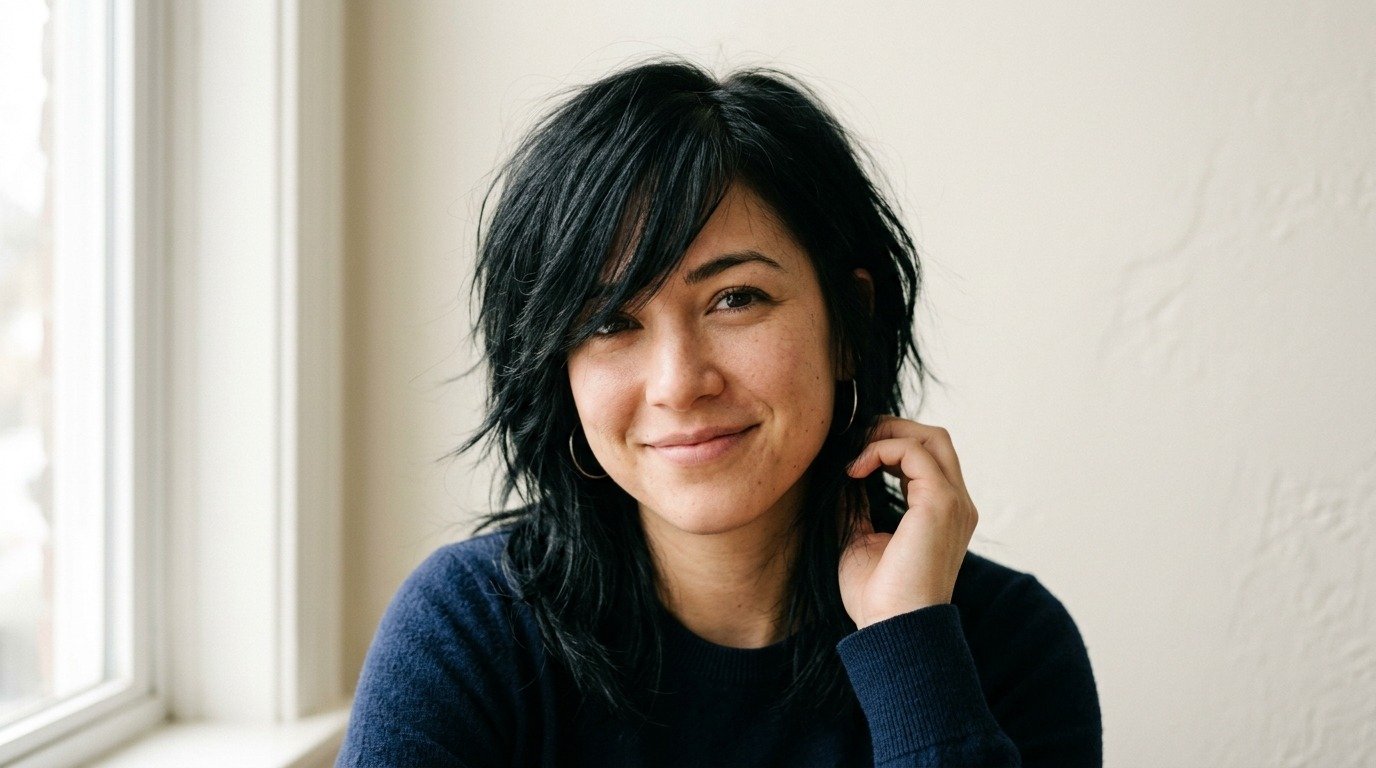
Emo scene hairstyle ideas are loud, layered, and full of personality, and it never really went out of style. It mixes sharp cuts, bold color, and messy texture into a look that feels personal rather than polished. Whether you want a small update or a full transformation, there is a version of this style that fits your hair length, budget, and comfort level. This list walks through simple, affordable ways to bring emo energy into your everyday look, from color and cutting choices to styling tricks you can try at home. No expensive salon visits required, just a bit of confidence and the right tools. If you’re also exploring Bridesmaid Hairstyle Ideas, soft curls, elegant updos, braided accents, and half-up styles can create a beautiful and coordinated look that complements the wedding theme while allowing each bridesmaid’s personality and hair texture to shine.
1. Choppy Layers With Long Side Swept Bangs
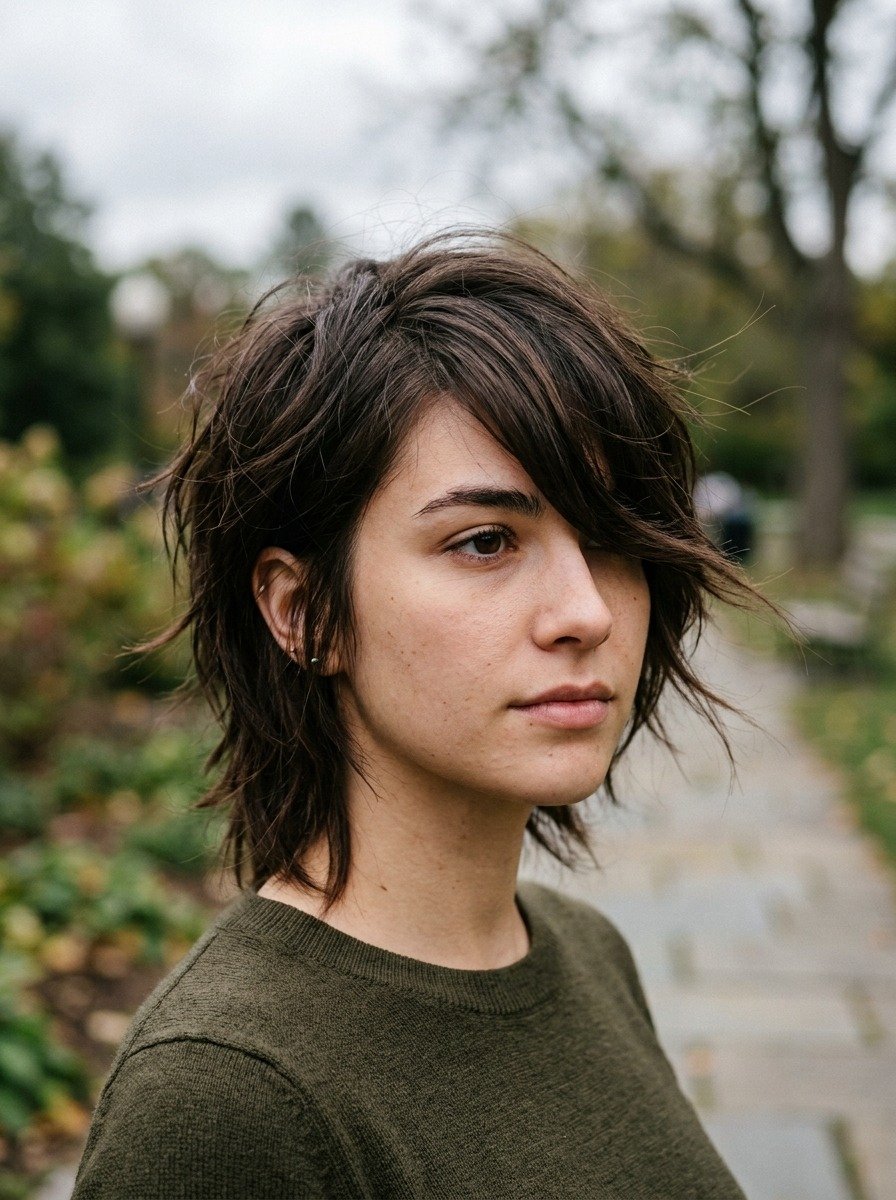
Choppy layers are the backbone of classic emo hair. They add movement without needing much length. The long side swept bang is the signature piece that frames the face and adds a bit of mystery. You can ask your stylist for razor cut layers, which create a rougher, more textured edge than regular scissors. If you are cutting at home, start small. Trim tiny sections at an angle instead of straight across. This keeps the shape soft instead of blocky. A cheap pair of texturizing shears from a beauty supply store works well for beginners. Style with a small amount of pomade or gel, then blow dry with your fingers to separate the pieces. Avoid brushing it smooth, since the point is texture, not sleekness. If you want a low cost trial run before committing, clip in bangs are a great option. They let you test the look for a few dollars before any actual cutting happens. This cut works on almost any hair type and length, making it one of the easiest entry points into the style.
2. Jet Black Base With Colorful Streaks
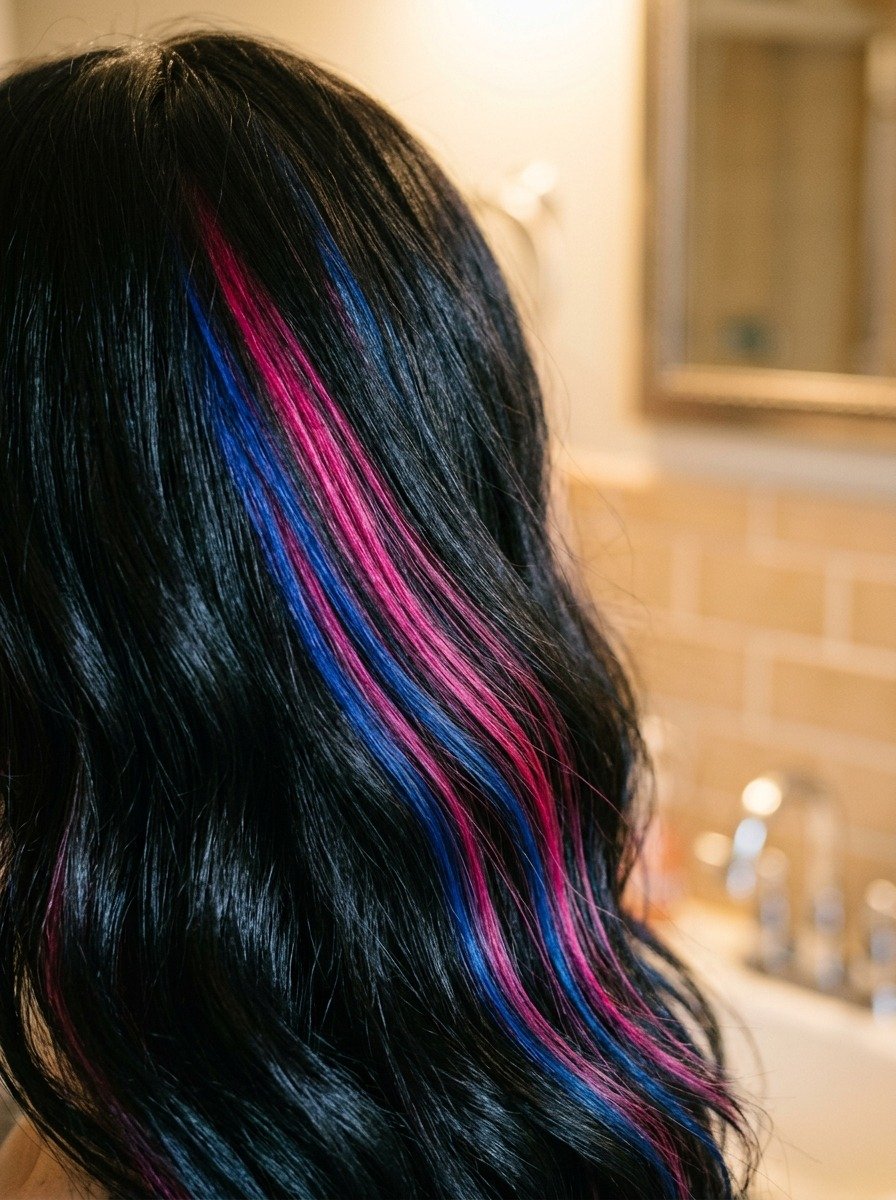
A solid black base gives you a blank canvas for bold color accents. It also makes any streak color pop harder against the darkness. You do not have to color your whole head to get this effect. Pick a few small sections near the front or sides and apply semi permanent dye there instead of your whole head. This saves money and keeps damage low. Box dye brands made for dark hair work fine for the black base, and semi permanent colors like pink, blue, or purple wash out over a few weeks if you want to switch things up later. Use bleach only on the streak sections, not the entire head, to keep costs and damage manageable. A basic bleach kit and a semi permanent dye tube together usually cost less than one salon color service. Always do a strand test first so you know how the color will look before committing. Deep condition weekly to keep the bleached sections from feeling dry or brittle. This combination gives a dramatic effect with a small amount of product and effort.
3. Asymmetrical Bob With Undercut
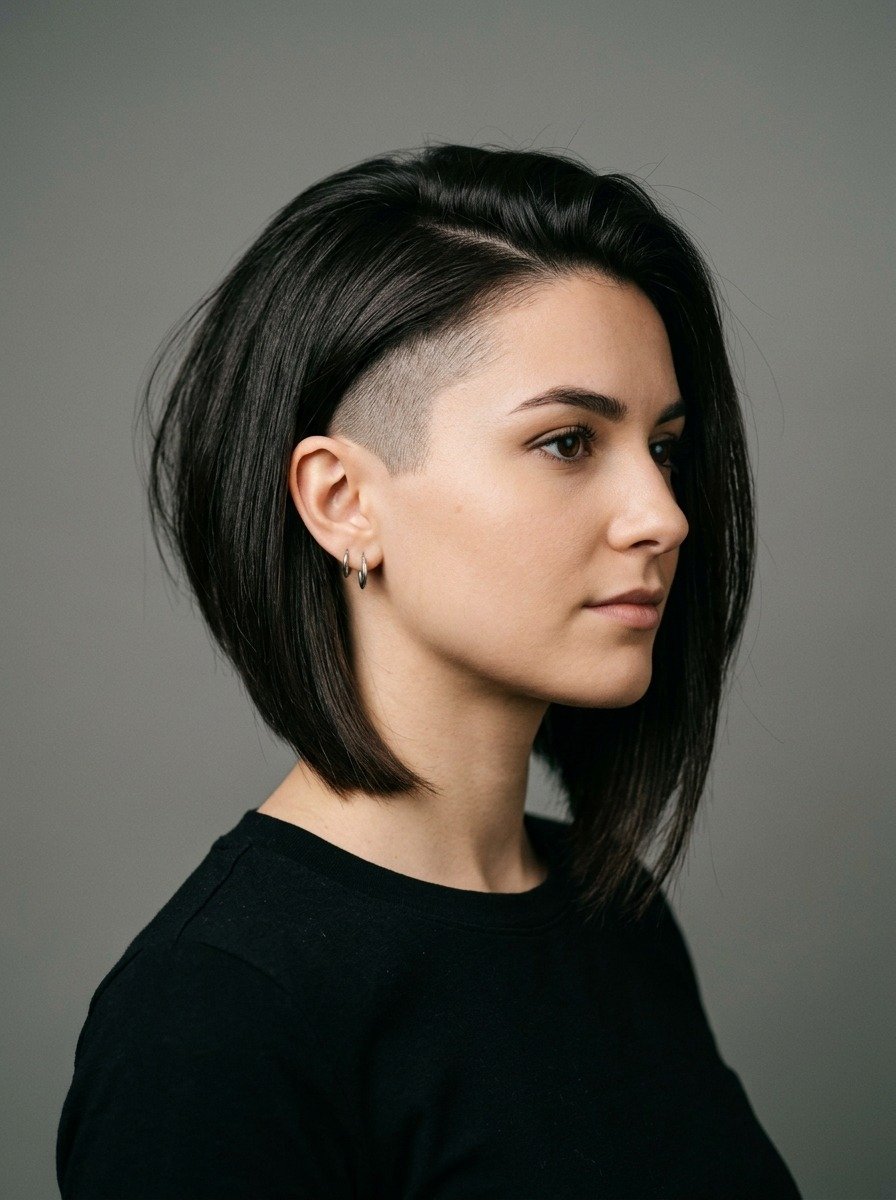
An asymmetrical bob mixed with an undercut gives a sharp, modern take on emo styling. One side stays longer while the other gets clipped short or shaved. This creates contrast and makes the haircut feel intentional rather than just short hair. You can maintain the undercut yourself between salon visits using a basic hair clipper with a guard attachment. A number two or three guard keeps things tidy without going too short. Trim every few weeks to keep the shape sharp. The longer side can be left straight or given loose waves for extra texture. Style the shorter side flat against the head or texturized with a small dab of clay for a piecey look. This cut works well for people who want something bold but still manageable for work or school. It also grows out gracefully, so you are not stuck if you decide to change direction later. A cheap clipper set pays for itself after just a couple of touch ups compared to salon undercut maintenance.
4. Deep Side Part With Volume on Top
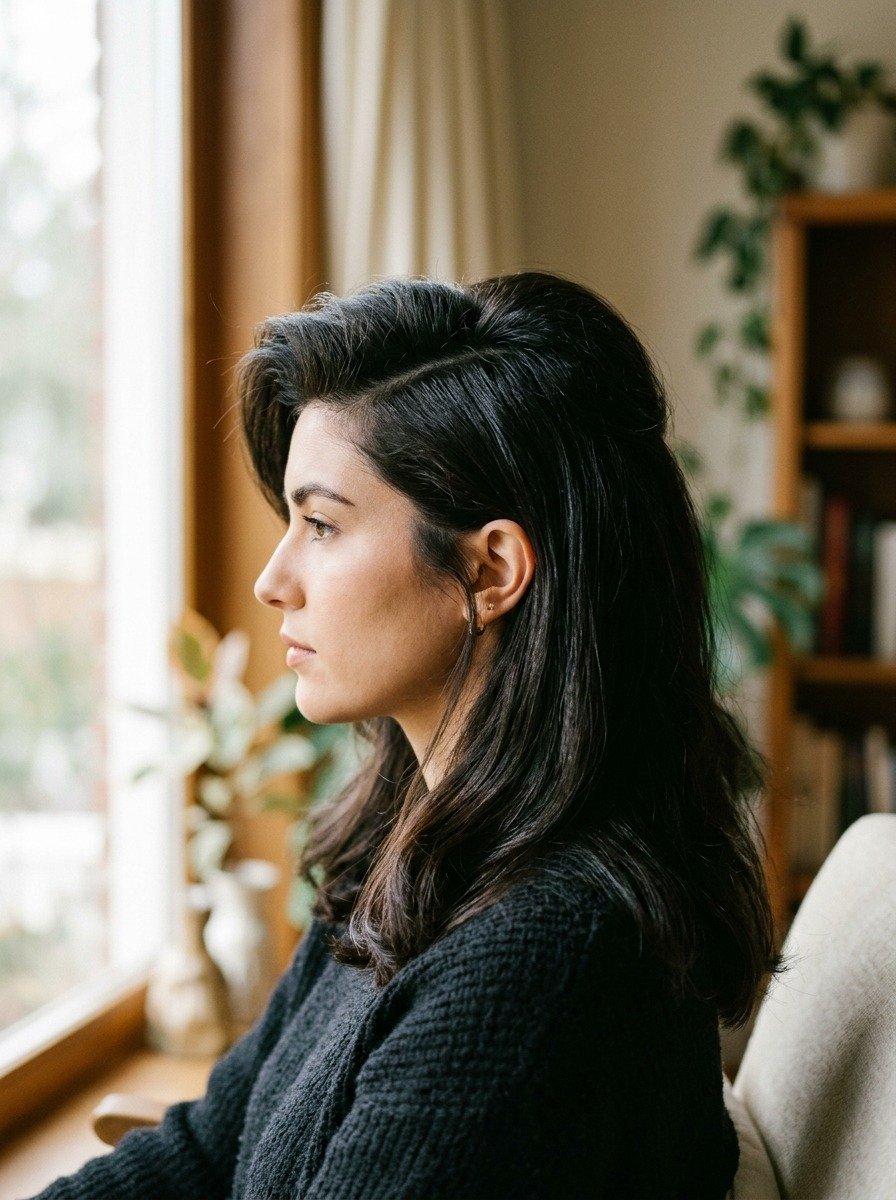
A deep side part adds instant drama to any length of hair. It shifts weight to one side and creates a dramatic sweep across the forehead. Pair it with volume at the crown for extra height and presence. To build volume without expensive tools, blow dry your roots upward using just your fingers and a round brush from a drugstore. A light dusting of dry shampoo at the roots also adds grip and lift, even on clean hair. Comb the part deep, past where your natural part usually sits, then use a small amount of gel to hold the shape while it dries. This works for both short and long hair, making it one of the most flexible styles on this list. If you have layers or bangs, this part style pushes them to one side for a softer, more dramatic frame around the face. It takes only a few extra minutes compared to your regular routine, and the tools needed are things most people already own.
5. Vivid Fringe With Natural Length Behind
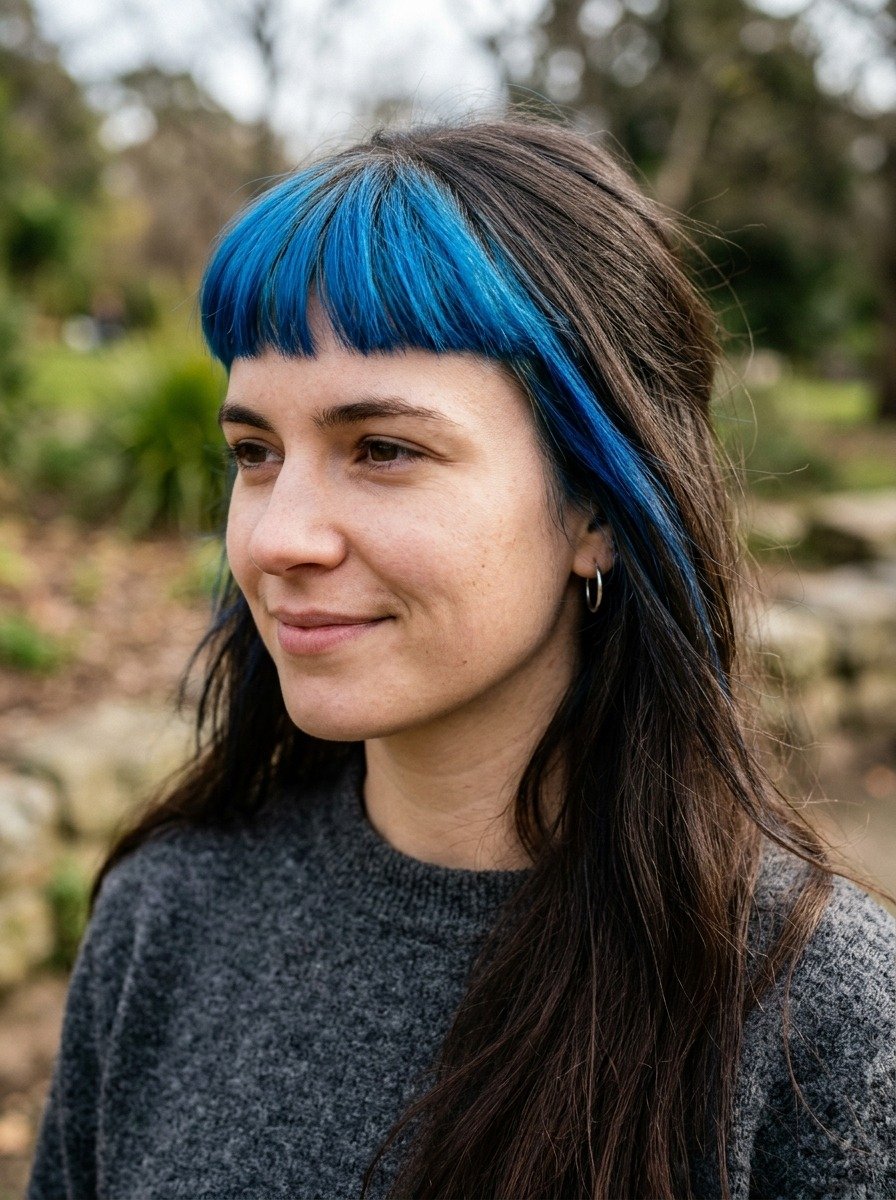
This style keeps most of your hair in its natural state while making a statement with just the front section. It is a budget smart choice because you are only coloring a small area. Cut a fringe that sits above the eyebrows or just at eye level, depending on how bold you want to go. Then apply a bright semi permanent dye like red, blue, or violet only to that section. Because the color touches a small area, one small dye tube can last through several applications. This also means less bleach damage overall, since the rest of your hair stays untouched. Keep the fringe trimmed every few weeks with small nail scissors or hair shears to maintain the shape. Wash the fringe separately with cool water to help the color last longer between touch ups. This look gives a strong visual impact with a small time and money investment, and it is easy to grow out or change later since the rest of your hair remains unaffected.
6. Messy Textured Spikes
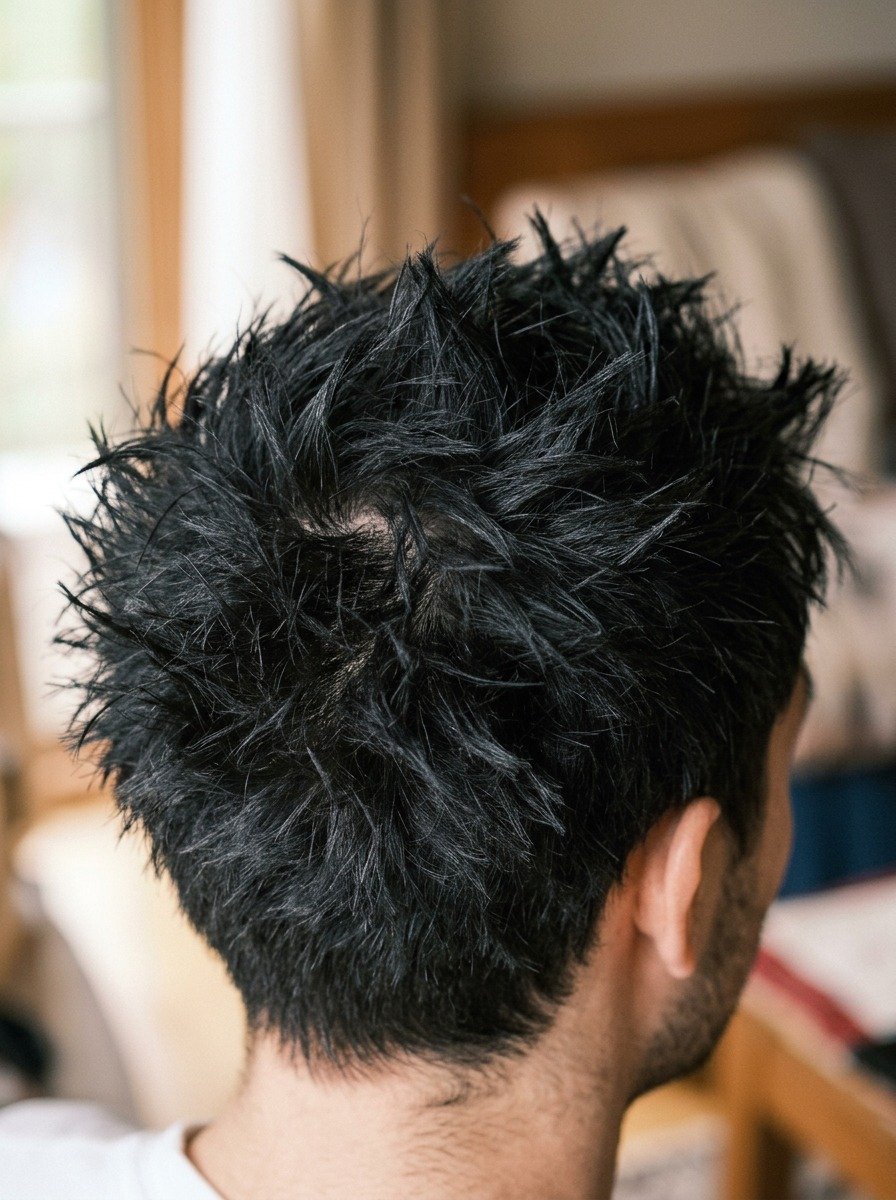
Spiked hair brings an aggressive, punk leaning edge to the emo look. The key is keeping it messy rather than uniform. Uneven spikes look more natural and less like a costume wig. Start with damp hair and a small amount of strong hold gel or wax. Work it through with your fingers instead of a comb, pulling small sections upward at different angles. Let some pieces stand taller than others for a lived in look. A blow dryer on a low heat setting helps set the shape as you go. Cheap gel from a drugstore works just as well as expensive salon products for this style, since the goal is texture, not shine. Avoid gels labeled as high shine, since a matte finish reads more authentic. This style works best on shorter hair, roughly two to four inches in length, but can be adapted on slightly longer hair with more product. It takes only a few minutes each morning and no special tools beyond a tub of wax you likely already keep in the bathroom.
7. Long Layers With Face Framing Pieces
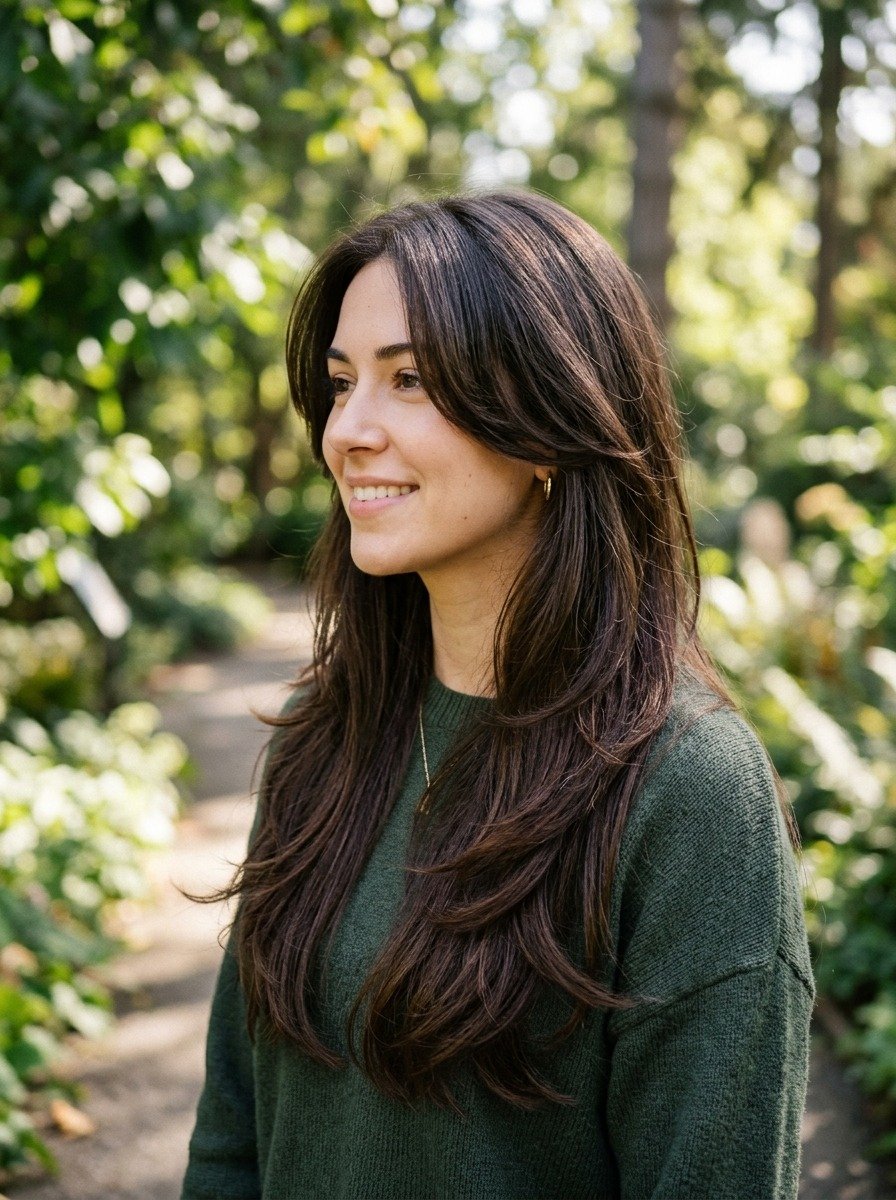
For those who want to keep length while still nodding to emo styling, face framing layers are the answer. These are shorter pieces cut around the cheeks and jaw while the rest of the hair stays long. They add shape and movement without a dramatic overall cut. Ask your stylist for layers that start around chin length and merge smoothly into the rest of your hair, or if cutting at home, section off a small piece on each side of your face and trim carefully at an angle. Go slow and check both sides for balance as you cut. Style with a flat iron to add a slight bend inward or outward at the ends for extra shape. A cheap flat iron from a discount store works fine for this kind of light styling. This cut suits people who are not ready to cut off length but still want the framed, edgy feel associated with the style. It also pairs well with color placed just at those face framing sections for added contrast.
8. Bleached Blonde With Dark Roots
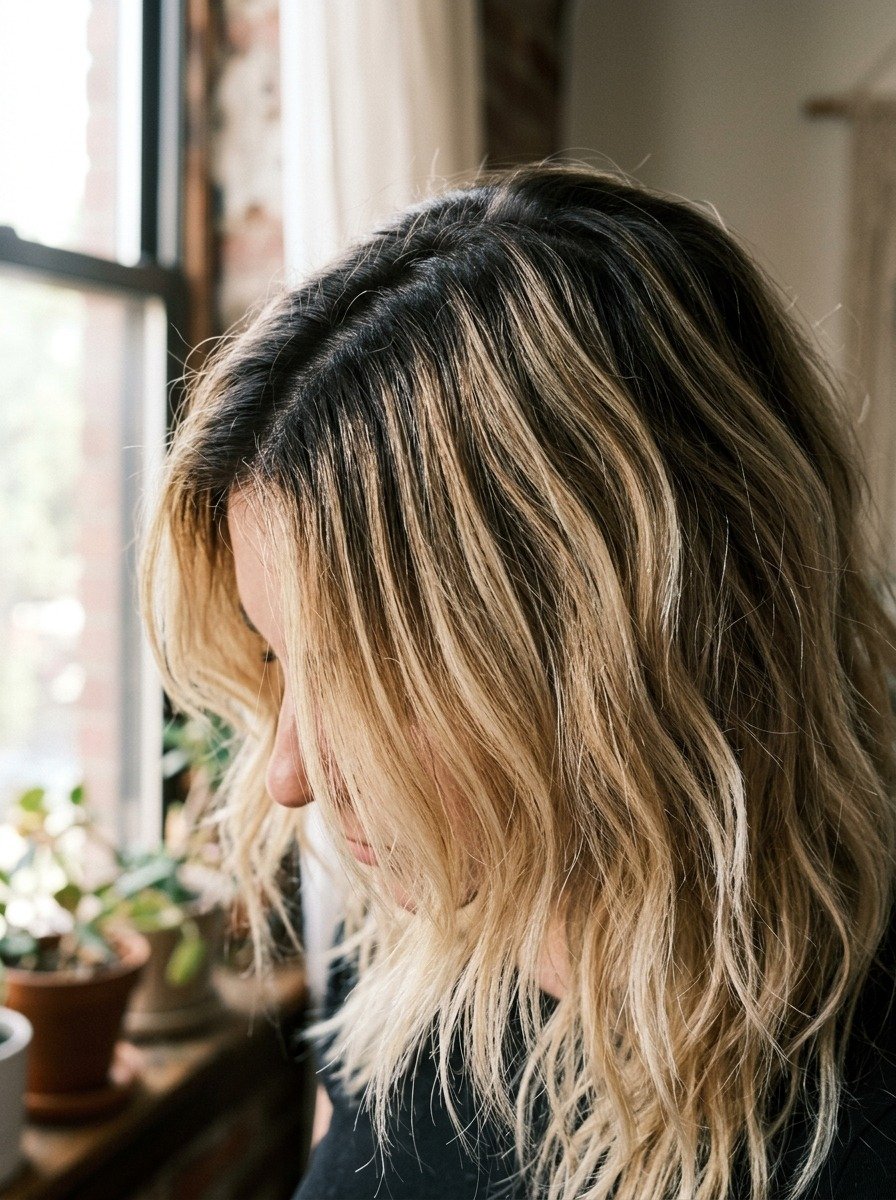
The contrast between bleached ends and natural dark roots creates a gritty, lived in look that fits the emo aesthetic well. It is also a low maintenance color choice since regrowth is part of the style rather than something to hide. Start by bleaching only the mid lengths and ends, leaving the first inch or two near the roots untouched. This reduces scalp irritation and cuts down on the amount of bleach product needed. A basic at home bleach kit costs far less than a full salon lightening service. Tone the bleached sections with a purple or silver toner to avoid brassy yellow tones, and follow with a deep conditioning treatment weekly to keep the hair from feeling like straw. Since the roots are meant to show, touch ups can happen every couple of months instead of every few weeks, saving both time and money. This style pairs especially well with choppy layers or a shag cut, since the color contrast highlights the texture of the layers.
9. Side Shaved Design With Long Top
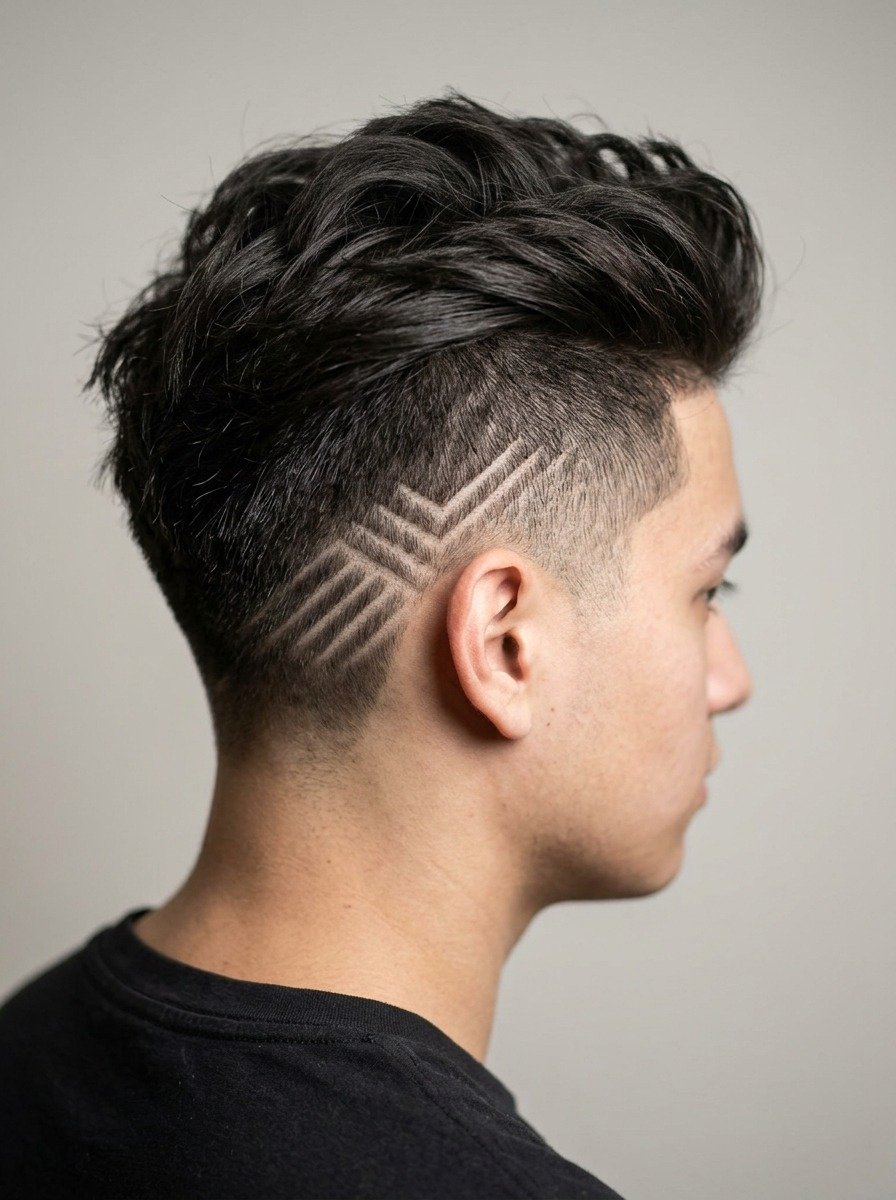
A shaved side design adds a personal, artistic touch to an otherwise simple haircut. It can be as basic as a straight shaved line or something more detailed like a small geometric pattern. Start simple if you are new to this. A single clean line shaved into the side with a clipper and detail trimmer is easy to maintain and looks intentional. Many beauty supply stores sell detail trimmers for under the price of one salon visit, and they last for years with proper care. Keep the design touched up every one to two weeks as the hair grows back in, using the same guard size each time for consistency. The long hair on top can be styled straight down to cover the design for a subtle look, or swept back to show it off fully. This gives you flexibility depending on the setting, whether that is school, work, or a night out. It is a small detail that adds a large amount of personality to the overall style.
10. Curtain Bangs With Textured Layers
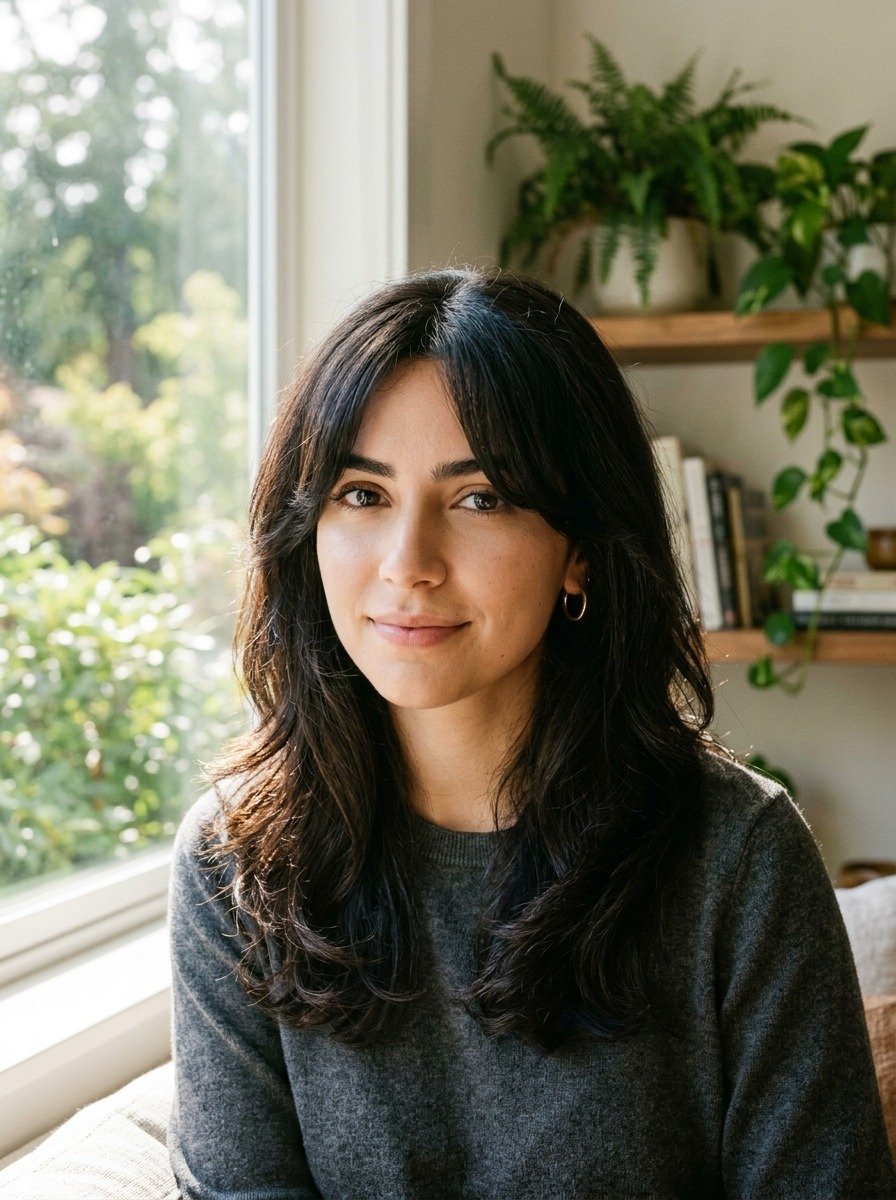
Curtain bangs bring a softer take on emo hair while still keeping the face framing effect the style relies on. They part naturally down the middle and sweep to either side, blending into longer layers behind. This is a forgiving cut for beginners since curtain bangs are more about length and shape than sharp precision. Trim small amounts at a time if cutting at home, checking length against your cheekbones as a guide. A round brush and blow dryer help train the bangs to curve outward instead of sitting flat. If you want to avoid daily styling, a light heat protectant spray and a few minutes with a small curling wand can set the curve so it lasts through the day. Curtain bangs work on straight, wavy, or curly hair, making this one of the most adaptable choices on this list. They also grow out easily into a regular layer cut if you decide to change directions, so the commitment level is lower than other bang or fringe styles.
11. Full Black Hair With Glossy Finish
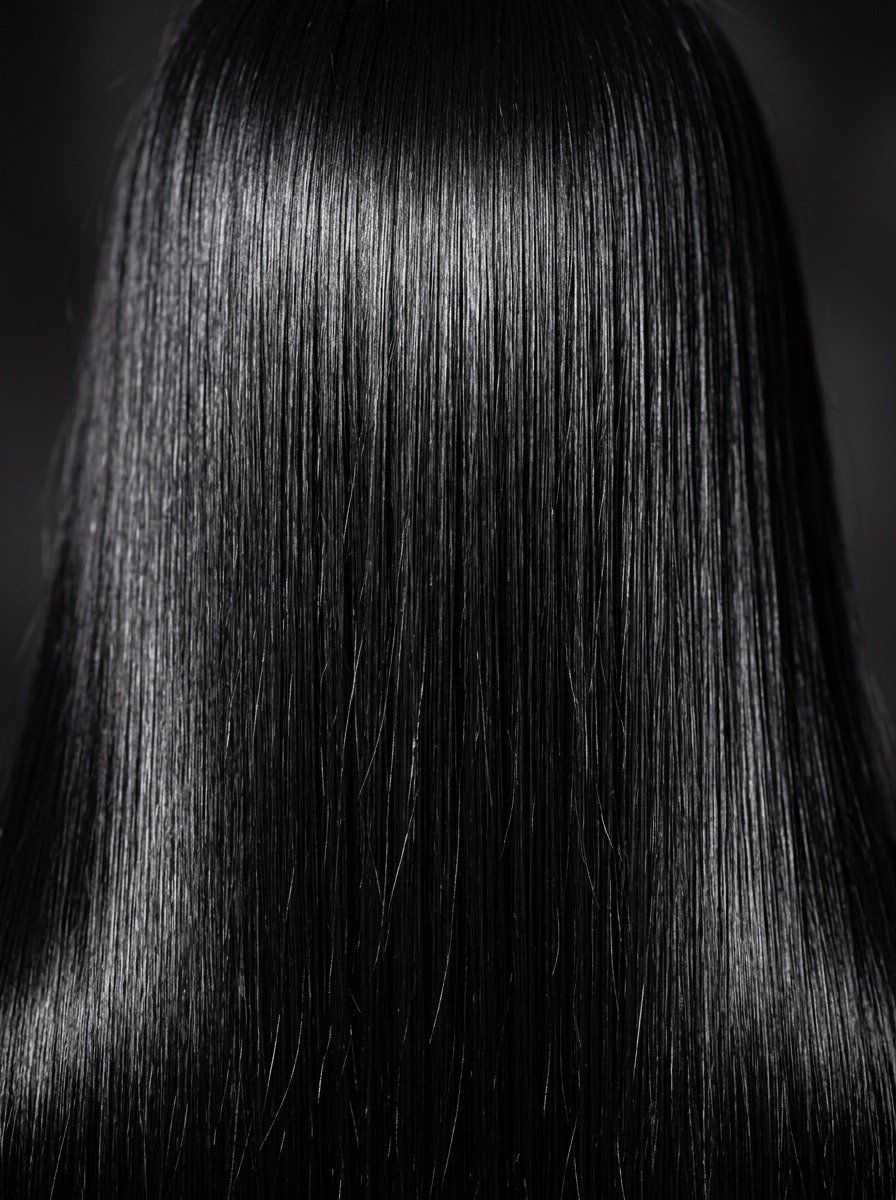
Sometimes the boldest move is simplicity. A full head of glossy black hair delivers a strong, clean version of the emo look without needing multiple colors or complicated cuts. The shine is what sells this style, so focus your budget there instead of on color products. A basic hair gloss treatment, available at most drugstores, adds shine and depth to dark hair for a few dollars. Apply it after shampooing, following the instructions on the box, and rinse according to the timing listed. Avoid heavy oils on the scalp since they can weigh hair down and reduce the sleek look. Instead, apply a small amount of shine serum only to the mid lengths and ends after styling. A flat iron on a low to medium heat setting smooths the hair further for maximum shine. This look pairs with almost any cut length, from a bob to long hair, and requires far less maintenance than color heavy alternatives, since there is no touch up schedule to follow.
12. Half Up Space Buns With Loose Pieces
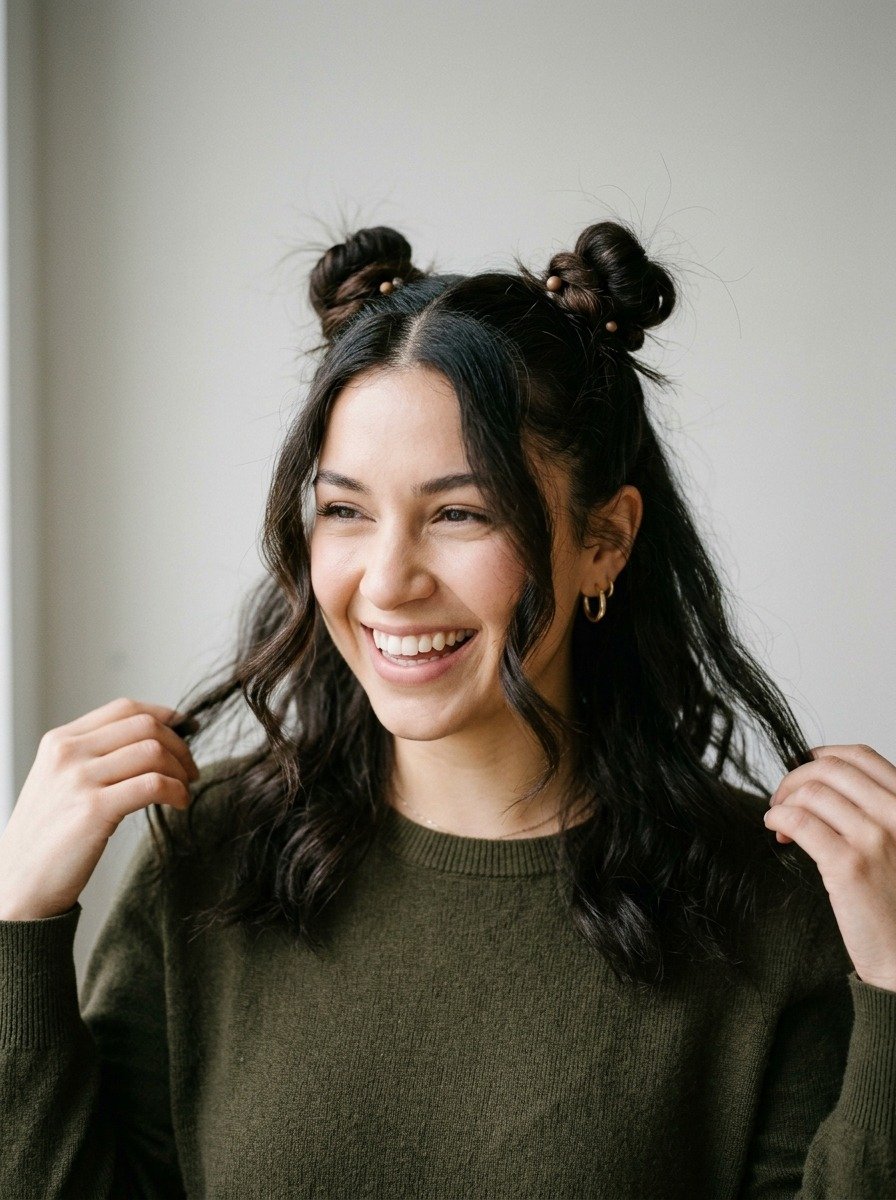
Space buns bring a playful twist to emo hair while keeping the overall style recognizable. This works well for longer hair and takes nothing more than a couple of small hair ties. Section the top half of your hair into two even parts, then twist each into a small bun near the crown. Leave the rest of your hair down, along with any bangs or face framing pieces. For extra texture, twist the sections before wrapping them into buns instead of leaving them smooth. A bit of texturizing spray, or even a small amount of dry shampoo, adds grip so the buns hold shape longer. This style costs nothing beyond hair ties you likely already own. It is a great option for days when you want a bold look without cutting or coloring your hair, and it works especially well over dyed or streaked hair since the color still shows through the loose sections left down.
13. Wolf Cut With Heavy Fringe
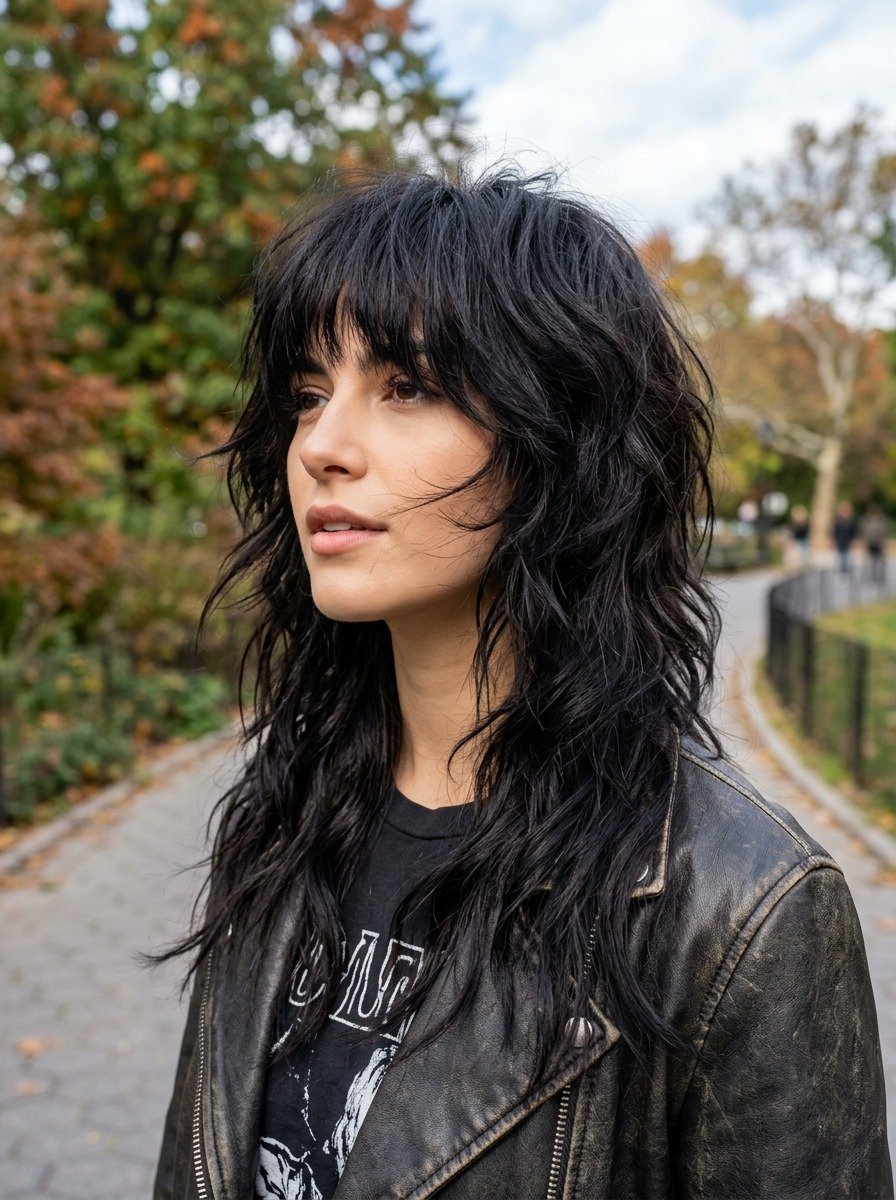
The wolf cut combines shag layers with a mullet inspired shape, and pairing it with a heavy fringe pushes it further into emo territory. The layers are shorter at the crown and get longer toward the ends, creating a lot of built in texture and volume. This cut usually benefits from a professional shaping session at least once, since the layering is more technical than a simple trim. After that, you can maintain length and the fringe yourself between visits. Use a texturizing spray and scrunch damp hair with your hands to enhance the natural shag texture instead of blow drying it smooth. A cheap sea salt spray from the drugstore works well for this. Trim the fringe every few weeks with small scissors to keep it from falling into your eyes too much. This cut suits people who want volume and texture without needing constant styling tools, since the shag shape does a lot of the work by itself once it grows in properly.
14. Copper Red With Black Underlayer
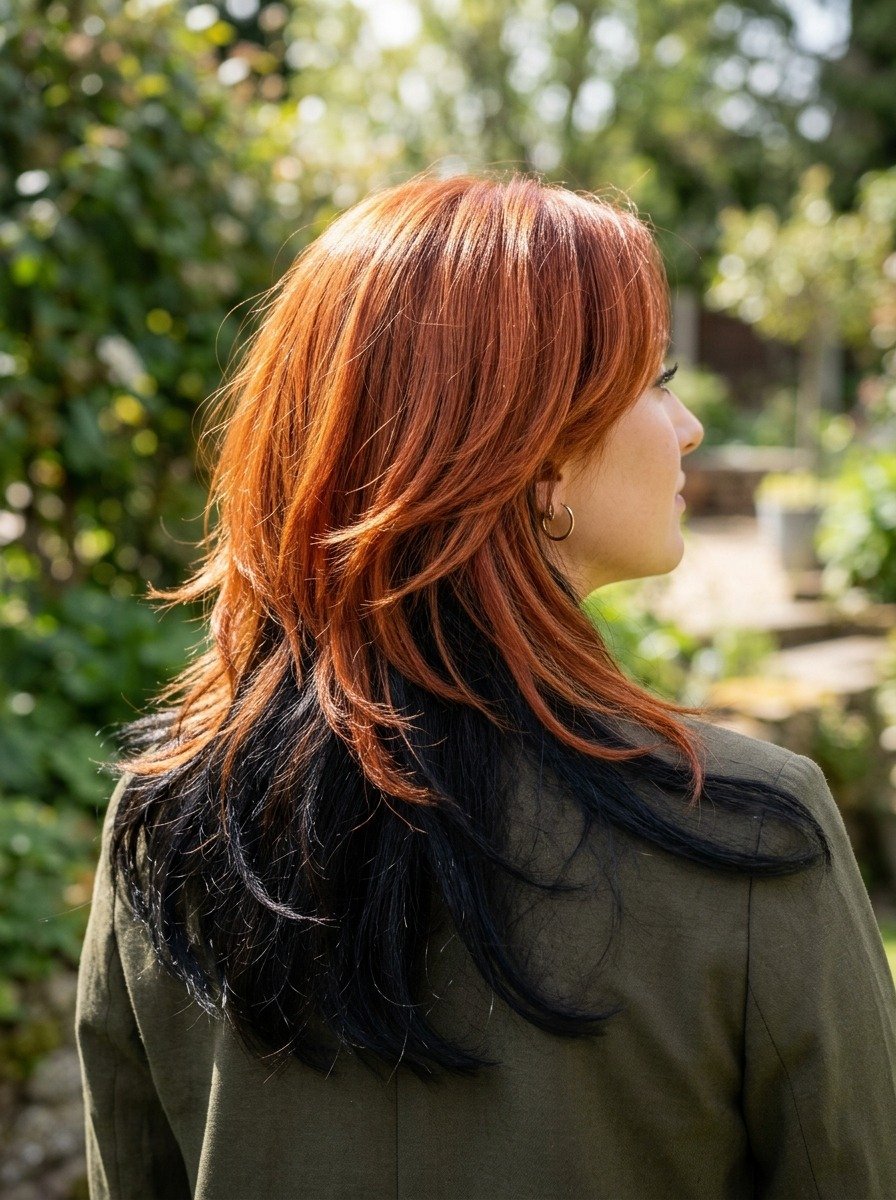
This two tone color placement gives a hidden surprise every time the hair moves or gets tucked behind an ear. The top layer stays a bold copper or red tone while the underneath section stays black or dark brown. Sectioning is the key step here. Separate the top half of your hair from the bottom half using a clip, then apply lightener only to the top section before toning it copper or red. Leave the bottom section in its natural dark color. This method uses less bleach and dye overall since only half your hair gets treated, cutting the cost roughly in half compared to a full head color job. Style with layers that allow both colors to peek through during movement, and consider a slight flip or curl at the ends to show off the underlayer more. Refresh the copper tone every few weeks with a color depositing conditioner instead of a full re dye, which extends the vibrancy without repeating the whole process.
15. Blunt Bangs With Straight Long Hair
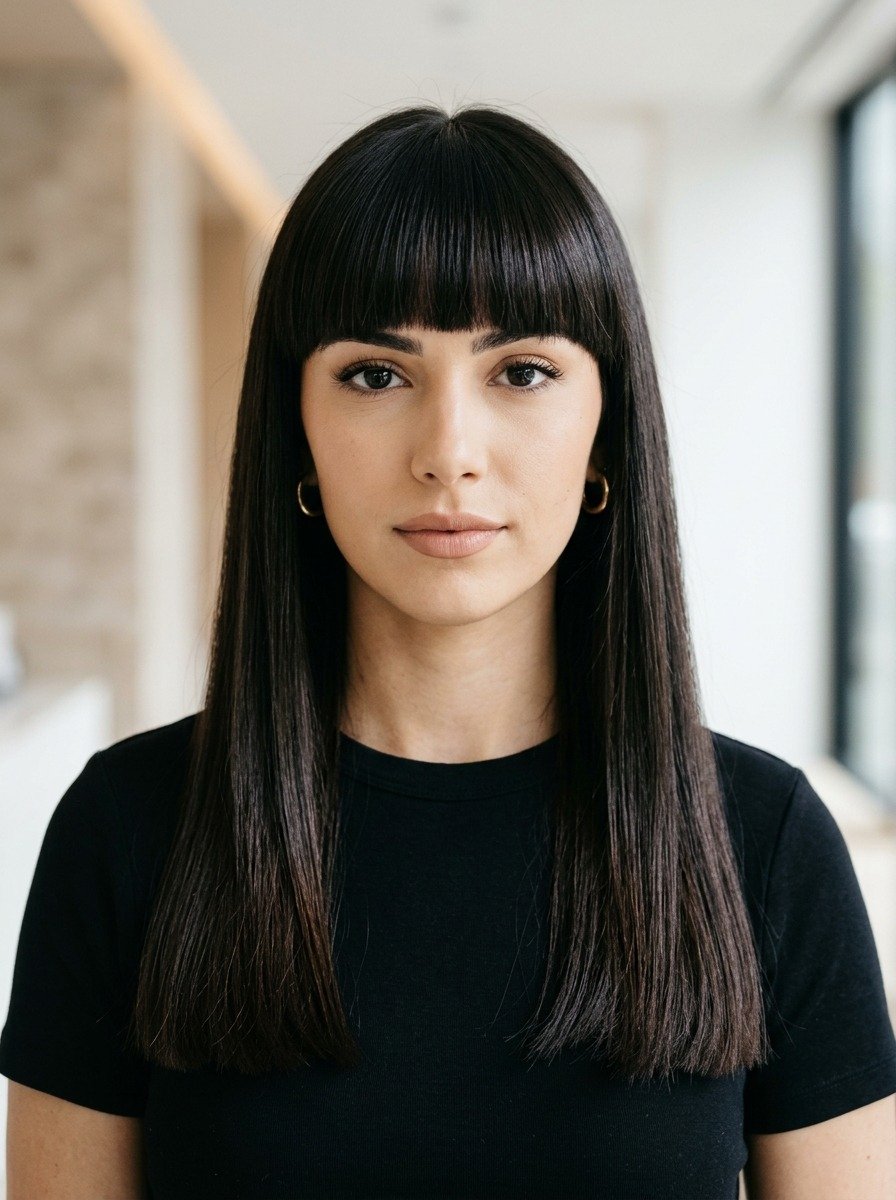
Blunt bangs cut straight across the forehead give a graphic, doll like edge to the emo look. Paired with long, straight hair, the contrast between the sharp bang line and the smooth length creates a strong visual statement. Cutting blunt bangs at home takes patience. Section a triangle shaped piece from the crown down to the outer corners of your eyebrows, then comb it forward and trim in small increments while the hair is dry, not wet, since wet hair shrinks upward when it dries. Go slower than you think you have to, checking evenness in a mirror after each small cut. A flat iron helps keep both the bangs and the length looking sleek, and a heat protectant spray is worth the small cost to prevent damage from daily straightening. Trim the bangs every two to three weeks to maintain the sharp line, since blunt bangs grow out and lose their shape faster than layered ones.
16. Purple and Black Split Dye
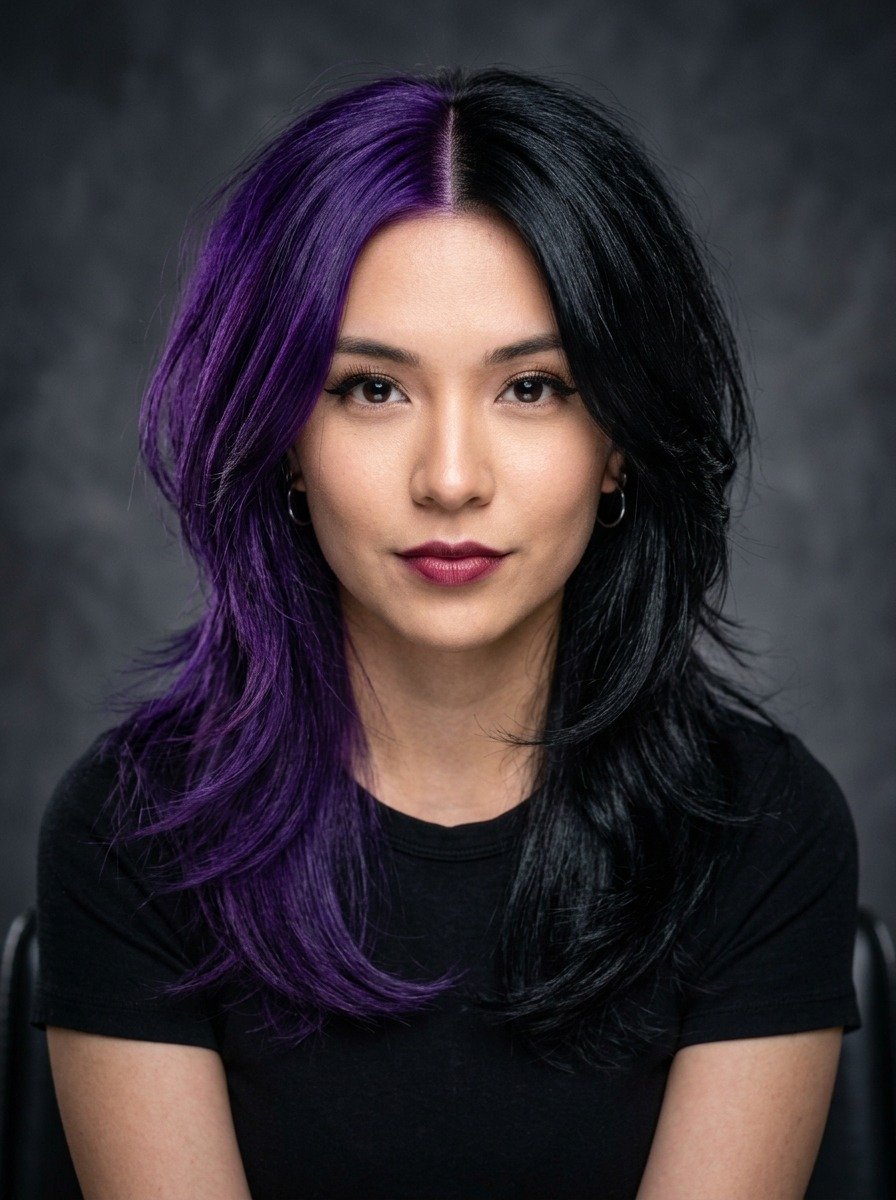
Split dye styles divide the hair down the middle, giving each half its own color. Black and purple is a classic combination for emo styling, offering contrast without clashing. To try this affordably, section your hair down the natural middle part and clip one half away completely while working on the other. Bleach only the half that will become purple, then apply a semi permanent purple dye once the bleaching step is toned and dried. The other half can stay its natural black or be deepened slightly with a black semi permanent dye for evenness in tone. Since only half the head takes bleach, this cuts product costs and processing time nearly in half compared to an all over color change. Maintain the part precisely when styling, since a wandering part line blurs the effect. Wash with cool water and a color safe shampoo to help the purple side last longer between refresh applications.
17. Short Pixie With Long Fringe
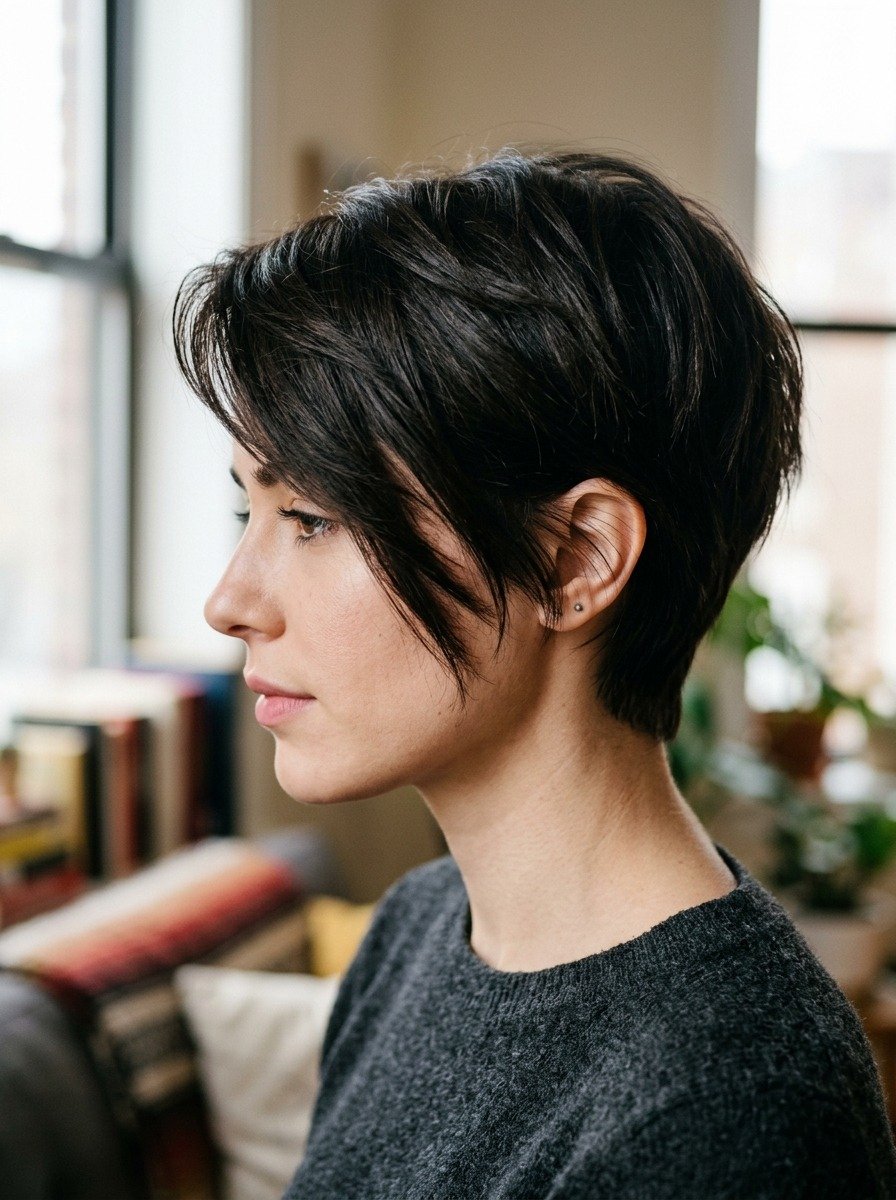
A pixie cut paired with a longer fringe gives a compact, low maintenance take on emo hair. Most of the hair stays short, but the fringe is left longer, sweeping across the forehead for that signature framed look. This cut works well for people who want a bold change without much daily upkeep. A small amount of matte paste, worked through with fingers, keeps the short sections textured rather than flat. The longer fringe can be swept to one side and held in place with a touch of gel if needed. Because most of the hair is short, product use stays minimal, which keeps ongoing costs low compared to longer styles that use more product per application. Trims are needed more frequently, roughly every four to six weeks, to maintain the shape, but each trim is quick and inexpensive since there is less hair to cut. This style suits people with fine or thin hair especially well, since shorter length often reads fuller.
18. Long Hair With Heavy Middle Part Waves
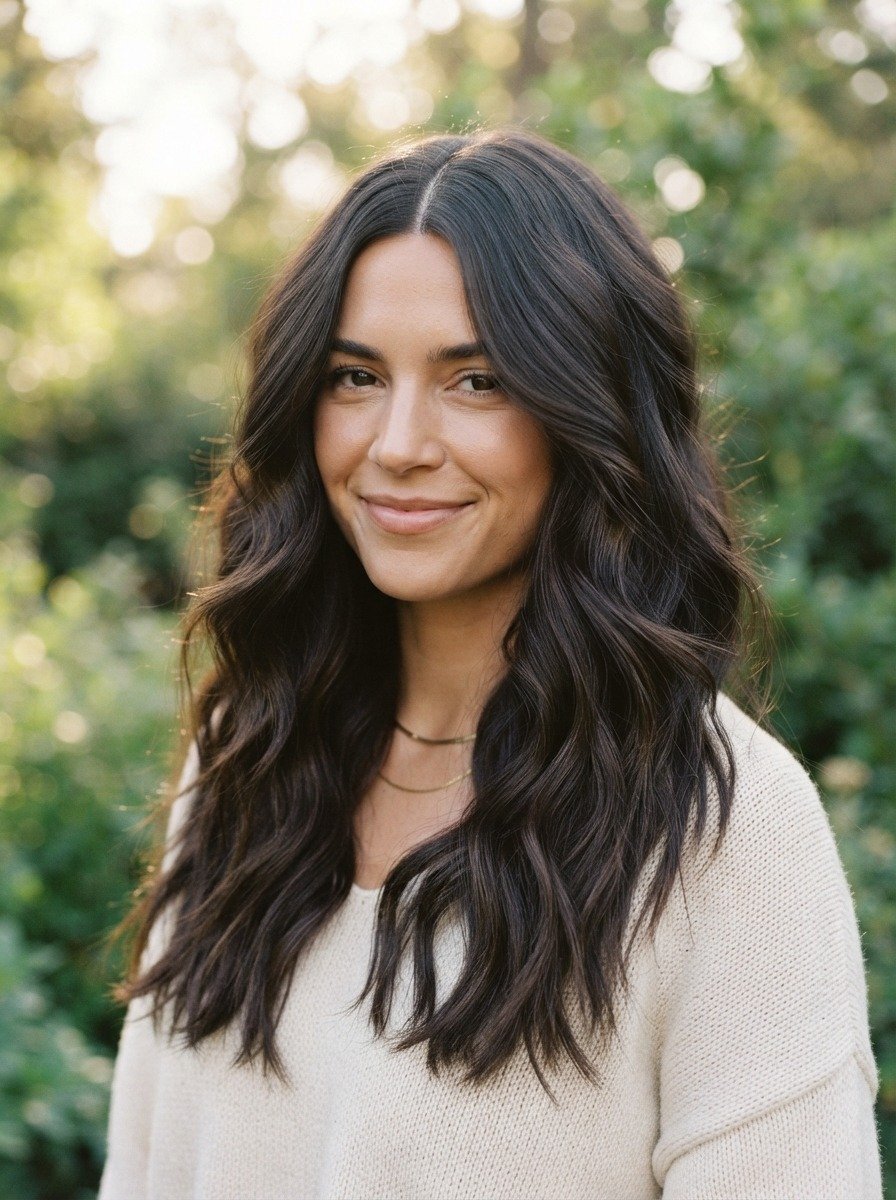
Waves add softness to the sharper elements typically associated with emo hair, creating a balanced look. A deep middle part combined with loose waves gives length and movement without needing a dramatic cut or color change. Achieve the waves using a flat iron or curling wand on a low heat setting, wrapping small sections and holding for just a few seconds before releasing. Run your fingers through the waves once they cool to loosen the curl into a softer, more natural looking wave instead of a tight curl. A cheap sea salt spray applied to damp hair before drying also builds texture with minimal effort or cost. This style pairs naturally with a heavy fringe or face framing layers, since the waves add movement to those pieces as well. It requires only a basic heat tool most people already own, making it one of the more accessible looks on this list for those who want texture without commitment to a new cut or color.
19. Emo Mullet With Colored Tips
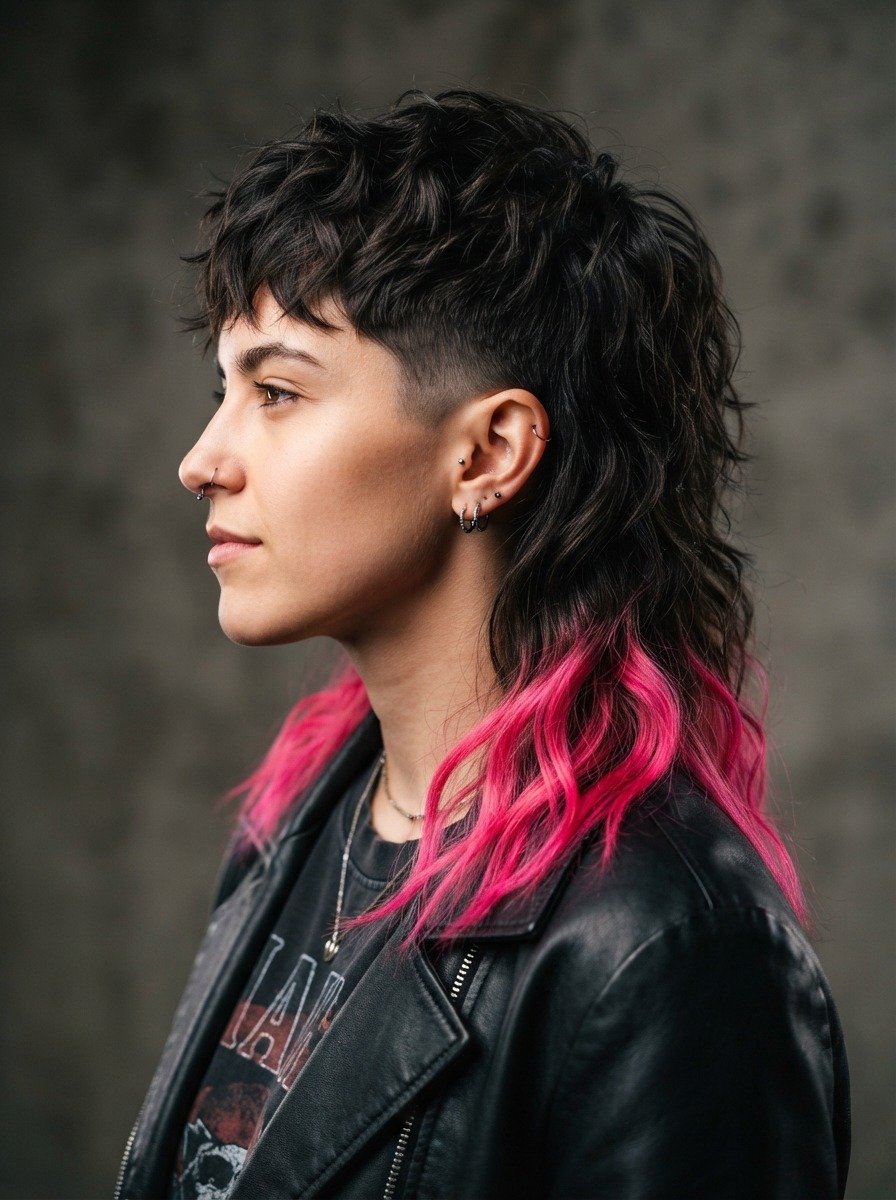
The mullet has found its way into emo styling through shorter, choppier versions paired with bold color at the ends. Short layers sit at the crown and sides while length is left at the back, and the very tips are dyed a bright, contrasting color like pink or teal. Since only the tips get dye, this is one of the most affordable color options on the list. A small amount of bleach followed by a semi permanent dye, applied only to the last inch or two of hair, delivers a strong visual pop without much product used. The rest of the cut can be maintained with basic trims every six to eight weeks. Style the top layers with a small amount of texturizing paste for lift, while letting the back hang naturally to show off the colored tips. This combination works for people who want a strong statement piece without a full color commitment across their entire head.
20. Straight Bangs With Heavy Eyeliner Framing
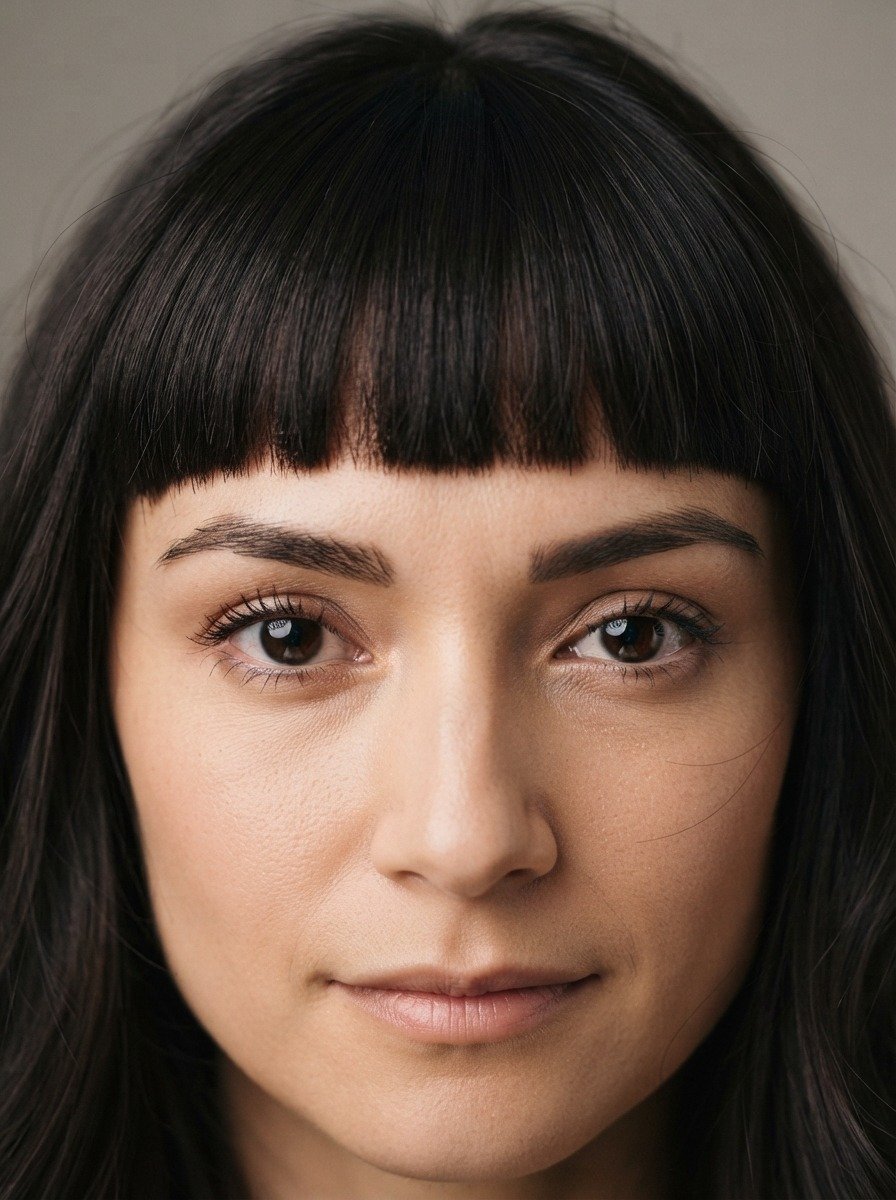
While this list focuses on hair, the placement of your bangs plays directly into how the rest of your look reads. Thick, straight bangs cut just above the eyebrows create a strong frame that pairs naturally with the bold makeup often associated with emo style. Keep the bang line straight and full rather than wispy for the most dramatic effect. Trim small sections at a time if cutting these yourself, checking evenness often since even small mistakes are noticeable this close to the eyes. A flat iron helps keep the bangs smooth and prevents them from curling upward throughout the day. Apply a small amount of anti frizz serum on humid days to keep the line crisp. This style requires minimal product cost since the bangs are a small section of hair, and trims can often be done at home with basic scissors every two to three weeks to maintain the sharp, heavy line this look depends on.
21. Two Tone Peekaboo Highlights
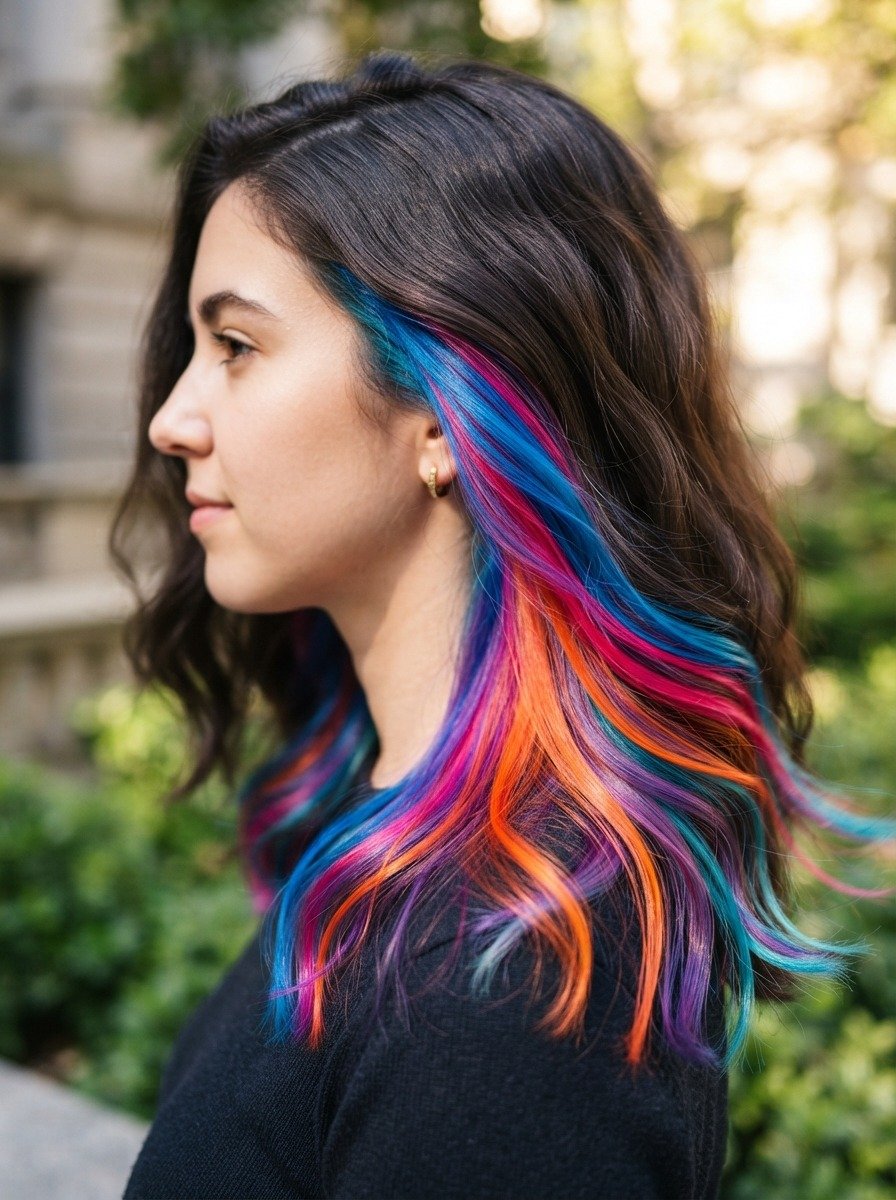
Peekaboo highlights hide beneath the top layer of hair, only showing when the hair moves, gets tucked, or is styled a certain way. This gives a subtle surprise element compared to more obvious color placements. Section a thin layer underneath the crown and apply bleach only there, followed by a bright semi permanent color like blue, pink, or green once toned. The top layer stays completely natural, which means less overall bleach and dye product is needed compared to full color changes. This also makes the style easier to hide for settings like work or school, since simply letting the top layer fall naturally covers the color underneath. Style with a slight flip or tuck to reveal the hidden color when you want it seen. Refresh the color every few weeks with a small amount of semi permanent dye applied directly to the hidden section, which uses very little product each time due to the small treated area.
22. Chunky Highlights Through Choppy Layers
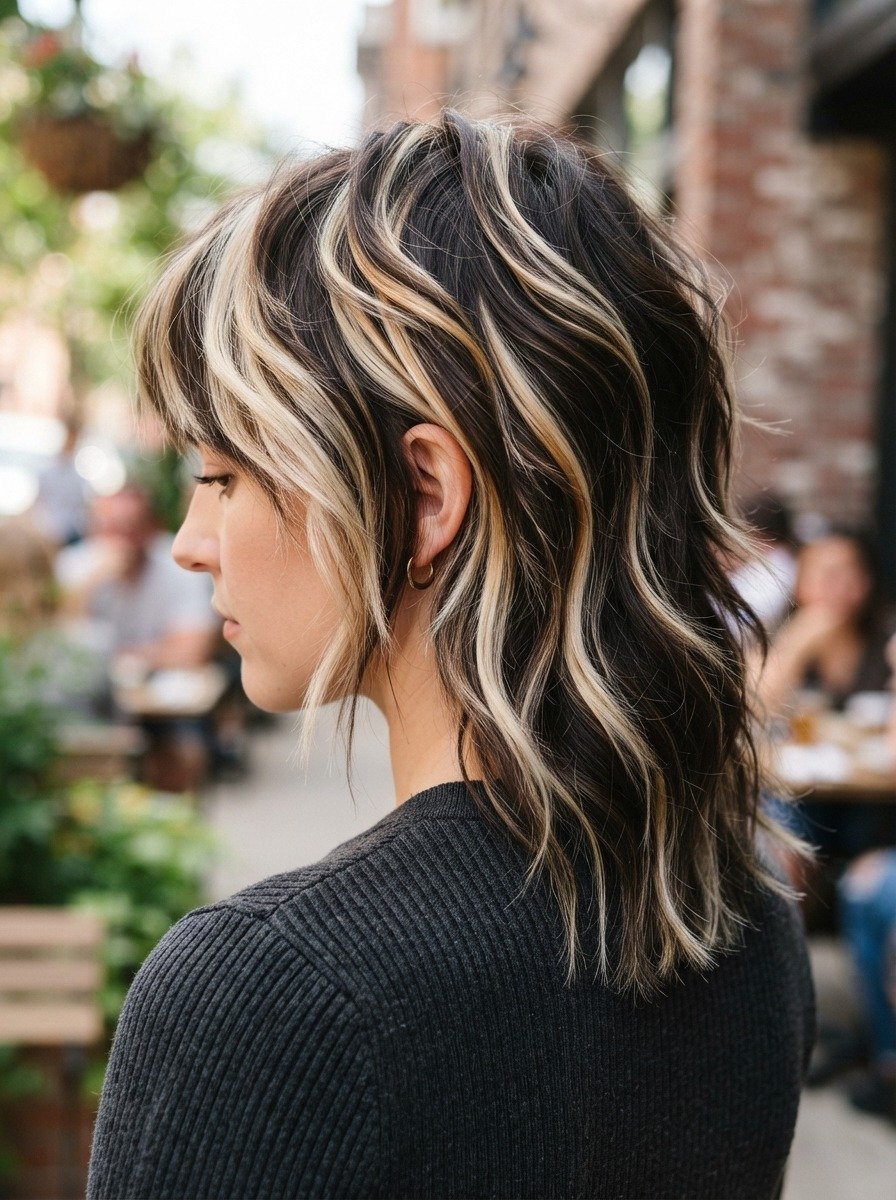
Chunky highlights bring back a distinctly emo era detail, thick streaks of color placed randomly throughout choppy layers rather than blended evenly like traditional highlights. The uneven placement is part of the charm here. Section random pieces throughout your hair, varying the width and placement instead of following a strict pattern. Apply bleach to those sections, then tone or dye with your color of choice once lifted enough. Because the highlights are meant to look chunky and obvious rather than soft and blended, less precision is needed during application, which can actually save time compared to traditional foiling techniques. A basic highlighting kit from the drugstore includes everything needed for this at home. Pair the finished color with choppy, textured layers to let each highlighted piece stand out as the hair moves. Touch up only the highlighted sections as they grow out, which keeps maintenance costs lower than an all over color change would require.
23. Long Layered Shag With Curtain Fringe
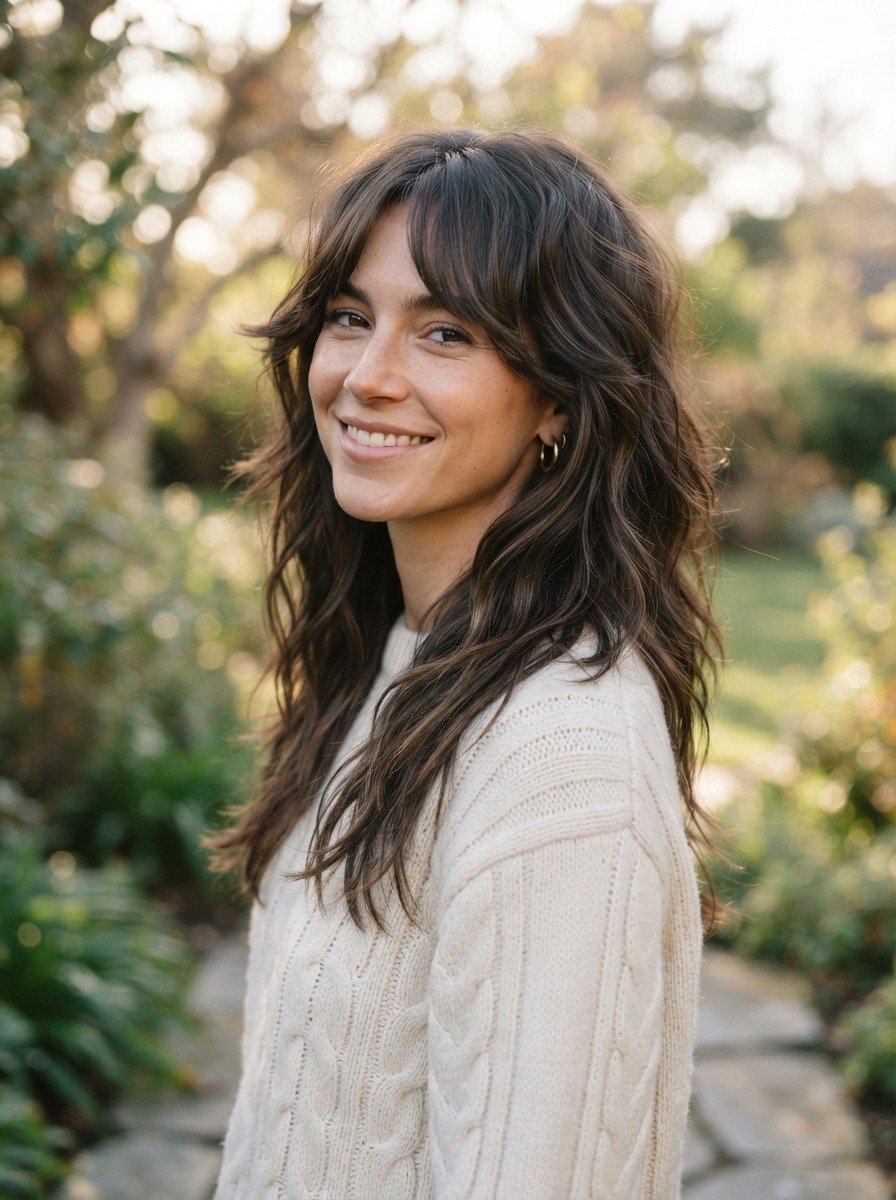
The shag and curtain fringe combination brings together two of the most flexible elements on this list into one cohesive style. Heavy layering throughout the length creates volume and movement, while the curtain fringe softens the face and adds the framing effect central to emo hair. This cut works on a wide range of hair types and lengths, making it a solid choice if you are unsure where to start. Style with a texturizing spray on damp hair, then air dry or use a diffuser attachment on your blow dryer to enhance natural texture without flattening the layers. The curtain fringe can be curled slightly outward using a small curling wand for extra shape around the face. Because the cut relies on texture rather than sharp precision, small at home trims between salon visits are easy to manage without risking the overall shape. This makes it one of the more forgiving and long lasting options for anyone building toward a full emo hair transformation.
Conclusion
Emo scene hair gives you room to play with color, texture, and shape until you land on something that feels like you. None of these looks require a big budget or a salon chair booked every few weeks. A pair of clippers, a small dye kit, or even just a new part can shift your whole look. Start with one change, whether that is a fringe, a streak of color, or a shaved detail, and build from there as you get comfortable. The best part about this style is how forgiving it is. Hair grows back, color fades, and cuts can always be adjusted. Pick the idea from this list that matches your current hair length and budget, gather a few affordable tools, and give yourself permission to experiment. Bold hair starts with one small, doable step.
Leave a Reply