The ponytail is one of the most underestimated hairstyles in existence. It is fast, practical, and works for almost any occasion. But there is a big difference between a rushed ponytail thrown together in thirty seconds and one that looks like you actually meant it. A few small adjustments in technique, product, and styling can take a basic ponytail from forgettable to genuinely impressive. Whether your hair is thick, thin, curly, straight, short, or long, there is a ponytail variation that works for you. These ideas cover everything from sleek and polished to loose and effortless, with tips that cost next to nothing and take very little time to execute. If you’re also exploring shaggy haircut medium ideas, combining layered cuts with simple styling can give your hair more movement and texture, making even basic styles like ponytails look fuller and more intentional.
The Classic Sleek High And Easy Ponytail hairstyle Ideas

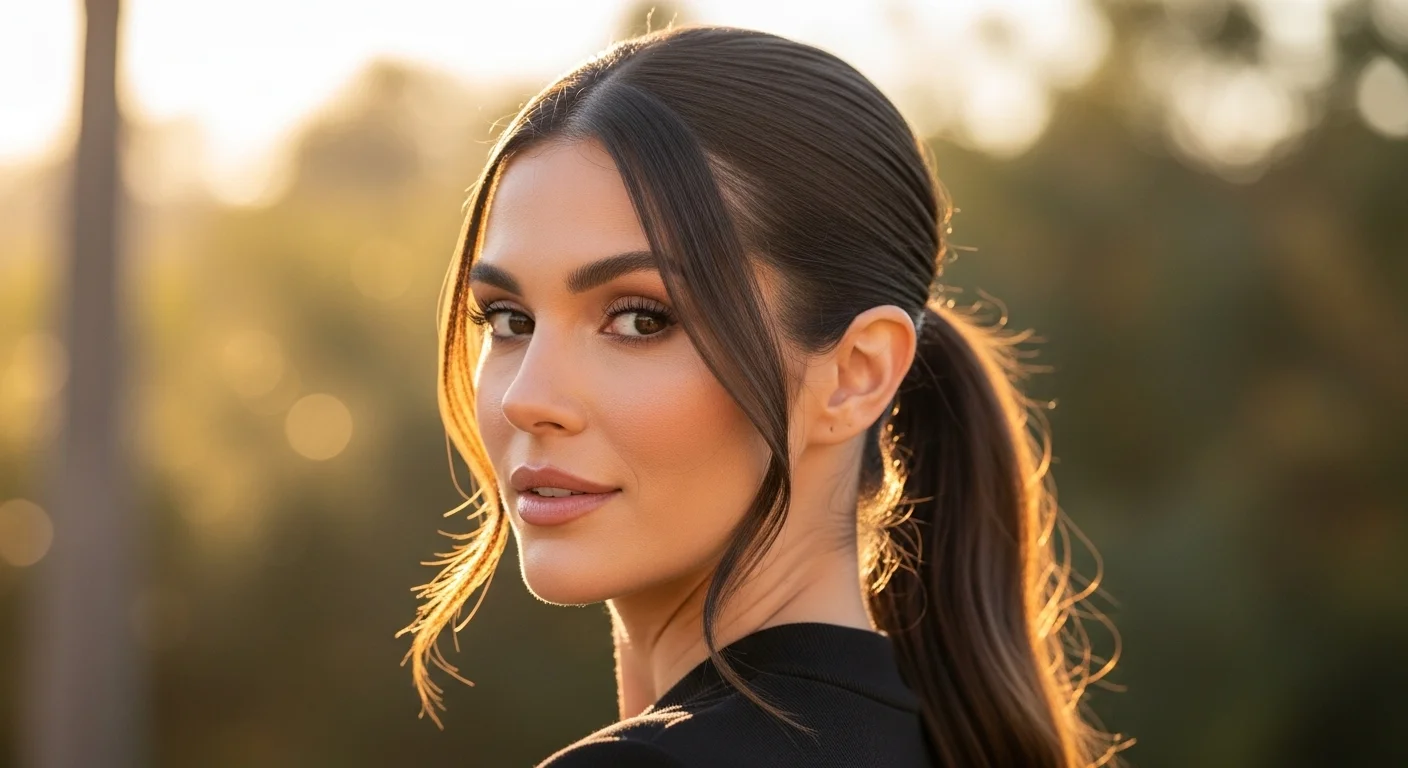
The sleek high ponytail is the foundation of all ponytail styles. When done right, it looks sharp, clean, and pulled together without much effort.
Start by brushing your hair thoroughly from roots to ends. Any tangles or texture will show up once the hair is pulled tight.
Apply a small amount of smoothing serum or hair oil to the surface before brushing. This tames flyaways and adds the glassy finish that makes this style look polished.
Use a boar bristle brush for the final smooth. It grips every strand and lays them flat in a way that plastic brushes cannot match. A boar bristle brush costs five to twenty dollars and lasts for years.
Pull the hair straight up to the crown and secure it with an elastic. Hold the ponytail at the base and gently tug upward to tighten the placement without pulling from the roots.
Wrap a small piece of hair around the elastic and pin it underneath to hide the band. This one step makes a huge difference in how finished the style looks.
Spray a light-hold hairspray over the surface to lock everything in place without stiffness.
This style works for every occasion from school drop-off to a dinner out. It takes under five minutes once you practice it a few times.
The Low Lazy Ponytail

The low lazy ponytail is the style for days when you want to look put-together without actually trying very hard.
Gather your hair loosely at the nape of your neck. Do not brush it too aggressively. A little texture and natural body makes this style look more intentional than perfectly smooth hair.
Let a few pieces fall loose around your face. This softens the look and makes it feel less severe than a pulled-back style. Pull out a strand on each side and one or two around the temples.
Secure the ponytail with a soft, fabric-covered elastic rather than a tight rubber band. Fabric elastics are gentler on the hair and look more intentional.
Gently pull the ponytail apart at the base to loosen the volume slightly. This makes it look fuller and more relaxed.
A low ponytail works especially well with second-day hair. The natural oils give the hair a weight and texture that makes the style easier to hold.
If your hair is short, use a few bobby pins to tuck any pieces that fall out. They blend into most hair colors and cost almost nothing.
This style is practically effortless and works beautifully for running errands, casual Fridays at work, or weekend brunch with friends.
The Wrapped Ponytail With a Hair Scarf
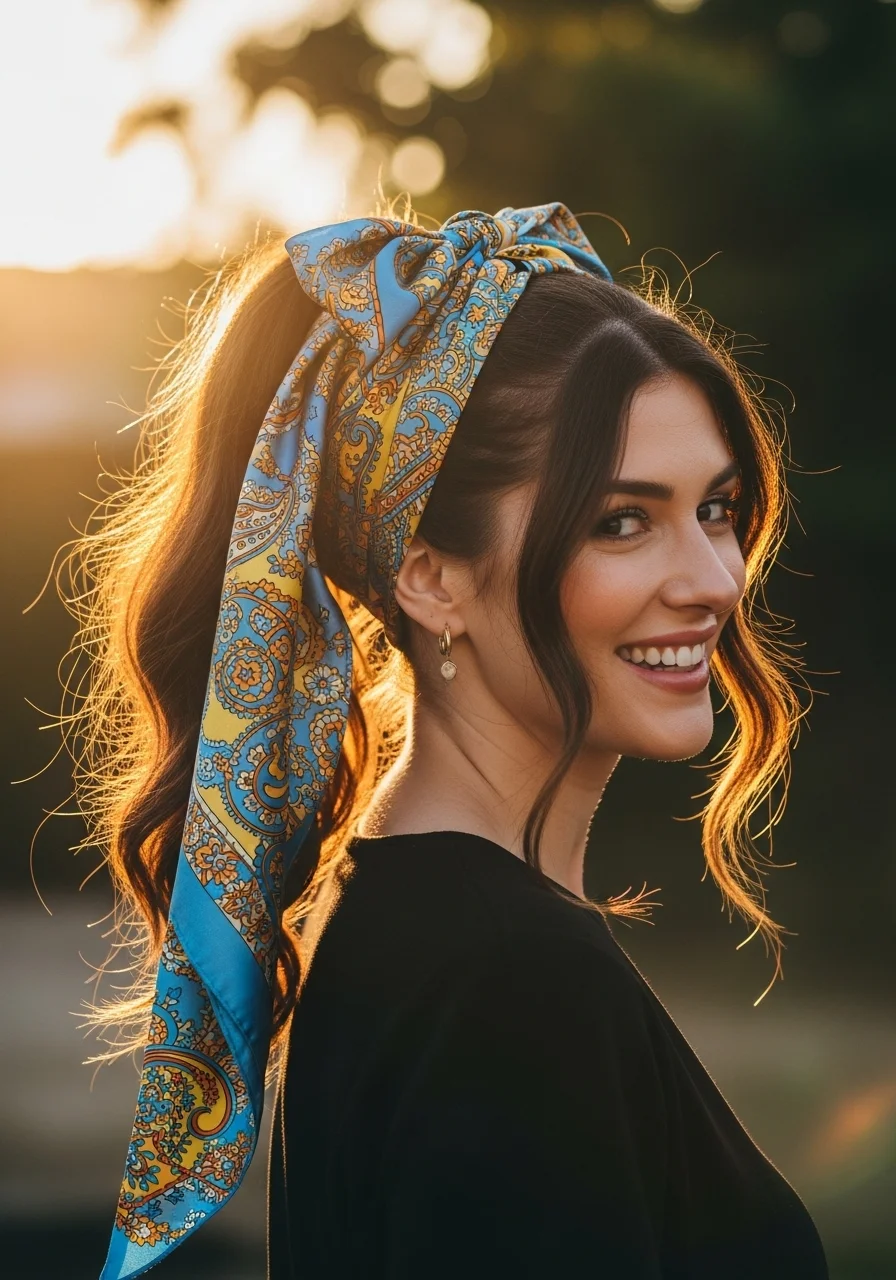
A hair scarf wrapped around a ponytail is one of the easiest ways to take a plain style and make it feel special. It adds color, texture, and a personality that a plain elastic simply cannot give.
You do not need an actual hair scarf. A thin fabric ribbon, a shoelace, or a strip cut from an old silk blouse all work just as well.
Fold your scarf into a long, thin strip before wrapping. Start at the base of the ponytail and wind it down toward the ends, then back up again. Tie it off in a bow or knot at the base.
Leave the ends of the scarf trailing alongside the ponytail for extra movement and visual interest. Or tuck them neatly under the wrap for a cleaner look.
This technique works on all ponytail heights. High ponytails get a playful, youthful feel with a scarf. Low ponytails feel more elegant and editorial.
Silk scarves at thrift stores and charity shops cost almost nothing. A thin square scarf can be folded down to the perfect width for hair wrapping in seconds.
Change the scarf to match your outfit and the whole vibe of the ponytail shifts instantly. One hairstyle, endless variations.
The Textured Messy Ponytail
Not every ponytail should be smooth and polished. Sometimes the most stylish look is one that appears effortless because it genuinely is.
The textured messy ponytail works best on hair with some natural wave or curl. If your hair is naturally straight, use a texturizing spray or sea salt spray before gathering it up.
Scrunch the spray through your hair before pulling it back. This activates any natural texture and gives the ponytail a lived-in, beachy quality.
Gather the hair loosely rather than pulling it smooth. Some bumps and unevenness at the scalp are part of the look. Over-smoothing kills the texture you are going for.
Once the elastic is in place, pull gently on individual sections of the ponytail to loosen and expand the volume. Do this across the full length of the ponytail for a full, relaxed shape.
Pull a couple of pieces loose around the face. Leave them as they fall rather than styling them precisely.
Sea salt spray costs five to fifteen dollars at drugstores or can be made at home by dissolving a teaspoon of sea salt in warm water with a small drop of conditioner in a spray bottle.
This style actually looks better on day two or three hair than on freshly washed locks.
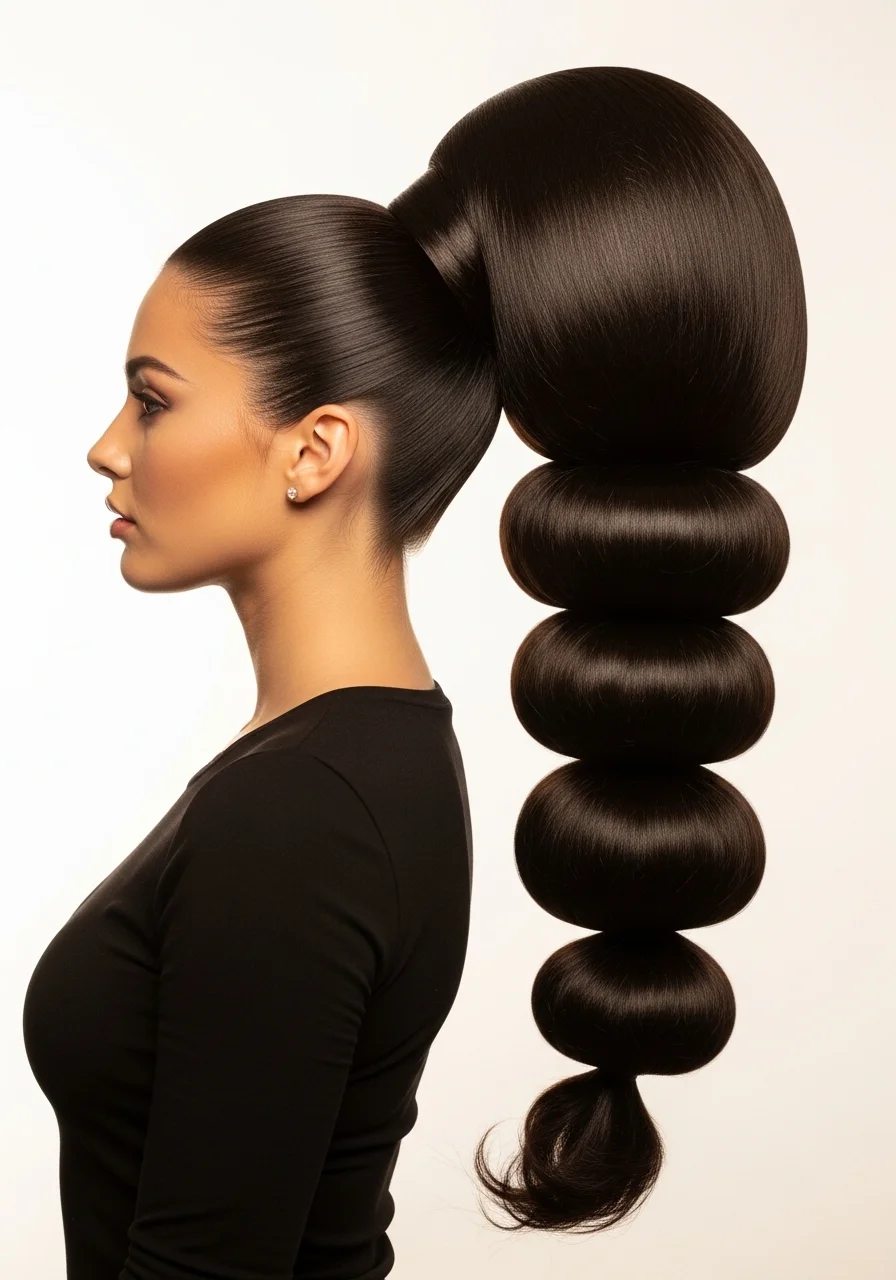
The Bubble Ponytail
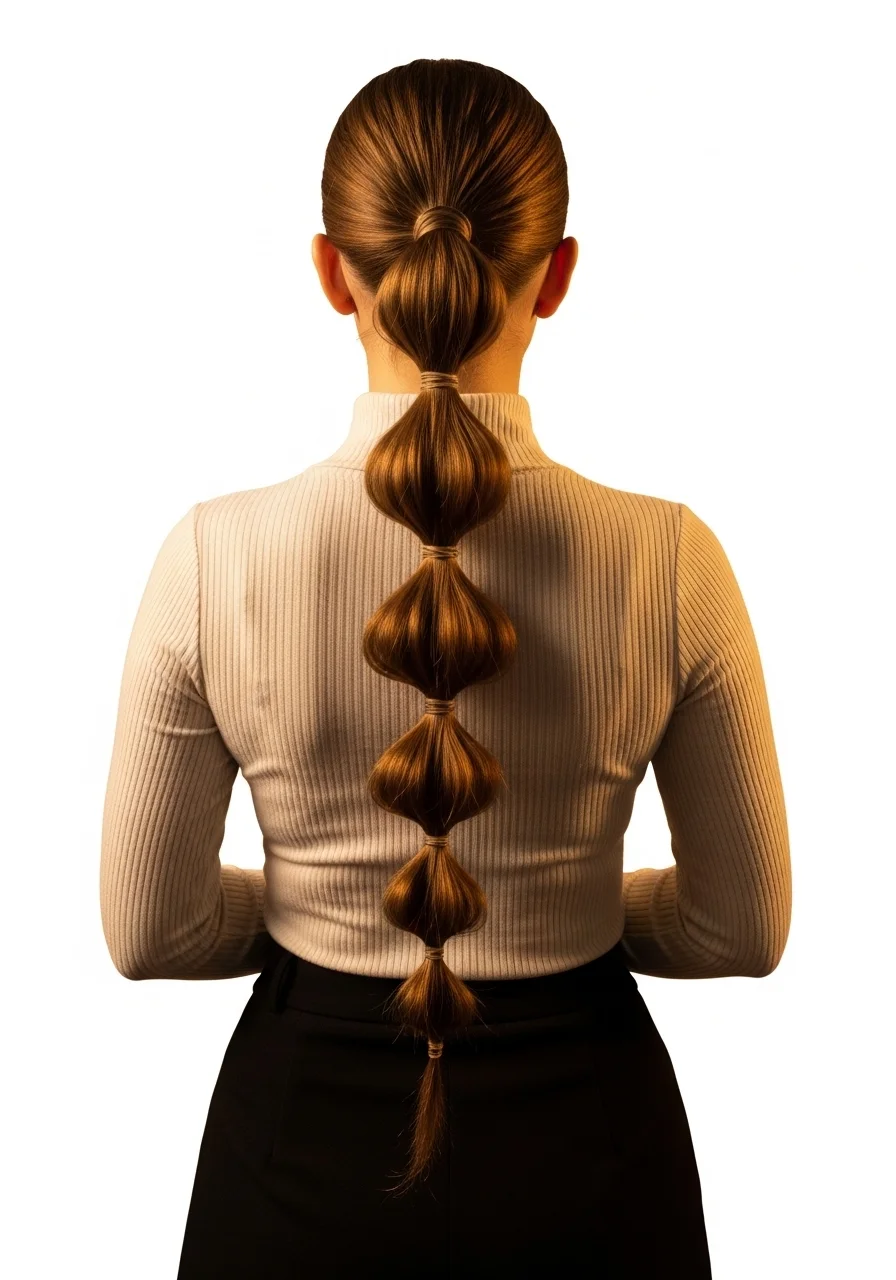
The bubble ponytail is one of the most fun and eye-catching variations of the classic style. It looks intricate but takes only a few minutes and a handful of hair elastics.
Start with a regular ponytail at whatever height you prefer. High ponytails give the most dramatic effect.
Add a second elastic about two to three inches below the first. Then gently pull the hair between the two elastics outward on both sides to create a rounded, balloon shape.
Continue adding elastics every two to three inches down the length of the ponytail. Puff out each section between the elastics as you go.
The more you puff each bubble, the fuller and more dramatic the effect. For a subtle look, just pull gently. For a bold statement, really expand each section.
This style works on all hair types but looks especially good on thick hair. Fine hair may need a volumizing spray applied before styling to make the bubbles hold their shape.
A bag of clear hair elastics costs one to two dollars at any drugstore. You need about five to eight for a full-length ponytail.
This hairstyle photographs beautifully and gets compliments every single time. It is one of those styles that looks like you spent much more time on it than you actually did.
The Braided Ponytail
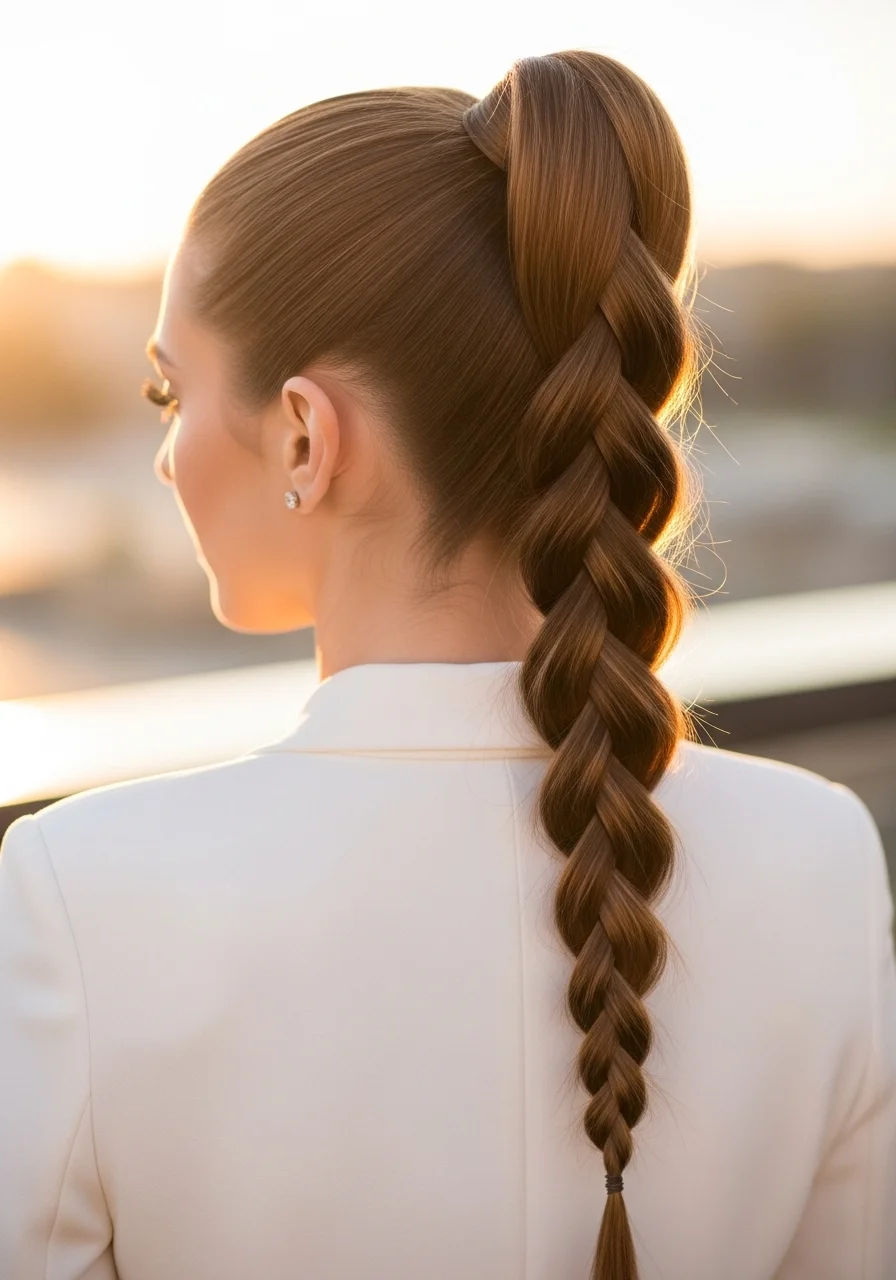
Adding a braid to your ponytail gives it instant texture, depth, and a more finished look that works for both casual and dressed-up occasions.
The simplest version is a basic three-strand braid. Secure your ponytail at the base, then divide the length into three sections and braid all the way to the end. Secure the braid with a small elastic.
Gently pull on the outer edges of the braid after finishing it. This loosens the braid and makes it look fuller and more relaxed rather than tight and stiff.
For a different look, try a fishtail braid instead. Divide the ponytail into two sections and alternate pulling small pieces from each side across to the other. The result is a textured, feathery-looking braid that looks far more complicated than it is.
You can also add the braid on top before gathering the ponytail. Take a small section of hair from one side, braid it loosely, and include it in the ponytail alongside the rest of your hair.
No hair products are required for a basic braid. The style holds itself once secured at the end.
Practice makes this faster. Once you can braid without looking in a mirror, the whole process takes under three minutes.
The Ponytail With Face-Framing Curtain Bangs
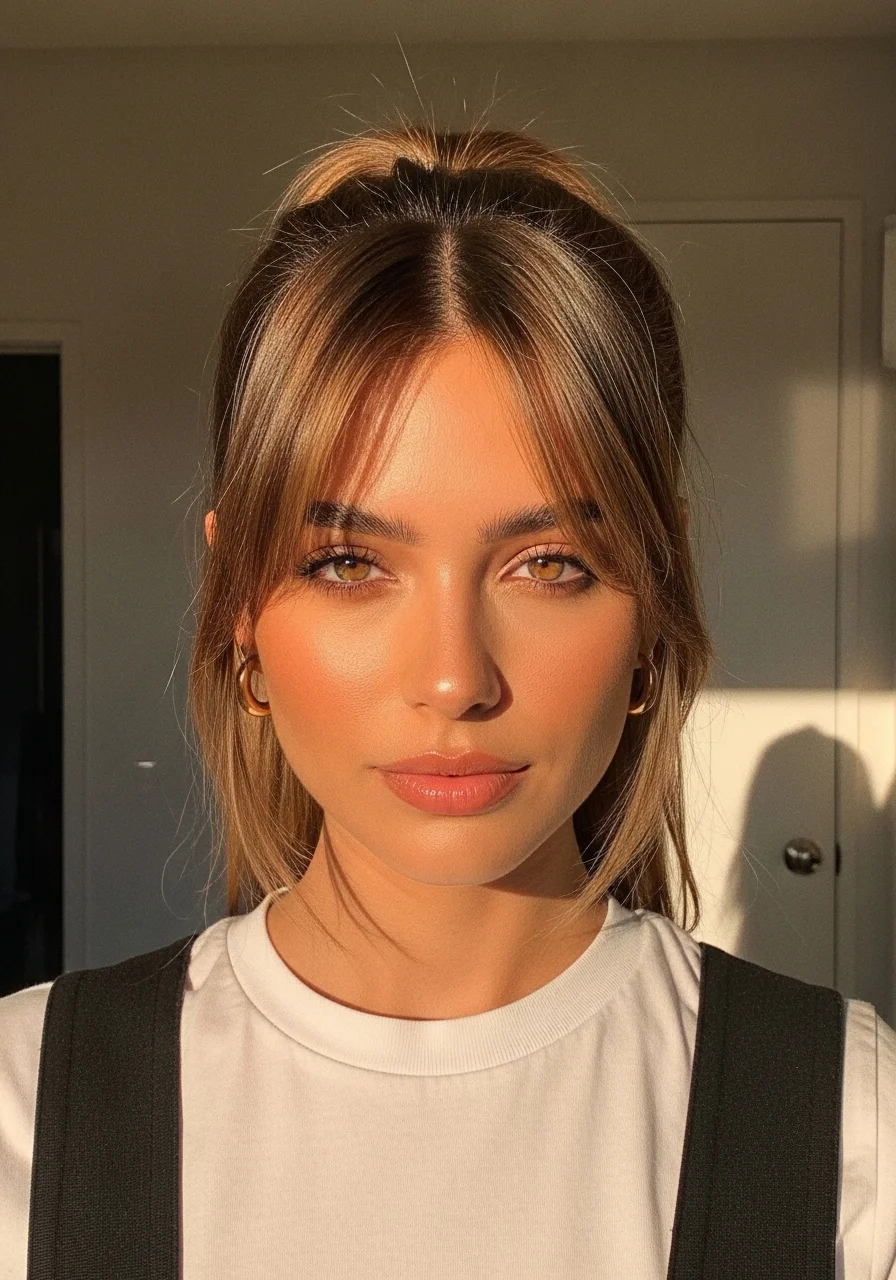
Curtain bangs and a ponytail are a combination that looks deliberately styled without requiring much skill or time at all.
If you already have curtain bangs, pulling the rest of your hair into a ponytail while leaving the bangs loose instantly creates a face-framing effect that flatters almost every face shape.
Part the bangs down the center and let them fall naturally on each side. Avoid over-styling or over-brushing them. A light touch gives a more natural, lived-in result.
For a polished version, use a round brush and a low-heat blow dryer to gently curve the bangs outward as they dry. This takes about two minutes once the technique is practiced.
For a casual version, simply air dry and let them fall as they will. A little natural texture in the bangs actually softens the overall look.
A small amount of lightweight styling cream or hair oil rubbed between the fingertips and run lightly through the bangs tames any frizziness without weighing them down.
If you do not have curtain bangs, you can fake the effect. Pull out two long, thin face-framing sections on either side before gathering the ponytail. Loosely curl or wave these sections with a wand for a similar effect.
The Slicked-Back Wet Look Ponytail
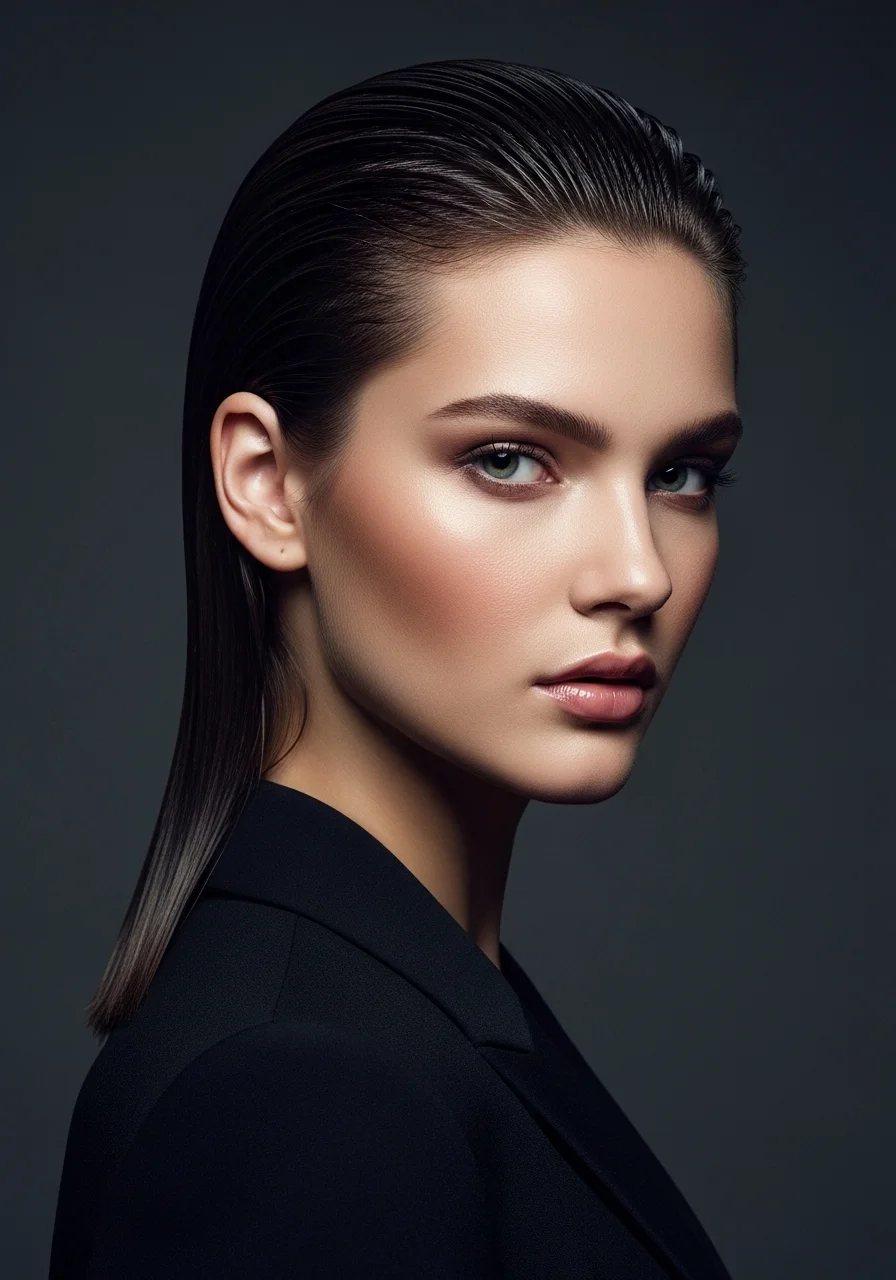
The wet look ponytail is one of the most striking, high-fashion versions of this style. Despite looking very intentional, it is genuinely one of the simplest techniques to execute.
Apply a generous amount of gel or strong-hold pomade to dry or slightly damp hair. Work it through from roots to ends while combing it flat against the head.
A fine-tooth comb is the tool that makes this style work. Use it to smooth every strand completely flat. Pay special attention to the crown and sides where flyaways tend to appear.
Gather the hair at the nape of the neck for the most editorial look. Or bring it to a mid-height for a slightly less severe variation.
The key is the product. Cheap hair gel from the drugstore works perfectly for this style. A bottle of LA Looks or Eco Styler gel costs two to four dollars and gives a high-gloss, long-lasting finish.
Let the gel set for a few minutes before touching the style. Once it begins to dry, it locks everything in place.
This look is excellent for formal events, job interviews, or any occasion where a sharp, groomed appearance matters. It photographs exceptionally well because of the light reflection across the smooth surface.
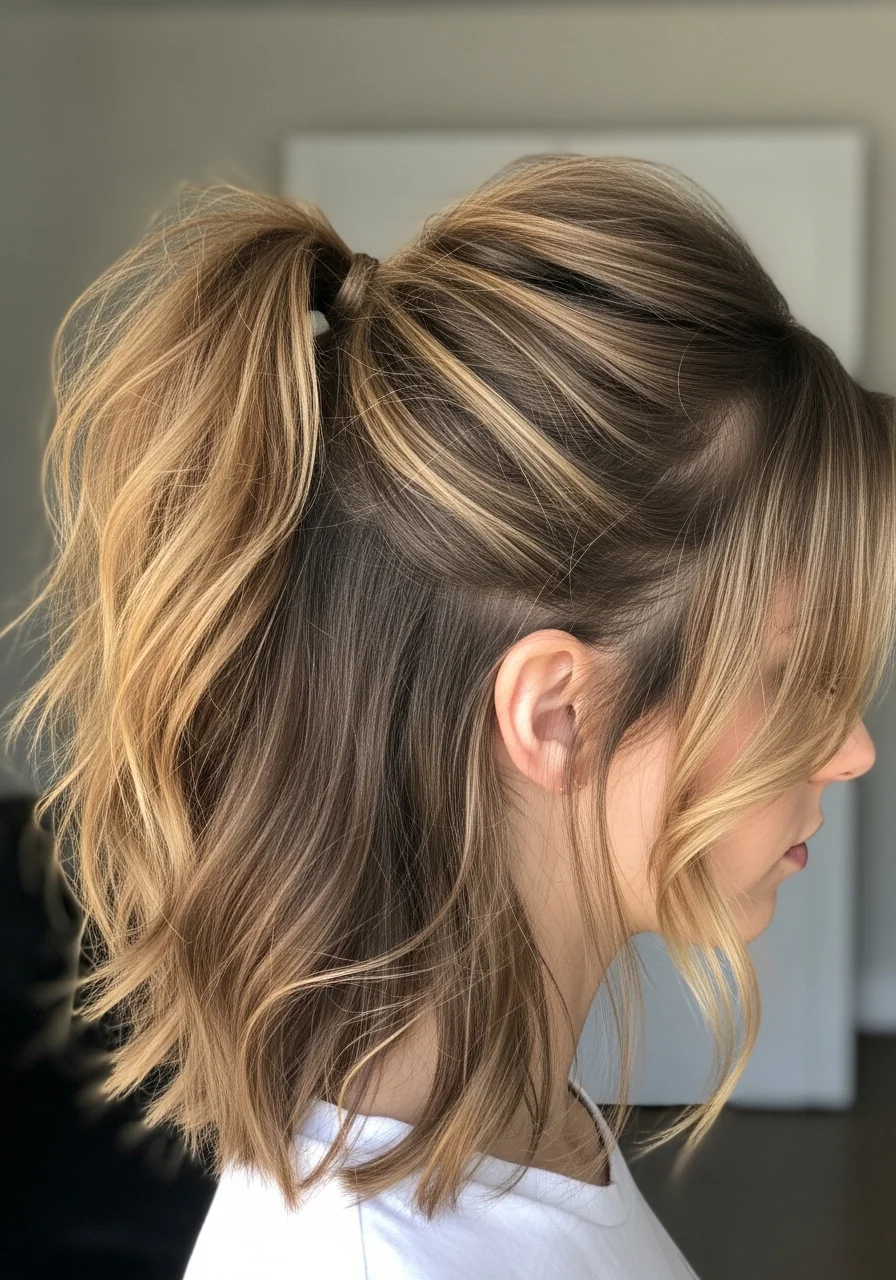
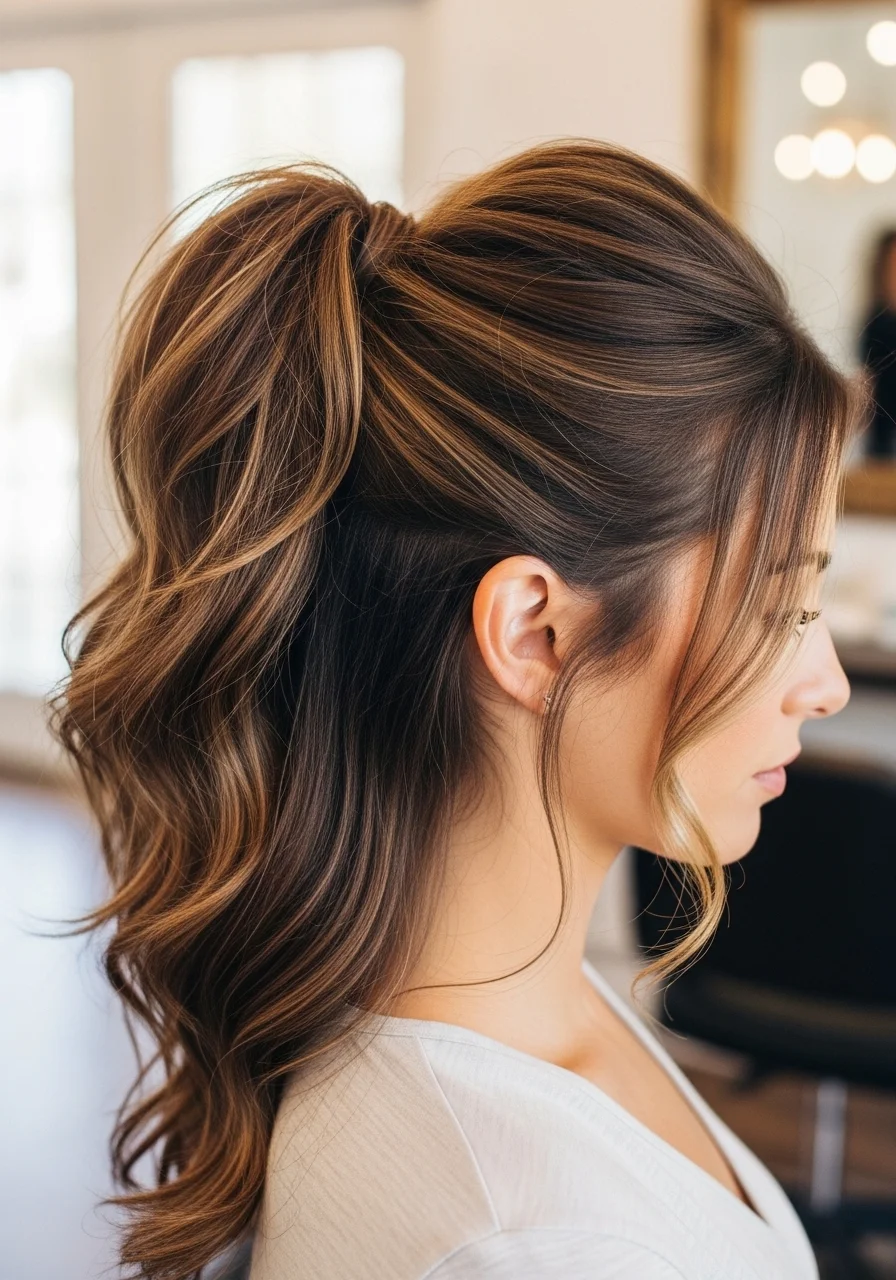
The Half-Up Pony With Volume on Top
The half-up ponytail is ideal when you want your hair off your face but do not want to commit to pulling all of it back. It is one of the most flattering styles for any hair length.
Take the top half of your hair, roughly from the temples and the crown, and gather it into a small ponytail at the back of the head. Leave the bottom half loose.
Backcomb or tease the gathered section lightly before securing it to create volume at the crown. This lifts the top section and gives the style more shape and presence.
The loose bottom half should have some texture to it. Second-day waves, natural curl, or a quick run-through with a curling wand all add the right kind of body.
For a more polished version, smooth the gathered section completely before tying it. For a casual version, leave a little bump or texture in the crown section.
Wrap a piece of hair around the elastic or use a clip or claw clip to secure the top section. Claw clips are having a major style moment right now and add a chic, effortless quality to this style.
This look works on medium and long hair most effectively but can be done on shorter lengths too with some bobby pin assistance.
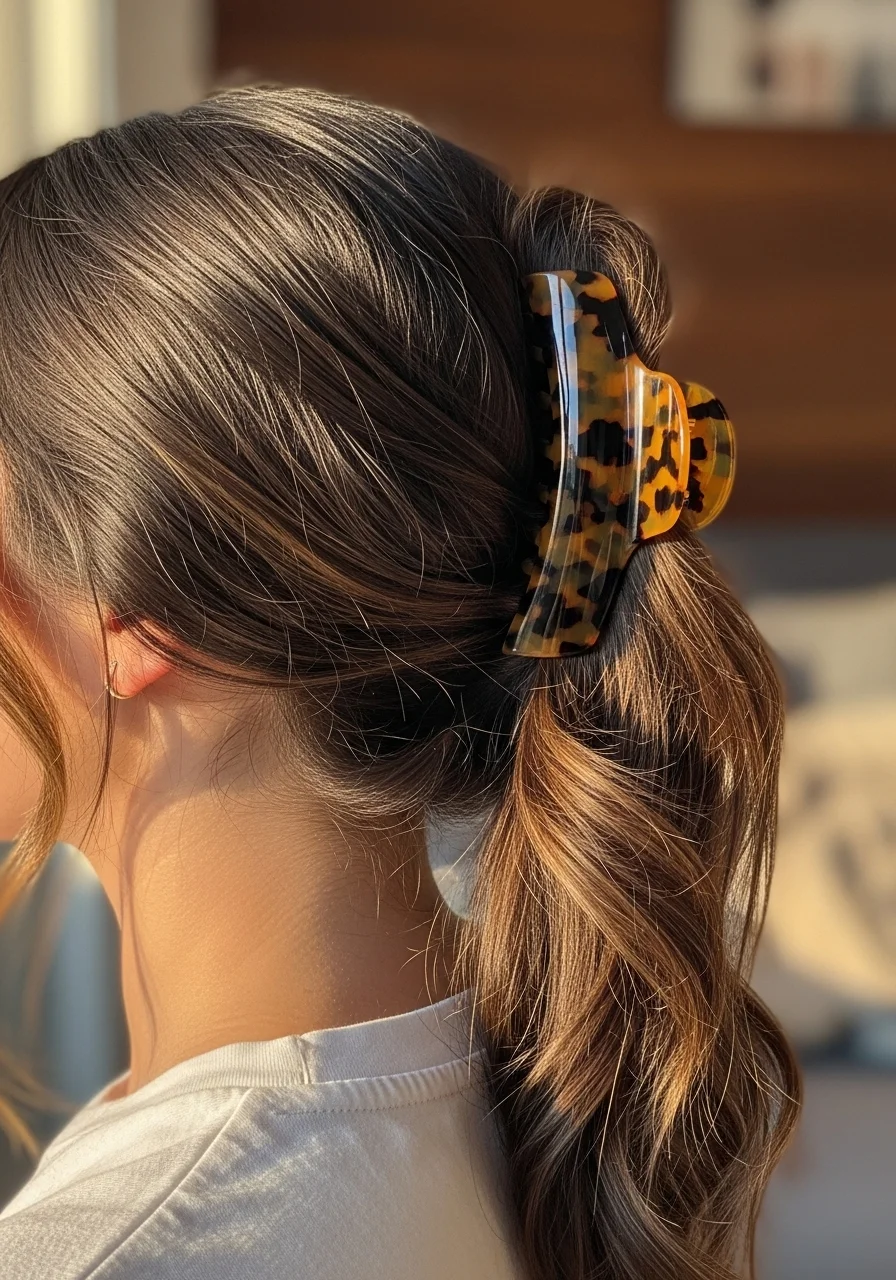
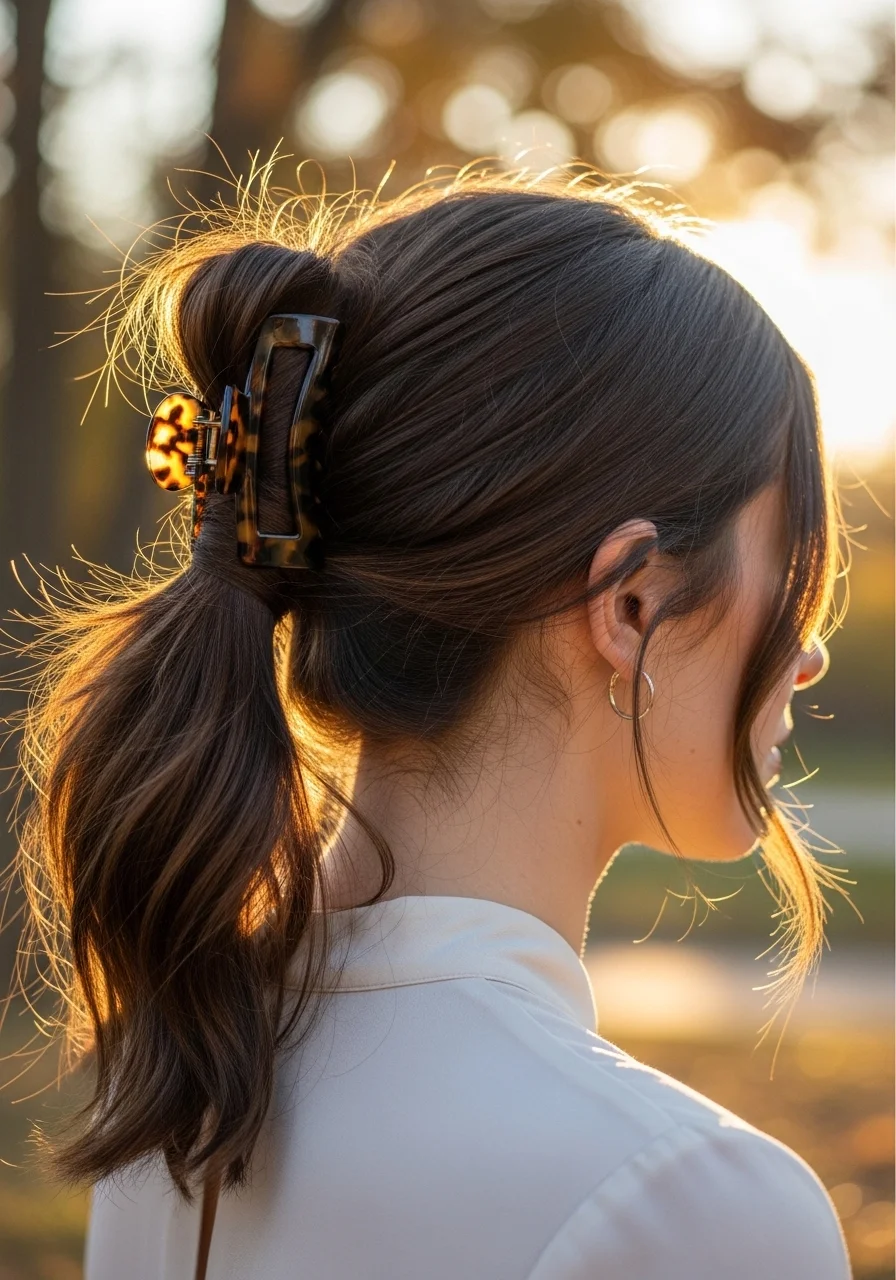
The Pony With a Claw Clip Finish
The claw clip ponytail has taken over social media and for good reason. It takes fifteen seconds, requires zero skill, and looks genuinely stylish when done with intention.
The secret is in the clip size and how loosely you gather the hair. A large claw clip holds more hair and creates a more dramatic, full effect. A smaller clip works for thinner hair or a neater look.
Gather your hair loosely in one hand and twist it slightly before clipping it at the base. The twist adds structure and keeps the clip from sliding down.
Let the ends of the hair fall out of the top of the clip in different directions. Some pieces pointing up, some falling to the side. This looks casual and intentional at the same time.
Pull a few face-framing pieces loose around the hairline. This is the detail that takes the look from thrown-together to deliberately styled.
Claw clips come in dozens of colors, sizes, and materials. Tortoiseshell acetate clips look the most polished. Basic plastic clips work just as well and cost under two dollars.
A set of mixed-size claw clips runs from three to ten dollars online or at any drugstore. Once you start using them regularly, you will wonder how you styled your hair without them.
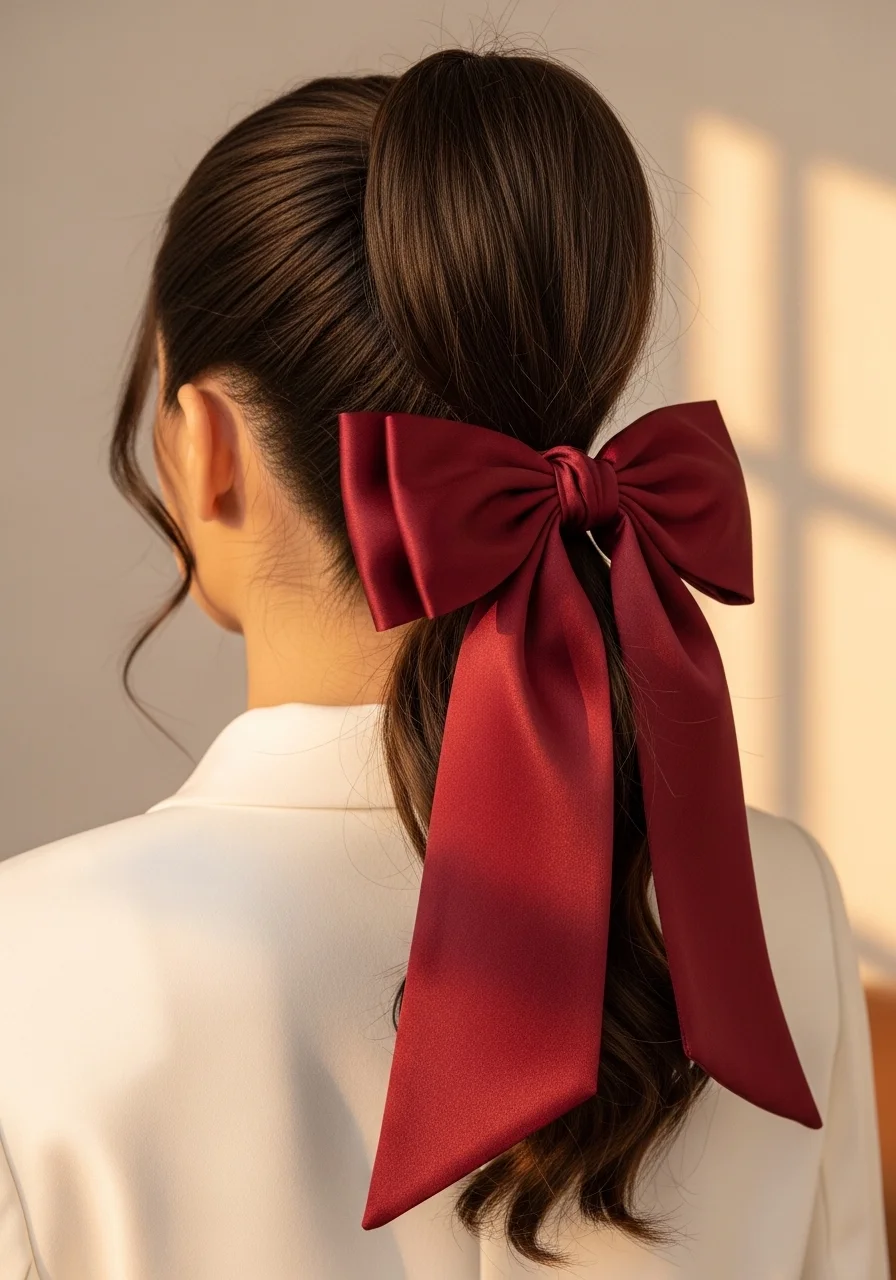
The Ponytail With Curtain Scarf Bow
A bow tied at the base of a ponytail adds instant elegance or playfulness depending on the material and how it is tied.
A large satin or silk bow at the base of a high ponytail reads as feminine and polished. A casual cotton bow in a bright color feels playful and youthful.
Use a long ribbon or strip of fabric, roughly thirty to forty centimeters long, and tie it around the elastic base in a classic bow knot. Adjust the loops until both sides are even.
For the most refined look, use a ribbon that matches or complements your outfit. A plain black bow works with almost anything and photographs beautifully.
You do not need to buy hair ribbons specifically. A thin belt, a piece of gift ribbon, or a strip of fabric from an old scarf all work perfectly. Fabric stores sell ribbon by the meter for almost nothing.
The bow looks best when the loops are full and the tails are long enough to trail alongside the ponytail. Trim any fraying edges neatly for a cleaner finish.
This style is particularly good for special occasions, photo shoots, or any time you want the ponytail to feel like a deliberate choice rather than a default hairstyle.
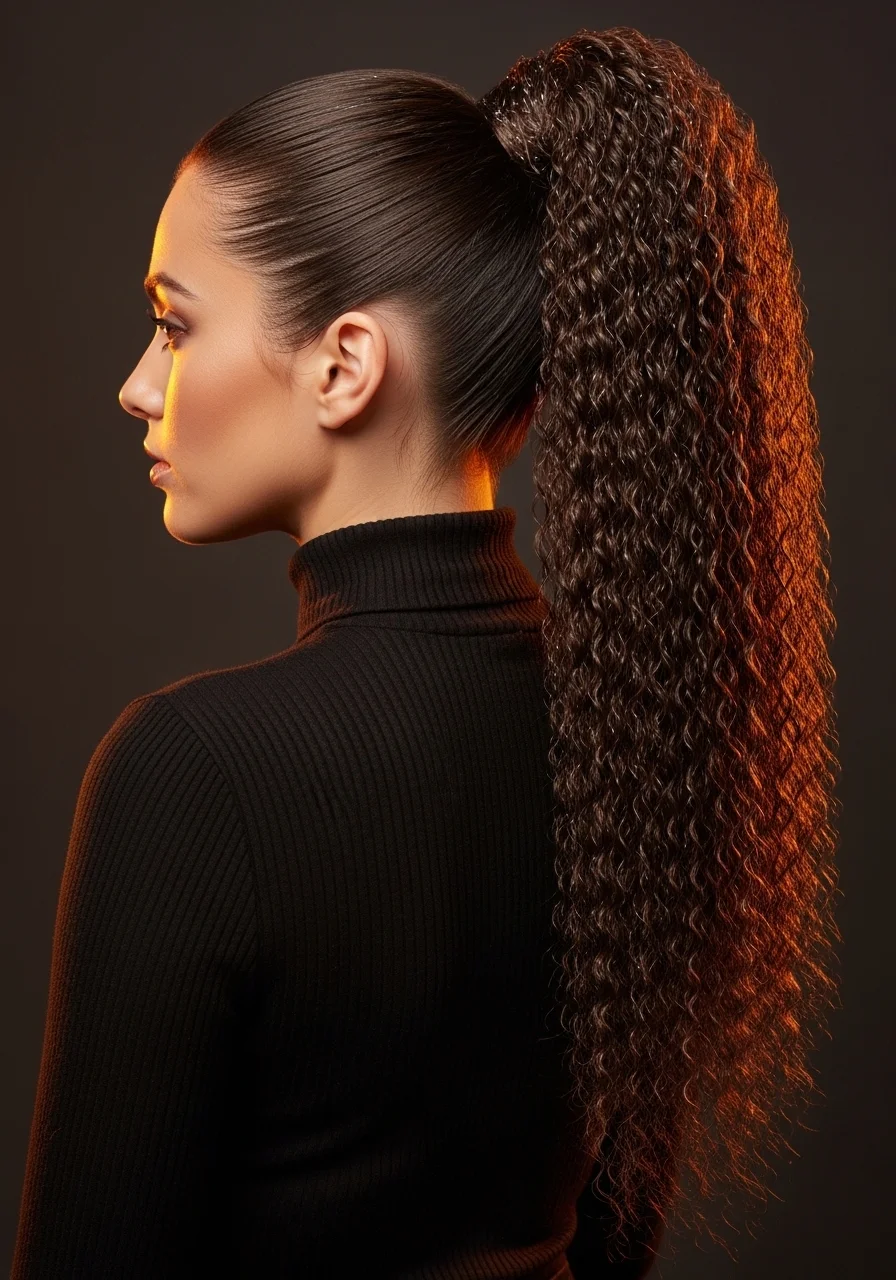
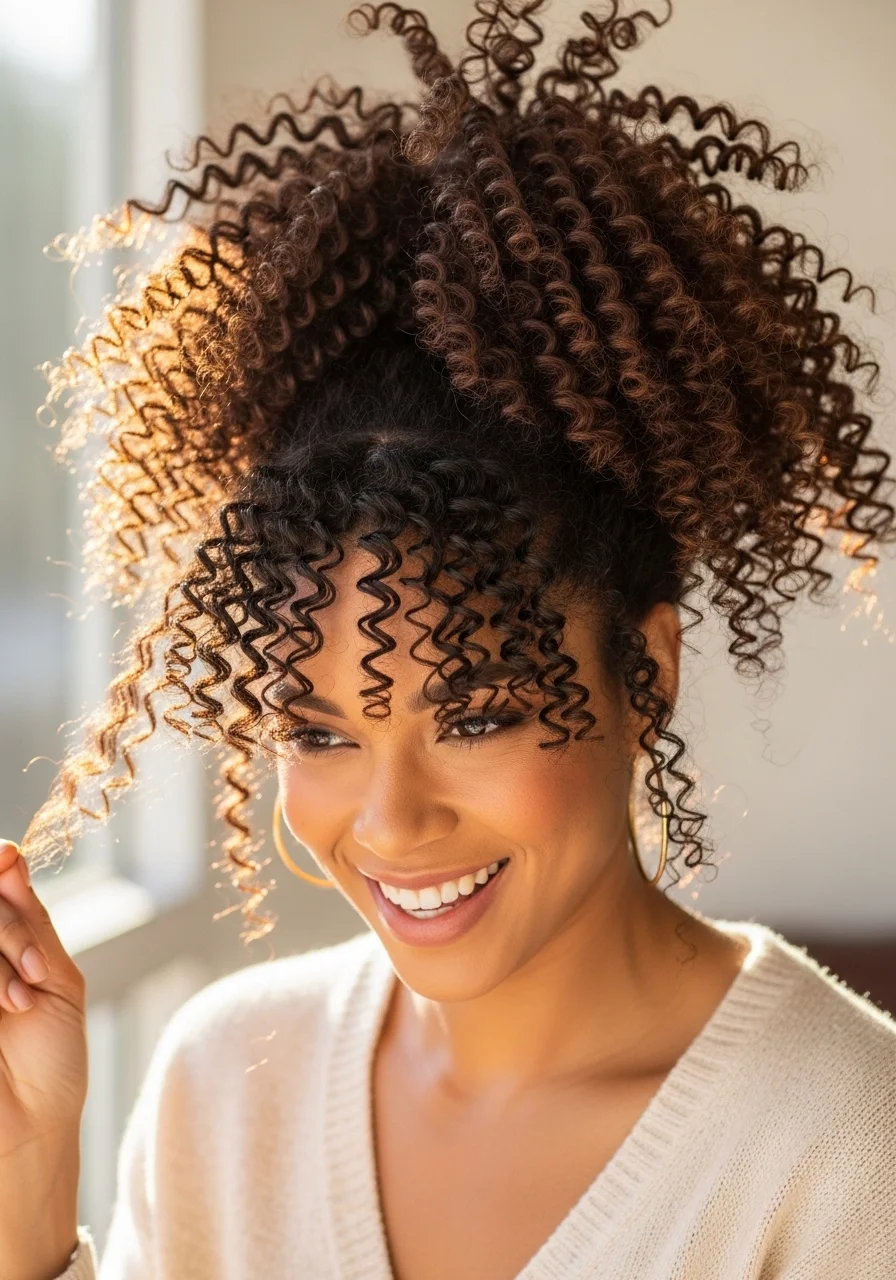
The Crimped Texture Ponytail
Crimping hair is back in a big way and adding it to a ponytail gives one of the most eye-catching and retro-inspired looks around.
A crimping iron is the tool you need. They are widely available online and at beauty supply stores for ten to twenty-five dollars. Modern versions have adjustable heat settings that make them safer and easier to use than older models.
Work in sections from the bottom up, clamping the crimper down for two to three seconds on each section and moving upward. The result is a consistent zigzag texture throughout the hair.
Once all the hair is crimped, gather it into a high ponytail and secure with an elastic. The crimped texture gives the ponytail enormous volume compared to smooth hair.
Apply a light-hold hairspray after crimping to keep the texture from loosening throughout the day. Too much product will weigh the crimps down, so keep it light.
You do not need to crimp every single strand perfectly. A more random application of the crimper creates a lived-in, textured look that often photographs better than perfectly uniform crimping.
This style is exceptional for festivals, parties, or any time you want to make a visual statement with your hair. It is far easier to achieve than it looks.
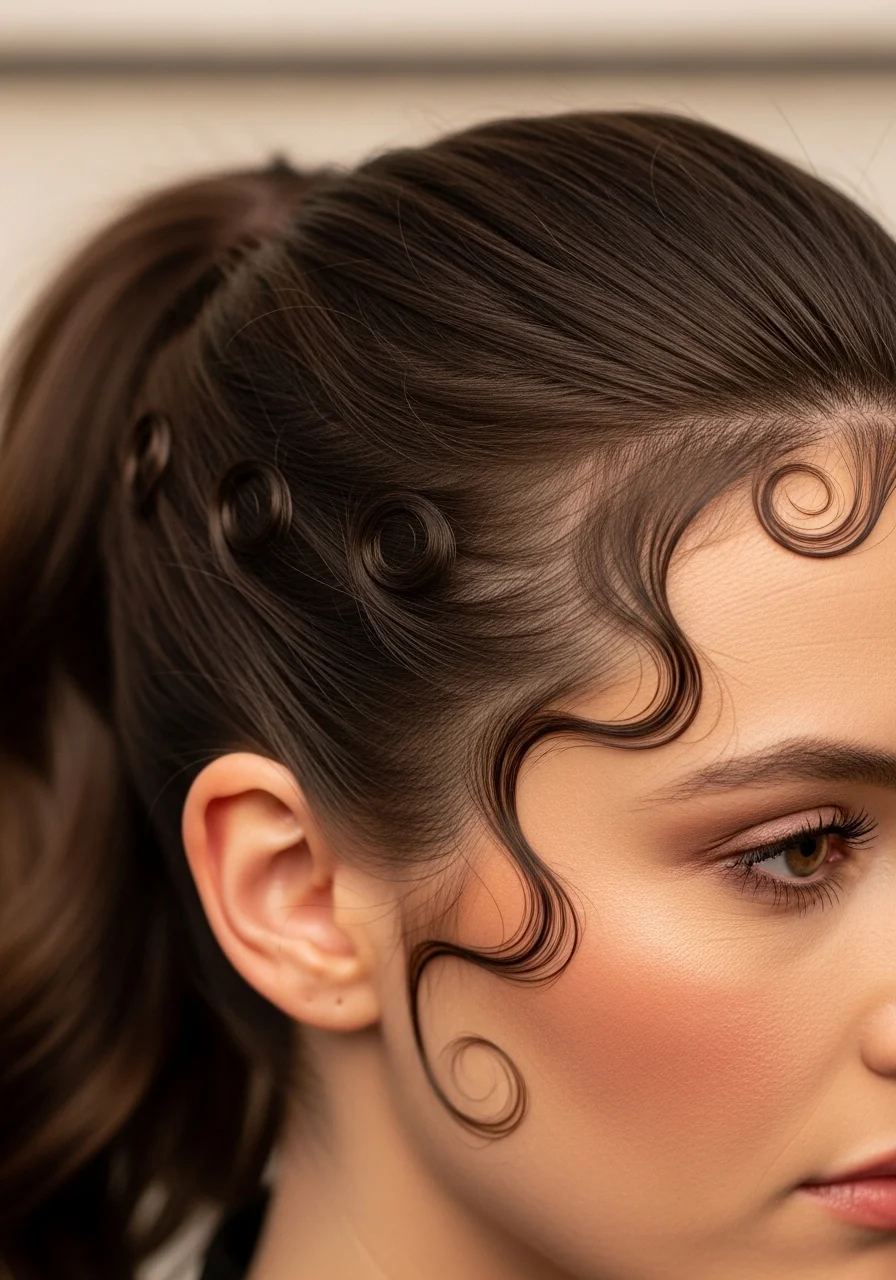
The Ponytail With Wispy Baby Hair
Baby hair styling is one of those small details that separates a basic ponytail from a truly polished and intentional look.
The small, fine hairs along the hairline can be styled into elegant swirls, soft waves, or neat flat pieces. This frames the face beautifully and gives the style a finished quality.
Use a soft toothbrush, a fine-tooth comb, or a dedicated edge brush to lay the baby hairs down. Apply a tiny amount of edge control gel or strong-hold pomade to the brush before styling.
Work in small sections, shaping each piece into a swirl or a soft curve against the forehead and temples. Press each shaped section down gently with your fingertip and let it set before moving on.
Edge control products are available at most drugstores and beauty supply stores for three to eight dollars. Eco Styler, Got2b, and Ampro are all affordable and effective options.
Once styled, lay a satin scarf gently over the hairline and leave it on for a few minutes while you finish your makeup. This presses the baby hairs flat and helps them hold the shape longer.
This technique is popular in Black hair styling traditions and has crossed over into mainstream hair culture because the results speak for themselves.
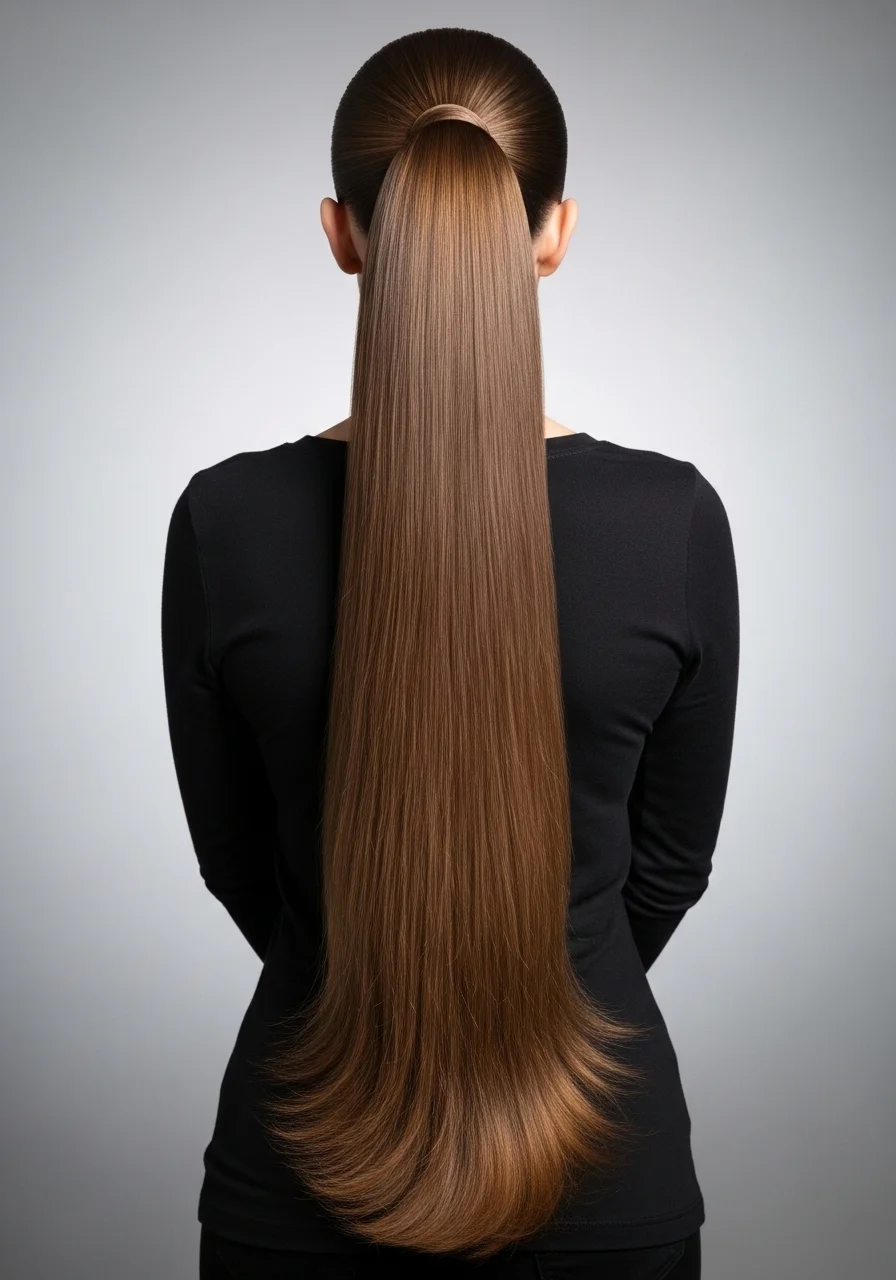
The Voluminous High Pony With Padding
A voluminous, full ponytail looks incredible but is often out of reach for people with fine or thin hair without a little help.
A hair donut or padding ring is the secret tool. It slips over the ponytail and sits at the base, adding a rounded, full shape that makes even thin hair look thick and dramatic.
Thread your ponytail through the donut and spread the hair evenly over it. Pin or wrap the outer layer around the donut to cover it completely. Finish by smoothing the surface and securing any loose ends with bobby pins.
Hair donuts cost two to five dollars at beauty supply stores and come in various sizes and shades to match most hair colors. They are reusable and essentially last forever.
If you do not have a donut, a sock works just as well. Cut the toe off an old sock, roll it into a donut shape, and use it exactly the same way.
For extra volume at the crown before gathering the hair, backcomb the roots gently with a fine-tooth comb. This lifts the roots and creates height before the ponytail is even tied.
This look is especially popular for weddings, formal events, and any occasion where you want your hair to make a statement.
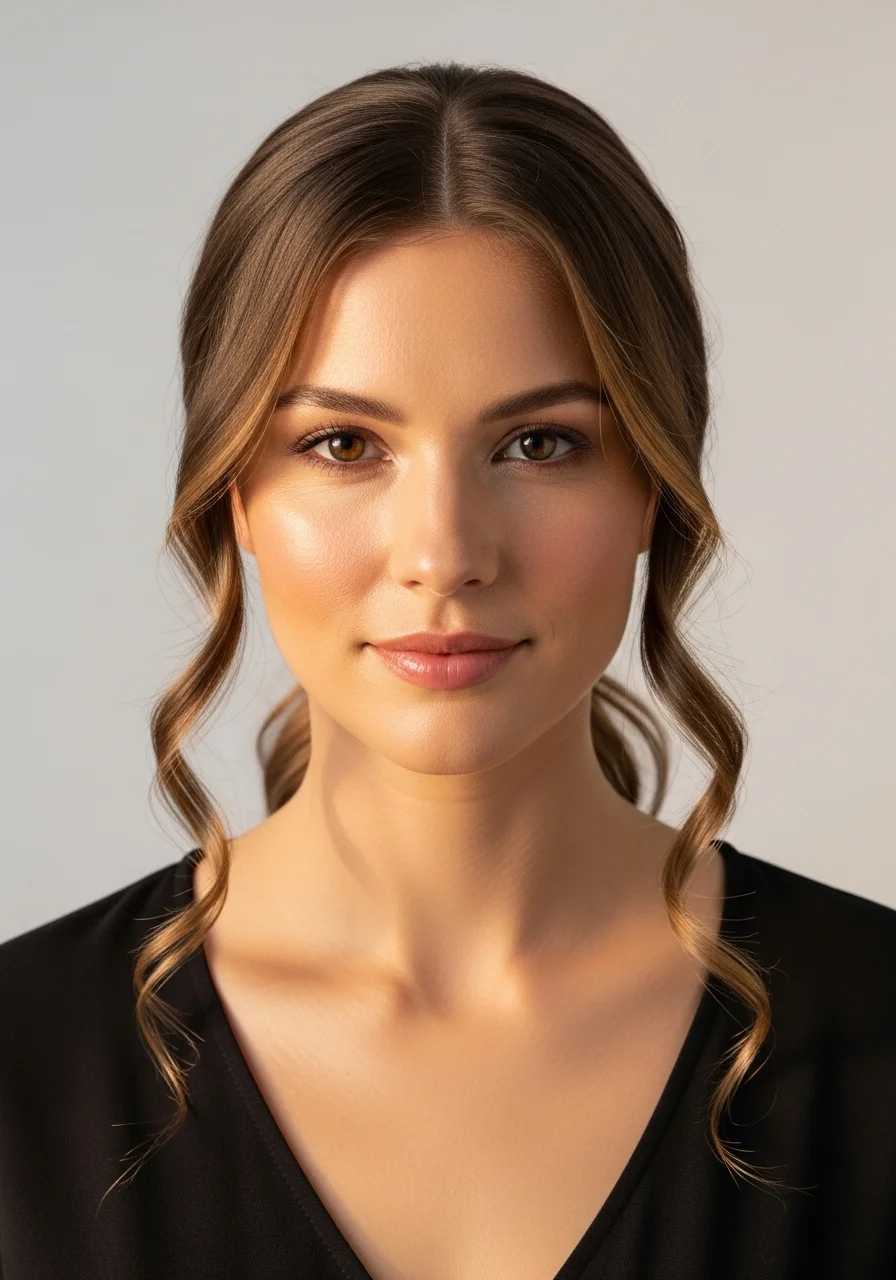
The Ponytail With Curtain-Framed Face
Pulling the entire hair back without any face-framing pieces can look stark. Leaving a few soft tendrils loose completely changes the feel of the same style.
Before pulling your hair into a ponytail, take a thin section from just in front of each ear. Leave these out and gather the rest of the hair into your ponytail.
Wrap each tendril loosely around your finger to create a soft curl. Hold it for a few seconds. The warmth from your finger sets a gentle wave without any heat tool. For a more defined curl, use a small curling wand on a low setting.
The tendrils should frame the cheekbones and jaw. This adds softness, femininity, and a more romantic quality to what might otherwise be a severe style.
Length matters here. The face-framing pieces should be long enough to reach at least the chin for the most flattering effect. Too short and they stick out stiffly. The right length lets them curve naturally alongside the face.
Apply a light cream or hair oil to the tendrils to define them without stiffness. Too much product makes them look wet rather than soft.
This is one of the most universally flattering ponytail adjustments regardless of face shape, hair type, or age.
The Knotted Ponytail
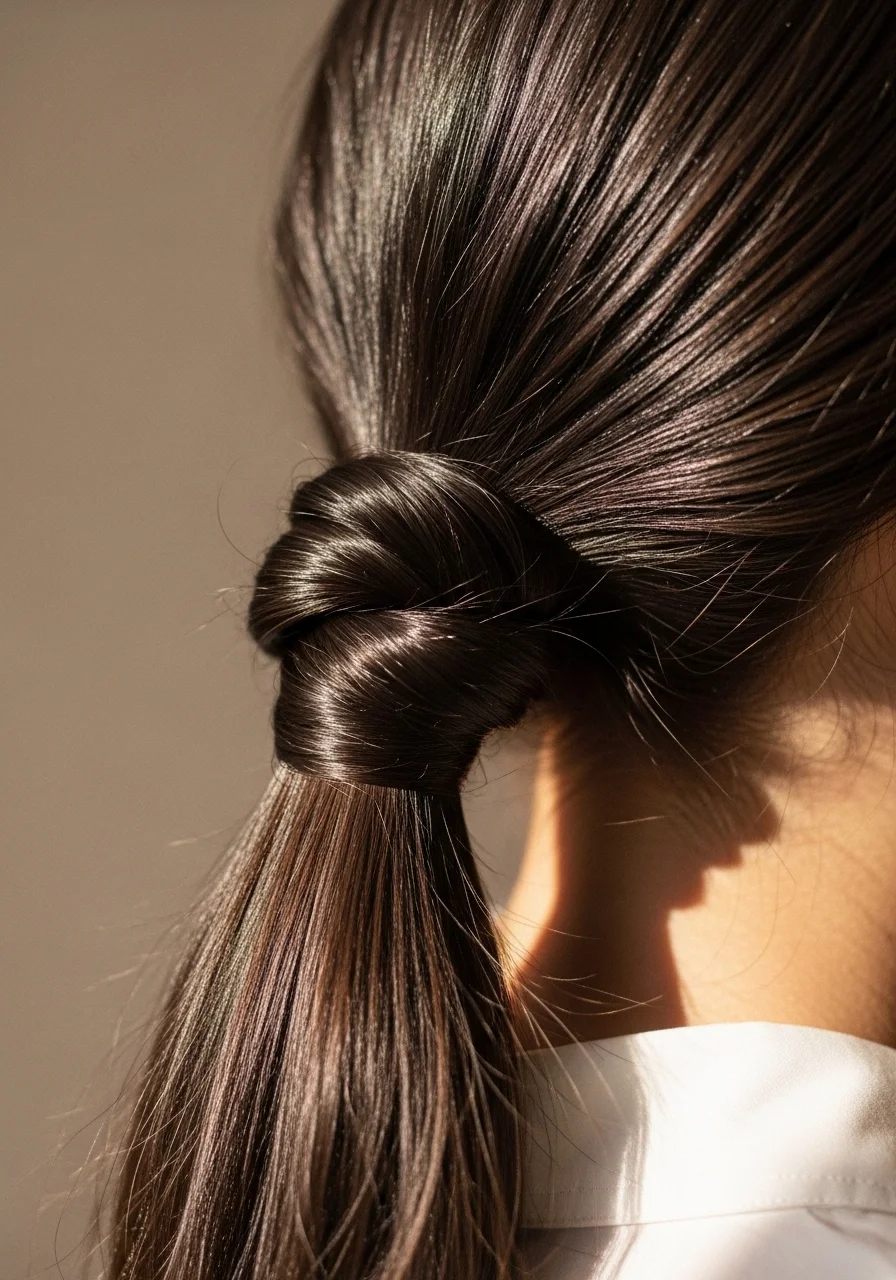
The knotted ponytail is a clever style that sits somewhere between a ponytail and an updo. It takes about sixty seconds and looks significantly more polished than a plain pony.
Gather your hair into a low ponytail at the nape of your neck. Divide the ponytail into two equal sections.
Cross the two sections over each other and then loop them through the way you would begin tying a shoe. Pull gently so the knot sits close to the base of the ponytail.
Secure the ends with a small elastic or tuck them under the knot and pin them in place with bobby pins. Pull a few strands loose from the knot for a more relaxed finish.
Spray lightly with hairspray to hold everything in place. The knot tends to loosen throughout the day, so a light mist of spray at the base is a worthwhile step.
This style works best on medium to long hair. Very short hair may not have enough length for the knot sections to work properly.
It photographs beautifully from the back and profile, making it popular for events where you want your hair to look considered from every angle.
The knotted ponytail is one of those styles that looks like a hairdresser did it but genuinely takes almost no skill once you try it twice.
The Ponytail Bun Hybrid
Can’t decide between a ponytail and a bun? Do both at the same time.
Pull your hair into a high or mid-height ponytail. Then twist the length of the ponytail loosely around the base, creating a loose bun shape. Secure the wrapped hair with a large clip or several bobby pins.
Leave the ends of the ponytail sticking out slightly rather than tucking them all in neatly. This creates a casual, lived-in finish rather than a tight, formal bun.
The result is a style that reads as an updo from the front and a ponytail-bun hybrid from the back. It stays up well throughout the day and requires almost no maintenance once in place.
Pull a few face-framing pieces loose around the front before securing everything. This adds softness and prevents the style from looking too severe.
This works on medium and long hair most effectively. Very long hair may need two or three clips to hold all the wrapped sections in place.
It is an excellent style for warm weather because it keeps all the hair off the neck while looking more interesting than a plain bun.
Claw clips large enough to hold this style cost three to eight dollars and come in enough variety to match any outfit or occasion.
The Two-Tone Ribbon Laced Ponytail
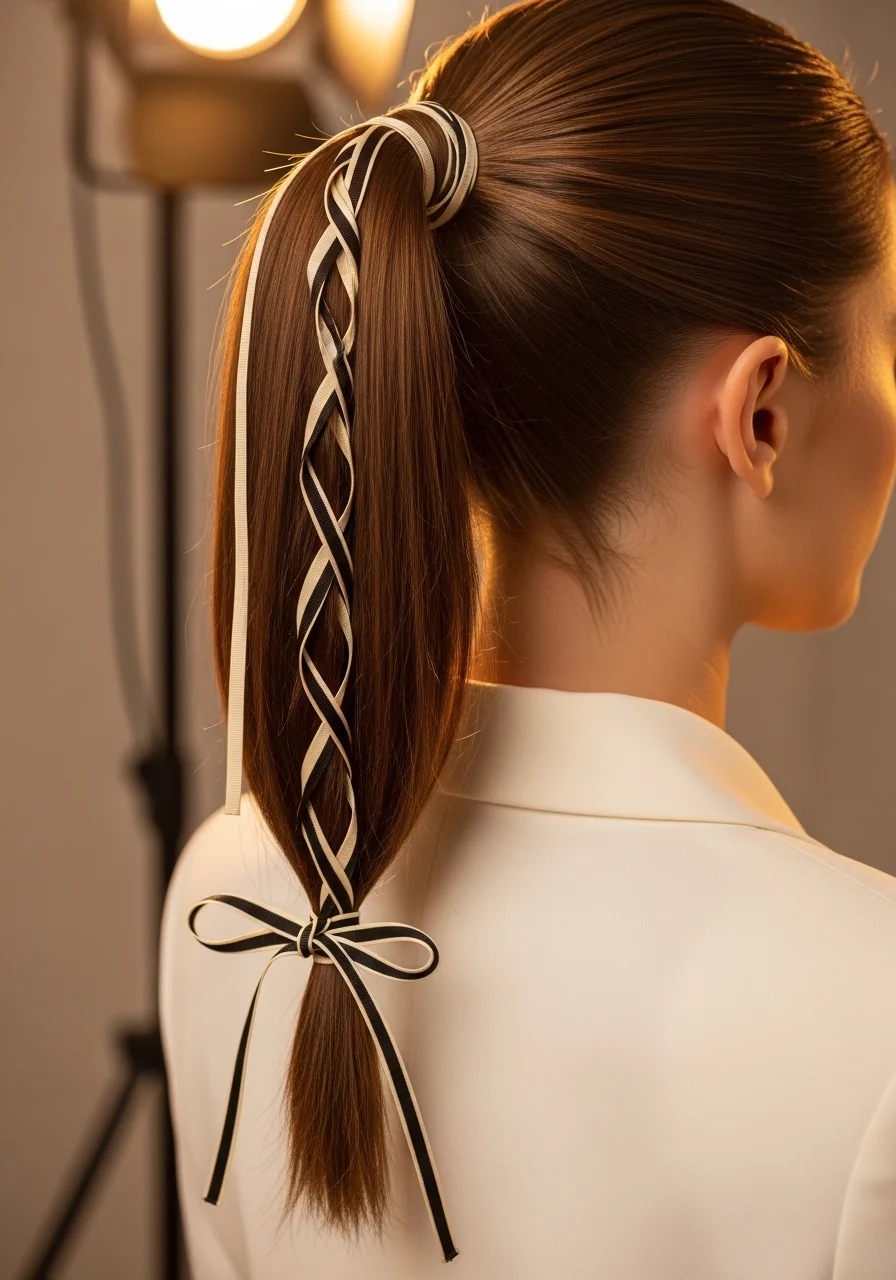
Weaving ribbon through a ponytail takes a plain style and turns it into something genuinely eye-catching. The technique is simple but the result looks carefully considered.
Cut two ribbon lengths of roughly fifty centimeters each. Fold them in half and loop them around the base elastic of your ponytail so all four ribbon ends hang down alongside the hair.
Separate the ponytail hair into two sections. Take one ribbon from each side and cross them over each other between the two hair sections. Bring each ribbon to the outside and continue down the length of the ponytail, crossing every few centimeters.
Secure the ribbons at the end of the ponytail with a small elastic and tie the ribbon ends into a bow.
This technique is easier to learn by doing than by reading instructions. Practice once on a loose section of hair and you will get the pattern immediately.
Ribbons from craft stores or sewing shops cost almost nothing. A spool of satin ribbon runs one to three dollars and provides enough for dozens of ponytail styles.
Two-tone options look especially striking. Try black and gold for an elegant look, or pastel ribbons for a more playful approach. Matching the ribbon to a color in your outfit creates a coordinated look that feels intentional and styled.
The Sporty Side Ponytail
The side ponytail is a classic that never fully goes away. Done with a little care and the right placement, it looks modern and intentional rather than dated.
The key is in the height and how neatly the hair is gathered. A very low side ponytail positioned just behind one ear has an editorial, asymmetric quality that feels current.
Brush all the hair to one side and gather it smoothly at the point just above and behind the ear. Secure with an elastic and wrap a small piece of hair around the band to conceal it.
The side you choose matters. Most people have a more flattering side. Experiment with both and notice which direction feels better for your features.
For a sleek version, apply a smoothing serum before brushing all the hair to one side. For a textured version, add sea salt spray and let the hair air dry slightly before gathering.
This style is excellent for athletes and active people because it keeps hair contained and off the face without putting all the weight at the back of the head, which can cause headaches during exercise.
It also works beautifully for casual everyday wear, particularly for people with shoulder-length or longer hair who want something different from the standard center-back ponytail.
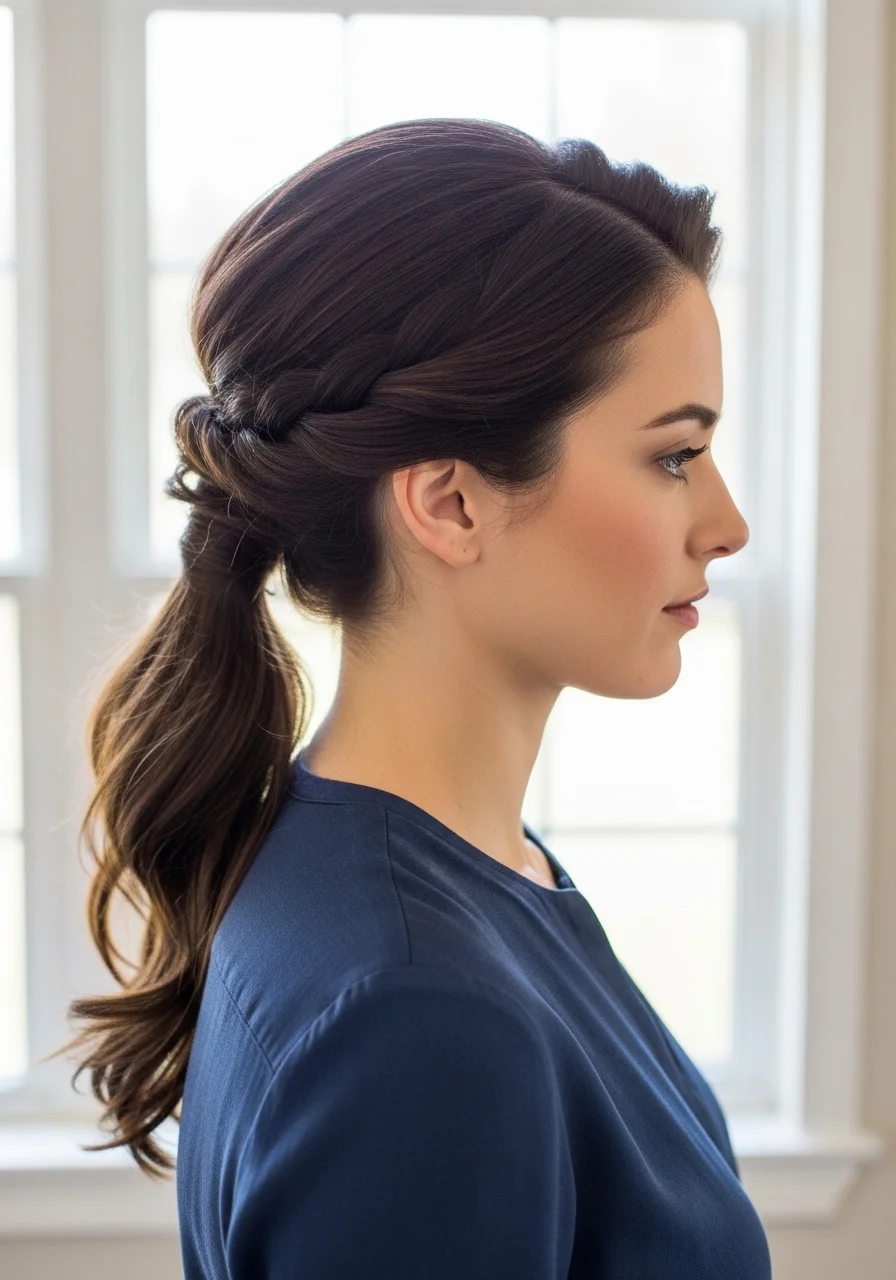
The Twisted Crown Into Ponytail
This style combines the elegance of a crown twist with the practicality of a ponytail. It keeps everything off the face while adding a decorative element at the top.
Take a section of hair from the hairline on one side, above the ear. Twist it backward along the crown of the head toward the back. Pin it in place with a bobby pin as you go.
Repeat on the opposite side. The two twisted sections should meet at the back of the head where the ponytail begins.
Gather all the remaining hair along with the ends of the two twists into a low ponytail at the nape of the neck. Secure with an elastic.
The pinned twists create a crown-like frame across the top of the head that elevates the style significantly above a plain ponytail.
Bobby pins are the only tool required. Use pins that match your hair color to keep them invisible within the twist.
This style is a wonderful option for occasions where a plain ponytail would feel too casual but a full updo seems excessive. It works for church, weddings as a guest style, office settings, and date nights.
Practice the twist a couple of times before an important occasion. The technique becomes natural very quickly.
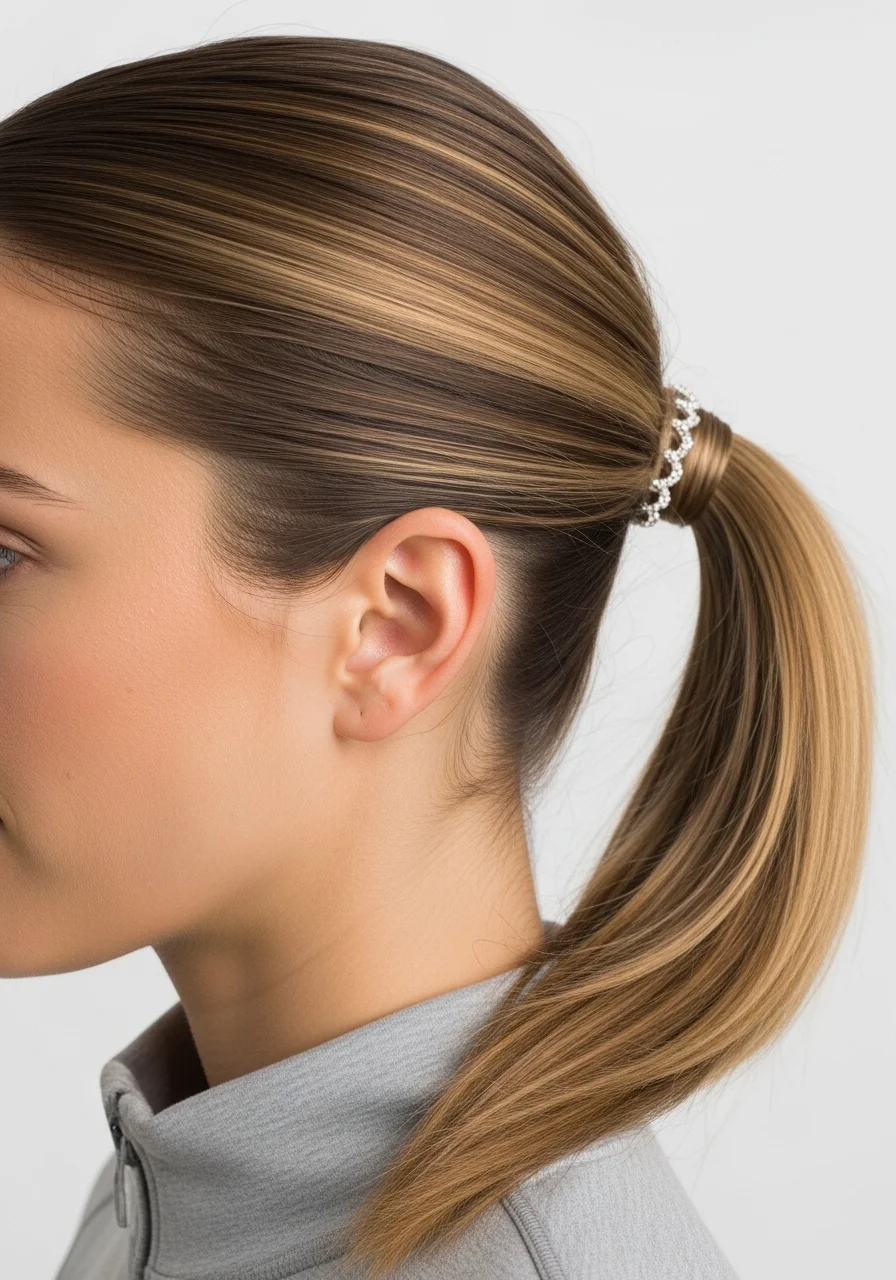
The Ponytail With Statement Elastic
Your hair tie is a visible part of the style. Choosing a decorative elastic instead of a plain one instantly upgrades the look of any ponytail.
Scrunchies are still going strong. Large silk or velvet scrunchies add softness and color to the base of a ponytail in a way that feels fashion-forward rather than functional.
Embellished elastics with pearls, gold rings, or braided cord are widely available online and at beauty supply stores. A set of decorative elastics typically costs between five and fifteen dollars.
Match the elastic color to your outfit or your accessories. A gold-toned elastic pairs with gold jewelry. A cream scrunchie picks up the tones of a neutral outfit. A bold colored scrunchie can become the accent detail of an otherwise simple look.
Even a plain black scrunchie looks more intentional than a standard hair tie and is significantly gentler on the hair. Silk scrunchies in particular cause far less breakage and leave fewer dents in the hair shaft.
Keep a selection of decorative elastics in your bag, car, or desk drawer. They cost very little and give you the ability to make any ponytail look more finished without any additional styling.
This is one of those tiny details that people notice without being able to articulate why your hair looks better than theirs doing the same basic style.
The Ponytail With Extensions for Instant Length
Clip-in ponytail extensions are one of the best-kept secrets in hair styling. They take a short or thin ponytail and turn it into something full, long, and impressive in about two minutes.
Ponytail extensions come as a single piece with a clip or wrap mechanism at the top. They are designed specifically to add to the length and volume of an existing ponytail.
Gather your natural hair into a ponytail first. Then clip the extension around the base so it covers your natural elastic. The extension hair falls over the top of your own ponytail, making them appear as one unified piece.
For the most realistic look, choose a color that matches your hair as closely as possible. Many extension brands sell shade-matching guides online or offer multiple tones to blend with highlighted hair.
Quality clip-in ponytail extensions are available for twenty to sixty dollars online. At the lower end of that range, you get a very convincing result that lasts for hundreds of uses with proper care.
Wash and condition extensions after several uses and store them in a silk bag or box to keep them from tangling.
This is an excellent option for people growing out a bob, those with naturally fine hair, or anyone who wants dramatic hair for a special occasion without a full-length style every day.
The Curly Defined Ponytail
Natural curls in a ponytail look stunning when the curls are defined, moisturized, and allowed to do their thing rather than being forced flat or smooth.
The key to a good curly ponytail is starting with properly hydrated hair. Apply a curl-defining cream or leave-in conditioner to damp hair before air drying or diffusing.
Gather the hair with your hands rather than a brush. Brushing curly hair disrupts the curl pattern and creates frizz. Use your fingers to gently collect the curls upward into a ponytail position.
Secure with a soft elastic or a scrunchie. Tight elastics can distort the curl pattern at the base and leave marks. Fabric-covered or coil elastics are far gentler.
Shake the ponytail gently once secured to encourage the curls to separate and open up. This adds volume and prevents the ponytail from looking bunched and compressed.
Pull a few curls loose at the front to frame the face. These should be left as natural curls rather than straightened or overly styled.
Curl-defining creams from brands like SheaMoisture, Cantu, and Camille Rose are available at most drugstores for reasonable prices. A single product applied consistently makes a significant difference in how defined and frizz-free the curls look.
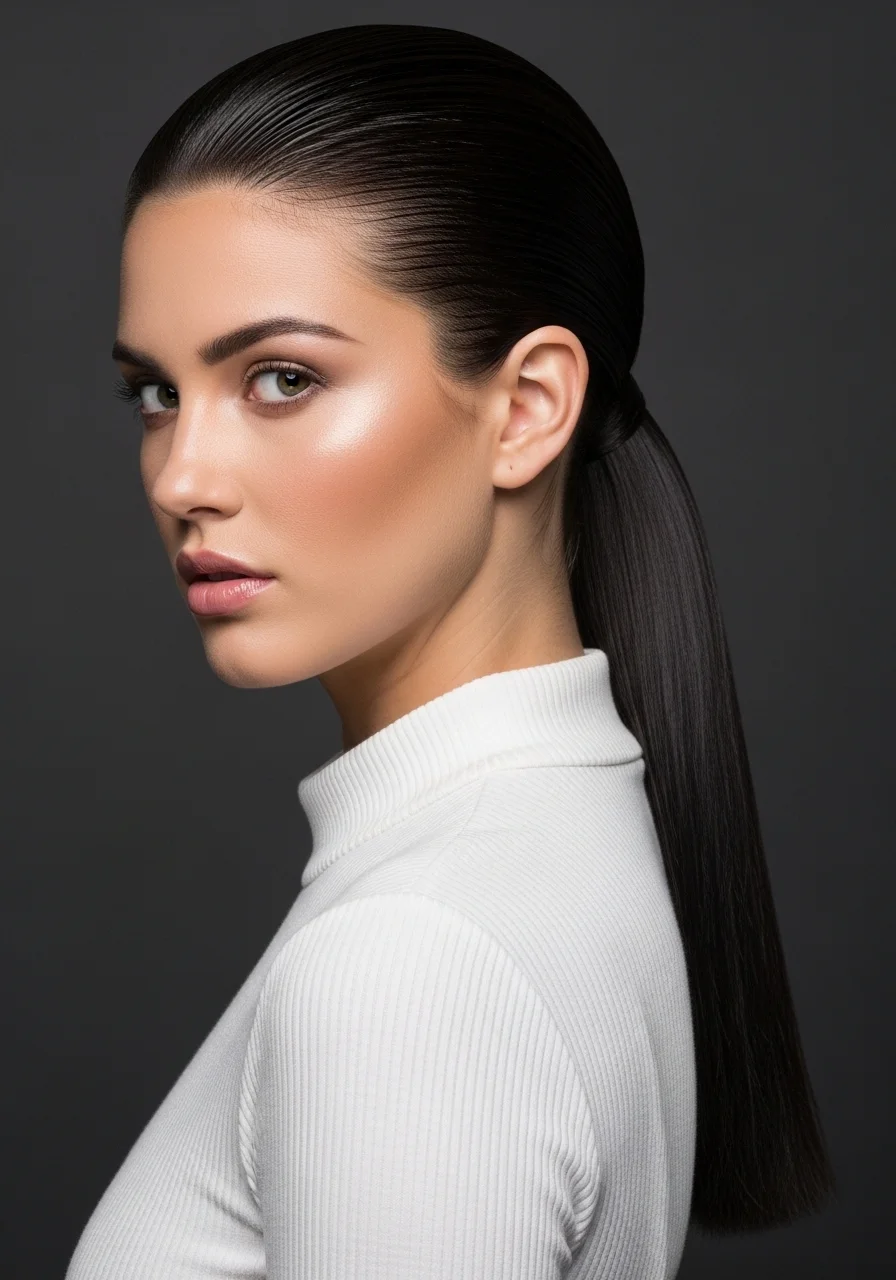
The Low Pony With Sleek Side Part
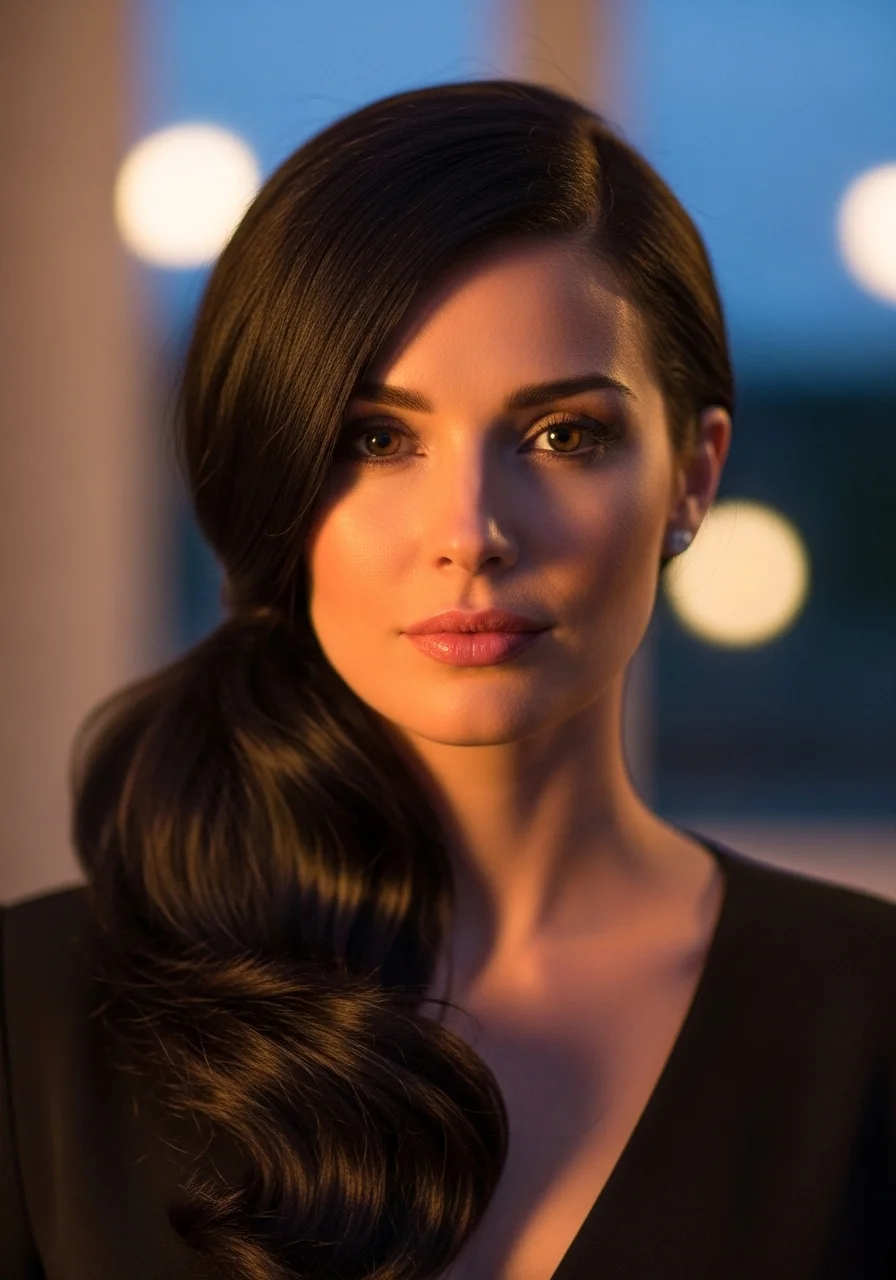
A deep side part completely changes the shape and personality of a low ponytail. It adds drama, asymmetry, and a glamorous quality that a center-part version does not have.
Create a deep side part on whichever side flatters you most. Use a fine-tooth comb to draw a clean, sharp parting line from the hairline toward the back of the head.
Smooth all the hair to one side first using a boar bristle brush and a light hold gel or serum. Then sweep it back and gather it at the nape of the neck into a low ponytail.
The hair on one side of the part will fall smoothly over the forehead or swoop behind the ear. The other side will sit flat and pulled back. This asymmetric volume is the defining characteristic of this style.
A small amount of strong-hold gel or pomade applied to the hairline keeps the parting crisp and the surface smooth throughout the day.
Wrap a thin piece of hair around the elastic to conceal the hair tie. This is especially important in this style because the ponytail is low and visible from many angles.
This is the kind of ponytail that works for evening events, professional presentations, or any occasion where you want to look sophisticated with minimal effort.
The Ponytail Packed With Accessories
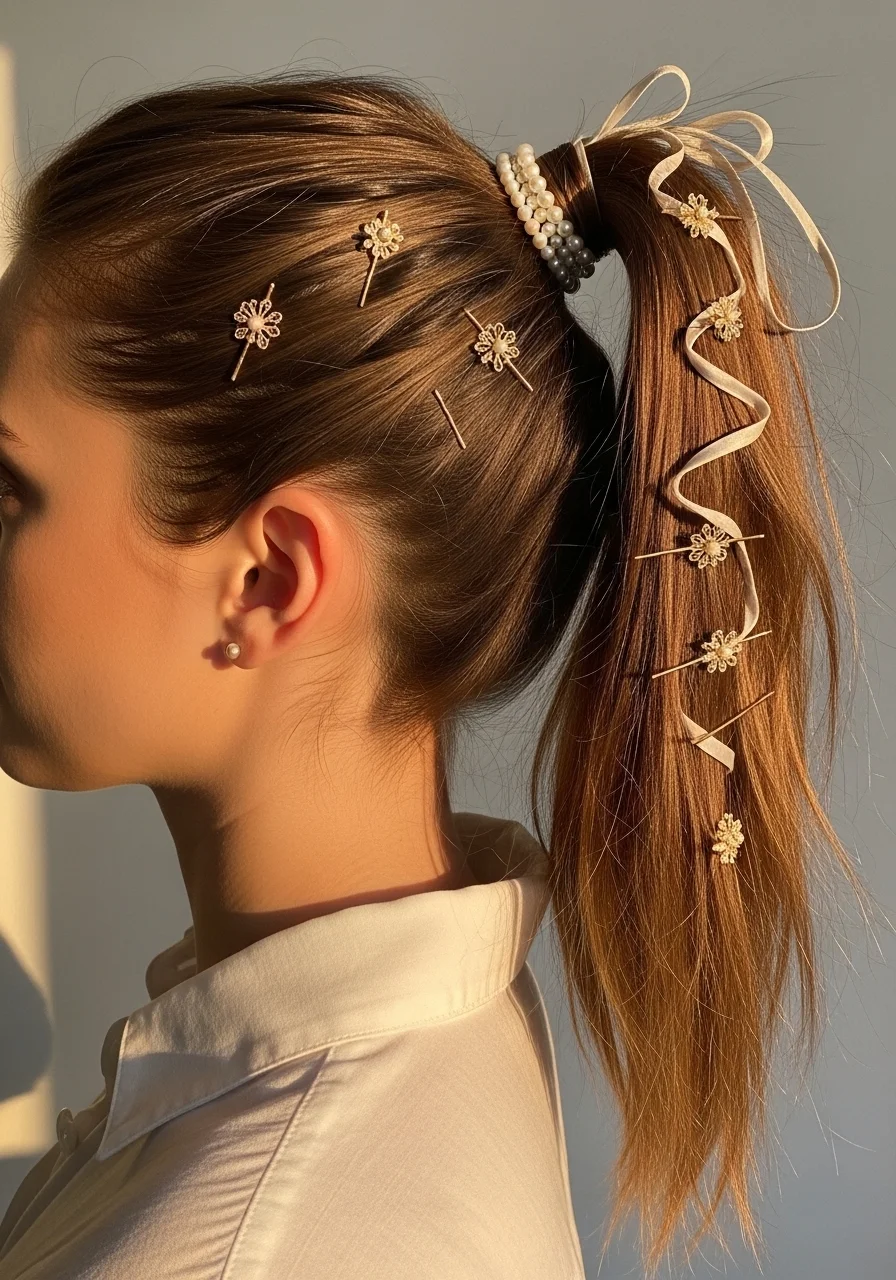
Accessories are the fastest way to make any ponytail feel like a styled, thoughtful look rather than a practical default.
The approach is to layer complementary accessories rather than using just one. A decorative elastic at the base, a small pin or clip halfway down the ponytail, and a thin ribbon woven through the length creates a layered, curated effect.
Choose accessories that share a material or color theme. All gold, all pearl, all pastel. Mixing metals and colors randomly looks chaotic. Staying within a theme looks coordinated.
Bobby pins with small jewel or pearl tips are inexpensive and widely available. Scattering two or three into the sides of a ponytail adds a delicate, decorated quality.
Stick-on star or moon shaped hair gems are a fun option for night out styles. They press directly onto dry hair and stay put for hours.
Hair accessories at Claire’s, H&M, or Amazon are priced very affordably. A multi-piece set of mixed hair clips, pins, and elastics typically costs five to fifteen dollars and provides dozens of combinations.
The more you collect over time, the more options you have. Start with a small set in neutral tones that work with most hair colors and build from there as you develop a preference for specific styles.
Your Ponytail, Your Rules
A ponytail is not a compromise or a last resort. It is a hairstyle with as much potential as any updo, blowout, or styled look. What separates a good ponytail from a great one is almost always small details rather than big skill or expensive products. The placement, the accessories, the face-framing pieces, the texture, and the finish all work together to create something that looks deliberately chosen.
The best part is that most of these styles cost nothing extra if you already have a few basic products and accessories at home. Many can be done in under five minutes with practice. Pick two or three ideas that appeal to you and try them this week. Once you see how small changes shift the entire look of a basic ponytail, you will approach your hair with a completely different level of confidence and creativity. Your ponytail is already capable of more than you think. It just takes a little attention to prove it.
Leave a Reply