
Your natural hair is not a problem to be solved. It is a crown that grows upward, outward, and beautifully in every direction it chooses. Natural afro hairstyle ideas have moved far beyond a single look or era today, they cover everything from tight protective styles to free-flowing coils, from sculpted updos to soft wash-and-go curls. Whether your hair is 4a, 4b, or 4c, whether it is short and compact or long and sprawling, there is a natural style that fits your life, your schedule, and your budget. This list brings together 27 beautiful, wearable, and affordable natural afro hairstyle ideas designed to help you wear your curls with confidence every single day. If you’re also exploring Short shaggy haircuts ideas, textured layers, soft movement, and effortless styling can help create a modern look that feels lightweight, edgy, and easy to maintain.
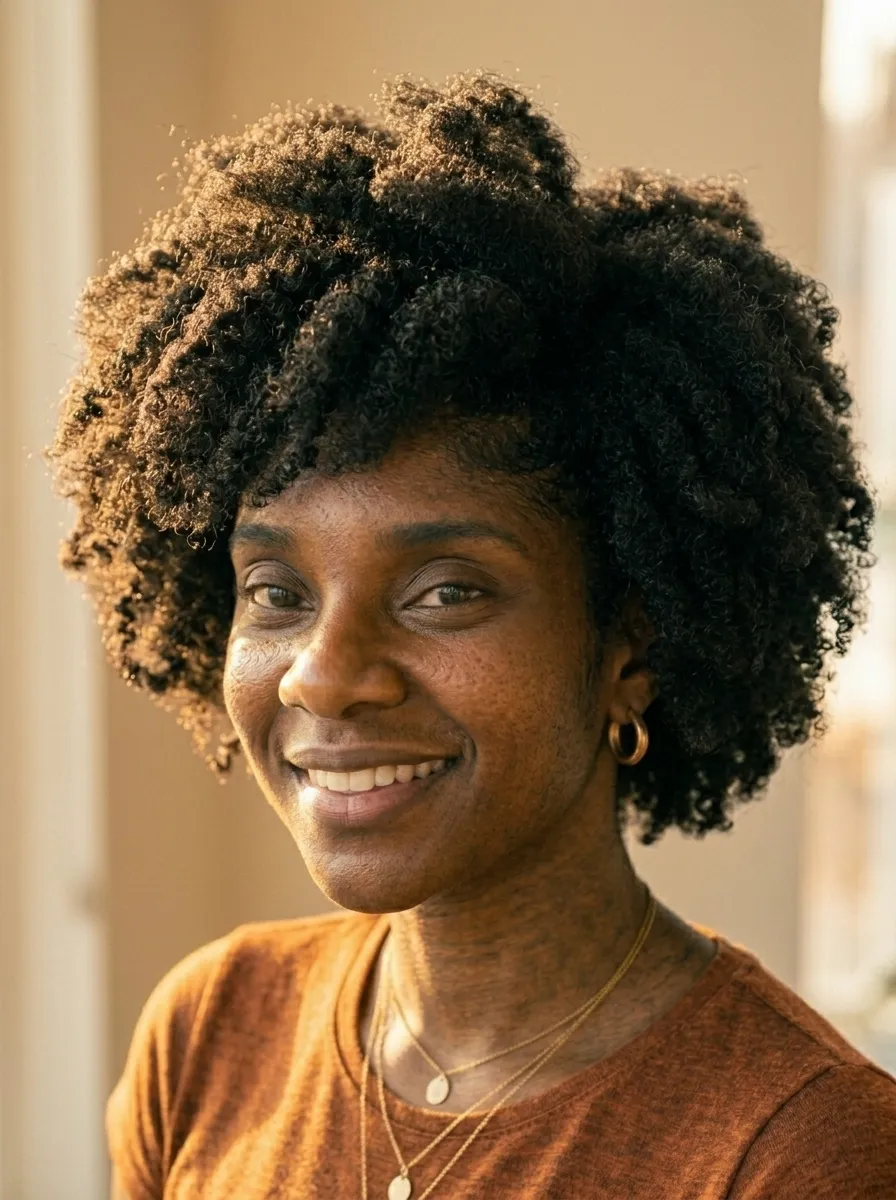
1. The Classic Full Afro
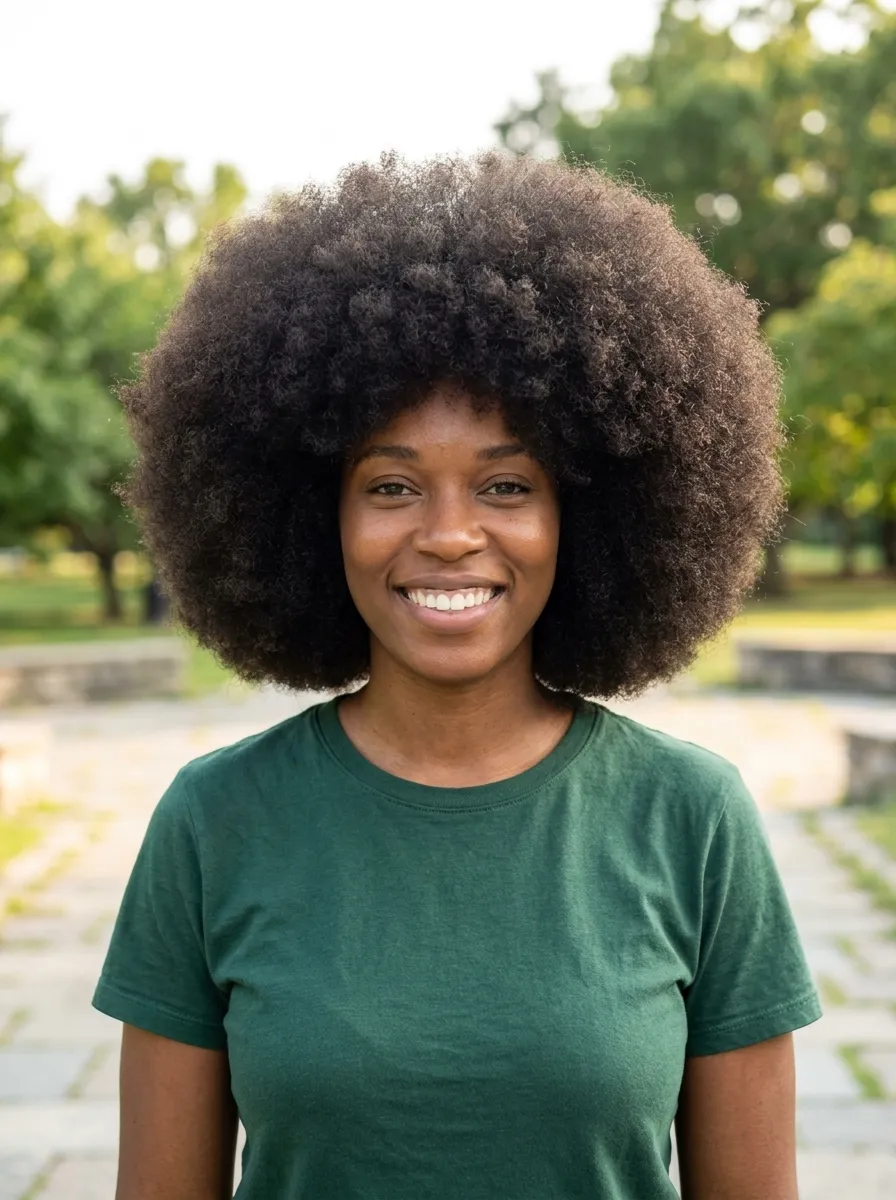
Nothing makes a statement like a full, round, lifted afro.
This is the style that started a movement and still turns heads today.
The goal is an even, rounded shape with lifted roots and defined coils throughout.
How to get the shape:
Start with freshly washed, detangled hair. Apply a leave-in conditioner and a curl defining cream while hair is soaking wet. Diffuse or air-dry completely. Once dry, use an afro pick to lift from the roots outward, working in sections from the bottom up.
Getting the round shape:
Pick the sides and back evenly while tilting your head in different directions. Step back and check the shape in the mirror regularly.
Products that help:
Eco Style Olive Oil Gel (under $4) defines the coils before drying. Cantu Shea Butter Leave-In Conditioning Repair Cream (under $8) adds moisture and hold.
Budget tip:
You do not need a salon for this style. A wide-tooth comb and a quality afro pick are your only tools — both under $5.
This style works on hair that is at least 3 to 4 inches long and suits every face shape beautifully.
2. Wash and Go Defined Curls
The wash and go is the most low-effort natural style you can do — and it looks incredible when done right.
The idea is simple: wash your hair, apply product while it is wet, and let the curl pattern do the rest.
Step by step:
Wash with a sulfate-free shampoo. Condition with a thick, moisturizing conditioner and detangle gently in the shower. Do not rinse the conditioner completely — leave a small amount in as extra moisture. Apply a curl defining gel or cream in sections while hair is dripping wet. Scrunch upward and leave to air-dry or diffuse.
The key to avoiding frizz:
Do not touch your hair while it is drying. Every touch disturbs the curl clumps and creates frizz. Wait until it is fully dry, then scrunch out the cast with your hands.
Affordable products:
Mielle Organics Pomegranate and Honey Curl Defining Smoothie costs under $12 and works on 4a through 4c hair.
As I Am Curl Defining Jelly is under $8 and gives excellent definition on tighter coils.
Refresh on day two:
Mist lightly with water, scrunch gently, and leave to dry again. Your definition comes back quickly.
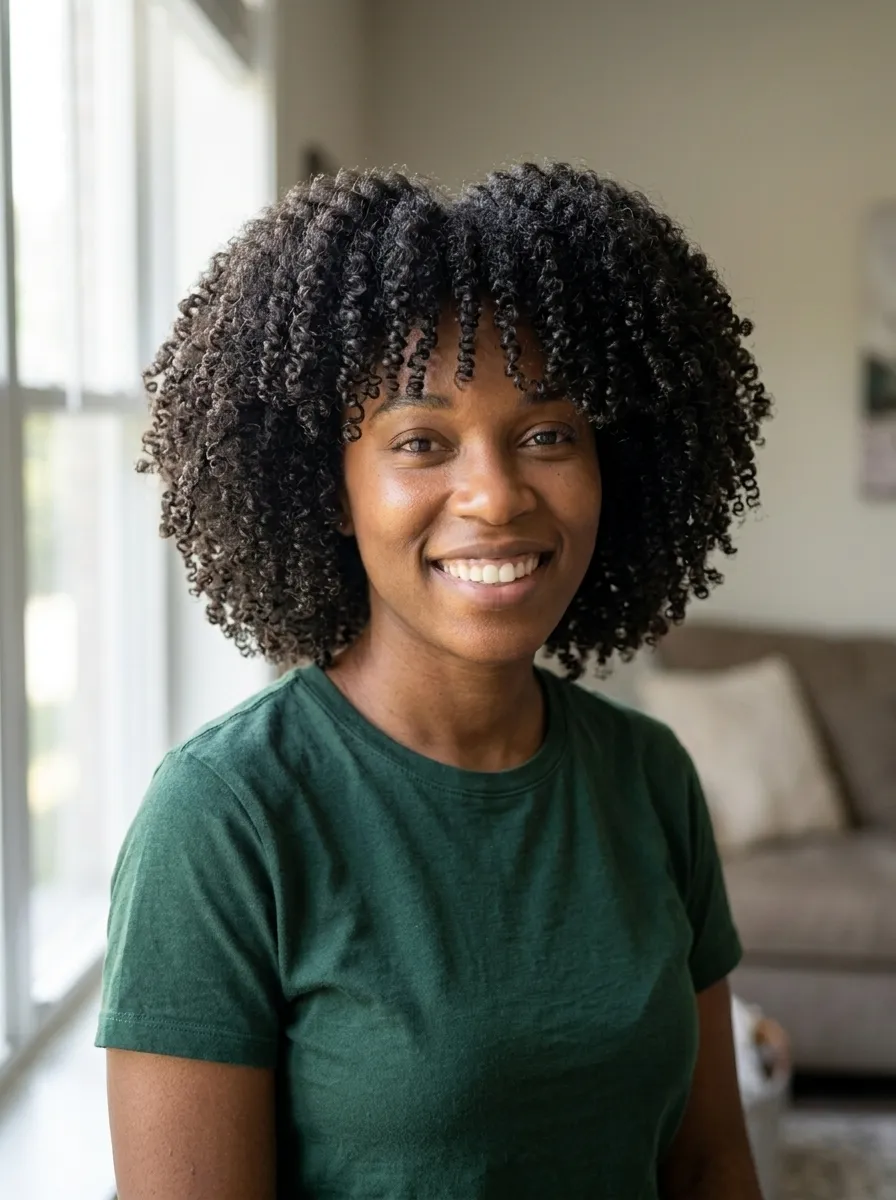
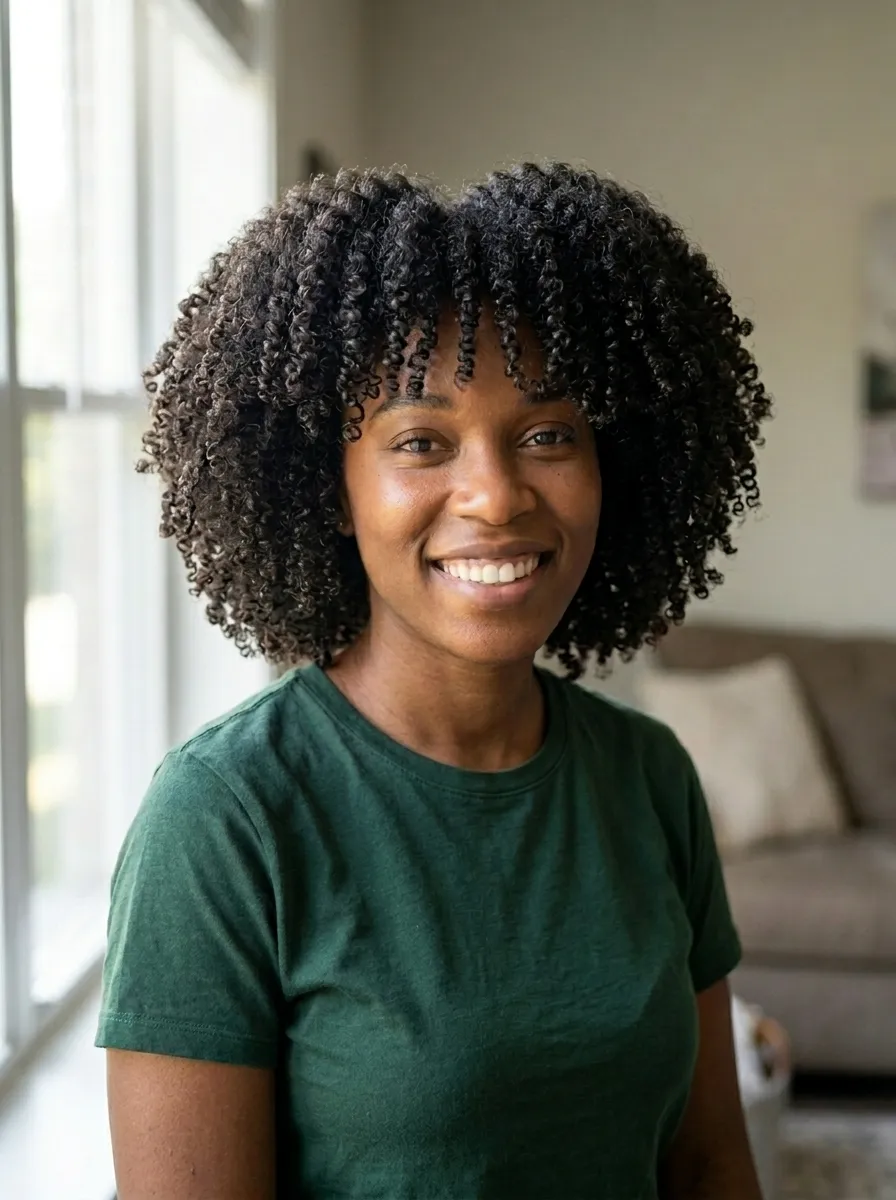
3. Twist Out

The twist out is one of the most popular natural styles for good reason — it gives defined, stretched curls with beautiful volume.
It works by twisting sections of damp or dry hair, letting them set overnight, then unraveling for defined, elongated curl clumps.
How to do a twist out:
Wash and condition your hair. Apply a leave-in conditioner and a butter or cream product to each section. Divide into two strands and twist from root to tip. Repeat throughout the entire head. Sleep with a satin bonnet or on a satin pillowcase. Unravel in the morning by separating each twist from the tip upward with oiled fingers.
Getting the best results:
Twist tightly and consistently. The tighter the twist, the more defined the result. Unravel slowly — rushing causes frizz.
Products to use:
Shea Moisture Coconut and Hibiscus Curl Enhancing Smoothie is a classic, available at most drugstores for under $12.
Carol’s Daughter Hair Milk Original Leave-In Moisturizer costs under $10 and works beautifully as a base.
Budget tip:
Unrefined shea butter purchased in bulk online costs around $10 for a large container and works perfectly as a twist out product.
4. Braid Out
The braid out creates a slightly different texture than a twist out — the pattern is more angular and defined, with a beautiful zigzag wave running through each section.
It is a protective style while the braids are in and a gorgeous free style once unraveled.
How to do a braid out:
Start with damp, product-coated hair. Section into manageable parts. Apply a styling cream or butter to each section. Braid from root to tip — the smaller the braid, the tighter the wave pattern. Allow to fully dry before unraveling.
Unraveling the right way:
Separate each braid from the tip upward, using just the tips of your fingers. Add a small amount of oil to your hands to reduce frizz as you separate.
Size matters:
Larger braids create looser, more relaxed waves. Smaller braids give tighter, more defined waves with more volume.
Affordable tools:
A spray bottle for wetting hair costs under $3. Camille Rose Curl Maker Jelly costs around $10 and gives excellent wave definition.
Longevity tip:
Preserve your braid out by sleeping in a pineapple ponytail on top of your head, covered with a satin bonnet. It holds for 3 to 4 days easily.
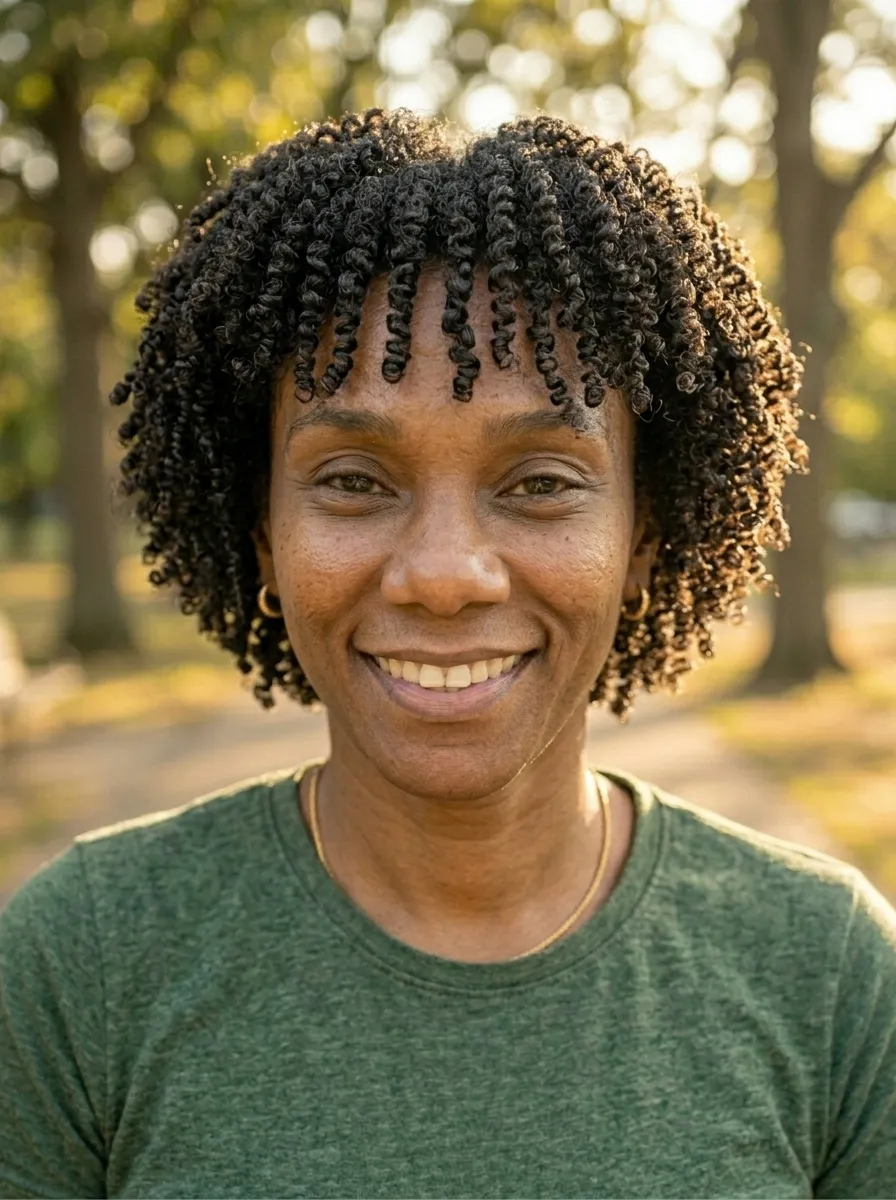
5. Bantu Knot Out
Bantu knots are a traditional African hairstyle — and when unraveled, they create some of the most spectacular spiral curls you will ever see.
The process: coil small sections of hair into tight, flat knots. Let them set. Release for perfect spiral ringlets.
Step by step:
Apply your styling product to damp hair in sections. Take each section and twist it tightly around itself in one direction until it coils into a flat knot against the scalp. Pin or tuck the end to hold. Leave in overnight or until completely dry, then release each knot carefully.
Releasing the knots:
Do not rush. Open each knot by gently pulling the coil downward and apart with oiled fingers. For more volume, separate the curl clumps further once all knots are released.
Best products:
African Pride Moisture Miracle Honey and Coconut Oil Curl Defining Crème works well for bantu knot outs and costs under $8.
Budget tip:
Bantu knots look amazing as a style on their own before you unravel them. Wear them to work one day and unravel to a gorgeous curl out the next.
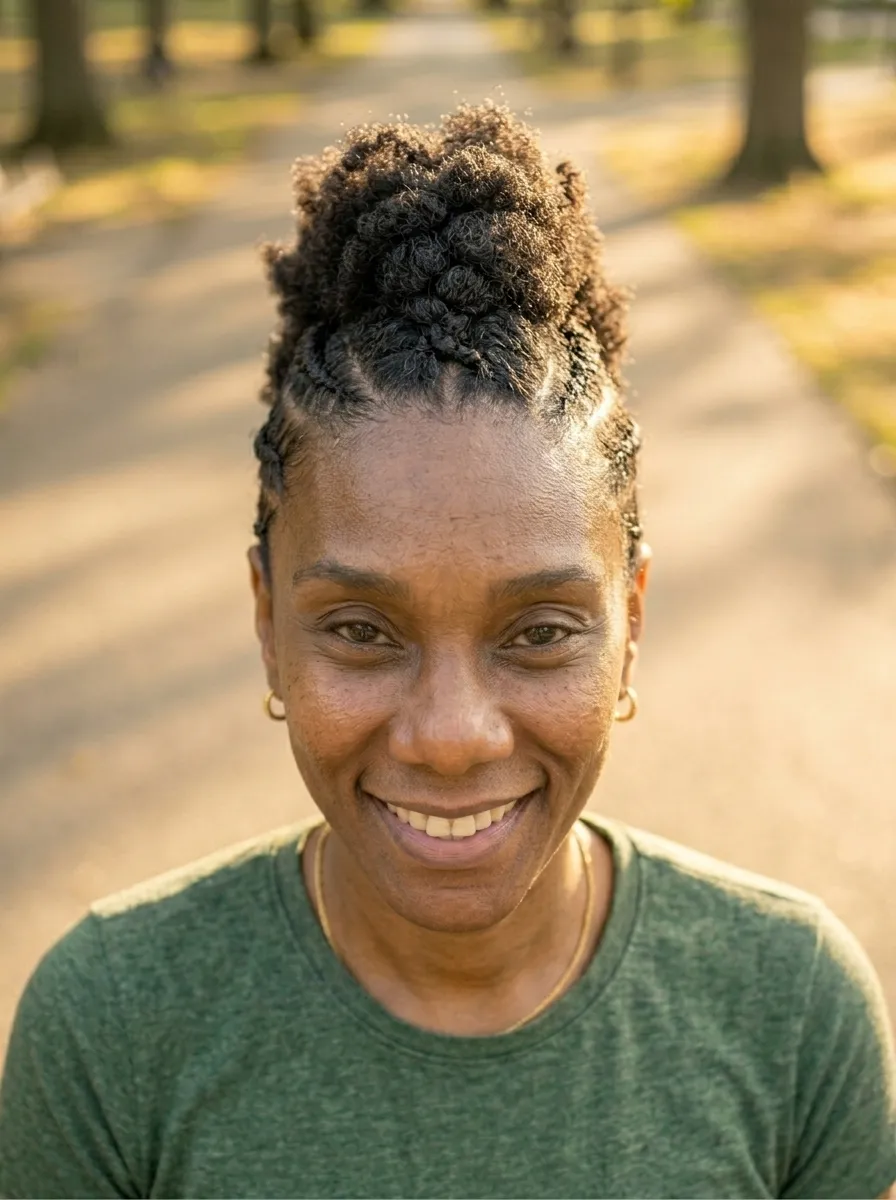
6. High Puff
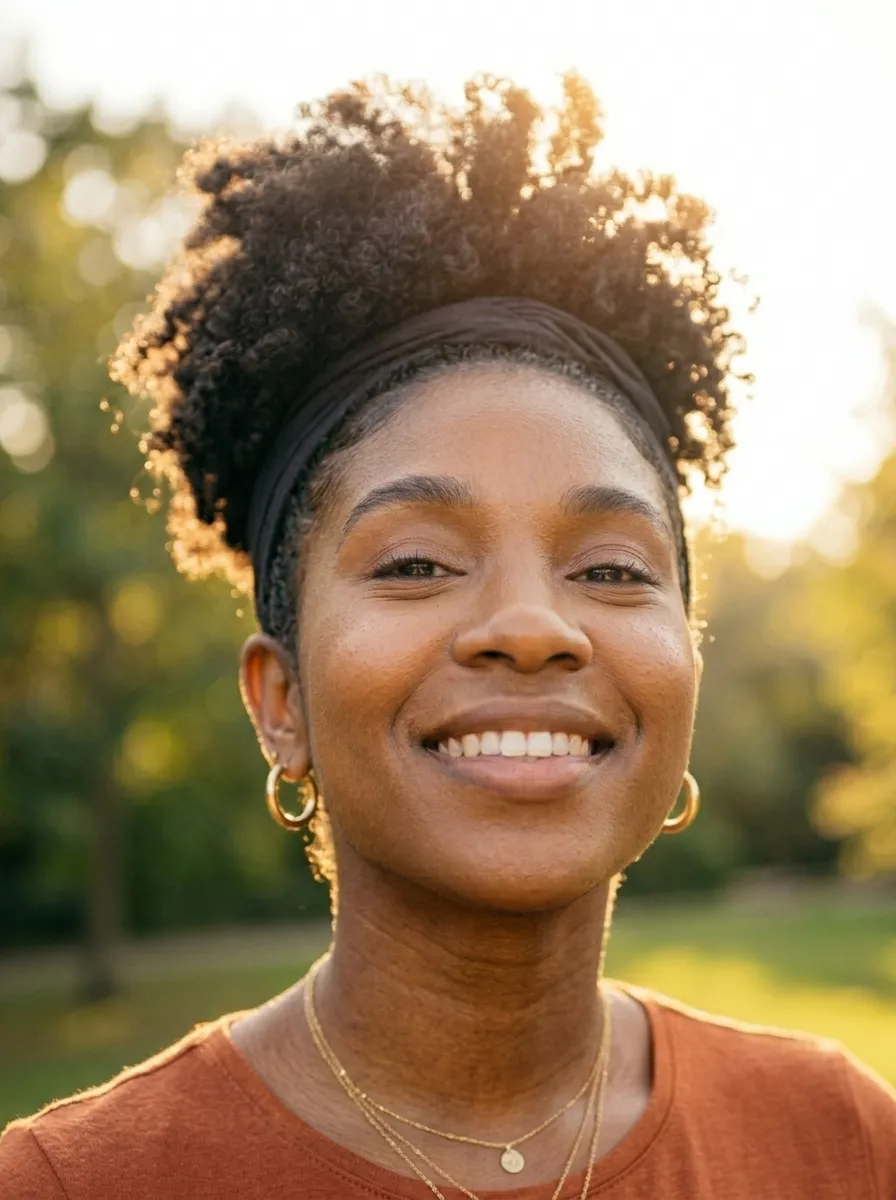
The high puff is the ultimate quick natural style. It takes about five minutes and looks polished every time.
Gather your hair at the crown, smooth the edges, and you are ready to go.
How to create a puff:
Apply a leave-in conditioner or water to dampen your hair slightly. Use a wide-tooth comb or your fingers to gather everything toward the crown. Secure with a soft, no-damage hair tie. Fluff the puff outward with a pick or your fingers.
Smooth those edges:
Apply a small amount of edge control gel or just your regular styling gel along the hairline. Use a soft toothbrush or edge brush to smooth and lay the baby hairs flat.
Products for edges:
Got2b Ultra Glued Invincible Styling Gel works well and costs under $5 at any drugstore. Ampro Pro Styl Protein Styling Gel is another affordable classic under $4.
Variations:
Try a low puff at the nape for a different look. Add a headband, scarf, or hair pins at the base for a more styled appearance.
Budget tip:
A pack of snag-free hair ties costs under $3 and will last you months. No special equipment required for this style.
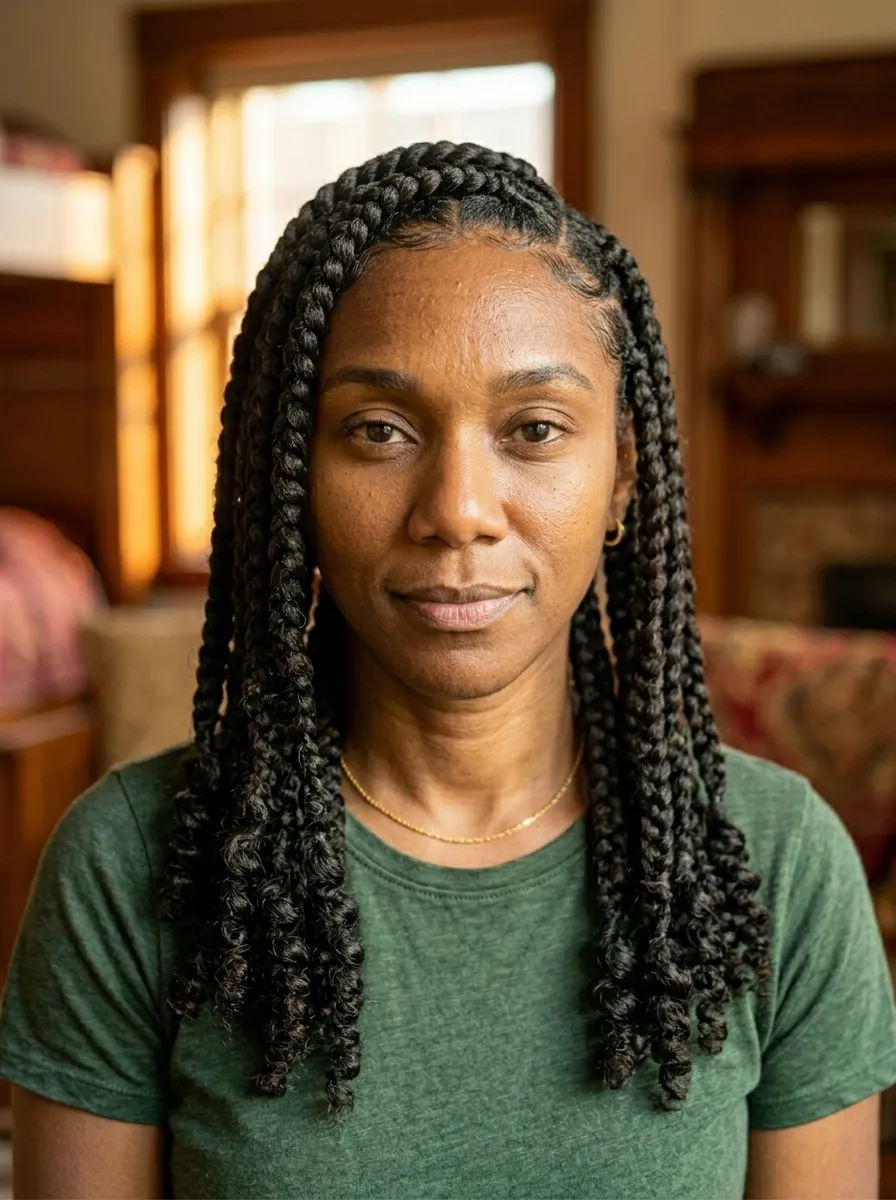
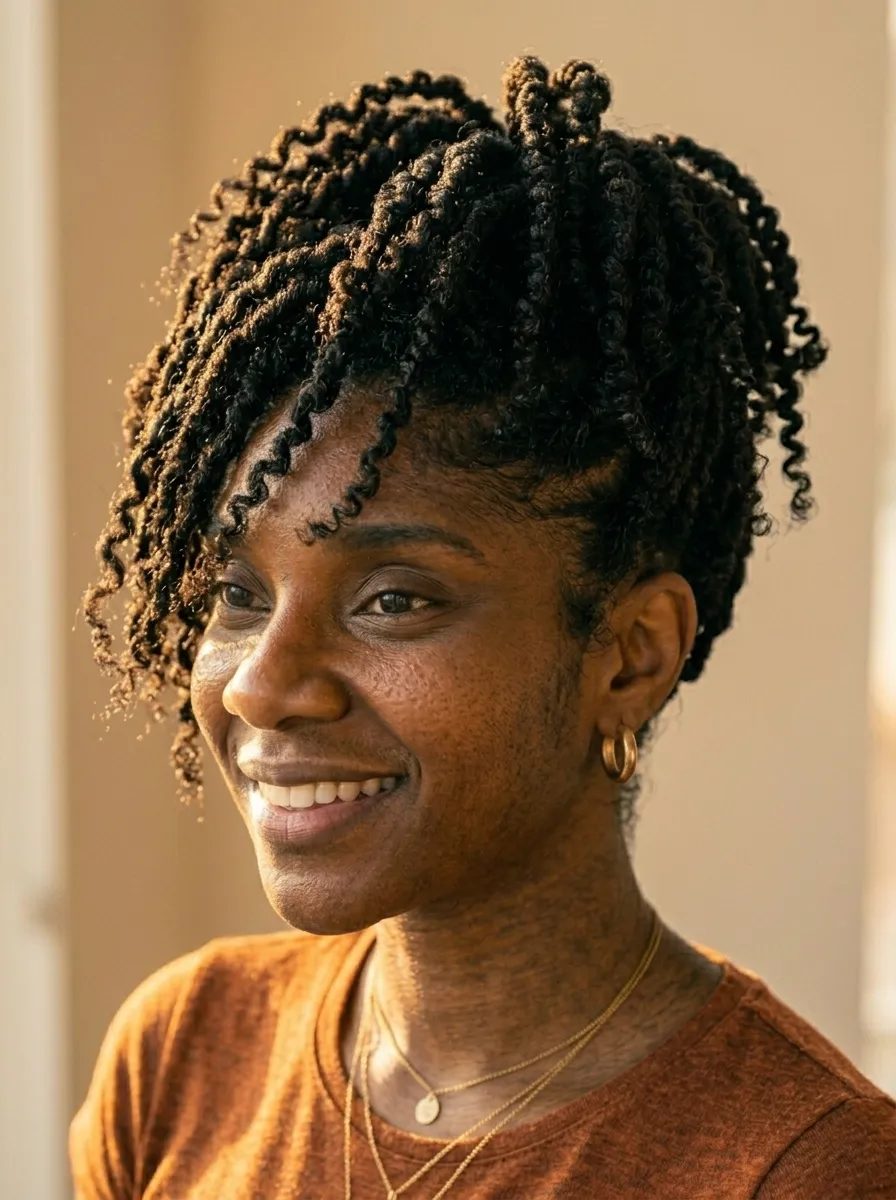
7. Two Strand Twists as a Finished Style

Two-strand twists do not have to be just a prep step for a twist out. They are a complete, beautiful, wearable style on their own.
And they are one of the best protective styles for natural hair because they minimize manipulation and retain moisture.
How to do them:
Start with clean, moisturized hair. Section your hair into even parts. Apply a cream, butter, or gel to each section. Take two strands and wrap them around each other from root to tip. The tighter and more consistent your tension, the neater the result.
Size options:
Mini twists (very small sections) give a fine, detailed look and last weeks. Medium twists are faster to install and give a fuller, chunkier appearance. Large twists are very quick and create a bold, fashion-forward look.
Maintaining your twists:
Moisturize daily by misting with a water and leave-in conditioner mix. Seal with a light oil like jojoba or grapeseed oil. Sleep in a satin bonnet every night.
Budget tip:
You can twist your own hair at home with no professional help. It takes practice but costs nothing beyond your products.
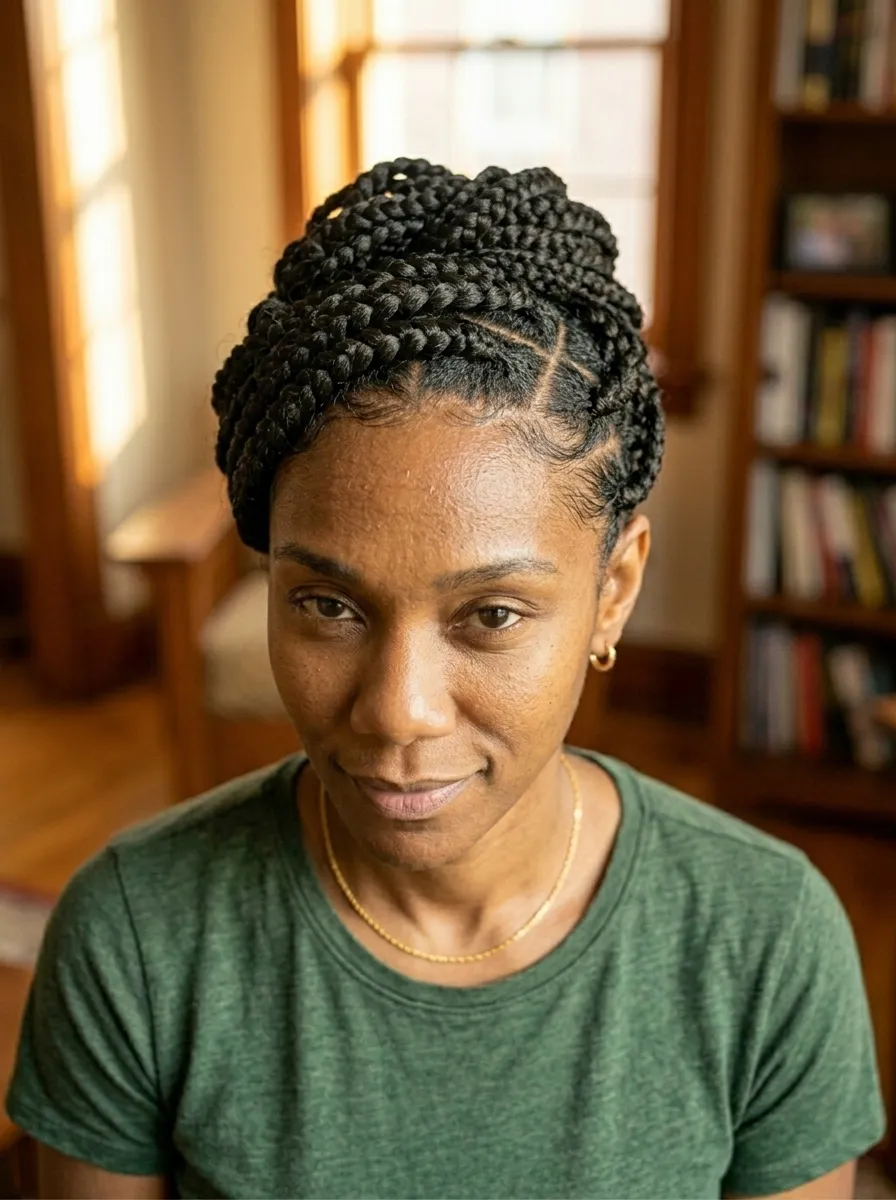
8. Flat Twist Updo
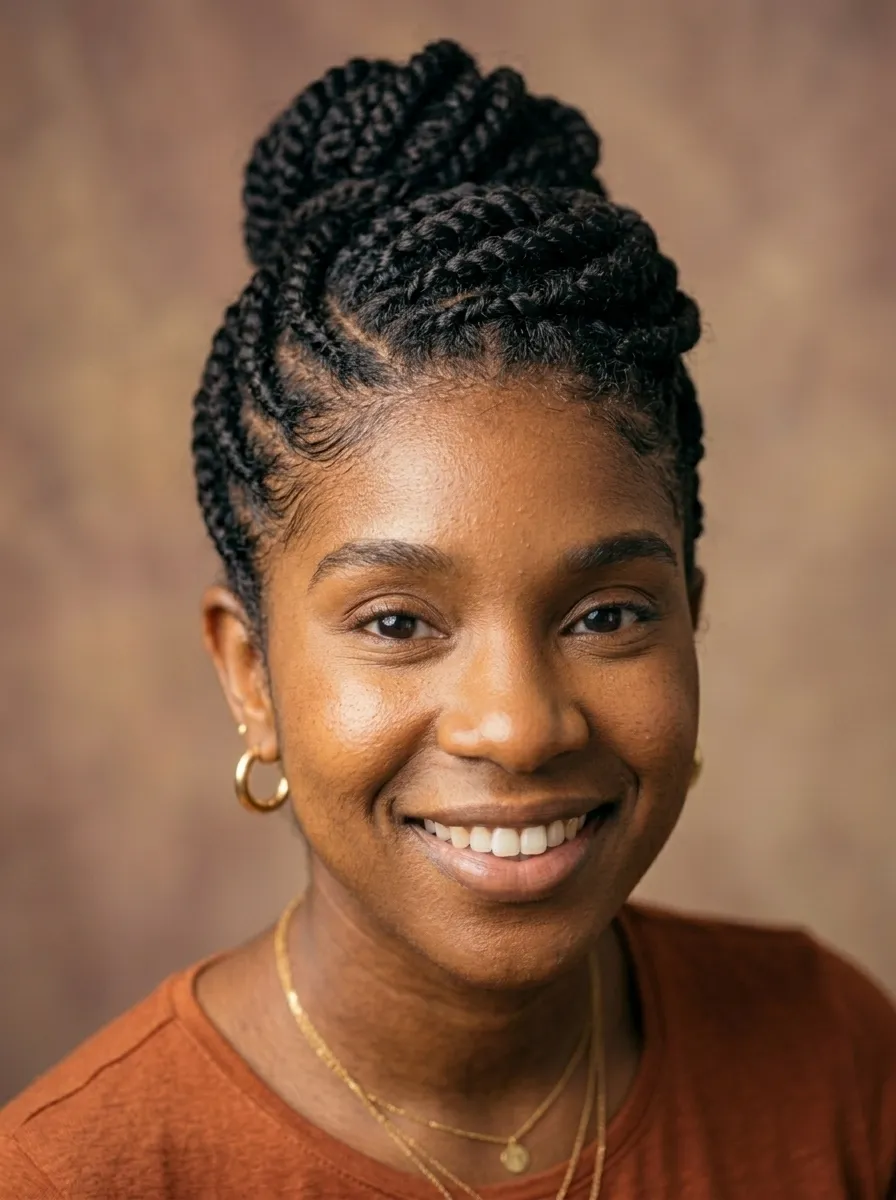
Flat twists are like cornrows but twisted — and they create beautiful, intricate patterns along the scalp.
An updo using flat twists is a protective, polished style that works for both casual days and formal events.
How flat twists work:
Section your hair into parts. Take a section at the hairline, split into two pieces, and begin twisting them around each other while adding more hair from the scalp as you move along — similar to a French braid but twisted. When you reach the end, continue the twist without adding hair and pin or tuck the end into the updo.
Simple updo versions:
Flat twist all sections toward the crown and tuck the ends into a puff or bun. Flat twist from the sides and meet in a gathered twist out at the center top. Create a simple pattern of two flat twists going back from the front to a bun at the nape.
Products needed:
A holding cream or gel, a rat-tail comb for parting, and a few bobby pins. Total cost under $10.
Longevity:
This style holds beautifully for 5 to 7 days with proper nighttime care.
9. Cornrows with Natural Hair
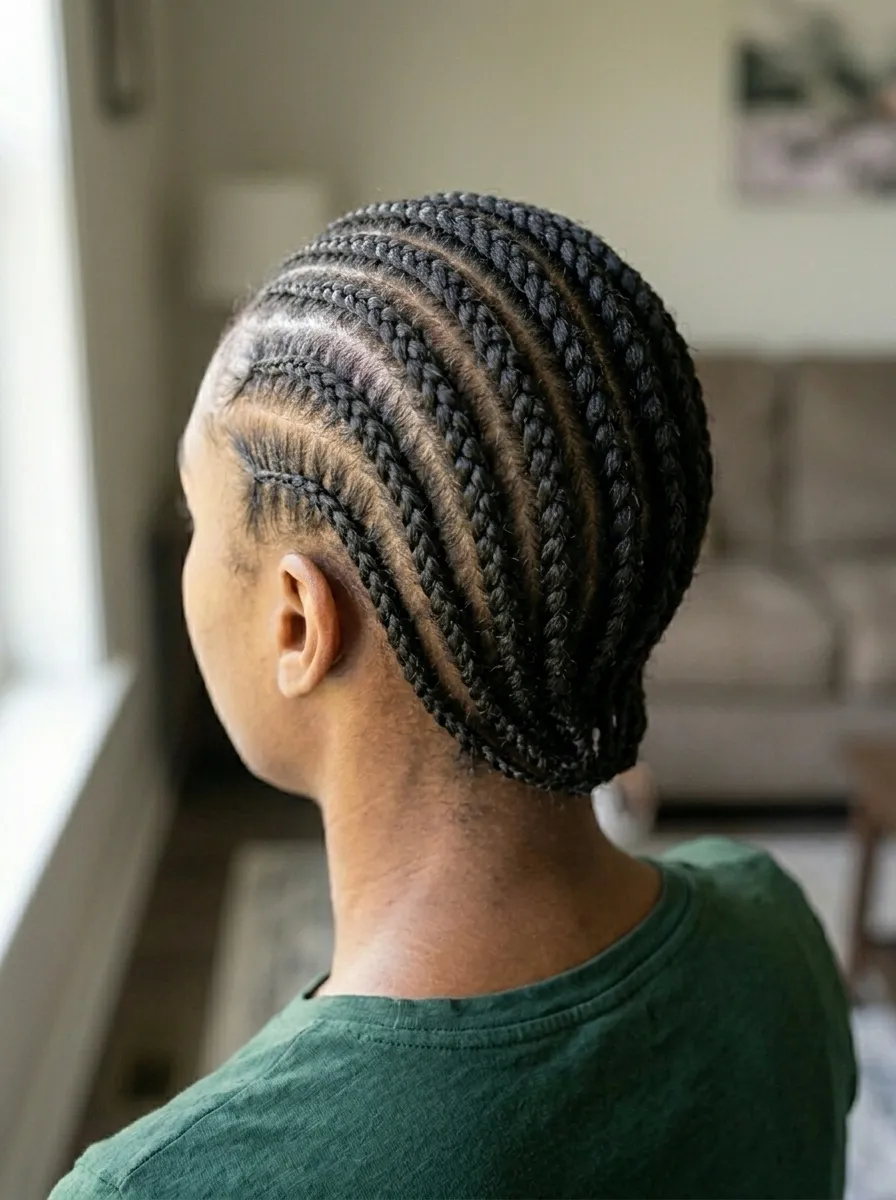
Cornrows are one of the oldest and most culturally significant hairstyles in the natural hair world — and they are one of the best protective styles available.
They keep your ends tucked away, minimize daily manipulation, and can last for weeks.
Classic styles:
Straight back cornrows running from front to nape. Feed-in cornrows that start thin at the hairline and gradually get fuller. Cornrows laid in curved patterns for a more artistic look. Zigzag parts for added visual interest.
DIY cornrows:
Learning to cornrow your own hair takes practice but is completely achievable. Start with large sections on freshly moisturized hair. Keep consistent tension. Watch YouTube tutorials — there are hundreds of free step-by-step guides specifically for self-cornrowing.
Products that help:
Apply a thick leave-in conditioner or braid cream before braiding. This keeps the hair moisturized inside the braid and reduces breakage.
Proclaim Braid Sheen Spray costs under $5 and keeps cornrows looking fresh between washes.
Maintenance:
Mist your scalp and braids daily with water or a light oil. Re-lay your edges as needed with edge control gel. Sleep in a satin bonnet every night.
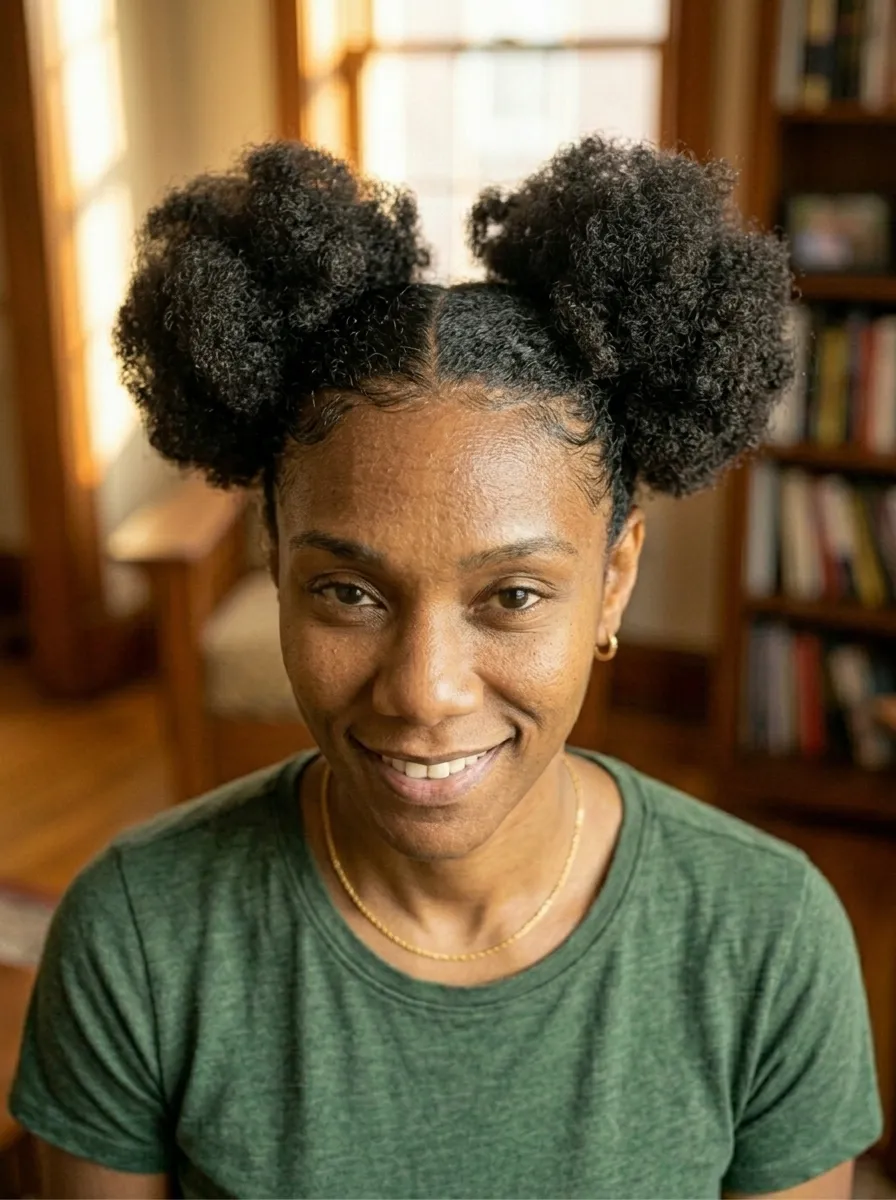
10. Afro Puff Buns
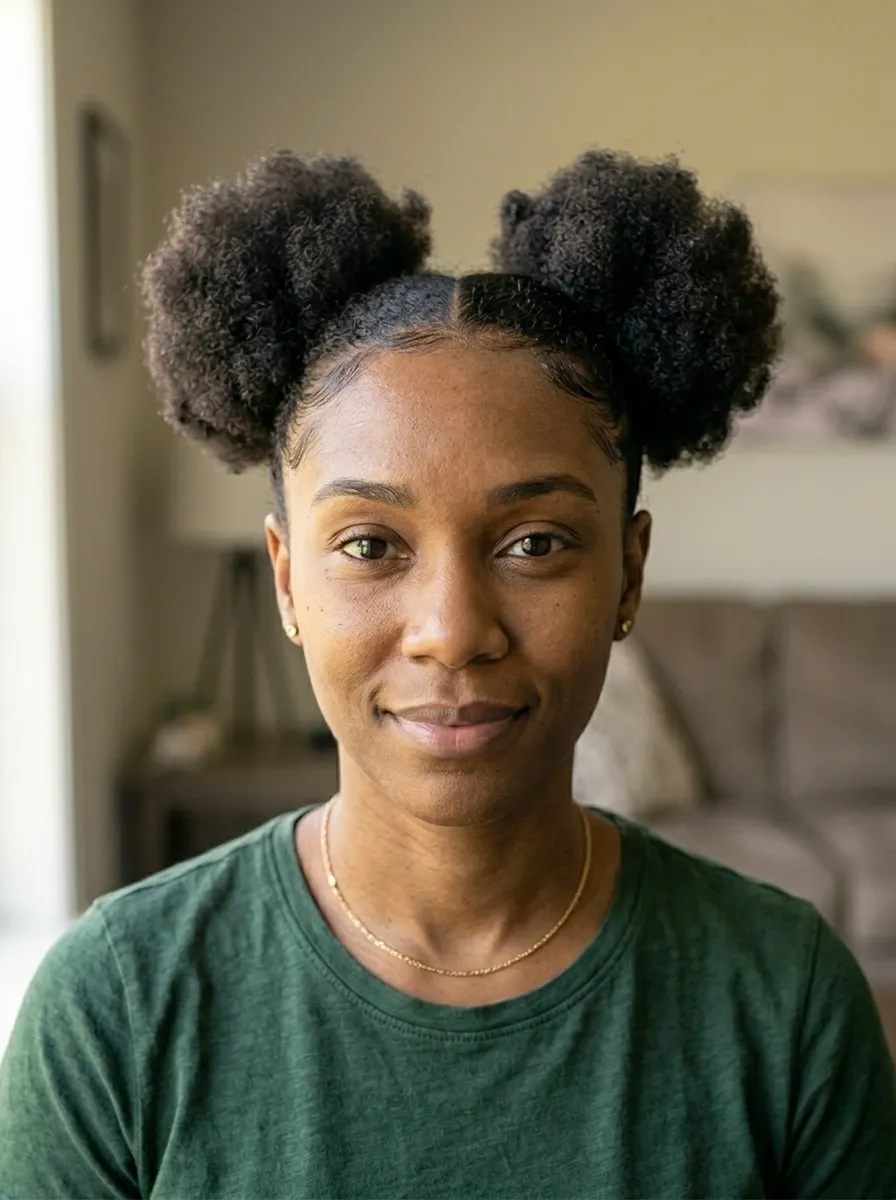
Double afro puff buns are playful, easy, and completely adorable.
They work on hair of almost any length — from a short TWA (teeny weenie afro) to longer natural hair — and take under ten minutes.
How to create them:
Part your hair down the center from front to back. Gather each half into a puff and secure with a soft hair tie. Fluff each puff outward with your fingers or a pick. Smooth your edges with edge control.
For extra fullness, loosen the hair tie slightly so the puff can expand outward rather than pulling tight.
Add-ons to try:
Wrap a satin ribbon or scarf around the base of each puff. Insert a decorative hair pin at the front of each bun. Try a playful accessory like a small floral clip or pearl pin.
Budget tip:
Two soft hair ties and a travel-size bottle of edge control is all you need. Both available at any drugstore for under $5 total.
Who it works for:
This style is especially popular for children but looks equally great on adults. It works beautifully on 3c through 4c curl types.
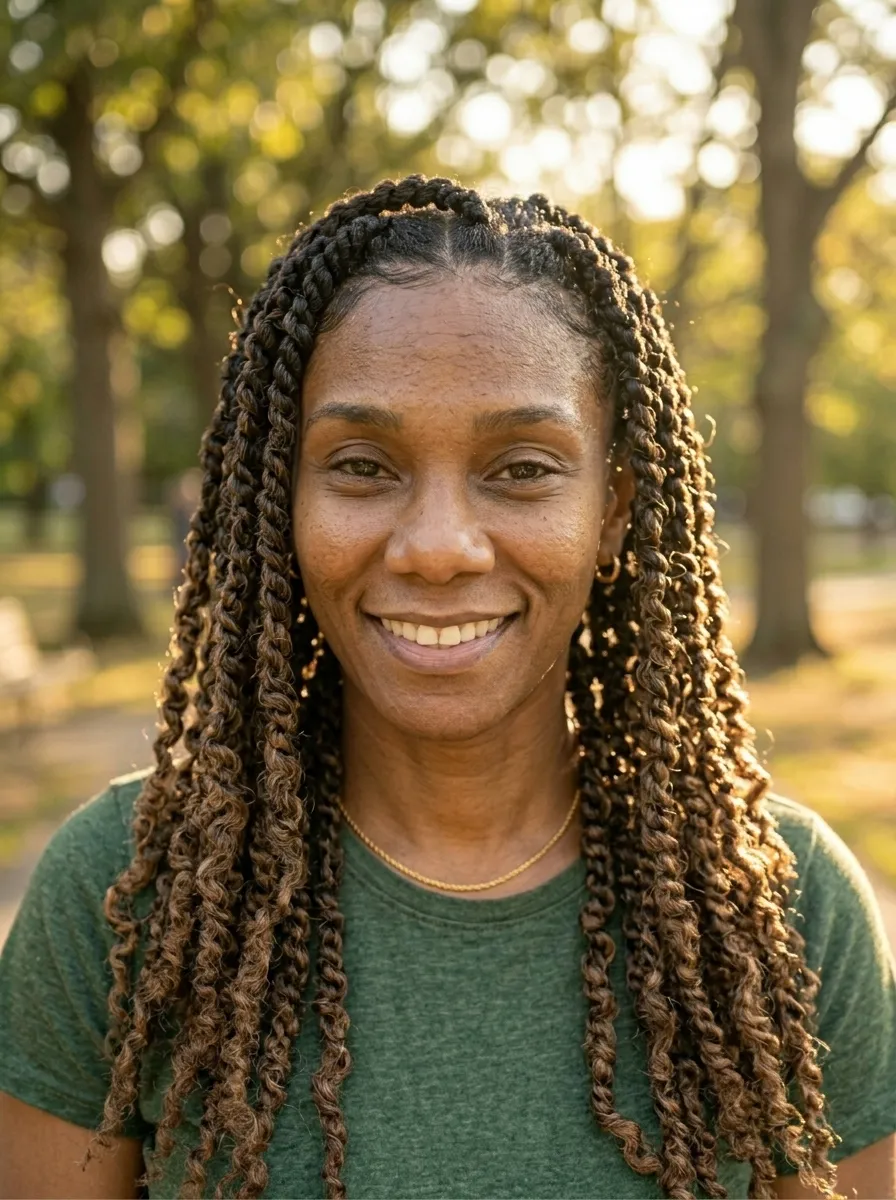
11. Faux Locs
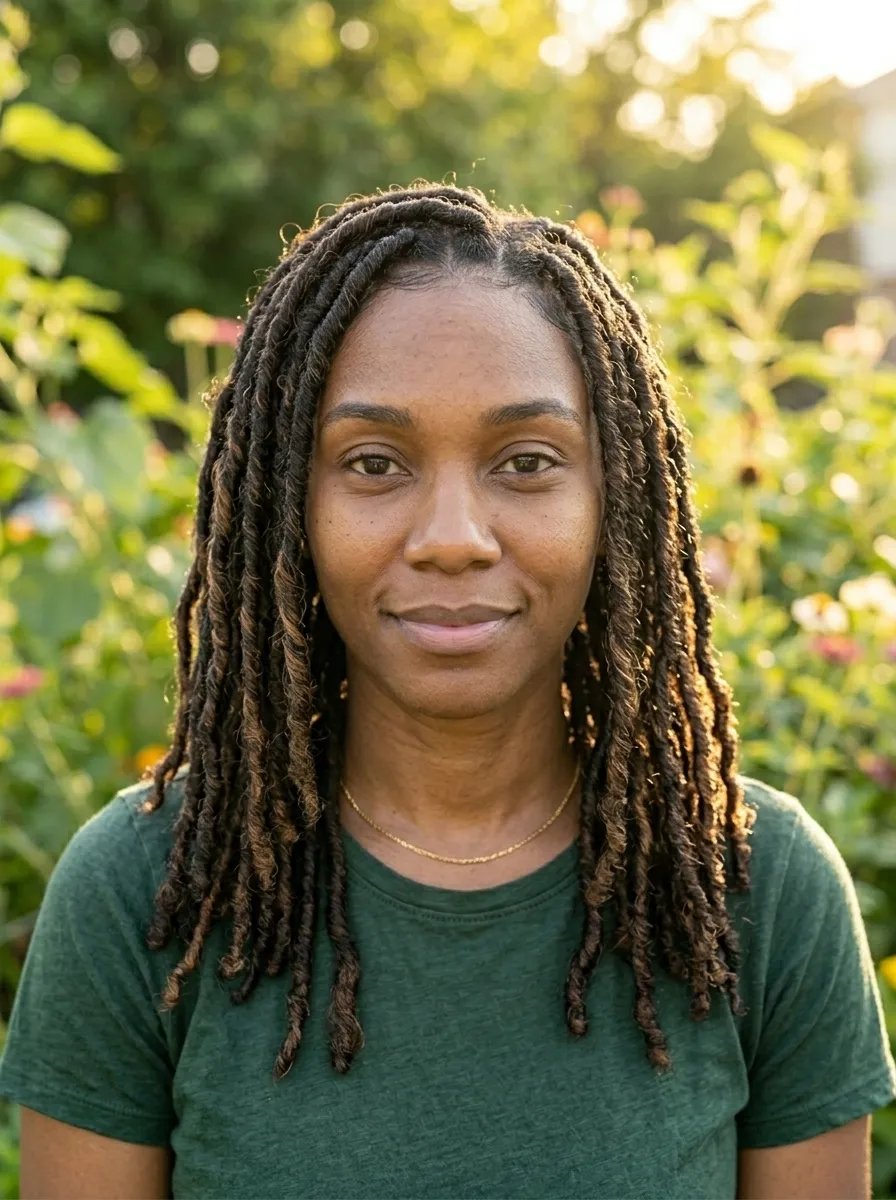
Faux locs give you the look of traditional locs without the long-term commitment.
They are installed using braiding hair wrapped around your natural hair in sections — and the result looks almost identical to grown, matured locs.
Installation options:
Traditional faux locs are wrapped by hand using Marley hair or locs hair packs. Butterfly locs are a looser, more distressed version created by looping the hair as you wrap — very popular and fast to install.
DIY installation:
Faux locs can absolutely be done at home. Watch installation tutorials on YouTube before starting. The process takes 4 to 8 hours depending on your speed and the number of locs.
Hair to buy:
Freetress Water Wave hair or Marley Bulk Braid Hair are popular choices, both available for under $5 to $8 per pack. Most full head installs require 6 to 8 packs.
Maintenance:
Mist your scalp regularly with a light oil spray. Sleep in a satin bonnet or on a satin pillowcase. Do not leave faux locs in for more than 6 to 8 weeks.
Cost comparison:
Salon faux locs can cost $150 to $300. DIY at home costs $30 to $60 in materials.
12. Box Braids
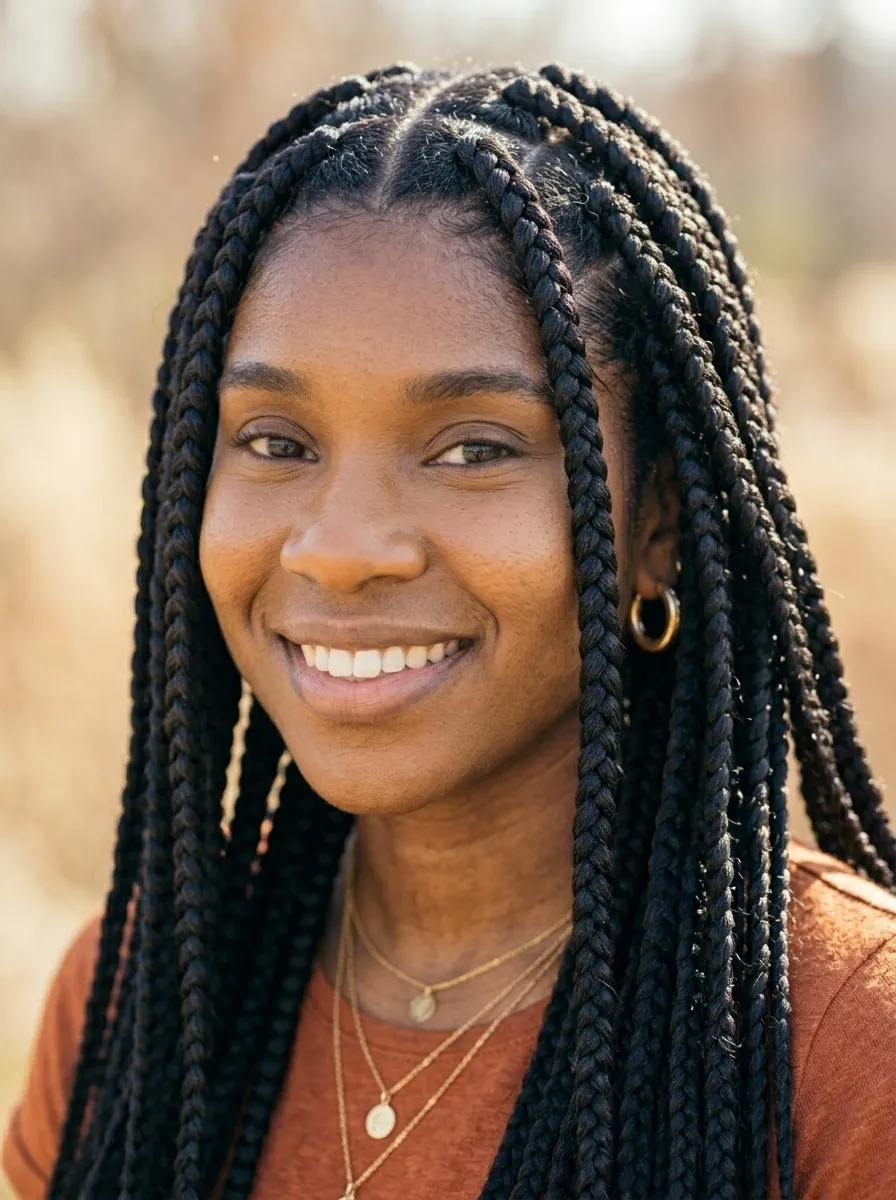
Box braids are a classic protective style that has never gone out of fashion — and for good reason.
They protect your natural hair, require minimal daily styling, and can last 4 to 8 weeks with proper care.
Sizing options:
Small box braids are fine and delicate — they take longer to install but look incredibly detailed. Medium box braids are the most popular choice and strike the best balance between install time and longevity. Large or jumbo box braids are bold and fast to install.
Extensions or natural hair only:
Box braids can be done with just your natural hair or with synthetic braiding hair added for length and thickness. Kanekalon or X-Pression braiding hair costs under $5 per pack.
DIY box braids:
Installing your own box braids takes time and practice. Start with larger sections to learn the technique. Use a rat-tail comb for clean parts and work in rows from the back forward.
Care routine:
Moisturize your scalp with a lightweight oil every 2 to 3 days. Wrap in a satin bonnet at night. Wash your scalp every 2 weeks using a diluted shampoo applied directly with a squeeze bottle.
13. Goddess Braids
Goddess braids are large, chunky braids that sit close to the scalp — a bold, sculptural version of cornrows.
They take less time to install than box braids and create a striking, architectural look.
Classic goddess braid styles:
Two large braids going straight back. A single large braid running along the center of the head. Multiple large cornrow-style braids laid in curved or straight patterns. Updos where the braids converge at the crown.
The look with extensions:
Adding braiding hair makes goddess braids thicker, longer, and more dramatic. Use chunky braiding hair like Outre X-Pression (around $4 to $6 per pack) for the fullest effect.
DIY option:
Goddess braids are one of the more achievable DIY braid styles because the sections are large. Clean parts and consistent tension are the keys to a neat result.
Caring for goddess braids:
Apply a scalp oil every few days to prevent dryness. Smooth edges with edge control as needed. Keep the braids moisturized with a light braid spray.
How long they last:
With good care, goddess braids stay looking fresh for 2 to 4 weeks. They are a great option when you want a low-maintenance protective style that still looks intentional.
14. Havana Twists
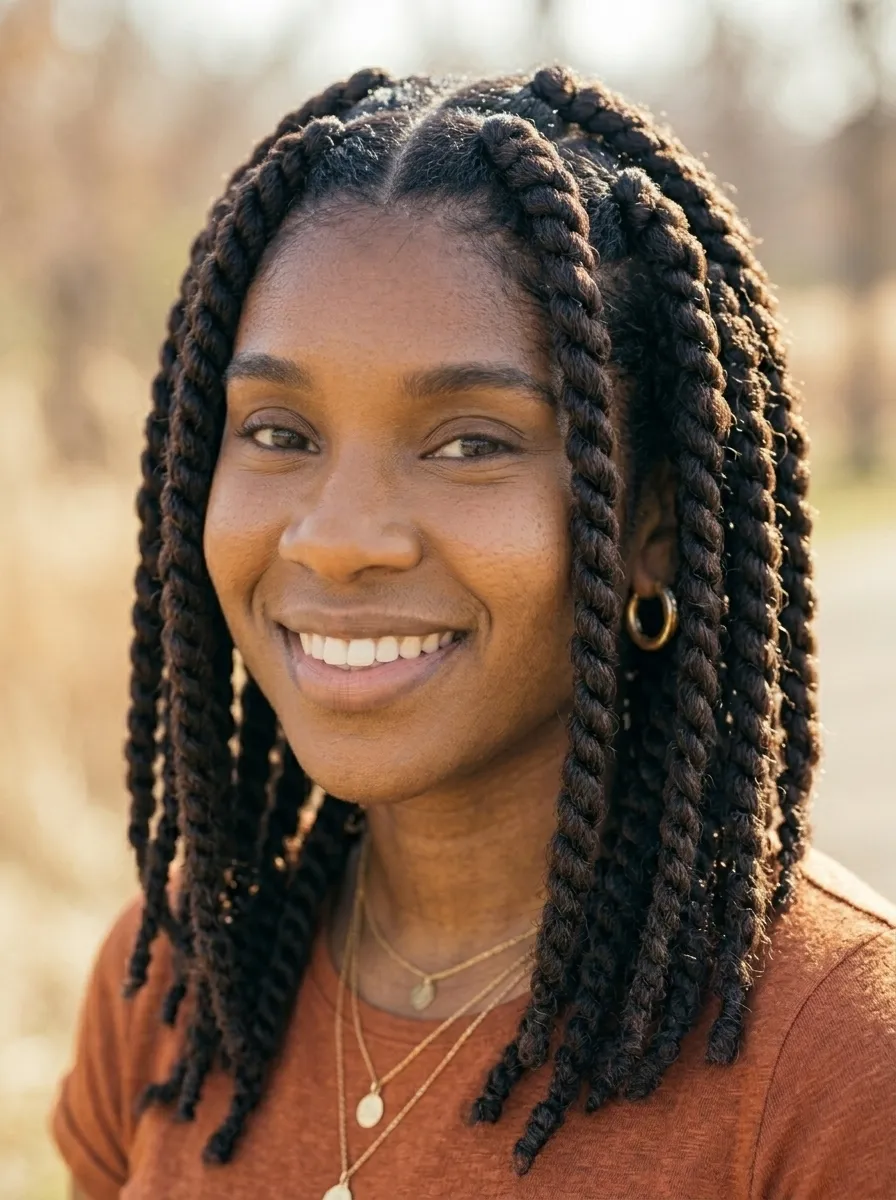
Havana twists are large, chunky, rope-like twists made with Havana or Marley braiding hair.
They are one of the most popular natural protective styles because they look incredibly natural, install relatively quickly, and last for weeks.
How they differ from regular twists:
The braiding hair used for Havana twists has a coarser, more textured feel that mimics natural 4b and 4c hair closely. The result looks like your own large twists rather than a clearly synthetic style.
Installation:
Each section of natural hair gets braiding hair added and twisted together into large two-strand ropes. The coarser texture of Havana hair grips and holds without needing rubber bands or knots at the tip.
Hair to buy:
Outre Havana Mambo Twist Braid Hair or Freetress Braid Marley Bulk Hair both cost around $5 to $8 per pack. Most head installs need 5 to 7 packs.
DIY tips:
Keep your sections even using a rat-tail comb. Stretching the braiding hair before use gives a more natural, less shiny result.
Maintenance:
Seal your scalp with a light oil every few days. Sleep in a satin bonnet to preserve the edges and prevent frizz.
15. Braided Updo
A braided updo takes natural hair from everyday to extraordinary.
Whether it is for a wedding, a job interview, a graduation, or just a day when you feel like looking spectacular, a braided updo delivers.
Simple updo ideas:
Crown braid: braid one or two sections around the perimeter of the head and pin at the back. Braided bun: gather multiple braids or twists and coil them into a bun shape at the crown. French braid updo: braid all hair toward the crown in a French braid and tuck or fan out the ends at the top.
DIY approach:
Most braided updos are achievable at home with bobby pins, a rat-tail comb, and some practice. Start with clean, moisturized hair and a clear plan for where you want the braids to go.
Products needed:
A strong-hold gel for edges, bobby pins, and a light holding spray. Total cost under $10.
Making it last:
Spray a light mist of hairspray over the finished style to hold flyaways and keep the shape in place throughout the day.
16. Senegalese Twists
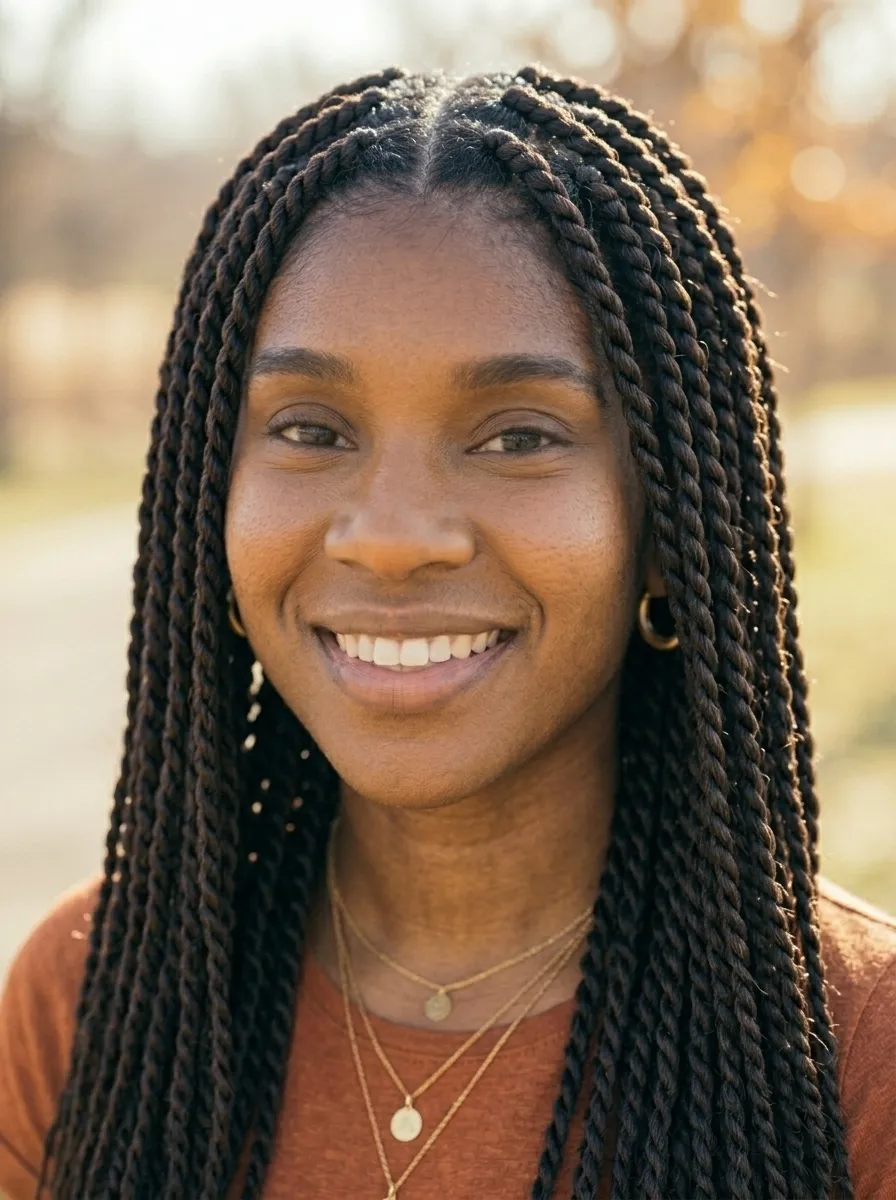
Senegalese twists are smooth, polished, rope-like twists made with kanekalon or braiding hair.
They are sleeker than Havana twists and have a more refined, tailored appearance.
How they are made:
Your natural hair is braided close to the scalp and then braiding hair is twisted over it in a tight, smooth rope pattern. The result is a long, even, elegant twist.
Size options:
Small Senegalese twists are fine and detailed — stunning but take many hours to install. Medium size is the most popular. Large Senegalese twists go in quickly and look bold.
Hair to use:
Kanekalon braiding hair in a smooth texture works best. X-Pression or Outre Kanekalon are reliable brands, each pack under $5. You will need about 5 to 8 packs for a full head.
Care routine:
Seal the scalp with oil every 2 to 3 days. Dip the ends in hot water briefly to seal them if they unravel. Sleep in a satin bonnet always.
Budget tip:
A salon install for Senegalese twists can cost $100 to $200. Learning to do them at home saves you this cost after just a few practice rounds.
17. Space Buns
Space buns on natural hair are a fun, statement style that works beautifully on afro-textured coils.
Unlike straight hair space buns, natural hair versions have incredible volume and texture — the buns are full, round, and alive with coil definition.
How to create them:
Part your hair down the center. Gather each half up high, near the top of the head. Twist or coil the section around itself and pin into a round bun shape. Secure with bobby pins and a hair tie. Fluff gently with your fingers for volume.
Make them bigger:
If your hair is medium length, the buns may be smaller naturally. To add volume, use a donut bun shaper or a small foam ring inside each bun to build it up.
Styling options:
Leave the ends loose and fluffy sticking out of the top for a wild, textured look. Keep everything neatly coiled and tucked for a cleaner finish. Wrap a scarf or ribbon at the base of each bun.
Products needed:
Edge control, a soft hair tie, and bobby pins. Total under $8.
18. Natural Hair Frohawk
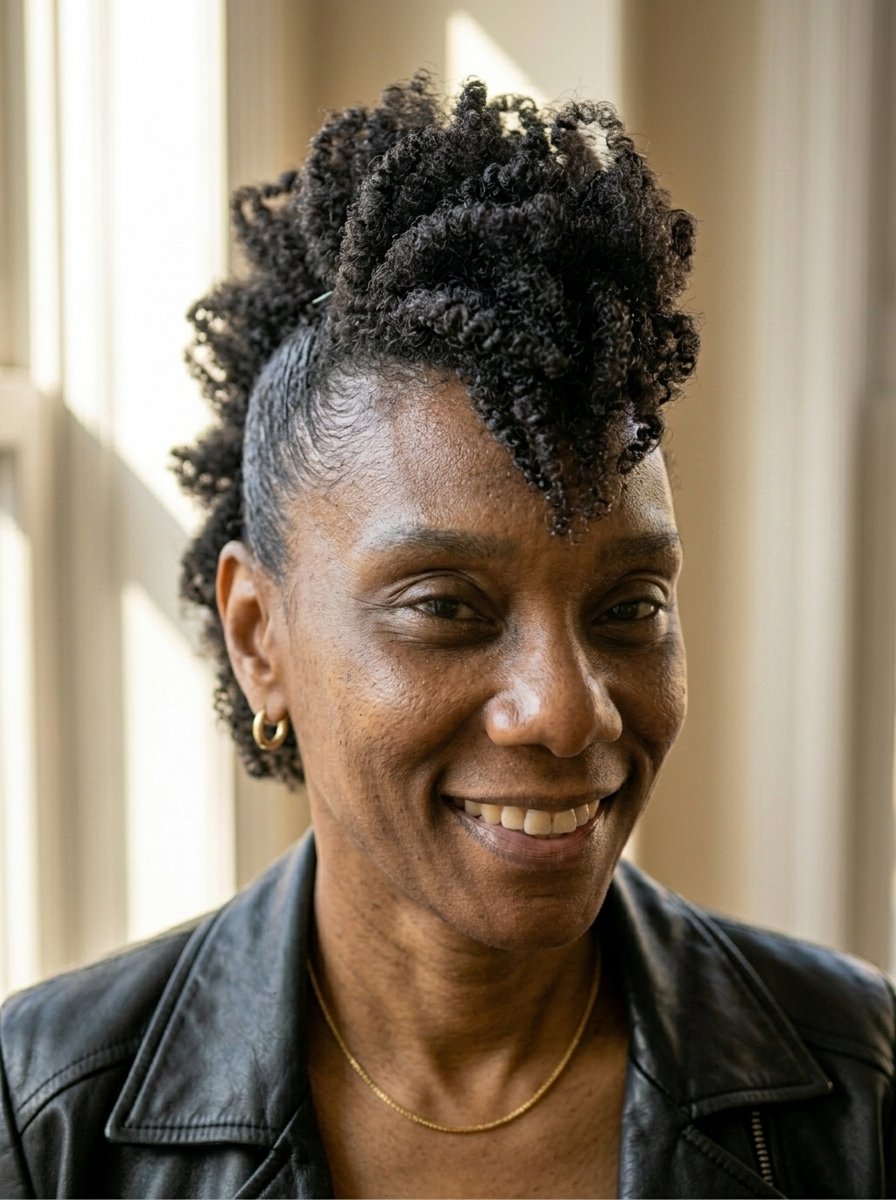
The frohawk takes the concept of a mohawk and applies it to natural afro hair — with a stunning result.
Instead of shaving the sides, you simply tuck or pin them down. The center section of your hair stands free and full, running from front to nape like a bold ridge of coils.
How to create it:
Dampen your hair slightly. Pull the side sections downward and pin flat against the sides of your head using bobby pins hidden close to the scalp. The center section remains free. Pick or fluff the center section into a tall, lifted strip running down the middle of your head.
Variations:
High and dramatic: pick the center section as tall as possible. Soft and low: leave the center lower and more textured. Braided sides: flat braid the side sections before pinning for a cleaner look.
Products:
Apply a small amount of gel to the side sections before pinning to keep them flat and smooth. Use Eco Style Gel (under $4) for strong hold without stiffness.
This style works on:
Medium to long natural hair. The longer the center section, the more dramatic the frohawk effect.
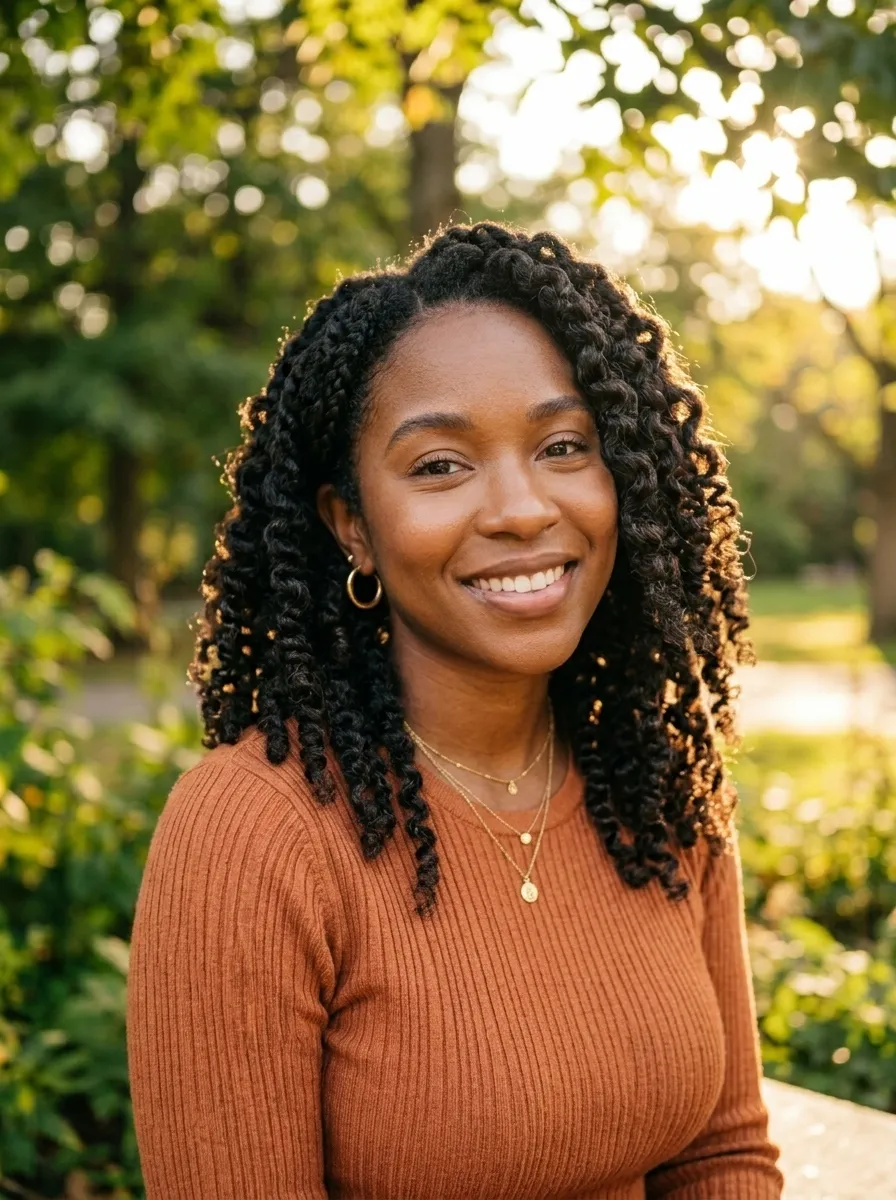
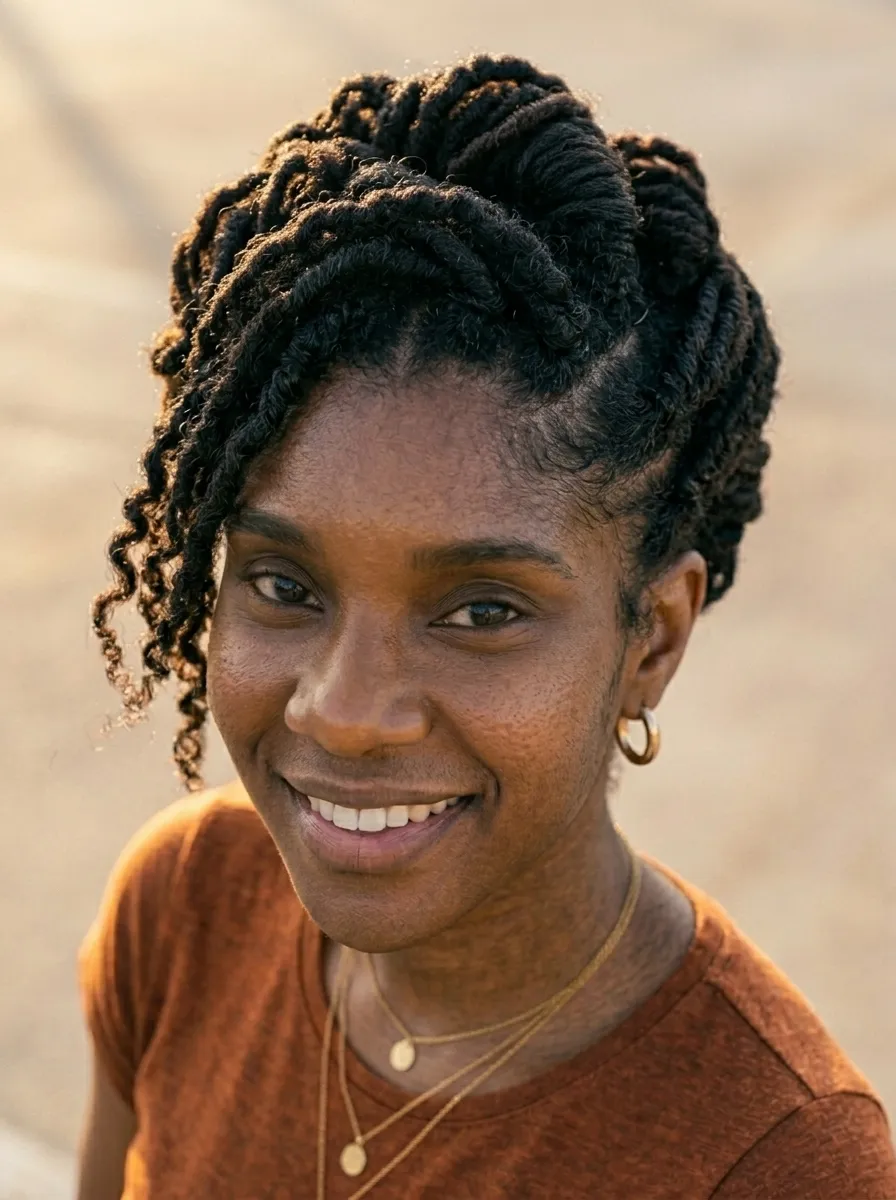
19. Passion Twists
Passion twists are a bohemian, textured variation of traditional twists that became hugely popular for their natural, organic look.
They are created using wavy braiding hair rather than smooth kanekalon — giving each twist a soft, flowing movement.
Why they look so natural:
The wavy texture of the braiding hair closely resembles naturally curly and wavy afro-textured hair. The result looks like a very natural, slightly undone twist style.
Hair to buy:
Freetress Water Wave Braiding Hair is the most popular choice for passion twists and costs around $5 to $8 per pack. You will typically need 7 to 9 packs for a full head.
Installation:
Braid your natural hair close to the scalp in small sections. Add the braiding hair and twist it around the braid from root to tip. The loops of wavy texture form naturally as you work.
DIY potential:
Passion twists are achievable at home but take time to learn. Watch installation tutorials for the looping technique before starting.
Care and maintenance:
Mist your scalp with a light oil spray every few days. Sleep in a satin bonnet. The style lasts 4 to 6 weeks with proper nighttime care.
20. Loc Bun
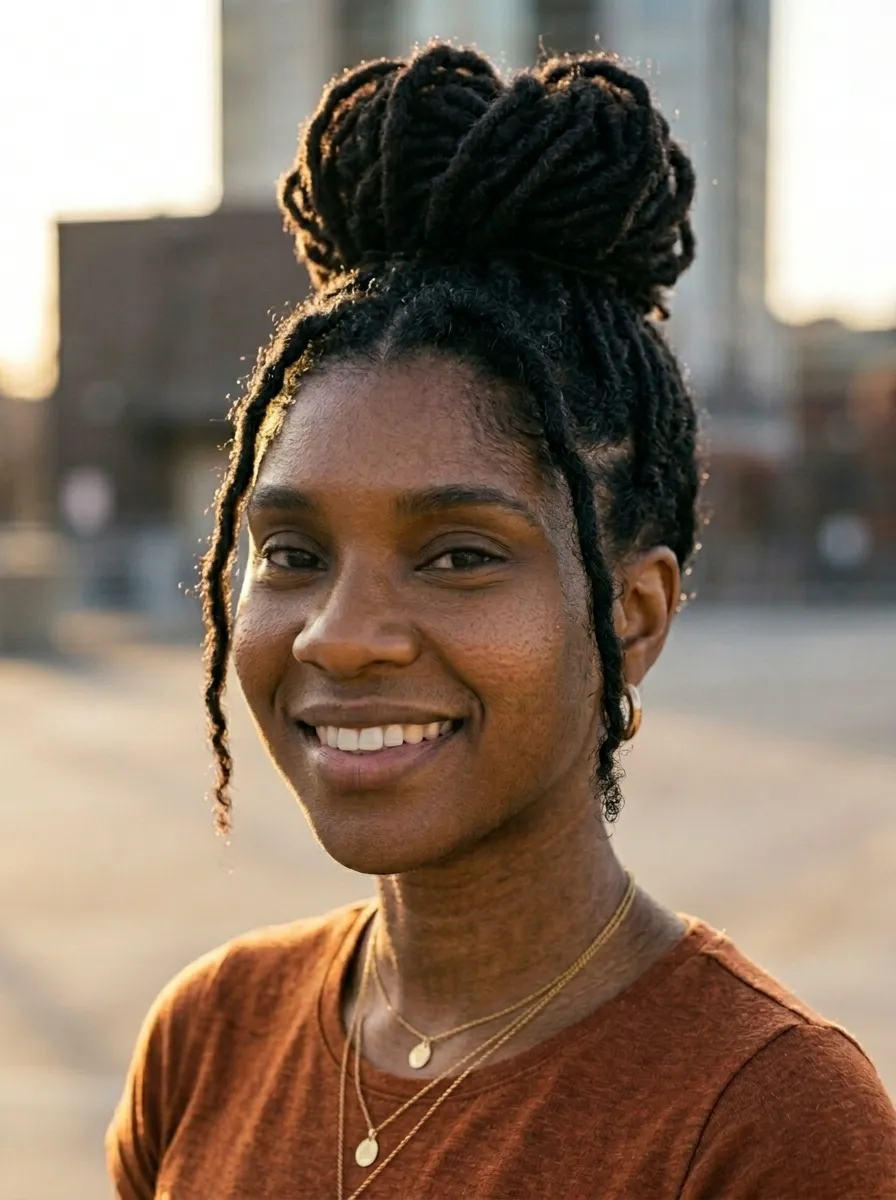
If you have locs — whether starter locs, traditional locs, or sisterlocks — the loc bun is your go-to polished style.
It is effortless, elegant, and takes under five minutes once your locs are long enough to gather.
How to do a simple loc bun:
Gather all locs upward toward the crown. Coil them around a central point and tuck the ends under the bun. Secure with large bobby pins or a soft hair tie. Smooth the front edges and any flyaways with a small amount of edge control or light pomade.
Variations:
Low bun: gather at the nape for a refined, polished look. Side bun: gather all locs to one side for an asymmetric effect. Half-up bun: gather the top half of locs into a bun and leave the lower half hanging free.
Accessory ideas:
Wrap a headwrap or scarf around the base of the bun for color and pattern. Add hair cuffs or rings to individual locs at the front for extra detail.
No products required:
The loc bun can be done with literally no product at all. Locs hold shape on their own — making this one of the most genuinely zero-cost daily styles available.
21. Shrunken Afro
The shrunken afro celebrates hair in its most natural state — fully coiled, compact, and close to the head.
Shrinkage is not something to fight. It is a sign of healthy, elastic natural hair.
A shrunken afro has a defined, uniform curl pattern and a rounded shape that hugs the head beautifully.
How to achieve it:
Wash your hair, apply a curl defining product, and let it air-dry without touching or manipulating it. No picking, no stretching, no diffusing with movement. Just pure air-drying.
The result is your tightest, most defined coil pattern fully expressed.
Products for maximum definition:
Kinky Curly Curling Custard is a cult favorite for defining tight coils and costs around $15. Eco Style Krystal Styling Gel under $4 also gives excellent definition on 4c hair.
Embracing shrinkage:
If you measure your stretched length and then see how much your hair shrinks when dry, you might be surprised how long it actually is. Celebrating the shrunken afro is celebrating what your hair actually does naturally.
Quick daily refresh:
Mist lightly with water each morning and scrunch gently. Your definition refreshes without a full wash.
22. Updo with Natural Coils
A natural coil updo takes your curl pattern and turns it into a piece of living sculpture.
Unlike straight hair updos that depend on smoothness, natural hair updos work with texture — and the texture is exactly what makes them spectacular.
Simple versions to try:
The gathered coil bun: gather all hair at the crown and let the coils spring outward in every direction from the gathering point. Pinned curl sections: separate hair into large sections, coil each one loosely, and pin in a staggered pattern across the back of the head. The twisted crown: take two large sections from the front, twist them back toward the crown, and pin them while leaving the rest of the hair free.
Products:
A light-hold gel or curl cream keeps the coils defined without making them stiff. A few large bobby pins and small hair clips are all the tools you need.
Best occasions:
Natural coil updos work for weddings, formal dinners, office events, or any time you want to make an impression without sacrificing the integrity of your natural hair.
23. Afro with a Headband or Headwrap
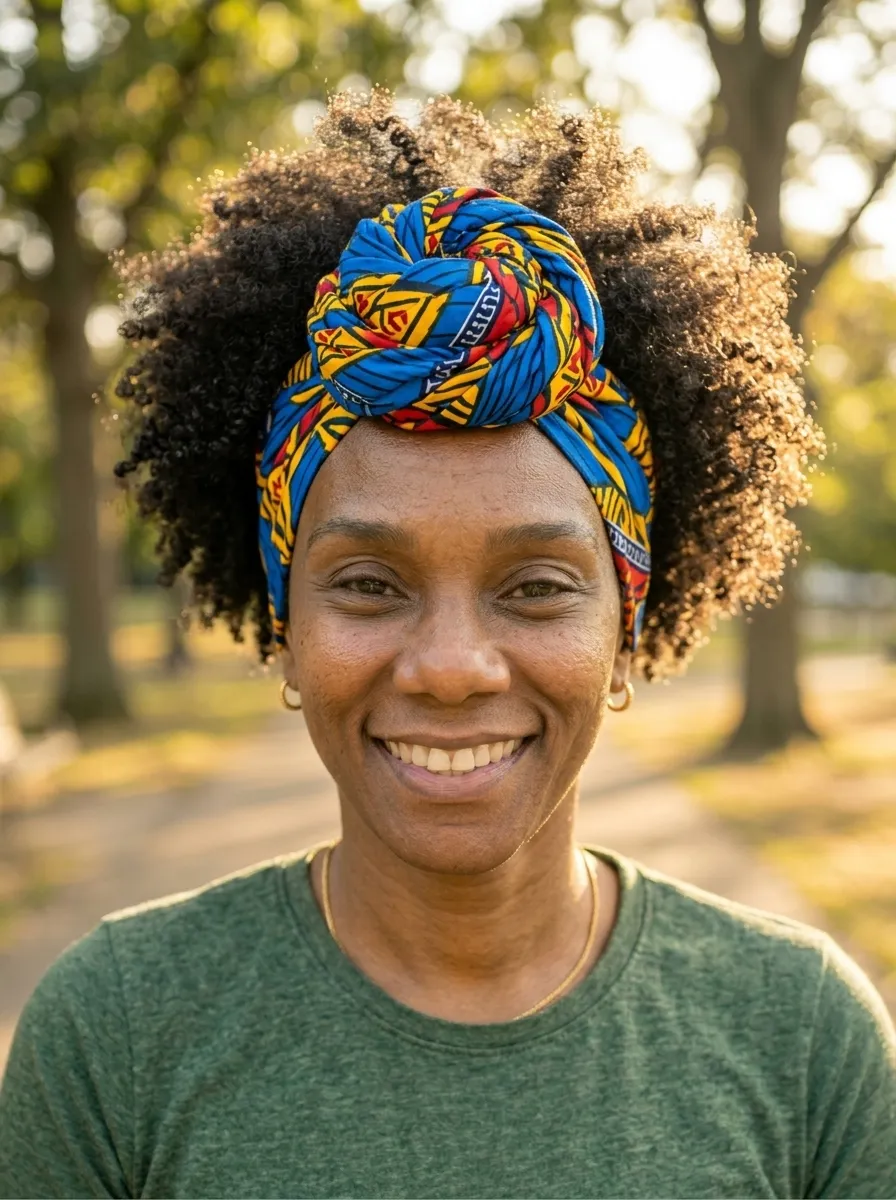
A headband or headwrap paired with a natural afro is one of the most striking style combinations in natural hair.
It adds color, pattern, culture, and intention to your look without any extra styling effort.
Types of headbands and wraps:
Wide fabric headbands that sit across the crown. Scrunchie-style headbands placed at different points around the afro. Ankara or kente fabric headwraps tied in various styles. Knotted jersey or satin turbans.
How to position them:
At the crown for a high-drama look that pushes the afro upward and outward. Around the edges of the afro for a wreath effect. Pulled toward the back to sweep hair away from the face.
DIY headwraps:
Cut 2 yards of fabric from a craft or fabric store — any fabric, any pattern. A 2-yard piece costs $3 to $10 depending on the fabric. Wrap it around your head in a turban style, tuck the ends, and you have a completely custom headwrap.
Budget tip:
Fabric stores frequently have remnants available for under $2 per piece — the perfect size for a headwrap. Check the remnant bin at any fabric or craft store.
24. Pineapple Style
The pineapple is a quick style but also the best overnight preservation method for wash and go curls and twist outs.
It involves gathering all your hair at the very top of your head and securing it loosely — the hair falls forward in a voluminous pile that genuinely resembles a pineapple.
How to pineapple:
Flip all of your hair toward the top of your head. Secure loosely with a satin scrunchie or a soft hair tie — not too tight or you will create a crease. The coils hang freely downward from the top.
As a daytime style:
Let the hair fall as a high, loose puff. Pull a few coils down to frame your face. Add a satin scrunchie in a fun color to make it a deliberate style choice rather than just a maintenance move.
Overnight use:
Sleeping in a pineapple with a satin bonnet on top is the best way to preserve defined curls. You wake up with the same definition you had the night before.
Products:
No products needed for the pineapple itself. A satin scrunchie costs under $3 at any beauty supply store.
25. Mohawk Braid with Natural Ends
The Mohawk braid combines the structure of cornrows with the freedom of a natural afro in one powerful style.
The sides are braided flat in cornrows directed toward the center, and the middle strip of natural hair is left loose, full, and coiled.
How to create it:
Part the hair into three sections: left side, center strip, and right side. Cornrow the left side toward the center, ending the braid where the center strip begins. Repeat on the right side. Leave the center strip completely free and pick it out for maximum height and volume.
The width of the center:
A wider center strip gives a dramatic, voluminous mohawk. A narrower center creates a more polished, graphic look.
Variations:
Flat twist the sides instead of cornrowing for a slightly different texture on the flat sections. Leave the center strip in a defined twist-out rather than a picked-out afro for a more refined look.
Products needed:
Braid cream for the side cornrows. A curl-defining gel for the center strip. A pick. Total cost under $15.
Longevity:
This style holds well for 5 to 7 days with satin bonnet care at night.
26. Crochet Braids with Afro-Textured Hair
Crochet braids are one of the fastest protective style installations available — and when done with the right hair, they are almost indistinguishable from natural afro hair.
How crochet braids work:
Your natural hair is cornrowed flat to the scalp in a pattern. Then, using a latch hook crochet needle, loops of braiding hair are attached through the cornrows. No glue, no heat, no bonding.
The best hair for a natural afro look:
Freetress Bohemian curl crochet hair. Outre X-Pression Kinky Bulk Hair. Model Model Glance Afro Kinky Bulk Hair. All are available for $4 to $8 per pack. A full install typically needs 4 to 6 packs.
DIY installation:
Crochet braids are one of the most DIY-friendly protective styles. The cornrow base is the hardest part. Once the base is done, the actual crocheting process takes just 1 to 2 hours.
Maintenance:
Moisturize your scalp through the cornrows daily with a light oil. Sleep in a satin bonnet. Refresh the hair with water and a curl activator spray to revive the texture.
Cost savings:
Salon crochet installs cost $80 to $150. DIY cuts that to $25 to $50 in materials.
27. Defined Coil Out with Shingling
Shingling is a curl-defining technique where you smooth product through each small section of hair, coil by coil, to create the most defined version of your curl pattern possible.
It is time-consuming, but the results are extraordinary.
How to shingle:
Start with soaking wet, conditioned hair. Take a very small section — about the width of one finger. Apply a curl-defining gel or cream from root to tip, smoothing it through the section while twisting slightly to encourage the coil to clump. Move through the entire head section by section.
The key:
Do not disturb the hair while it dries. No touching, no repositioning. Set a timer and walk away. The product and the curl pattern do all the work.
Best products for shingling:
Kinky Curly Curling Custard is widely considered one of the best shingling products for 4a and 4b hair. Jane Carter Solution Curl Defining Cream works beautifully on 3c and 4a types.
After drying:
Gently separate any clumps that are too large by pulling from the bottom. Use oiled fingers only — never a comb or brush on dry shingled hair.
Budget tip:
Eco Style Krystal Gel under $4 works surprisingly well for shingling on a budget.
Conclusion
Your natural hair deserves celebration, care, and the freedom to be exactly what it is. From a full round afro to intricate protective styles, from a five-minute high puff to a detailed shingle out, the styles in this list cover every mood, every occasion, and every budget. Natural afro hairstyles are not about following trends — they are about finding what works for your specific hair texture, your lifestyle, and your confidence. Take one style from this list and try it this week. Start simple if you are new to natural hair care. Build your technique and your product collection one step at a time. The more you learn about your own hair, the more beautiful and manageable every single style becomes. Your curls are worth knowing.
Leave a Reply