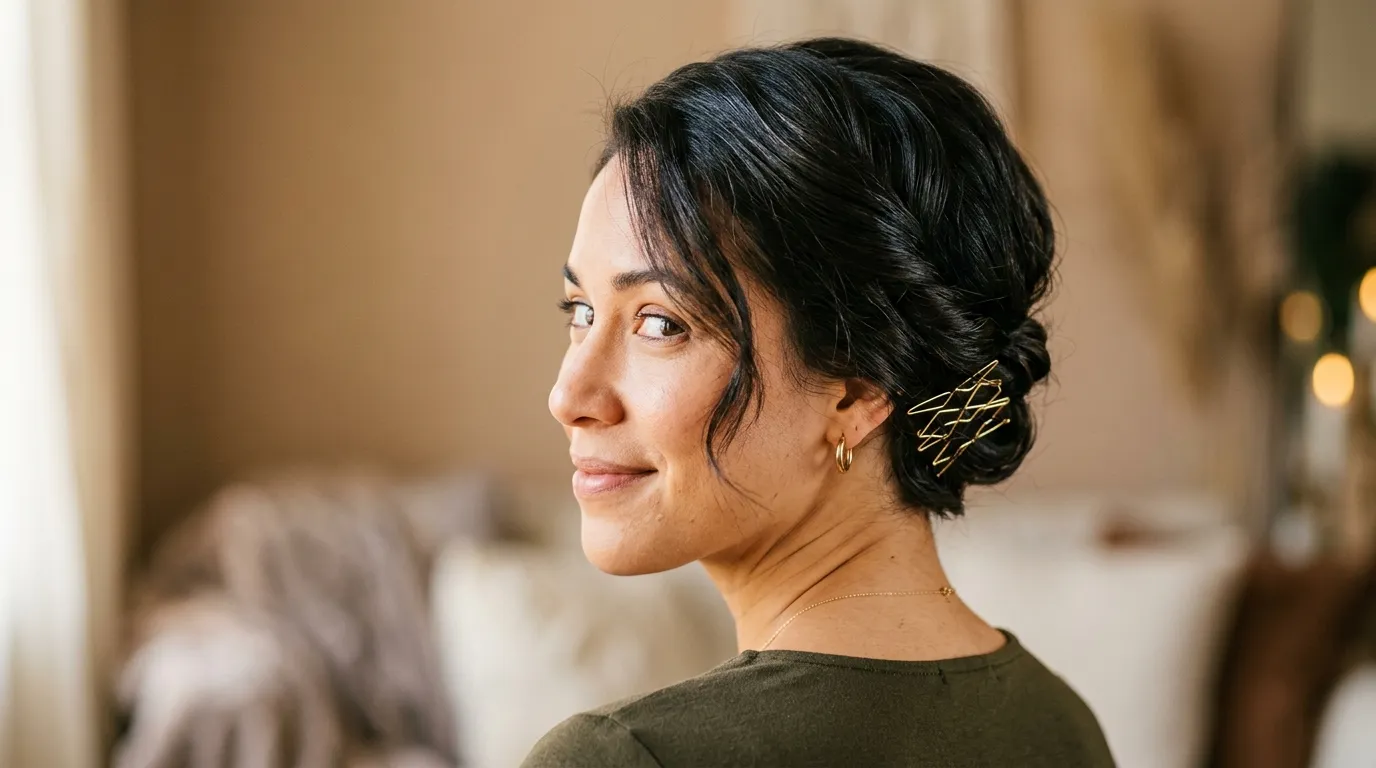
Short hair updo ideas are not mutually exclusive. This is one of the most persistent hair myths that leaves people with short cuts feeling limited on formal occasions, hot days, and any moment they want their hair off their face. The truth is that short hair has its own set of updo techniques that work brilliantly with the length rather than fighting against it. From bobby pin art to twisted tucks and accessory-forward styles, short hair updos can be just as elegant, polished, and creative as anything you can achieve on longer hair. This list covers 22 specific updo ideas designed for short hair, from pixie cuts and bobs to chin-length styles and everything between. Each idea includes clear instructions, practical styling tips, and budget-friendly advice for achieving the look at home. If you’re also interested in 90s Bob Haircut Ideas, this timeless cut offers sleek lines, effortless styling, and vintage-inspired charm that can be adapted with modern touches for a fresh and fashionable look.
1. The Elegant Bobby Pin Tuck
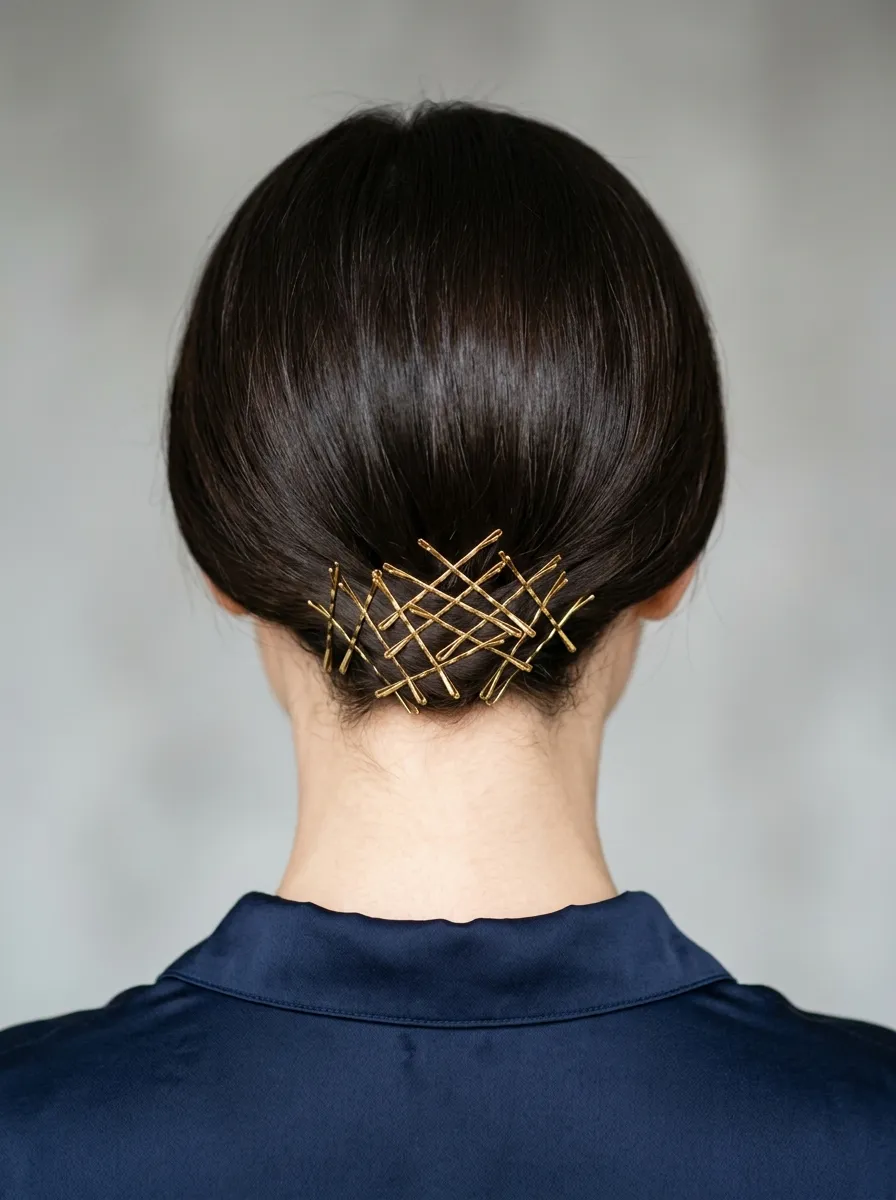
The bobby pin tuck transforms a short bob into a polished updo by tucking the ends under and pinning them flat against the nape. The pins become part of the style rather than just a functional tool.
Working section by section from one side to the other, roll the ends of the bob under toward the nape and secure each section flat with a bobby pin.
Use decorative gold, silver, or pearl-tipped pins rather than plain black ones. When the pins are part of the design, the style looks intentional and finished rather than just pinned.
Start at one ear, tuck and pin, then work across to the other ear. Overlap the sections slightly so there are no visible gaps.
A small amount of light-hold pomade worked through the ends before tucking helps them stay flat and prevents them from springing out during the day.
This works best on chin-length bobs where there is enough length to tuck under but not so much that the roll becomes bulky.
Budget tip: Decorative bobby pins are available at dollar stores and drugstores for under $3 per pack. A set of gold and a set of silver covers most styling needs and outfit combinations.
Apply a light-hold hairspray over the finished tuck to keep everything in place.
2. The Twisted Pixie Updo
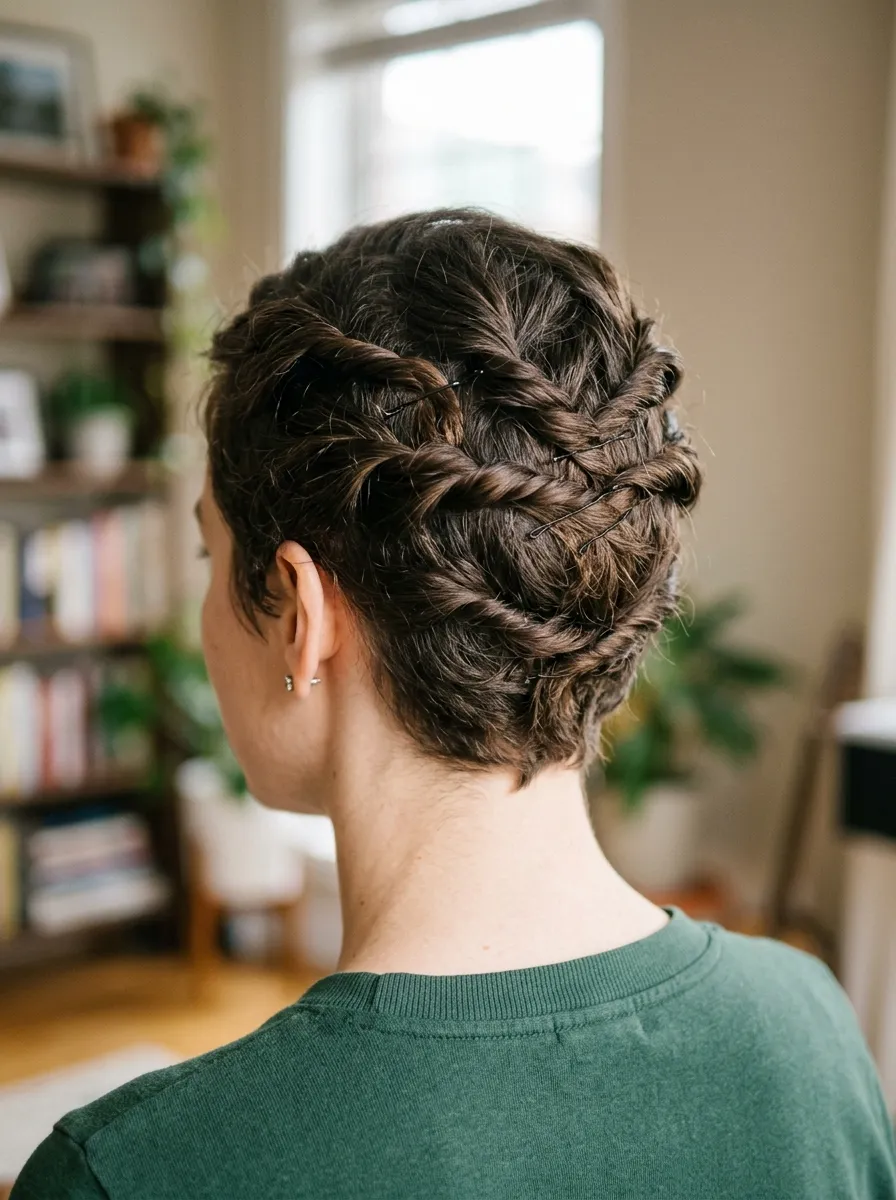
A pixie cut has more styling potential than most people realize. The longer top sections of a pixie can be twisted and pinned in multiple directions to create a textured, dimensional updo.
Start with the longest sections at the top and crown. Twist each section and pin it flat against the head. Work the twists in different directions, some toward the back, some toward the sides.
The key is creating a layered, overlapping pattern of twisted sections rather than pinning everything in the same direction. Overlapping creates a more intricate, finished look.
Use bobby pins pushed through each twist perpendicular to the direction of the twist for the strongest hold.
Repeat with smaller sections at the nape and sides until all the hair is secured in the twisted updo.
A light mist of hairspray before starting makes the hair more workable and helps each twist hold its position while you work.
Finish with another light spray over the completed style.
This technique works on pixie cuts with at least one to two inches of length on top. Very short crops with uniform length all over have less to work with but can still create a few pinned twists at the longer crown section.
Budget tip: Plain bobby pins from a bulk pack work just as well as boutique versions for this technique.
3. The Short Hair French Roll
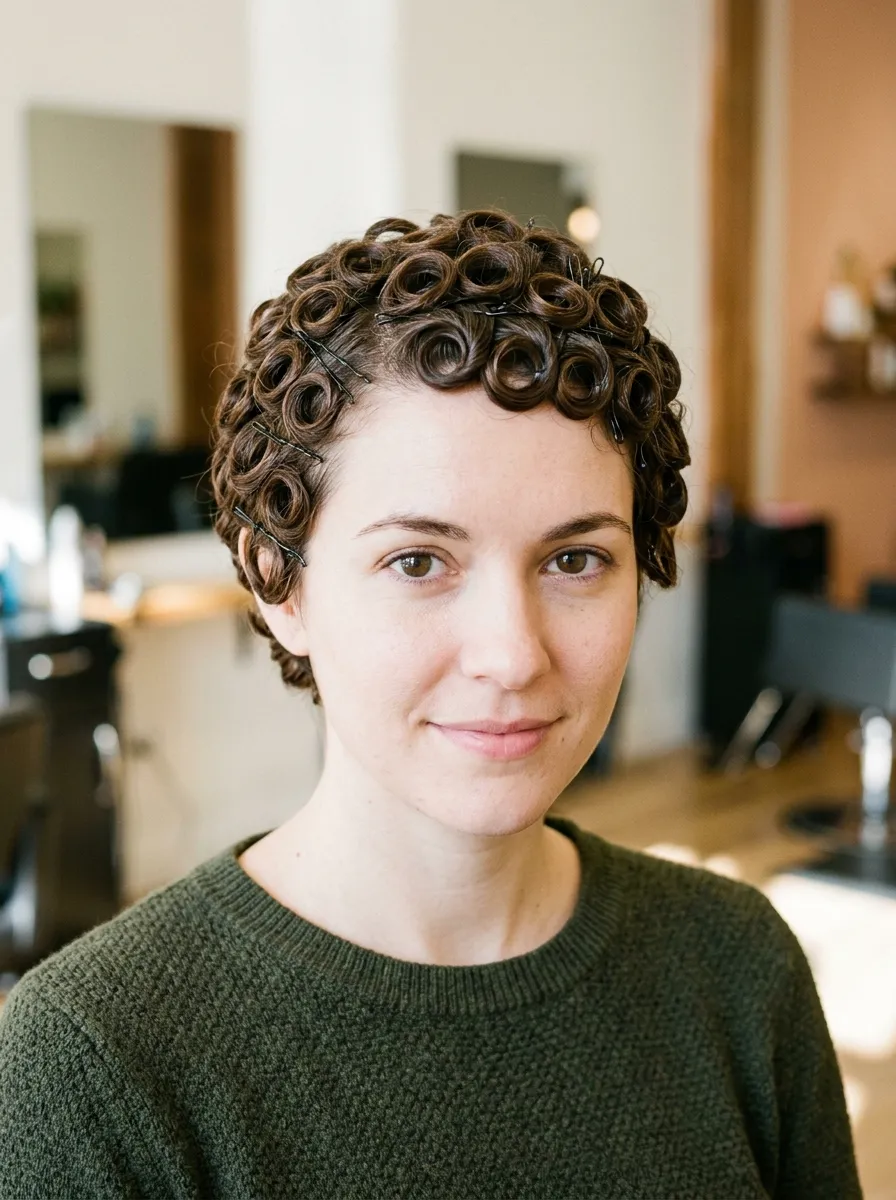
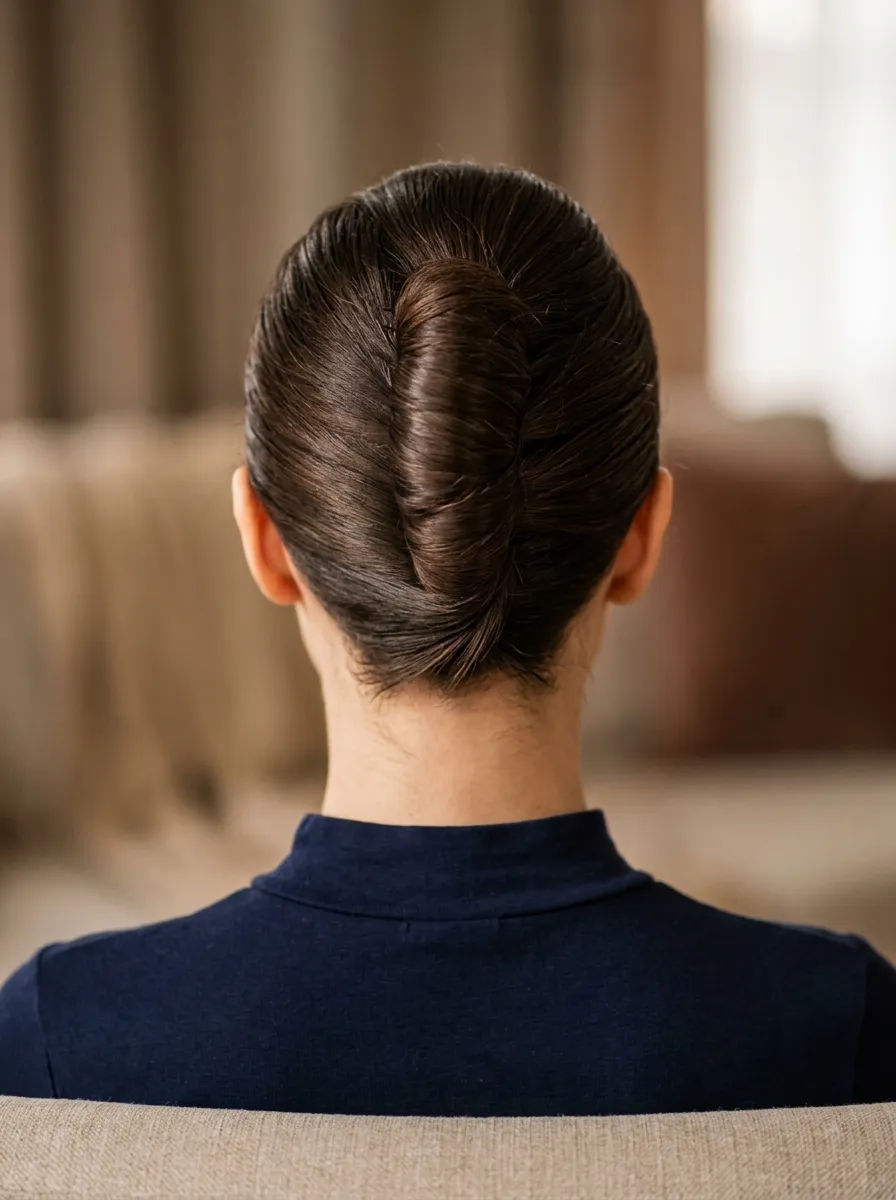
The French roll is typically associated with longer hair but it works beautifully on a bob with the right technique. The hair is gathered to the center back, twisted into a vertical roll, and pinned flat.
Comb all the hair to the center back and hold it in one hand. Begin rolling the gathered section upward toward the crown, tucking the ends in as you roll.
Pin the roll flat at each stage as you work upward rather than trying to pin everything at the end. Pinning as you go keeps each section secure while you continue rolling.
Tuck the ends at the top under the roll and pin them in with a final set of pins.
The French roll on short hair is naturally smaller and more compact than on long hair. This compact quality actually suits shorter cuts very well because the proportions match the overall length.
Smooth the sides with a fine-tooth comb and a small amount of edge control before rolling to give the style a polished, formal finish.
This style suits weddings, formal events, job interviews, and any occasion where you want a polished updo without sacrificing your short cut.
Budget tip: A fine-tooth comb and bobby pins are the only tools needed. Both cost almost nothing.
4. The Pin Curl Set
Pin curls create beautiful waves and vintage-inspired texture on short hair. Wrap small sections of damp hair into flat circular curls and pin each one close to the scalp. Let the hair dry completely before releasing.
The smaller the sections, the tighter and more defined the resulting wave. Larger sections create softer, looser waves.
Wrap each section around two fingers in a circular motion, slide the curl off the fingers, and pin flat to the scalp with a single pin through the center.
Let the curls dry naturally or sit under a hooded dryer if available. Once completely dry, release each pin carefully.
After releasing all the curls, use your fingers to gently separate and style them. For a vintage wave look, use a wide-tooth comb or a brush. For a more modern, defined curl, keep the finger-separated texture.
A light-hold hairspray after releasing sets the waves or curls without making them crunchy.
This technique works on any short hair length as long as there is enough hair to wrap around two fingers. It requires no heat tools, making it one of the healthiest styling options for short hair.
Budget tip: Bobby pins and water are the only requirements. If you have them, a small amount of setting lotion improves the definition of the curls but is not mandatory.
5. The Floral Pin Updo
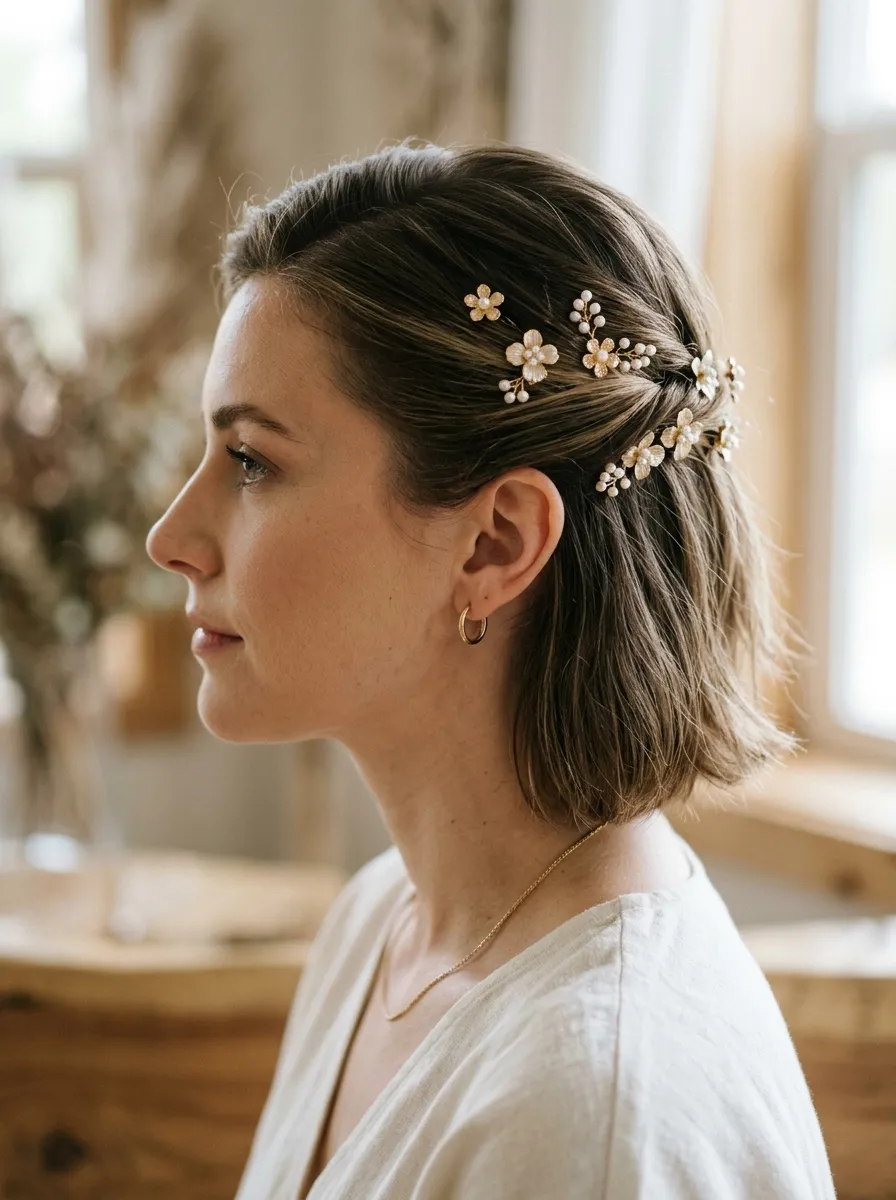
A floral pin updo uses decorative flower-shaped accessories to create a styled look on short hair that is more about the accessories than the technique. Small floral pins, clips, and barrettes placed throughout the hair in a deliberate arrangement create a finished, event-appropriate style.
Smooth the hair back from the face using a light-hold pomade. Begin placing floral pins through the hair in a scattered but considered pattern.
Place the first pin at the temple, the second behind the ear, and additional pins through the crown and nape. This diagonal placement creates a natural flow rather than a random scattering.
Use three to five pins for a subtle look. Use seven to ten for a more dramatic, accessory-forward result.
This style suits weddings, garden parties, and outdoor events where floral accessories feel especially appropriate.
Budget tip: Floral hair pins are available at dollar stores, craft stores, and online in packs for very little money. A set of twelve to twenty pins in gold, silver, or pearl gives you enough to create this style multiple times with different arrangements.
This technique works on all short hair lengths from pixie to chin-length bob.
6. The Sleek Side Tuck
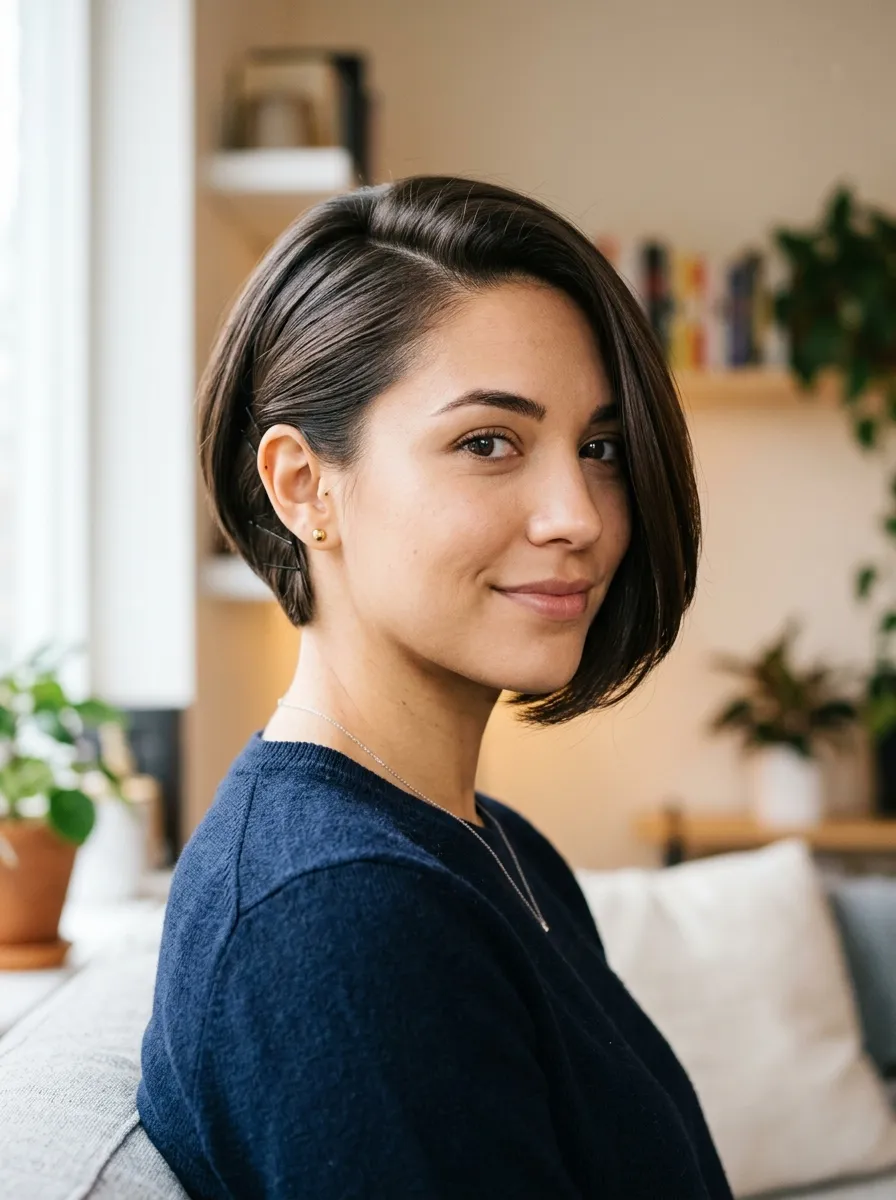
The sleek side tuck sweeps all the hair to one side, tucks it behind the ear, and pins it flat at the nape on that side. The opposite side remains smooth and natural. The result is a clean asymmetric style that looks intentional and polished.
Apply a small amount of smoothing gel or pomade through the hair. Sweep all the hair firmly to one side using a flat brush or fine-tooth comb.
Tuck the ear on the swept side and pin the gathered hair behind the ear and along the nape with several bobby pins pushed flat against the head.
The opposite side of the hair sits smooth and fuller, framing that side of the face naturally.
This style shows off earrings on the swept and tucked side. A statement earring on that side becomes the focal point of the whole look.
A light-hold hairspray sets the swept side in place and prevents the tucked section from loosening through the day.
This suits chin-length bobs and longer pixie cuts where there is enough length on all sides to sweep and tuck. Very uniform short pixie cuts may not have enough length for the tuck.
Budget tip: Pomade or smoothing gel from a drugstore costs $4 to $8 and is all the product needed.
7. Braided Accent on Short Hair
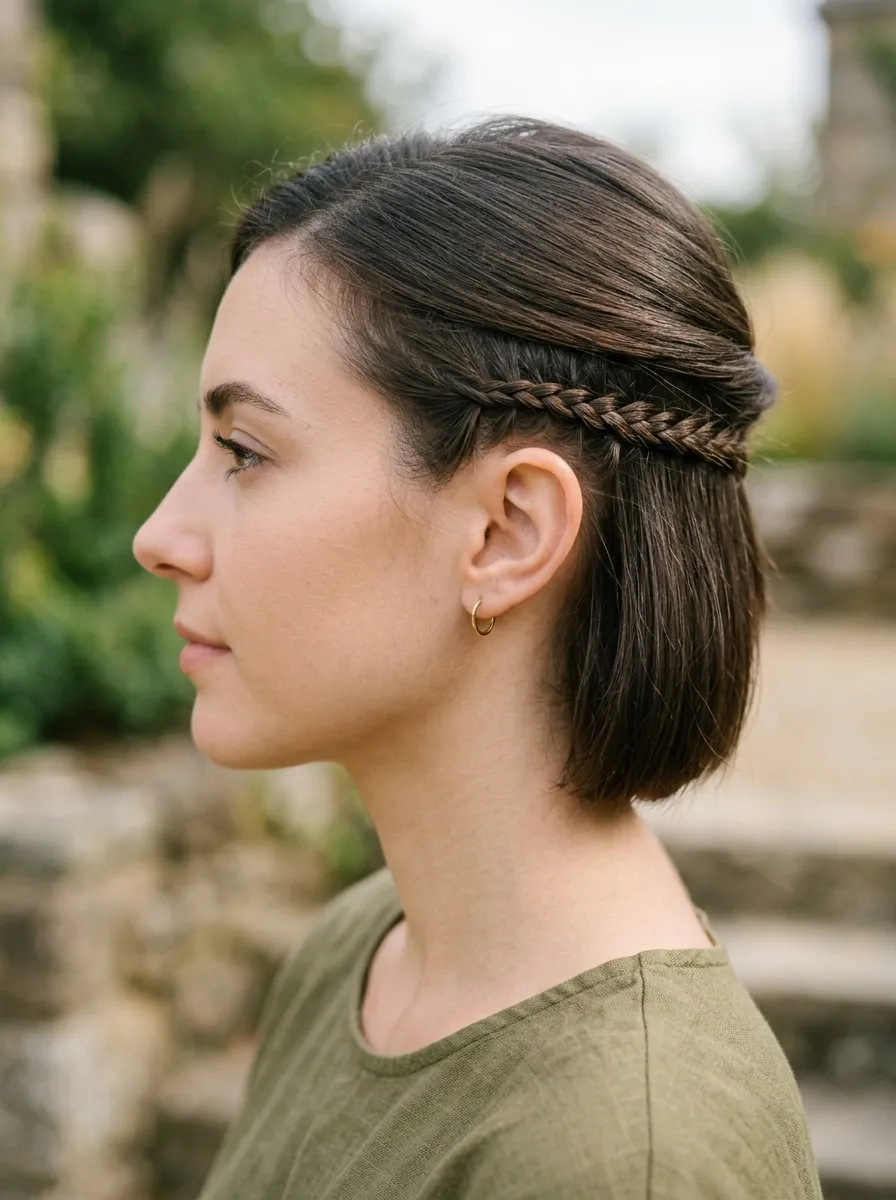
Even with short hair, a small accent braid adds a completely different dimension to an otherwise simple style. A single thin braid running from the temple back toward the ear creates a detail that looks deliberate and styled without requiring long hair.
Take a small section from the front temple. Begin a three-strand braid and work it back toward the ear, keeping the braid flat against the head.
When the braid reaches the ear, secure the end with a tiny clear elastic or a small bobby pin. Tuck the pin under the braid so it is not visible.
The rest of the bob falls naturally around the accent braid.
This works on any short hair length with at least two to three inches of hair in the temple section. The shorter the hair, the shorter the resulting braid, but even a very small braid creates a visible accent detail.
For a more elaborate version, create two accent braids, one on each side, and bring both back to meet at the center back where they are pinned together.
Thread a small metal hair ring or bead onto the braid for a decorative detail. These cost almost nothing at beauty supply stores.
Budget tip: A single small elastic and one small bead or ring cost under $2 total.
8. The Tucked Nape Knot
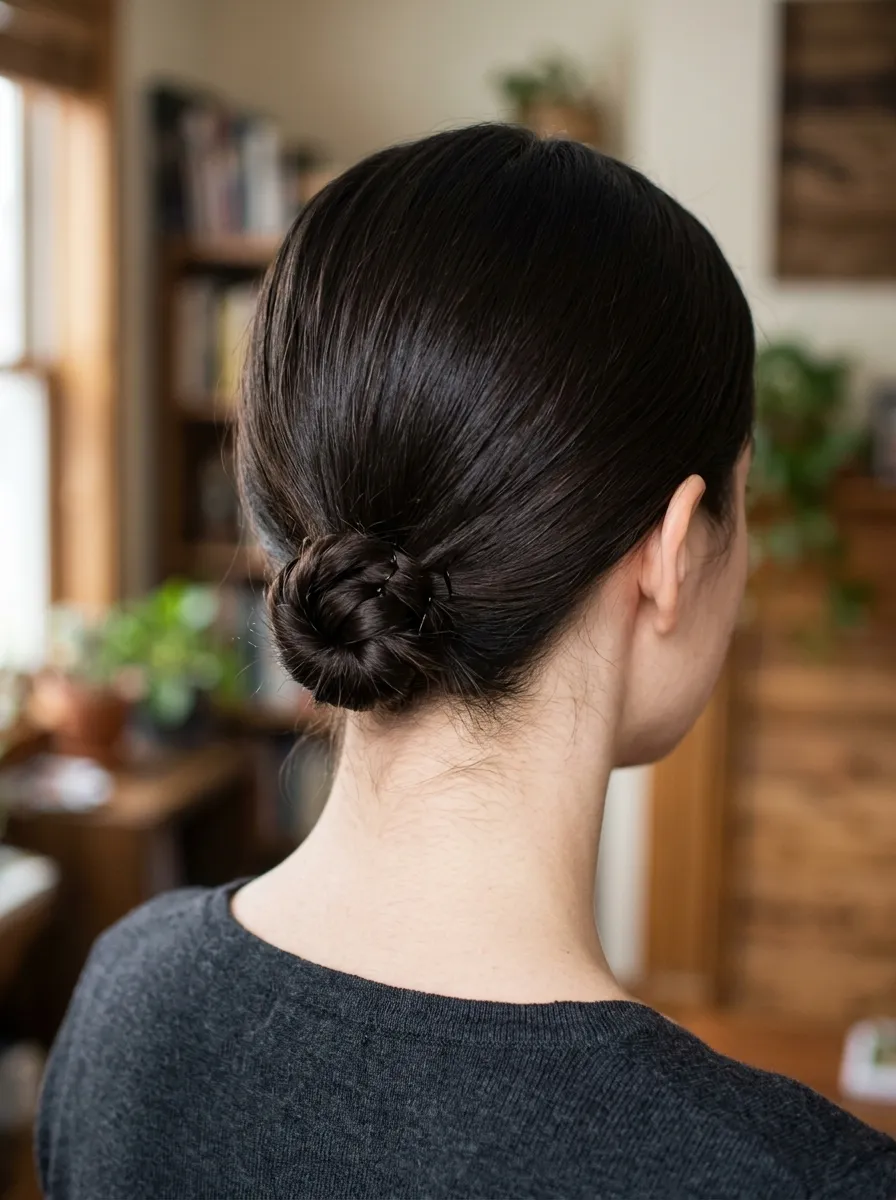
The tucked nape knot gathers all the hair at the nape, twists it into a compact knot, and pins it flat. On short hair, the knot is naturally small and sits very close to the head, which actually creates a very elegant, refined appearance.
Gather all the hair at the nape without securing with an elastic first. Hold the gathered section and twist it firmly until it begins to coil back on itself.
Guide the coil against the nape and pin it flat with several bobby pins pushed through the knot at different angles. Multiple pins at different angles provide much more secure hold than several pins all going in the same direction.
Tuck any loose ends under the knot before pinning the final layer.
Smooth the sides with a fine-tooth comb before gathering. Edge control applied along the sides and nape gives the style a polished, formal quality.
A light-hold hairspray over the completed knot keeps it intact through an event or working day.
This suits chin-length bobs where there is enough length at the nape to gather and knot. Shorter bobs and pixie cuts may not have enough length at the nape for this technique.
Budget tip: No products are strictly required for this style, though edge control gel from a beauty supply store for around $5 gives the most polished result.
9. The Velvet Headband Updo
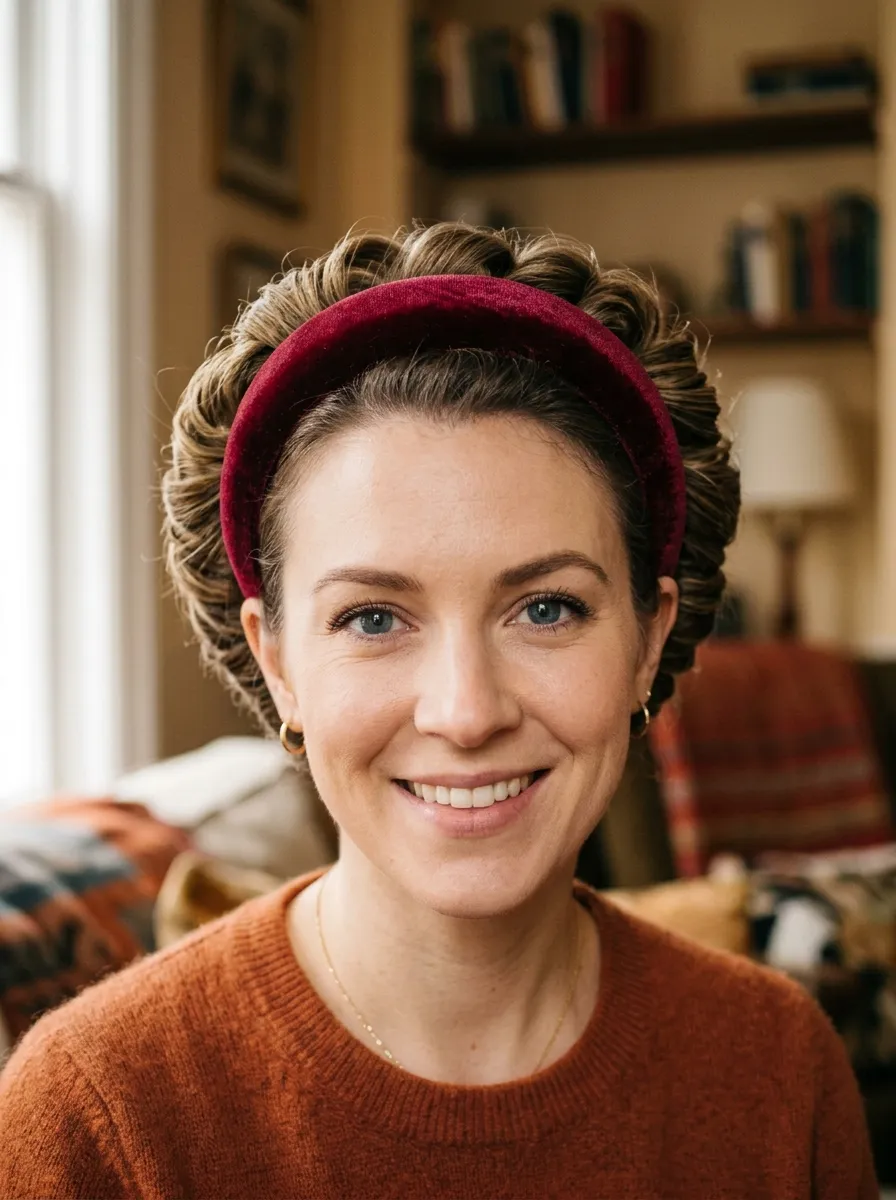
A wide velvet or fabric headband can transform a short bob into a vintage-inspired updo by using the headband as a base to roll the hair around and over. This technique creates a retro style that looks like much more effort than it takes.
Place the headband on the head a couple of inches back from the hairline. Take sections of hair and tuck them up and over the headband, rolling them toward the scalp.
Work from the front sections backward, tucking each section under and over the headband until all the hair is secured in the rolled tuck.
The headband holds all the rolled sections in place. No bobby pins are needed for the main structure, though a few pins at the nape tuck in any remaining ends.
This style has a 1940s and 1950s quality that suits formal events, photo shoots, and any vintage-inspired occasion.
Wide headbands are inexpensive and widely available. A velvet headband in black, navy, or burgundy suits formal occasions. A printed or colorful fabric headband suits casual events.
Budget tip: Wide headbands cost under $5 at most stores. A single headband enables this entire updo style without any additional accessories.
10. The Glam Slicked-Back Bob Updo
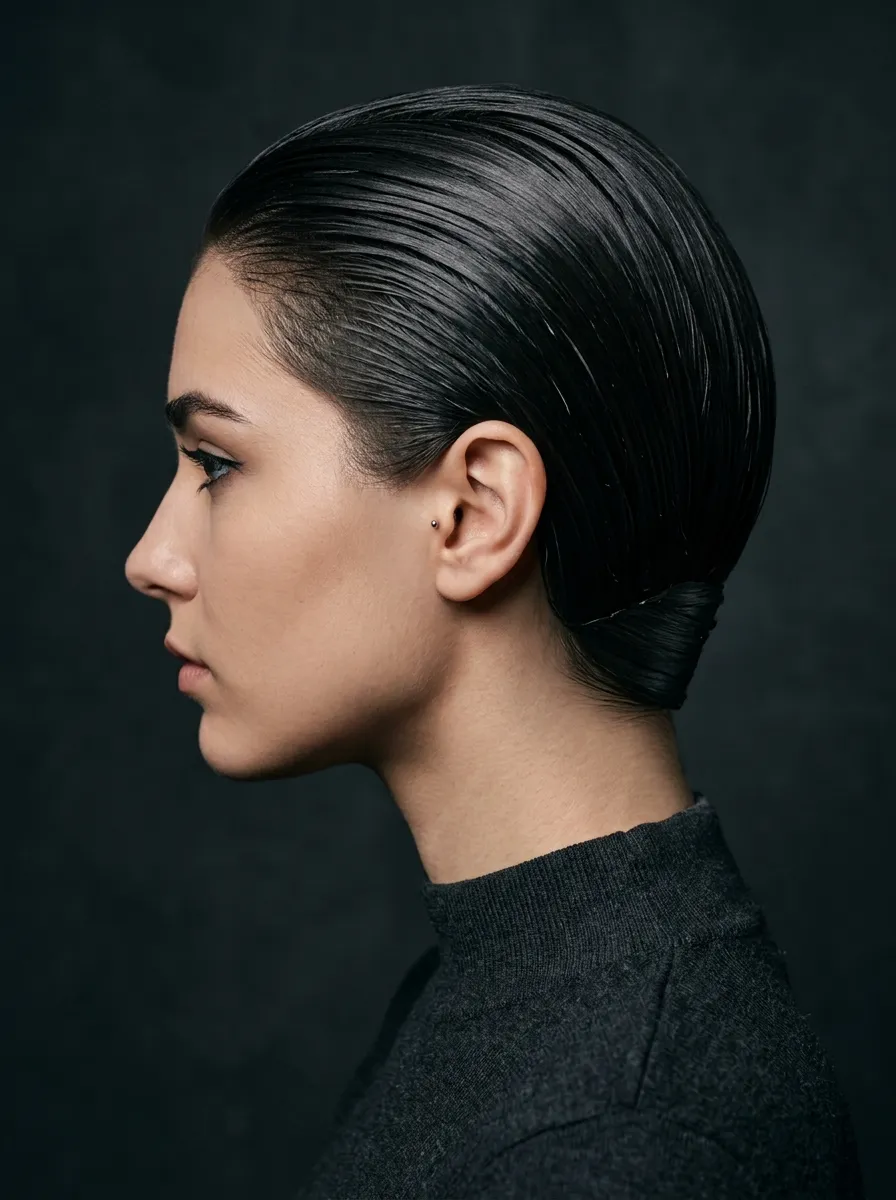
A fully slicked-back bob updo creates one of the most dramatic and glamorous short hair looks possible. Every strand is swept away from the face, behind the ears, and secured at the nape.
Apply a generous amount of strong-hold gel to damp hair. Comb everything straight back from the hairline using a fine-tooth comb.
Push the hair firmly behind both ears and smooth the surface completely. A flat-backed brush pressed against the head while the gel sets helps everything lie flat.
Gather the ends at the nape and pin them flat. There may not be much length to gather on shorter bobs, but even a small gathered section pinned at the nape completes the style.
The slicked surface needs to dry completely for the style to hold through the day. Sitting under a cool-air blow-dryer speeds up the drying time.
A light-hold hairspray over the set gel prevents the surface from flaking as it dries.
This style dramatically shows off facial features, earrings, and neck jewelry. It is a statement look that suits bold makeup and minimal accessories.
Budget tip: Strong-hold gel from a drugstore such as Eco Styler or Got2b costs around $5 and gives a professional result.
11. The Decorated Claw Clip Updo
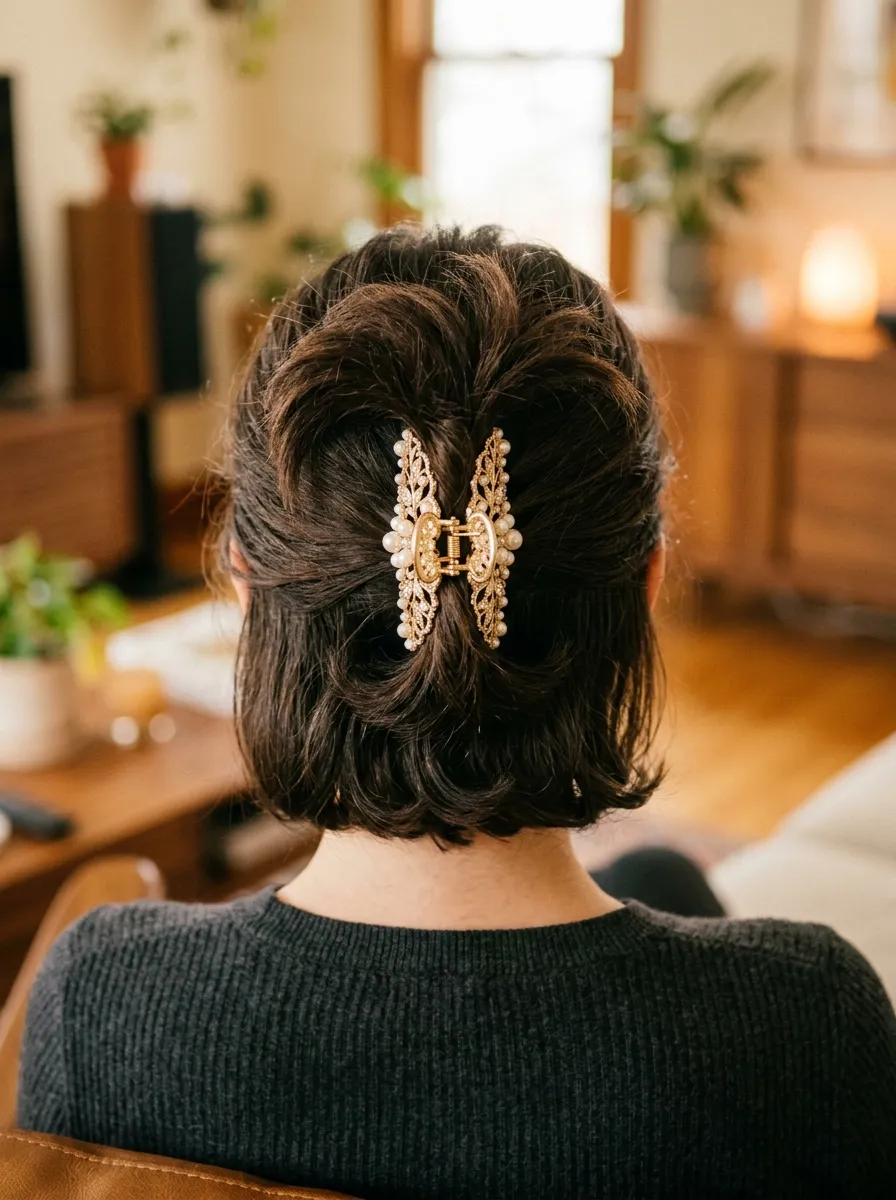
On longer hair, a claw clip creates a bun. On short hair, a claw clip creates a gathered, fanned style where the clip becomes the centerpiece. The result looks deliberately styled and can be dressed up or down depending on the clip you choose.
Gather all the hair at the center back. Do not try to gather it into a bun shape. Simply hold the gathered section and clip it.
The hair will fan out above and below the clip in a natural burst shape. This is the style. Do not try to tuck the hair in completely as you would for a bun.
A large decorative clip in gold, silver, pearl, or crystal looks polished and event-appropriate. A plain black or tortoiseshell clip suits casual days.
This works on chin-length bobs and longer short styles. Very short cuts may not have enough length to reach the clip comfortably.
Switch the clip for different occasions. The same gathered style looks formal with a crystal clip, casual with a tortoiseshell, and playful with a colorful printed clip.
Budget tip: Large claw clips range from under $2 at dollar stores to around $15 for decorative versions at accessory shops. You do not need to spend much for a clip that looks polished.
12. The Twisted Crown on a Short Bob

The twisted crown takes the front sections of a short bob, twists each one back toward the crown, and pins them together at the center top. The back and sides of the bob fall naturally. The result is a half-updo with a crown detail that suits both casual and formal settings.
Take a section from the left temple and twist it back toward the center. Repeat from the right side. Overlap both twisted sections at the crown and pin with crossed bobby pins.
Pull the pinned section slightly forward before setting the pins to create a rounded, voluminous crown rather than a flat, pinned-down look.
Gently loosen a few pieces of the twist after pinning for a softer, more romantic quality.
The rest of the bob falls naturally below the crown twist. This contrast between the structured crown and the free lower bob is very effective.
Add a small decorative pin or clip to the crossed section at the crown for a finishing detail.
This works on chin-length to jaw-length bobs. Very short bobs with less front section length may produce a very small twist that sits right at the hairline.
Budget tip: Two crossed bobby pins are the only requirement. The decorative pin is optional.
13. The Pearl Pin Scatter Style
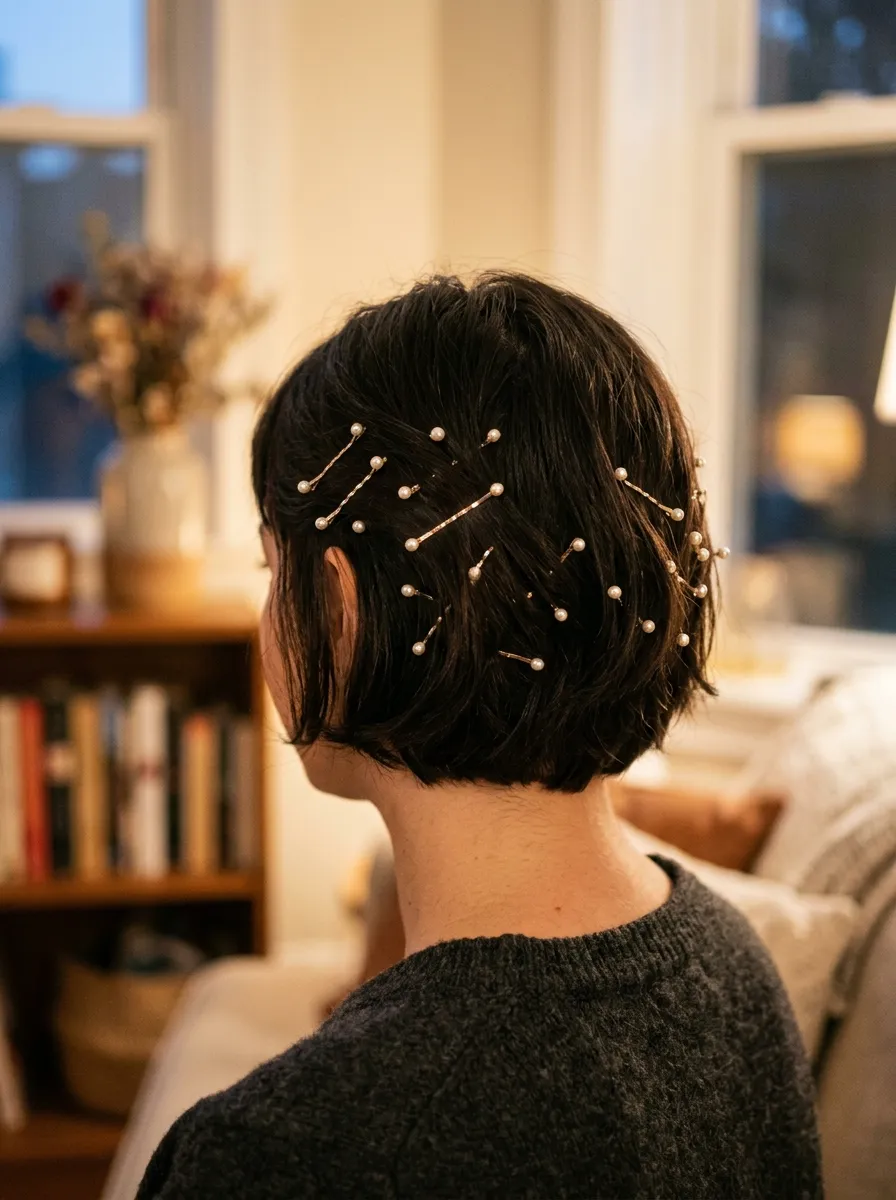
Scattered pearl pins through short hair create a finished, event-appropriate style with almost no technique required. The pins are the style.
Apply a light styling cream to the hair and smooth or shape as desired. Then begin placing pearl-tipped or gem-tipped bobby pins throughout the hair in a considered arrangement.
Space the pins irregularly rather than placing them in a uniform grid. An irregular scatter looks organic and intentional. A perfectly regular arrangement looks like a pattern that can go wrong.
Place pins at different angles throughout the hair. Some horizontal, some diagonal, some vertical. The varied angles create visual movement.
This style works on all short hair lengths including pixie cuts. Even a very short style can hold a few decorative pins.
This is one of the best updo alternatives for short hair at weddings, formal events, or any occasion where you want to look dressed up without a specific updo shape.
Pearl pins are widely available in sets at beauty supply stores, craft stores, and online retailers for very little money. A set of twenty pearl-tipped pins costs around $3 to $5.
Budget tip: A pack of pearl pins from a dollar store is all you need for this style. No other products or tools required.
14. The Faux Updo with Rolled Ends
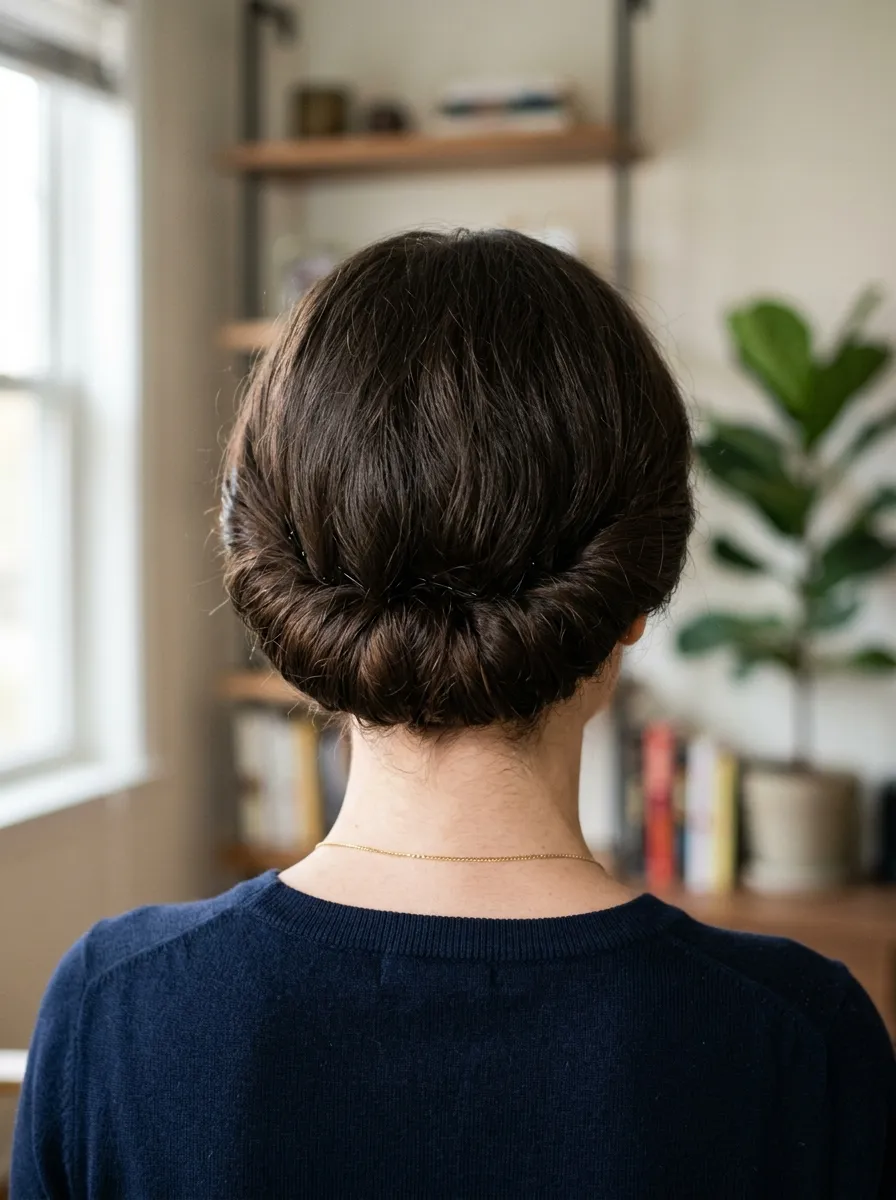
The faux updo rolls all the ends of a chin-length bob under and pins them flat, creating the appearance of a shorter, neater style without any actual cutting. From the front, the hair frames the face normally. From the back, the rolled and pinned ends create a clean, finished silhouette.
Section the hair horizontally from ear to ear. Starting with the bottom section, roll the ends under toward the nape and pin flat. Work upward section by section.
Overlap each new rolled section over the one below as you work up. This creates a layered, smooth back rather than a series of visible rolls.
The result from the back looks like a short, clean style. From the front, the longer face-framing pieces remain.
This technique suits people who want the elegance of a short updo while keeping the face-framing length of a chin bob.
A small amount of pomade worked through the ends before rolling helps them stay flat and smooth during the day.
This is an excellent technique for formal events where you want a polished appearance but are not ready to commit to a shorter cut permanently.
Budget tip: Bobby pins and pomade are the only requirements. Both are very affordable.
15. The Braided Headband Updo on a Bob

A braided headband on a short bob runs a single thin braid along the front hairline from one temple to the other, sitting like a natural headband and pulling that section away from the face.
Take a small section from behind the right ear. Begin a thin three-strand braid and work it along the front hairline toward the left temple.
Incorporate small pieces of hair from along the hairline as you braid to keep the braid running exactly along the front edge of the hair. This creates the most accurate headband effect.
When the braid reaches the left temple, secure the end with a small bobby pin tucked under the surrounding hair.
The rest of the bob falls naturally behind and below the braided headband.
This style keeps hair completely off the forehead while showing off a decorative technique that looks like salon work. It is a practical and elegant solution for warm weather events or active days in professional environments.
Works on chin-length bobs and longer pixie styles where there is enough front hairline section to braid.
Budget tip: One small bobby pin and zero products are needed for this style.
16. The Side Pin Wave
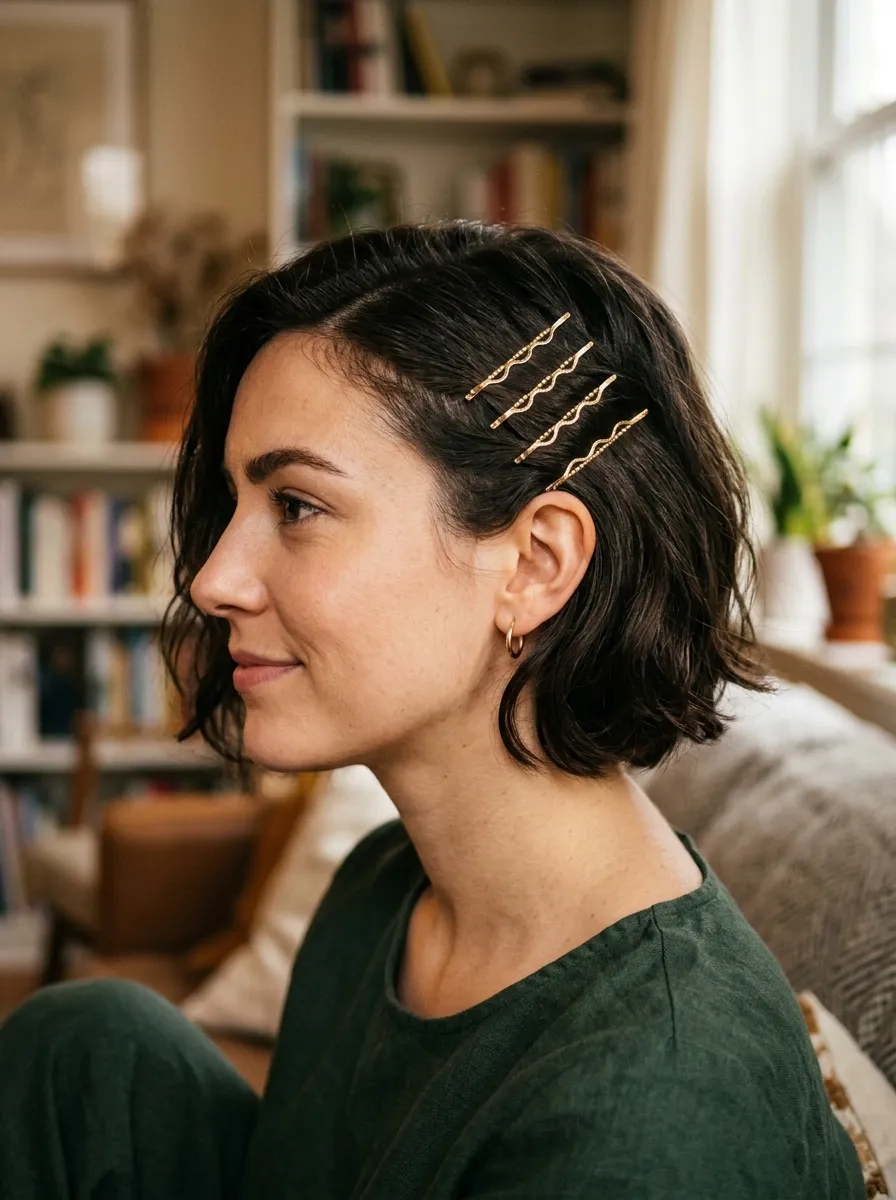
The side pin wave uses three to four decorative pins placed in a curved wave pattern along one side of the head to create an asymmetric style that looks deliberately designed.
Smooth the hair on one side with a flat brush and a tiny amount of pomade. Place the first pin just above the temple. Place the second pin slightly behind and lower. Continue placing pins in a gentle curve that follows the natural shape of the skull toward the ear.
The pins should follow a smooth curve rather than a straight line. A straight line of pins looks like a row. A curved line looks like a wave pattern.
The opposite side falls naturally, creating the asymmetric balance that makes this style look designed.
This is a wonderful technique for formal events, work presentations, or any occasion where you want to look polished without a full updo.
Decorative pins in gold, silver, or with small gem details suit formal settings. Colorful or patterned pins suit casual creative environments.
Budget tip: A pack of decorative gold bobby pins from a beauty supply store costs around $3 to $5.
17. The Rolled Side Updo
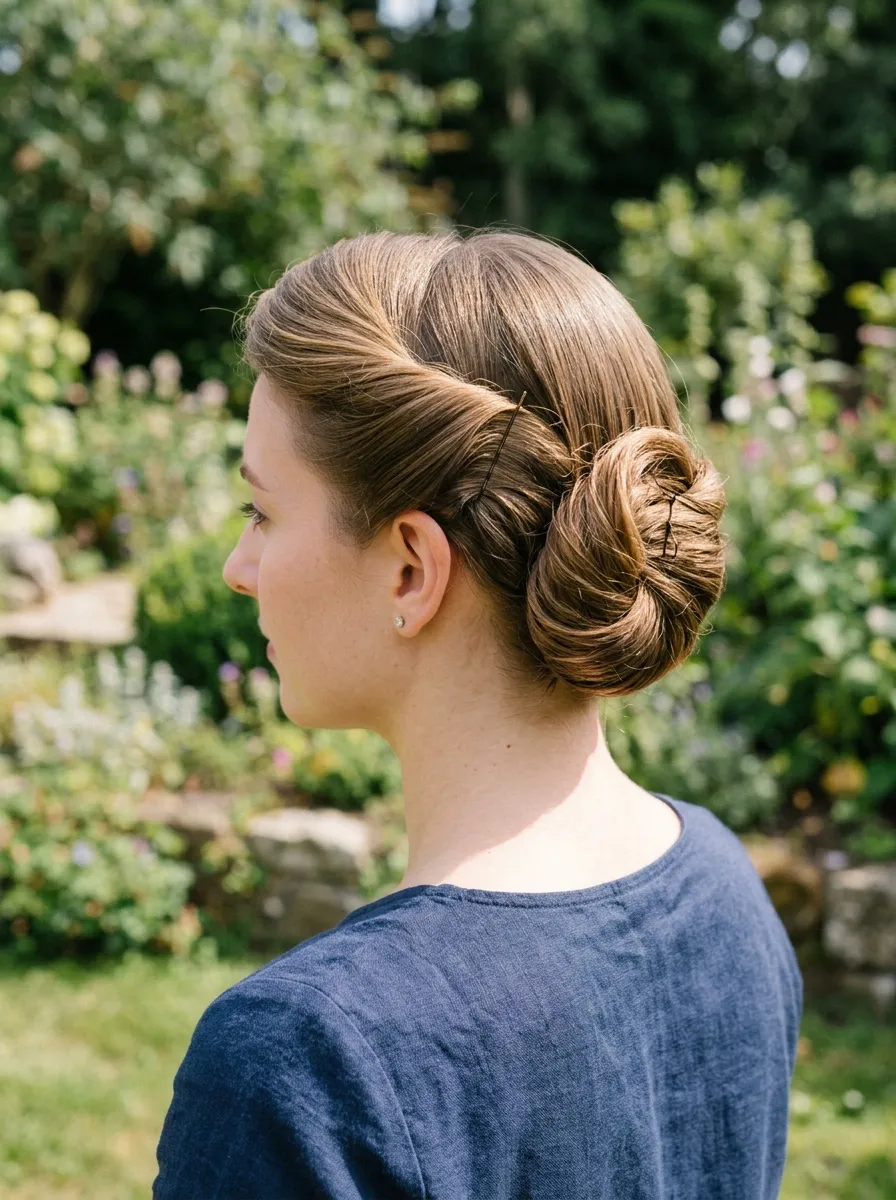
A rolled side updo sweeps all the hair to one side and rolls it upward into a compact roll pinned flat against the side of the head. It is an asymmetric updo that works particularly well on short hair because the compact size of the roll suits the overall proportions of a short cut.
Sweep all the hair firmly to one side using a fine-tooth comb and a smoothing product. Gather the swept hair and begin rolling it upward toward the ear.
Roll tightly and pin each layer of the roll flat as you work upward rather than completing the full roll and then attempting to pin it all at once.
Tuck the ends into the top of the roll and pin firmly.
Smooth any surface frizz with a light serum or hairspray.
The side of the head where the roll sits is completely filled with the pinned structure. The opposite side is smooth and close to the head, creating a dramatic contrast.
This style looks stunning with a statement earring on the side opposite the roll.
Budget tip: Bobby pins and a fine-tooth comb are the only tools required.
18. The Textured Pin-Up Style
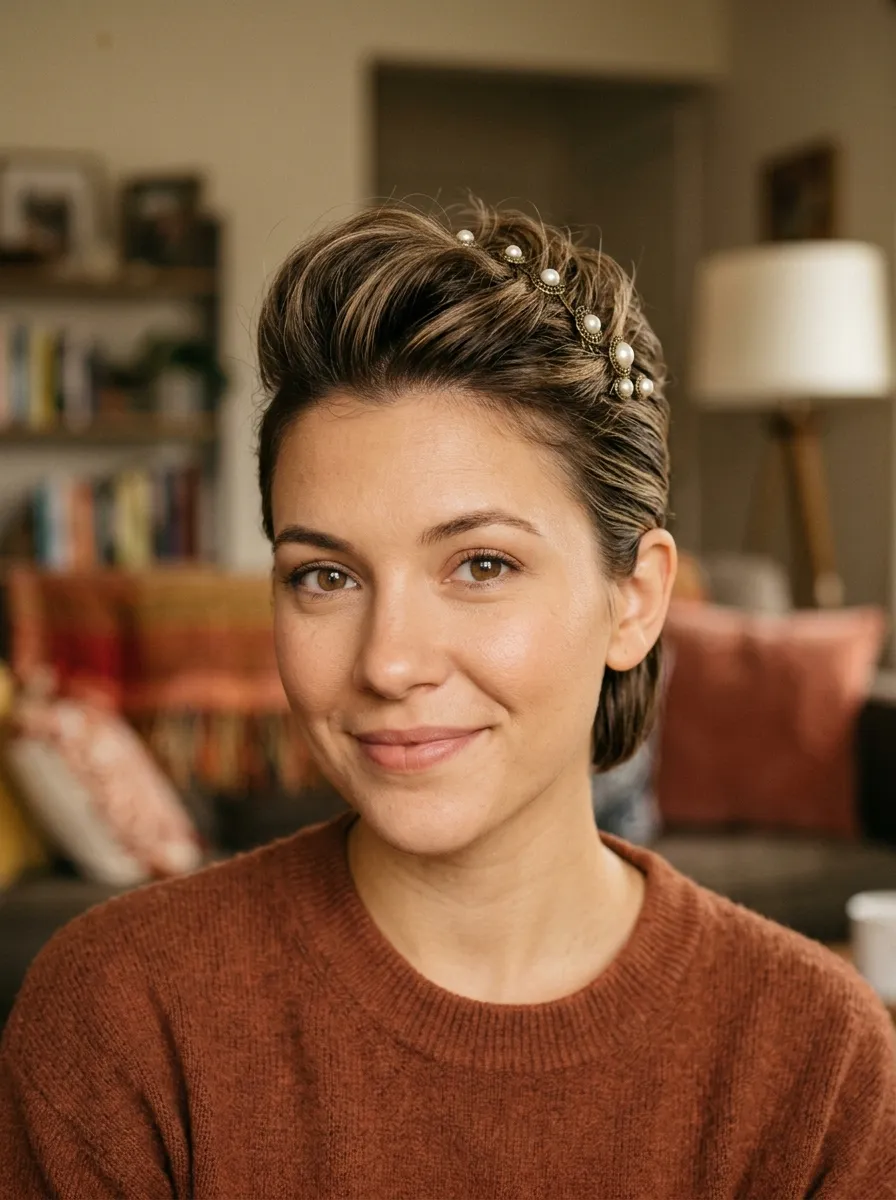
The textured pin-up pushes the top and crown sections back and upward to create a casual pompadour-like volume while the sides are smoothed back. Decorative pins placed through the crown section complete the style.
Apply a medium-hold pomade or styling cream to the hair. Push the crown section up and back with your fingers, creating a slight volume or wave at the top.
Use a few well-placed bobby pins to hold the raised crown section in place. Push the pins down through the raised section at an angle so they grip the hair beneath without being immediately visible.
Smooth the sides back with a flat brush and secure close to the head.
Place one or two decorative pins through the crown for visual detail.
This style has a mid-century inspired quality that suits both formal and creative environments.
A medium-hold product rather than a strong-hold one is ideal here because the style needs a little movement and texture rather than a stiff, locked finish.
Budget tip: Pomade from a drugstore costs around $5 to $8 and works perfectly for this technique. A medium-hold product from a well-known drugstore brand achieves the same result as any premium salon product.
19. The French Twist on a Pixie
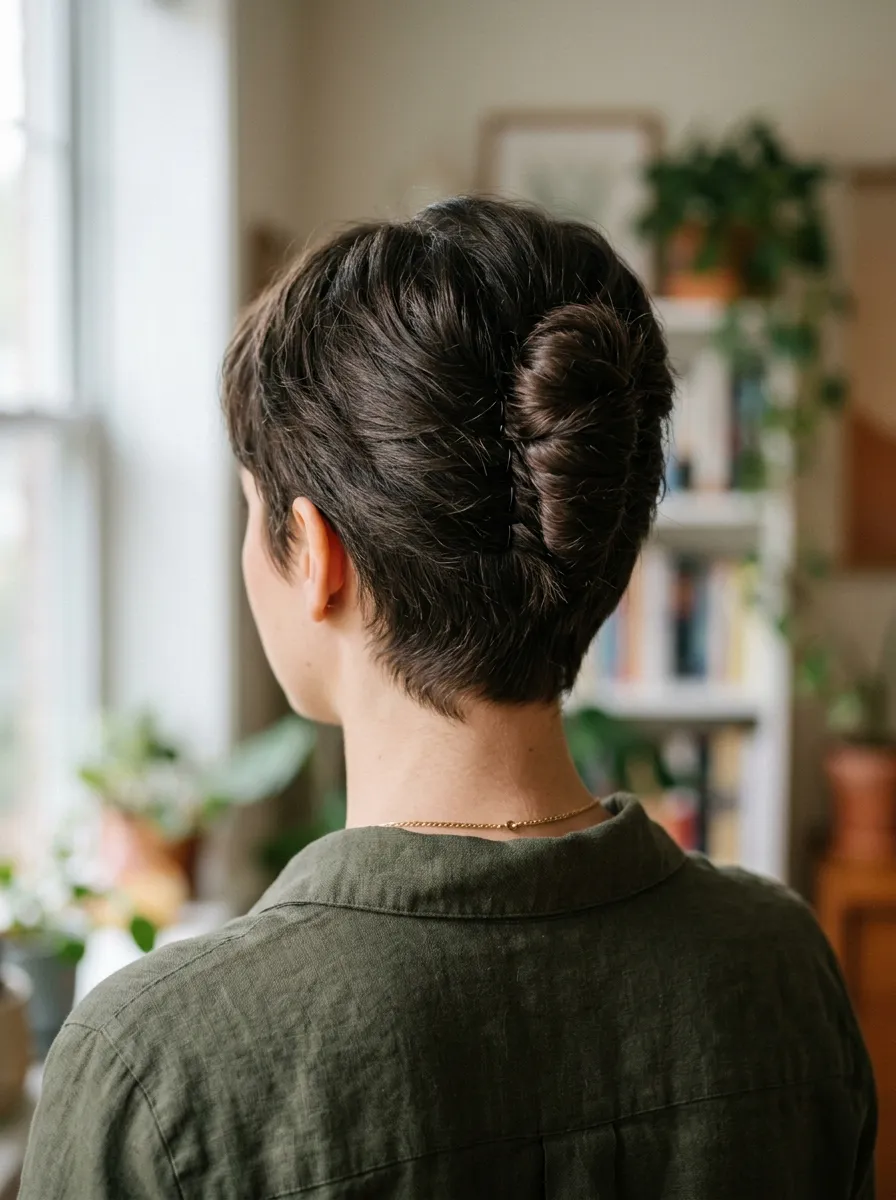
A French twist on a pixie uses the longer top and crown sections of the cut to create a miniature version of the classic style. It is compact and sits close to the head, but the structure is unmistakably a French twist.
Comb the longer top sections back toward the crown. Gather them into the center back and begin rolling upward, tucking the ends in.
Pin the rolled section flat at each stage as you work upward using several bobby pins at different angles. Multiple pins at varied angles hold the small twist in place much more effectively than a few parallel pins.
Tuck the ends at the top under the roll and pin firmly.
The shorter sides and nape of the pixie remain visible below the twist, creating a clear contrast between the pinned crown and the closely cut sides.
This is one of the most elegant solutions for wearing a pixie cut at a formal event. The mini French twist signals a deliberate choice to style the cut formally rather than just wearing it naturally.
Smooth the sides with a boar bristle brush and a small amount of pomade for a polished finish.
Budget tip: Bobby pins are the only tool needed. Use at least six to eight pins for a secure hold on the small gathered section.
20. The Knotted Bun on a Short Bob
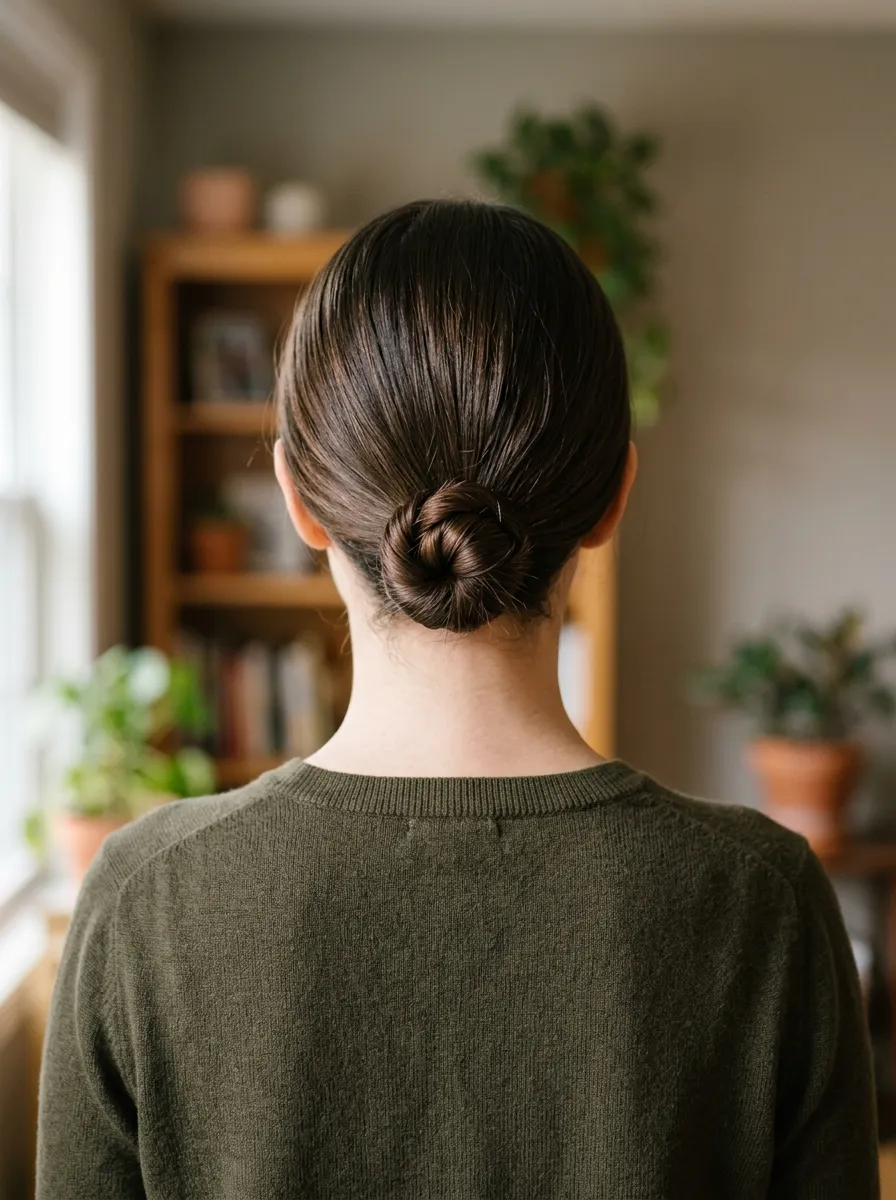
A knotted bun works on a chin-length bob by gathering all the hair at the nape, tying it into a single knot, and tucking the ends back through the knot opening.
Gather all the hair at the nape. Divide into two sections. Cross the right section over the left as if tying a knot. Pull the right section through the opening to complete the knot.
Tuck the remaining ends of both sections back up through the center of the knot and pin any loose ends flat against the head beneath the knot structure.
The result is a small, compact bun that sits close to the nape without requiring an elastic.
This technique works on chin-length bobs where there is just enough length at the nape to knot. Shorter bobs may not have enough length at the nape. Slightly longer bobs have more length to work with and can create a more substantial knot.
A small amount of light-hold pomade worked through the hair before knotting helps the knot stay in place through the day.
This style suits formal and professional settings equally well. It keeps all the hair completely off the face and neck while being genuinely elegant.
Budget tip: No tools or products are strictly required if the hair has enough natural grip.
21. The Chignon on a Short Lob
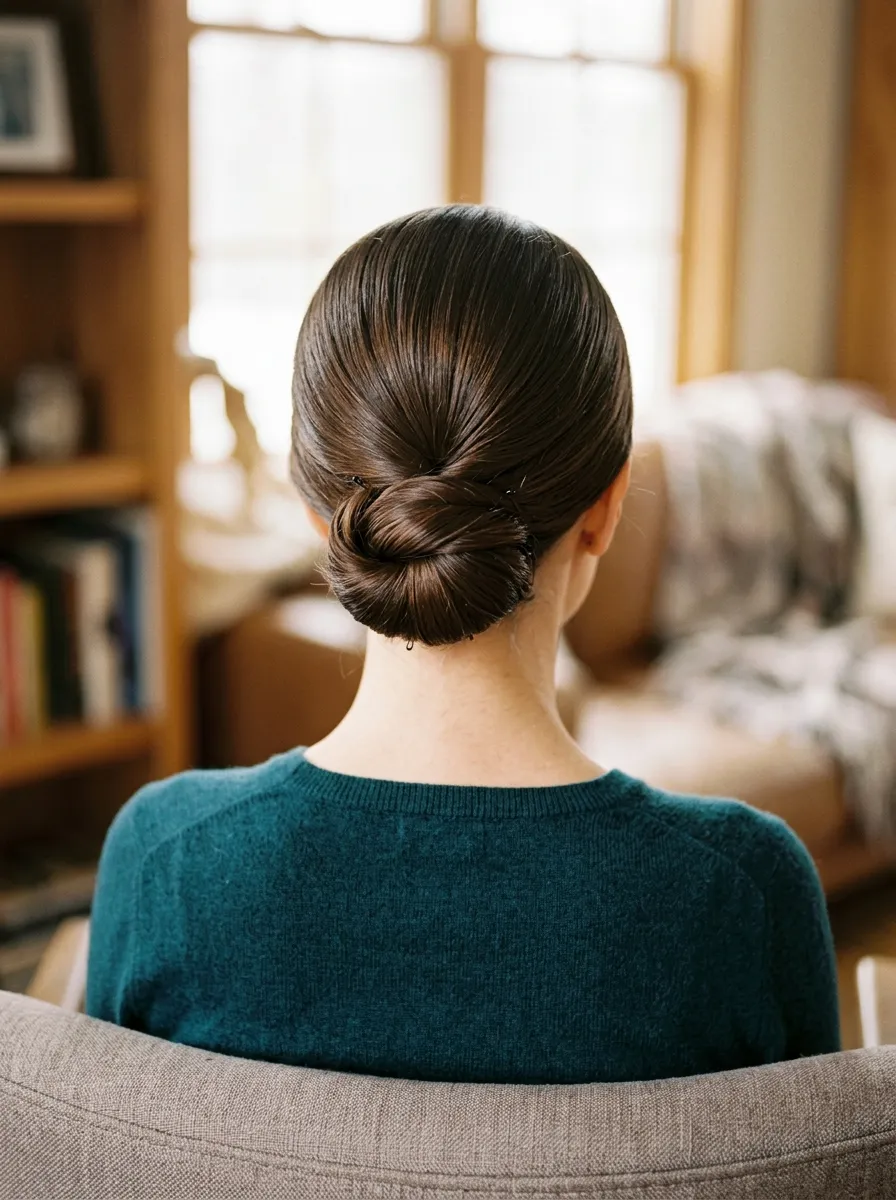
A low chignon on a short lob sitting at the collarbone creates a genuinely elegant updo that suits black-tie events, formal dinners, and weddings. The chignon is a smooth, rounded bun gathered low at the nape.
Gather all the hair into a low ponytail at the nape and secure with an elastic. Divide the ponytail into two sections. Wrap each section around the ponytail base in opposite directions.
Tuck both wrapped sections flat against the nape and pin each one securely. Where the ends of both sections meet, pin them together flat.
Smooth the surface of the chignon with a fine-tooth comb and a light serum to eliminate any frizz or bumps.
Add a small decorative pin, a pearl clip, or a fabric-wrapped elastic over the base for a finishing detail.
A smooth chignon on a short lob looks remarkably formal and polished. The compactness of the style suits the shorter length beautifully.
This works best on smooth or straight hair. Wavy or curly hair needs blow-drying before attempting the chignon to achieve the clean, smooth surface.
Budget tip: An elastic, bobby pins, and a light serum are all you need. Keep a small travel size serum in your bag for touch-ups at events.
22. The Accessory-Led Scarf Updo
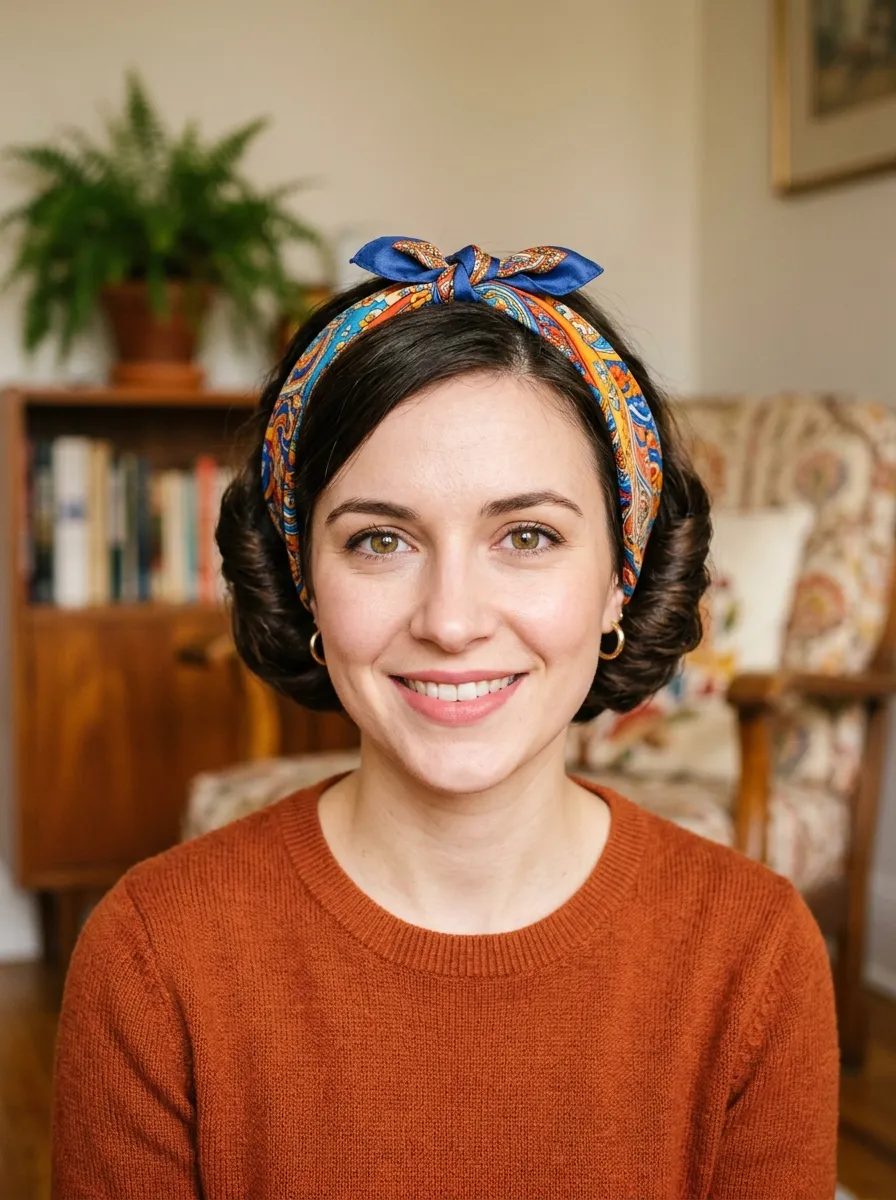
A scarf updo uses a thin silk or printed headscarf as the main structural and decorative element of the style. The hair is tucked and rolled under the scarf, which holds everything in place while also acting as the primary accessory.
Fold a thin scarf into a long strip. Tie it around the head like a headband, positioning the knot or bow at the top or side.
Tuck sections of the bob upward and under the scarf from each side until all the hair is gathered and controlled by the scarf. Pin any stubborn ends with small bobby pins under the scarf.
The scarf holds the gathered hair in place while the tied knot or bow at the top creates the focal point of the style.
This has a retro 1940s and 1950s quality that works for themed events, casual summer occasions, and creative work environments.
Silk scarves are available at thrift stores for very little money. Printed fabric scarves in seasonal colors or patterns add personality and can be changed for different outfits.
Budget tip: A scarf from a thrift store or dollar store costs almost nothing. Combined with a few bobby pins, this creates a complete and polished short hair updo for under $5.
Conclusion
Short hair and updos are a pairing that rewards creativity. Every idea on this list demonstrates that the length of your hair does not determine how styled, elegant, or event-ready you can look. From a scattered pearl pin arrangement to a miniature French twist, from a braided headband to an accessory-led scarf updo, the options for short hair are genuinely extensive and genuinely achievable at home. The starting point is understanding which techniques suit your specific length and cut. A pixie has different options than a chin-length bob, and a short lob opens up styles that a shorter cut cannot achieve. Once you know what your hair length can do, the styles on this list become accessible rather than aspirational. Pick one that suits your next occasion, gather the simple tools it requires, and practice it once before the day arrives. Short hair updo ideas are not a workaround. They are a category of their own, and this list proves it.
Leave a Reply