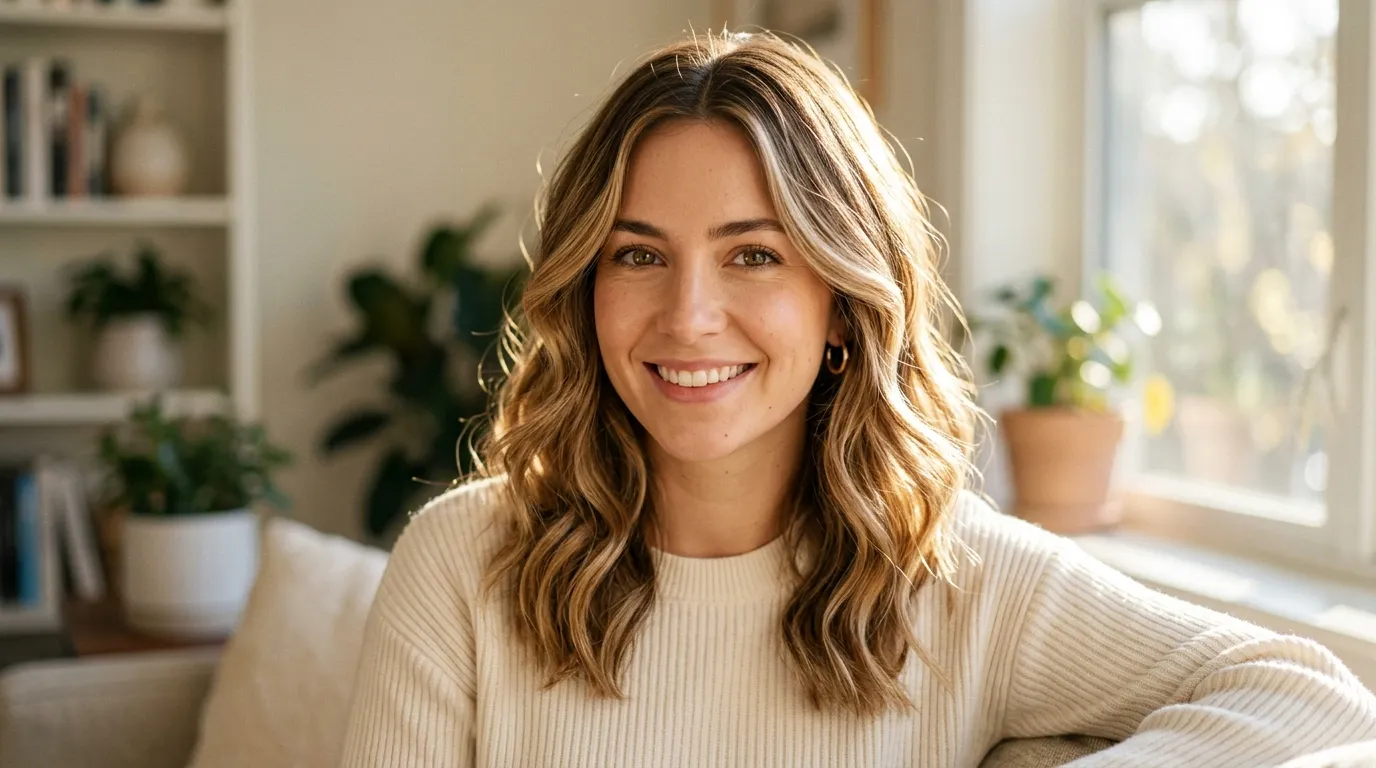
Medium-length hair is one of the most practical and style-friendly lengths you can have. It sits somewhere between the shoulder and the collarbone, which means it is long enough to style in multiple ways but short enough to dry quickly, stay manageable, and work without constant professional maintenance. If you are stuck in a styling rut or simply looking for new ideas that actually work on busy mornings, this list is built for you. Every idea here is practical, achievable at home, and works across different hair textures and face shapes. No elaborate tools or salon-level skills required. Just simple ideas that make medium length hairstyle ideas look like you put real thought into it, even on the days when you absolutely did not. If you’re also looking for Cute Haircut Ideas, soft layers, trendy bobs, playful shags, and face-framing cuts can help refresh your look while keeping your hair easy to style, flattering, and full of personality.
1. Effortless Half-Up Twist Medium Length Hairstyle Ideas
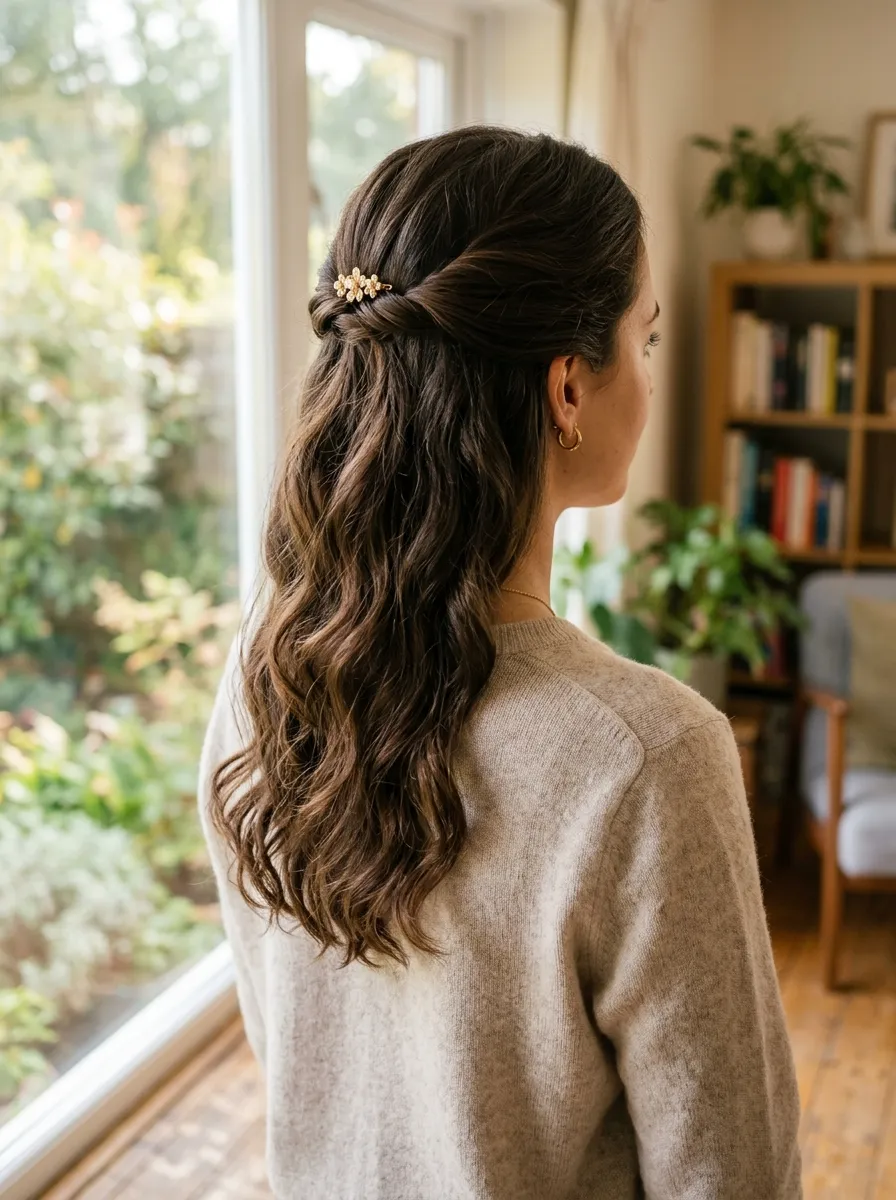
The half-up twist is a two-minute style that looks far more deliberate than the time it takes. Take the top section of your hair from the temples upward, twist it gently twice, and secure with a small claw clip or decorative pin.
That is genuinely all there is to it.
The key is using a clip that matches your hair color or complements your outfit. A simple tortoiseshell clip, a gold pin, or a matte black clip each give a completely different feel to the same basic style.
Leave the bottom section completely natural. Whether your hair is straight, wavy, or curly, let it fall as it wants to.
Pull a few face-framing pieces loose at the front before securing the twist. These soften the look and prevent it from feeling too pulled-back.
This style works especially well on day-two or day-three hair. The natural oils give the twist grip and the style actually holds better than on freshly washed hair.
Budget tip: Small claw clips and decorative pins are available at dollar stores and drugstores for almost nothing. A collection of three or four in different finishes gives you styling options without spending much.
Works on straight, wavy, and curly medium hair equally well.
2. Beachy Waves with a Sea Salt Spray
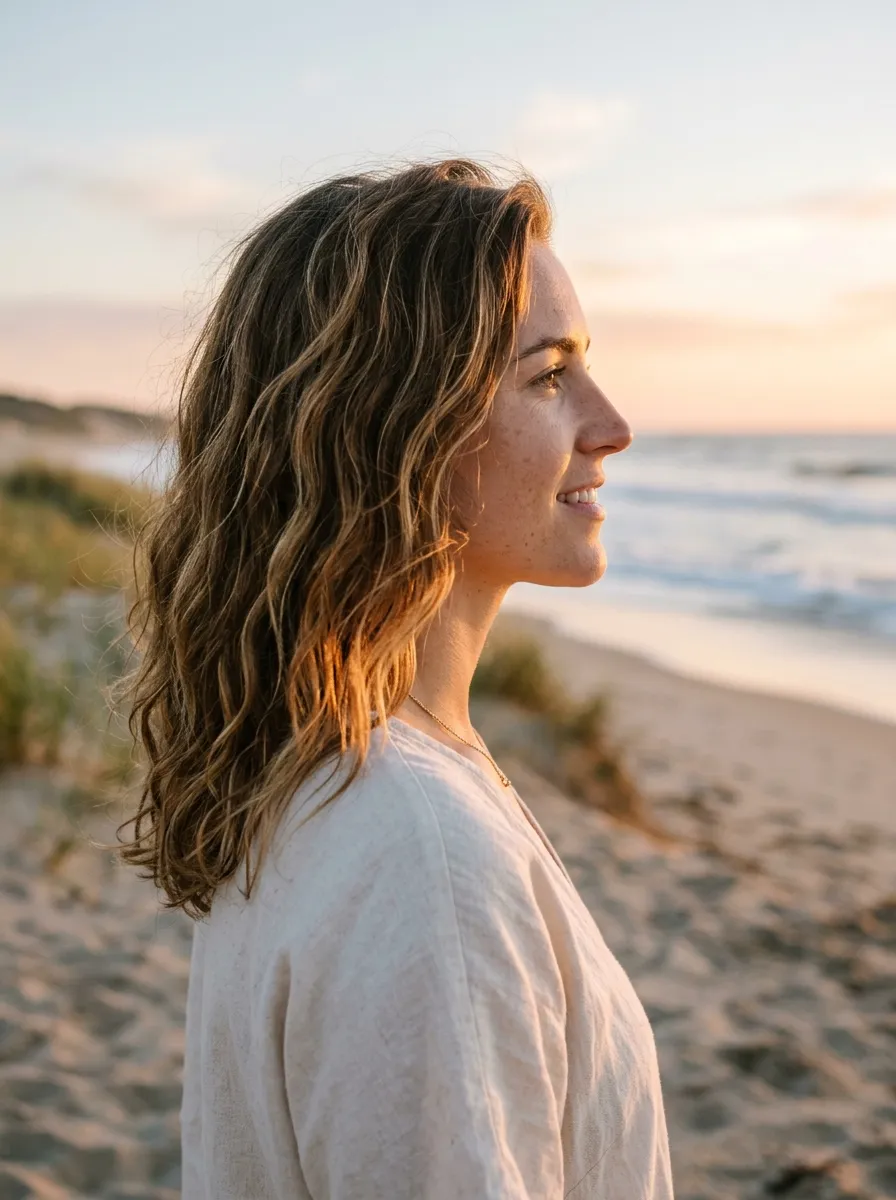
Beachy waves are one of the most requested medium length hairstyles because they look effortless, suit almost every face shape, and work with natural texture rather than against it.
You can create them two ways. With heat or without.
For the no-heat version, apply a sea salt spray to damp hair, scrunch the hair upward with your hands, and air-dry completely. Do not touch while drying. The waves form as the spray dries into the hair.
For the heat version, use a one-inch curling wand. Wrap sections around the barrel without a clip, hold for eight seconds, and release. After all sections are done, run your fingers through loosely.
Sea salt spray is the most affordable wave product available. Many drugstore versions cost under $8 and work just as well as salon brands.
Apply a light-hold finishing spray after the waves are set to extend the style through the day.
On humid days, a light anti-humidity spray applied before styling prevents waves from frizzing or dropping flat.
Beachy waves look better the second day. The waves relax slightly and look more natural than the day they are created.
3. Sleek Straight Blowout
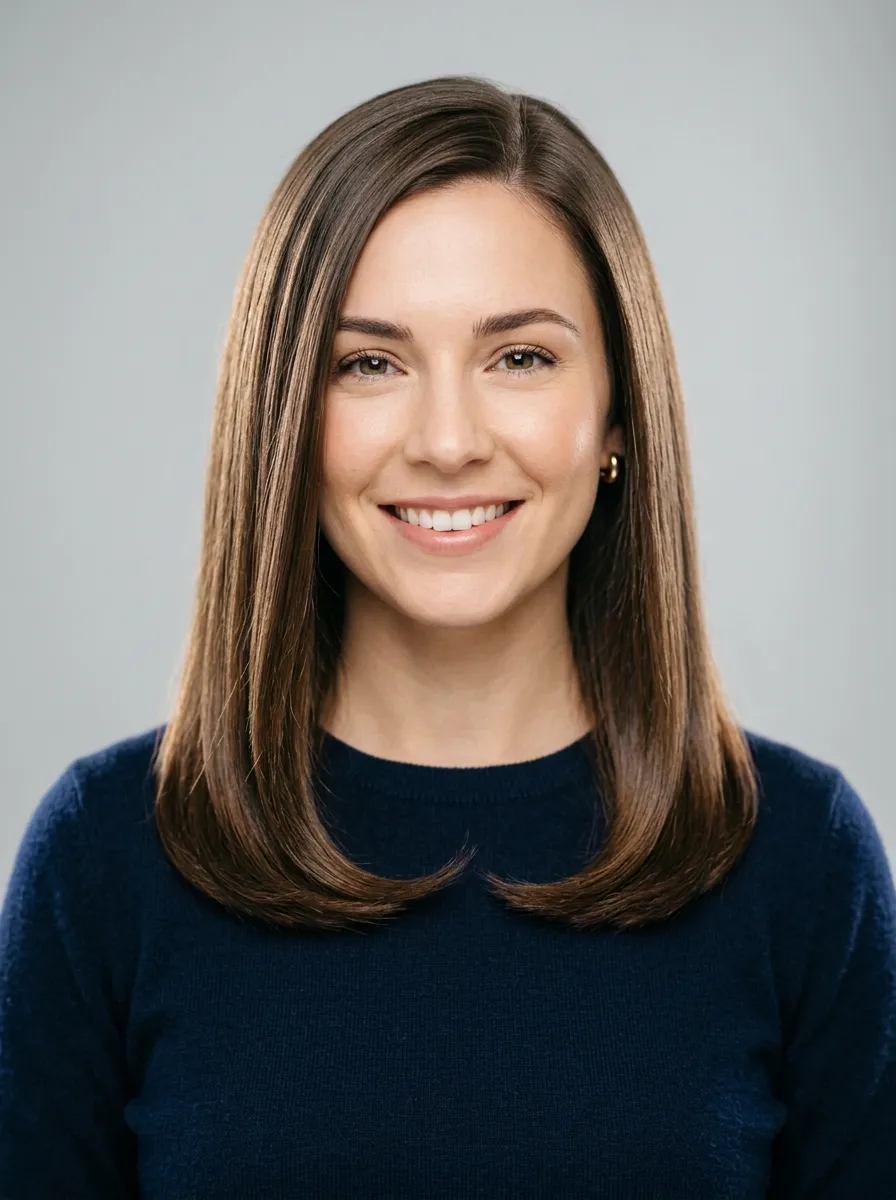
A sleek straight blowout transforms medium hair into something polished and professional in under fifteen minutes. It works for job interviews, formal events, or any day when you want your hair to look deliberately groomed.
Apply a heat protectant spray to damp hair before starting. This step protects the ends from heat damage over time.
Blow-dry in sections from the nape upward, using a round brush. Place the brush underneath each section and roll it slightly while directing the blow-dryer downward along the hair shaft. This creates smoothness and a slight inward curve at the ends.
Work from the lower sections to the crown. Clip the upper sections out of the way while working beneath them.
Finish with a light serum or shine spray worked through the palms and smoothed over the surface of the hair. This eliminates any remaining frizz and adds the glossy finish.
Budget tip: A basic drugstore heat protectant spray and a round brush from a beauty supply store cost around $10 total and are all you need for this style. No salon-grade tools required.
A sleek blowout on medium hair typically lasts two to three days with dry shampoo at the roots.
4. Low Ponytail with a Wrapped Base
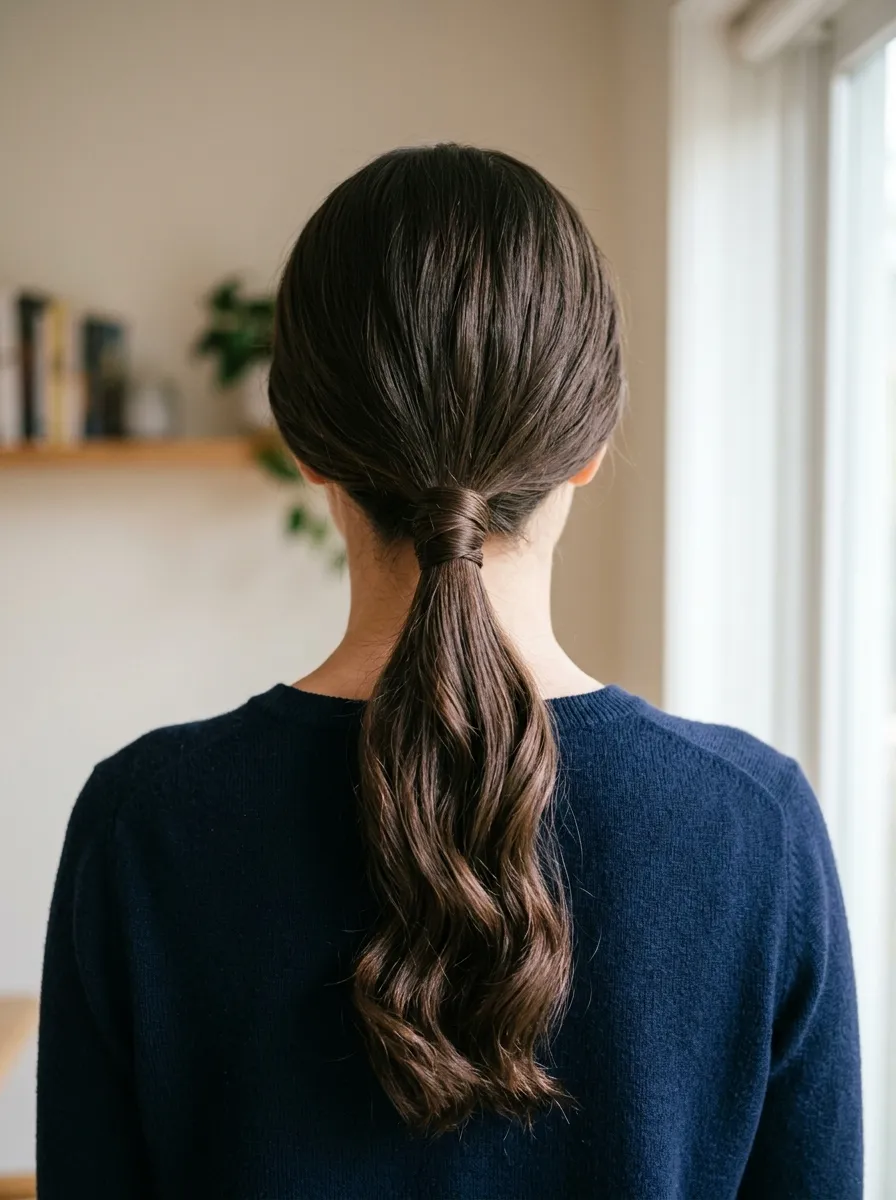
A low ponytail with a wrapped base looks significantly more polished than a standard ponytail with an elastic showing. The wrapping takes about thirty seconds and completely changes how the style reads.
Gather all the hair into a low ponytail at the nape. Secure with an elastic.
Take a thin section of hair from the underside of the ponytail, wrap it around the elastic twice, and pin the end underneath with a bobby pin. The elastic is hidden and the base looks clean and intentional.
This styling detail works on all hair textures and is completely free because it uses your own hair.
Add a little smoothing serum to the gathered section before pulling it into the ponytail to reduce flyaways and give the surface a polished finish.
For extra sleekness, smooth the top section with a fine-tooth comb before gathering. This removes any surface texture and makes the ponytail look more refined.
This is one of the best styles for medium hair in professional environments. It keeps hair completely off the face and neck while looking deliberately styled.
Try a slightly off-center low ponytail instead of a straight-back one for a more modern, fashion-forward version of the same style.
5. Middle Part with Curtain Bangs
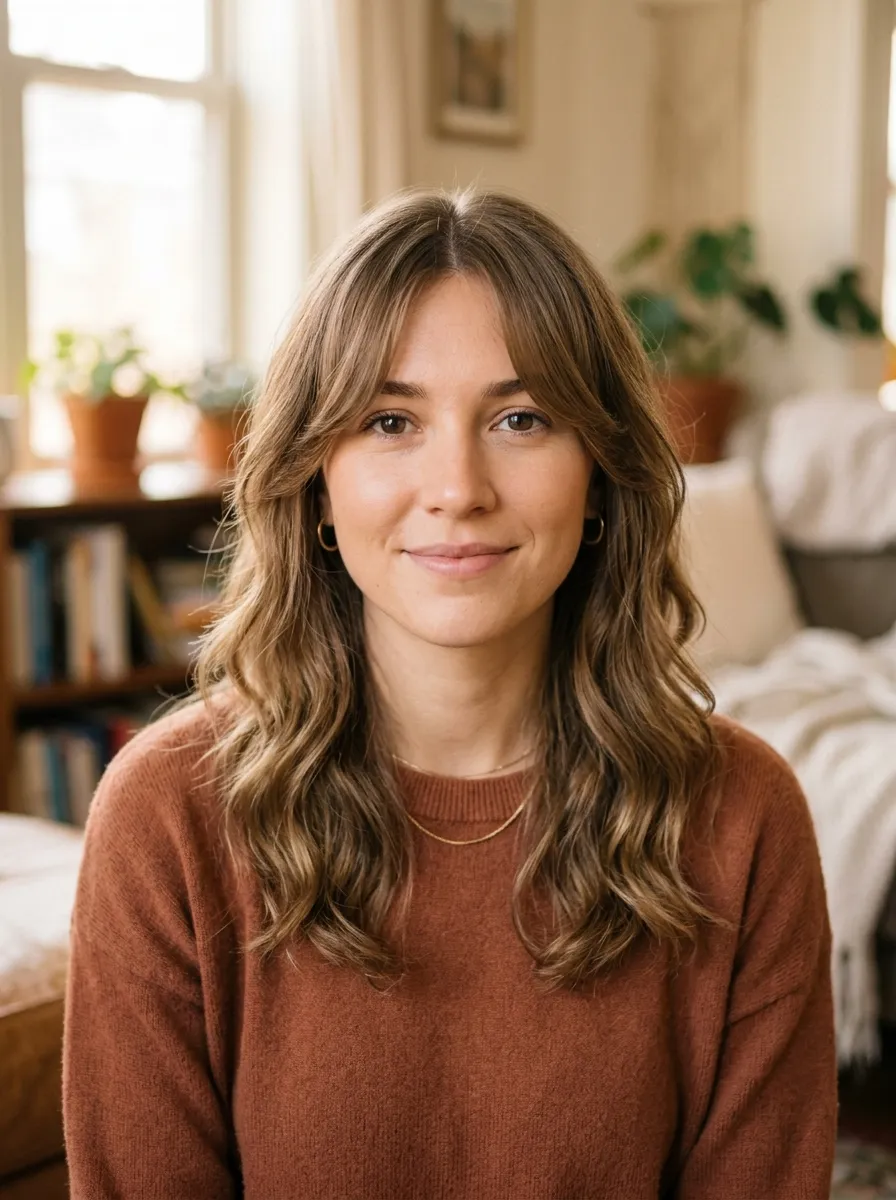
The middle part with curtain bangs is one of the most flattering everyday styles for medium hair. The center part creates symmetry and the curtain bangs frame the face in a way that softens every face shape.
This requires very little setup. Part the hair precisely at the center using a fine-tooth comb and let the curtain bangs fall naturally to each side.
Curtain bangs air-dry into their swept position on most hair types without any styling at all. If yours need a little help, blow-dry with a small round brush, directing each side outward from the center.
The rest of the medium-length hair can be completely natural behind the bangs. Air-dried waves, straight hair, or lightly curled sections all work.
A small amount of lightweight styling cream applied to the bangs while damp helps them hold their shape as they air-dry.
If your curtain bangs get flat during the day, a small round brush and thirty seconds with a blow-dryer refreshes them completely.
This style suits oval, round, heart, and square face shapes. Curtain bangs are one of the most universally flattering bang options because they never cover the full forehead and always create a soft frame.
6. Loose Braid Worn to the Side
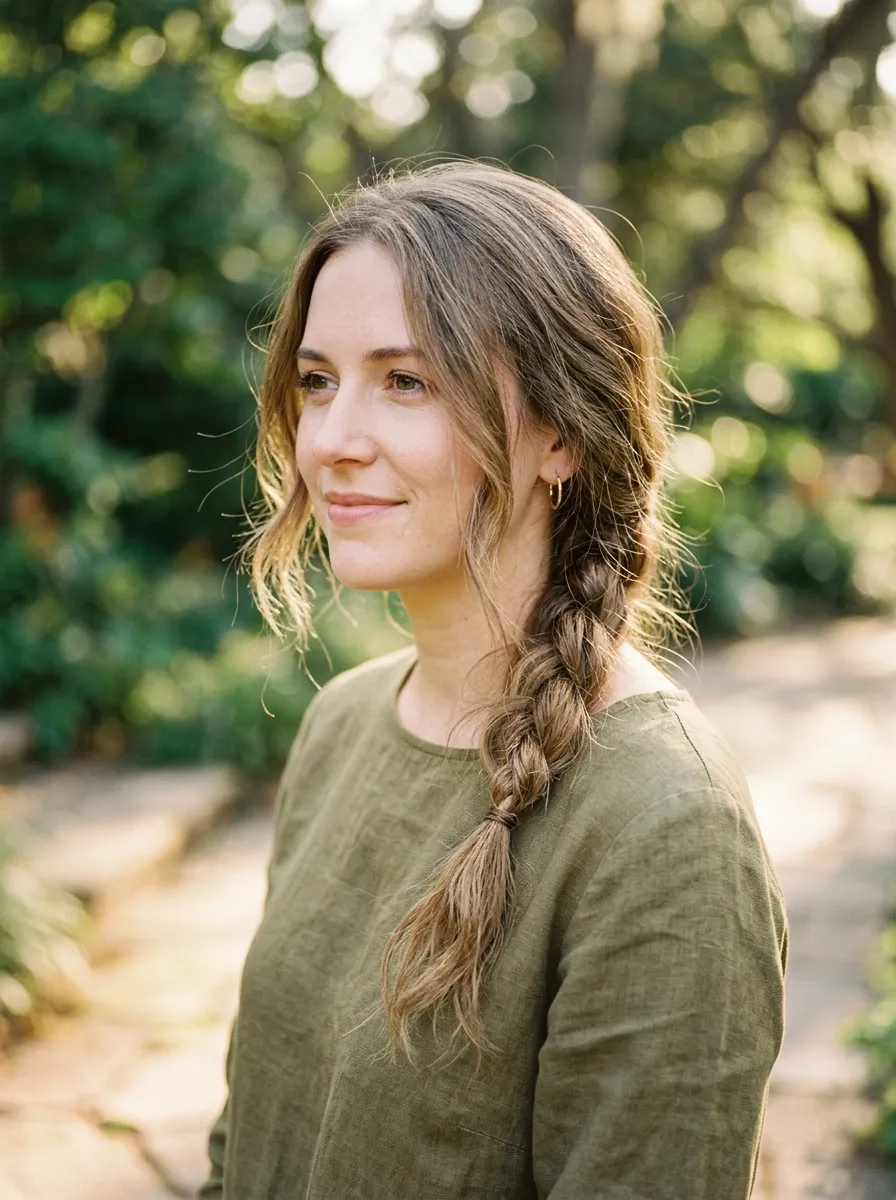
A loose side braid is one of the fastest ways to style medium hair and have it look intentional. Sweep all the hair to one side, braid loosely from just below the ear to the ends, and secure with a small elastic.
After securing, gently pull the braid outward on each side from top to bottom to widen it. This creates a fuller, more relaxed braid that looks styled rather than functional.
Leave a few face-framing pieces loose at the front before starting the braid. These soften the overall look.
This style holds up through a full day of activity and actually looks better as the day goes on as a few more pieces work their way loose.
For a more polished version, use a fishtail braid technique instead of a three-strand braid. This takes only slightly more time but produces a noticeably more detailed result.
A small clear elastic or a fabric scrunchie both work for securing the end. A fabric scrunchie in a neutral tone adds a casual, modern touch.
Budget tip: Everything needed for this style is already in your bathroom. No product is needed at all for this look on day-two hair.
Works beautifully on wavy, straight, and lightly curly medium hair.
7. Messy Bun with Face-Framing Pieces
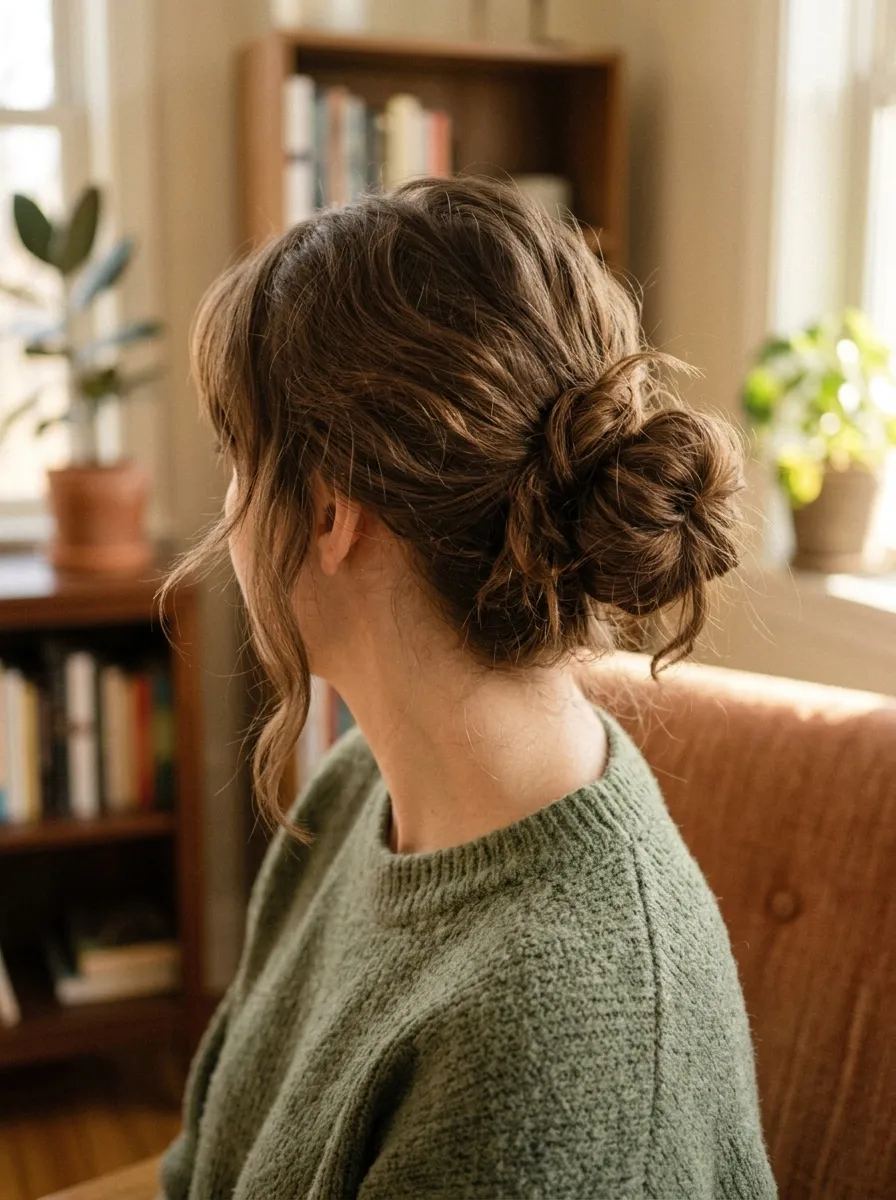
A messy bun on medium hair requires a different approach than on long hair because there is less length to work with. The trick is building volume and letting the imperfection work in your favor.
Gather the hair into a ponytail at the back of the head at whatever height you prefer. Twist the ponytail loosely and wrap it around the base, but do not wrap it tight. Secure with bobby pins and a hair tie.
Pull several sections of the bun outward to create volume and an intentionally undone look. The looser the bun, the more romantic and effortless it reads.
Leave face-framing pieces out intentionally at the temples. These are what separate a messy bun from just a hastily tied-back style.
Medium hair can sometimes lack the length to make a truly full bun. To add volume, back-comb the gathered section very slightly before wrapping.
A light-hold hairspray helps the loose sections of the bun stay in place without looking stiff.
This style takes about two minutes and works for casual days, working from home, and even informal social events when paired with the right accessories and outfit.
8. Sleek Middle Part Lob
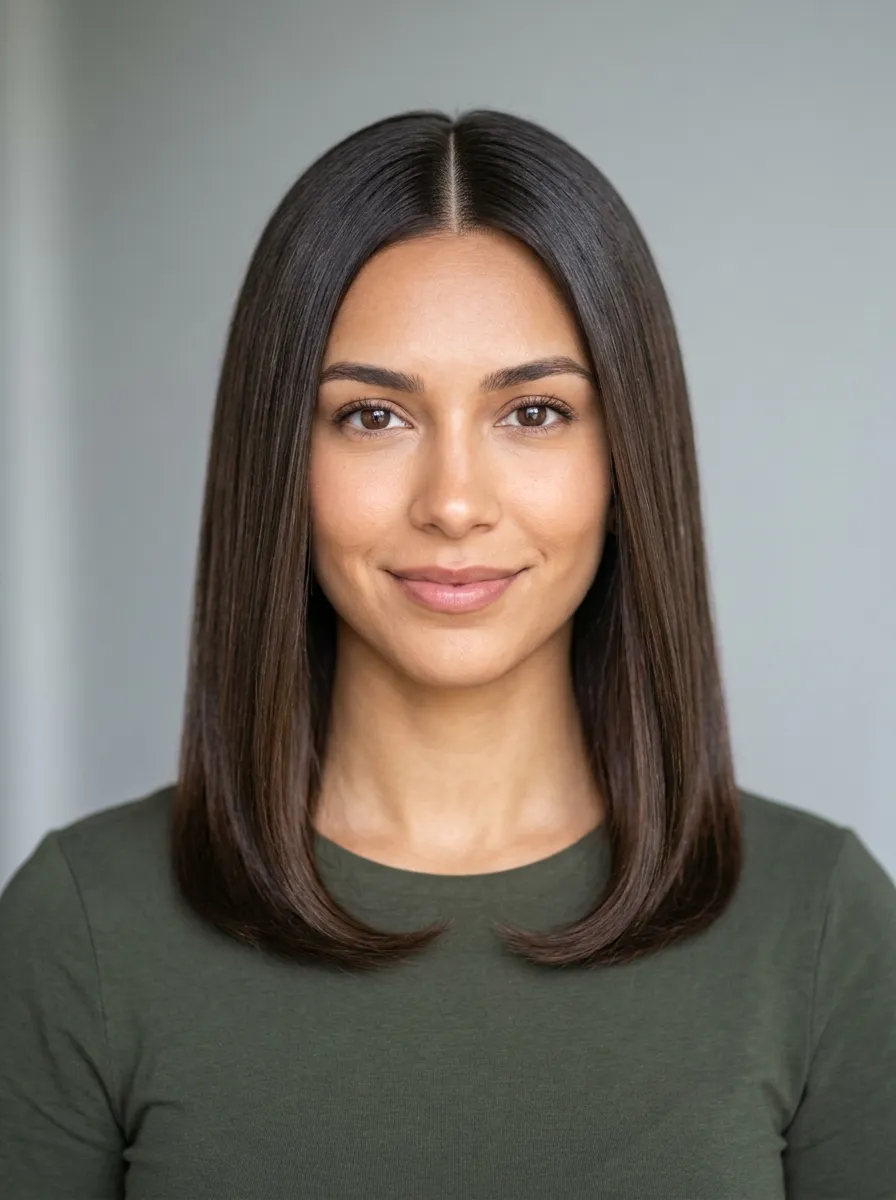
The sleek middle part lob is clean, modern, and genuinely timeless. It pairs the universally flattering center part with a smooth, polished finish on medium-length hair.
This style works best on straight and slightly wavy hair. Very curly hair requires significant heat styling to achieve the sleek result.
Blow-dry with a round brush for the smoothest result. Work from the nape upward, directing each section downward with the brush as you dry.
Finish with a flat iron on any sections that did not dry completely smooth. Use on medium heat rather than maximum. High heat damages ends over time.
Apply a small amount of smoothing serum or shine spray through the palms and smooth over the surface. This eliminates frizz and adds the glossy finish that makes this style look polished.
The center part is the defining feature of this look. Use a rat-tail comb for a precise, straight part rather than eyeballing it.
This style suits all face shapes. For rounder faces, a center part is slightly more elongating than a side part and works very well.
Budget tip: A drugstore flat iron costing around $20 to $30 is completely sufficient for this style. You do not need a professional-grade tool for basic smoothing.
9. Half-Up Space Buns
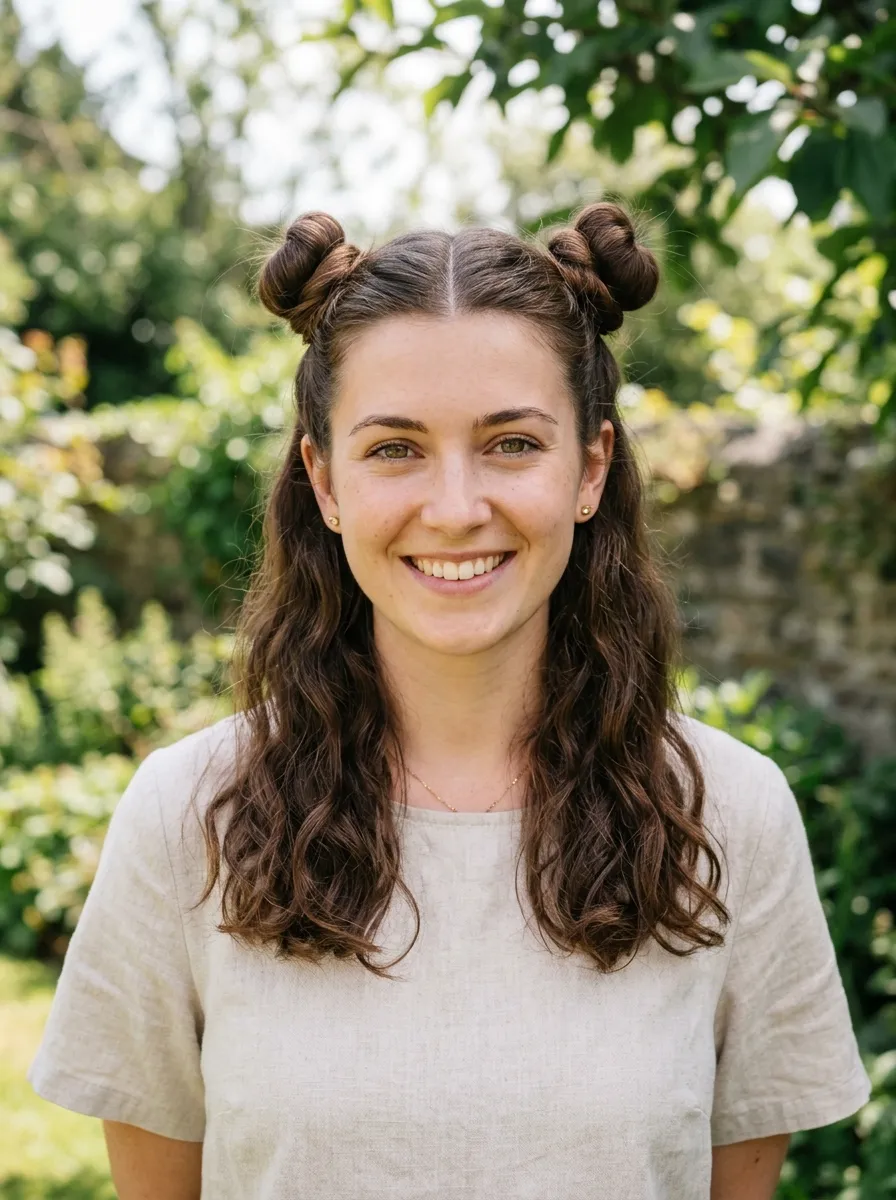
Half-up space buns on medium hair are a playful, expressive style that takes about three minutes and requires no special tools. Part the hair down the center. Gather the top half into two equal sections, one on each side.
Twist each section and wrap it into a small bun. Secure each bun with a small elastic and a few bobby pins.
The buns should sit at roughly the same height on each side for the most balanced look. Use the center part as a guide to keep them symmetrical.
Leave the lower half of the hair completely down and natural.
This style suits casual and creative environments beautifully. It is expressive, fun, and very different from the standard half-up styles.
Decorate each bun with a small scrunchie, a colorful clip, or a ribbon tied around the base for a more personalized look. These accessories cost almost nothing at drugstores or dollar stores.
On wavy or curly medium hair, the loose lower half has beautiful natural movement that balances the neat buns above.
Budget tip: Small clear elastics and basic bobby pins are the only tools needed. Both are available in bulk at very low cost at any drugstore.
10. Soft Boho Waves with a Center Part
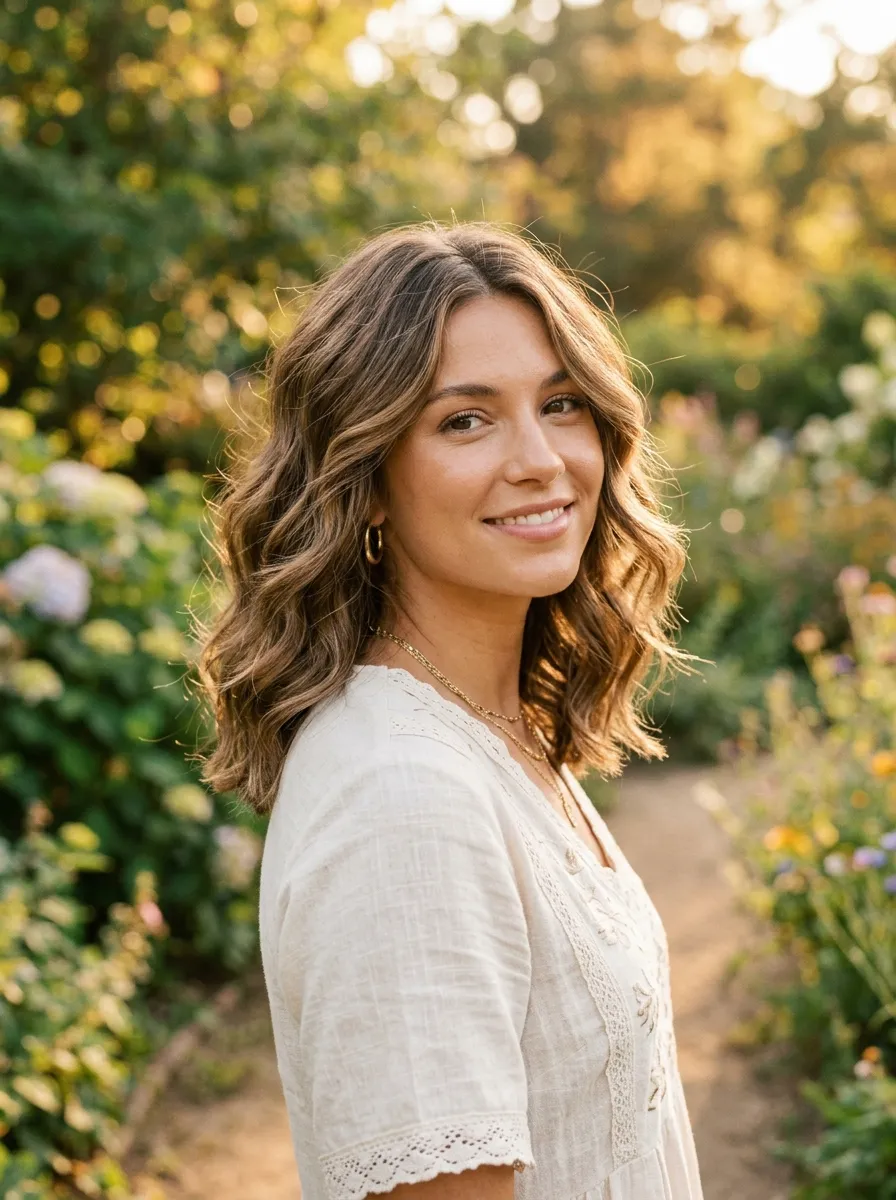
Soft boho waves feel romantic and carefree. They are slightly more defined than basic air-dried texture but far less structured than a formal curl set.
Create them with a one-inch curling wand or by braiding damp hair overnight and releasing in the morning.
For the overnight braid method, divide damp hair into two sections and braid each loosely. Sleep in them and release in the morning. Run your fingers through lightly and apply a small amount of light-hold cream for definition.
For the wand method, wrap sections in different directions rather than always the same way. Alternating directions creates a more natural, boho result than uniform curls.
The center part is the finishing touch. Create a precise part using the end of a comb and position the waves to fall symmetrically on each side.
A light-hold hairspray sets the waves without making them crunchy.
Budget tip: The overnight braid method costs absolutely nothing. No heat tools, no product purchase. Just two braids and a night of sleep.
This style works on straight, wavy, and lightly textured medium hair. Curly hair already has the boho texture built in naturally.
11. Tucked Under Bob Style
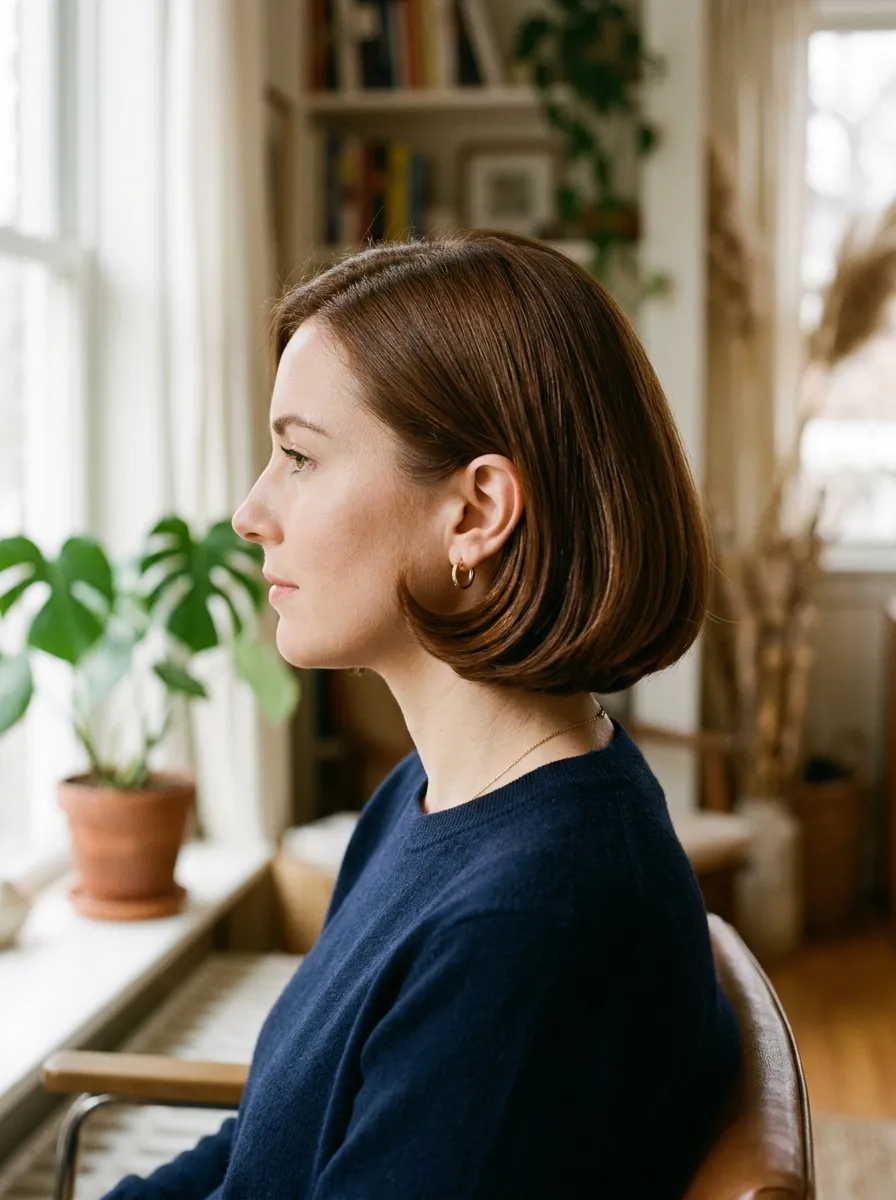
The tucked-under style rolls the ends of medium-length hair inward and under toward the nape, creating the appearance of a sleek bob without any cutting. It is a clever way to change your look completely without committing to a shorter length.
Blow-dry the hair section by section using a large round brush. On each section, roll the brush under at the ends and hold for a few seconds before releasing. This curls the ends inward.
Work from the back sections forward, keeping the roll consistent on each section. The more uniform the roll, the more convincing the bob illusion.
Finish with a flat iron on any sections that need more defined curl under. Hold the flat iron and curl the ends under rather than pulling straight down.
A light-hold hairspray sets the tucked ends in place through the day.
This style looks particularly polished for work and professional settings because it mimics the clean perimeter of a proper bob.
It works best on straight to slightly wavy hair. Very wavy or curly hair requires more heat styling to achieve the smooth, tucked result.
Budget tip: A large round brush from a beauty supply store costs around $8 to $12. This is the main tool investment for this style and it lasts for years.
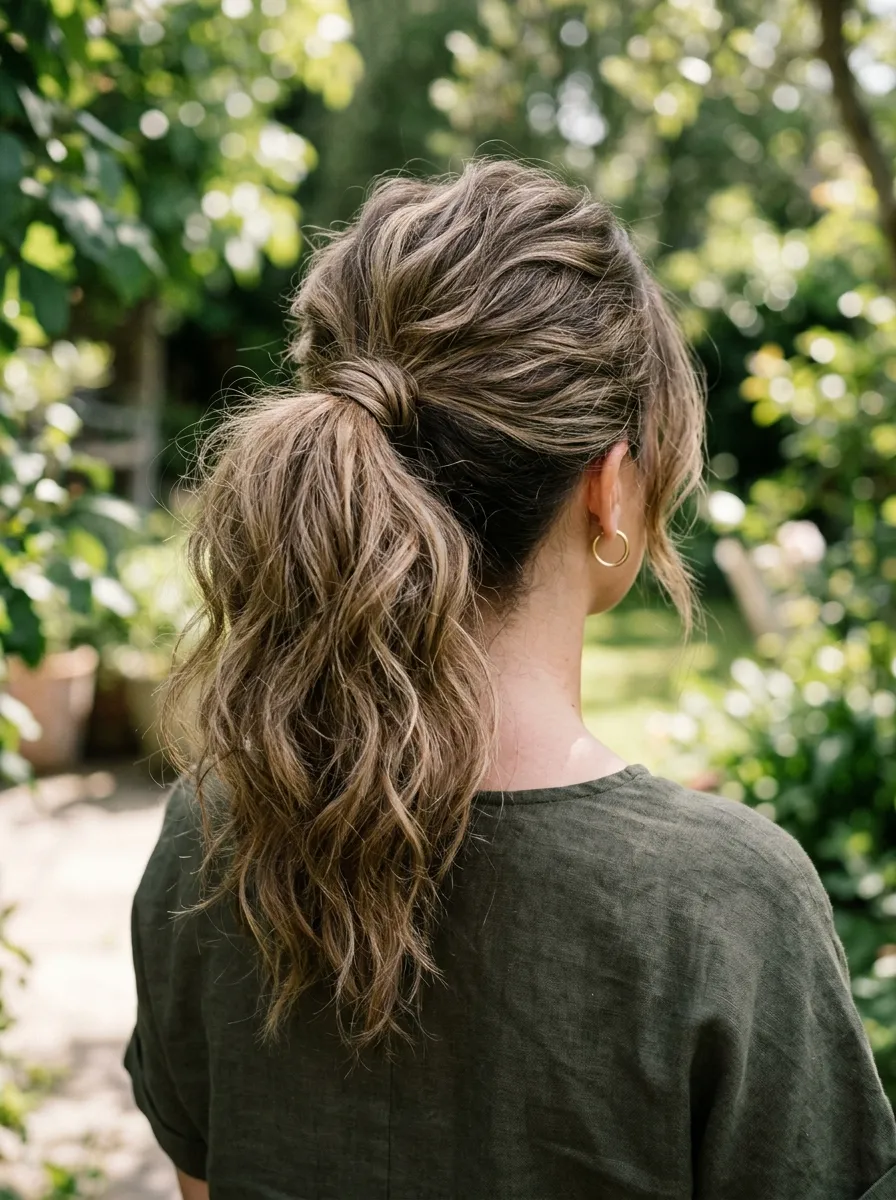
12. Textured High Ponytail
 e.]
e.]
A high ponytail on medium hair can look flat and limp without the right technique. Adding texture before gathering the hair makes the ponytail appear fuller and more deliberate.
Apply a texturizing spray or dry shampoo to the hair before starting. Back-comb the crown section lightly for added volume at the base.
Gather everything into a high ponytail at the crown and secure with a strong elastic. Once secured, use the tail of a comb to push the hair forward at the crown, creating a slight bump above the elastic.
Wrap a thin piece of hair from the ponytail around the elastic and pin underneath.
Smooth the sides with a fine-tooth comb and a small amount of edge control gel for a cleaner, more polished look.
This style works on medium hair of at least shoulder length. If the hair is too short, the ponytail will sit low at the back of the crown rather than at the top.
Add a sleek or wrapped scrunchie for a more fashion-forward finish. Silk and satin scrunchies are widely available and affordable.
Budget tip: Dry shampoo at the roots before styling adds both volume and texture simultaneously. A drugstore can of dry shampoo does this job just as well as any premium product.
13. Low Twisted Updo
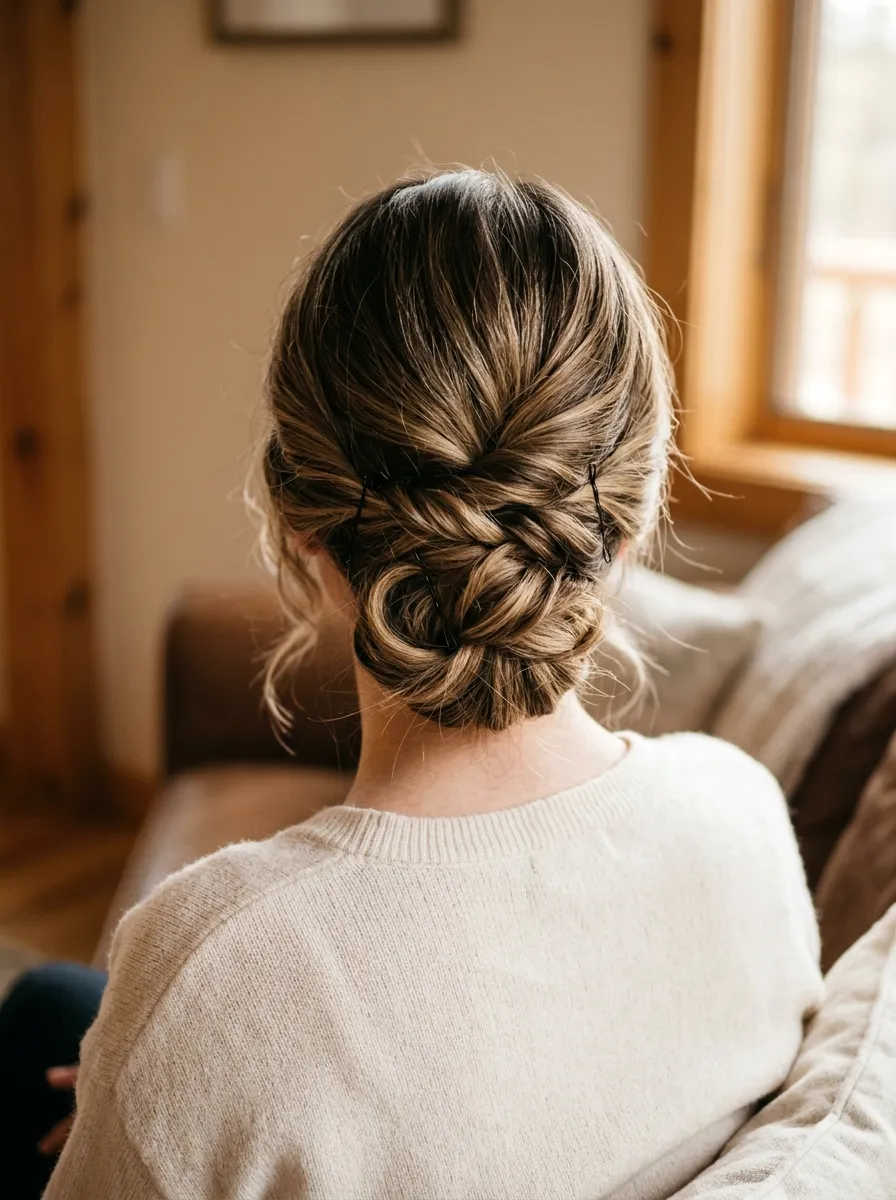
A low twisted updo is one of the most elegant five-minute styles for medium hair. Gather the hair into a low ponytail at the nape without securing it with an elastic first. Twist the ponytail into a loose knot and pin it flat against the nape with bobby pins.
The key is pinning each section individually rather than trying to hold the whole knot with one pin. Multiple pins spread through the knot keep it stable through the day.
Let a few face-framing pieces fall loose at the temples. These soften the updo and prevent it from looking too severe.
This style suits professional environments, events, and any occasion where you want your hair completely off the face and neck without a simple bun.
A light-hold hairspray over the finished updo keeps flyaways down.
On wavy or naturally textured medium hair, this updo has a particularly beautiful quality. The texture adds dimension to the twisted knot and makes the style look more elaborate than it is.
For a more polished version, smooth the surface with a boar bristle brush before twisting. For a more relaxed version, leave the surface naturally textured.
This style takes practice. The first few attempts may not stay perfectly. By the third or fourth try, it becomes second nature.
14. Voluminous Blowout with a Side Part
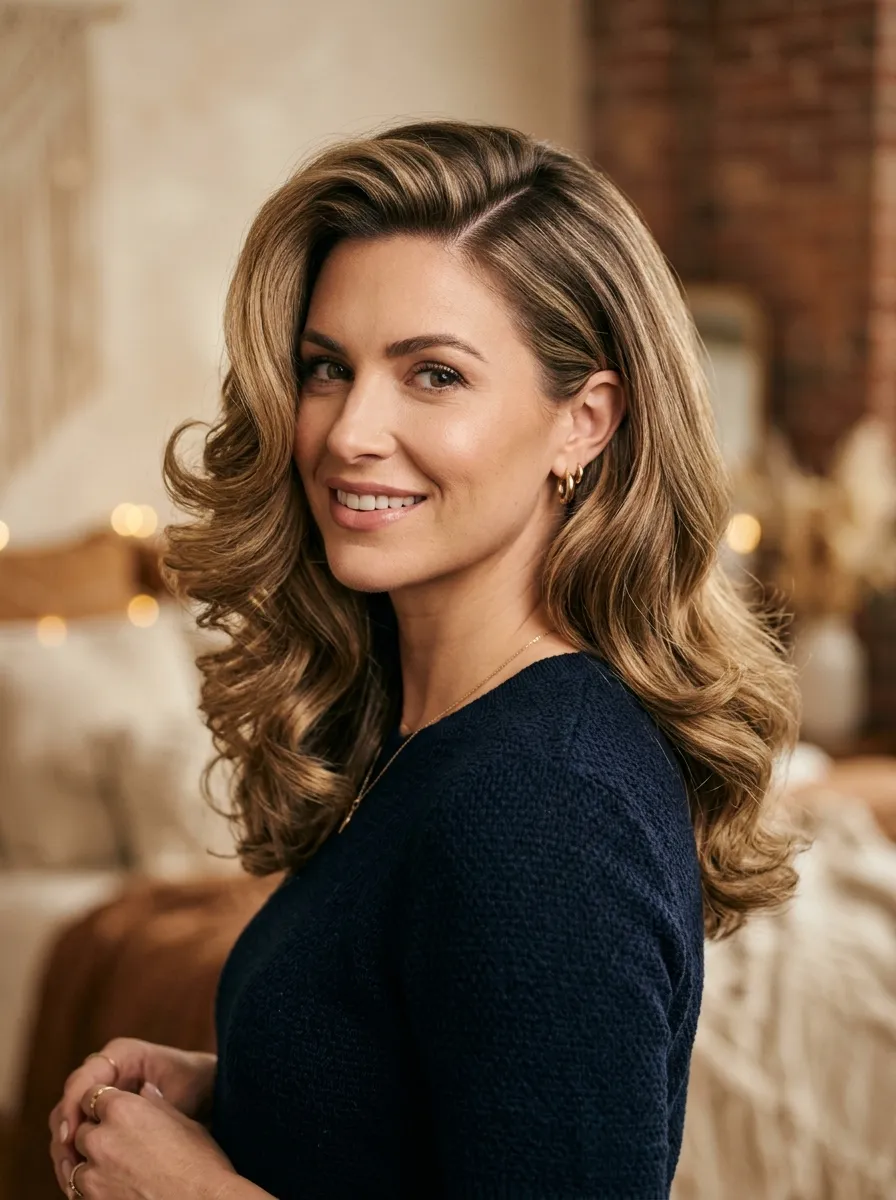
A voluminous blowout with a side part gives medium hair a glamorous, full quality that works beautifully for evenings out, formal events, and any day when you want your hair to make a statement.
Apply a volumizing mousse to damp hair before starting. This is the product that creates the foundation for lasting volume.
Blow-dry with your head flipped upside down to maximize root lift. Once most of the moisture is out, flip back up and use a large round brush to smooth and shape each section.
Direct the brush and blow-dryer outward and slightly upward on the heavier side of the part for maximum volume on that side.
Finish with a light to medium hold hairspray to lock the volume in place.
The side part is the most dramatic element of this style. Use a rat-tail comb to create a precise, deep side part. The more dramatic the part, the more volume appears on the heavier side.
For fine or thin hair, a side part blowout creates the most noticeable volume difference because the asymmetric parting naturally concentrates more hair on one side.
Budget tip: A volumizing mousse from a drugstore costs around $6 to $8 and lasts months. It is one of the best value products for medium hair styling.
15. French Tuck with a Clip
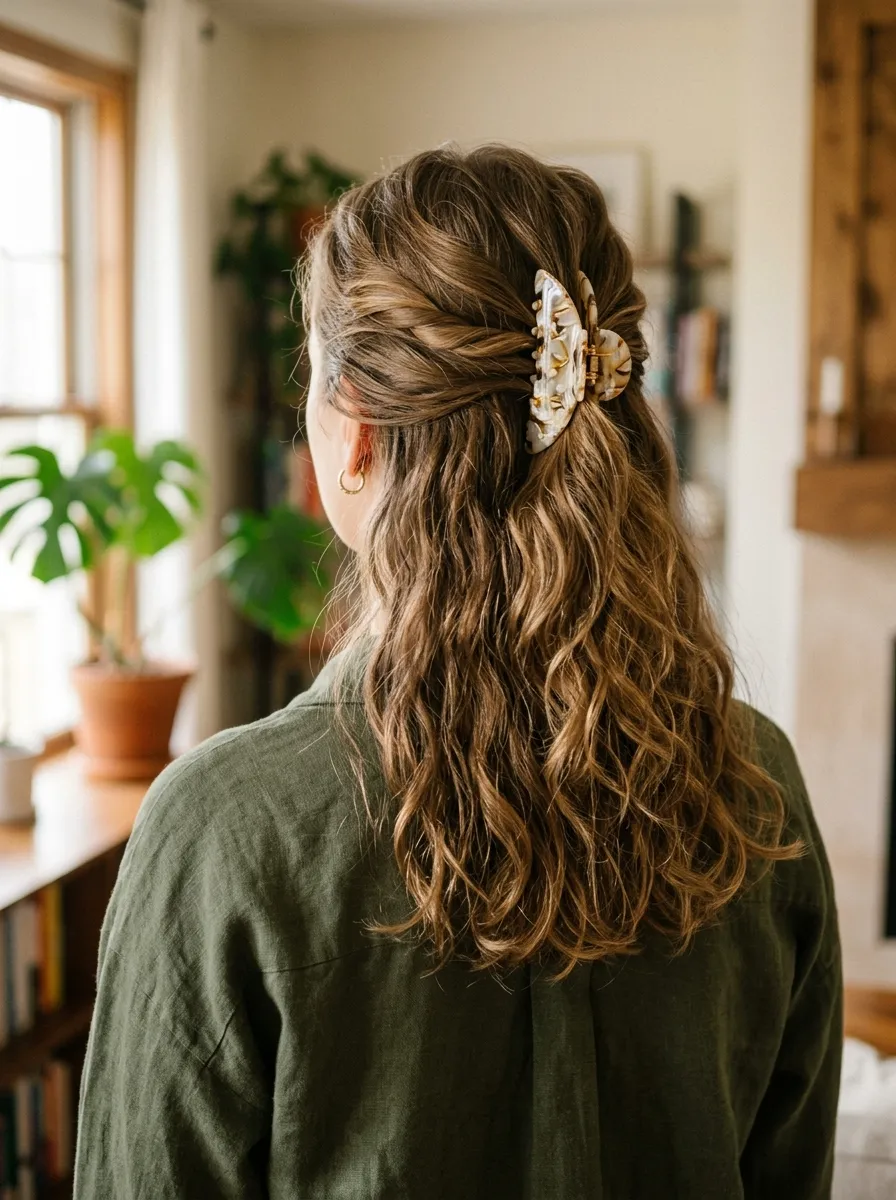
A French tuck with a clip gathers just the front top section of the hair, twists it loosely, and secures it at the back of the crown with a decorative clip. The rest of the hair falls completely free.
This is different from a standard half-up because only the front section is gathered rather than the full top half. The result is a lighter, more casual look that keeps hair off the face without feeling like a real updo.
Choose a clip that is large enough to hold the front section securely but not so large that it overwhelms the style. A medium claw clip, a barrette, or a decorative pin all work well.
Leave everything below the gathered section completely natural.
This style suits casual days, working from home, or any situation where you want hair out of your face without looking overly styled.
On wavy or curly medium hair, this style is particularly beautiful. The front section is neatly caught while the free waves or curls below create natural movement.
Budget tip: Decorative clips and barrettes are available at dollar stores and discount shops for almost nothing. A small collection in different styles gives you variety for the same technique.
16. Romantic Low Side Bun
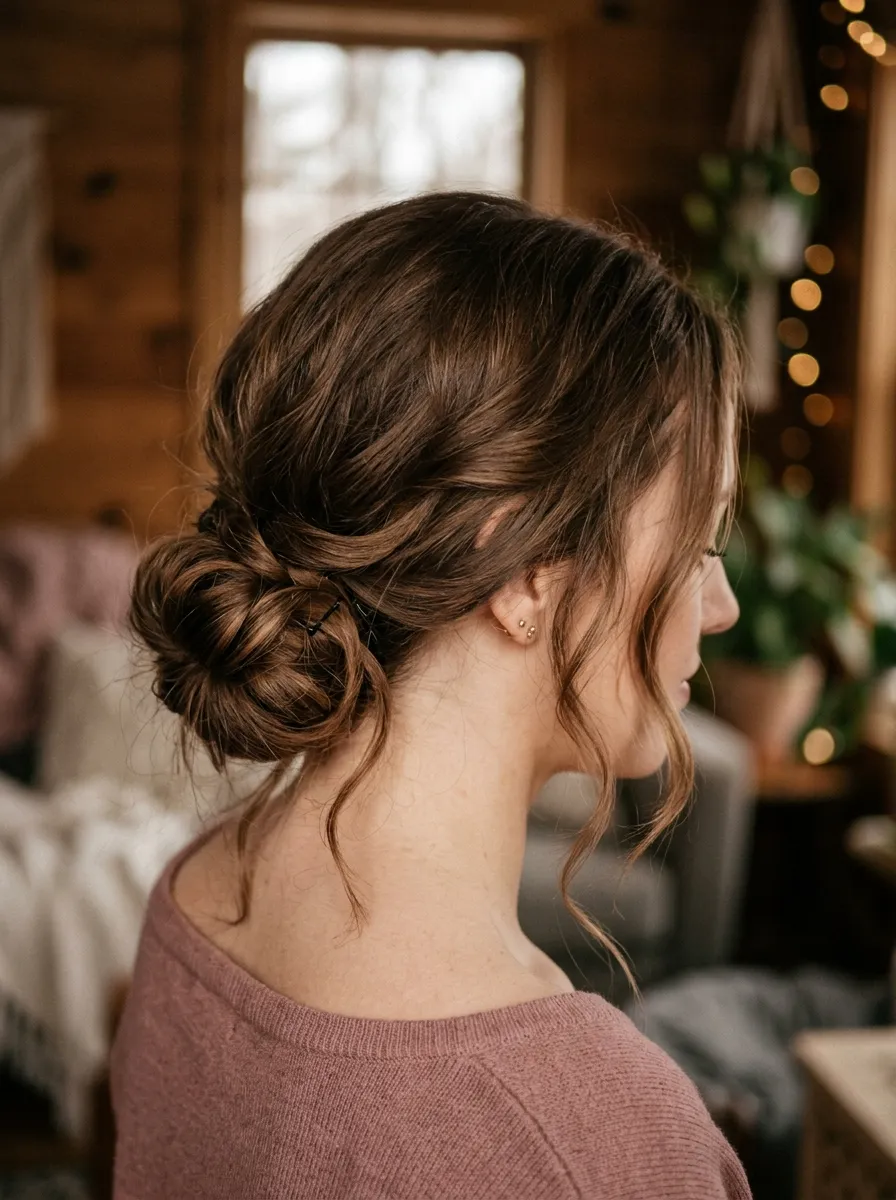
A low side bun sits behind one ear rather than at the center nape, creating an asymmetric, romantic look that suits events, dates, and any occasion with a slightly dressed-up feel.
Sweep all the hair to one side. Twist it loosely into a bun behind the ear and secure with bobby pins and a small elastic.
Keep the bun loose rather than tightly wound. A loose bun has a romantic, effortless quality. A tight bun reads as functional.
Leave several face-framing pieces loose at the front on the side where the bun sits. These soften the look and create a beautiful contrast between the gathered bun and the loose strands.
Add a few small bobby pins or a decorative pin to the bun itself as an accessory detail.
For extra security, lightly back-comb the gathered section before forming the bun. This gives the hair grip and prevents the bun from slipping.
This style works on all hair textures. Wavy hair creates a particularly beautiful side bun because the waves add natural volume and texture to the gathered section.
A light mist of hairspray after completing the bun keeps the style intact through the evening.
17. Bubble Ponytail
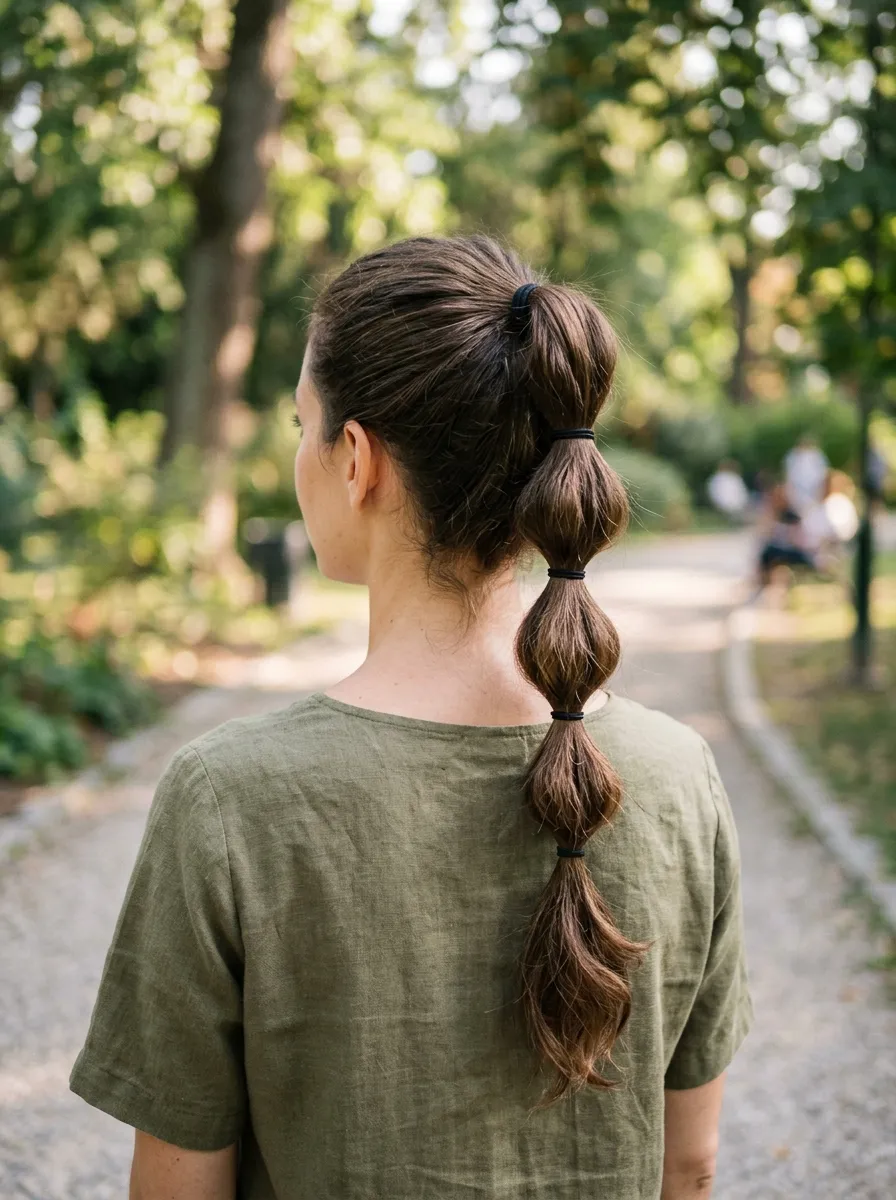
The bubble ponytail is a fun, modern style that makes medium-length hair look significantly more full and interesting than a standard ponytail. Multiple elastics are placed along the ponytail at regular intervals and each section between them is gently puffed outward.
Pull the hair into a standard ponytail. Secure with an elastic at the base. Add another elastic about an inch or two below the first.
Gently pull the section between the two elastics outward and around until it forms a rounded, puffy bubble shape. Continue adding elastics and puffing each section all the way to the end.
The more sections you add, the more dramatic the bubble effect. On medium hair, three to four bubbles is usually the right amount given the length.
Use small clear elastics so they are less visible between each bubble section.
This style works best on hair with some natural volume or texture. Very fine, flat hair may need a texturizing spray applied before styling to help each section puff outward and hold its shape.
Budget tip: A bag of small clear elastics costs under $3 at any drugstore and contains enough for hundreds of bubble ponytails.
18. Side Swept Waves
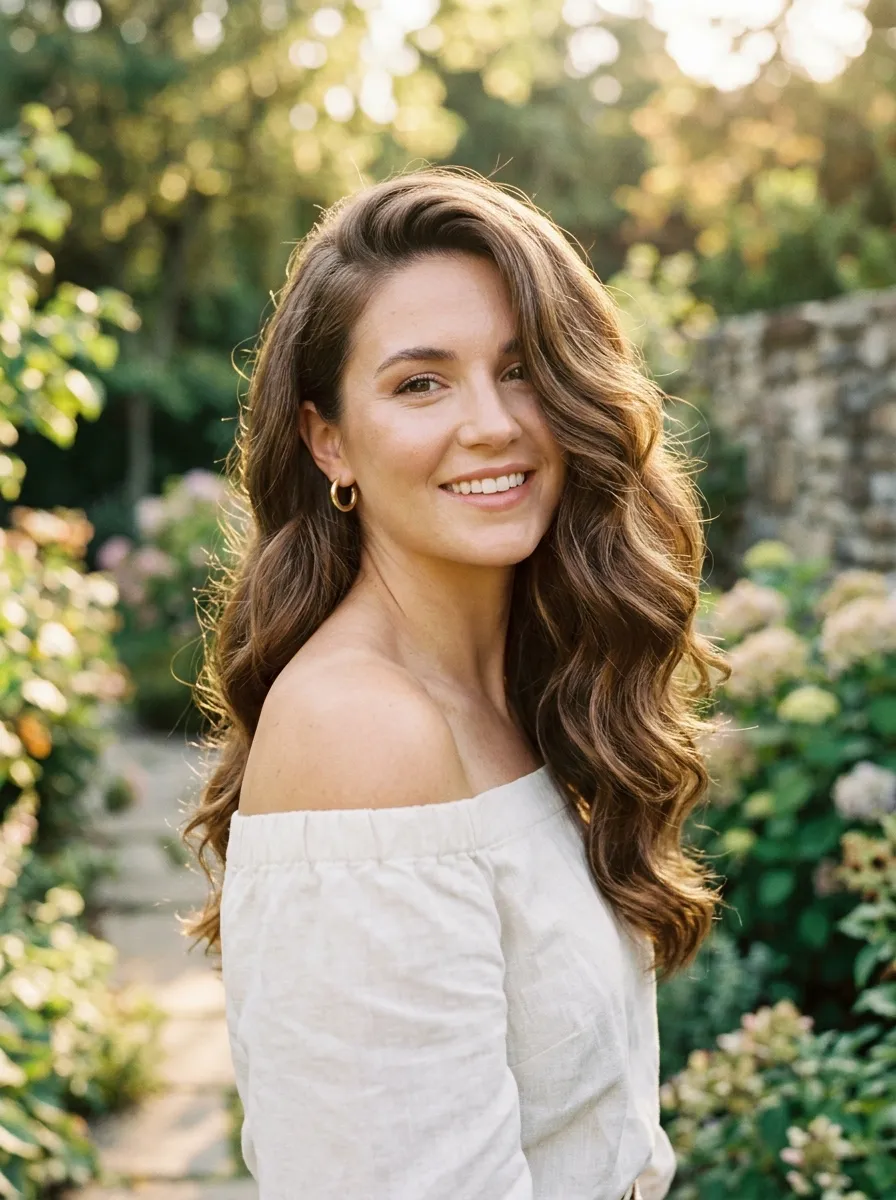
Side swept waves move all the medium-length hair to one side of the face and down over the shoulder. The asymmetric placement is immediately more interesting than hair worn centered or down evenly.
Create the waves first using a curling wand or the overnight braid method. Then sweep all the hair to one side and tuck the top layer behind the ear on the opposite side.
Tucking one side behind the ear is what locks the side sweep in place throughout the day. Without it, the hair gradually migrates back to center.
Secure the tuck with a small bobby pin behind the ear if you want extra security.
Leave a single face-framing piece loose on the side where the hair is swept from. This small detail adds depth and prevents the style from looking too severe on one side.
A light-hold hairspray sets the waves and keeps the swept position without stiffness.
This style suits all face shapes. For rounder faces, the asymmetric side sweep creates a natural lengthening effect that is very flattering.
The swept position also works beautifully in photographs because it shows the profile of the face clearly.
19. Natural Texture Wash and Go
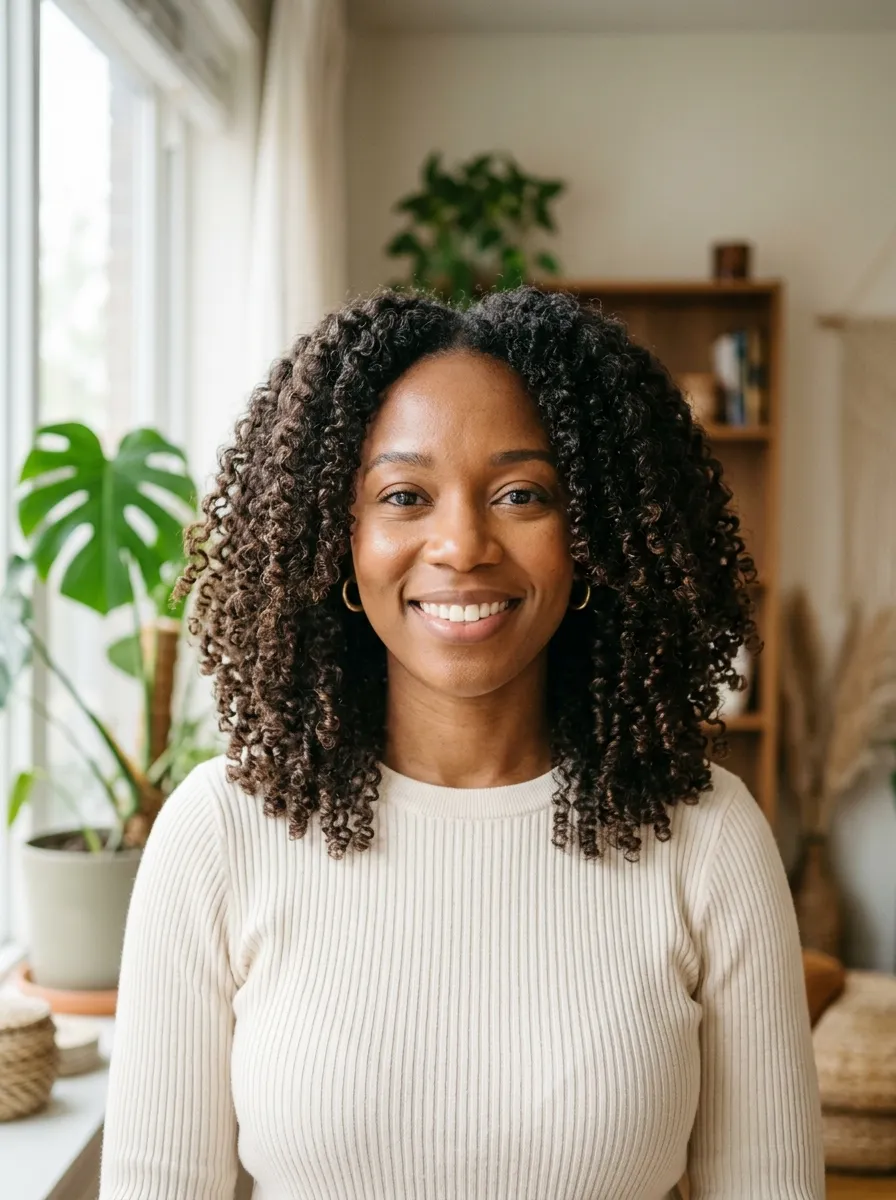
A wash-and-go is not just about skipping styling. It is about working with your natural texture in a way that looks intentional rather than undone. On medium-length hair, a good wash-and-go routine produces beautiful, defined results.
The product routine is everything for this style. Apply products while the hair is soaking wet, not just damp.
For wavy hair, apply a lightweight styling cream or mouse and scrunch upward. For curly hair, apply a curl cream followed by a gel and scrunch. Let both air-dry completely before touching.
The plopping method speeds up drying time and reduces frizz significantly. Lay a microfiber towel or T-shirt flat, flip your wet hair onto it, and wrap the towel around the top of your head. Leave for twenty minutes before releasing.
Once completely dry, gently break the gel cast on curly hair by scrunching the hair again with your palms. This releases the curls from the stiff gel layer and creates a softer result.
Budget tip: Drugstore curl creams and gels like Cantu, LA Looks, or Eco Styler work just as effectively as many premium products.
A wash-and-go on medium hair is one of the most effortless everyday looks available.
20. Dutch Braid into a Ponytail
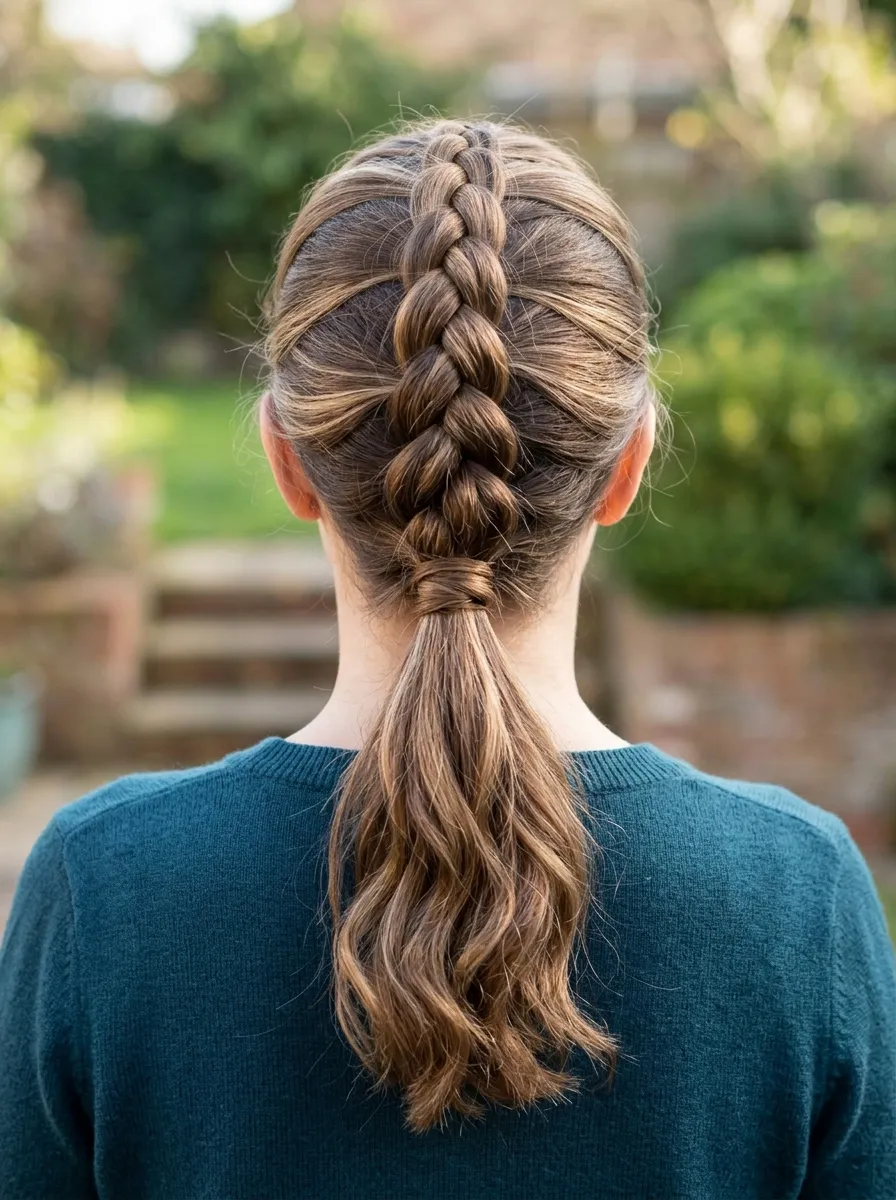
A Dutch braid that runs from the crown into a low ponytail combines the raised, three-dimensional Dutch braid with the practical manageability of a ponytail. The result is a style that looks much more detailed than a plain ponytail without requiring advanced braiding skills.
Start a Dutch braid at the crown by dividing a section into three pieces and crossing them under rather than over as you would for a French braid.
Continue the Dutch braid down the back of the head, adding hair from each side as you go. When you run out of hair to add, continue the remaining section as a regular braid or gather everything into a ponytail secured with an elastic.
Loosen the Dutch braid slightly by pulling each section outward after completing to add width and volume.
This style works well for active days because the braid keeps the top section secure and flat while the ponytail manages the length.
It also suits formal and semi-formal events because the Dutch braid detail adds a polished, deliberate quality.
Budget tip: This style requires no products or tools beyond a comb and a small elastic. Both are already in your bathroom.
21. Blunt Lob with a Deep Side Part
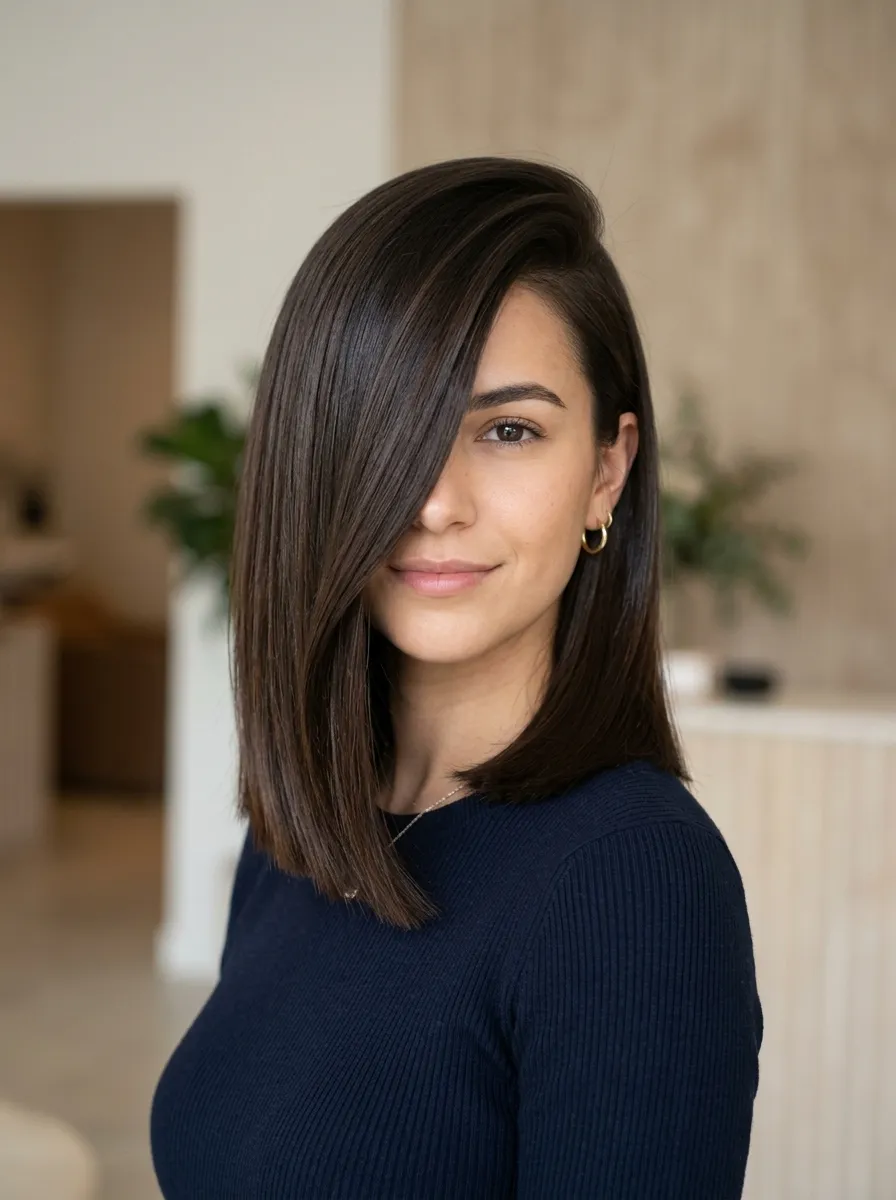
A blunt lob with a deep side part is one of the most dramatic and fashion-forward everyday styles for medium hair. The deep side part throws a heavy curtain of hair to one side, creating a striking asymmetric frame.
The blunt lob perimeter emphasizes the clean line of the style and prevents the side part from looking random or accidental.
Create the deep side part with a rat-tail comb, placing it as far to one side as possible. The further from center, the more dramatic the effect.
Blow-dry the heavier side smoothly with a round brush directed outward and downward. Smooth the lighter side flat against the head.
Use a flat iron to eliminate any frizz and create the sleek, polished finish that suits the blunt lob best.
A light serum smoothed over the surface adds shine and eliminates any remaining frizz.
This style suits all face shapes. For oval and oblong faces, the deep side part adds width. For round faces, the asymmetric parting creates the lengthening effect that most flatters rounder features.
The blunt perimeter means regular trims every six to seven weeks are needed to keep the clean line sharp.
22. Loose Fishtail Braid
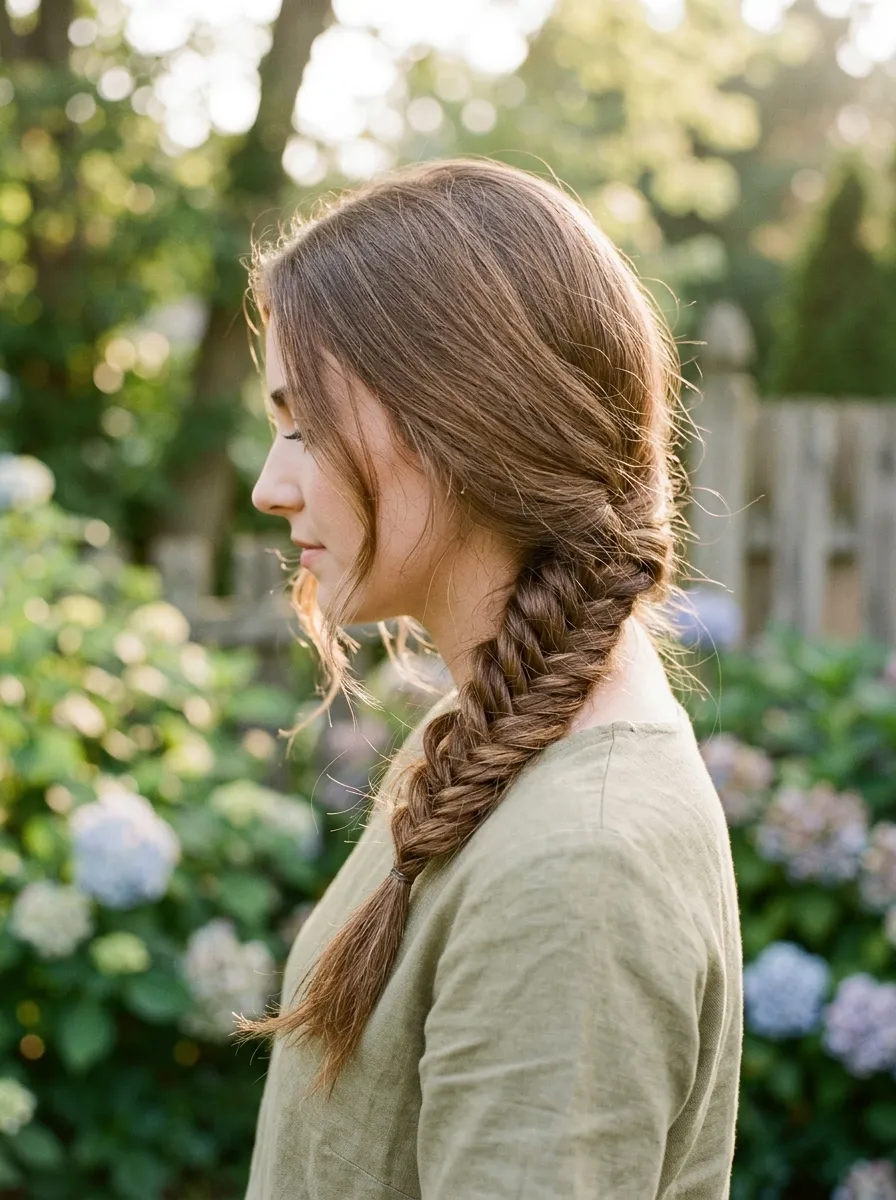
A loose fishtail braid on medium hair looks elaborate but only requires two sections rather than three. Divide the hair into two equal sections. Pull a thin piece from the outer edge of the right section and cross it to the left. Repeat from the left to the right.
Continue this motion all the way down.
After securing with a small elastic, widen the braid by gently pulling each section outward from top to bottom. This is the step that transforms a tight, structured fishtail into the loose, romantic version.
Leave a few face-framing pieces loose at the front.
The thinner the individual pieces you pull, the finer and more detailed the fishtail pattern. For a casual everyday style, slightly larger pieces create a chunkier, more relaxed result.
A texturizing spray or dry shampoo on the hair before braiding adds grip and prevents the sections from sliding.
This style lasts through a full day without needing touch-ups. The fishtail structure is naturally self-locking because of the cross-over technique.
Budget tip: A fishtail braid needs only a small elastic and your hands. No tools or products needed.
23. Twist and Clip Updo
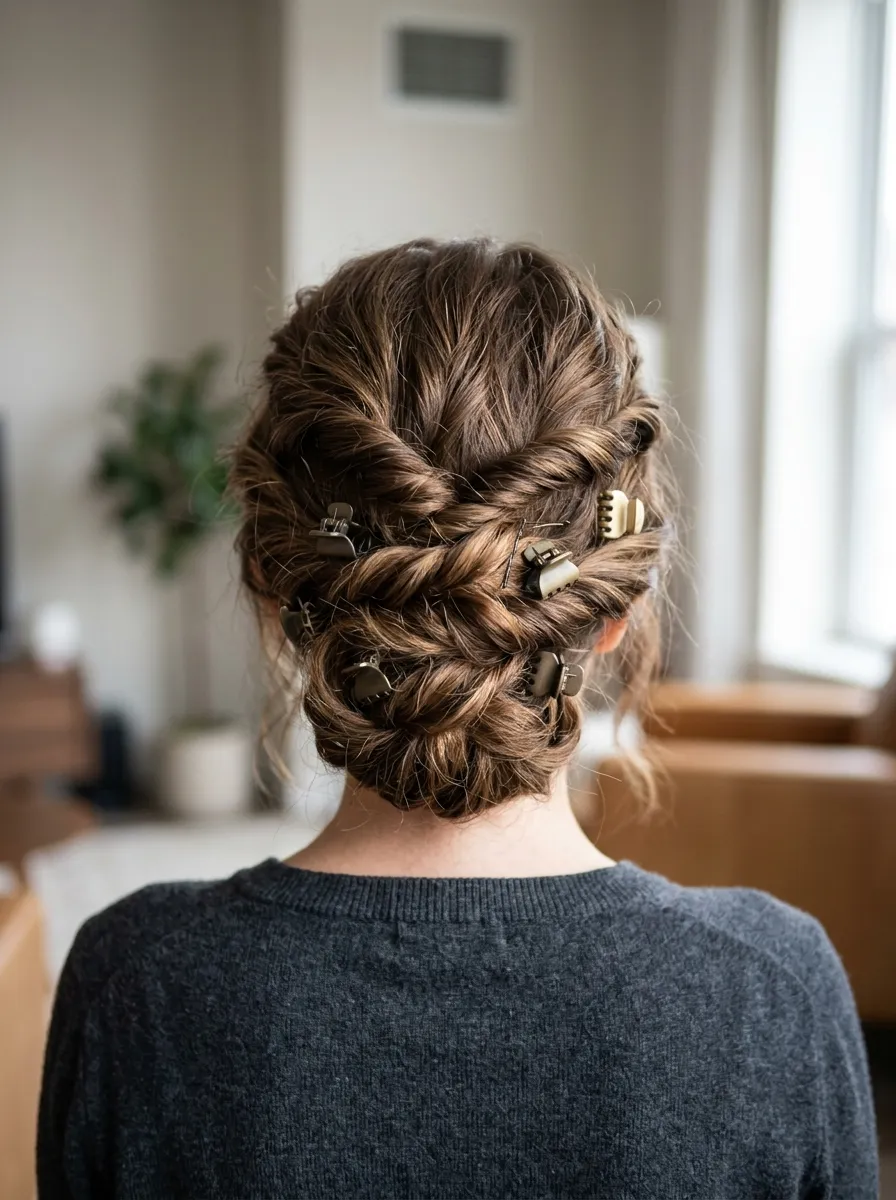
The twist and clip updo uses multiple small sections twisted and clipped across the back of the head to create a multi-textured updo that looks artistic and intentional. This is one of the most creative five-minute styles for medium hair.
Section the hair into four to six horizontal sections from the nape upward. Twist each section and secure flat to the head with a small clip or bobby pins.
Work from the bottom of the hair upward, overlapping each section slightly over the one below. This creates a layered, stacked appearance across the back of the head.
The clips can be decorative or hidden depending on the look you want. Decorative clips in gold or tortoiseshell become part of the style. Concealed bobby pins create a cleaner, more formal updo.
Leave the front face-framing pieces completely loose.
This style is infinitely customizable. Use more sections for a denser, more elaborate result. Use fewer sections for a more minimal look.
Budget tip: Bobby pins cost almost nothing in bulk. A box of a hundred pins from a drugstore is under $3 and lasts months.
Works on all hair textures including wavy and curly medium hair.
24. Sleek Side Braid
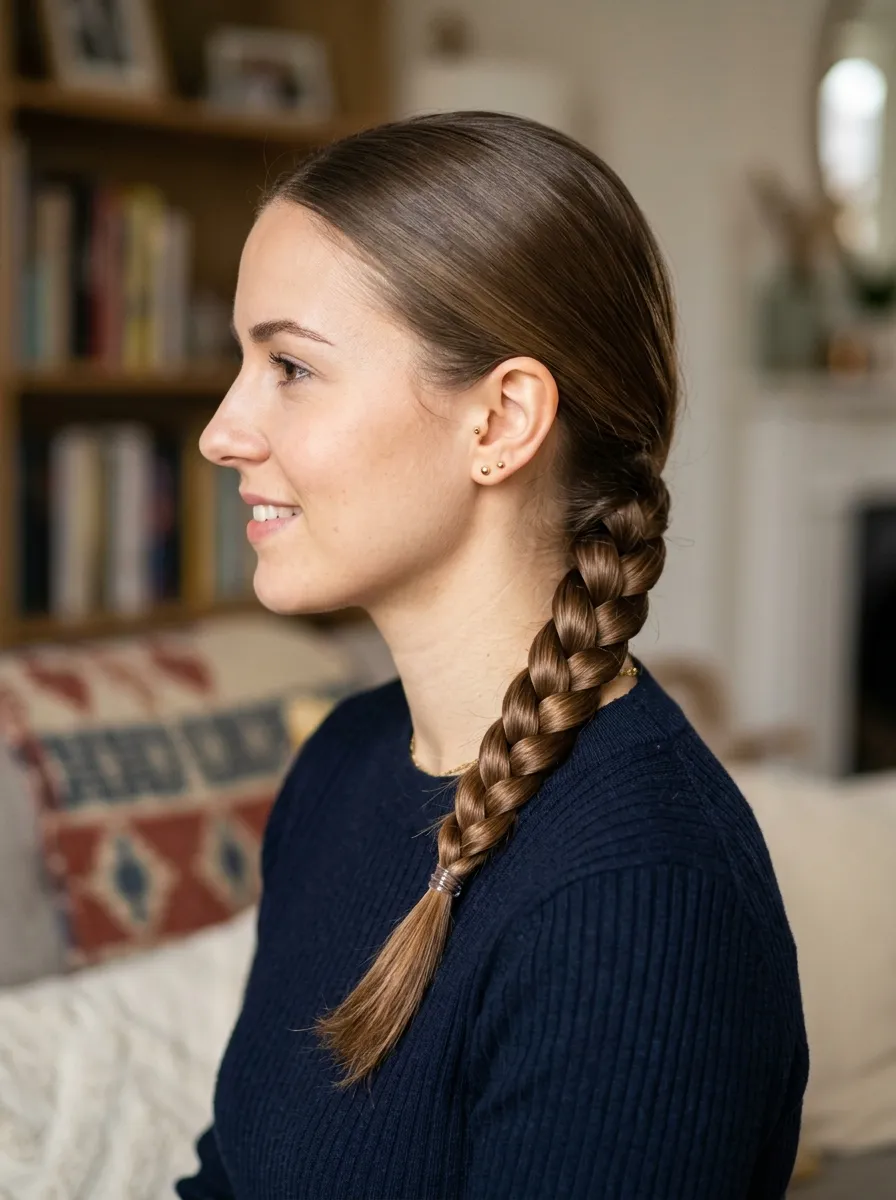
A sleek side braid is the polished counterpart to the loose, textured version. Rather than being widened and pulled for texture, this braid stays tight and smooth for a clean, refined look.
Apply a smoothing cream or light serum to the hair before braiding. This reduces flyaways and creates the smooth surface that makes this braid look polished.
Braid with consistent, firm tension throughout to maintain the sleek surface. Inconsistent tension creates bumps and loosens the clean line of the braid.
Smooth any remaining surface flyaways with a light application of hairspray after finishing. Spray lightly from a distance and then run a clean hand down the surface of the braid.
Secure the end with a small elastic that matches your hair color.
This style is particularly effective for professional environments, interviews, and formal events. The sleek braid communicates a deliberate, polished appearance.
It also works beautifully under formal clothing. A side braid at the front creates a beautiful neckline effect that frames the shoulders well.
Budget tip: A small amount of inexpensive hair serum is all you need for the sleek surface. Argan oil works excellently for this purpose and is available at drugstores for around $6.
25. Effortless Air-Dried Natural Wave
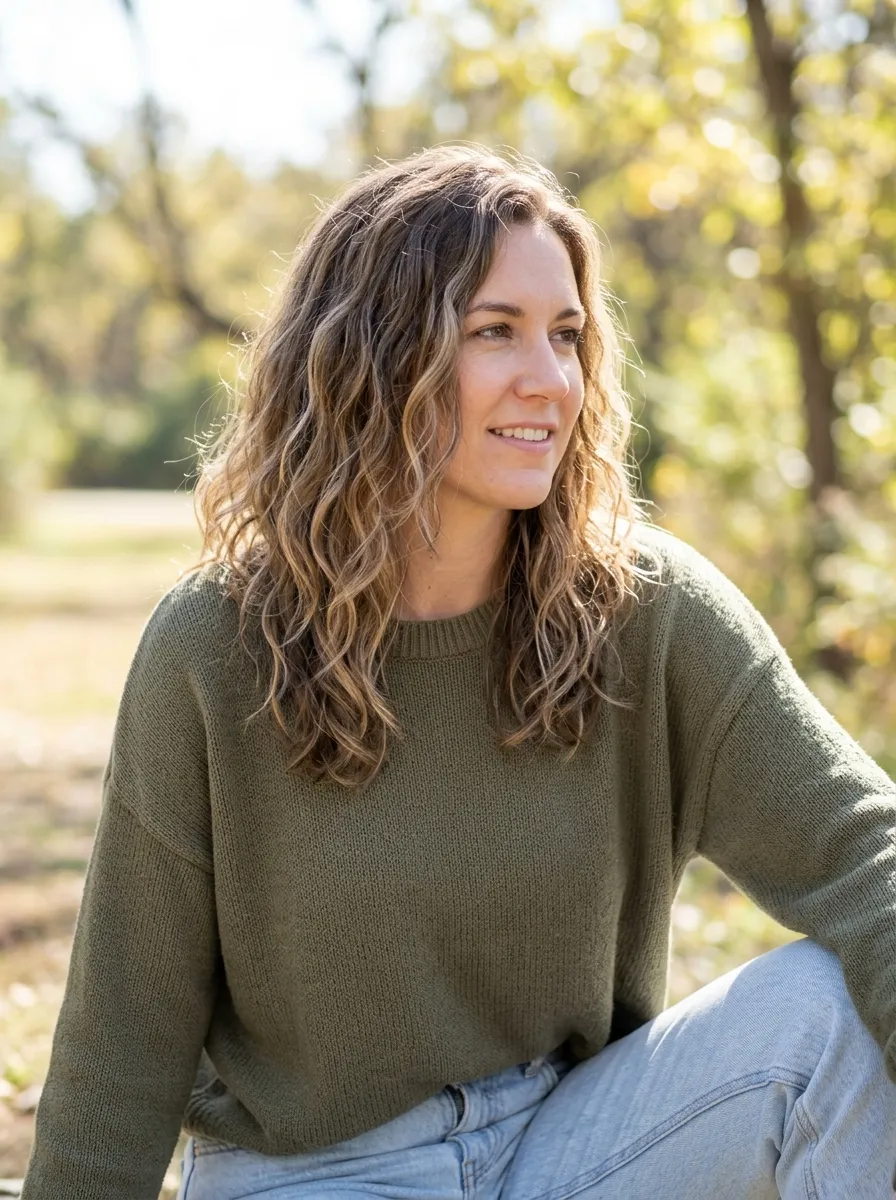
Air-drying medium hair correctly is a skill that produces one of the most genuinely effortless everyday looks. The secret is in what you apply while the hair is wet rather than what you do while it dries.
Apply a lightweight styling cream or a small amount of mousse to soaking wet hair. Scrunch lightly upward.
Do not touch the hair while it dries. Touching disrupts the wave pattern and creates frizz. Leave it completely alone from the moment you apply product until it is fully dry.
A microfiber towel or cotton T-shirt to gently squeeze excess water before applying product reduces frizz compared to a regular terry cloth towel.
Drying time on medium hair is typically thirty to sixty minutes depending on thickness and texture.
Once completely dry, use your fingers to gently separate any sections that clumped together and add a small amount of light-hold spray for hold.
Day-two air-dried waves often look better than the first day because the waves relax into a more natural position.
Budget tip: A lightweight drugstore styling cream costs under $8 and is all you need. No diffuser, no wand, no heat tools of any kind.
This is the most time-saving style on this entire list. Apply product and walk out the door.
Conclusion
Medium length hair gives you more styling options than almost any other length, and every idea on this list proves that you do not need a lot of time, money, or skill to take advantage of them. From a two-minute half-up twist to a polished sleek blowout, from a romantic side bun to an effortless air-dried wave, the range of looks available at this length is genuinely impressive. Pick two or three ideas from this list that match your daily schedule and your natural hair texture. Practice them a few times each until they feel easy. Then rotate through them so your hair looks different and intentional throughout the week without any additional effort. A good haircut at the right medium length combined with even one or two of these styling techniques is enough to make a real and visible difference in how you feel about your hair every single day. Go start with the easiest one and work from there.
Leave a Reply