Long hair updo ideas are one of the most beautiful canvases for special occasion styling. Whether you are attending a wedding, a gala, a prom, or a milestone birthday dinner, the right updo can completely change how you feel about yourself. The good news is that you do not need a high-end salon appointment for every look. Many of these styles are achievable at home with a few tools, some patience, and a handful of bobby pins. This guide walks you through 26 gorgeous updo ideas that range from simple and sweet to dramatically glamorous. Each one is designed to work with naturally long hair and can be adjusted to suit your hair texture, face shape, and outfit. Read through, find your favorites, and get ready to walk into any room with total confidence. If you’re also exploring Fall Hair Trend Ideas, warm tones, soft layers, textured waves, and rich seasonal colors can help create a cozy, stylish look that feels modern, effortless, and perfectly matched to autumn’s aesthetic.
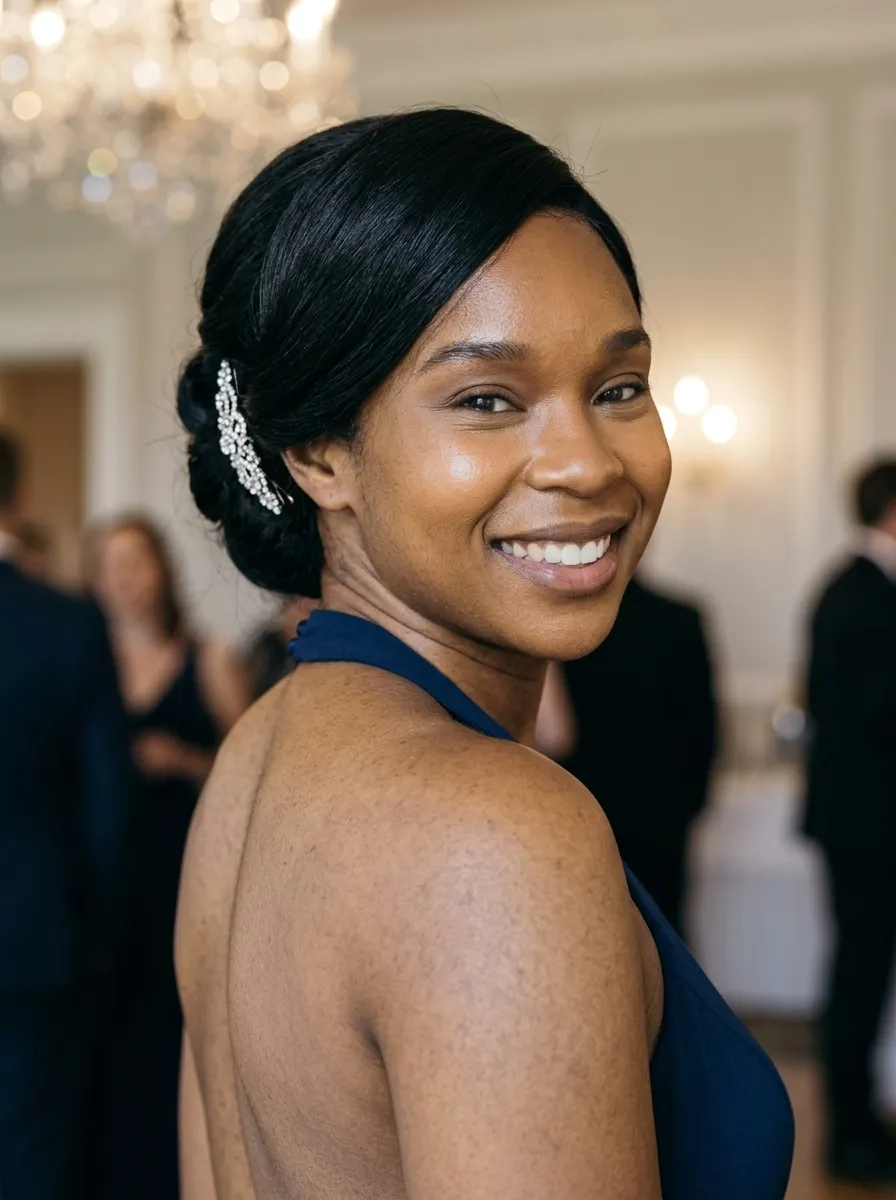
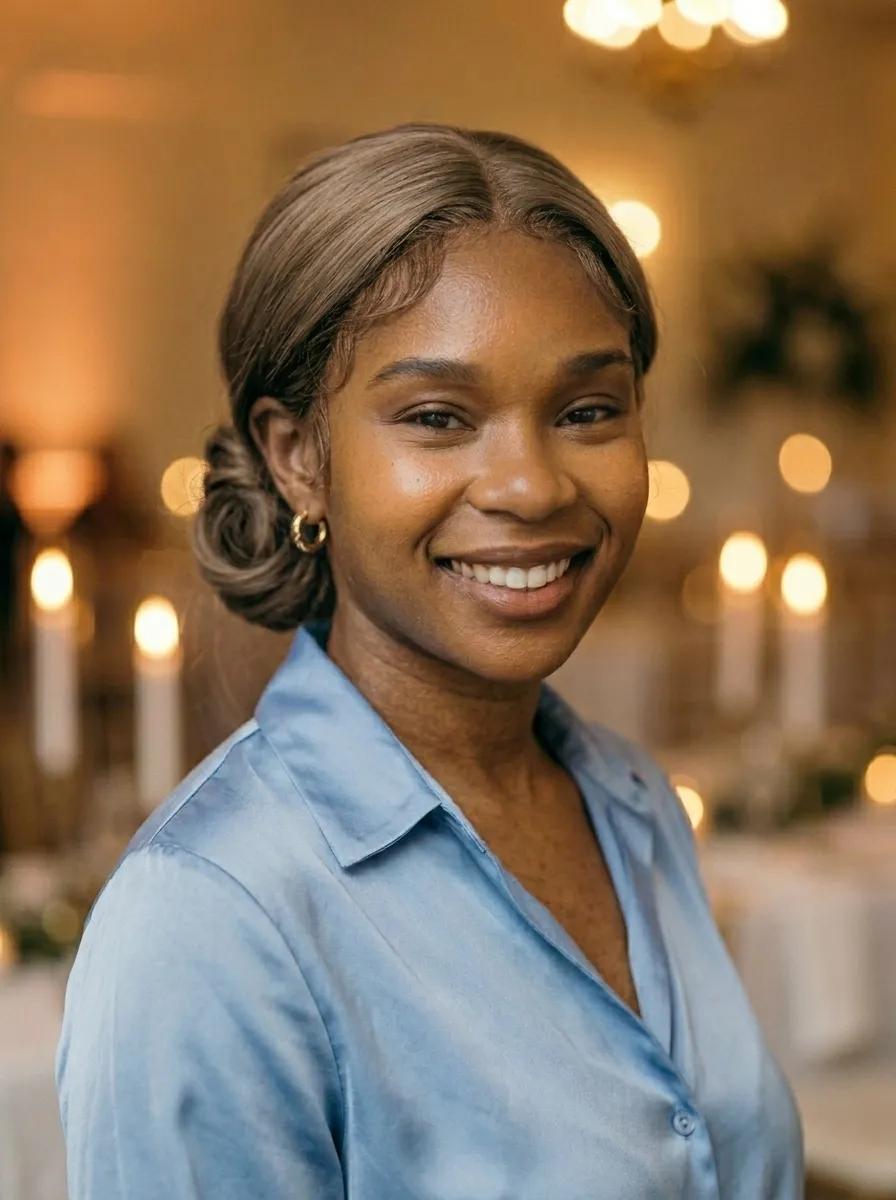
1. Classic Low Chignon
The classic low chignon is one of those hairstyles that never goes out of style. It works for every occasion from black-tie galas to garden weddings.
The look involves gathering your hair at the nape of your neck and twisting or tucking the ends into a smooth bun. You secure it with bobby pins and finish with hairspray.
What makes this style so popular is how clean it looks. It keeps all attention on your face and neckline, which makes it perfect when you are wearing statement earrings or a beautiful open-back dress.
DIY Tip: Start with slightly damp hair and blow dry it smooth. Use a fine-tooth comb to slick the sides back cleanly before forming the bun. A light pomade on flyaways will keep everything polished.
You can dress this style up with a jeweled hair comb or keep it minimal with just a silk scrunchie. It suits oval, heart, and square face shapes particularly well.
Budget-friendly versions are totally achievable at home. A pack of bobby pins, some strong-hold hairspray, and ten minutes is all it takes.
2. Braided Crown Updo
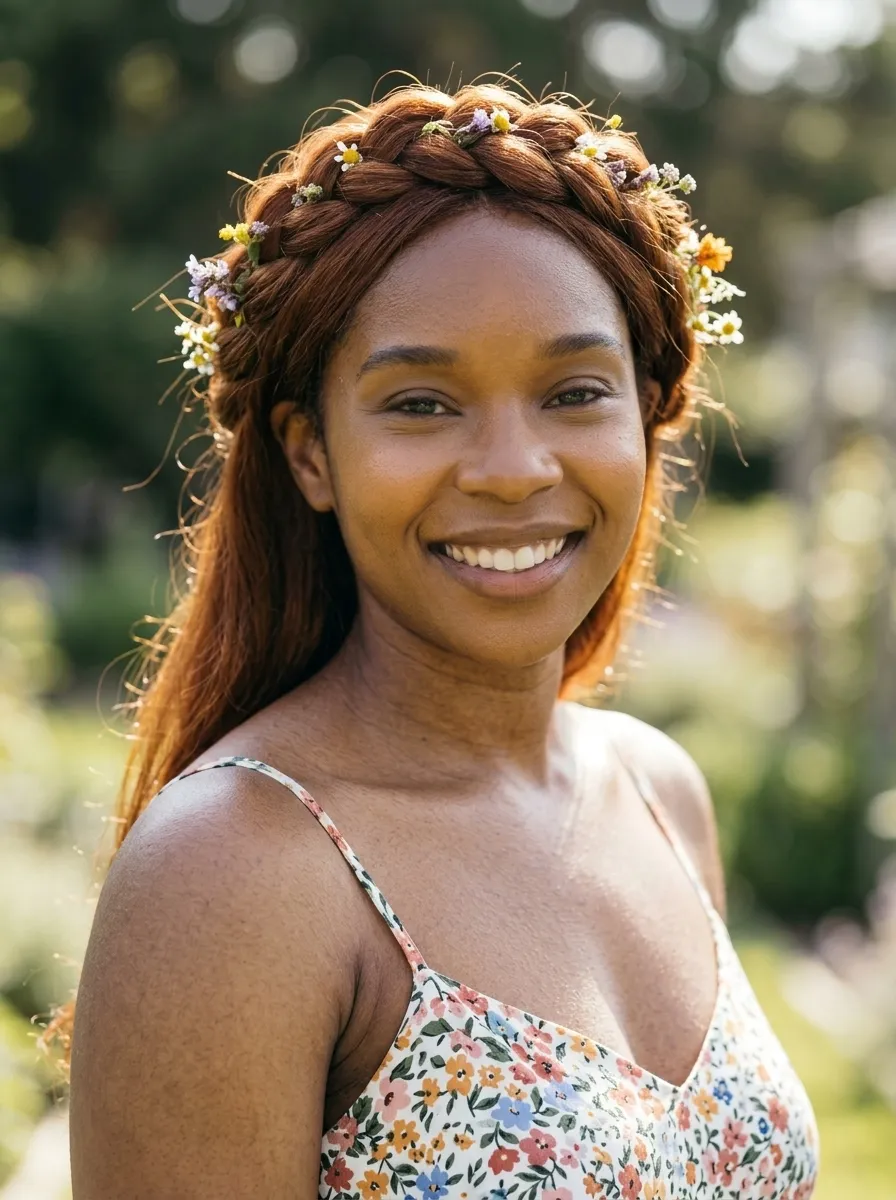
A braided crown gives off a romantic, almost ethereal feel that works beautifully at outdoor weddings and garden parties.
To create this look, you part your hair down the middle and create two long braids. Then you wrap each braid across the top of your head in opposite directions and pin them in place. The result is a gorgeous crown effect that looks like it took hours but is actually quite straightforward.
This style is especially flattering for people with oval and long face shapes because the width of the crown adds visual balance.
DIY Tip: Make your braids slightly loose for a fuller, more romantic appearance. Tight braids can look too flat on top. Gently tug each section of the braid outward after braiding to give it that editorial volume.
Adding fresh or faux flowers into the braid makes this look even more special. Small baby’s breath, dried lavender, or tiny silk blooms all work beautifully and can be found cheaply at craft stores.
This is also a great style for second-day hair because it works better when your hair has a little texture to it rather than being freshly washed and silky.
3. Soft Romantic Bun with Loose Curls
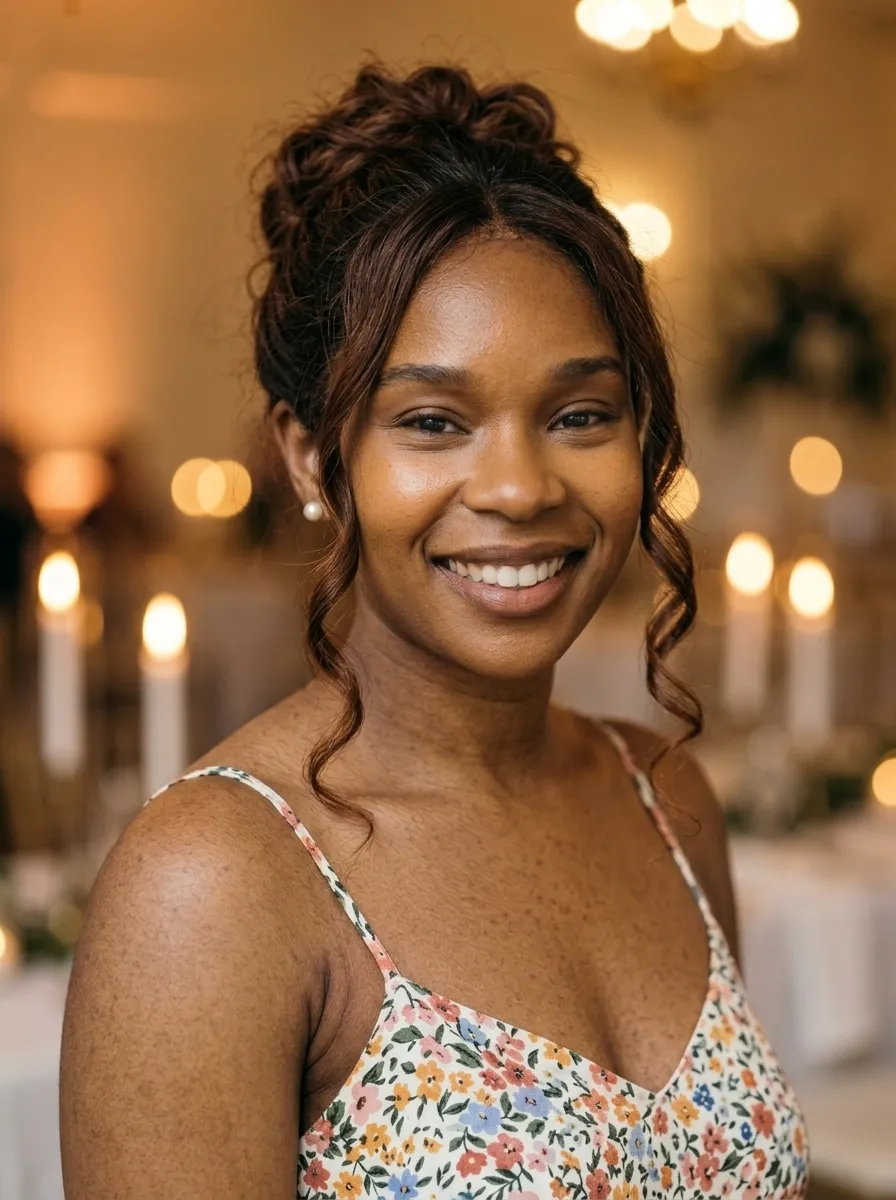
This style walks the line between polished and effortlessly pretty. It is the kind of updo that looks like you spent a lot of time on it but still has a relaxed, romantic quality.
The base is a soft, loosely gathered bun at the middle or crown of the head. Before putting the hair up, you curl sections around your face and let those pieces fall free. The contrast between the structured bun and the loose curls is what makes this look so striking.
DIY Tip: Use a one-inch curling wand for the face-framing pieces. Curl away from your face for a more open, flattering effect. Let the curls cool completely before touching them so they hold their shape longer.
This look is great for evening events because it photographs beautifully under low lighting. The curls catch the light in a way that straight hair simply does not.
Keep the bun itself casual and textured rather than tightly wound. Pull a few small strands out from the bun to keep the whole look feeling soft and warm.
A little dry shampoo at the roots before styling adds grip and volume, which helps the bun stay in place all night without extra products.
4. French Twist
The French twist is a timeless updo that has appeared on red carpets and wedding aisle photos for decades. It looks incredibly sophisticated and works well with both formal and semi-formal occasions.
To create it, you gather all your hair to one side at the back of your head, then roll it upward and tuck the ends in. You secure it with bobby pins placed vertically along the fold. The finished result is a smooth, sculpted shape that sits close to the head.
DIY Tip: Use a wide-tooth comb to gather your hair to the side before rolling. This keeps the base smooth. Place your bobby pins in a zigzag pattern along the fold for a stronger hold that lasts all evening.
A decorative clip or a jeweled comb placed at the top of the twist adds an instant glamour touch without requiring any extra effort. This is one of those styles where a single accessory does most of the heavy lifting.
This updo works best with smooth, straight, or lightly blown-out hair. If your hair is very curly, use a flat iron on the sections before gathering them.
The French twist flatters almost every face shape and is particularly stunning when paired with elegant drop earrings.
5. Twisted Half-Up Half-Down Style
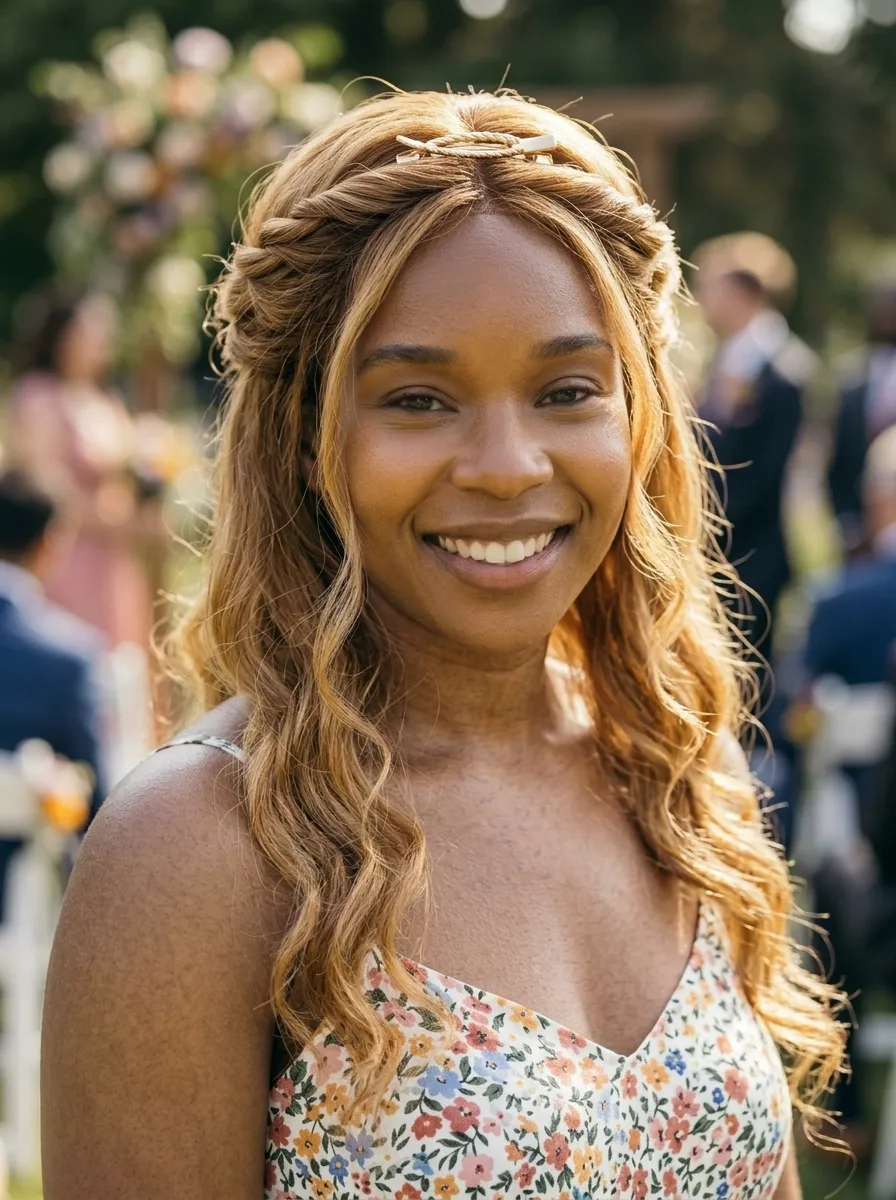
Not every special occasion calls for a full updo. Sometimes a half-up half-down style is the perfect answer, especially when you want to show off the length and beauty of your long hair.
This version involves taking two sections from the front of your hair, twisting each one toward the back, and securing them together at the crown with a clip or pins. The rest of your hair falls loose or in soft waves.
DIY Tip: Twist each front section tightly before pinning, and pull the twist slightly upward to add lift at the crown. This small trick creates a flattering shape that frames your face beautifully.
This style works especially well for daytime events, outdoor celebrations, and cocktail parties. It keeps hair away from your face while still showing off its natural beauty.
Adding waves or curls to the loose bottom half of your hair before starting the twist sections makes the whole look feel much more polished. Use a large barrel wand or foam rollers the night before.
Budget tip: A simple gold or pearl barrette from a drugstore can make this whole look feel expensive and intentional. You do not need specialty products or professional tools.
6. Messy Ballerina Bun
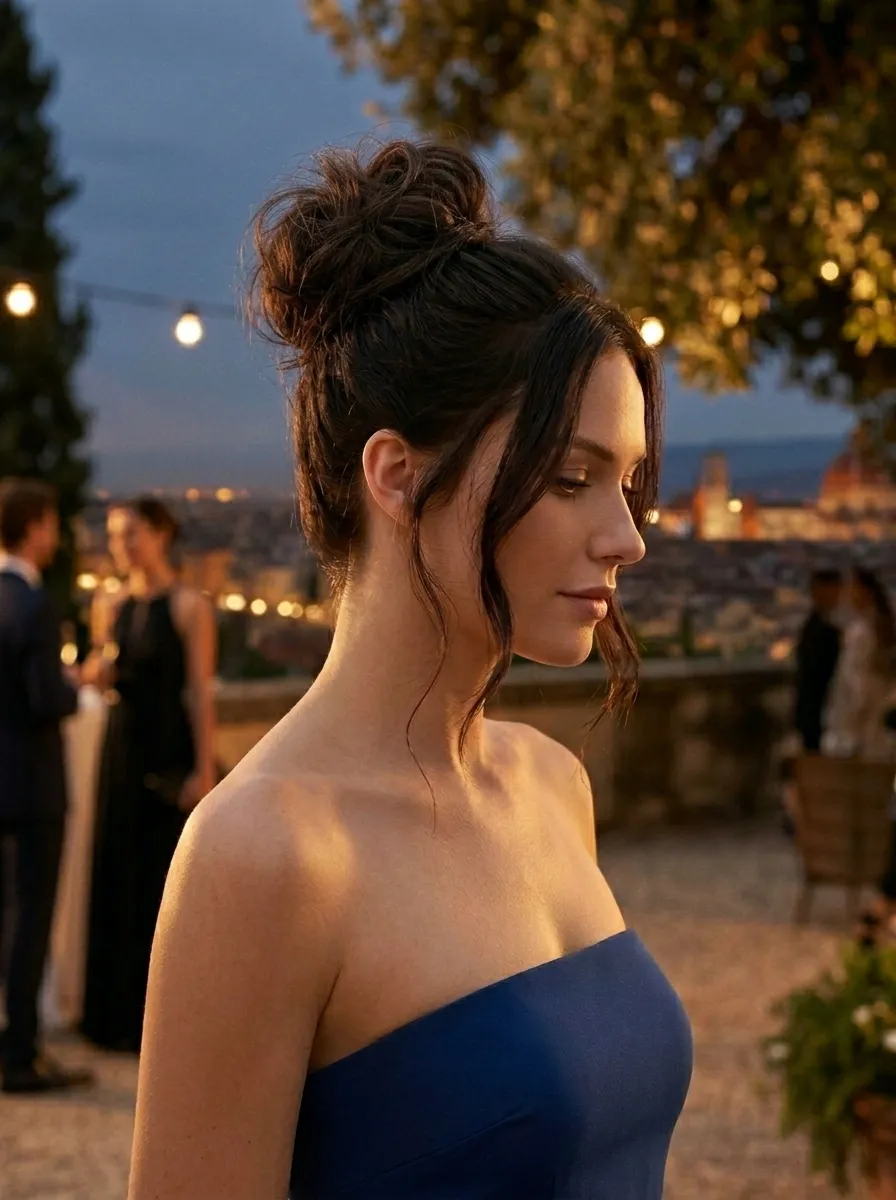
The ballerina bun gets a modern update when you let it be a little imperfect. A messy version of this classic updo has a cool, editorial quality that works for art gallery openings, cocktail dinners, and contemporary weddings.
To get this look, pull your hair into a high ponytail and then twist it around the base. Instead of smoothing everything down, let pieces fall out naturally and pull sections slightly for a more relaxed shape. Secure with a hair tie and pins.
DIY Tip: Before putting your hair up, spray some dry shampoo at the roots. This creates texture that actually helps the bun hold its shape. Perfectly clean hair is often too slippery for this style to stay in place.
The key difference between a sloppy bun and a chic messy bun is intentionality. Take a moment to pull pieces out deliberately rather than letting them fall out randomly. Frame your face with two or three small strands.
This look pairs amazingly with bold makeup, statement earrings, or a sleek turtleneck outfit. The simplicity of the updo lets everything else shine.
It works on most hair types including wavy and lightly curly hair, which actually gives the bun more natural texture and character.
7. Waterfall Braid into a Bun
The waterfall braid is one of the prettiest ways to add detail to an updo without overcomplicating it. It creates a flowing, cascading effect along one side of the head before gathering into a polished bun.
To do this, you start a standard three-strand braid near the front hairline, but instead of using the dropped section, you let it fall through and pick up a fresh piece of hair from above. The result looks like water cascading through the braid.
DIY Tip: Watch a slow-motion tutorial once before attempting this. The technique sounds complex but once you see the hand movements, it clicks quickly. Practice on a weekend morning before your actual event.
After completing the waterfall braid along the side of your head, gather all remaining hair into a low bun or twisted knot at the back. The braid adds a gorgeous decorative touch that elevates the whole look.
This style works especially well at daytime ceremonies and outdoor events. It photographs beautifully from every angle, which makes it a favorite for wedding party hairstyles.
Use small clear elastic bands or bobby pins to keep the braid sections tight and in place throughout the day.
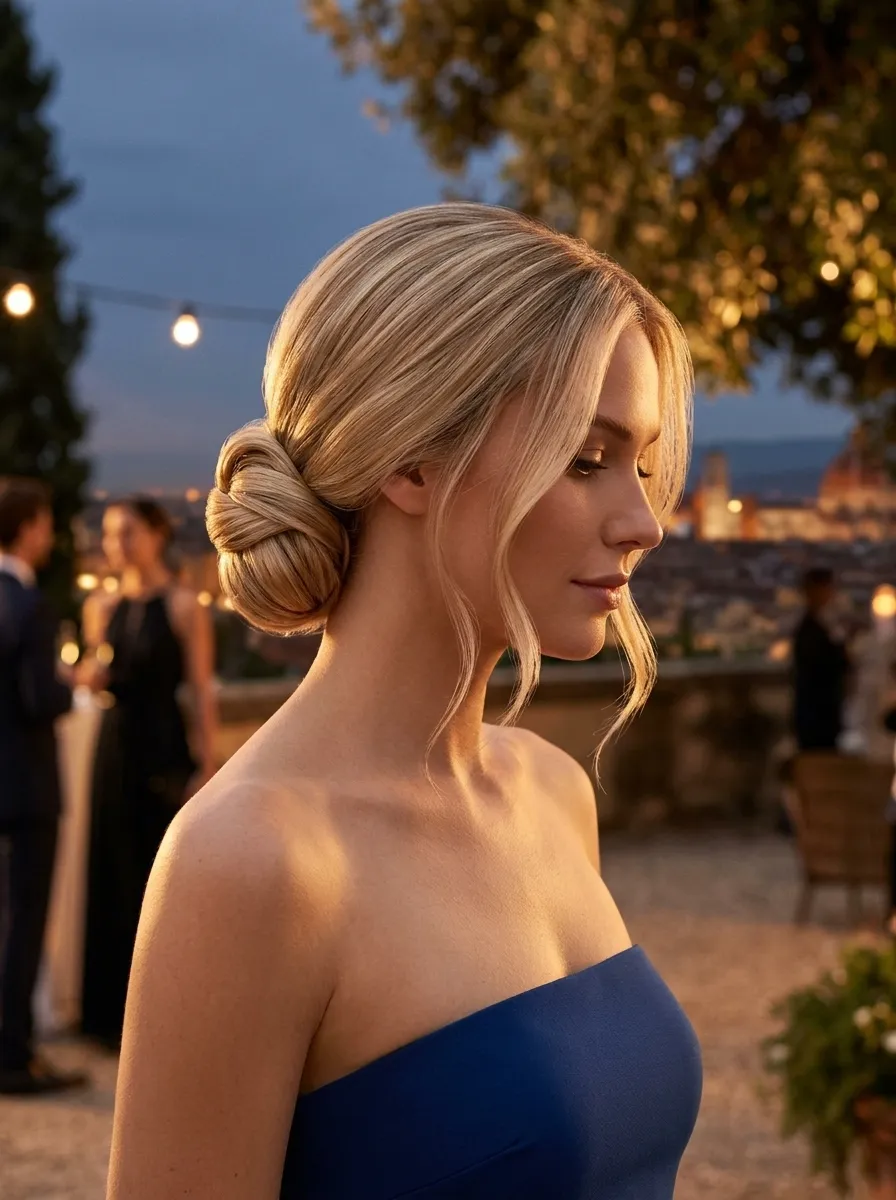
8. Side-Swept Low Bun
A side-swept bun is a small styling choice that makes a big visual difference. Shifting the bun to the side rather than centering it at the back of your head creates an asymmetric look that feels modern and chic.
Gather all of your hair to one side and twist or pin it into a low bun just behind your ear or at the nape on one side. Leave a few soft curls or waves loose at the front on the opposite side for a balanced look.
DIY Tip: This style works best when your hair has some wave or texture to it. If your hair is straight, add a few curls with a wand before pulling everything to the side. The texture helps the bun stay full and shapely.
This is a great choice for dinners, evening cocktail events, and semi-formal office parties. It feels dressed-up without being overdone.
Pairing this bun with statement earrings on the side where the bun sits creates a beautiful visual moment. The ear is fully exposed on that side, making your jewelry the focal point.
A satin scrunchie or a velvet band used to secure the bun instead of a plain elastic adds an instant touch of luxury.
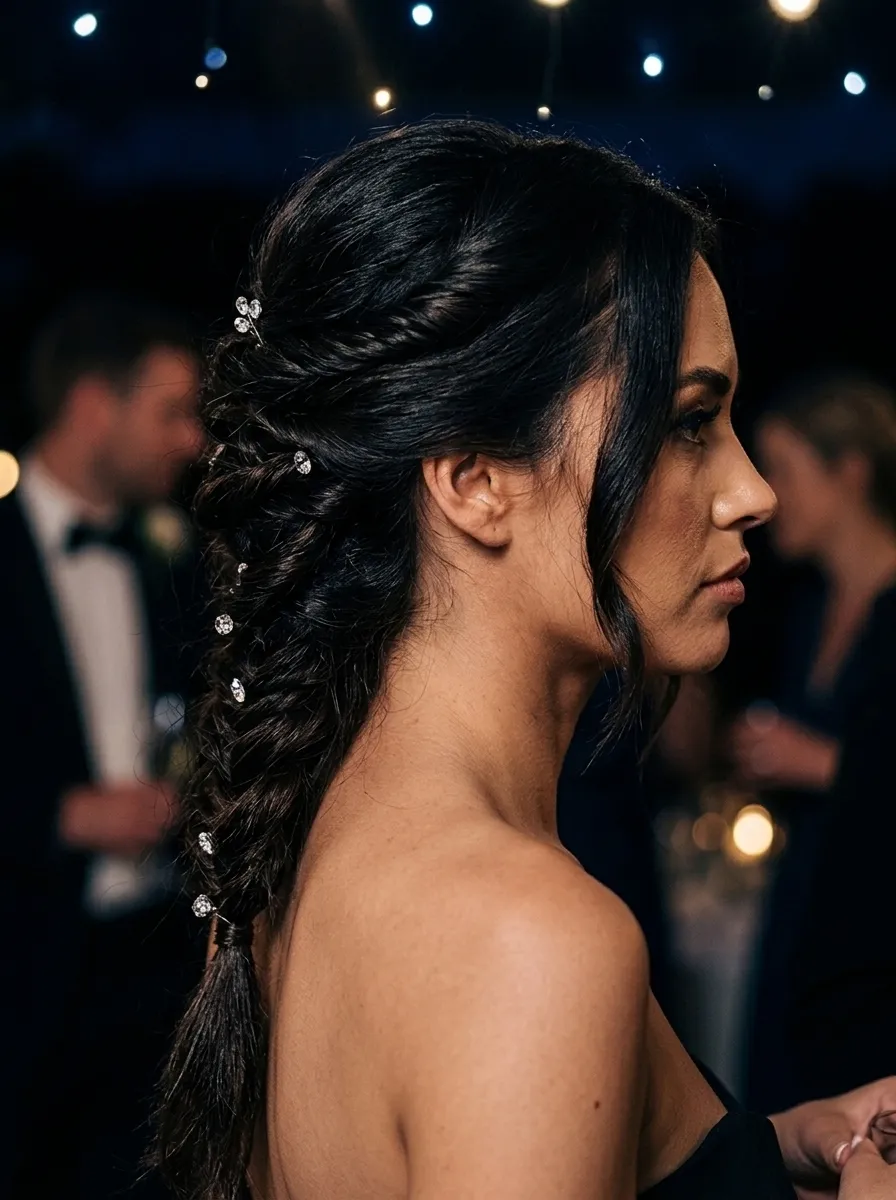
9. Boho Fishtail Updo
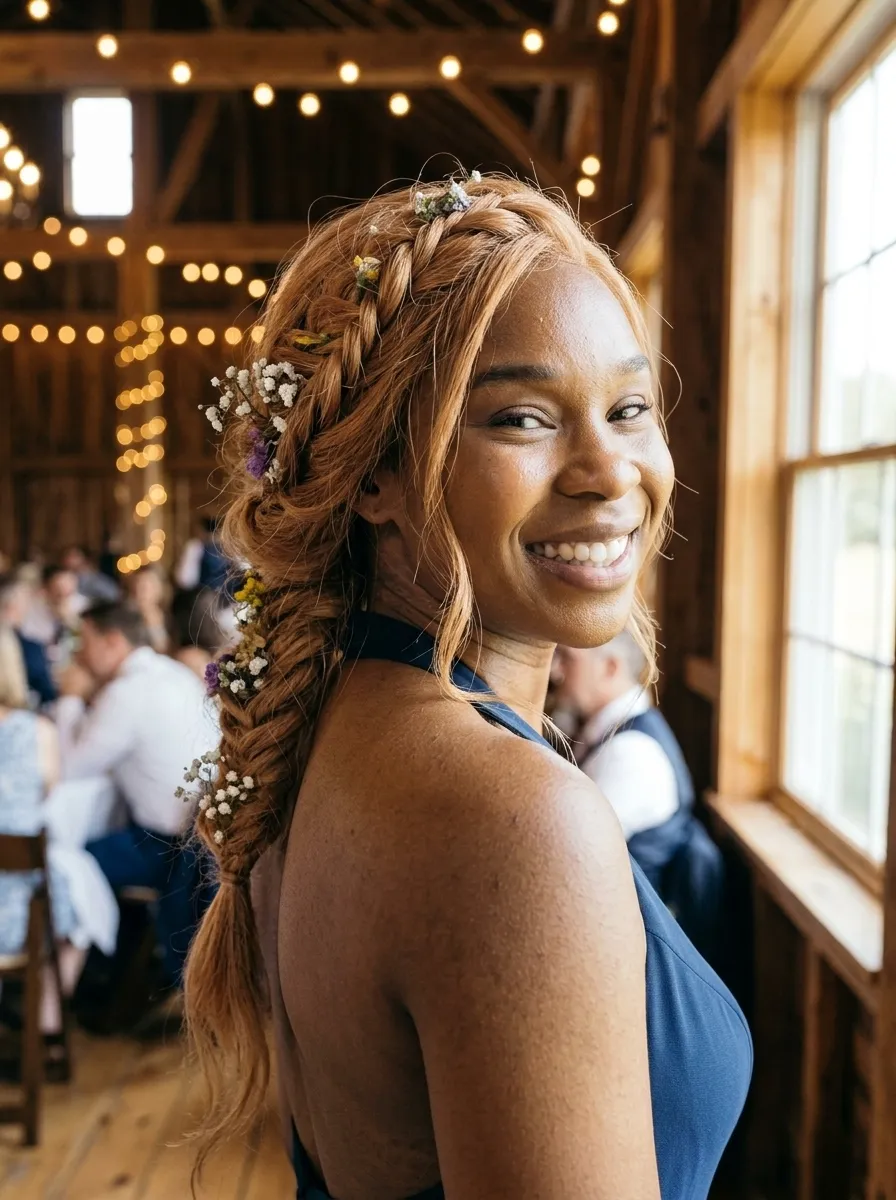
The fishtail braid has a naturally intricate appearance that makes any updo look like it came straight from a professional stylist’s hands.
To create a boho fishtail updo, start by braiding your hair into a loose fishtail braid. Then gather the end of the braid up toward the nape of your neck and pin it into a low bun shape. The braid itself becomes the decorative element of the updo.
DIY Tip: A fishtail braid looks much better when it is slightly loose and imperfect. After braiding, gently tug each section outward to expand the braid and give it that fuller, boho texture.
Tucking small dried or fresh flowers into the braid sections is one of the easiest ways to make this style look bridal or festival-ready. Baby’s breath is inexpensive and widely available at florists and grocery stores.
This style suits oval, heart, and round face shapes. The low placement of the gathered braid at the back keeps the look grounded and balanced.
Because the fishtail braid has so much visual detail, you do not need much else. Simple stud earrings or a thin headband are all you need to complete the look.
10. Knotted Low Ponytail
This is the kind of updo that looks deliberately styled and effortlessly chic at the same time. Instead of a plain ponytail, you split the tail into two sections and tie them into a knot before securing the ends.
The result is a sleek, architectural shape at the nape of the neck that looks like it required far more effort than it actually did. This style works best with straight or slightly wavy hair.
DIY Tip: After tying the knot, pull each side gently outward to tighten and shape it. Then secure the ends underneath with bobby pins so the knot holds its form. A light mist of hairspray keeps everything locked in.
Wrapping a thin silk ribbon or pearl-trimmed hair tie around the base where the ponytail begins adds an instant polished finishing touch.
This look is wonderful for rehearsal dinners, evening corporate events, and smart-casual celebrations. It pairs especially well with minimalist or structured outfits.
Because the style is so clean, your makeup and earrings get a lot of attention. Bold lip color or architectural earrings become the natural focal point when the hair is this streamlined.
11. Twisted Rope Braid Updo
A rope braid is made by twisting two strands together in opposite directions so they coil around each other. The result is a textured, rope-like effect that looks detailed and intentional.
To create this updo, divide your hair into two sections and twist each one in the same direction. Then twist both sections around each other in the opposite direction to form the rope. Wrap the finished rope around into a bun and pin.
DIY Tip: The key to a good rope braid is keeping consistent tension as you twist. Loose twisting creates a fluffy look while tight twisting gives a defined, sculptural result. Both are beautiful in their own way.
This style holds up beautifully throughout long events. The intertwined twists lock together and resist unraveling far better than a standard braid.
Gold bobby pins placed at the bun give this style a decorative edge without requiring any extra accessories. Mix sizes of pins for an intentional, collected look.
Rope braids work on all hair types but look especially stunning on naturally wavy or slightly textured hair, which adds dimension to each twist.
12. Pinned Curls Updo
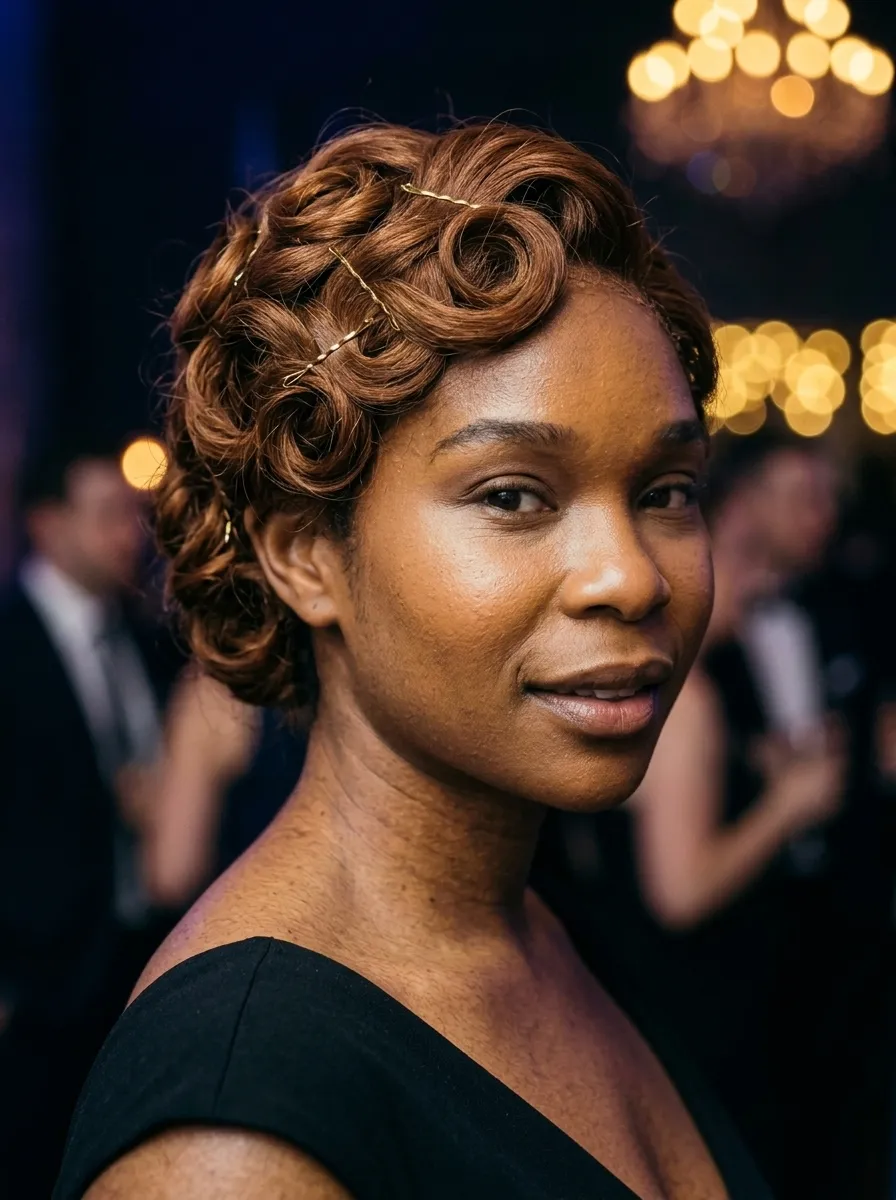
Pinned curls have a classic Hollywood glamour that is hard to beat. This style involves curling sections of your hair and pinning each curl flat against the head to create a sculpted, retro-inspired updo.
It looks incredibly elegant and works beautifully for formal galas, vintage-themed weddings, and award-style dinner events.
DIY Tip: Use a medium or small curling iron for this style. Curl each section and let it cool before unpinning. Then re-pin each curl flat against your head using bobby pins that match your hair color or decorative pins as a design feature.
Work in sections from the nape of the neck upward so each row of curls is supported by the one below it. This keeps the whole style structurally sound.
This look pairs perfectly with bold red lips, cat-eye liner, or vintage-inspired makeup. The combination has a timeless elegance that photographs beautifully.
Lightly misting each section with shine spray before curling adds a gorgeous glossy finish that photographs well under event lighting. Avoid heavy serums which can weigh the curls down before you pin them.
13. Sleek High Bun
A sleek high bun is one of the most powerful and polished looks you can wear to a formal event. It has a clean, architectural quality that says you are put together and confident.
The difference between a casual bun and a sleek high bun is all in the preparation. You need a firm hold gel or edge control product applied to the hairline and a hard-bristle brush to get everything completely smooth before pulling the hair up.
DIY Tip: Pull your hair into the highest ponytail you can and secure it tightly. Then wrap the tail around the base and pin it flat. Use a light amount of gel along any visible edges and smooth with an old toothbrush for precision.
This style works on all hair types but is especially popular for those with naturally thick, coarser hair because the sleekness creates a beautiful contrast with the density of the bun.
Dramatic earrings are the perfect companion for this style. Since the neck and ears are completely exposed, long chandelier earrings or sculptural statement pieces look extraordinary.
One pass of shine spray over the finished bun gives it that expensive, camera-ready finish that makes this look truly special.
14. Braided Updo with Hair Comb
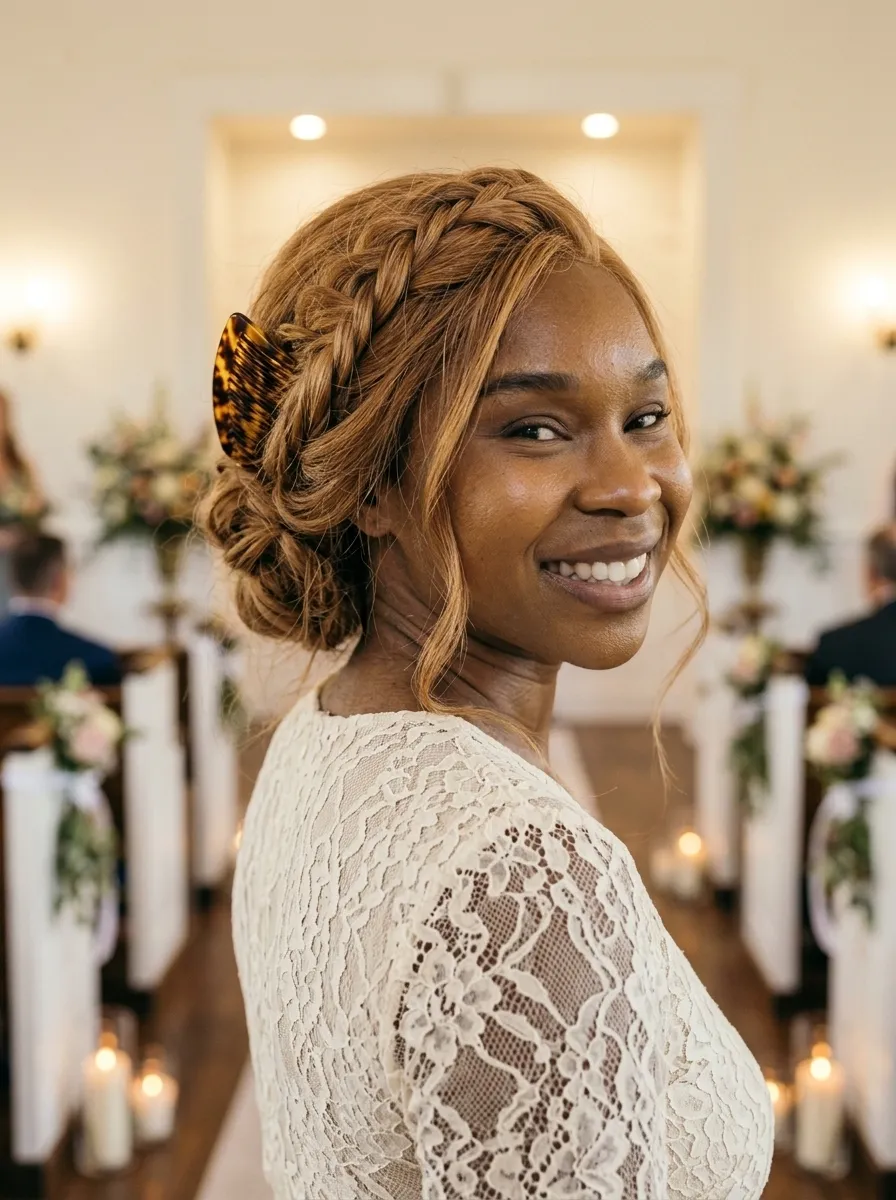
A braided updo paired with a decorative hair comb is one of the most affordable ways to create a bridal or formal look at home. The comb adds an instant heirloom quality to even the simplest braid.
Start by creating a Dutch or French braid from the crown of your head downward, or braid the hair loosely and pin it up at the nape. Then slide a decorative comb into the style near the side or the top.
DIY Tip: Hair combs hold best when inserted at a slight angle against the direction of your hair. Push the comb in, then rotate it slightly so the teeth grip the hair from both directions. This keeps it from sliding out.
Tortoiseshell, rhinestone, pearl, and gold-tone combs are all widely available at beauty supply stores and online for just a few dollars. An inexpensive comb can look stunning when placed intentionally in a well-executed braid.
This style suits all face shapes but is especially flattering for round faces because the braiding at the crown adds vertical height.
Pairing this with a floral dress and simple jewelry creates a complete, cohesive look that feels both polished and personal.
15. Voluminous Updo with Backcombing
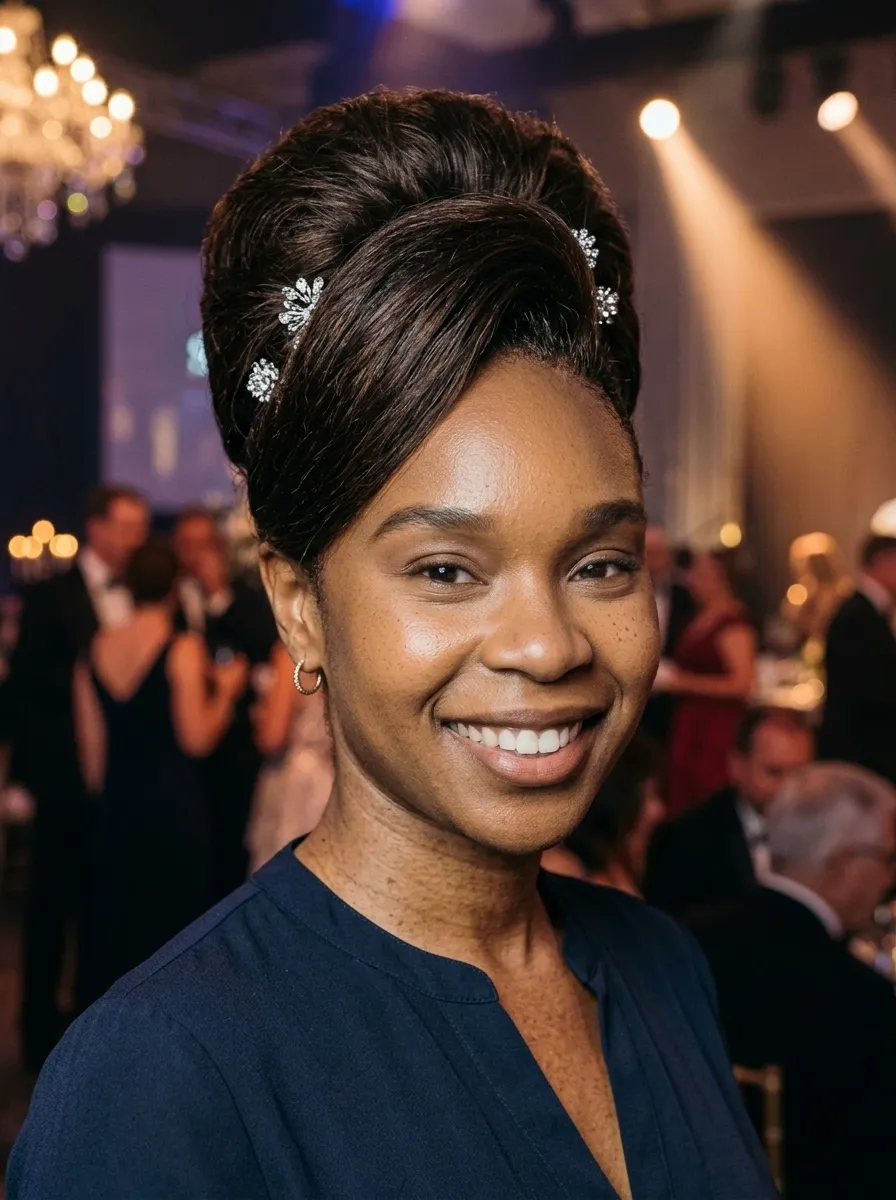
Volume is a statement. When you want your updo to command attention and add presence, backcombing the interior of the style gives you that dramatic, larger-than-life look.
To create this updo, backcomb or tease sections of hair at the crown before smoothing the top layer over the teased base. The teased hair creates internal structure that lifts the style and gives it height without any special tools.
DIY Tip: Use a fine-tooth comb and gently push each section of hair downward toward the scalp in short, quick strokes. Do not overdo it because too much backcombing can cause breakage. A moderate amount is all you need for beautiful volume.
Once you have your desired height, smooth the outer layer of hair gently over the teased section with a brush and pin everything into your chosen updo shape.
This style works beautifully for black-tie galas, prom, and theatrical or dramatic occasion dressing. It pairs well with bold, glamorous makeup and elegant gowns.
Finish with a firm-hold hairspray applied from a distance of at least 10 inches to keep the volume intact throughout the event without leaving the hair feeling stiff or crunchy.
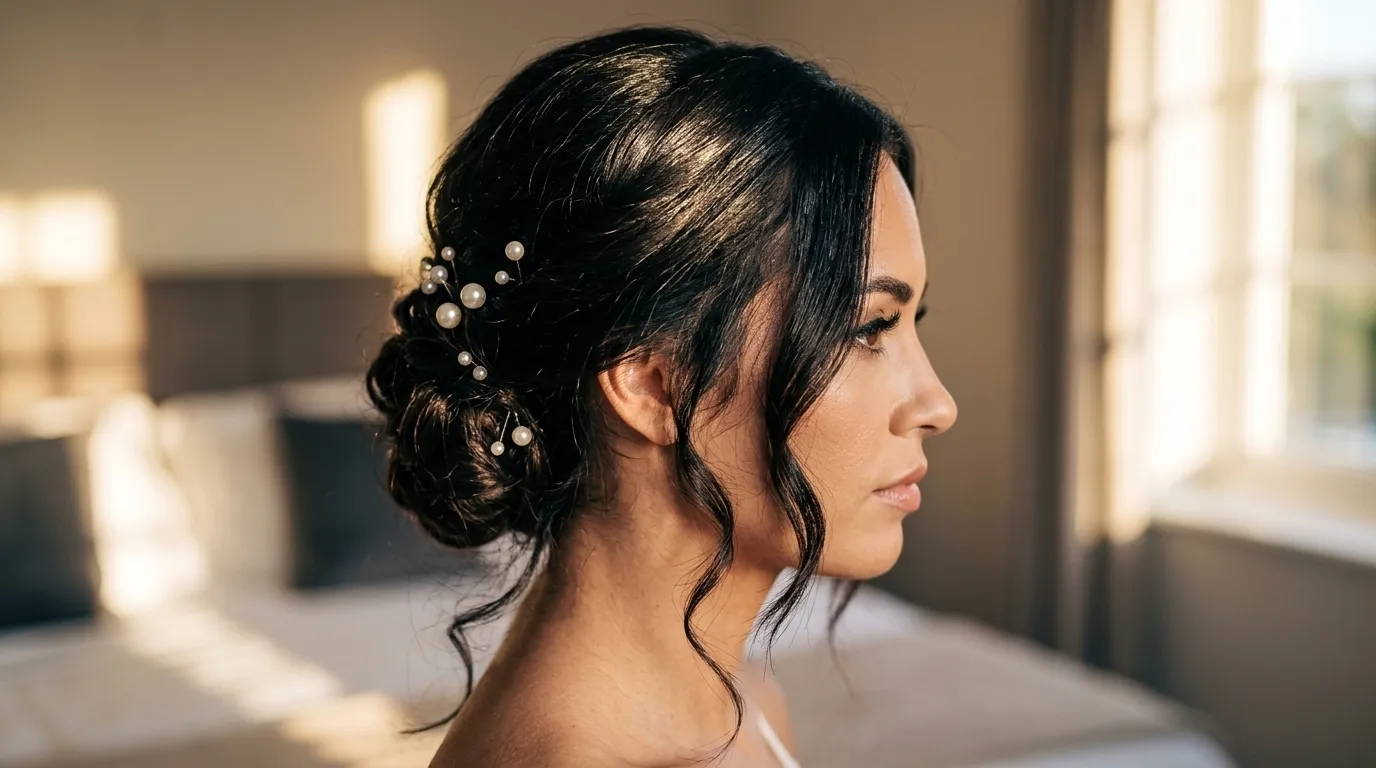
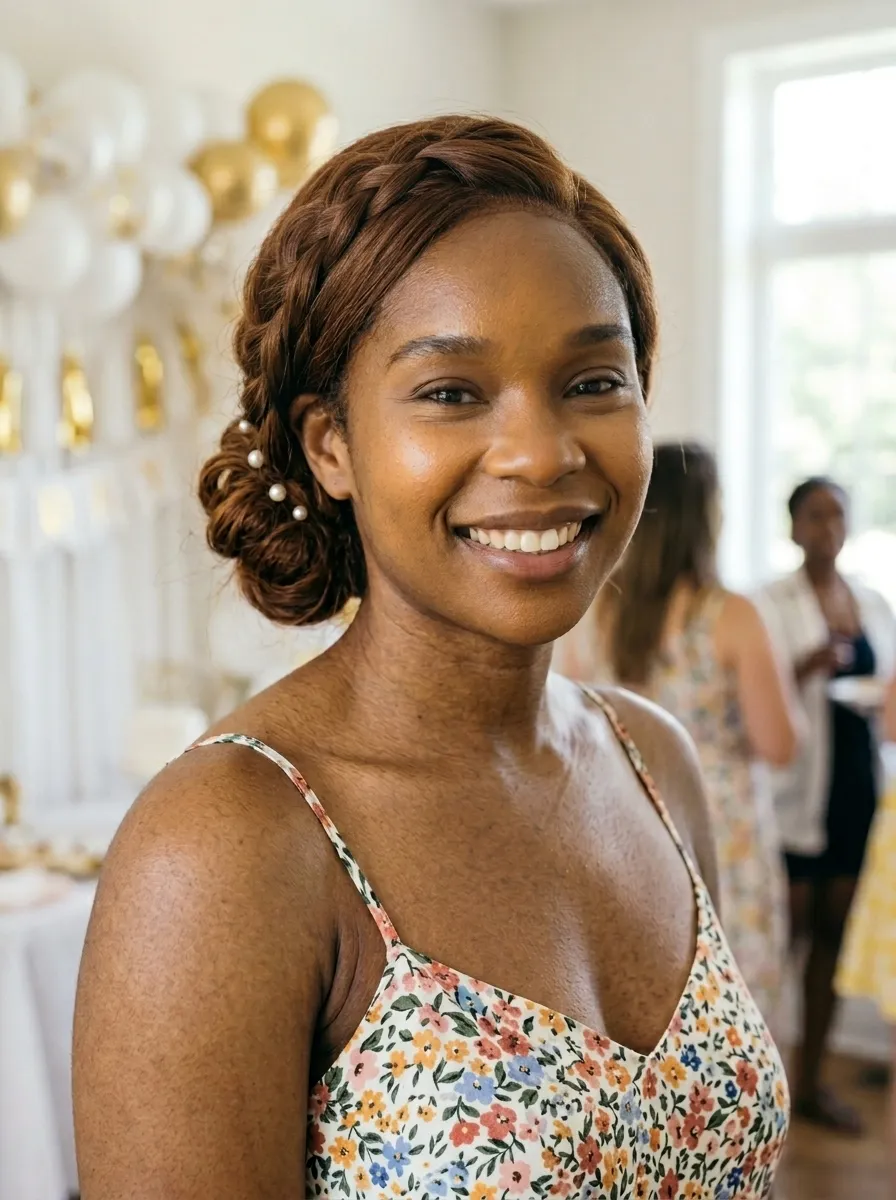
16. Twisted Updo with Pearl Pins
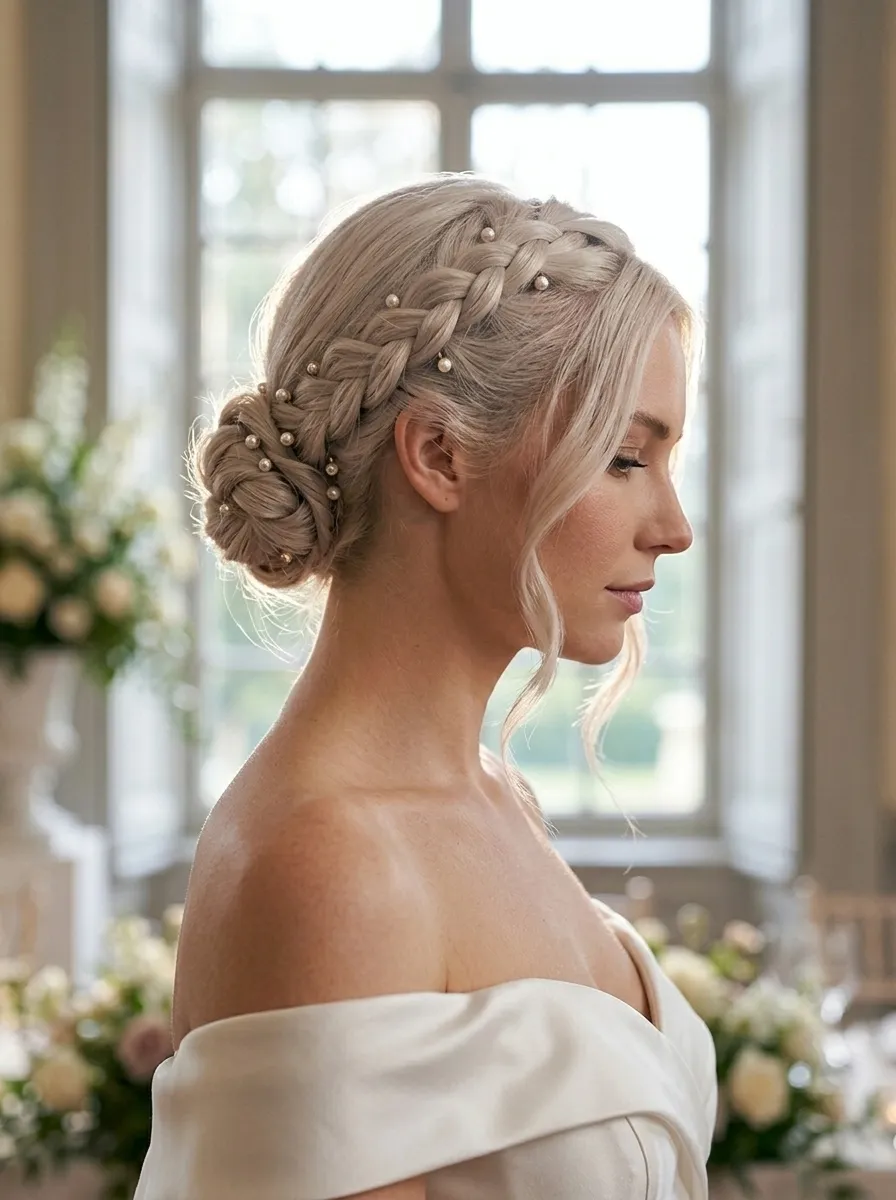
Pearl pins are one of the most beautiful and budget-friendly ways to decorate any updo. They are widely available online and in beauty stores, and just a handful of them scattered through a twisted style can make the whole look feel bridal and refined.
Create a soft, loosely twisted updo by gathering your hair and pinning sections in overlapping twists at the back of your head. Then insert pearl pins randomly but deliberately throughout the style.
DIY Tip: Work with small sections of hair when pinning. Larger sections slide out more easily. Smaller pinned twists create a more secure and detailed base for the pearl pins to sit in.
Mixing pearl pins of slightly different sizes adds visual depth and dimension. Alternate between small pearls and slightly larger ones for a natural, organic look.
This style is especially popular for brides and wedding guests because pearl tones complement almost every wedding color palette. They also photograph beautifully under both natural and artificial lighting.
For a completely cohesive look, wear pearl stud earrings alongside the pearl pins. The repetition of the material throughout the look ties everything together with quiet sophistication.
17. Greek Goddess Updo
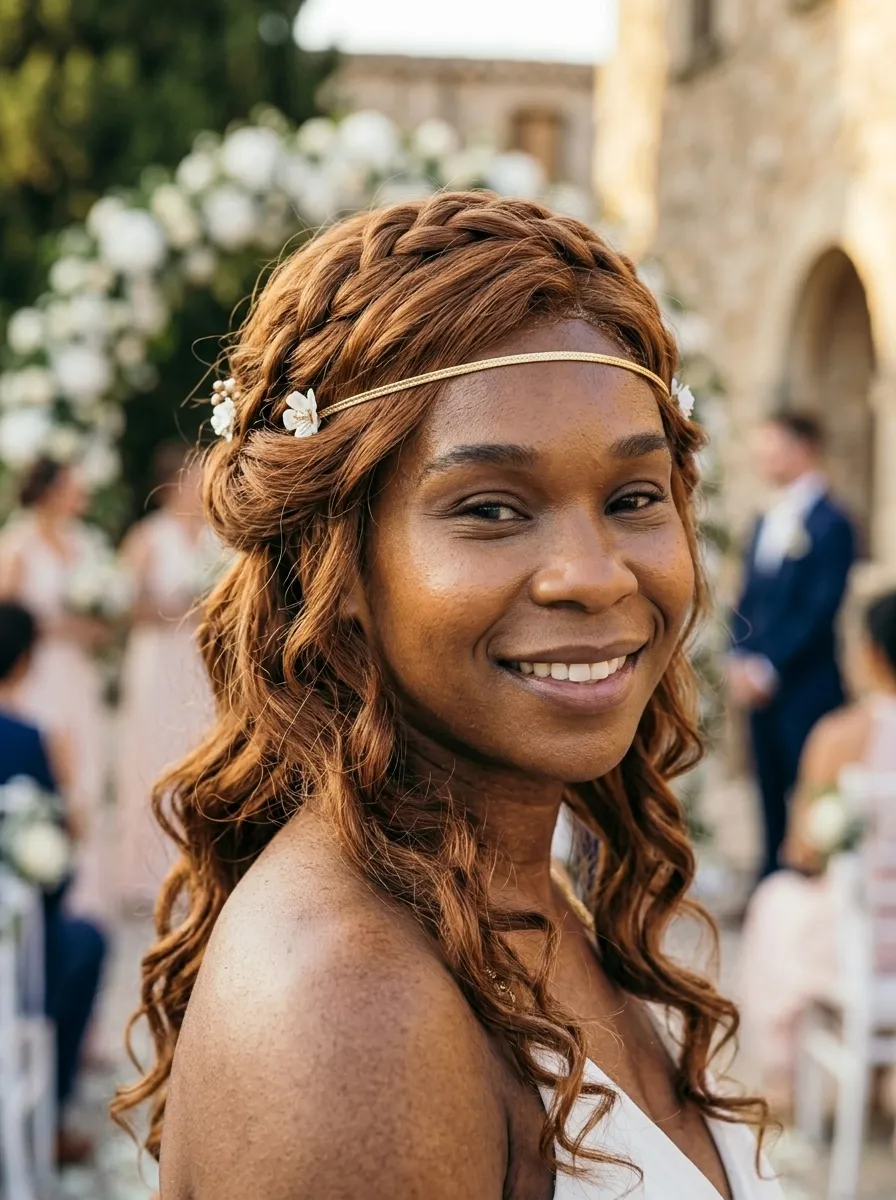
The Greek goddess updo has a romantic, ancient-inspired quality that works beautifully for summer weddings, beach parties, and destination event styling.
The key elements of this look are a thin gold headband or a braided crown at the forehead, loose romantic waves, and soft gathered sections at the back. The combination creates something that feels mythological and effortlessly beautiful.
DIY Tip: A thin gold headband placed across the forehead is the single easiest way to transform any loose hairstyle into a Greek goddess look. Pair it with a low, soft chignon or a half-up style with loose curls for the full effect.
To nail the texture for this style, apply a sea salt spray to your hair before drying. Let it air dry for a natural wave pattern, then loosely braid or twist sections before gathering the back.
This style works on naturally wavy and curly hair with very little effort. The natural texture does most of the heavy lifting.
Large, statement gold hoop earrings or layered gold necklaces complete the aesthetic. Keep makeup glowing and dewy rather than matte and dramatic to match the warm, open feel of this style.
18. Low Twisted Knot with Side Part
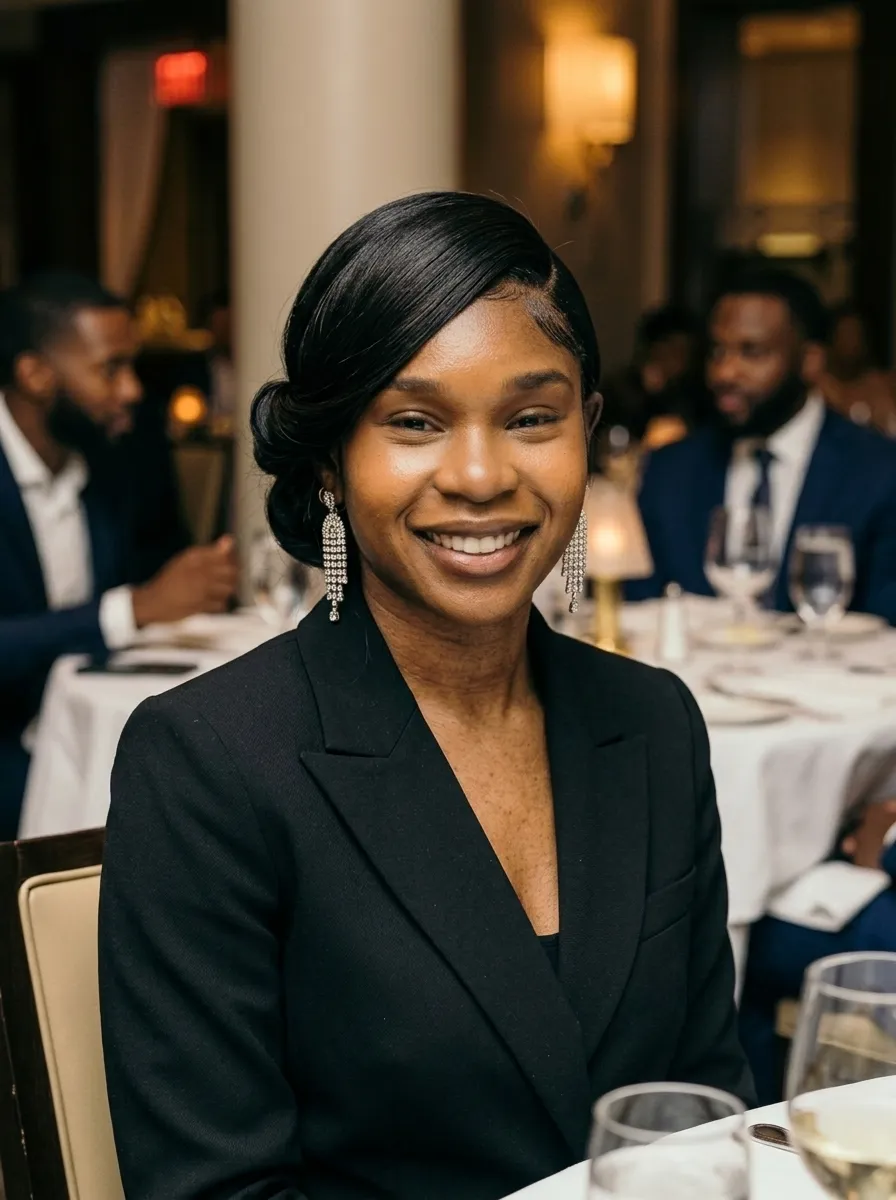
A deep side part transforms even a simple updo into something that feels intentional and modern. When you pair it with a low twisted knot, the result is a look that works equally well in corporate and social settings.
To create this style, part your hair deeply to one side using a comb. Then gather all the hair to the nape of your neck, twist it, and knot it into a low bun. The side part creates a sweeping visual line from one side of the head to the other.
DIY Tip: Use a rattail comb to get a clean, precise part. A blunt, well-defined part makes the whole style look much more deliberate and put-together than a rough part made with your fingers.
Apply a smoothing serum to the parted section before combing it back. This prevents flyaways and keeps the parted side looking sleek and clean throughout the event.
This is a great style for professional galas, award ceremonies, corporate events, and smart evening dinners. It suits a tailored, structured wardrobe particularly well.
A single thin hairpin or a minimalist clip at the point where the hair sweeps from the part into the gathered nape section adds a subtle but refined finishing touch.
19. Flower-Adorned Updo
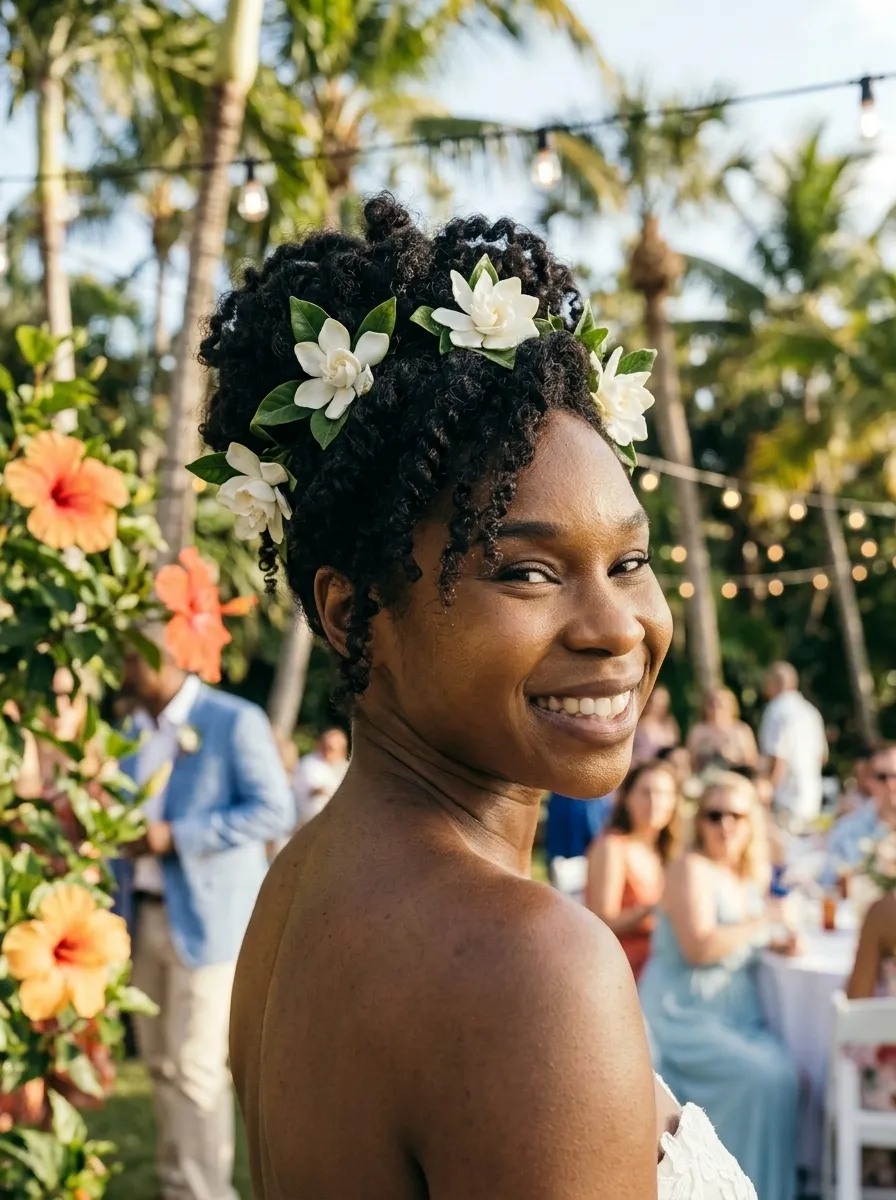
Few things are as beautiful at a special occasion as real flowers worn in the hair. A flower-adorned updo feels celebratory, personal, and undeniably festive.
Almost any updo style works as the base for this look. A low bun, a braided style, or a twisted knot all serve as wonderful foundations for tucking in fresh or faux blooms.
DIY Tip: Ask your florist to prepare a few small individual blooms on short stems with wire wrapped around the stem for easy insertion. Or use faux florals from a craft store and hot glue them to bobby pins the night before the event for a zero-wilt option.
White gardenias, tiny roses, baby’s breath, and small dahlias all work beautifully in updos. The smaller the flower, the easier it is to position and the longer it holds in place without drooping.
Distribute flowers in a pattern rather than clustering them all in one place. A trail of small blooms following the line of a braid or scattered across a bun looks much more intentional.
This style is especially perfect for Hawaiian celebrations, garden parties, destination weddings, and outdoor summer receptions.
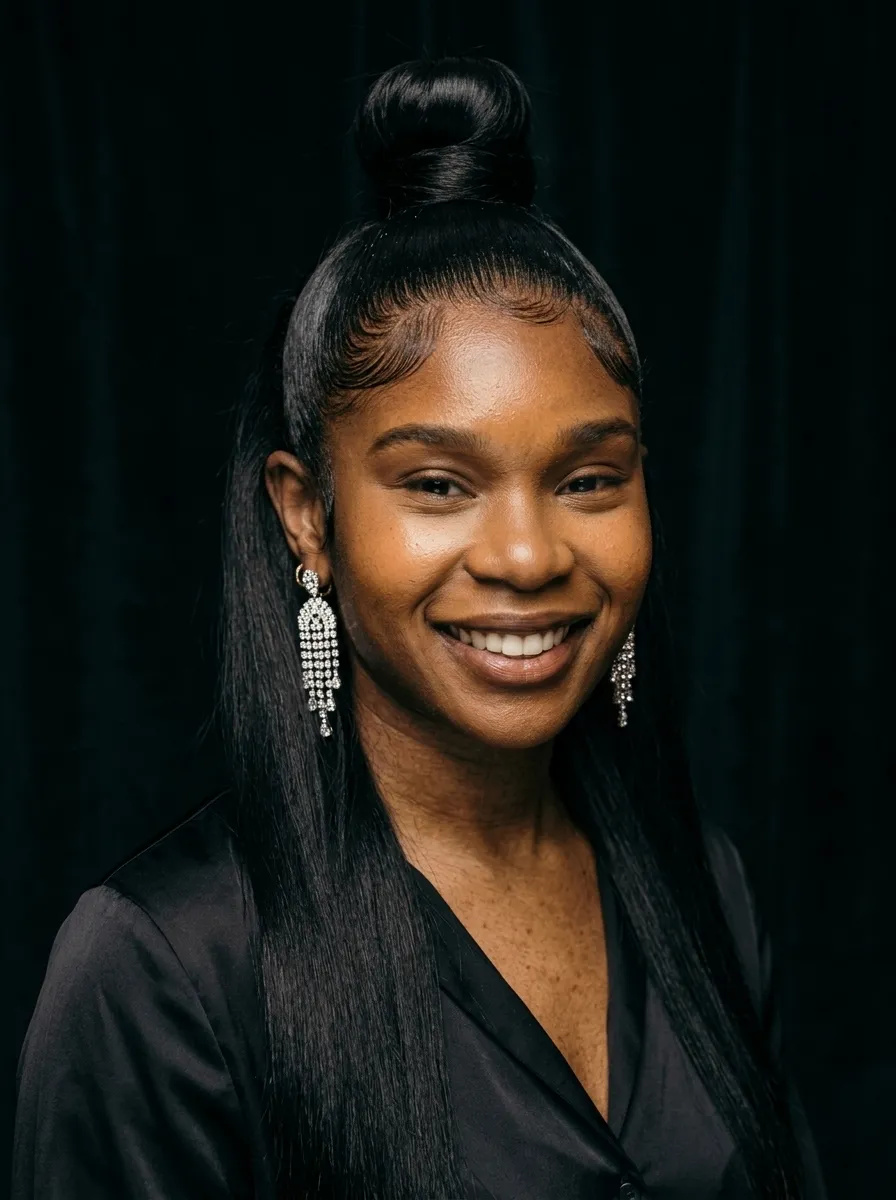
20. Chic Top Knot with Accessories

The top knot gets a sophisticated upgrade when you add a single well-chosen accessory. A ribbon, a metallic clip, or a velvet scrunchie can completely reframe the energy of this casual classic.
Pull your hair into a high ponytail and wrap the tail around the base, tucking or pinning the ends underneath. Then wrap a thin metallic ribbon or scarf around the base of the knot and tie it in a small bow or tuck it underneath.
DIY Tip: Choose an accessory that matches something else in your outfit, whether it is your belt, your bag hardware, or your shoes. This small detail creates a fully coordinated look that appears carefully curated.
A slightly loose top knot looks more modern and less severe than an extremely tight one. Let the bun be a little textured rather than forcing it into a perfectly round shape.
This style suits oval, heart, and oblong face shapes particularly well. Adding a few face-framing pieces from the front of the hairline softens the look if your face shape needs more width.
For evening events, a top knot with a rhinestone or crystal-encrusted clip becomes an instantly glamorous look that requires almost no effort to execute.
21. Low Side Bun with Ribbon
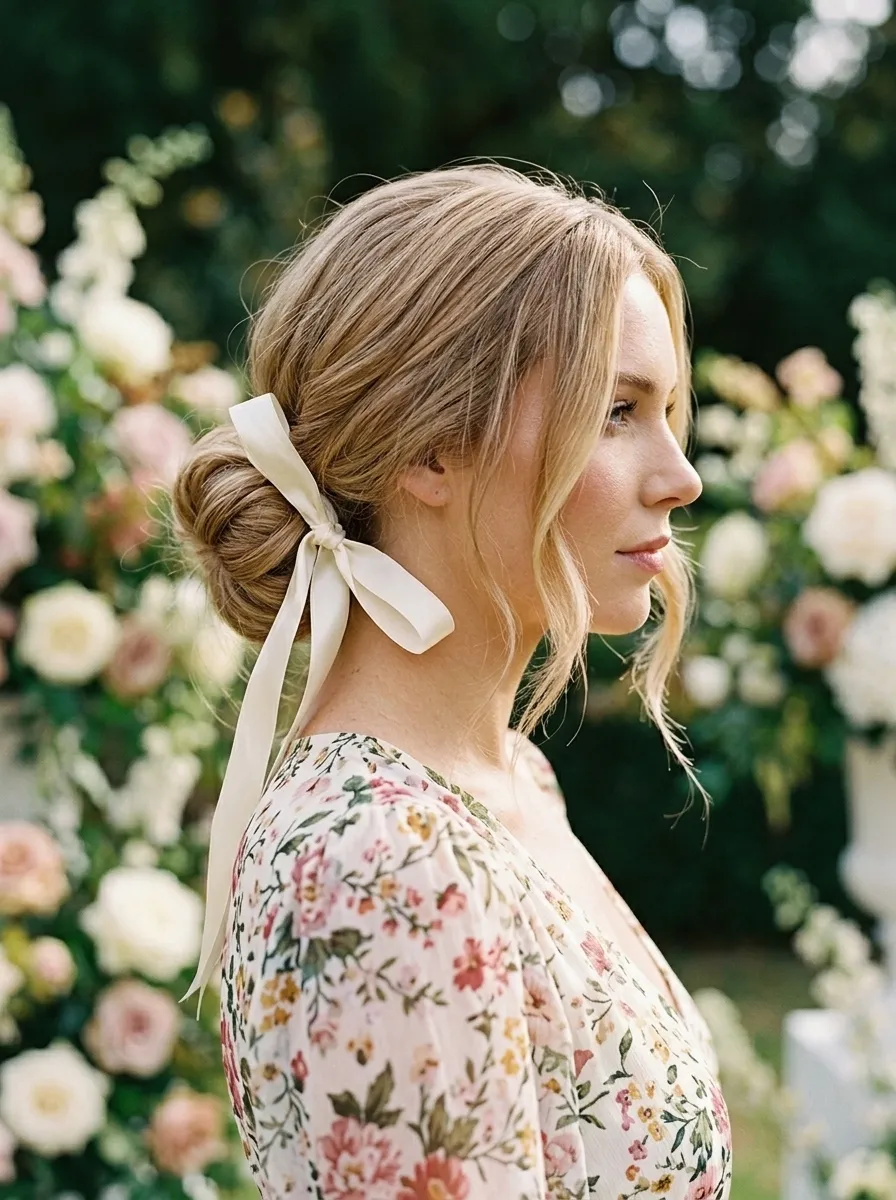
There is something undeniably charming about a ribbon worn in the hair. It adds a soft, feminine quality to any updo and instantly makes the look feel more celebratory and sweet.
To create a low side bun with ribbon, gather your hair to one side at or just below the ear. Twist it into a bun and secure. Then take a length of satin, grosgrain, or velvet ribbon and wrap it around the bun, tying it into a neat bow.
DIY Tip: Cut your ribbon at least 18 inches long so you have enough to wrap and tie comfortably. Stiffer ribbon types like grosgrain hold their bow shape better than very thin or silky ribbons.
This is a beautiful style for bridal showers, engagement parties, garden luncheons, and daytime events. It has a light, joyful quality that feels appropriately celebratory without being overdressed.
Matching the ribbon color to an element of your outfit pulls the whole look together beautifully. A pale blue ribbon with a blue floral print dress creates a seamless, considered aesthetic.
Ribbons can be purchased very cheaply at fabric stores or online. You can buy several colors and match them to different outfits throughout the year.
22. Braided Updo with Jeweled Hairpins
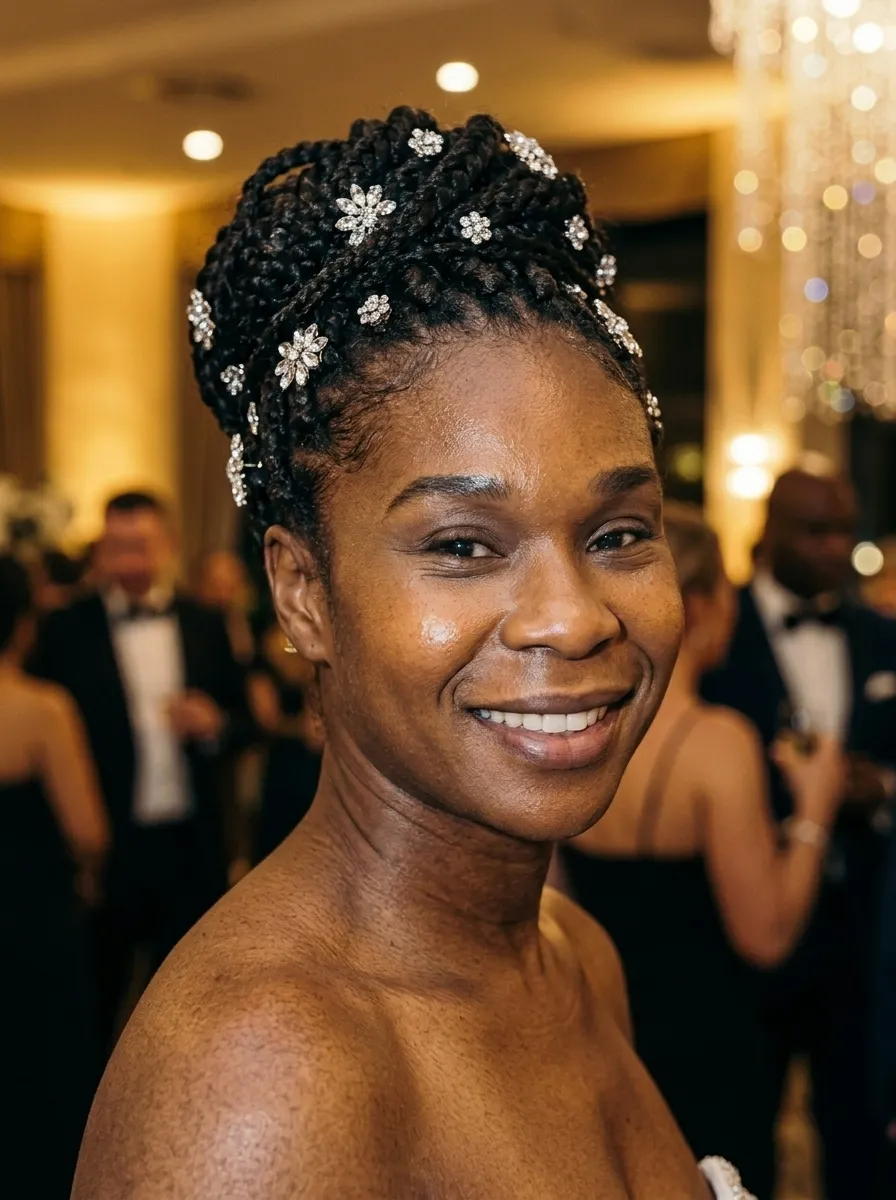
Jeweled hairpins are one of the most cost-effective ways to make an updo look truly formal and event-ready. Even the simplest braid or twisted style becomes something special when you scatter a few crystal or pearl pins throughout.
Start with any braided updo as your base. After securing the style, begin inserting jeweled pins at the crown, along the length of the braid, and around the edges of the bun.
DIY Tip: Insert pins at different angles rather than all going in the same direction. This creates a more dynamic, sparkling effect and also provides better structural hold for the style.
Sets of jeweled hairpins in crystal, rhinestone, pearl, and gold are widely available online at very affordable prices. A single set of 20 to 30 pins can be used across multiple occasions and rearranged differently each time.
Less is more with crystal pins at daytime events. Three to five pins placed intentionally throughout the style is more elegant than covering every inch of the updo.
For evening events, you can go more dramatic. A heavily pinned updo under event lighting creates a stunning shimmer effect that photographs beautifully.
23. Romantic Chignon with Soft Waves
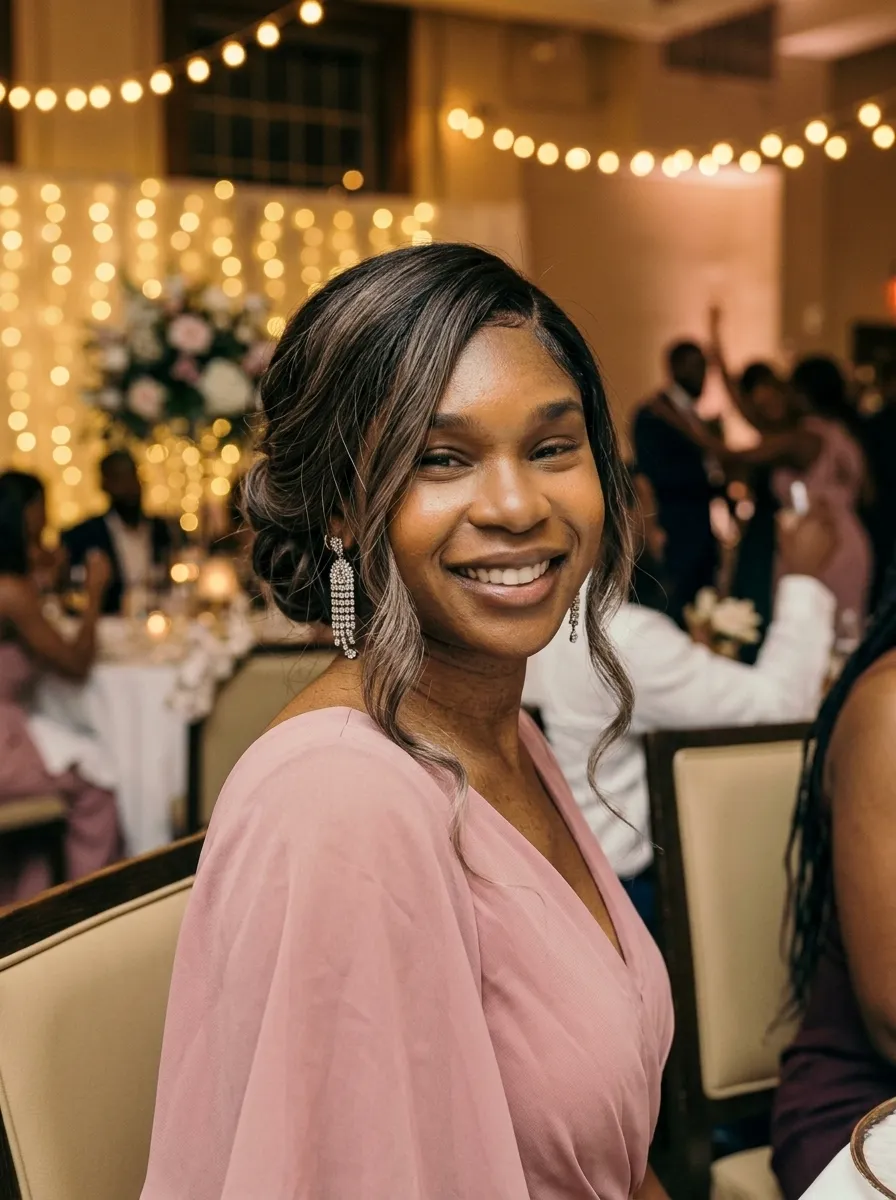
A chignon with soft waves is the answer when you want something that feels simultaneously put-together and warmly romantic. It is not as formal as a sleek updo but far more polished than a completely loose style.
Create soft waves throughout your hair before you begin styling. Then gather most of the hair into a low, loose chignon at the nape of the neck. Leave some of the waved sections loose near the front and on one side so they fall naturally over the shoulder.
DIY Tip: Do not pull every single strand into the chignon. The deliberate release of waved sections on one side is what gives this style its signature romantic quality. Aim for about 70 percent up and 30 percent falling loose.
This look works beautifully on all hair lengths within the long-hair category. It is especially stunning on hair that has some natural body or wave because the texture adds beautiful character to the loose sections.
This style is perfect for bridesmaids, wedding guests, and special dinner dates. It has a warmth and femininity that suits both daytime and evening occasions.
Use a fine-mist hairspray over the finished style to hold everything without stiffness.
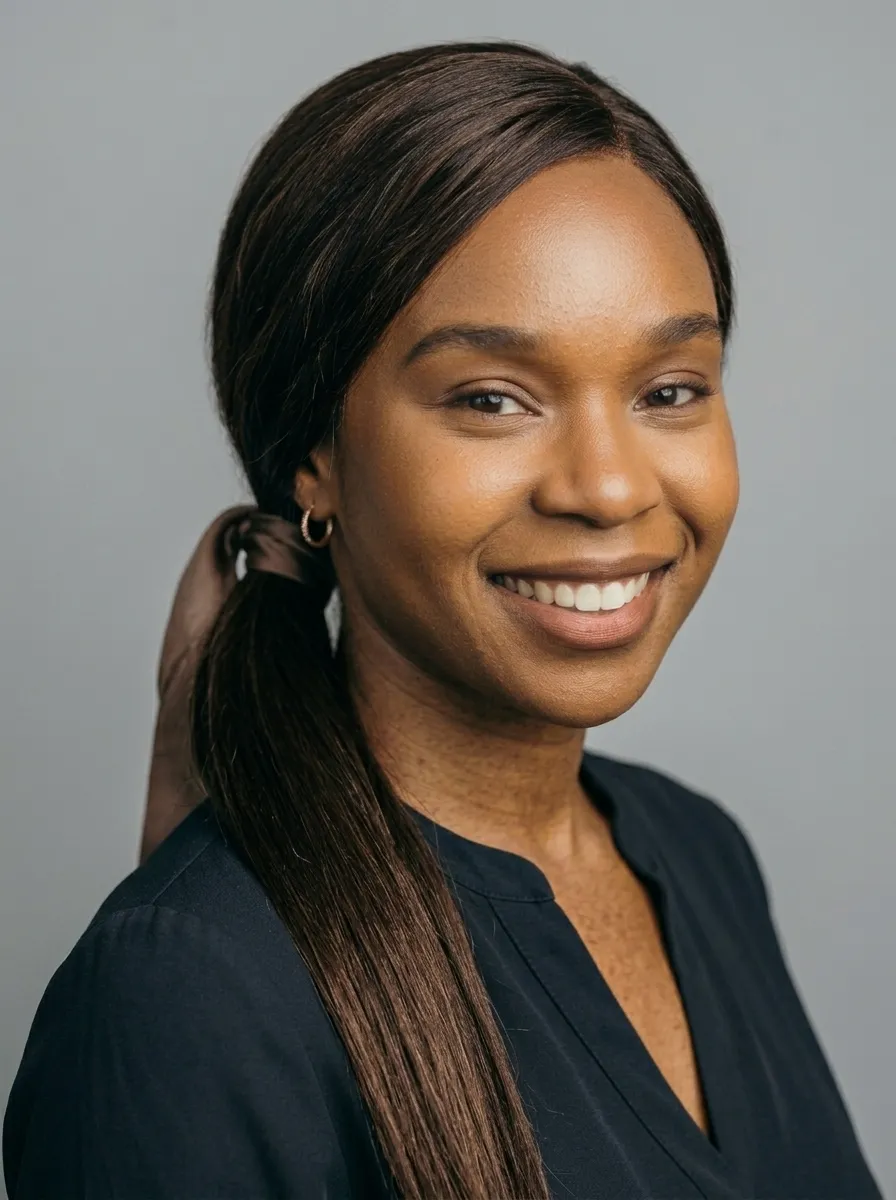
24. Wrap-Around Ponytail Updo
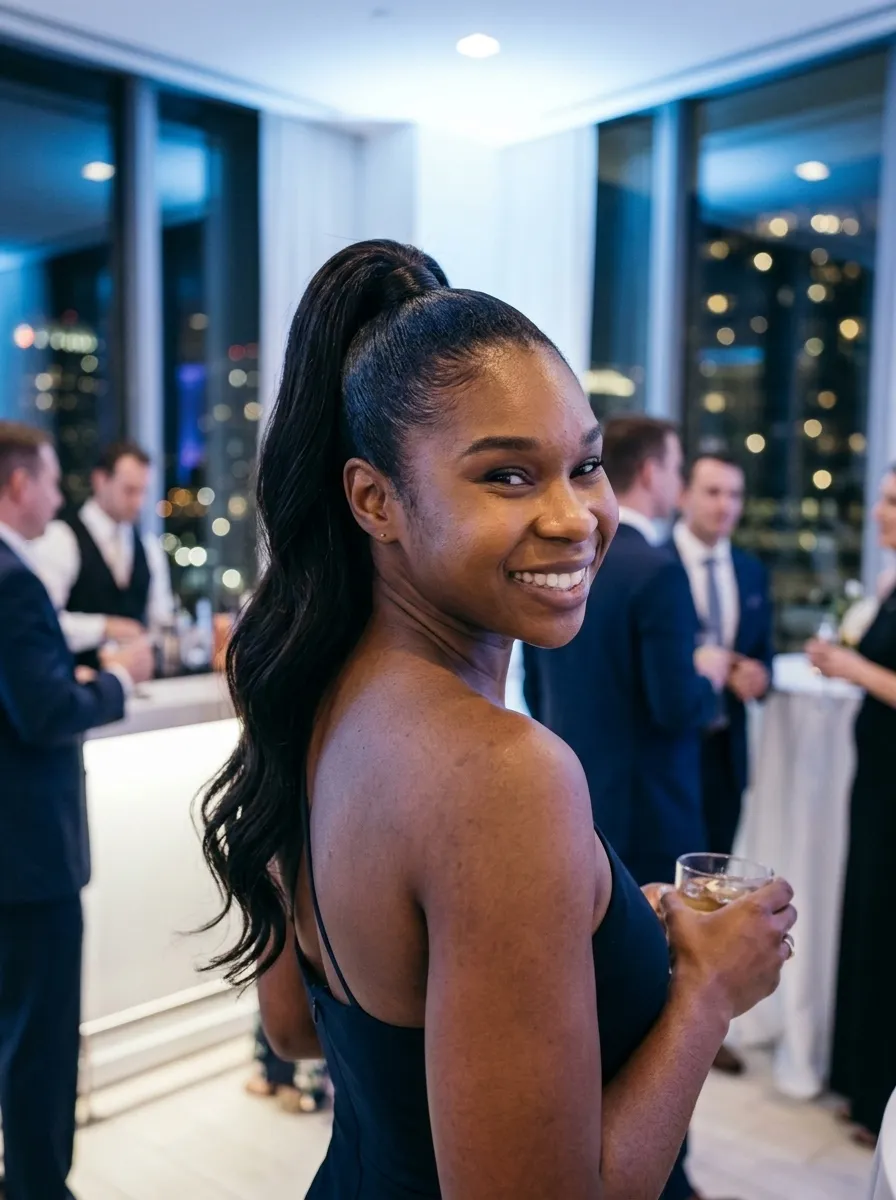
The wrap-around ponytail is a classic trick that turns a simple ponytail into a refined, finished look. By concealing the hair tie with a wrapped strand, you instantly upgrade the entire style.
To do this, create a ponytail at your preferred height. Then take a one-inch section from underneath the ponytail, wrap it tightly around the base of the hair tie several times, and secure the end with a small bobby pin.
DIY Tip: After wrapping, use a fine bobby pin to tuck the end of the wrapped strand securely under the ponytail. If the pin slides, secure it with a tiny dot of hair wax on the tip before inserting.
This style can be worn at many heights from a low nape ponytail for formal events to a high ponytail for more energetic occasions like galas or parties.
Adding a few loose curls to the tail of the ponytail makes it feel much more occasion-appropriate than a straight tail. Just curl the bottom half of the tail with a large-barrel wand for a soft, flowing effect.
This is also a great style for people who want a secure updo-adjacent look but find full updos uncomfortable for long events. The ponytail sits closer to your natural head shape and is easier to wear for extended periods.
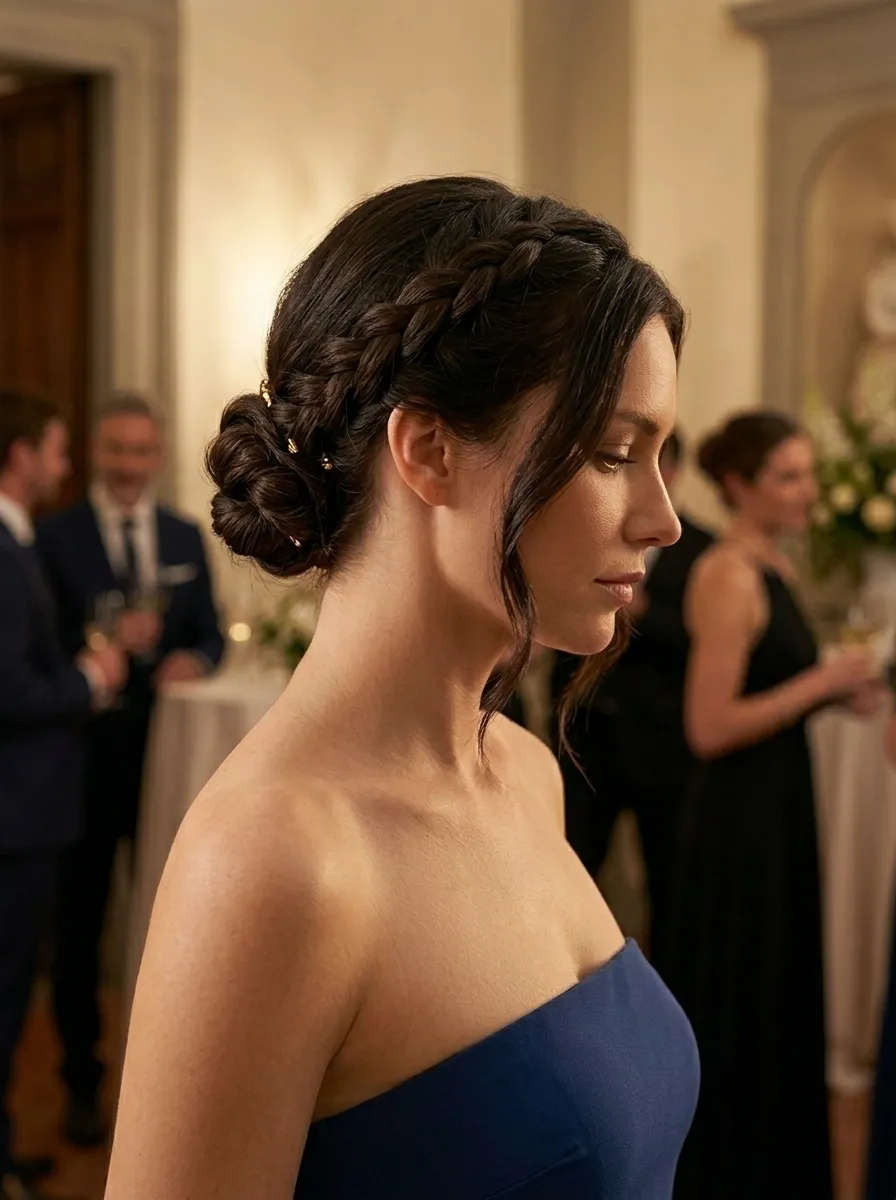
25. Elegant Twisted Crown Updo

A twisted crown updo involves pinning several twisted sections of hair in a circular halo arrangement around the back and top of the head. The result is a style that looks complex and artistic but is achievable step by step.
Begin by sectioning your hair into four or five large sections. Twist each section and wrap it around the back of your head like a crown, pinning each one in place before starting the next.
DIY Tip: Overlap each twisted section slightly over the one before it. This covers the pins of the previous section and creates a seamless, woven appearance across the back of the head.
Work from the bottom upward, starting at the nape and finishing at the crown. This order gives you the most structural support and the cleanest finished look.
Face-framing tendrils left loose near the temples and cheekbones soften the structured look and make it feel more romantic and personal.
This style holds extraordinarily well throughout long events. The multiple pinned sections support each other and resist unraveling, making it a practical choice for weddings and galas where you need the style to last for eight or more hours.
26. Cascading Twisted Updo
This is one of the most striking updos on this list because it plays with the idea of movement within a pinned style. Instead of gathering everything tightly, you allow twisted sections to cascade down the back in a structured, deliberate way.
To create this look, take small sections of hair from the top of your head and twist them. Pin each twisted section at intervals down the back of the head so the twists appear to flow downward rather than being gathered into a static bun.
DIY Tip: Start at the crown and work your way down toward the nape, pinning each section about one inch below the previous one. This creates the cascading effect. Use matching bobby pins to keep the fastening points invisible.
Inserting small crystal or pearl pins along the cascading sections adds a sparkling accent to this movement-based style.
This look is particularly suited to longer events where you want something that stands out visually without requiring a complete protective style. The cascading sections stay in place well because each twist is anchored at multiple points.
It is an excellent choice for evening galas, award ceremonies, black-tie dinners, and dramatic bridal party looks. The deliberate structure and flowing quality make it feel like wearable art.
Conclusion
Long hair gives you an incredible range of styling possibilities for special occasions, and as this list shows, you do not need to spend a fortune or book a professional appointment to look stunning. From a sleek French twist to a flower-adorned braided style, each of these 26 updos can be practiced at home with tools you likely already own. Start with the styles that match your skill level and work your way toward the more detailed ones as your confidence grows. The most important thing is how you feel wearing it. When your hair looks beautiful and stays in place all evening, you are free to be fully present at the event rather than worrying about flyaways and fallen pins. Pick your favorite style from this list, set aside some practice time before the big day, and walk in ready to make an impression.
Leave a Reply