Valentine’s Day calls for a hairstyle that matches the mood: romantic, sweet, and effortlessly put together. Whether you are heading out on a date night, celebrating with friends, or simply want to feel special, your hair can do a lot of the talking. You do not need a salon appointment or expensive tools to pull off something beautiful. Simple techniques, a few bobby pins, and some creativity can take your look from ordinary to genuinely heart-warming. This list covers 21 cute Valentine hairstyle ideas that work for different hair types, lengths, and budgets. Read on and find your perfect match. If you’re also exploring Valentine Braid Hairstyle Ideas, soft braided crowns, romantic side braids, heart-shaped partings, and elegant braided updos can help create a charming, feminine, and celebration-ready look that feels effortlessly beautiful and perfect for the occasion.
1. Classic Half-Up Heart Bun
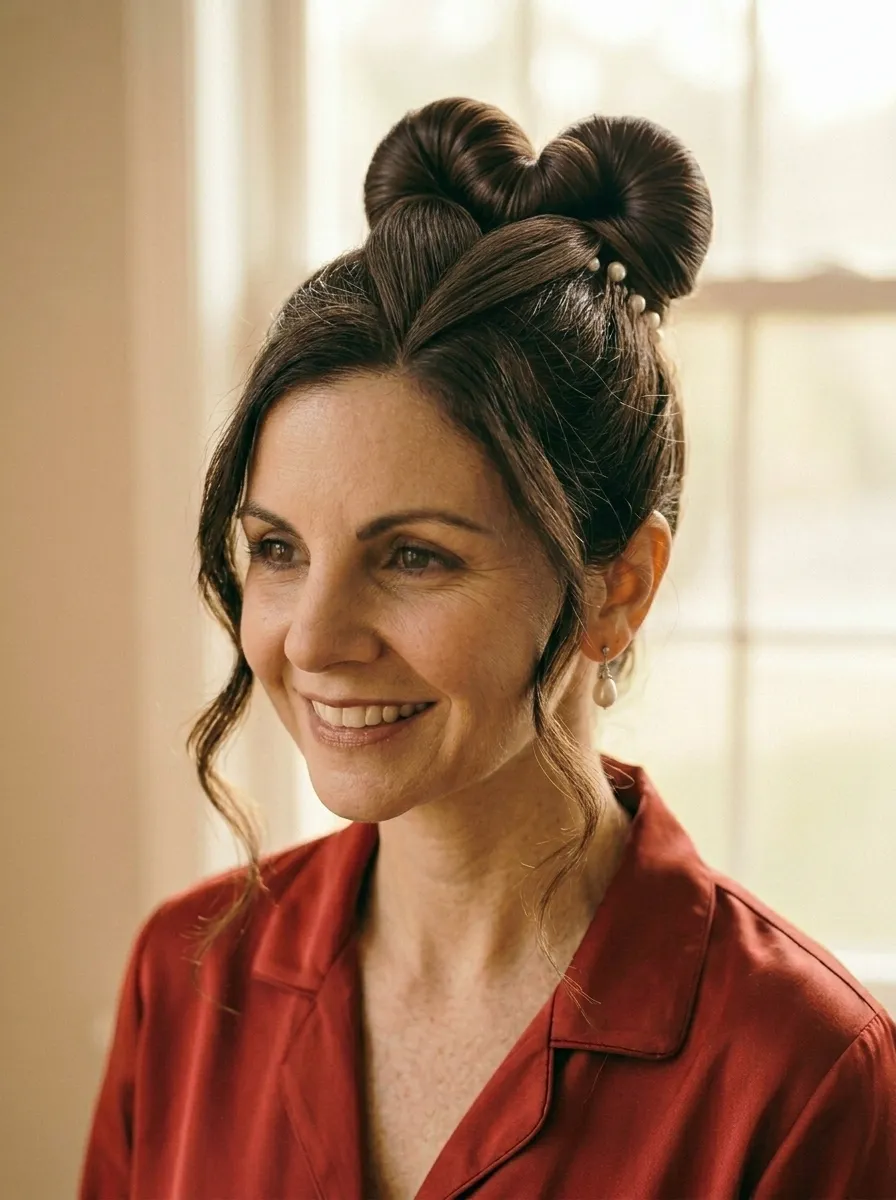
A heart-shaped bun at the crown of your head is one of the most recognizable Valentine looks. It is sweet without being over the top.
Start by pulling hair into a high ponytail. Divide the ponytail into two sections. Fold each section into a loop and pin them together at the top, shaping them into a heart. Tuck the ends underneath and secure with bobby pins.
The whole thing takes about five minutes. You only need a hair tie and a handful of bobby pins.
If your hair is slippery, a light mist of hairspray before shaping helps it hold. Textured or slightly wavy hair actually works better here than pin-straight hair.
This style works well for medium to long hair. Shorter hair can still attempt a mini version at the crown.
Leave a few face-framing pieces loose for a softer effect. Pull on a red or pink outfit and this hairstyle pulls the whole Valentine look together without trying too hard.
2. Loose Romantic Waves
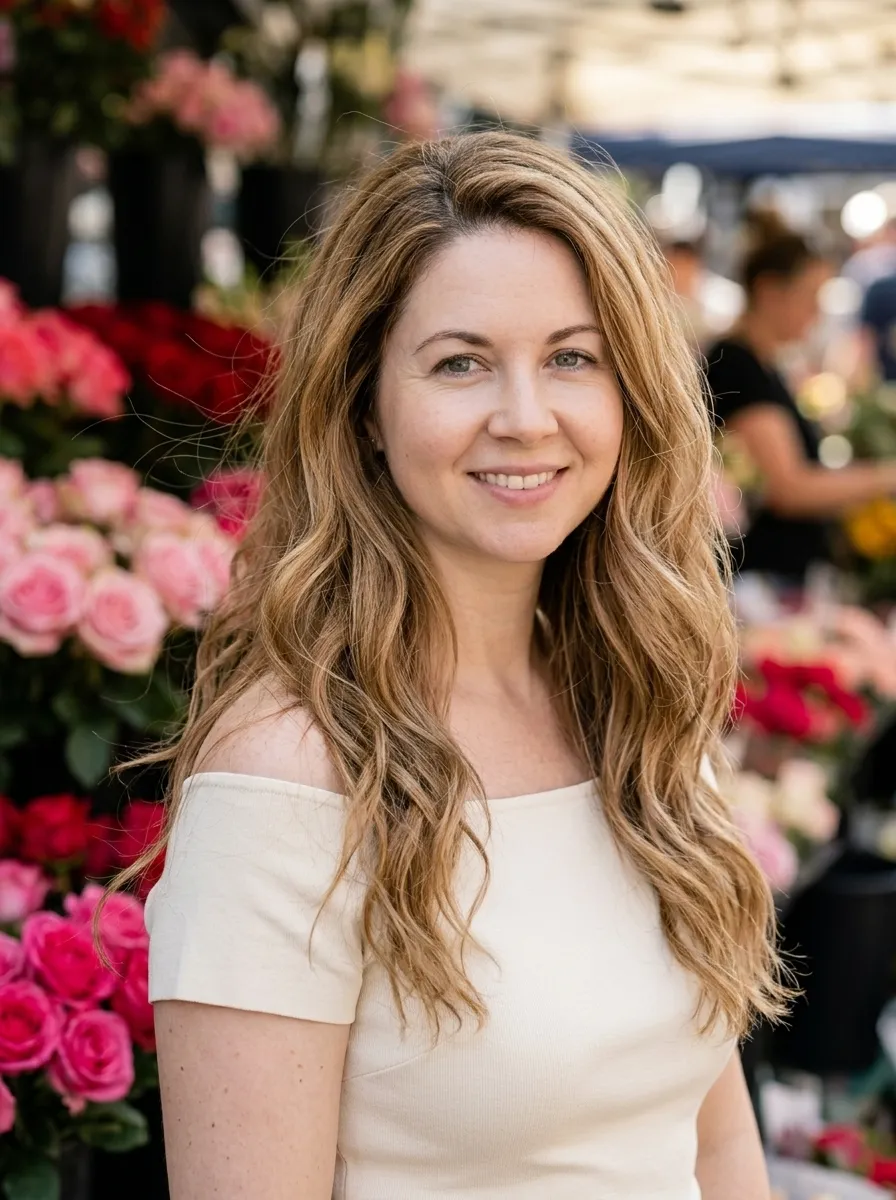
Loose waves are timeless. They look romantic, effortless, and work on almost every hair type.
You do not need a professional curling iron. A standard 1-inch barrel curling wand works perfectly. Wrap sections of hair away from your face and hold for eight to ten seconds. Let each curl cool before brushing through with your fingers.
Finger-combing the curls is the secret. It gives that soft, lived-in wave look instead of stiff ringlets.
No heat tool? No problem. Braid slightly damp hair the night before Valentine’s Day. Sleep on it. Unbraid in the morning and you have beautiful natural waves with zero effort.
Finish with a lightweight serum or a few drops of argan oil to add shine without grease. Avoid heavy products that flatten the wave.
This style suits every hair length from chin-length bobs to long flowing hair. It pairs beautifully with a romantic dinner outfit or even a casual daytime look. Simple, doable, and genuinely gorgeous.
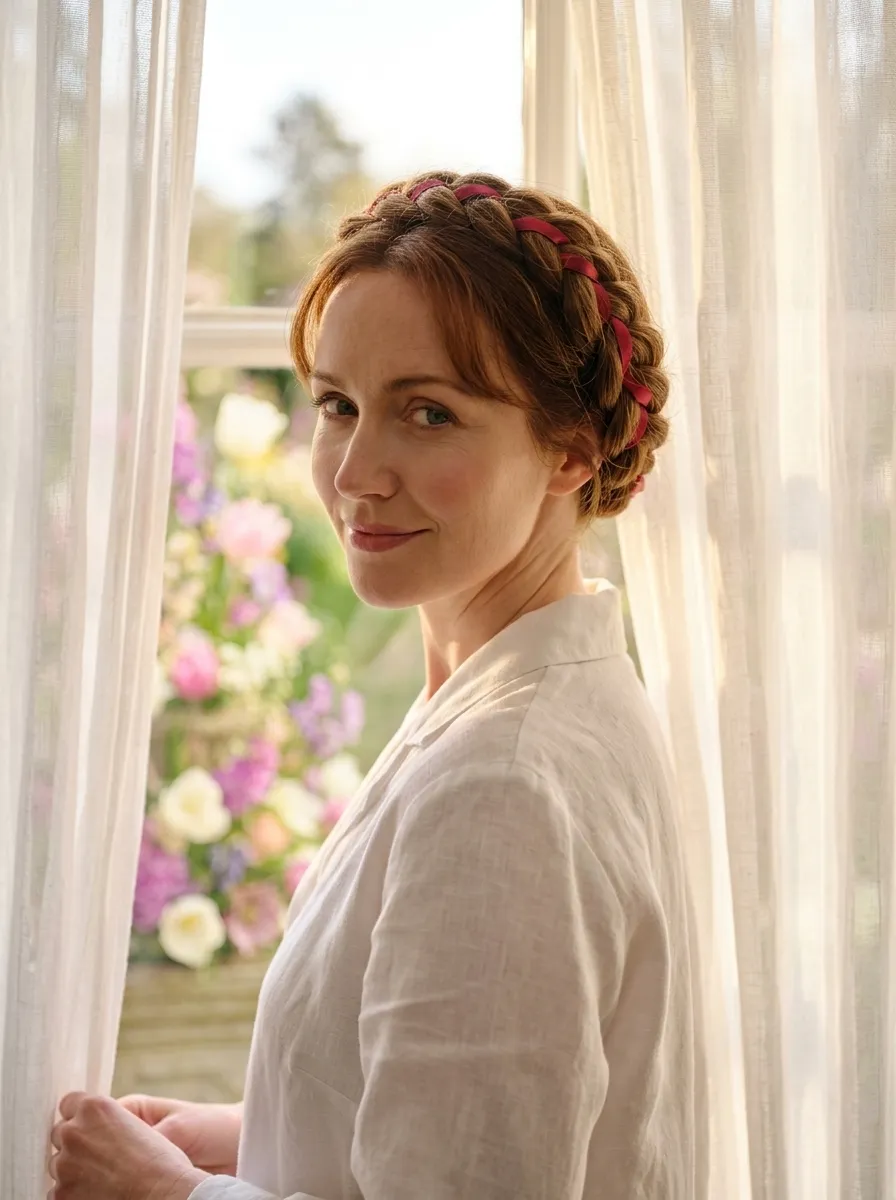
3. Braided Crown with Ribbon
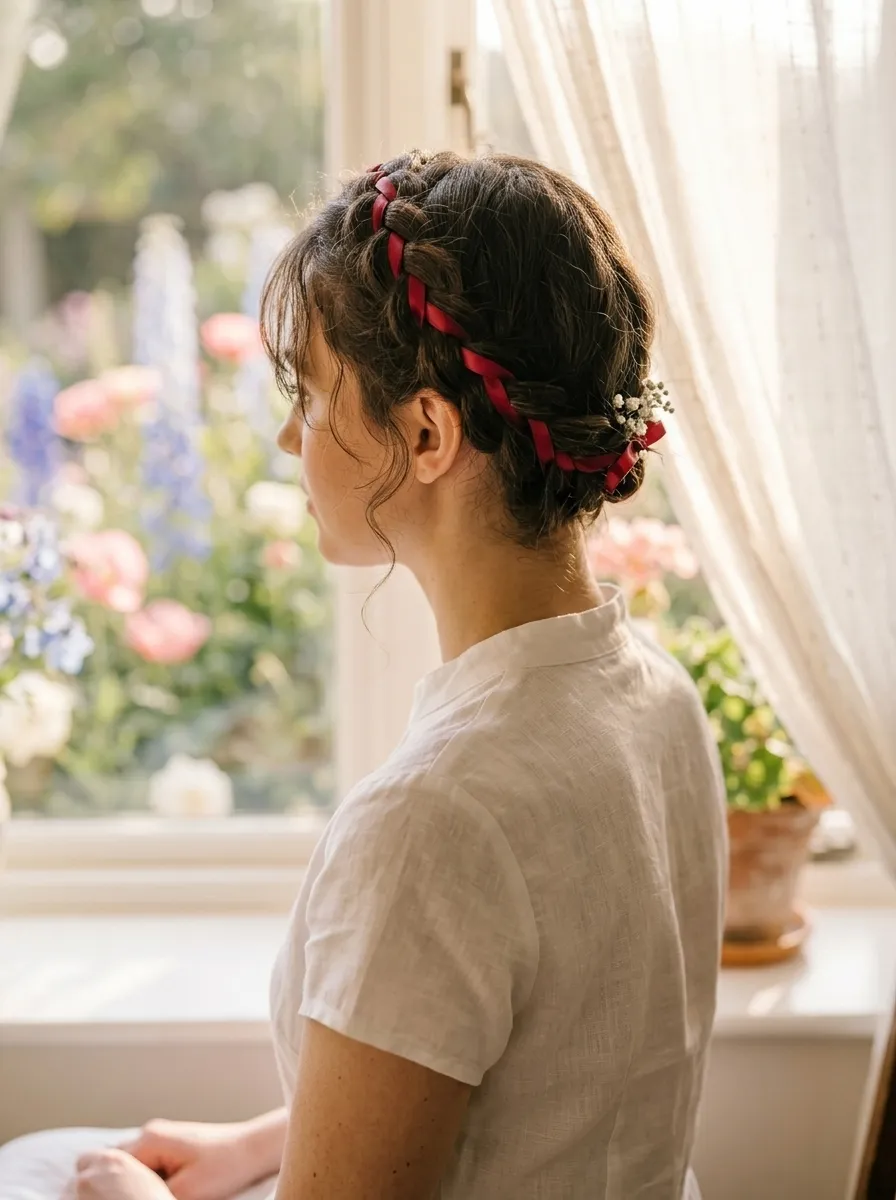
A braided crown looks like you spent hours on it. In reality, it takes about fifteen minutes.
Part your hair down the middle. Braid each side into a simple three-strand braid starting from behind the ear. As you braid, weave a thin red or pink satin ribbon through the strands. Bring each braid over the top of your head and pin them into place with bobby pins.
The ribbon is what makes this feel Valentine-specific. A one-dollar satin ribbon from any craft store does the job beautifully.
Pull on the loops of the braid gently after pinning to make it look fuller and more effortless. Tuck in all the ends neatly.
This hairstyle works best on medium to long hair. Those with shorter hair can create a partial crown by using just one side and sweeping it across the back.
It is also a great protective style. Your hair stays off your face all day, which makes it practical for work or a Valentine’s dinner without needing touch-ups. Add a small floral pin or two near the braid for extra charm.
4. Textured Low Ponytail with a Bow
A low ponytail feels polished but adding a big satin bow turns it into something genuinely romantic.
Pull your hair back into a low ponytail at the nape of your neck. Use a comb to smooth out any bumps at the crown if you want a sleeker look. Secure with a thin hair tie. Then tie a wide satin ribbon over the hair tie into a full bow.
Hair bows are having a real moment right now. A red or dusty rose bow elevates even the simplest hairstyle.
Backcomb the ponytail section lightly for added volume if your hair is fine. For thicker hair, the ponytail naturally holds its own weight.
You can buy large satin bows pre-made at most beauty supply stores for under five dollars. Or use a ribbon and tie your own, which gives you more color options.
This works on all hair types and lengths as long as the hair reaches a short ponytail. Even a chin-length bob can pull off a small low pony with a bow. It takes three minutes and the result looks intentional and put together.
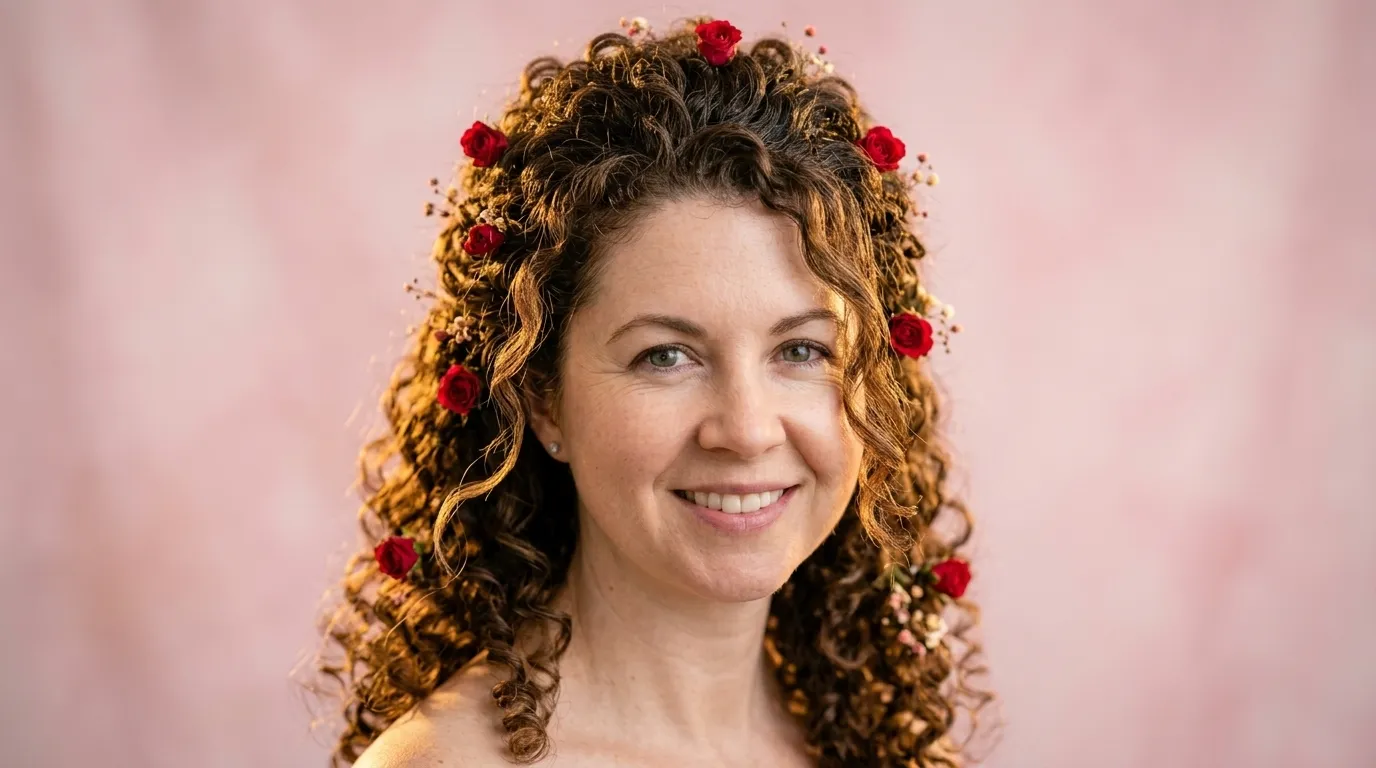
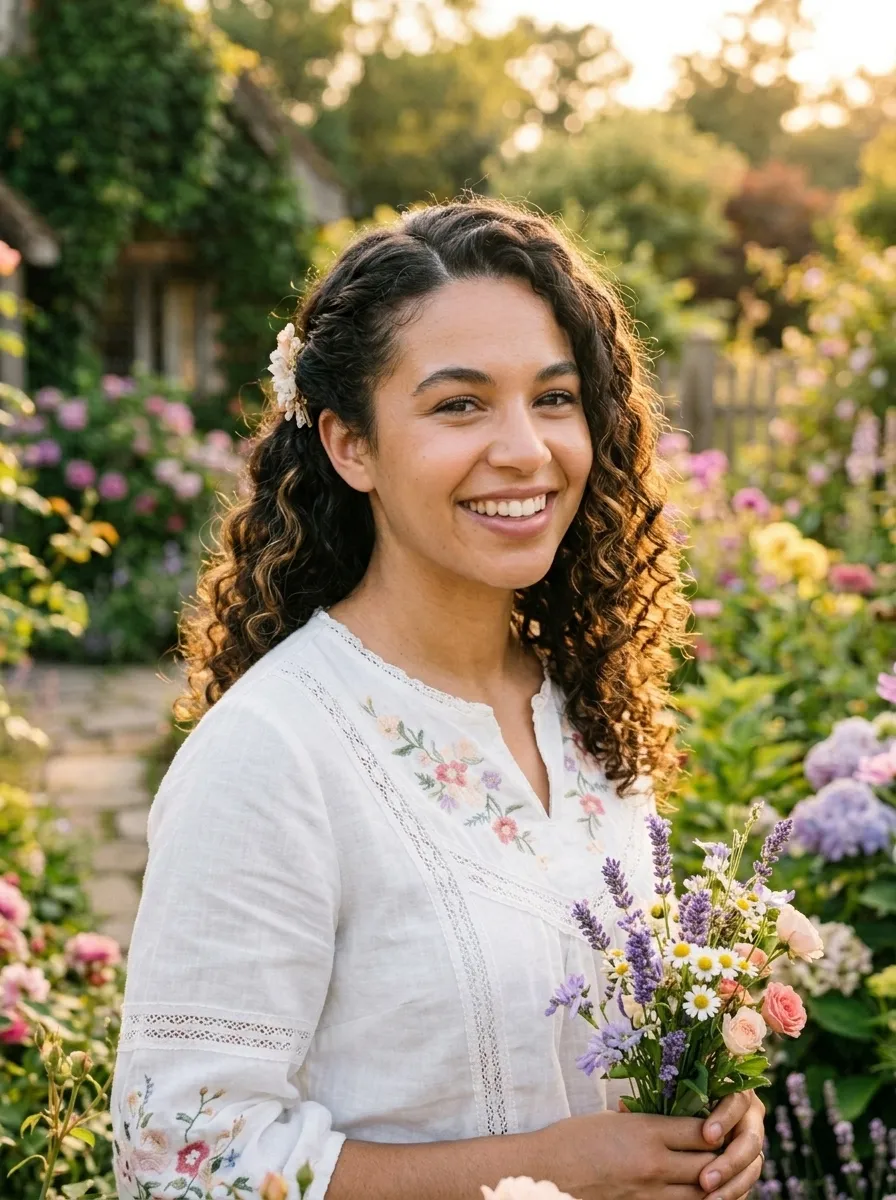
5. Soft Updo with Baby’s Breath

Baby’s breath is cheap, widely available, and looks absolutely dreamy tucked into an updo.
Gather your hair into a loose twisted bun at the back of your head. It does not have to be neat. A slightly messy bun actually photographs better and looks more romantic. Secure with bobby pins.
Grab a small bunch of baby’s breath from a grocery store — it usually costs around two to three dollars. Break off tiny sprigs and push the stems into the bun using bobby pins or just by tucking them between the hair strands.
You do not need floral wire or anything special. The stems are stiff enough to hold on their own.
Scatter the flowers throughout the bun rather than clumping them in one spot. This makes the style look intentional and airy.
This hairstyle reads as romantic without being overdone. It suits weddings, Valentine’s dinners, and even a brunch with friends. The flowers are real, they smell lovely, and they cost next to nothing. Pair with a simple dress and you look effortlessly romantic in under ten minutes.
6. Fishtail Braid with Heart Pins
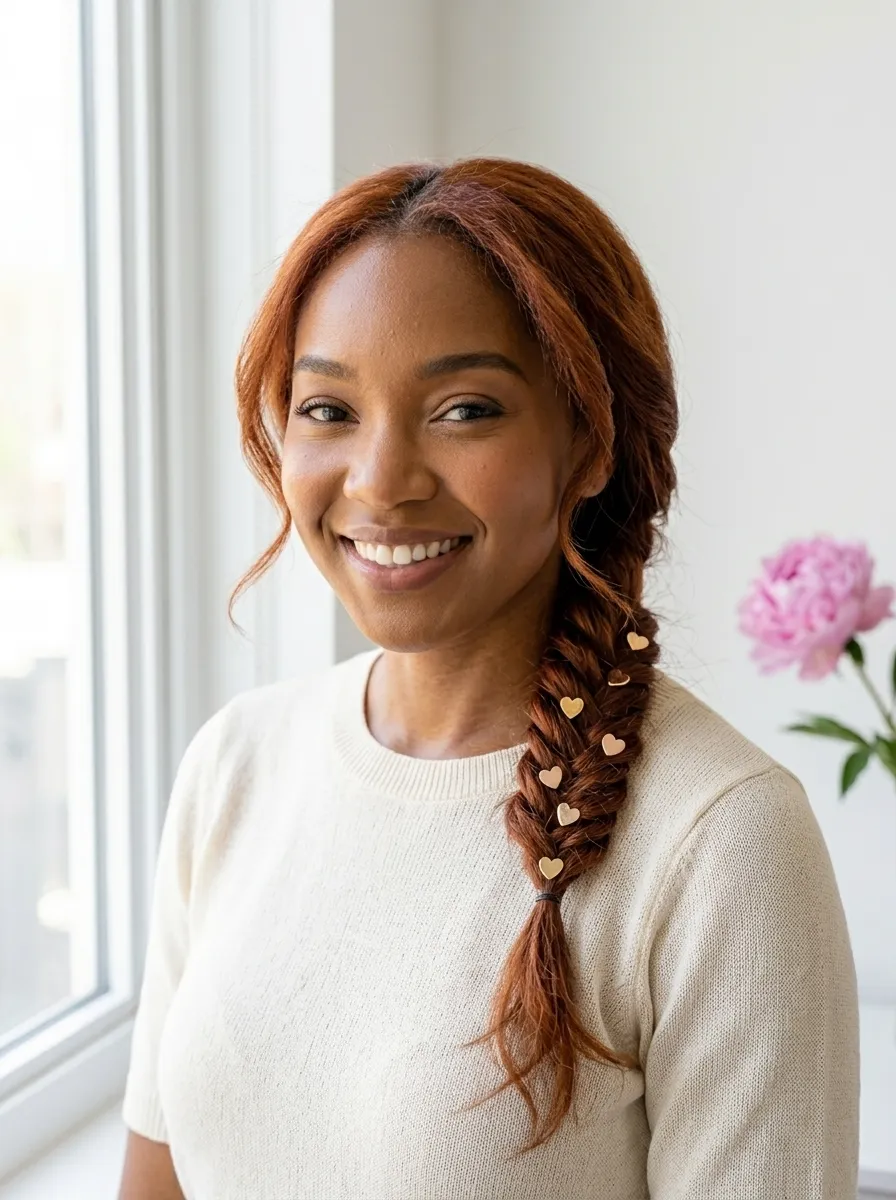
A fishtail braid looks complex but it only uses two sections of hair. Anyone can learn it in one try.
Split hair into two sections. Take a small piece from the outer edge of the left section and cross it over to the right section. Then do the same from the right side to the left. Keep going until you reach the end. Tie off with a clear elastic.
Gently pull on the loops of the braid to make it look fuller and messier. This is called “pancaking” the braid.
Add heart-shaped bobby pins or clips along the braid for the Valentine touch. These are available in packs at most dollar stores or beauty supply shops.
A fishtail braid over one shoulder is a flattering angle for most face shapes. It draws attention to the neckline and collarbone, which is great for date night.
This works best on hair that is past the shoulder. Fine hair should apply a texturizing spray first to give the braid something to grip onto. Thick hair naturally creates a beautiful full fishtail without much effort.
7. Curtain Bangs with Soft Curls
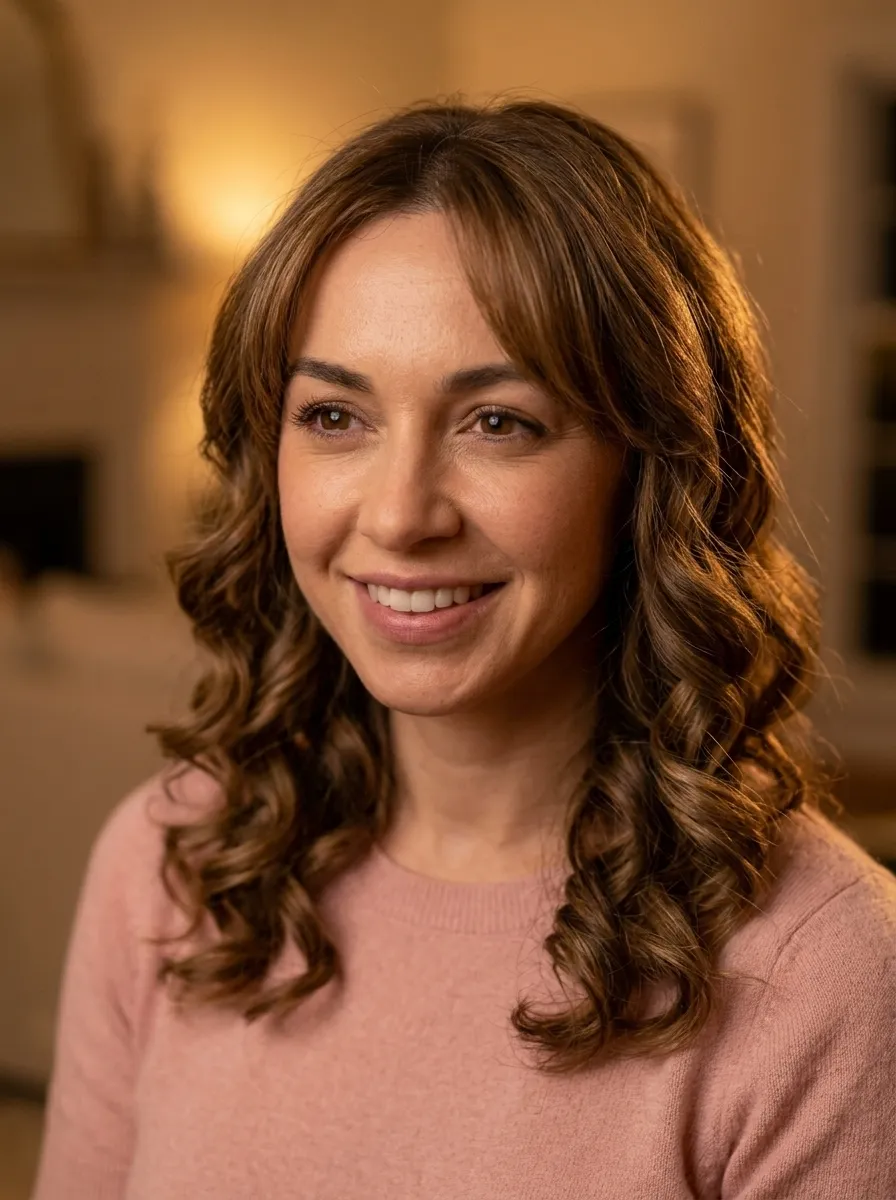
Curtain bangs paired with curls are having a huge moment. The combination looks cinematic and romantic without trying too hard.
If you already have curtain bangs, this is simple. Curl the rest of your hair using a wand or flexi rods. Then use a round brush and blow dryer to sweep the bangs gently to each side with a slight curve.
No bangs? You can fake them. Pull out thin face-framing sections from each side of your hairline and curl them gently inward. Pin the rest of your hair back. These pieces mimic the curtain bang effect instantly.
This fake curtain bang trick works surprisingly well in photos. It frames the face beautifully.
Keep the curls soft and loose rather than tight and structured. The whole style should feel relaxed and intentional at the same time.
Use a light-hold spray to keep the bang pieces in place without stiffness. A single spritz is enough. This look photographs incredibly well and works for a candlelit dinner or a daytime Valentine date.
8. Knotted Half-Up Style
The knotted half-up look is one of the easiest romantic styles you can do with no tools at all.
Take two sections of hair from each side of your head near the temples. Tie them into a simple knot at the back of your crown. Tighten gently. Pin in place with a bobby pin if needed. That is it.
No heat. No tools. No products required. It takes sixty seconds.
For a more polished version, take slightly larger sections and twist each one before knotting. This adds a bit more visual interest and texture.
You can layer this look. Do one knot and then take sections just below the first and do a second knot right underneath. Stacked knots look really intentional and effortless at the same time.
This works on all hair types. Fine hair, thick hair, wavy, straight — they all work. Curly hair creates a particularly beautiful knotted style because the texture adds volume at the knot point.
Pair with loose waves below the knot for a full romantic effect, or let the rest of your hair fall naturally for a more casual Valentine look.
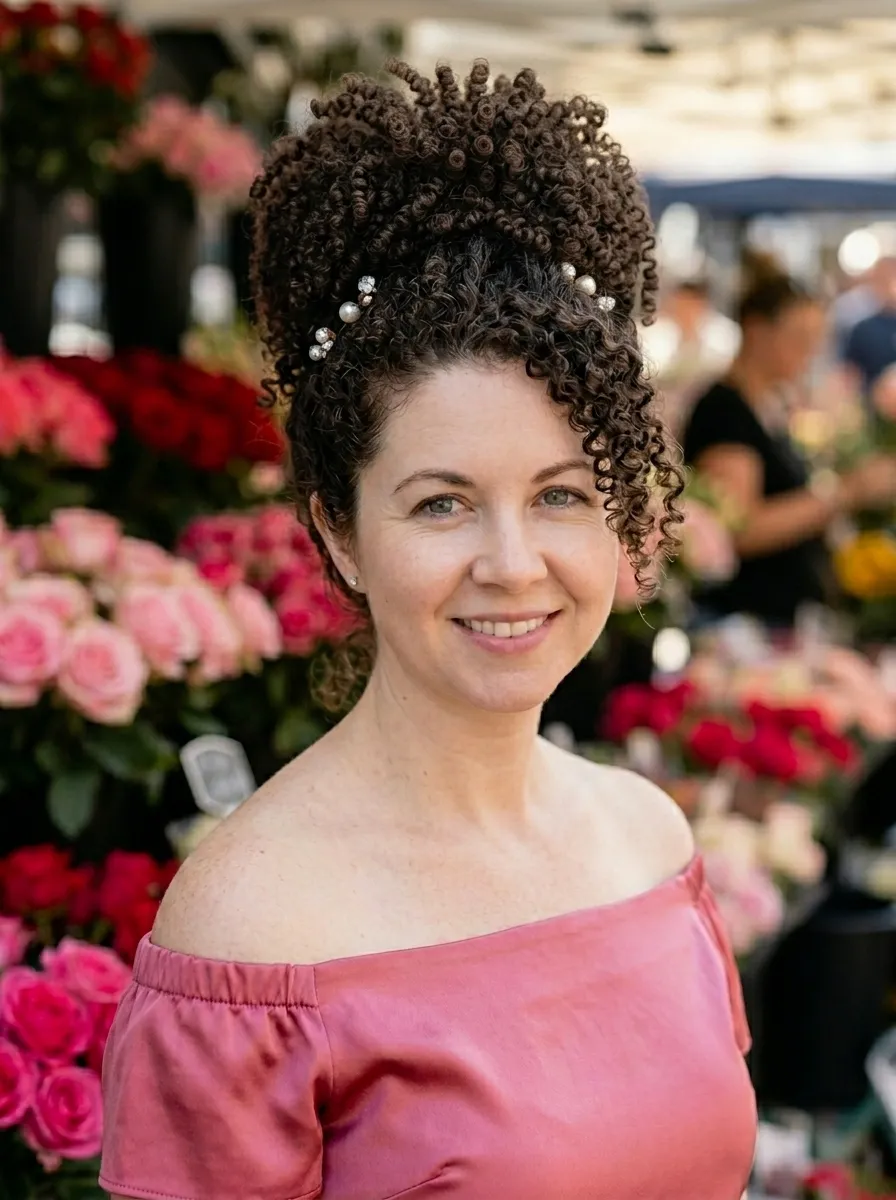
9. Pearl-Embellished Bun
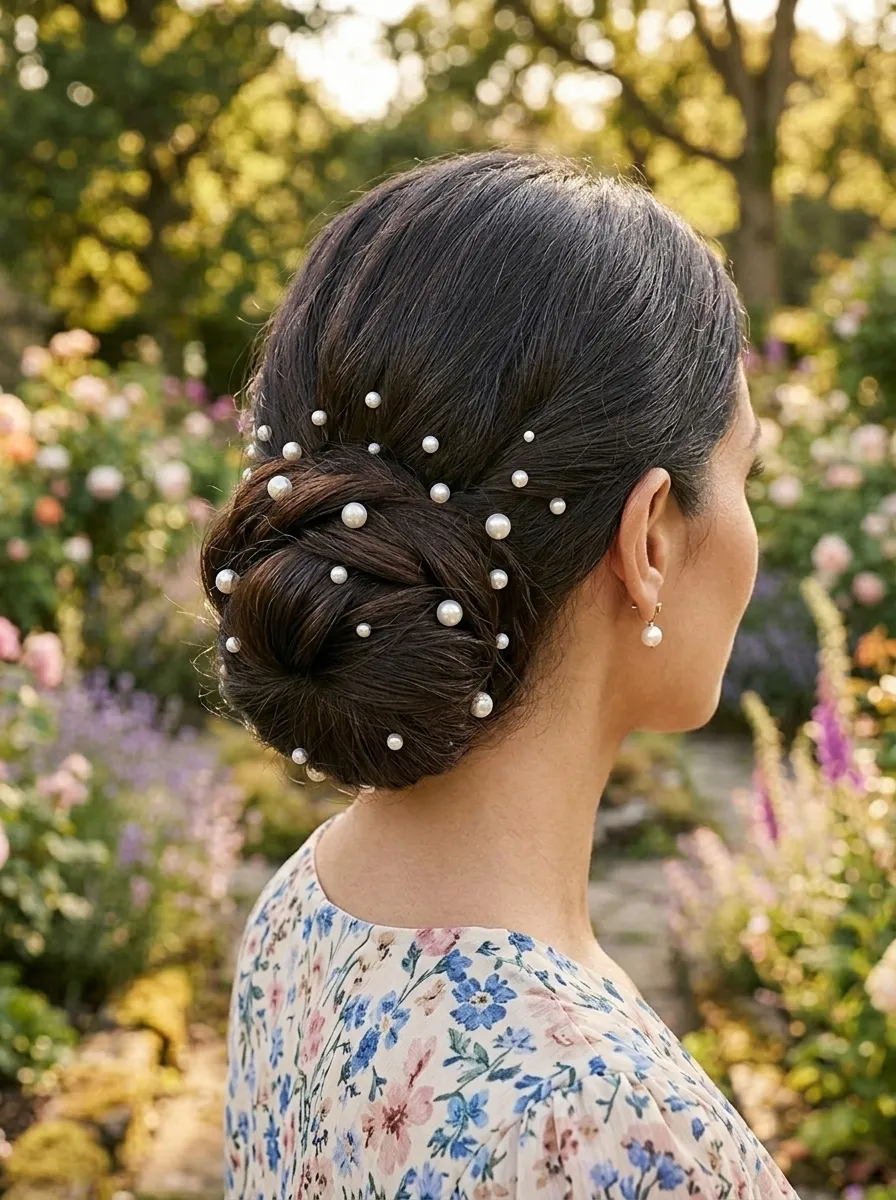
Pearl pins are having a major comeback. They make any bun look polished and intentionally romantic.
Twist your hair into a low bun or chignon at the nape of your neck. Secure with bobby pins. Then push small pearl-tipped pins throughout the bun at scattered intervals. They do not need to be in a pattern. Random placement looks more organic.
A pack of pearl pins costs around three to four dollars at most beauty supply or dollar stores. You get dozens of pins per pack, so one set lasts a long time.
This style works especially well on dark hair because the white pearls create a beautiful contrast. Lighter hair also looks great — the pearls catch light beautifully.
No special technique is needed here. Even a casual messy bun looks elevated once pearl pins are scattered through it. The messier the bun, the more pins you may want to add.
Finish with a light mist of shine spray over the entire bun so the hair surface catches the light the same way the pearls do. This creates a cohesive, polished appearance that looks genuinely chic without spending much money.
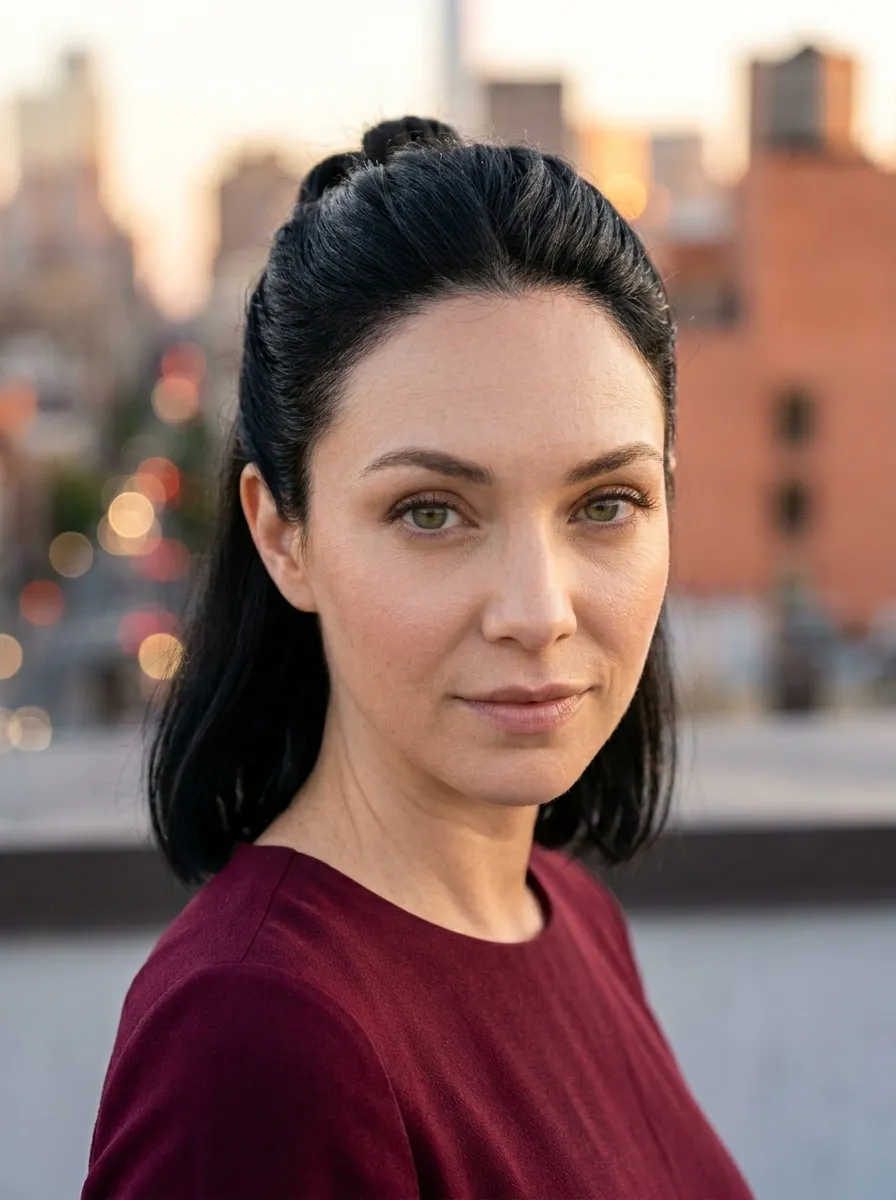
10. Sleek High Ponytail with Wrap
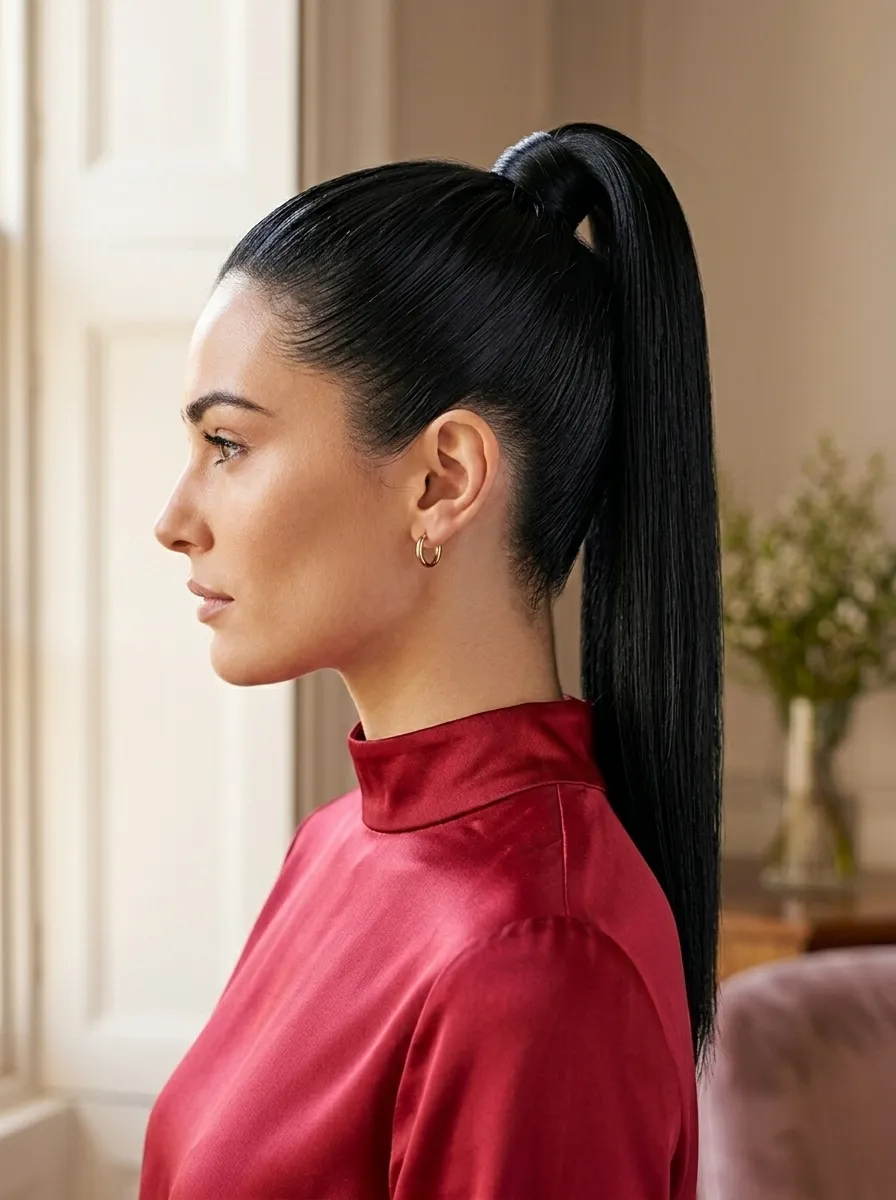
A sleek high ponytail looks powerful and romantic at the same time. The wrapped base detail makes it look expensive and intentional.
Brush all hair into a high ponytail at the very top of your head. Secure with a hair tie. Then take a small thin section from the underside of the ponytail, wrap it around the base to hide the elastic, and pin it underneath with a bobby pin.
This tiny detail makes the biggest difference. It is the step most people skip and the one that makes it look salon-done.
Use a bristle brush and a bit of edge control or a light gel to smooth down flyaways at the crown before securing the ponytail. This creates the sleek finish that makes high ponytails look polished.
For extra glamour, add a few loose curls to the ponytail itself. Alternatively, leave the tail straight for a more modern, minimal look.
This works best on longer hair. Medium-length hair can still achieve a high ponytail — it just may need a volumizing trick like teasing the root area slightly before pulling it up.
11. Space Buns with Heart Clips
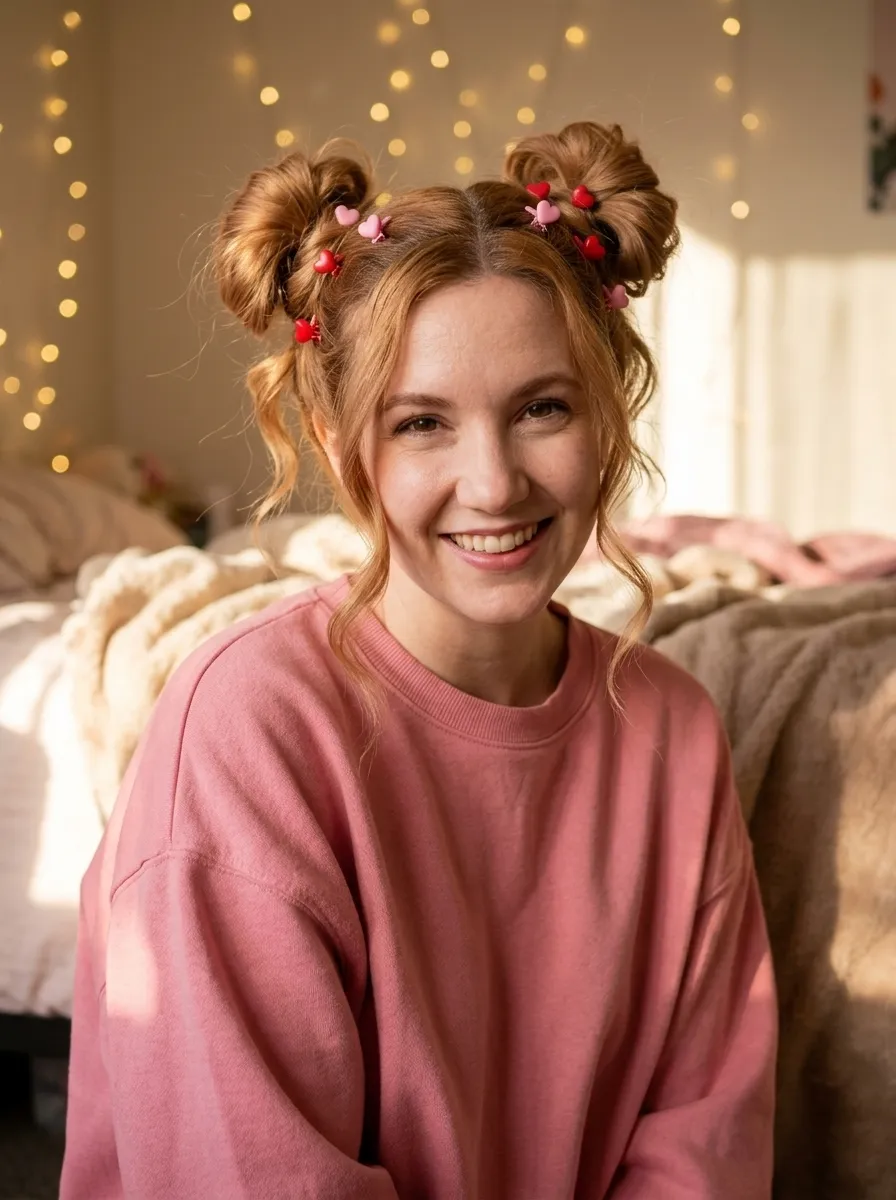
Space buns are playful, youthful, and perfect for a fun Valentine celebration that does not take itself too seriously.
Part your hair down the middle. Pull each side into a high pigtail. Twist each pigtail up into a bun and secure with a hair tie. Pin any loose ends under the bun.
Then add heart-shaped clips around the base of each bun. These clips come in multipack sets and usually cost under five dollars. Red, pink, and gold all work beautifully for Valentine’s Day.
For a messier and more relaxed version, leave the buns slightly undone and let some pieces fall around the face. This looks cute for brunch or a casual daytime celebration.
Space buns work on all hair types but look especially charming on wavy or curly hair, where the texture adds softness to the buns. Fine hair should tease the bun sections lightly before wrapping to add volume.
This style takes about five minutes total. It is also incredibly long-lasting, staying in place through a whole day without touch-ups. Add a bit of glitter at the center part for extra festive flair if you feel adventurous.
12. Old Hollywood Waves
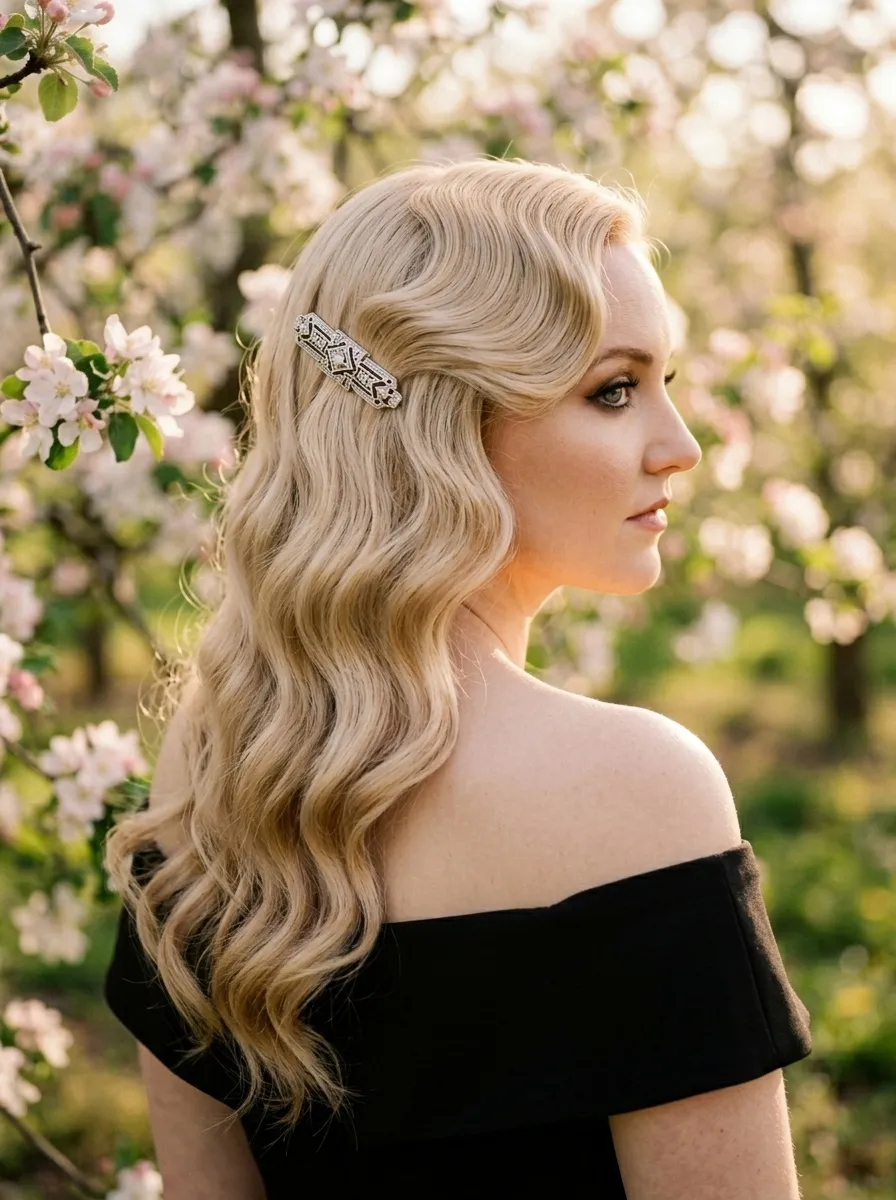
Old Hollywood waves make any Valentine look feel like a film scene. They are dramatic, glamorous, and surprisingly doable at home.
The key is sectioning. Use a 1-inch curling iron. Curl each section in the same direction away from your face and pin each curl in place with a duckbill clip while it cools. This is the step most people skip and it matters.
Once all curls have cooled, remove the clips. Use a paddle brush or a wide-tooth comb to gently brush through all the curls in one direction. They will merge into smooth connected waves.
Hold each wave in place with your hand and pin with a bobby pin until the style sets. Finish with a light-hold hairspray.
A side-swept version where all the waves fall to one side works beautifully for Valentine’s Day. Pair with red lipstick and the look is complete.
This takes about thirty minutes but the result lasts all night. Medium to long hair works best. If your hair does not hold curl well, apply a mousse or setting spray to damp hair and blow-dry before curling.
13. Twisted Side Sweep
A twisted side sweep is one of the most romantic and underrated Valentine hairstyles. It is asymmetrical and flattering on every face shape.
Create a deep side part. Take a large section from the heavier side of the part and twist it backward along your hairline. Pull it behind your ear and pin with a decorative clip. Let the rest of the hair fall naturally in waves over the opposite shoulder.
The contrast between the swept side and the flowing opposite side is what makes this style so striking.
If your hair is straight, add some waves before doing the twist. The texture makes the swept side look richer and more intentional.
Choose a clip that feels special, a small flower clip, a crystal pin, or a vintage-style barrette all work well. This does not need to be expensive. Many beautiful clips are available for under three dollars at accessory stores.
This style works on hair that is chin-length or longer. It is especially flattering for people with longer faces because the side asymmetry adds width. And the whole thing takes under ten minutes to complete.
14. Messy Romantic Updo
Not every Valentine hairstyle needs to be perfectly polished. A messy romantic updo looks like you put it together in five minutes and somehow it always looks gorgeous.
Curl your hair loosely or scrunch in some curl cream if you have natural texture. Pull everything back loosely and start pinning sections in different directions at the back of your head. There is no right or wrong here.
The messier it looks, the more romantic it photographs.
Leave several face-framing pieces out. These loose tendrils soften the overall look and make it feel effortlessly undone. Use a teasing comb to give the updo body and height before you start pinning.
Secure with as many bobby pins as needed. Color-match the pins to your hair so they disappear into the style.
Finish by misting the whole style with a flexible-hold hairspray. This keeps everything in place without making it look stiff.
This is a forgiving style that gets better if it is slightly imperfect. It works well on medium to long hair and especially suits curly and wavy textures. No heat tools required if your hair already has natural movement.
15. Waterfall Braid
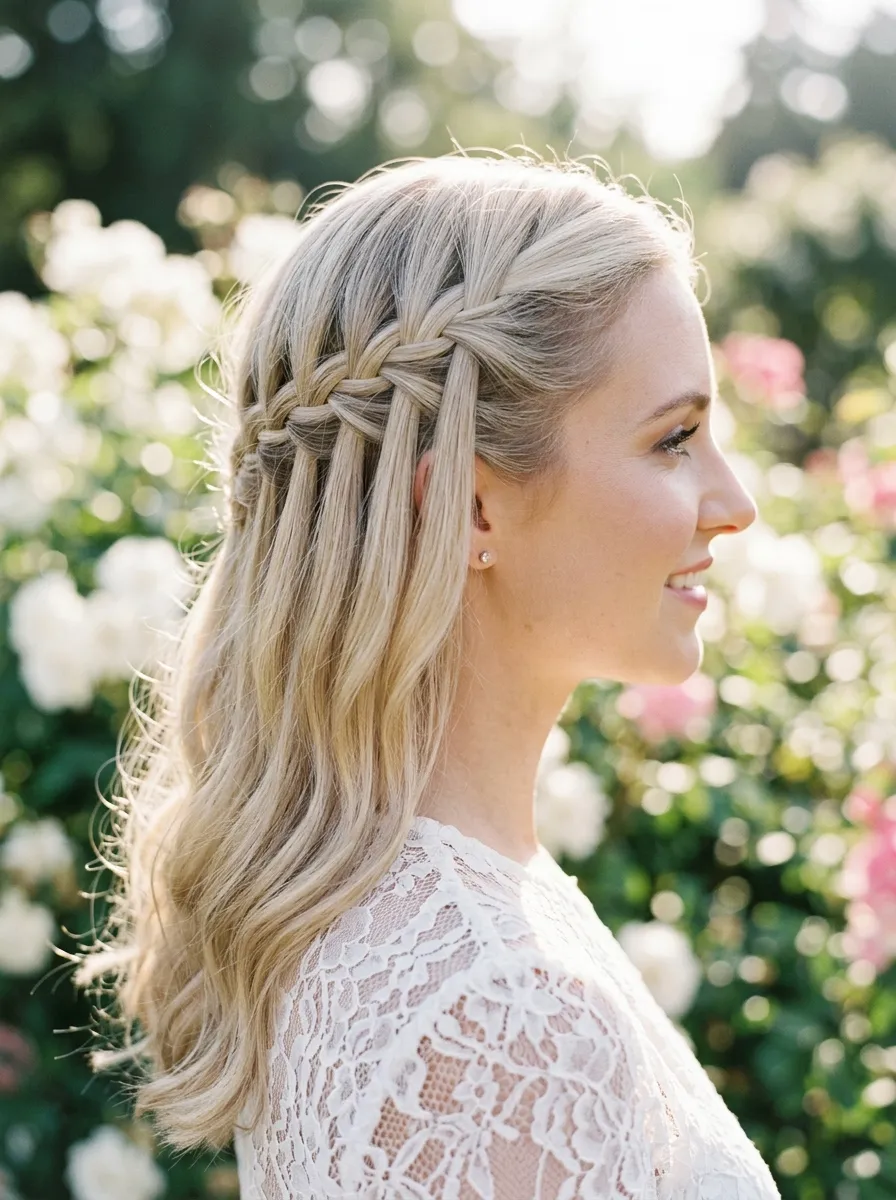
The waterfall braid looks like it belongs in a fairy tale. It is one of the most romantic braid styles and once you try it, you will reach for it every Valentine’s Day.
Start a French braid on one side of your head. When you would normally pull the bottom strand into the braid, instead drop it and pick up a new strand from above. This creates the “waterfall” of hair cascading through the braid.
Continue across the back of the head and pin or tie off at the other side.
The dropped strands are what create the waterfall effect. Do not rush this step.
Watch a short video tutorial the first time you try this. Once you understand the dropping motion, it becomes fast and natural to do.
This style works best on straight or slightly wavy hair because the cascading strands flow cleanly. Very curly hair can also do a waterfall braid but the dropped strands will curl naturally as they fall, which creates a different but equally beautiful effect.
This is a great style for a daytime Valentine look. Pair with minimal accessories and natural makeup.
16. Floral Hair Crown
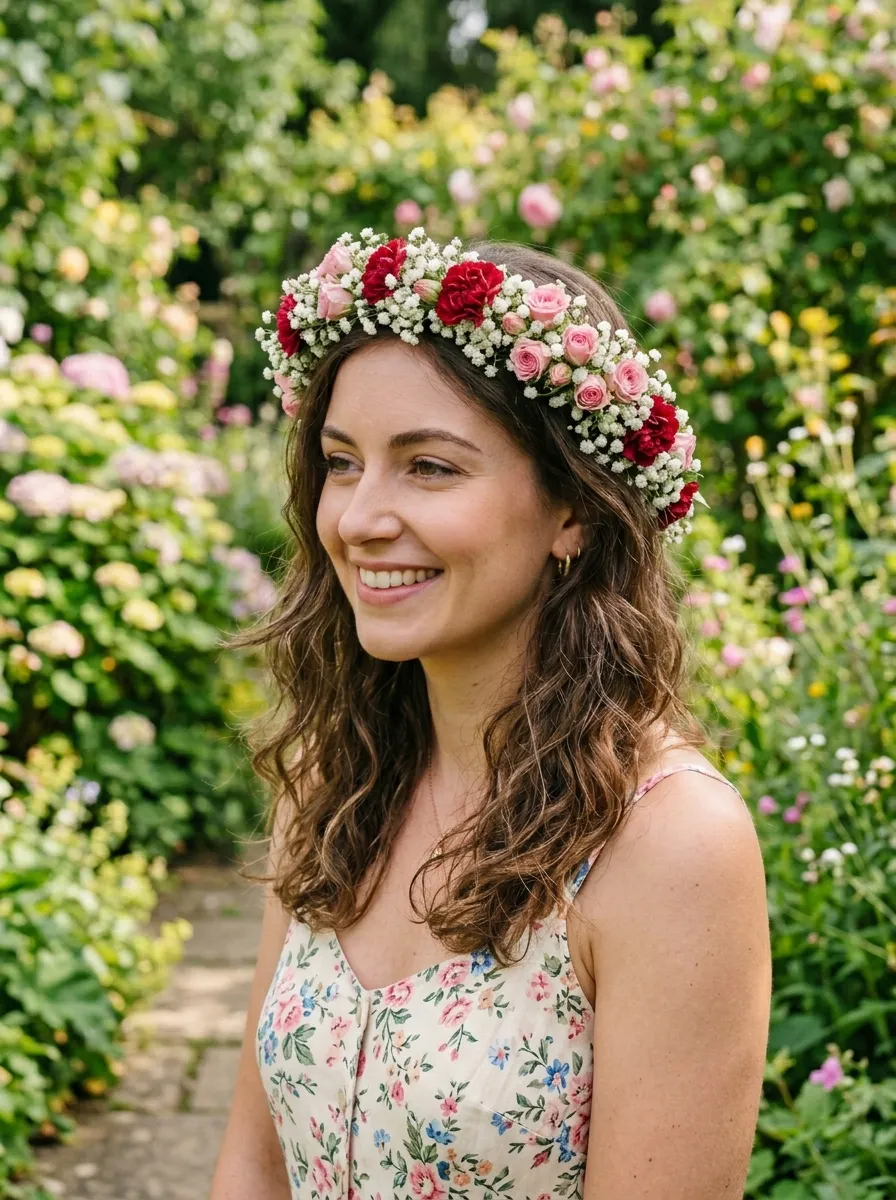
A real flower crown is a statement. It is also one of the most budget-friendly Valentine hairstyles you can make.
Pick up a small bunch of mixed flowers from a grocery store. Baby’s breath, mini roses, and carnations all work well. Cut the stems short, about two to three inches each. Use floral tape to wrap stems together into a small bundle. Connect bundles into a circle sized to your head. Secure with more floral tape.
A full DIY flower crown costs around five to seven dollars in total materials.
You do not need wire. Floral tape alone holds the structure when wrapped firmly. Start with a small round and add flowers as you go until it fits.
Place the crown on loose waves or a half-up style. It looks beautiful sitting slightly toward the back of the head rather than right at the hairline.
Fresh flowers hold up for six to eight hours which is plenty for a Valentine’s dinner or photo session. Keep the crown in a bag in a cool spot until you are ready to wear it. This style works on all hair types and photographs beautifully in both indoor and outdoor settings.
17. Bubble Ponytail
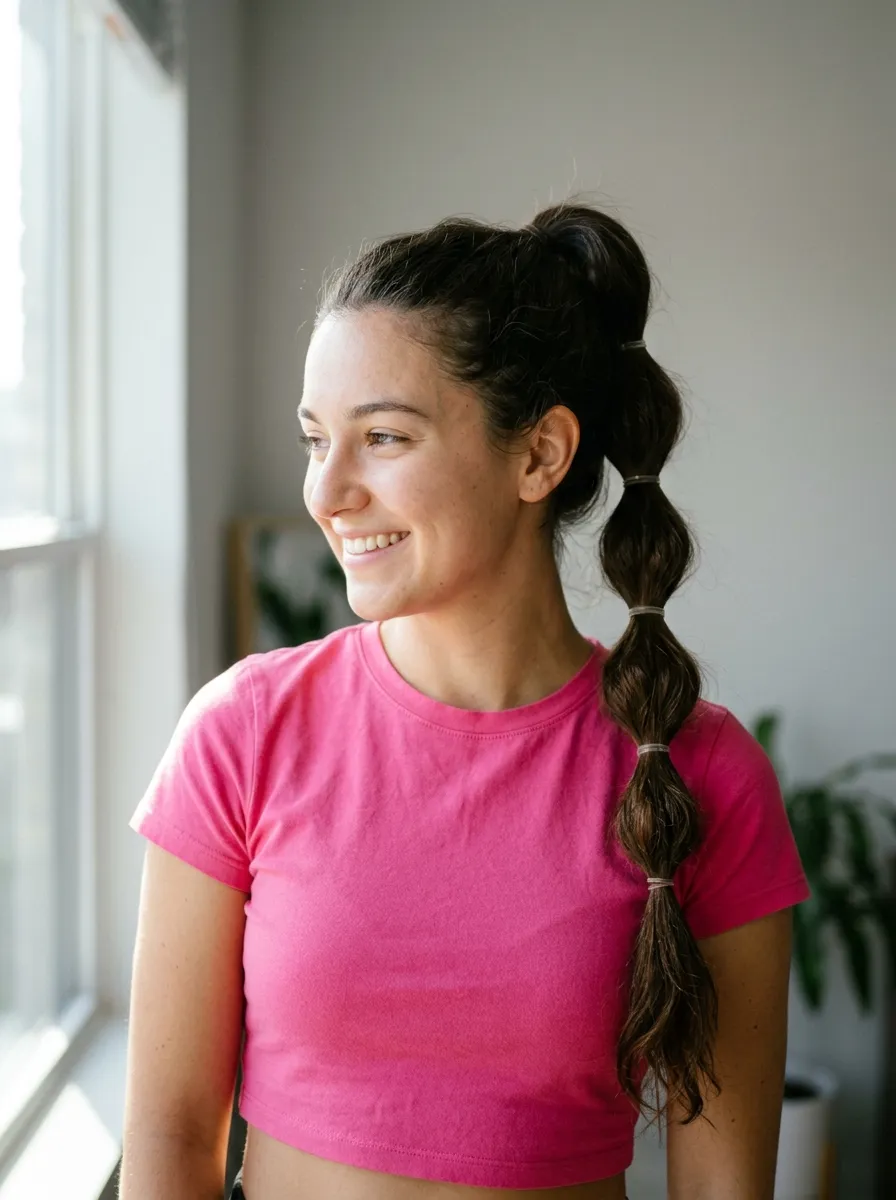
The bubble ponytail is fun, playful, and looks much more complex than it is. It is perfect if you want a Valentine look that is upbeat and full of personality.
Pull hair into a high ponytail. Add another hair tie about two inches down the ponytail. Gently pull on the hair between the two elastics to puff it out into a bubble shape. Add another tie two inches below that and repeat all the way down.
Use matching hair ties for a polished look or mix pink and red elastics for a Valentine-specific touch.
Five to seven ties create a full bubble effect on long hair. Shorter hair may only have room for two or three bubbles.
Pancake each bubble section by pulling gently from both sides to widen it. This doubles the visual impact of the style.
You can also create a bubble braid by adding a slight twist between each elastic before puffing out. The result has a braided texture running through the bubbles.
This style holds all day without touching up. Use a bit of edge-smoothing gel at the roots for a sleeker bubble ponytail or leave natural flyaways for a softer, more relaxed version.
18. Side Braid with Dried Flowers
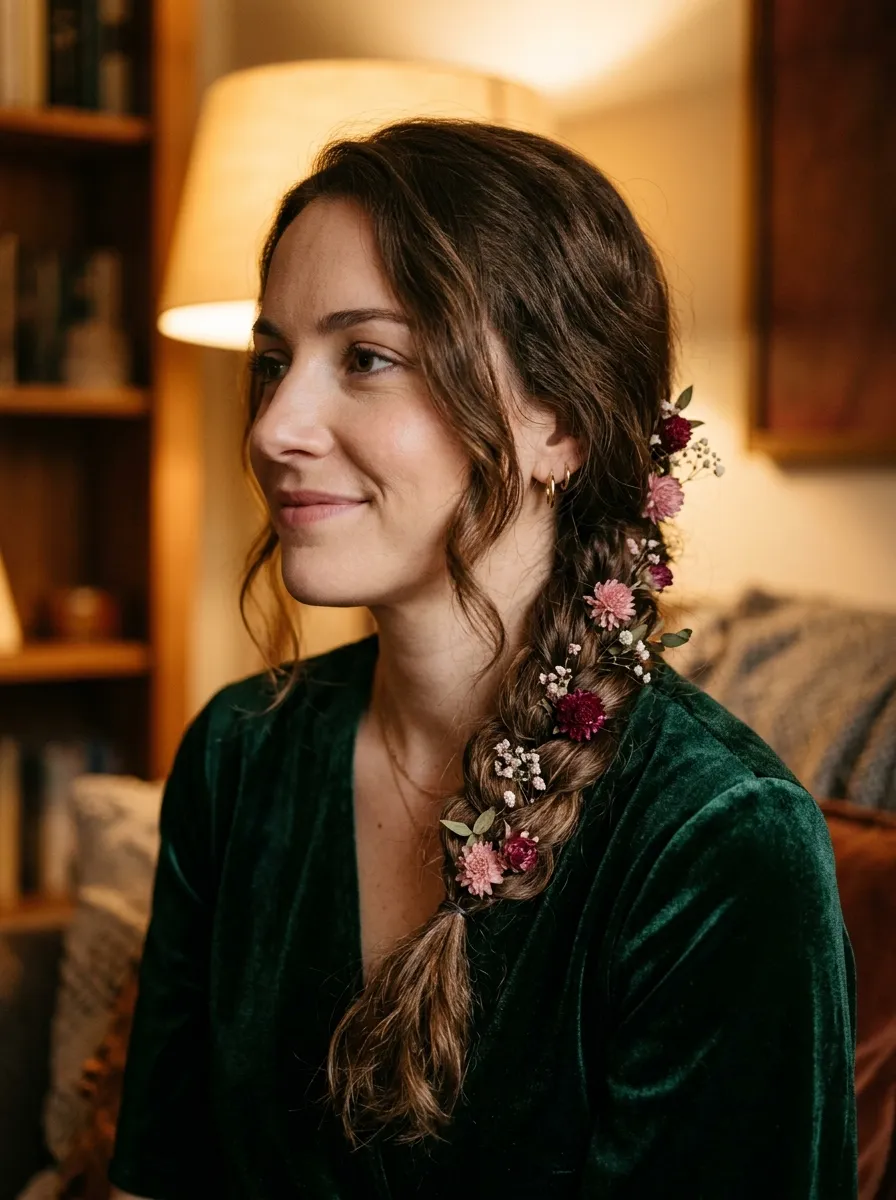
Dried flowers are a beautiful and long-lasting alternative to fresh ones. They tuck into braids easily and they hold their shape all day.
Do a loose three-strand braid over one shoulder. After securing the end with a clear elastic, start tucking small dried flower stems into the braid from top to bottom. Push the stems under a strand and loop them through so they grip the hair.
Dried flower packs are widely available online or at craft stores for around four to six dollars. Lavender, dried roses, and pampas grass all look stunning.
Pancake the braid first to make it wider, which creates more room to tuck flowers. This also makes the braid look fuller and more dramatic.
The flowers can stay in the braid for hours without wilting because they are already dried. This makes it one of the most low-maintenance Valentine hairstyles on this list.
The color of dried flowers, dusty pinks, burgundy, muted gold, naturally suits the Valentine palette. This style works best on medium to long hair and suits both casual daytime and romantic evening looks equally well.
19. Glossy Blowout with Red Ribbon
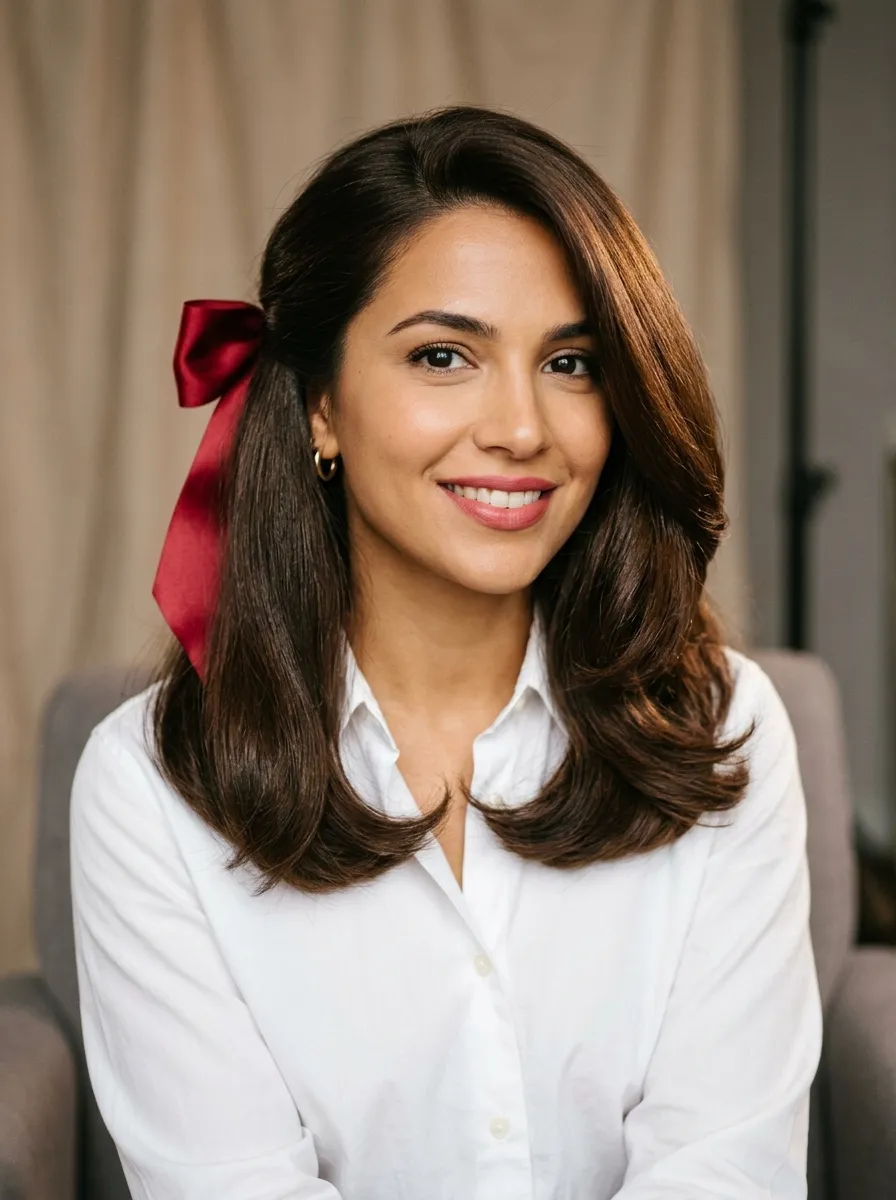
A glossy blowout is one of those looks that feels luxurious but you can absolutely do it at home.
Wash and towel-dry hair. Apply a heat protectant and a small amount of blowout serum. Section hair and blow-dry each section using a round brush. Pull the brush downward while drying to smooth the cuticle and add shine.
The direction you dry makes all the difference. Always dry from root to tip in a downward motion. Drying upward creates frizz.
Finish with a blast of cool air to seal the cuticle and lock in shine. Once done, add a wide red satin ribbon to one side, either pinning it behind the ear or tying it in a loose bow at a low ponytail.
A blowout with a ribbon takes the look from classic to seasonal without changing the structure of the hairstyle.
This works on all hair types. Fine hair should use a volumizing mousse before blowdrying. Thick hair benefits from a smoothing serum to keep the gloss without puffiness. Budget option: skip the salon and invest in a good round brush. It pays off every time.
20. Twisted Low Bun with Ribbon Tie
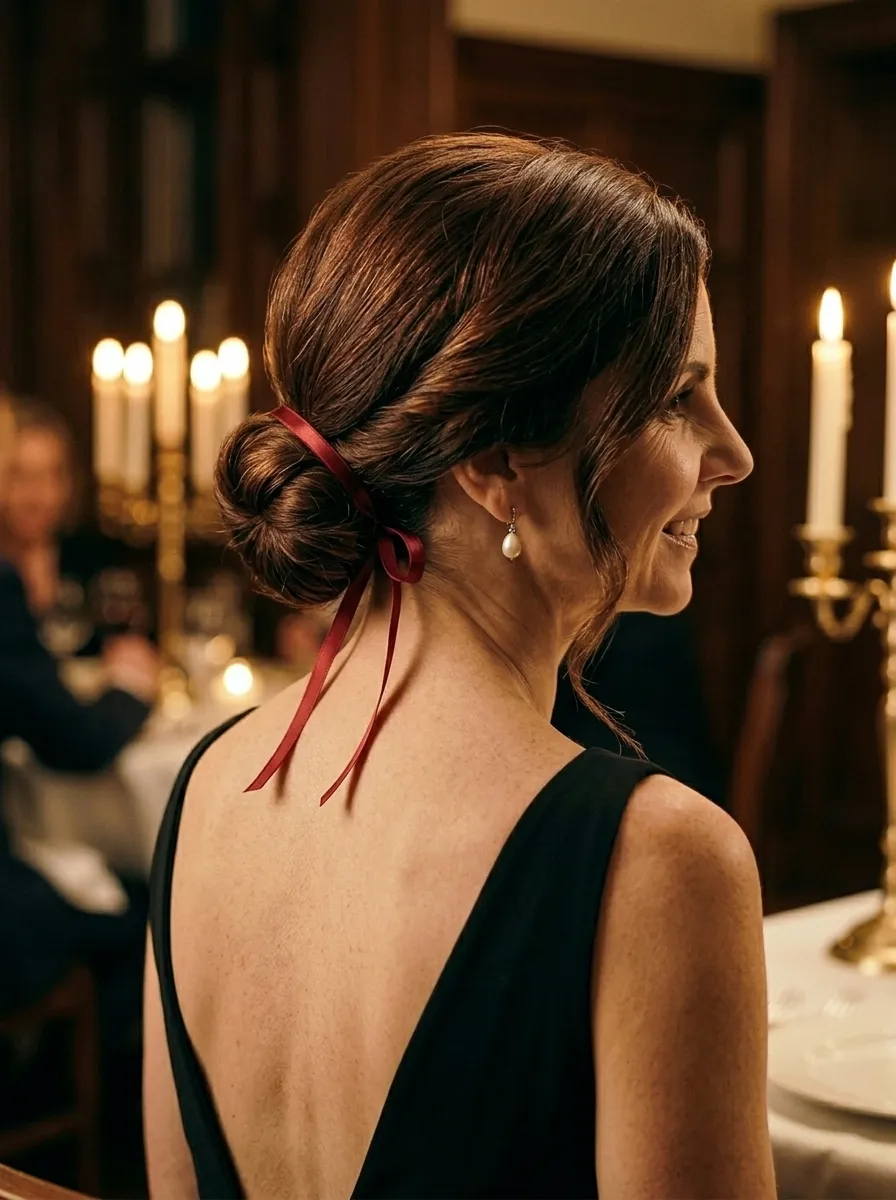
A twisted low bun with a ribbon tie looks like a gift. It is simple, romantic, and elegant.
Gather hair at the nape into a low ponytail. Twist the ponytail tightly upward in a spiral and coil it into a bun. Secure with bobby pins.
Cut a length of thin satin ribbon, about eighteen to twenty inches. Wrap it once around the base of the bun and tie into a bow or a loose knot. Trim the ribbon ends at a diagonal so they do not fray.
The ribbon is the focal point of this entire hairstyle. Choose a rich red, a blush pink, or even a deep burgundy for Valentine’s Day.
This looks especially beautiful from behind, which makes it perfect for a date night look in a romantic setting. Wear a dress or top that shows off your back or neckline so the hairstyle gets the attention it deserves.
The twisted bun works on all hair lengths that reach a ponytail at the nape. For shorter hair, gather as much as possible and add false hair or a clip-in piece if needed for a fuller bun effect.
21. Curly Pineapple Updo with Accessories
The pineapple updo celebrates natural curls and is one of the most effortlessly romantic Valentine’s styles for curly hair.
Flip all your curls to the top of your head and gather them into a loose, very high ponytail secured with a satin scrunchie. This is the pineapple. Let the curls at the front fall forward or spread the pineapple slightly so the curls fan out at the top.
A satin scrunchie is important here. Regular elastics cause breakage and disrupt the curl pattern. Satin protects both.
Spray a curl refresher or a light water-glycerin mist over the curls before styling so they look defined and hydrated.
Add pearl pins, gold clip accessories, or tiny heart-shaped gems throughout the curls for the Valentine effect. Place them at random heights throughout the pineapple for a scattered, intentional look.
This style works on all curl types from 3A waves to 4C coils. The higher you place the ponytail, the bigger the pineapple effect. For finer curls, gather loosely so you do not disrupt the curl structure.
This is a genuinely low-effort style that looks dramatically beautiful in person and in photos.
Conclusion
Valentine’s Day is the perfect excuse to have fun with your hair. As you can see from this list, you do not need a salon, expensive tools, or hours of prep to look genuinely beautiful. Most of these styles take under fifteen minutes. Many cost only a few dollars in supplies. The real secret is that small details — a ribbon, a few pearl pins, some dried flowers, or even a simple knot — are what make a hairstyle feel special and intentional.
Pick the style that matches your hair type, your plans for the day, and how much time you realistically have. Then try it at least once before Valentine’s Day so you are not figuring it out at the last minute.
Your hair is already beautiful. These ideas are just ways to remind you of that.
Leave a Reply