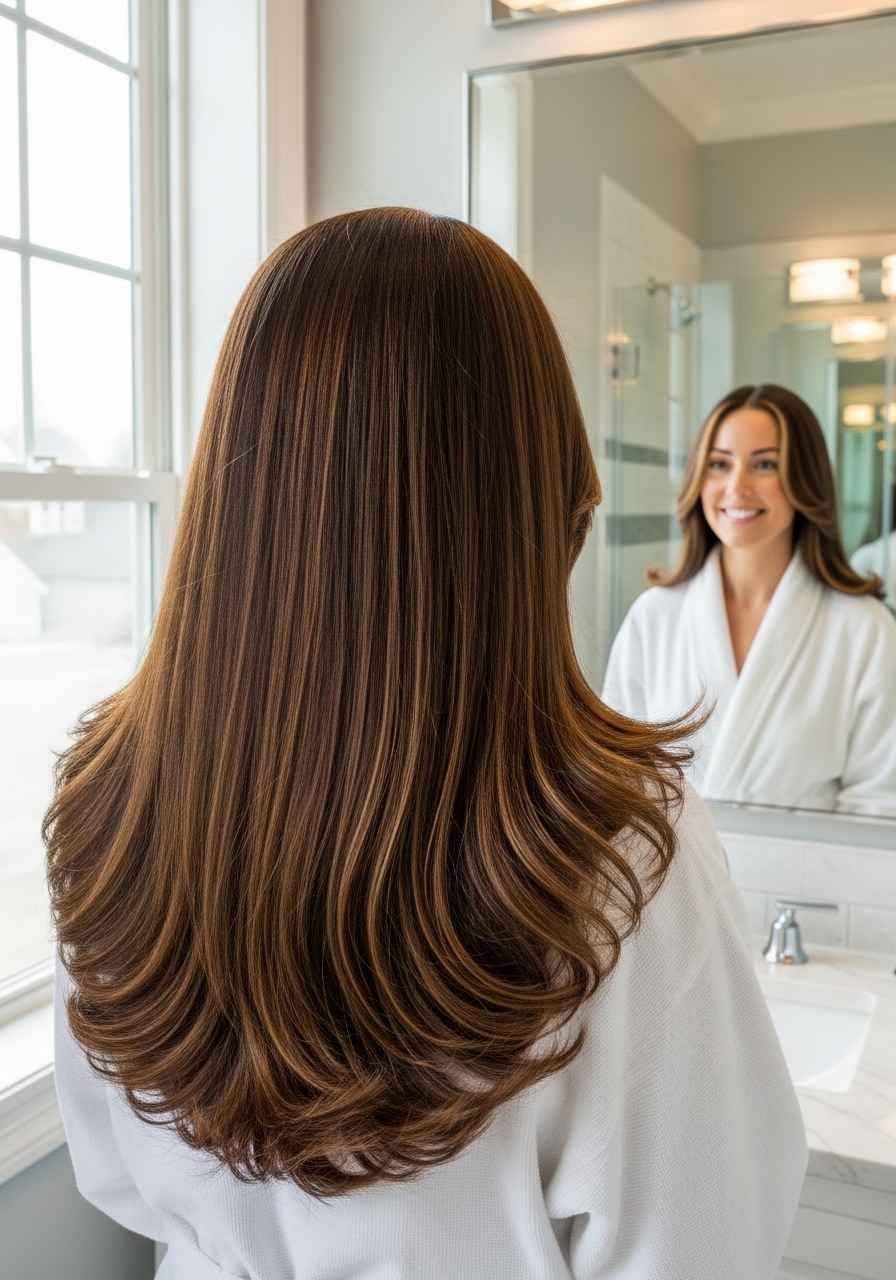
There is a very specific kind of disappointment that comes from leaving the salon with perfectly blow-dried hair and then attempting to recreate it at home three days later. The result never quite matches and most people assume it is because they lack the skill. The truth is it is almost never about skill. It is about technique, the right tools, and understanding a few simple principles that every professional uses without even thinking about them. Once you know what those are, a salon-quality blowout at home becomes completely achievable. If you’re learning how to curl hair with a flat iron, mastering the right hand movement and heat control can help you create smooth, long-lasting curls that look professionally styled at home.
Here is exactly how to blow dry your hair like a salon, step by step.
The Tools That Actually Make the Difference
Most people own a basic hair dryer and a regular brush and wonder why their blowout never looks like the salon version. The tools are usually a significant part of the answer.
What you need for a salon-quality blowout at home:
A hair dryer with at least 1800 watts of power. Underpowered dryers take too long to dry the hair which causes more heat damage and less smoothness in the final result. A concentrator nozzle attachment is essential. This is the flat attachment that clips onto the end of the dryer and directs the airflow in a precise stream rather than blasting air in all directions. A round brush is the tool that creates the volume, smoothness, and bend that defines a salon blowout. The size of the barrel matters. A larger barrel creates more volume and a smoother finish on medium to long hair. A smaller barrel creates more curl and bend on shorter styles. A heat protectant spray applied to every section before the dryer touches it.
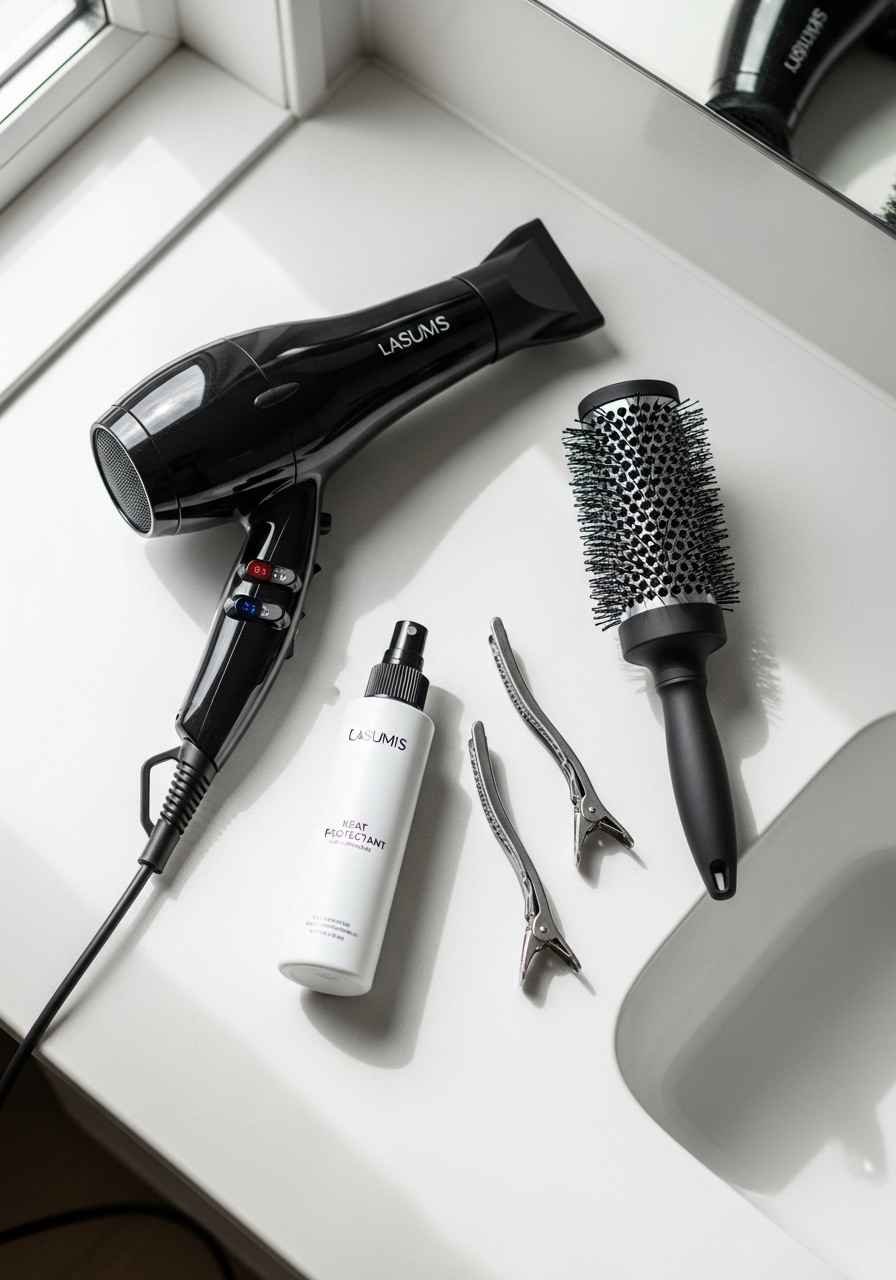
The concentrator nozzle is the single most underused attachment in most people’s bathroom drawer and it is the one that makes the biggest difference in the smoothness of the final result.
Step by Step: How to Blow Dry Like a Pro
The technique used at a salon follows a very specific order and logic. Understanding why each step exists makes it much easier to replicate at home.
Start by towel drying the hair gently after washing. Do not rub the hair vigorously with the towel as this roughens the cuticle and creates frizz before you have even started. Squeeze and press the towel against the hair to absorb the water instead.
Apply heat protectant to the hair while it is still damp. Work it through from mid-lengths to ends and comb through with a wide-tooth comb so it is distributed evenly before any heat touches the hair.
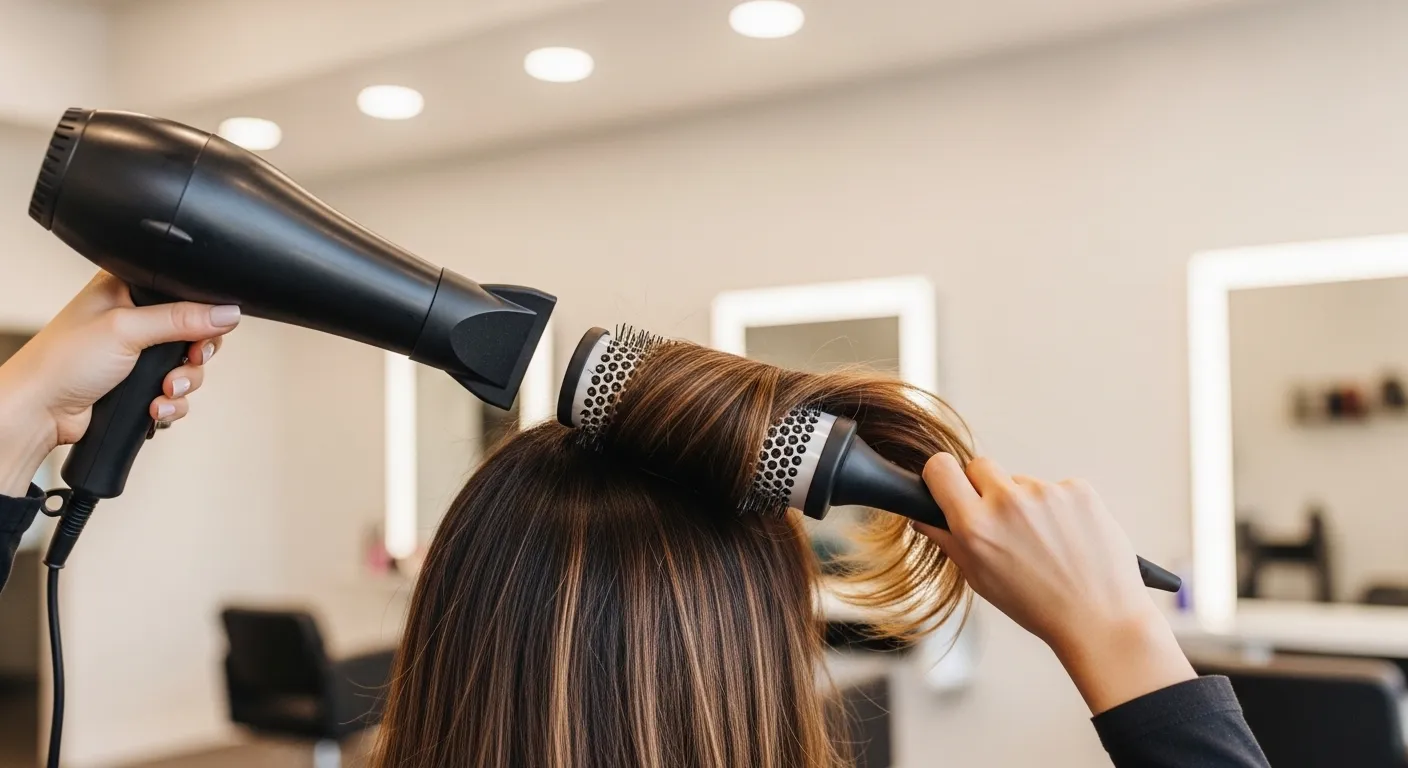
Section the hair into at least four parts. Clip three sections up and out of the way and start with the bottom sections at the nape of the neck. Working from the bottom up is the professional approach because it means the sections on top, which are most visible, get the most focused attention and the most polished result.
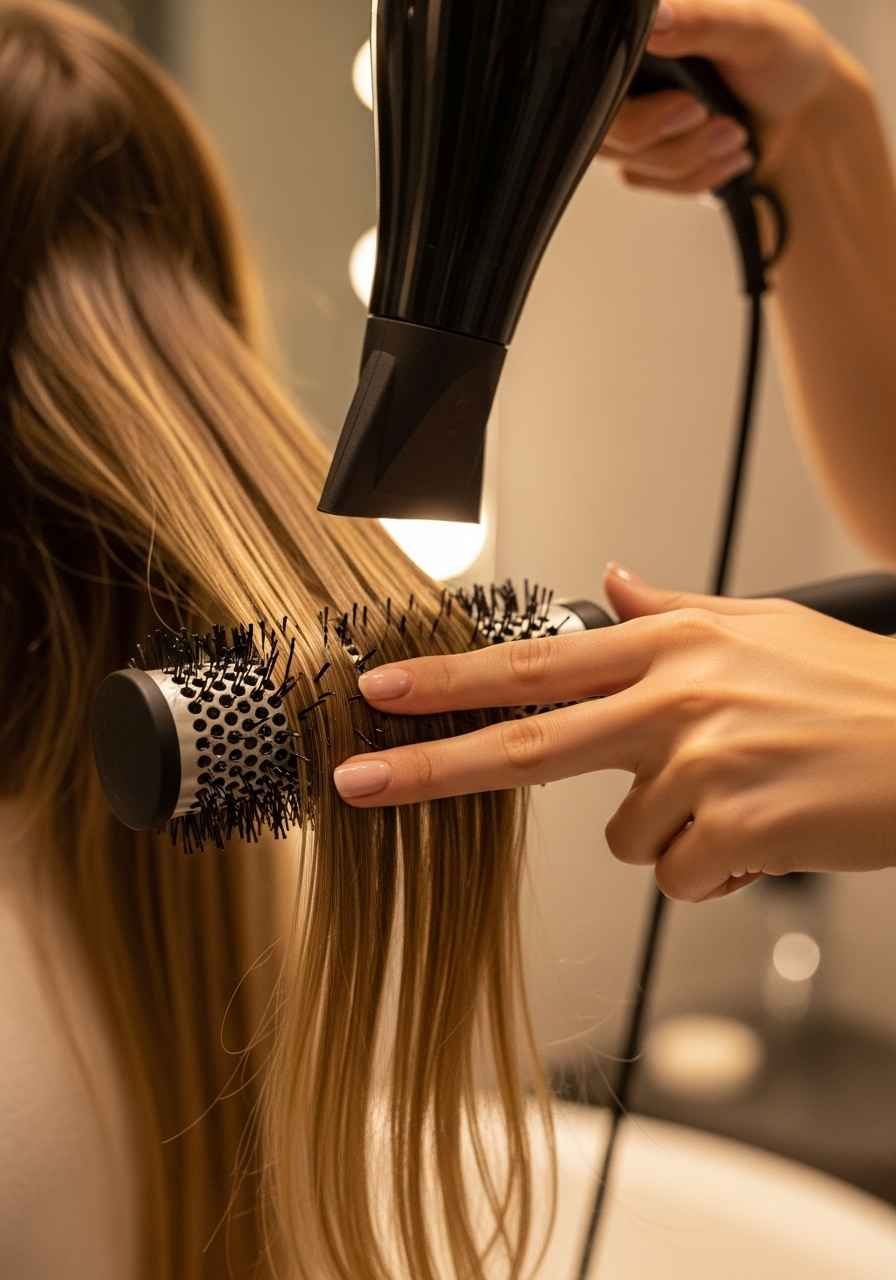
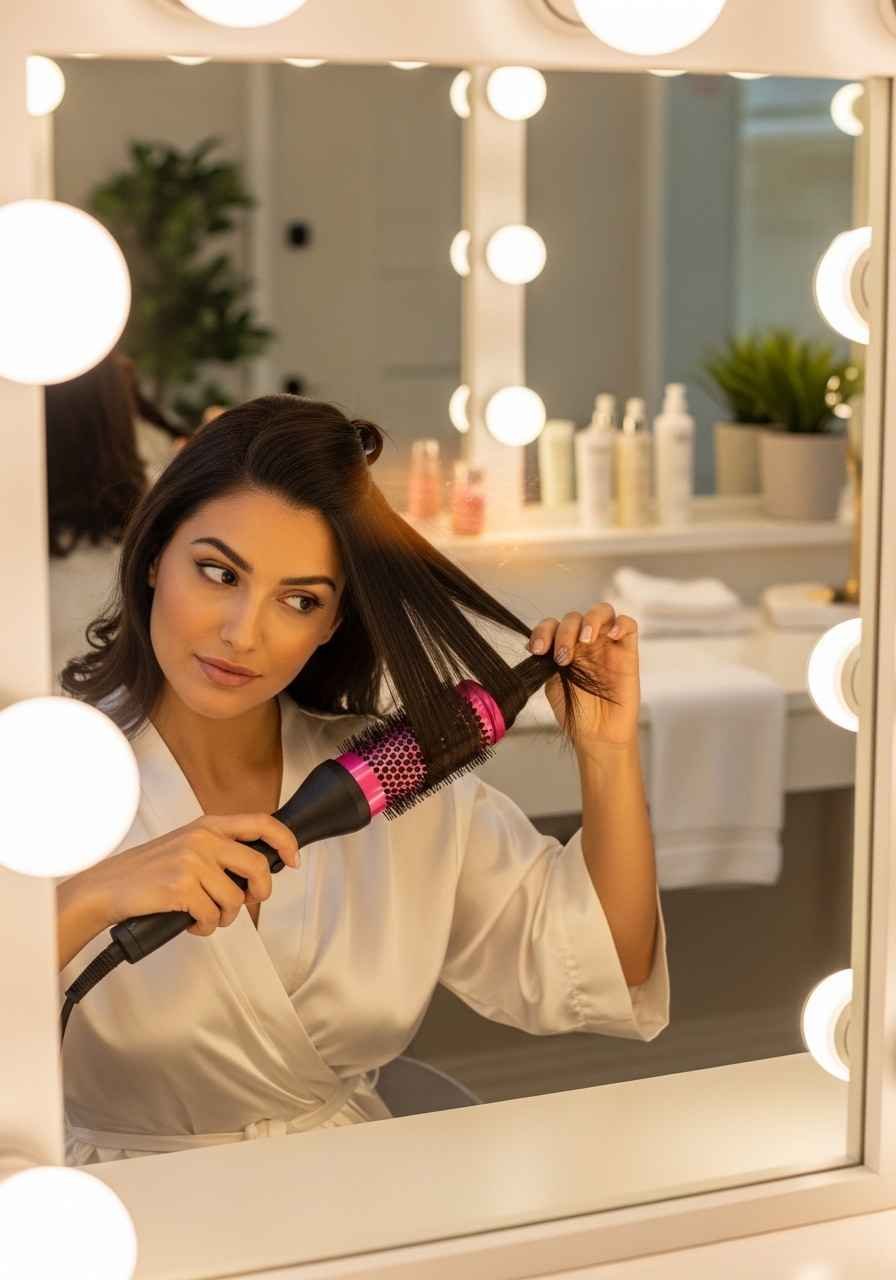
Take a section of hair no wider than the round brush. Place the brush underneath the section at the roots. Direct the dryer at the brush from above with the concentrator nozzle pointing downward along the hair shaft. This downward direction is important because it smooths the cuticle rather than roughing it up. Pull the brush slowly through the section from roots to ends while following it with the dryer. At the ends, roll the brush inward and hold for a few seconds to create the bend and volume that defines the blowout shape.
Release the section and move to the next one. Repeat until all sections are done.
Once the hair is fully dry, switch the dryer to the cool shot setting and blast each section with cold air for about fifteen seconds. This step seals the cuticle and locks the smoothness in place. It is the step that most people skip at home and it is one of the main reasons the blowout does not last as long as the salon version.
Finish with a very light mist of shine spray or a small amount of serum worked through the ends to add gloss and eliminate any remaining frizz.
Tips for Making Your Blowout Last Longer
A few habits before and after styling significantly extend how long a blowout holds its shape and smoothness.
Do not blow dry soaking wet hair. Let the hair air dry for ten to fifteen minutes first or use the dryer on a medium heat setting to rough dry it to about sixty percent before switching to the round brush. Trying to do a blowout on completely soaking wet hair takes too long and puts unnecessary heat stress on the hair.
Keep the dryer moving constantly. Holding the dryer in one spot on a section concentrates too much heat in one place and causes damage. Keep it moving along with the brush so the heat is distributed evenly across each section.
Tension matters. Pulling the round brush through the hair with steady, even tension is what creates the smoothness. Too little tension results in a wavy, uneven finish. Too much tension causes breakage over time. Aim for a firm but gentle pull that keeps the section taut without feeling like you are straining.
Sleep on a satin or silk pillowcase after a blowout to preserve the smoothness overnight. Cotton pillowcases create friction that roughens the cuticle and disrupts the shape while you sleep.
Frequently Asked Questions
How long should it take to blow dry hair at home? For medium-length hair using the sectioning and round brush technique, a full blowout takes between twenty and thirty minutes. Fine hair dries faster and thick or long hair takes longer. Rough drying the hair to about sixty percent before starting with the round brush reduces the total time significantly and puts less overall heat stress on the hair.
Why does my blowout never look as smooth as the salon? The most common reasons are skipping the concentrator nozzle attachment, directing the airflow upward instead of downward along the hair shaft, and not using enough tension with the round brush. The concentrator nozzle alone makes a dramatic difference in smoothness. Pointing it downward along the section instead of at random angles smooths the cuticle instead of roughing it up which is what creates that glassy, polished finish.
What size round brush should I use for a blowout? A large barrel round brush, around two to two and a half inches in diameter, works best for medium to long hair when the goal is volume and a smooth, flowing finish. A medium barrel around one and a half inches creates more bend and curl at the ends which suits shoulder-length hair. A smaller barrel under one inch works well for short styles where more curl and control is needed.
Is blow drying every day bad for your hair? Daily blow drying with high heat and no heat protection can cause long-term damage over time including dryness, breakage, and dullness. Using a heat protectant every time, keeping the dryer at a medium rather than maximum heat setting, and finishing with the cool shot to reduce overall heat exposure significantly reduces the damage. Giving the hair one or two air-dry days each week also helps maintain its health and moisture balance.
Get That Salon Finish at Home
A great blowout is not about talent. It is about having the right brush, using the concentrator nozzle, working in sections from the bottom up, and pointing the airflow downward every single time. Follow those steps consistently and your at-home blowout will start looking closer to the salon version with every attempt. Save this guide, grab your round brush, and give it a try on your next wash day.
Leave a Reply