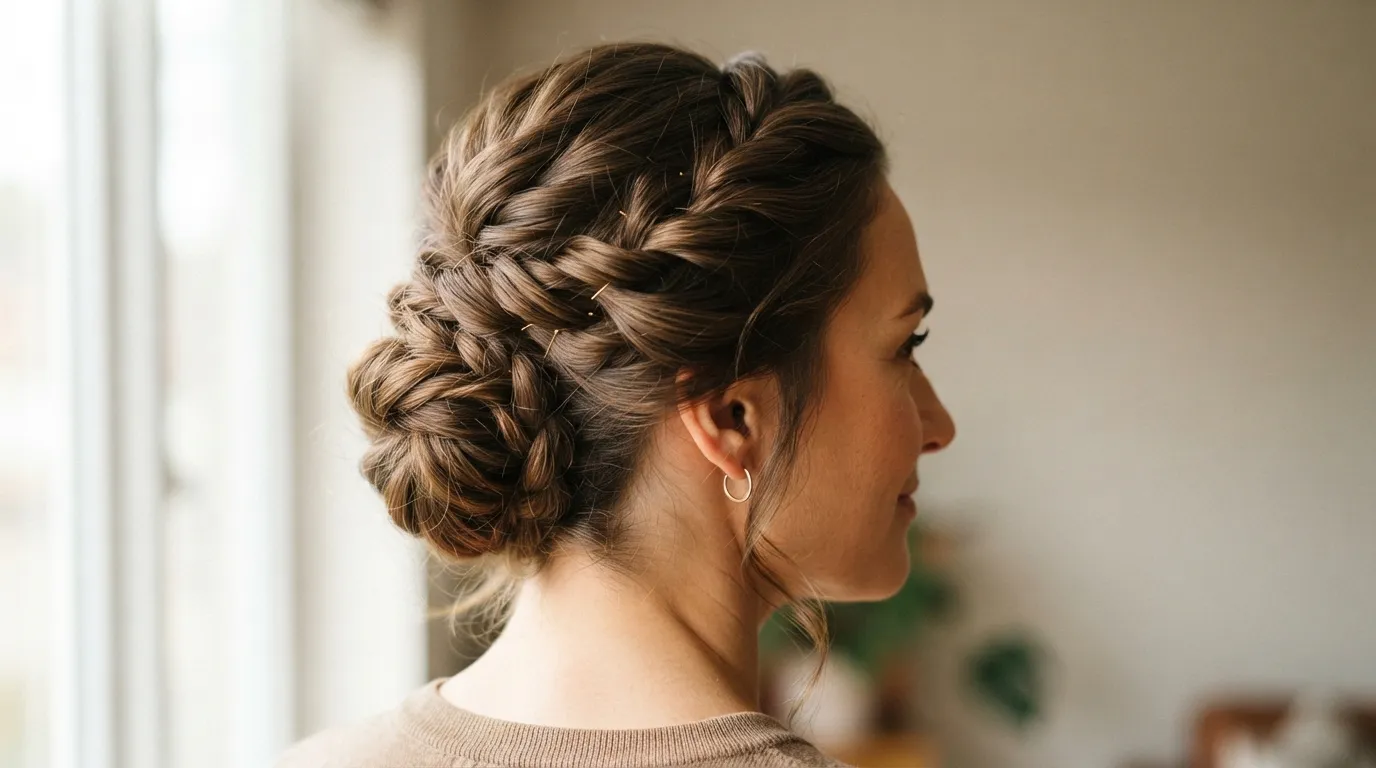
Updo hairstyle ideas are one of the easiest ways to look put together without spending hours in front of a mirror. Whether you have a wedding to attend, a work event on your calendar, or just want your hair off your neck on a hot day, an updo can carry you through almost any occasion. The best part is you do not need a salon appointment or expensive tools to pull one off. Most of the styles below use basic supplies like bobby pins, a comb, and a bit of hairspray. Some take less than five minutes, others are meant for special days when you want something more detailed. This list covers loose and messy options, sleek and formal ones, styles for short hair, styles for thick hair, and everything in between. Read through the ideas, pick the ones that match your hair length and the amount of time you have, and start practicing at home before the big day arrives. If you’re also exploring Butterfly Cut Long Hair Ideas, the soft, layered shape of this haircut can add beautiful movement and volume, making it an excellent choice for creating elegant updos as well as effortless everyday styles.
1. Classic Low Bun updo hairstyle ideas
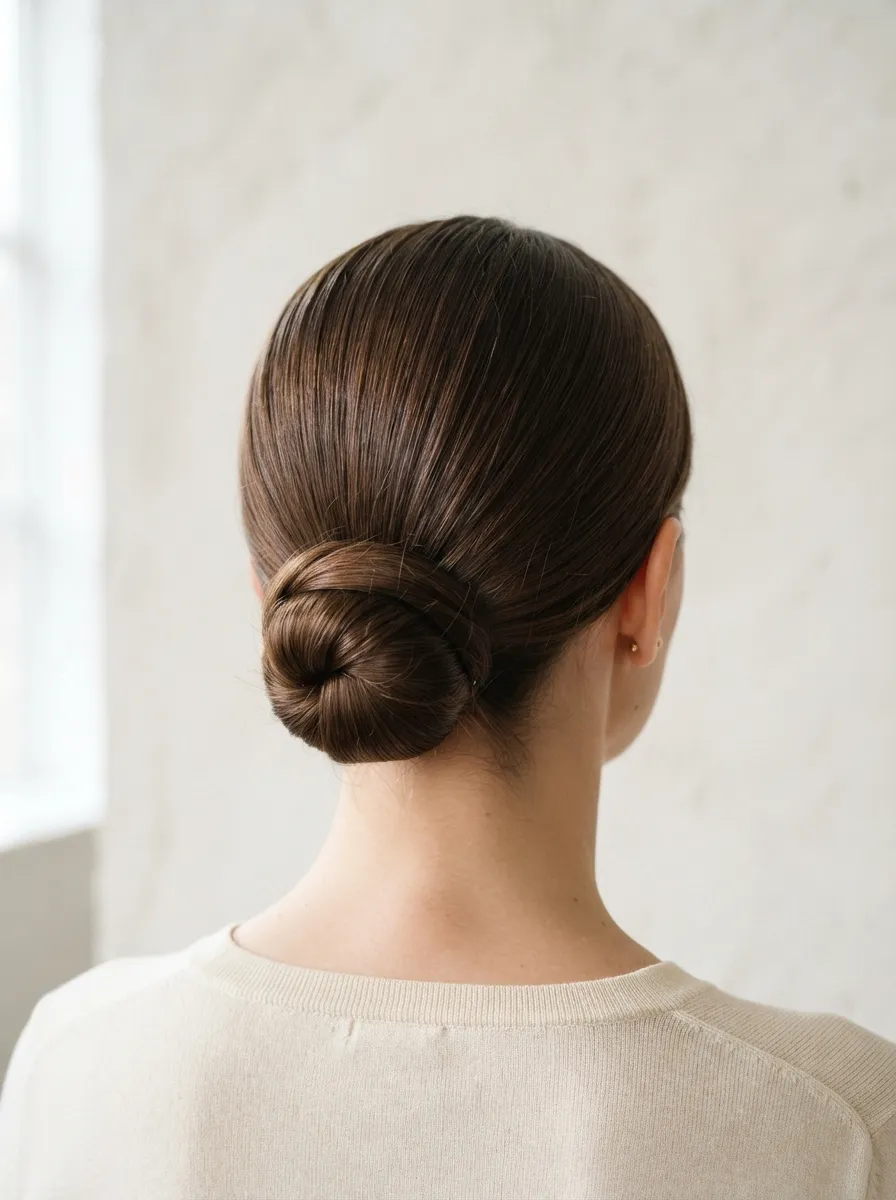
The low bun is the style most people learn first, and for good reason. It works with almost any outfit and takes only a few minutes once you get the hang of it. Start by gathering your hair into a low ponytail at the base of your neck. Twist the ponytail until it coils on itself, then wrap it around the base and pin it in place. Use four or five bobby pins in a criss cross pattern so it holds through a full day. For a budget friendly touch, a plain elastic and a handful of pins from a dollar store are all you need. If your hair is fine or slippery, spray a little dry shampoo on it first for grip. Try this for office days, casual dinners, or even a quick errand run when you want to look tidy without effort. Practice the twist and wrap motion a few times on a weekend so it becomes second nature. Once you master it, you can add small variations like a side part or a wrapped strand around the base for a slightly dressier finish.
2. Braided Crown
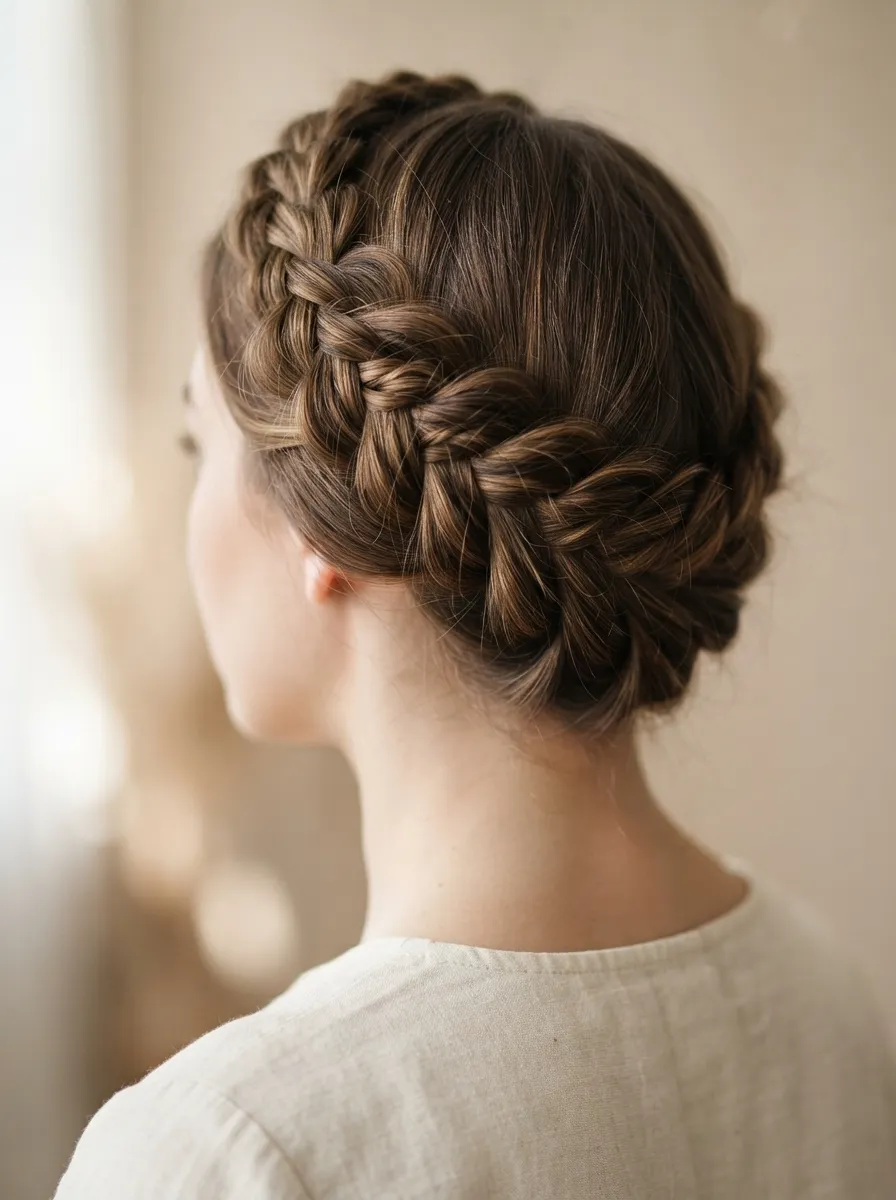
A braided crown looks complicated but only needs two simple braids. Part your hair down the middle and braid each side in a regular three strand braid. Pull the braids gently at the edges to make them look fuller and less tight. Then bring each braid across the top of your head and pin the ends near the opposite ear. Tuck any loose ends underneath so the crown looks continuous. This style works well for outdoor events since it keeps hair away from your face in wind. It also holds up through long days because braids stay put better than loose buns. For a low cost version, use small clear elastics instead of fancy hair ties, since they blend into any hair color. If your hair is short, this may only work as a half crown using the front sections. Practice this one a day or two before an event so you are comfortable with the pinning. Add small flowers or a thin ribbon woven into the braid if you want a slightly more decorated look for weddings or festivals.
3. Messy Top Knot

The messy top knot is the easiest style on this list and it barely needs any planning. Flip your head forward and gather your hair at the crown. Twist it loosely and wrap it around itself without trying to make it neat. Secure it with a claw clip or a couple of bobby pins. The goal is a relaxed, undone look rather than a tight bun. This works great for gym days, weekend errands, or lazy mornings when you still want to look intentional. You do not need any special products, though a small amount of texturizing spray helps if your hair is very smooth and slides out of place. A claw clip from any local store is often cheaper than an elastic set and holds thicker hair better. If you have layers or shorter pieces around your face, let them fall loose for a softer frame. This style also works as a quick fix on day two or three hair when you have not washed it yet, since a bit of natural oil actually helps the knot hold its shape longer.
4. Sleek High Ponytail Bun
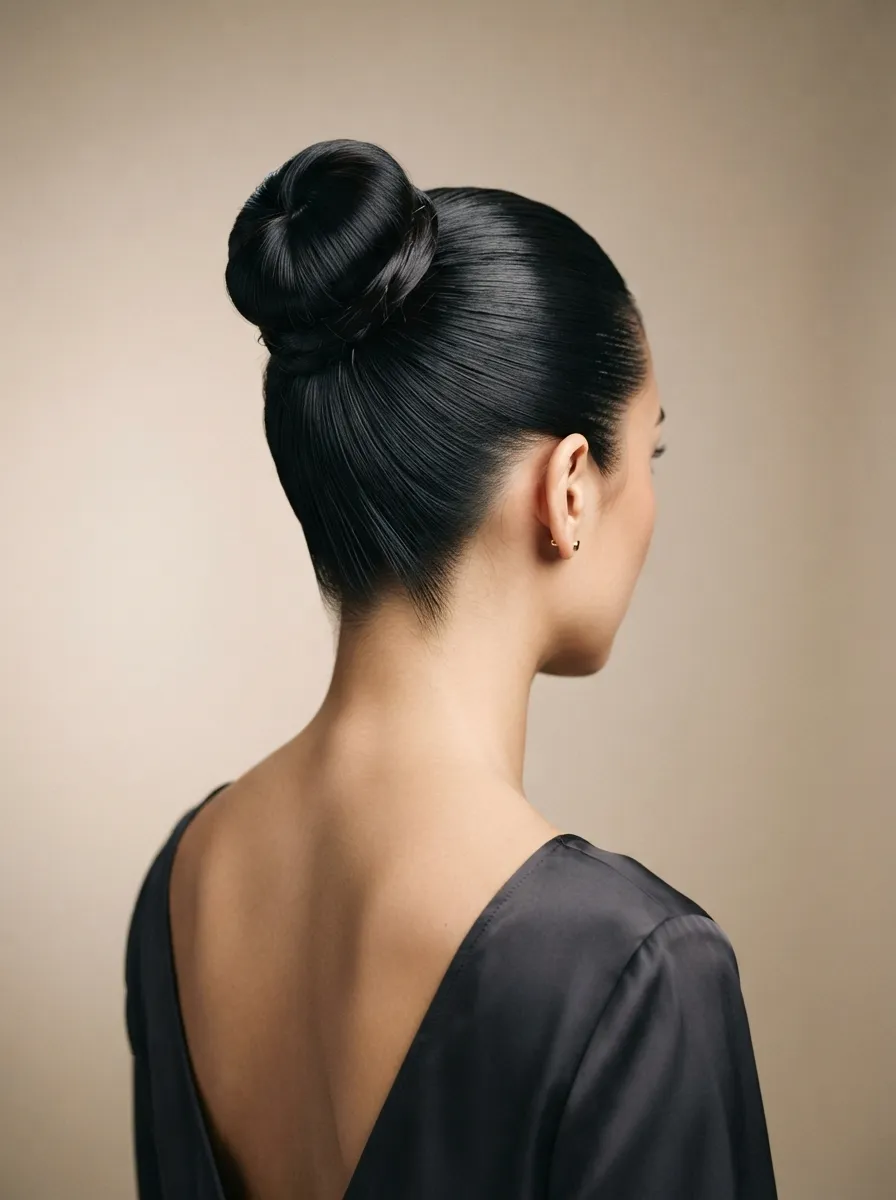
For a polished, formal look, the sleek high bun is a reliable choice. Brush your hair back tightly into a high ponytail and smooth down any bumps with a fine tooth comb. Wrap the ponytail around its base in a tight coil and pin it firmly. Use a bit of gel or hairspray on your palms before smoothing to keep flyaways under control. This style suits interviews, presentations, and formal dinners where a clean silhouette matters. A cheap toothbrush lightly sprayed with hairspray can smooth tiny baby hairs along the hairline without buying special edge control products. If your hair is naturally frizzy, apply a small amount of leave in conditioner before brushing it back. This bun also pairs well with statement earrings since it keeps the neck and ears fully visible. Practice pulling your hair back evenly so the part line stays centered, since an uneven pull can make the whole style look lopsided even after pinning it well.
5. Half Up Twisted Style
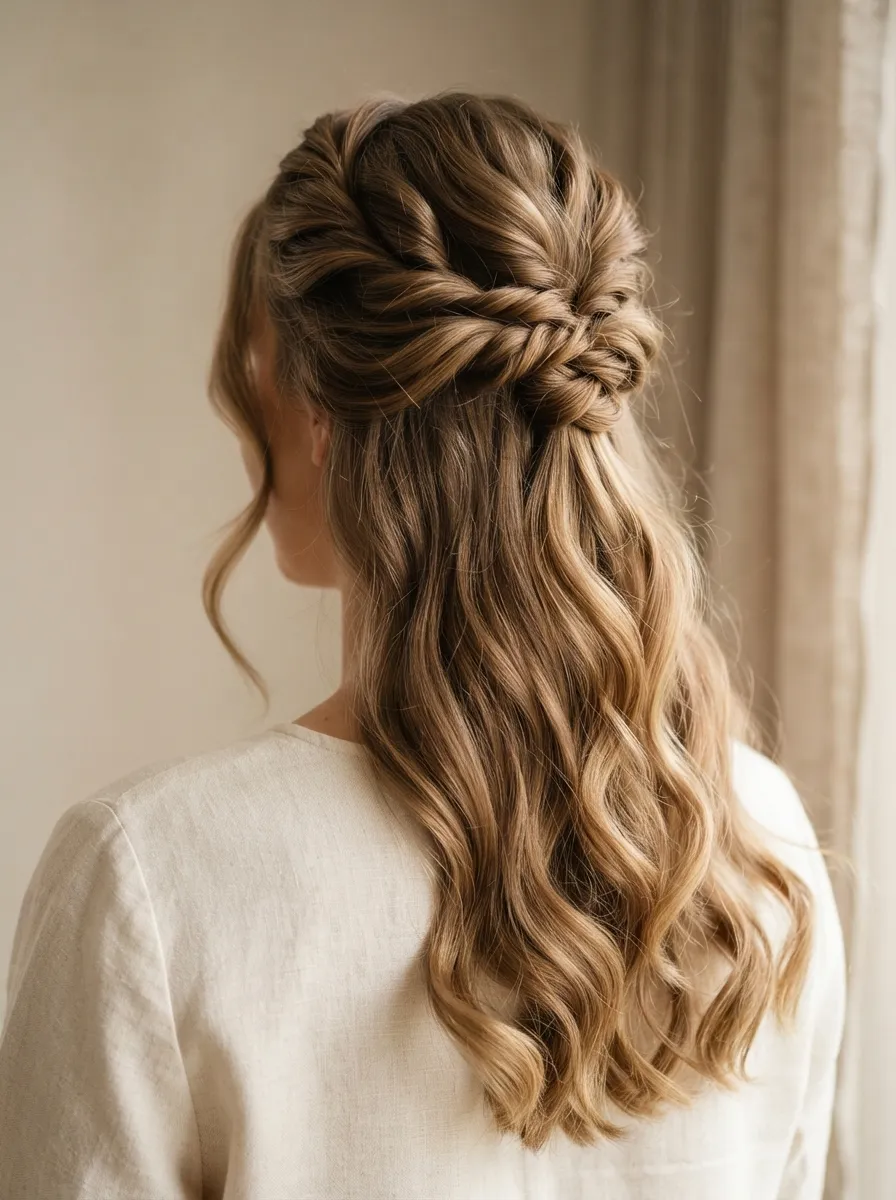
The half up twisted style gives you the best of both a formal and casual look. Take the top section of your hair, from ear to ear, and split it into two small sections. Twist each one back toward the center of your head and pin them together where they meet. Leave the rest of your hair down and loose. This style works for brunches, daytime events, or casual dates where you want your hair partly styled but still flowing. It takes less than five minutes once you understand the twisting motion. For added hold, cross the two twists over each other before pinning so they interlock slightly. A budget tip is to use two small matching pins instead of a decorative clip, which keeps the look simple and inexpensive. If your hair has natural waves, this style will look fuller without needing a curling iron. Straight hair also works fine, though a light curl on the ends adds a softer finish.
6. Low Twisted Bun
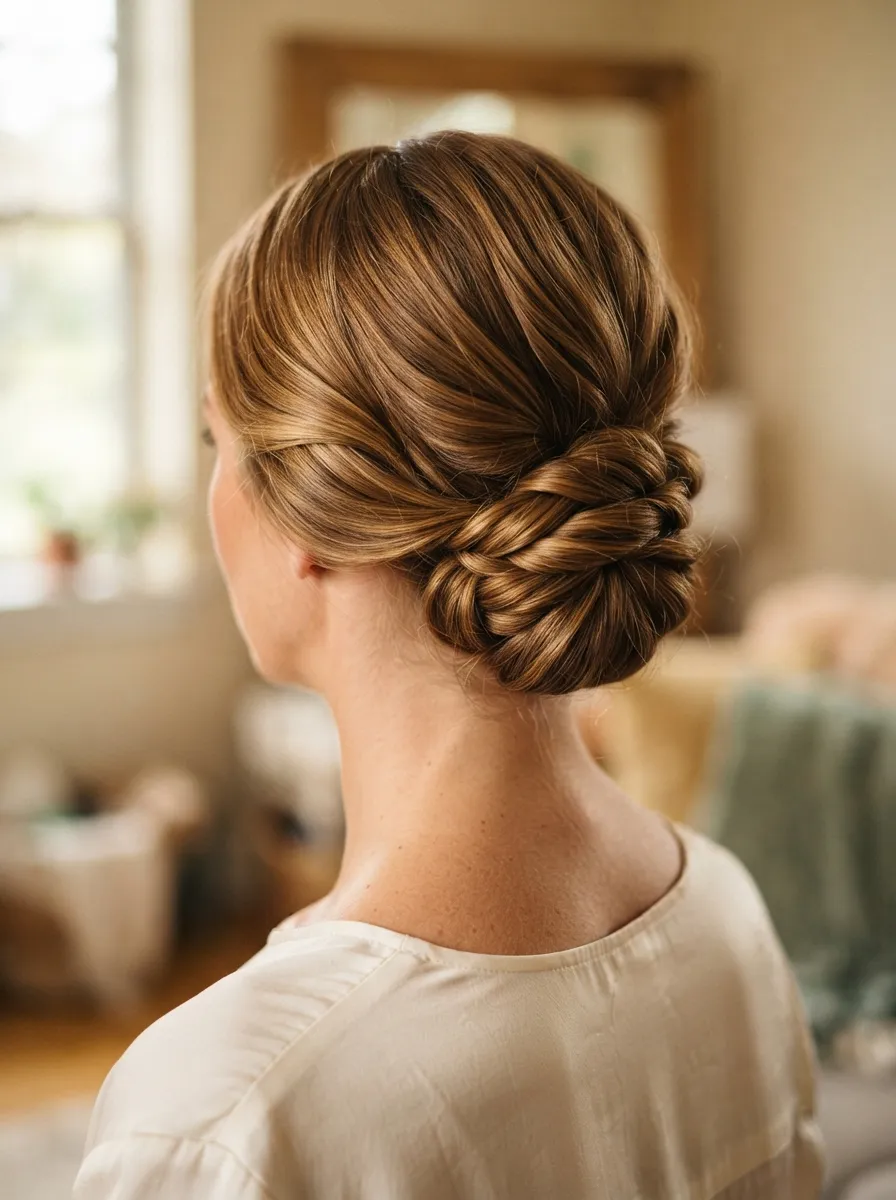
A low twisted bun adds a bit more detail than a plain bun without requiring advanced skill. Gather your hair low at the nape and instead of a single twist, split it into two sections before twisting each one separately. Twist the two sections together like a rope, then coil the rope into a bun shape and pin it. This creates visible texture that looks more finished than a flat bun. It works well for semi formal dinners, evening outings, or family gatherings where you want a little extra effort to show. Use a small amount of hair oil on the ends before twisting so they blend smoothly into the bun instead of sticking out. If you are on a budget, coconut oil from your kitchen works just as well as styling serum for this purpose. This style also holds up longer than a single twist bun because the rope pattern keeps loose strands locked in place through movement and wind.
7. Chignon With a Side Part
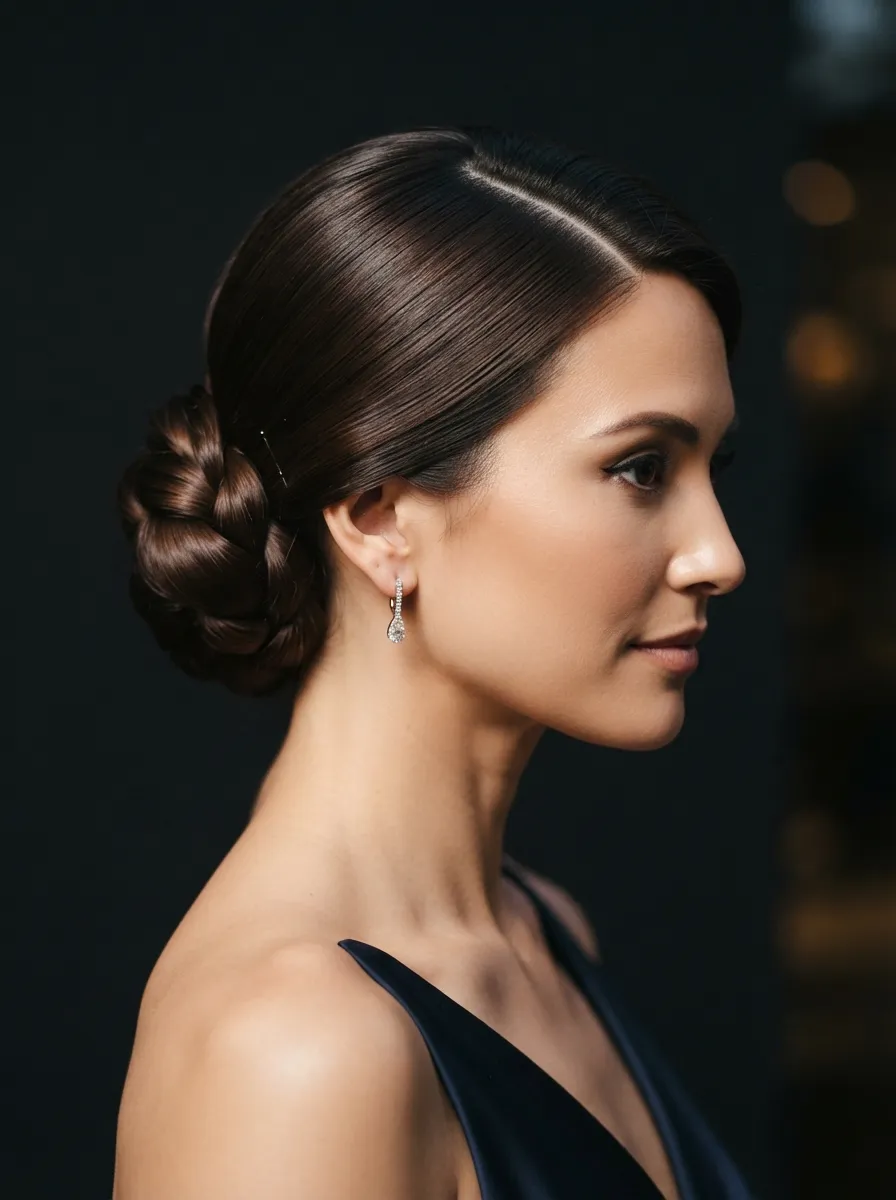
A chignon with a side part is a small change that makes a familiar style feel new again. Part your hair deeply on one side, then gather it toward the opposite side of your neck. Twist it into a loose knot and pin it flat against your head rather than letting it sit high. The deep side part frames your face differently and works especially well if you have a strong jawline you want to show off. This is a great choice for evening dinners, cocktail parties, or date nights. If you want a shinier finish, run a flat iron once over the section near your part before pulling it back. A cheap serum or even a drop of coconut oil rubbed between your palms and smoothed over the top adds shine without looking greasy. This style pairs nicely with drop earrings since the asymmetry already draws attention to one side of the face, creating a balanced overall look.
8. Double Braided Bun
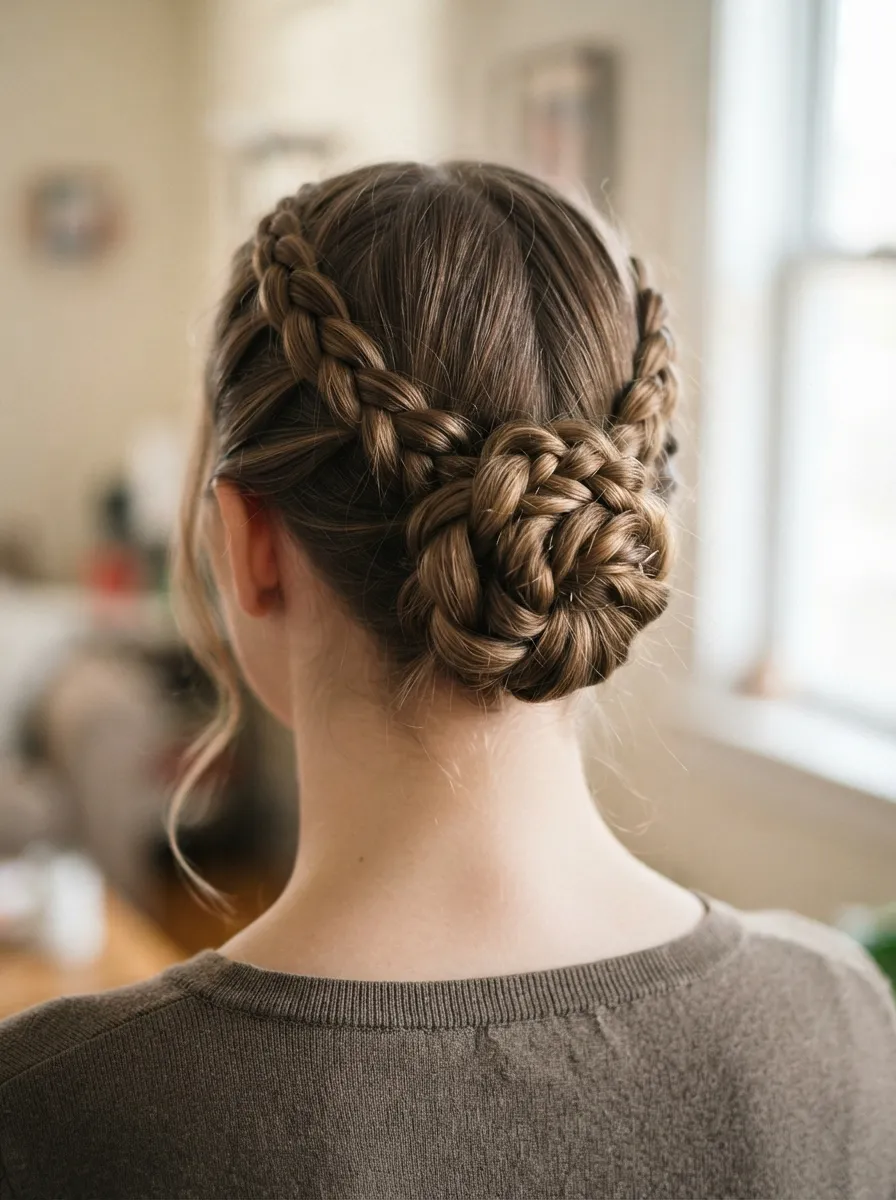
The double braided bun combines two techniques into one polished result. Start by braiding two small sections from each side of your part, near the temples. Bring both braids to the back of your head and combine them with the rest of your hair into a low bun. Pin everything together so the braids frame the top while the bun holds the bulk of your hair. This style works well for weddings, graduations, or any event where you want a slightly detailed look without spending an hour styling. It also keeps hair secure for long hours of standing or dancing. A useful budget tip is practicing the small braids on dry hair first, since damp hair can be harder to control for beginners. If your hair is thin, these small braids also add the appearance of volume near the crown, which is a nice side benefit for anyone wanting a fuller look without extensions or added products.
9. Textured Low Ponytail Twist
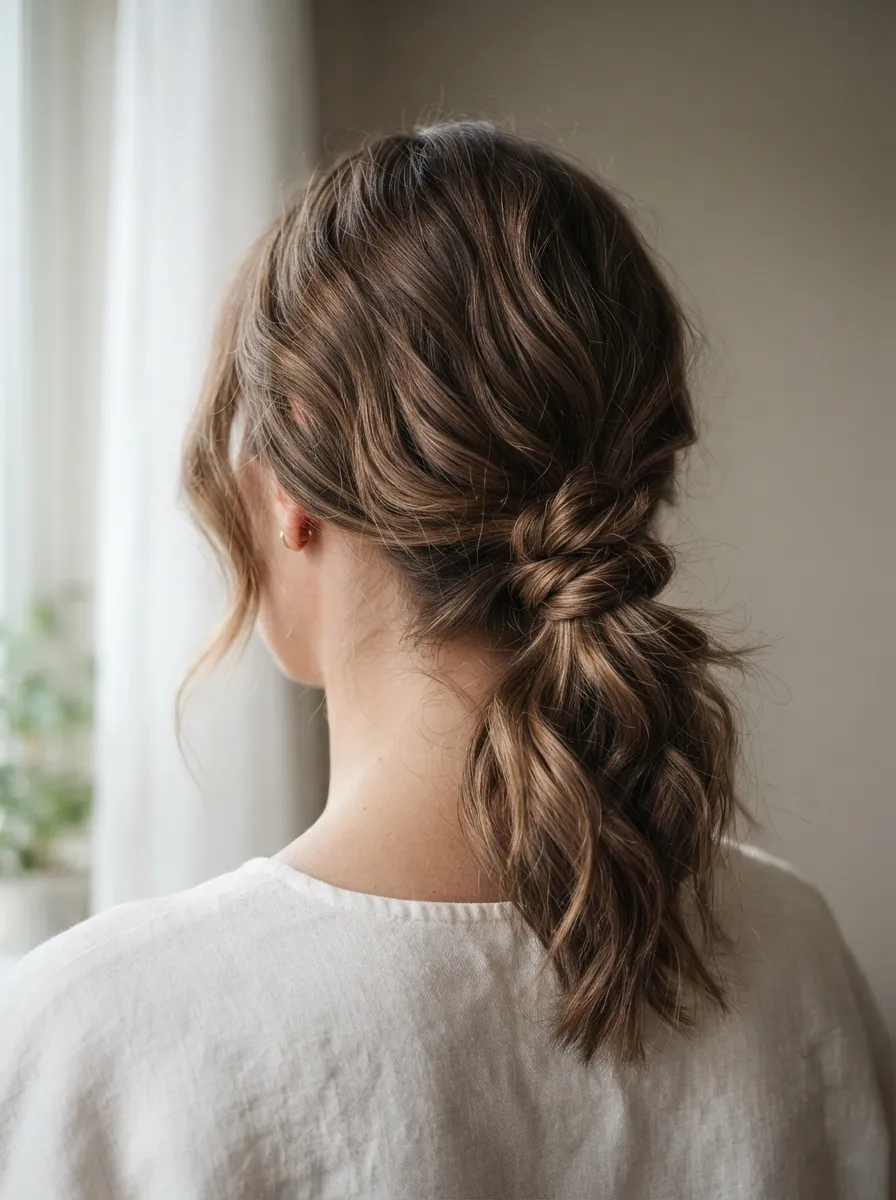
This style takes the classic low bun and adds texture on purpose. After gathering your hair into a low ponytail, gently pull apart small sections of the twist before pinning it down. This creates a softer, less structured look compared to a tightly wound bun. It suits casual weddings, garden parties, or daytime events with an outdoor setting. The slightly undone appearance also hides small styling mistakes, which makes it a forgiving option for beginners. A texturizing spray helps hold the pulled apart sections in place, but if you do not want to buy one, a light mist of salt water in a spray bottle works as a cheap substitute. Let it dry slightly before pulling the twist apart for the best texture. This look pairs naturally with loose waves left around the face, so if you have time, a quick curl with a wand on the front pieces adds a nice finishing touch.
10. High Braided Bun
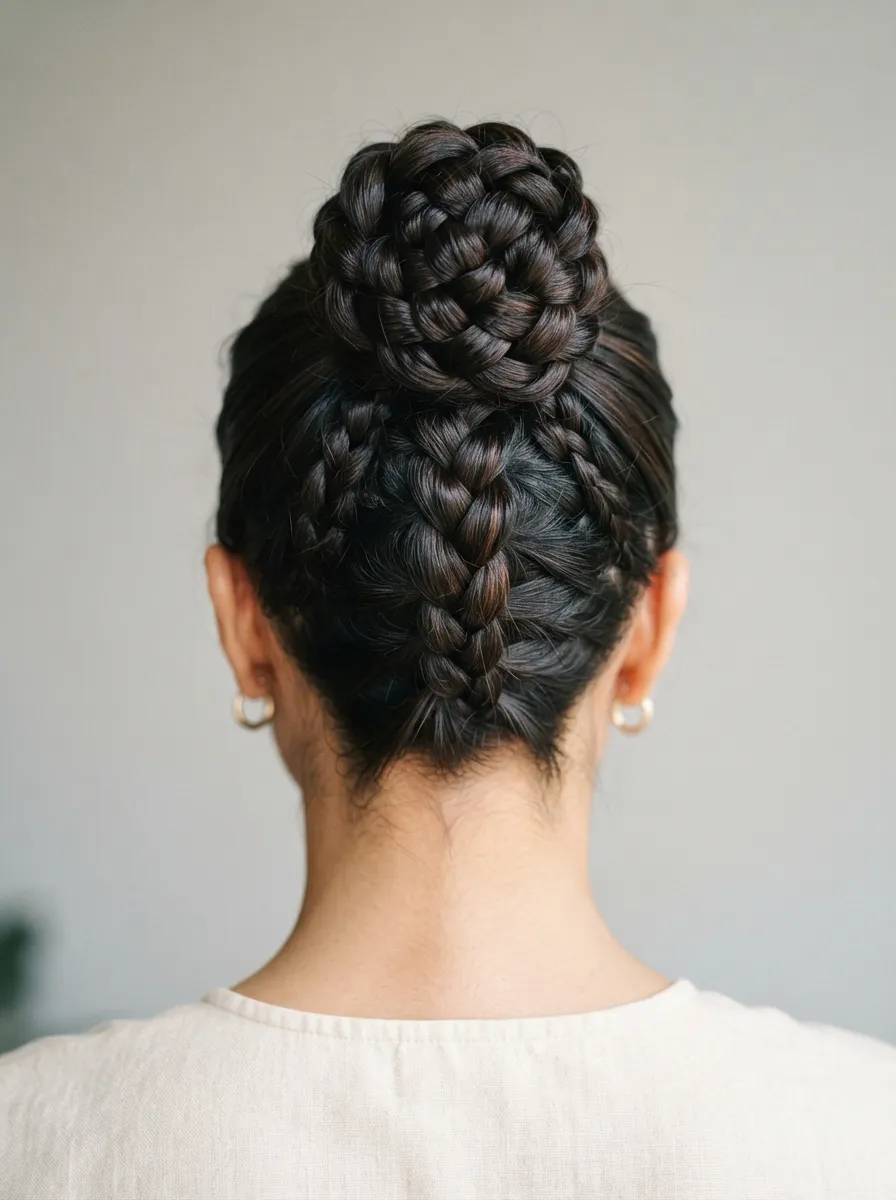
A high braided bun takes a bit more patience but delivers a striking result. Gather your hair into a high ponytail, then braid the ponytail fully from base to tip. Once braided, coil the braid around itself into a bun shape and pin it securely. The braid pattern gives the bun visible texture instead of a plain smooth surface. This style works well for formal events, festive celebrations, and any occasion where you want your hairstyle to stand out a little more. It also tends to last through long hours since braided hair holds shape better than smooth hair. If your arms get tired braiding your own hair upside down or behind your head, practice on a ponytail at the front first, then move it back once you are comfortable with the pattern. A few bobby pins from a basic drugstore pack are enough to secure the coil, so there is no need for expensive hair accessories to pull this off well.
11. Loose Side Bun
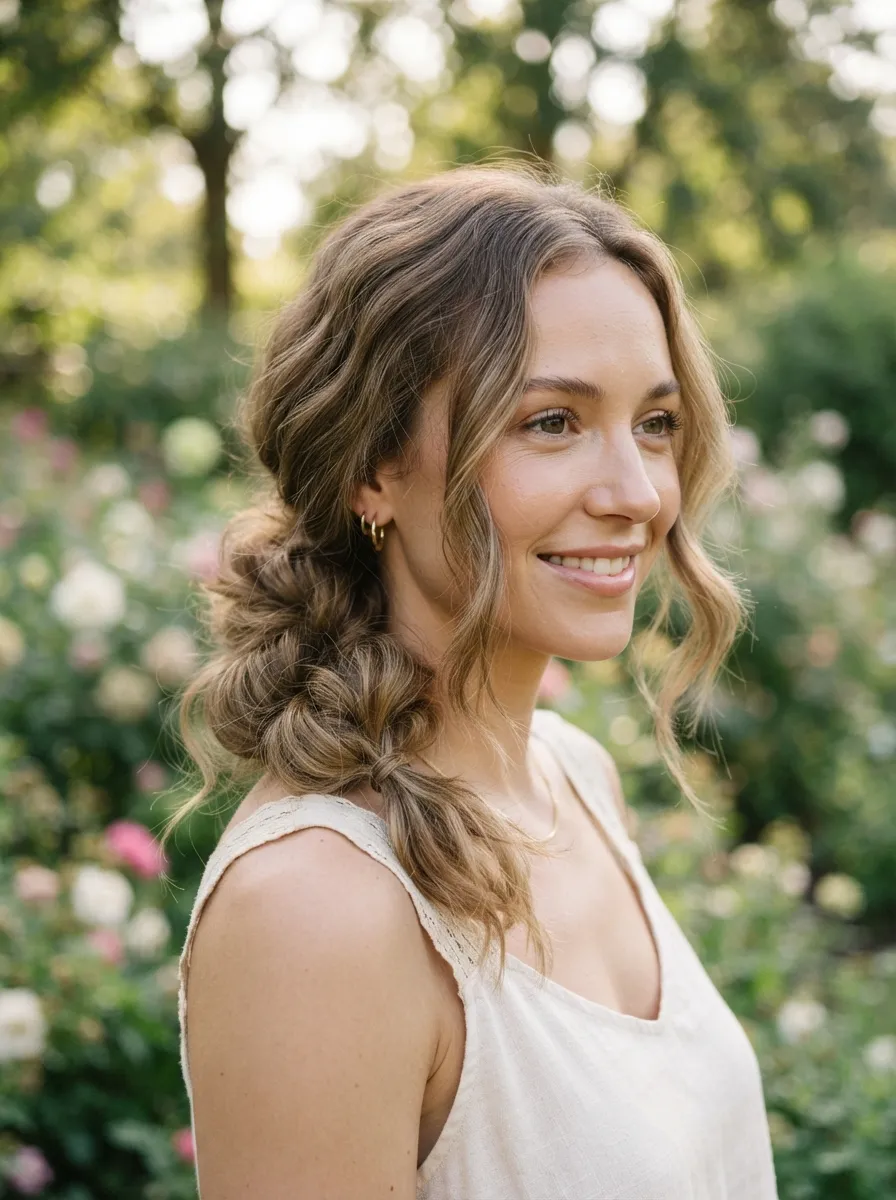
The loose side bun has a romantic, relaxed feel that works well for evening events. Gather your hair to one side at the nape and twist it loosely before securing it with pins near your ear or lower neck area. Leave a few pieces out around your face for a softer frame. This style suits date nights, rehearsal dinners, or beach weddings where a slightly undone look fits the mood better than a tight formal bun. To keep it from unraveling, use bobby pins in an X pattern rather than just one or two straight pins. If your hair does not hold curls well, a bit of texturizing spray before twisting adds grip so the bun stays loose but secure. This look also works nicely with hair left slightly wavy from a braid the night before, which is a free way to add texture without heat styling or expensive products the morning of an event.
12. Twisted Half Bun
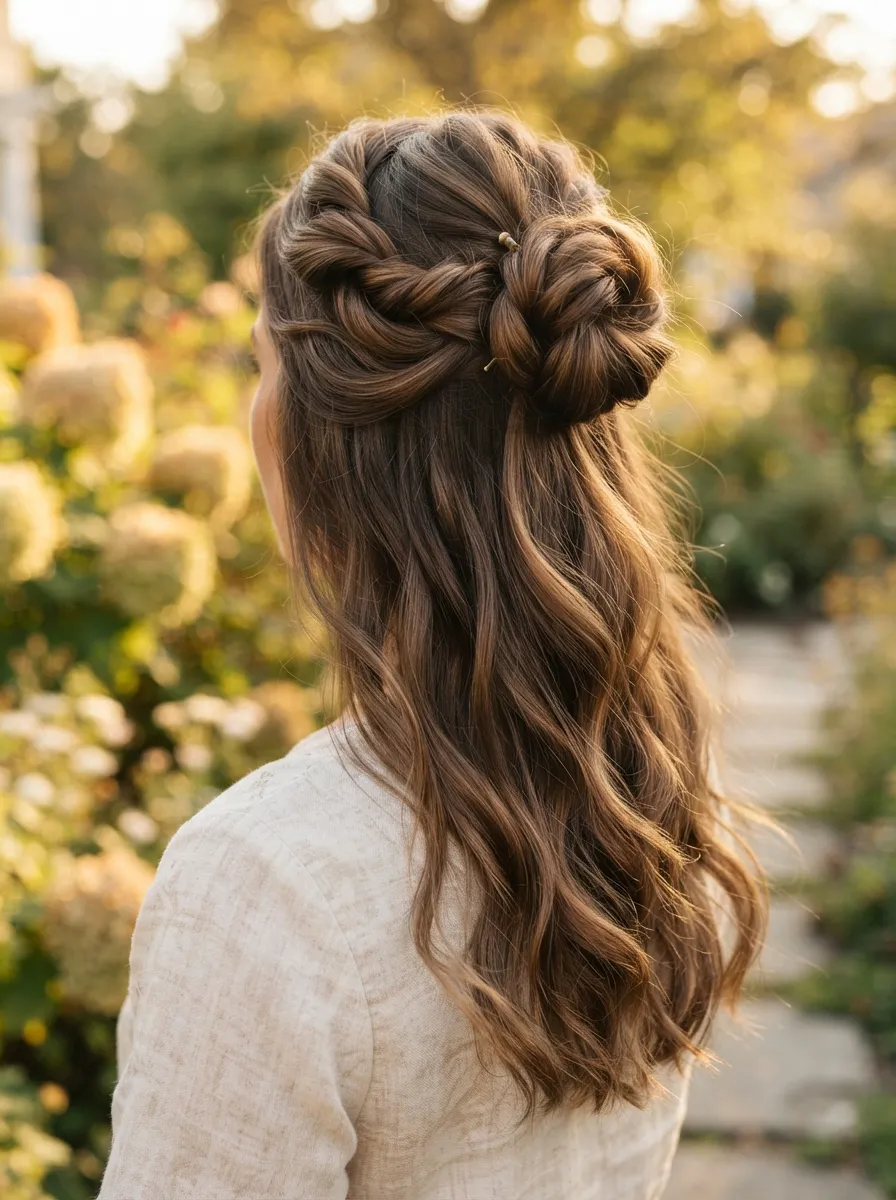
The twisted half bun is a step up from the basic half up style. Instead of just twisting the top section back and pinning it flat, gather it into a small bun shape instead of leaving it as a flat twist. This gives a bit more height and structure while still leaving the rest of your hair down. It works for semi formal parties, dinner dates, or daytime celebrations. Because only part of your hair is pinned up, this style is fast to create even if you are getting ready in a hurry. A budget friendly trick is using a small foam hair donut, which can be bought cheaply, to make the small bun look fuller without needing thick hair. Slip the top section through the donut, wrap the ends around it, and pin the edges down. This gives the appearance of a much bigger bun using only a small amount of hair.
13. Rope Braid Updo
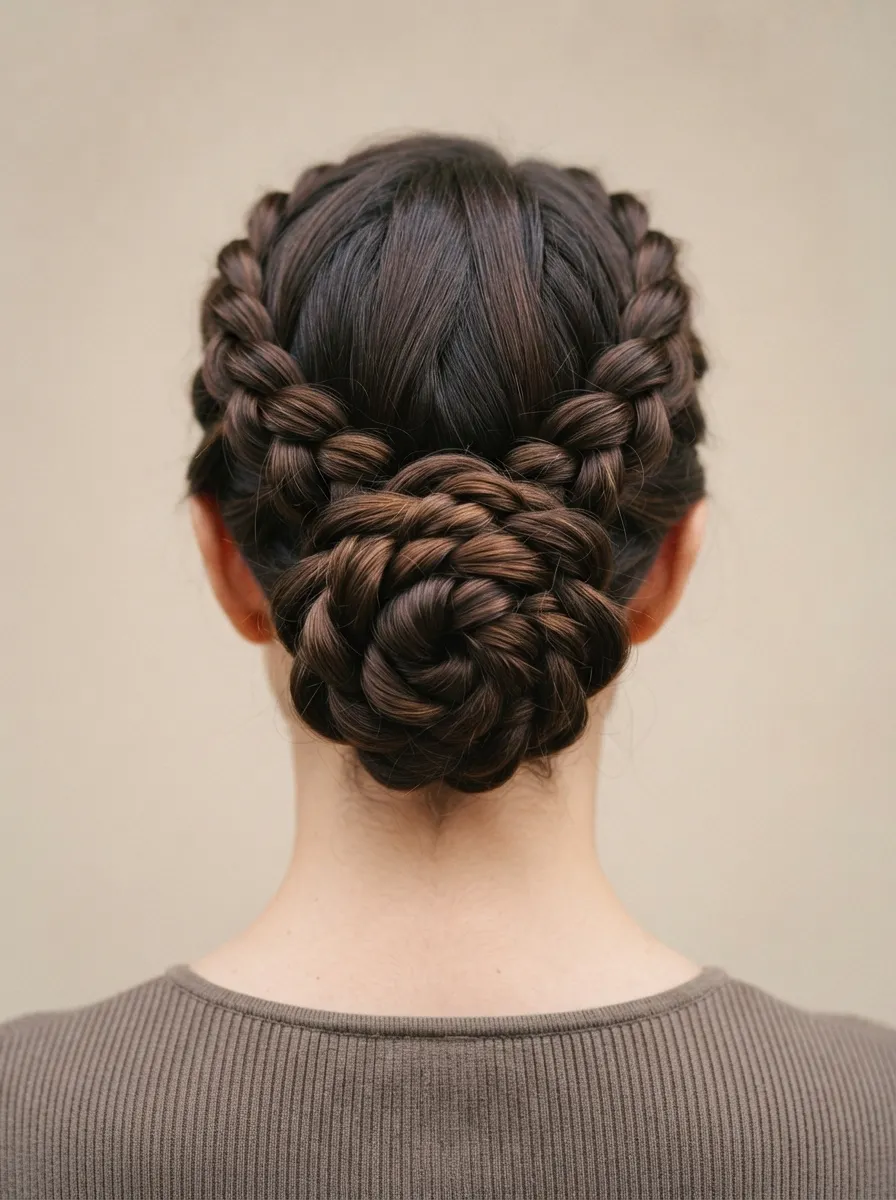
A rope braid looks more complex than a regular braid but is actually simpler to create. Take two sections of hair, twist each one individually in the same direction, then twist the two sections together in the opposite direction. This creates a spiral rope pattern. Once you reach the ends, coil the rope into a bun or loop it into a low updo and pin it in place. This style suits weddings, anniversaries, or any event with a slightly formal dress code. It also photographs well because the spiral pattern catches light nicely. If you struggle with the twisting direction, practice on a doll or a friend first to get comfortable with the motion before trying it on your own head. A cheap elastic to secure the ends before you start coiling helps keep the rope from unraveling while you work on pinning it into place.
14. Bubble Ponytail Updo
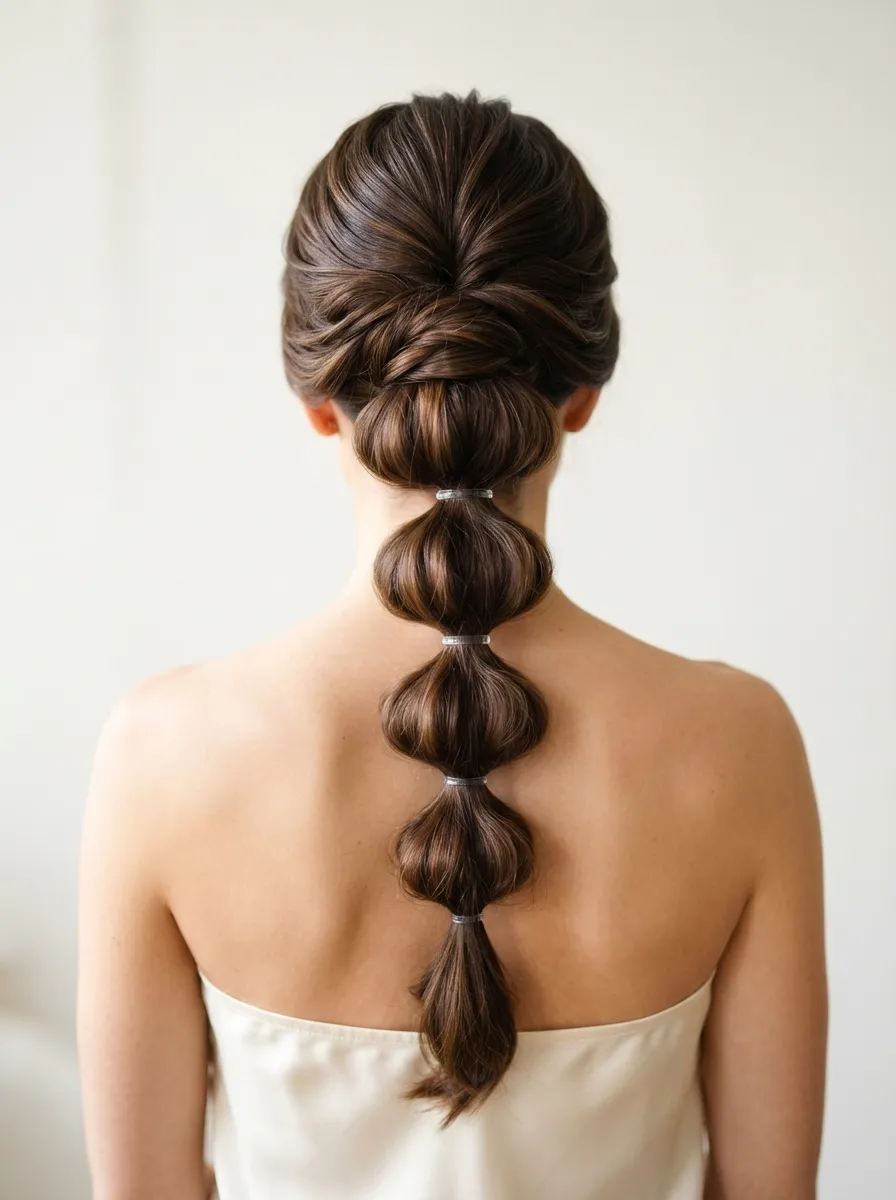
A bubble ponytail is a fun, modern take on an updo. Gather your hair into a ponytail, then place small elastics at even intervals down the length. Gently pull apart the hair between each elastic to create a rounded bubble shape. Once you have a few bubbles, coil the ponytail into a bun or loop shape at the base and pin it. This style suits birthday parties, casual celebrations, or any event where you want something playful rather than strictly formal. Small clear elastics work best since they disappear into the hair and keep the bubbles looking clean. This is also a great style to try with kids or teenagers since it is fun to create and does not require heat styling. If you want extra shine on each bubble section, a small amount of hair oil rubbed between your fingers before pulling the sections apart adds a nice glossy finish without looking heavy.
15. Low Bun With Face Framing Pieces
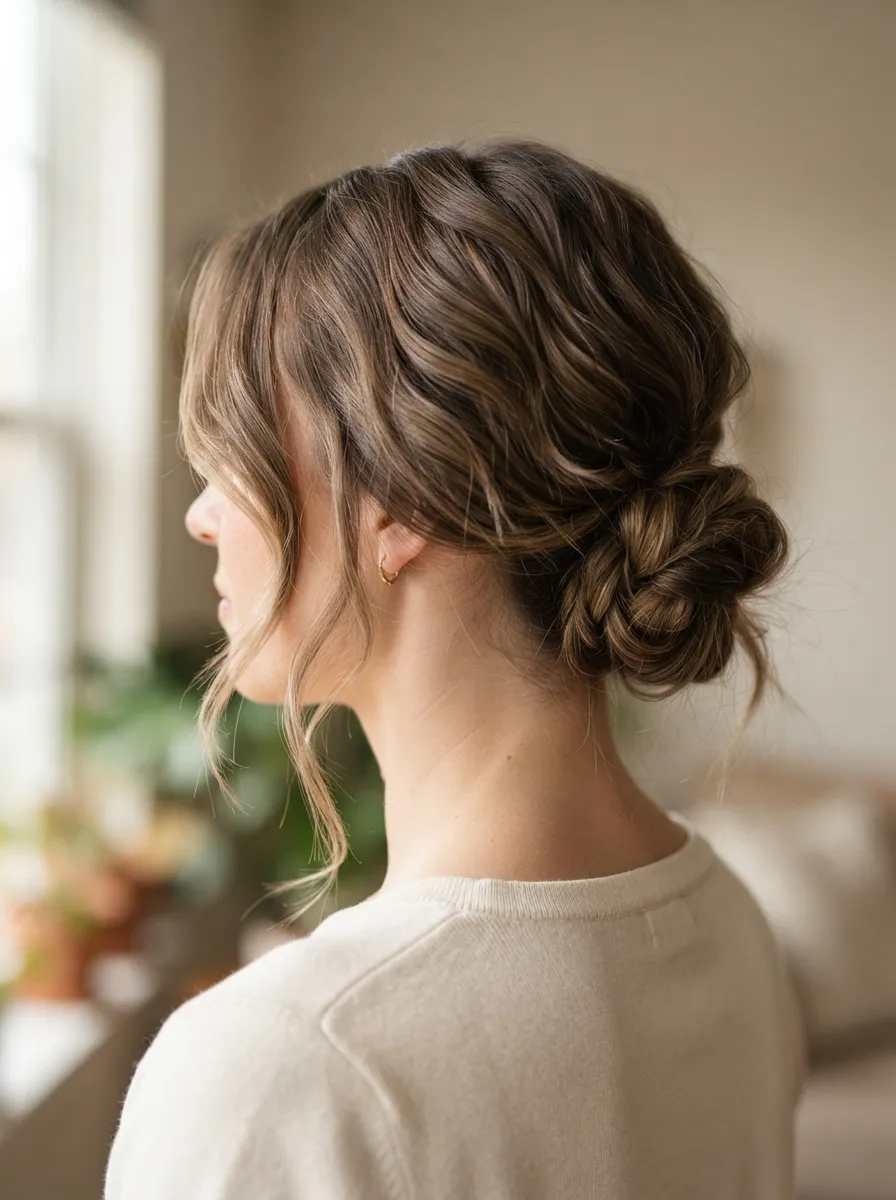
This style softens the classic low bun by leaving a few pieces out around the face. Create your low bun as usual, then pull two small sections loose near your temples before you finish pinning. Curl these pieces lightly with a wand or straightener to frame your face. This works especially well for round or square face shapes since the loose pieces add a soft contrast to the pulled back style. It suits weddings, formal dinners, or any event where you want a flattering, feminine finish. A budget friendly tip is using a flat iron you already own to create loose waves on the face framing pieces instead of buying a curling wand. Simply clamp small sections and twist the iron away from your face while pulling down gently. This creates soft bends without a specialized tool, which keeps costs low while still giving the style a finished, intentional look.
16. Braided Low Bun Combo
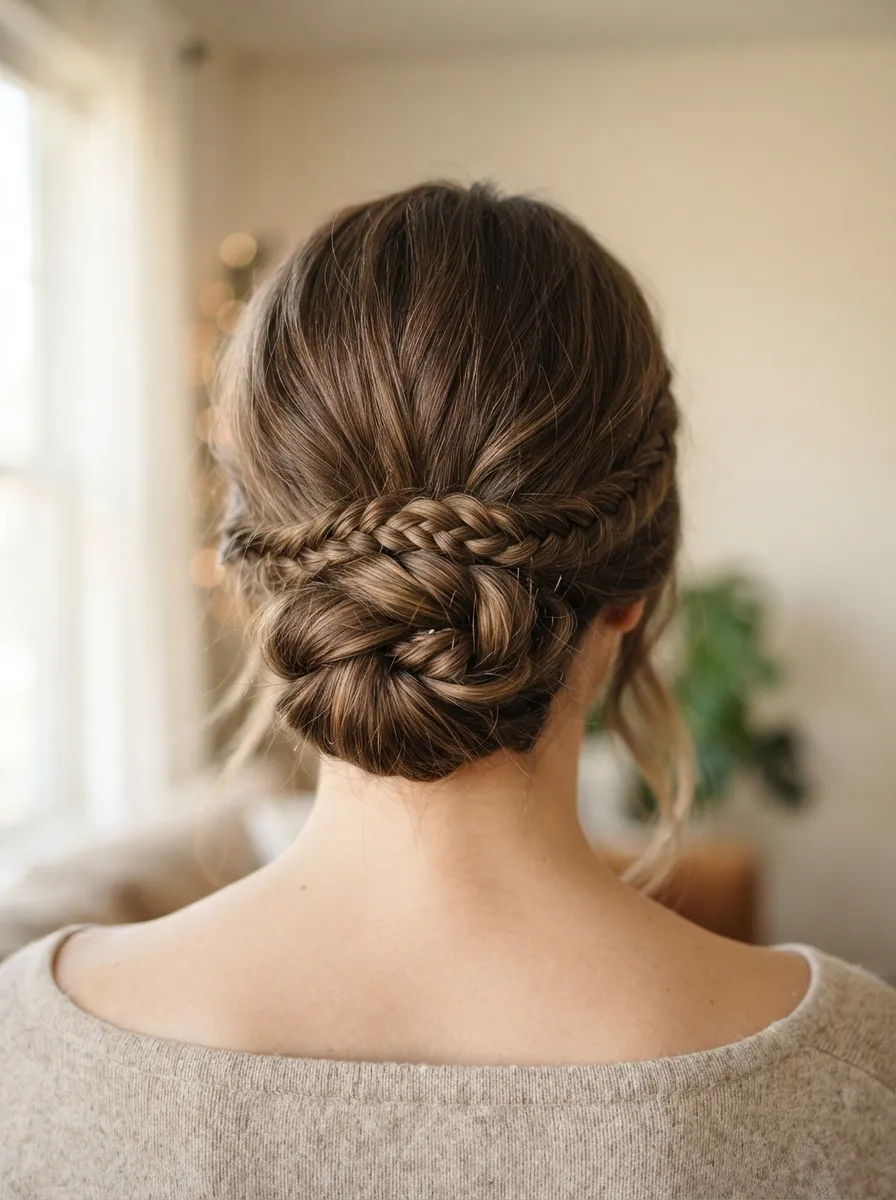
This style takes a plain low bun and wraps a thin braid around its base for extra detail. First create your low bun as you normally would. Then take a small section of hair from underneath, braid it, and wrap it around the base of the bun to cover the elastic or bobby pins. Pin the end of the braid underneath so it stays hidden. This small addition makes a simple bun look noticeably more finished, which makes it a great choice for weddings, work events, or any occasion where first impressions matter. It only adds a minute or two to your usual bun routine but changes the entire look. If you do not have a spare section to braid, take a thin strand from the top of your bun before fully pinning it down. This style works on all hair lengths as long as you have enough hair to create a small three strand braid from a single section.
17. Twisted Space Buns
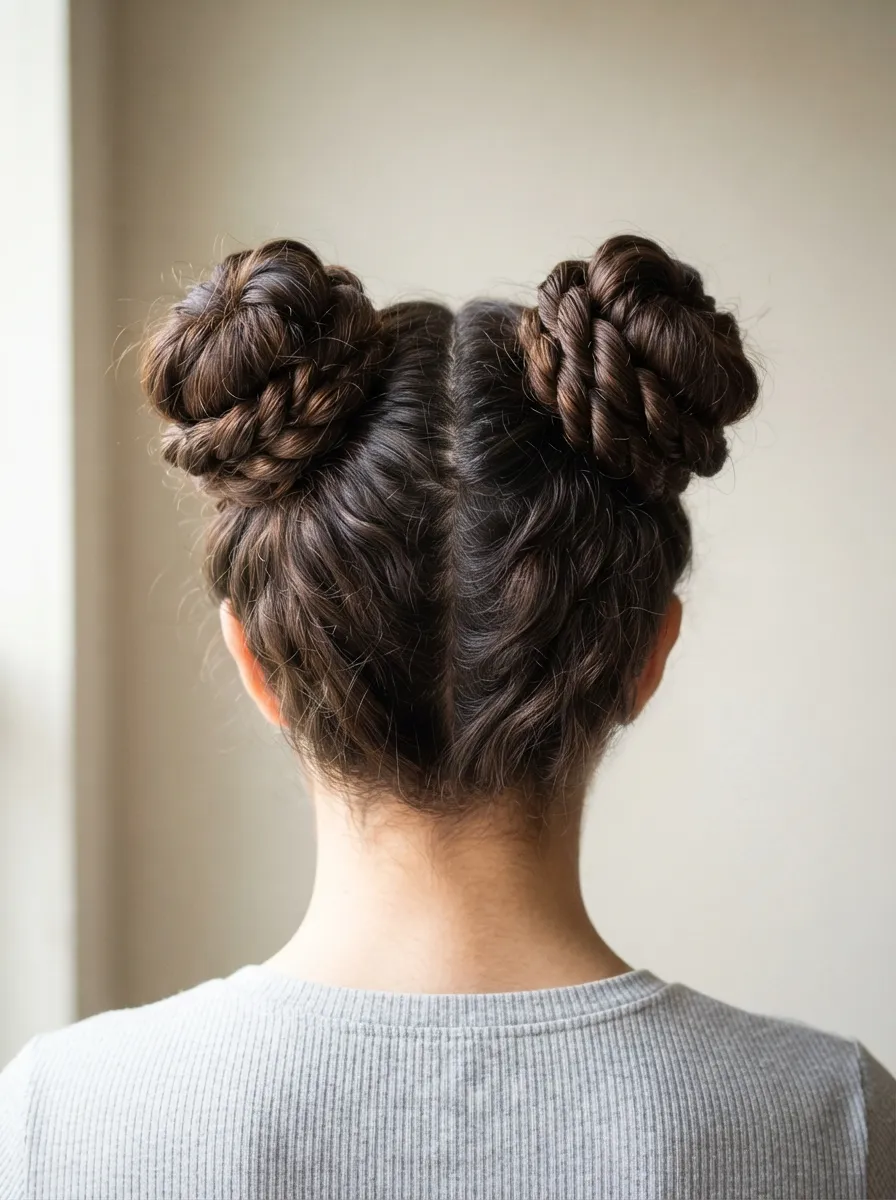
Space buns bring a youthful, fun energy to an updo look. Part your hair down the middle and gather each side into its own ponytail near the crown. Twist each ponytail instead of just wrapping it, then coil each twisted section into a bun shape and pin them symmetrically. This style suits festivals, casual parties, or everyday wear when you want something different from your usual routine. Twisting the sections before coiling gives them a bit more texture compared to plain space buns. A budget tip is using two matching small elastics from a basic hair tie pack so both buns look even in size and placement. If your face is on the rounder side, keep the buns slightly higher and closer together for a more flattering shape. This style also works well paired with bold makeup or colorful accessories since the simple hair shape leaves room for other elements to stand out.
18. Vintage Pin Curl Updo
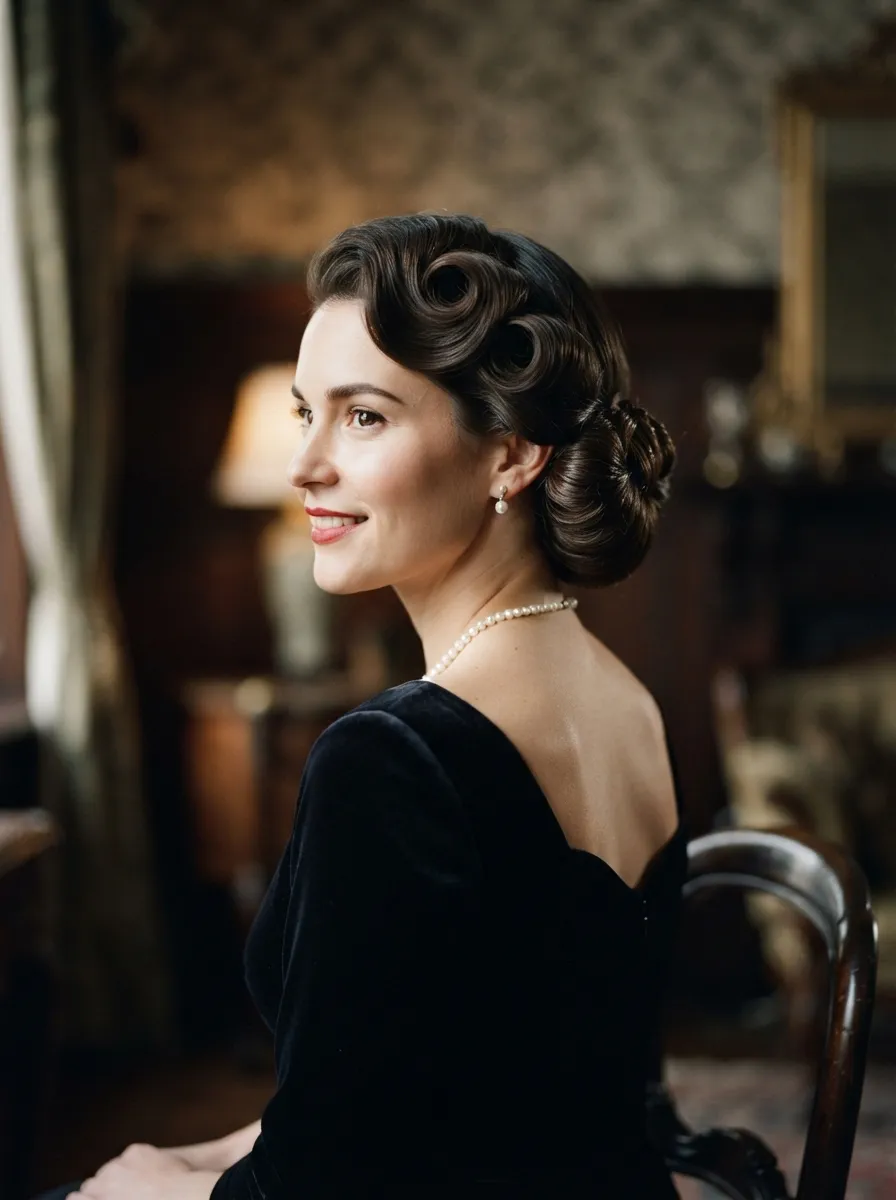
This style borrows from vintage hairstyling techniques using pin curls. Set small sections of damp hair into curls using bobby pins, let them dry fully, then release the curls and gently brush them into soft waves. Pin the sides and back into a classic swept updo, leaving the waves visible near the crown and temples. This look suits themed parties, formal events, or anyone wanting a timeless style for photos. Setting pin curls takes patience, so plan to do this the night before an event rather than the same morning. A cheap alternative to a curling iron, pin curls only need clean, damp hair and a pack of bobby pins you likely already own. Sleep with a silk or satin scarf over the curls if possible to protect the shape overnight. In the morning, simply remove the pins, brush gently, and pin the sides back for a soft, classic finish that looks like it took much more effort than it actually did.
19. Sleek Ponytail Into a Loop Bun
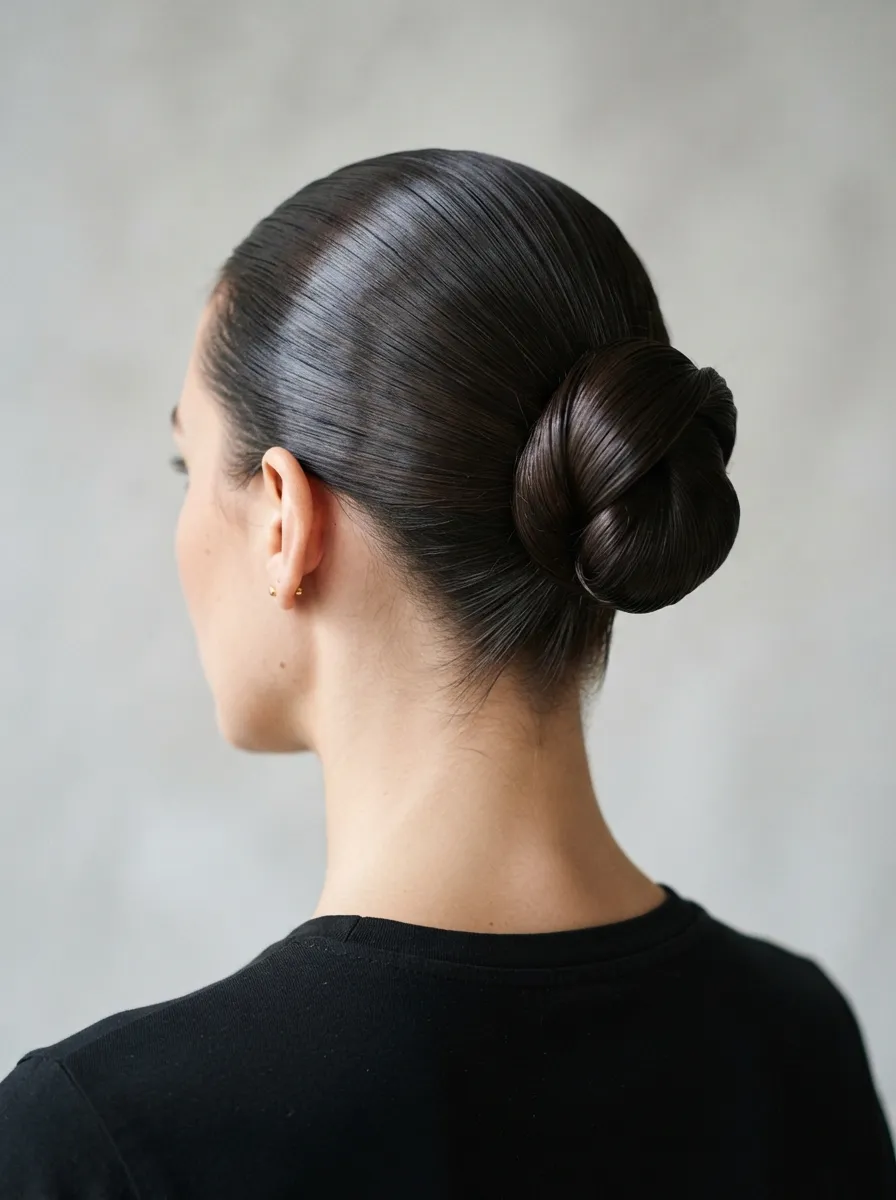
This style takes a simple sleek ponytail and transforms it into a loop rather than a coiled bun. Pull your hair into a high or mid ponytail, then instead of wrapping it around itself, fold the ponytail up and secure the folded loop with an elastic and pins. Tuck the tail end of the loop underneath and pin it flat. This creates a clean, structured shape that looks modern and tidy. It works well for interviews, business meetings, or formal events where a crisp silhouette is the goal. Smooth your hair with a comb and a small amount of gel before pulling it back to avoid bumps along the top. A cheap alternative to expensive smoothing products is a small dab of hand lotion rubbed thinly over your palms before smoothing your hair back. This style holds its shape for many hours, making it a solid choice for long work days or events that run late into the evening.
20. Braided Halo Updo
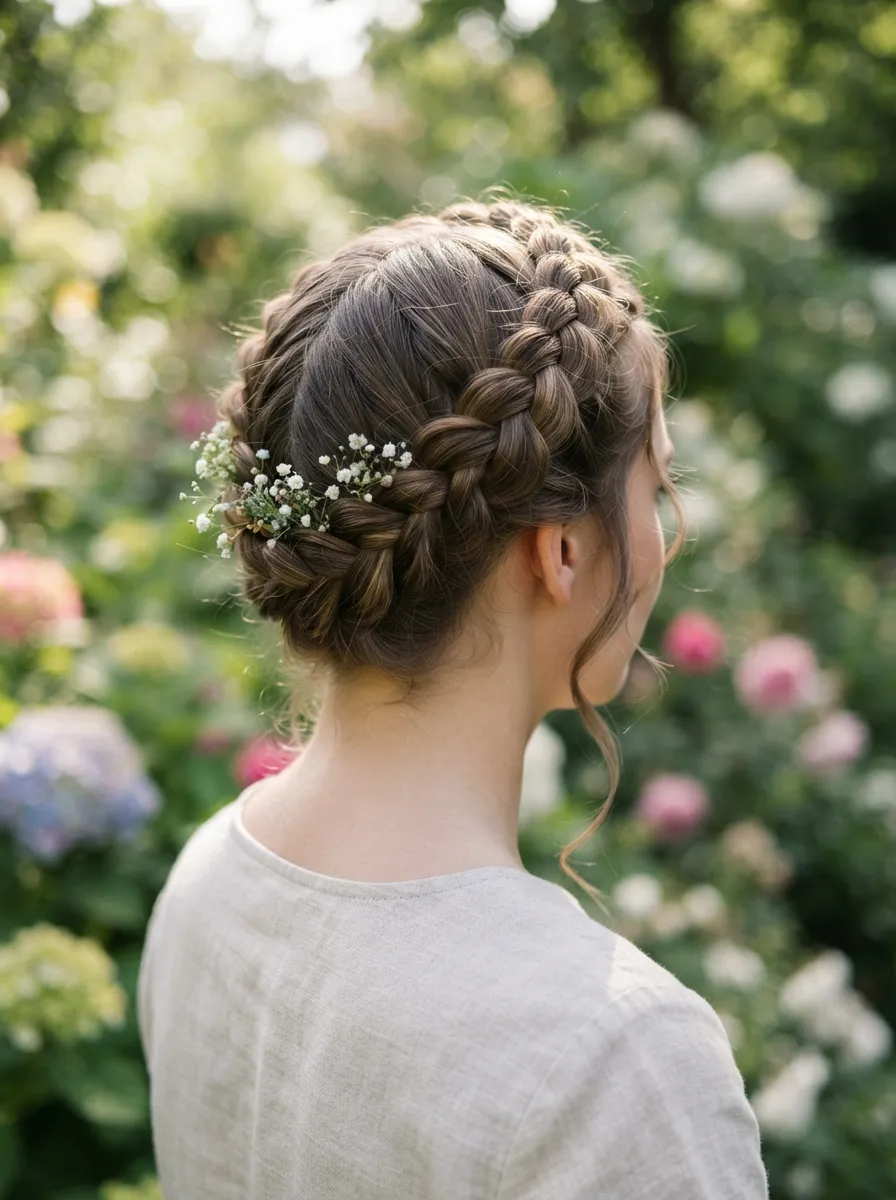
The braided halo takes the crown braid idea further by wrapping a single long braid entirely around the head. Braid a large section of hair from one side, starting near your ear, and continue wrapping it around your head until it meets the starting point. Pin the braid in place every few inches so it lays flat and secure. This style works beautifully for outdoor weddings, spring celebrations, or garden parties. It keeps hair fully off the face and neck, which is practical for warm weather events. If your hair is not long enough to circle your entire head, extend the braid using a small clip in hair piece, which is far more affordable than a salon visit and blends in well when matched to your hair color. Add small flowers along the braid for a festive touch, using real or artificial stems tucked gently between sections rather than pinned directly into the scalp.
21. Low Knot With Wrapped Strand
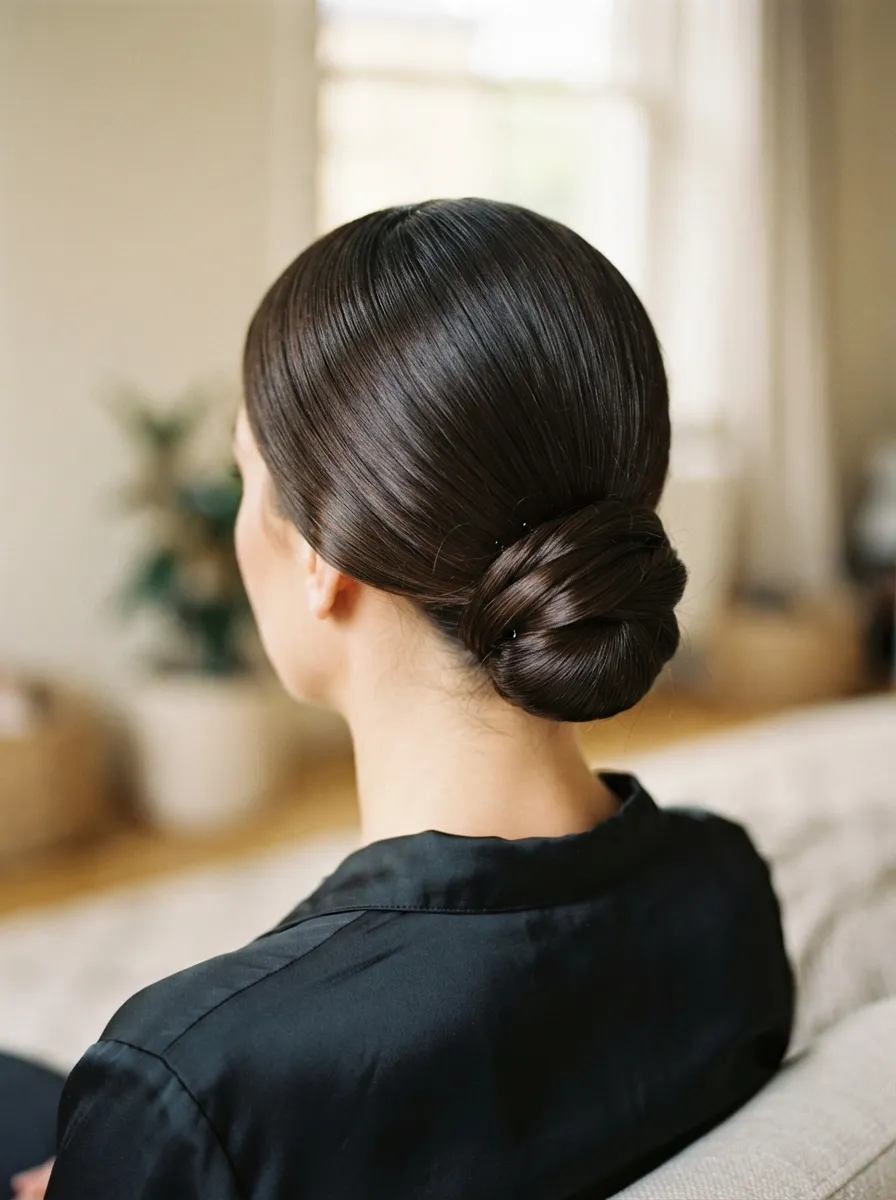
This style is a small upgrade to the basic low knot. After twisting your hair into a low knot and pinning it, take one thin strand from the underside of the bun and wrap it around the base to hide the elastic completely. Pin the end of the wrapped strand underneath the bun so it stays hidden from view. This tiny detail makes the whole style look much more finished and salon like without extra cost or time. It suits work presentations, dinner parties, or casual weddings where a clean but simple look is needed. Practice wrapping the strand snugly but not too tight, since overly tight wrapping can make the strand slip loose during the day. A single spare bobby pin is often all you need to finish this look, making it one of the most affordable upgrades you can add to an otherwise plain hairstyle.
22. Curled Half Up Bun
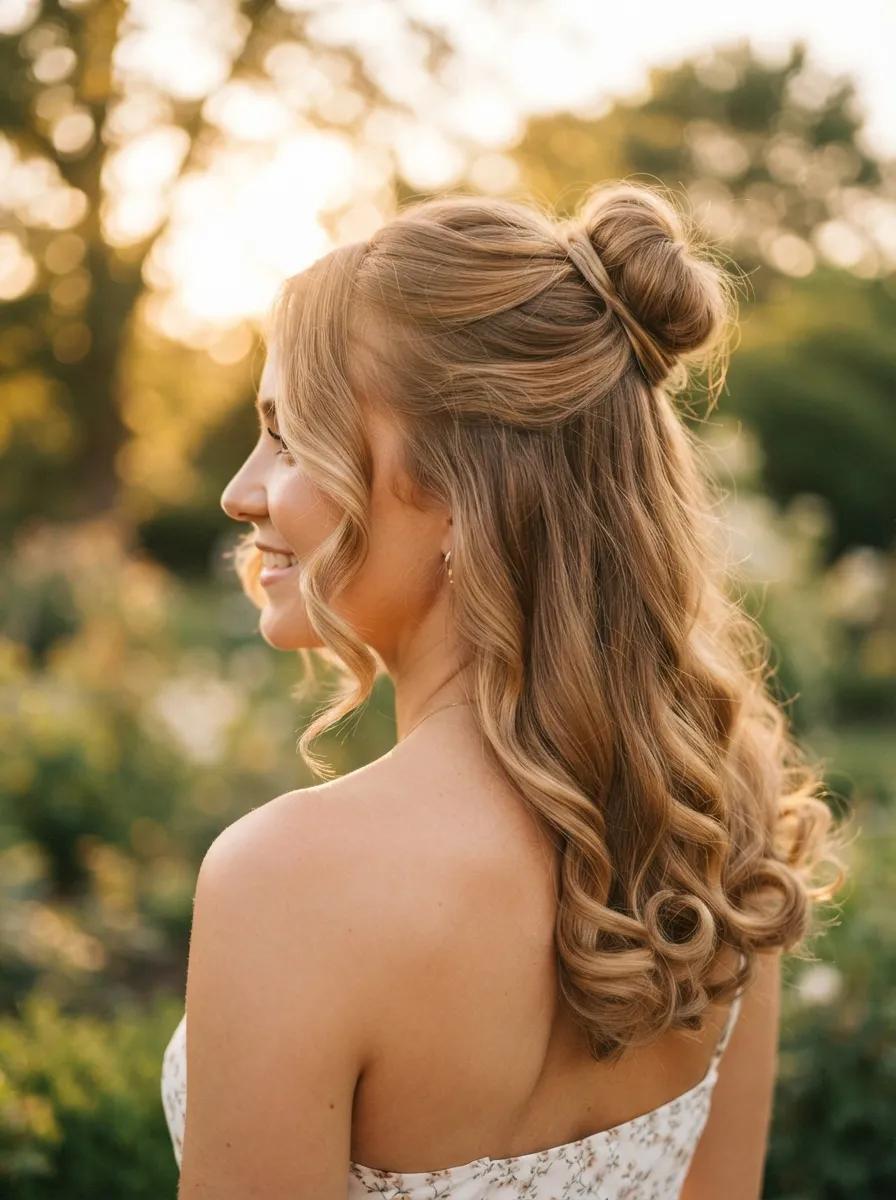
This style combines curls with a half up bun for a romantic finish. Curl your entire head first using a wand or straightener, then gather the top section of hair and twist it into a small bun, leaving the curled ends loose underneath. The curls add volume and movement to the lower half while the bun keeps hair away from your face. This works well for birthday parties, engagement dinners, or holiday gatherings where a softer, dressier look fits the occasion. If you do not own a curling wand, wrap small sections of hair around a straightener and hold for a few seconds to create loose waves instead. This budget friendly method uses a tool most people already have at home. Once curled, let the hair cool completely before touching it, since curls set better and last longer when they are not disturbed while still warm.
23. Twisted Low Ponytail
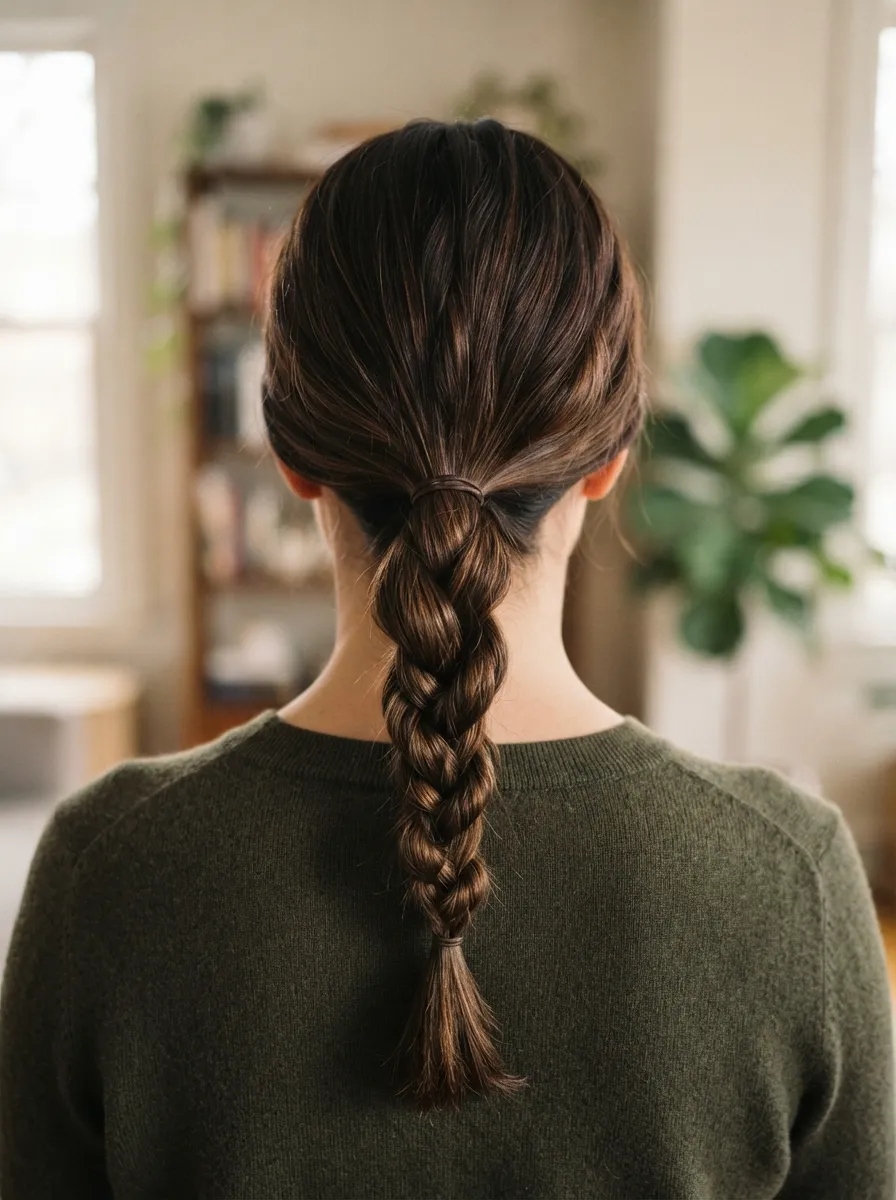
A twisted low ponytail is a quick way to dress up a regular ponytail without turning it into a full bun. Gather your hair low at the nape, then twist the entire ponytail from base to tip and let it hang naturally or pin the twisted end up slightly. This style works well for casual outings, brunches, or everyday errands when you want a bit more polish than a plain ponytail offers. It takes less than two minutes and requires nothing more than an elastic you likely already own. If you want to add texture, spray a small amount of salt water spray before twisting, which helps the twist hold its shape longer throughout the day. This style is also gentle on your hair since it does not require tight pinning or heat, making it a good option for days when you want to give your hair a break from more demanding styles.
24. Structured Chignon With Volume
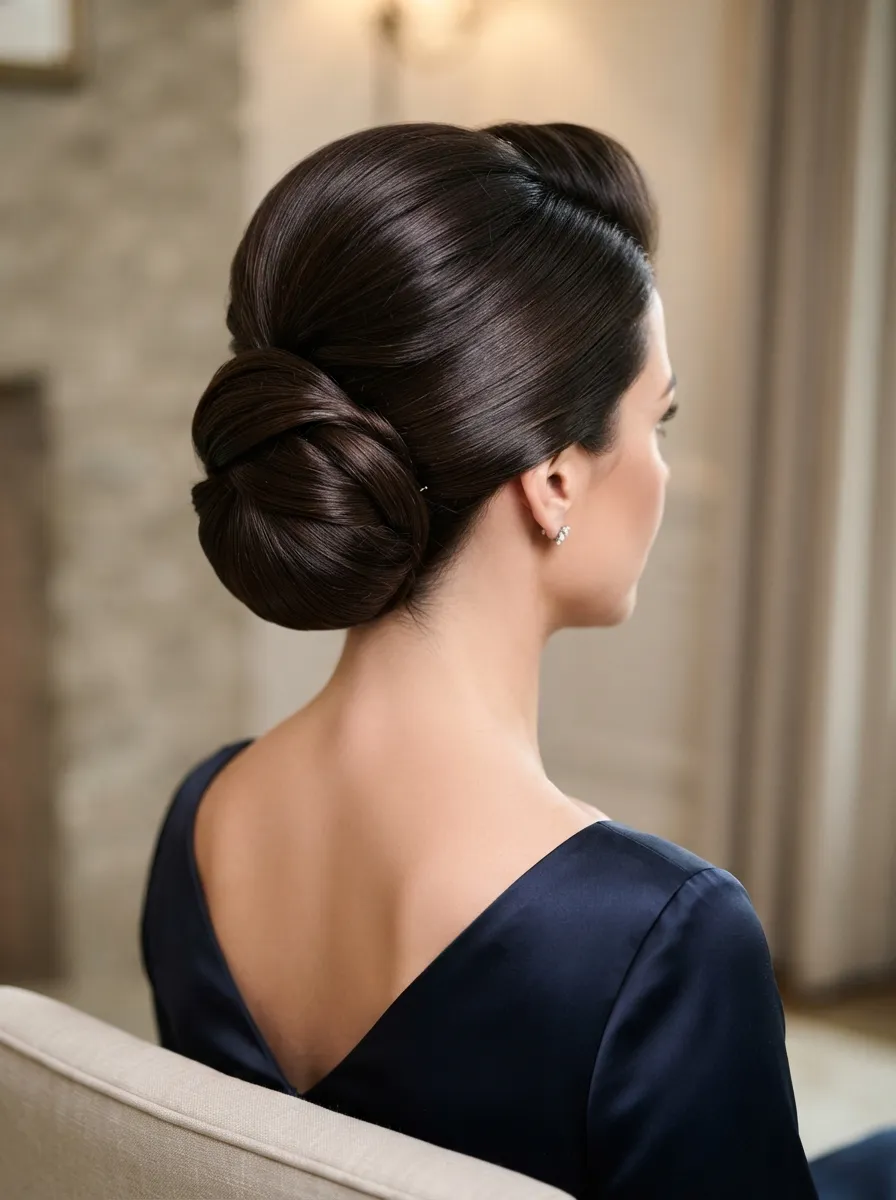
This style adds volume at the crown before pulling hair into a chignon for a more dramatic silhouette. Backcomb the top section of your hair gently at the roots, then smooth the top layer over the volume before gathering everything into a low chignon at the nape. Pin the chignon securely and smooth any bumps along the sides. This style suits formal dinners, award ceremonies, or any event where a bit of drama in your hairstyle feels appropriate. A fine tooth comb is the only tool needed to create the volume, so there is no need for teasing brushes or volumizing products if you already own a basic comb. Hold the top layer flat with one hand while smoothing with the other to avoid disturbing the backcombed section underneath. This structured look pairs nicely with a simple, minimal makeup style since the hair itself carries most of the visual weight of the outfit.
Conclusion
Updo hairstyles do not have to be complicated or expensive to look elegant. Most of the styles on this list use tools and products you likely already have at home, from basic elastics and bobby pins to a comb and a bit of hairspray. The key is practice. Try a few of these styles on a quiet weekend before you need them for an actual event, so you feel confident with the pinning and twisting motions when the day arrives. Mix and match ideas too. A twisted bun can borrow a wrapped strand from another style, or a half up look can gain texture from a bubble ponytail technique. With a little patience and the tips shared above, you can keep your hair looking polished for weddings, work events, casual outings, and everything in between without ever stepping into a salon.
Leave a Reply