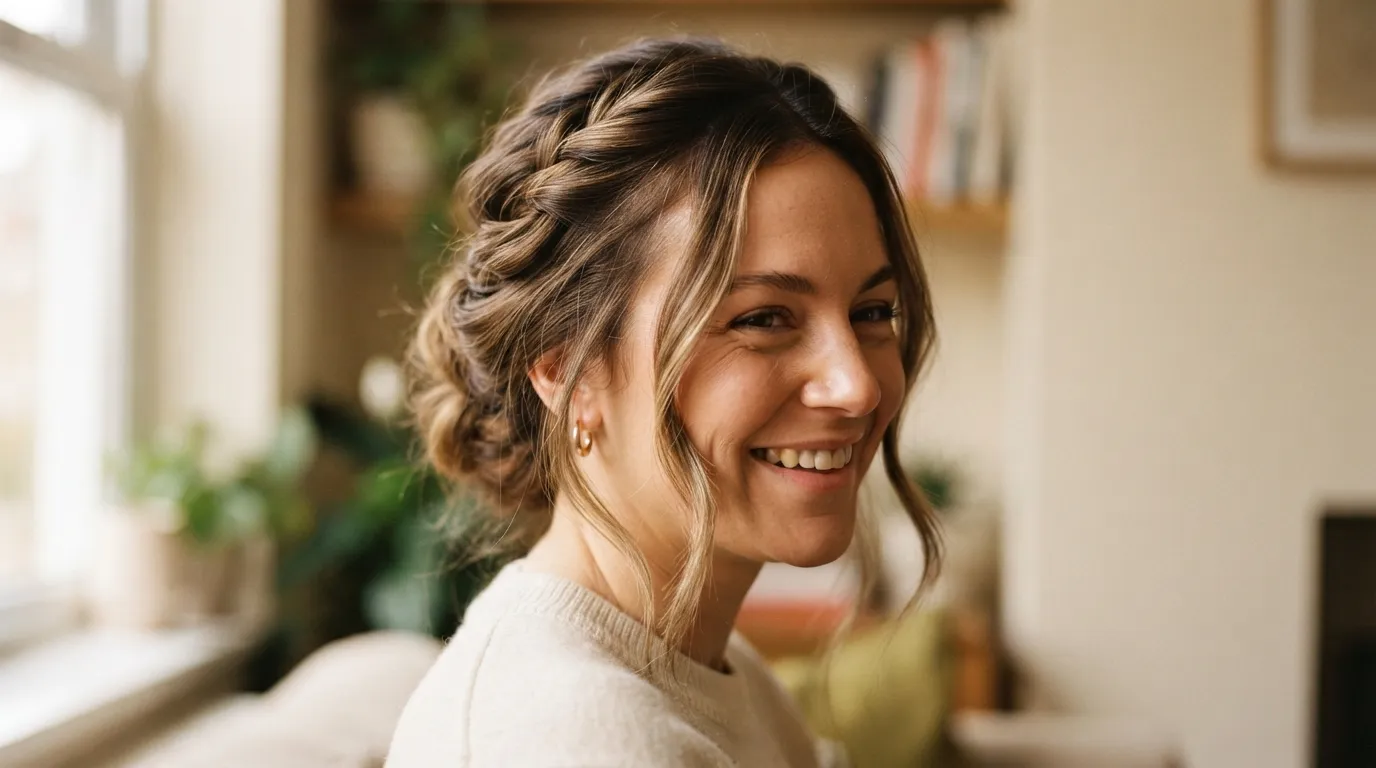
Long hair gives you so many options when it comes to styling, and updos are one of the easiest ways to show off that length while keeping things practical for everyday life. Whether you are heading to work, attending a wedding, or just want your hair off your neck on a hot day, there is an updo for every mood and every skill level. This list walks through 22 Updos for Long Hair Ideasthat range from five-minute throw-it-up styles to more polished looks worth saving for special occasions. Each one comes with simple tips so you can recreate it at home without expensive tools or a salon visit. If you’re also looking for Updo Hairstyle Ideas, these versatile styles offer everything from casual messy buns and braided updos to elegant chignons and formal twists, making it easy to find a look that suits any occasion and hair type.
1. Classic Low Bun updos for long hair ideas
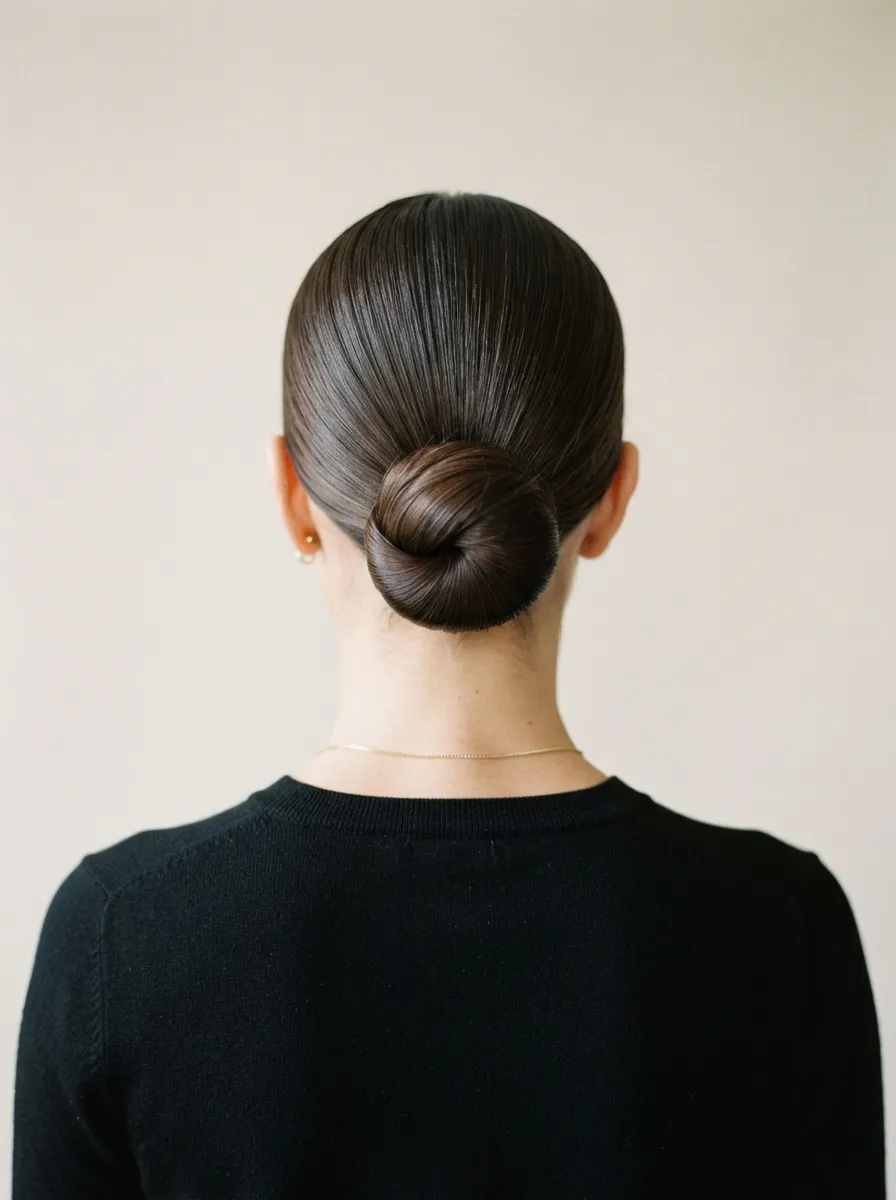
The classic low bun never goes out of style. It works for the office, a dinner date, or a lazy Sunday. All you need is a hair tie and maybe a few bobby pins. Start by gathering your hair into a low ponytail at the nape of your neck. Twist the ponytail around itself, then wrap it around the base like a coil. Tuck the end underneath and pin it in place. For a softer look, pull a few small pieces loose around your face. If you want extra hold, a bit of gel or hairspray on your palms before you start will smooth away flyaways. This style costs nothing beyond items already in most bathroom drawers. It also protects your ends from friction, which is a bonus if you are trying to grow your hair out. Try it with a middle part for a polished feel or a side part for something more relaxed.
2. Braided Crown
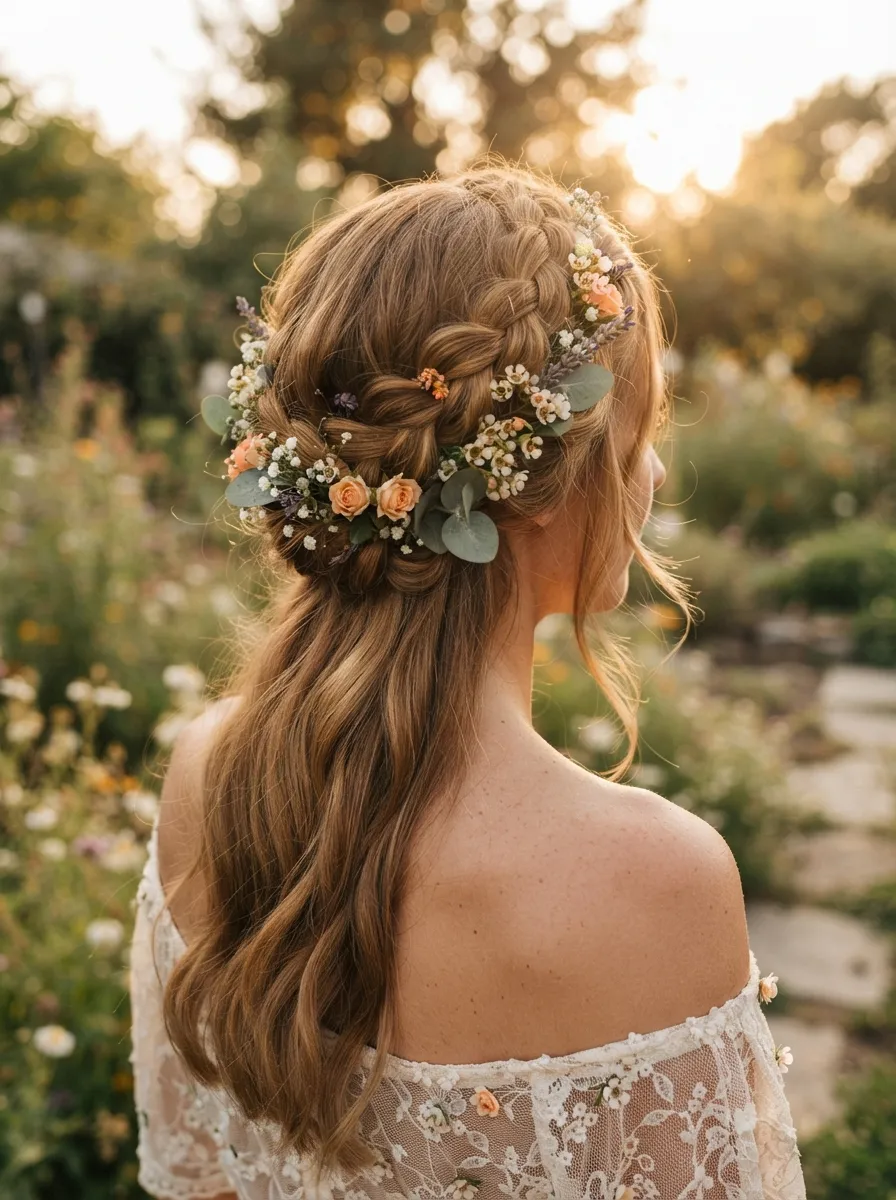
A braided crown looks far more complicated than it actually is. Split your hair into two sections and braid each one loosely. Cross the braids over the top of your head and pin them down where they meet. That is really the whole process. For beginners, French braids give a fuller look, but a simple three strand braid works too. Pull small sections of the braid apart gently with your fingers to make it look fuller and less tight. This style pairs well with festivals, garden parties, or any outdoor event. You do not need a stylist or specialty products, just a comb, some bobby pins, and patience for the first few tries. If your hair is layered, use a bit of texturizing spray beforehand so shorter pieces stay in place. This look also holds up well through humidity, making it a smart choice for summer weddings or beach trips where sleek styles tend to fall apart.
3. Textured Top Knot
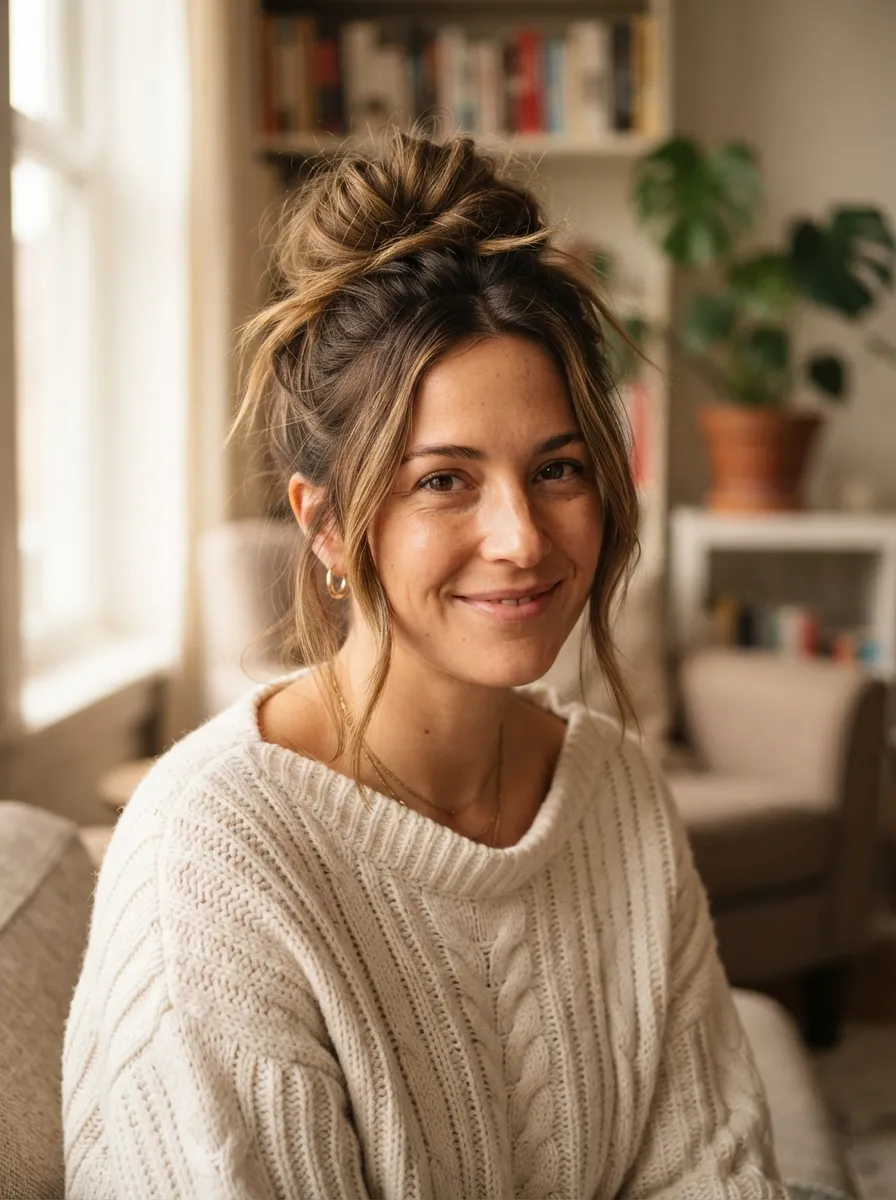
The textured top knot is the updo you reach for on busy mornings. Gather your hair high on your head, twist it once or twice, and wrap it into a loose knot. Secure with a few pins or a claw clip. The key word here is loose. You do not want this style to look tight or perfect. Pull a few strands out around your face and at the nape for that lived in effect. Dry shampoo actually helps this style hold better since it adds grip to clean, slippery hair. This is a great option for gym days, running errands, or working from home when you still want to look put together on a video call. It takes under two minutes once you get the hang of it. Pair it with hoop earrings and a simple top for an effortless everyday look that feels current without trying too hard.
4. Half Up Twisted Updo
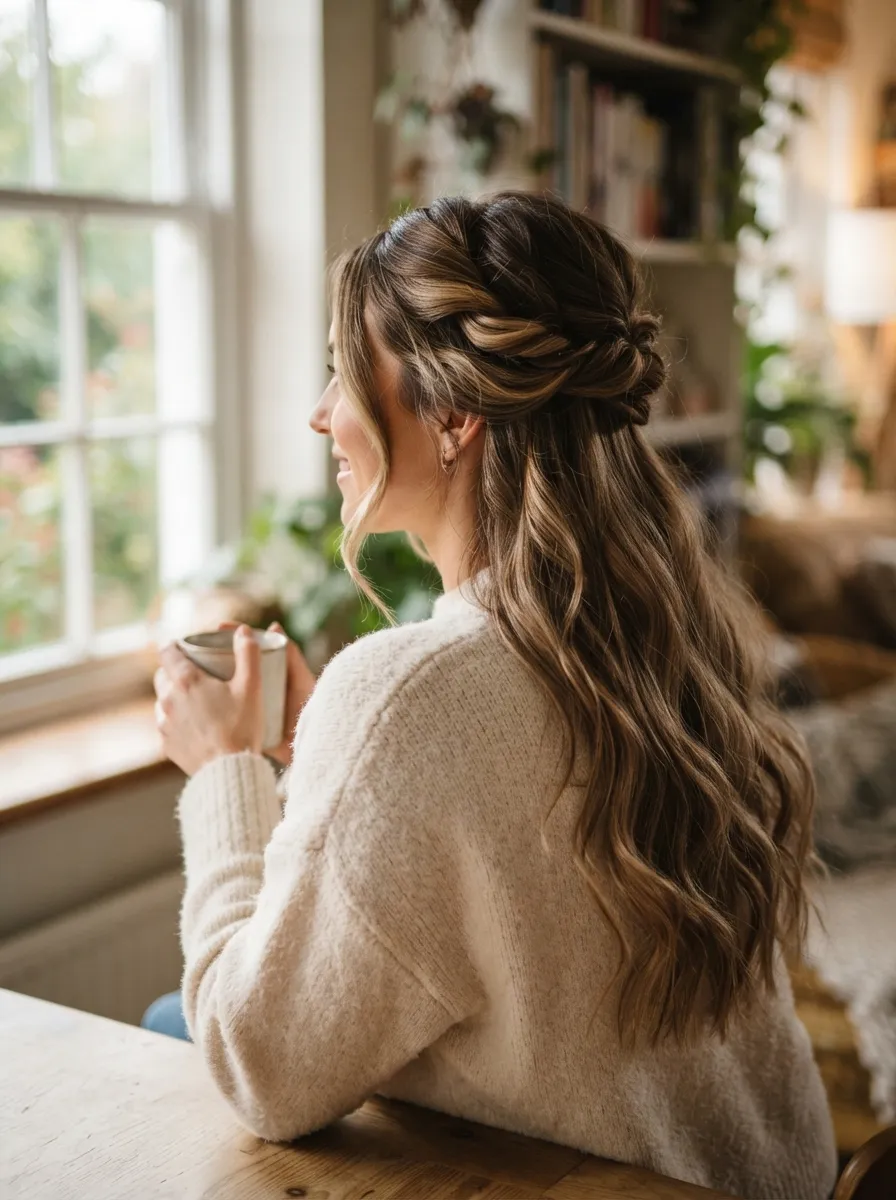
If you love the length of your hair but still want it out of your face, the half up twisted updo is a good middle ground. Take the top section of your hair, twist it back, and pin it at the crown. You can do one twist or two smaller twists that meet in the middle. The rest of your hair stays down, showing off length and any waves or curls you have. This style takes barely any time and works for both casual and dressy occasions. Add a small clip or bobby pin with a decorative top for a bit of shine. If your hair is very straight, curling the ends beforehand gives the whole look more movement. This is a favorite for brunch, date night, or even school pickup because it feels done without requiring much effort. Budget wise, all you need is a couple of bobby pins, which cost very little at any drugstore.
5. Chignon With a Twist
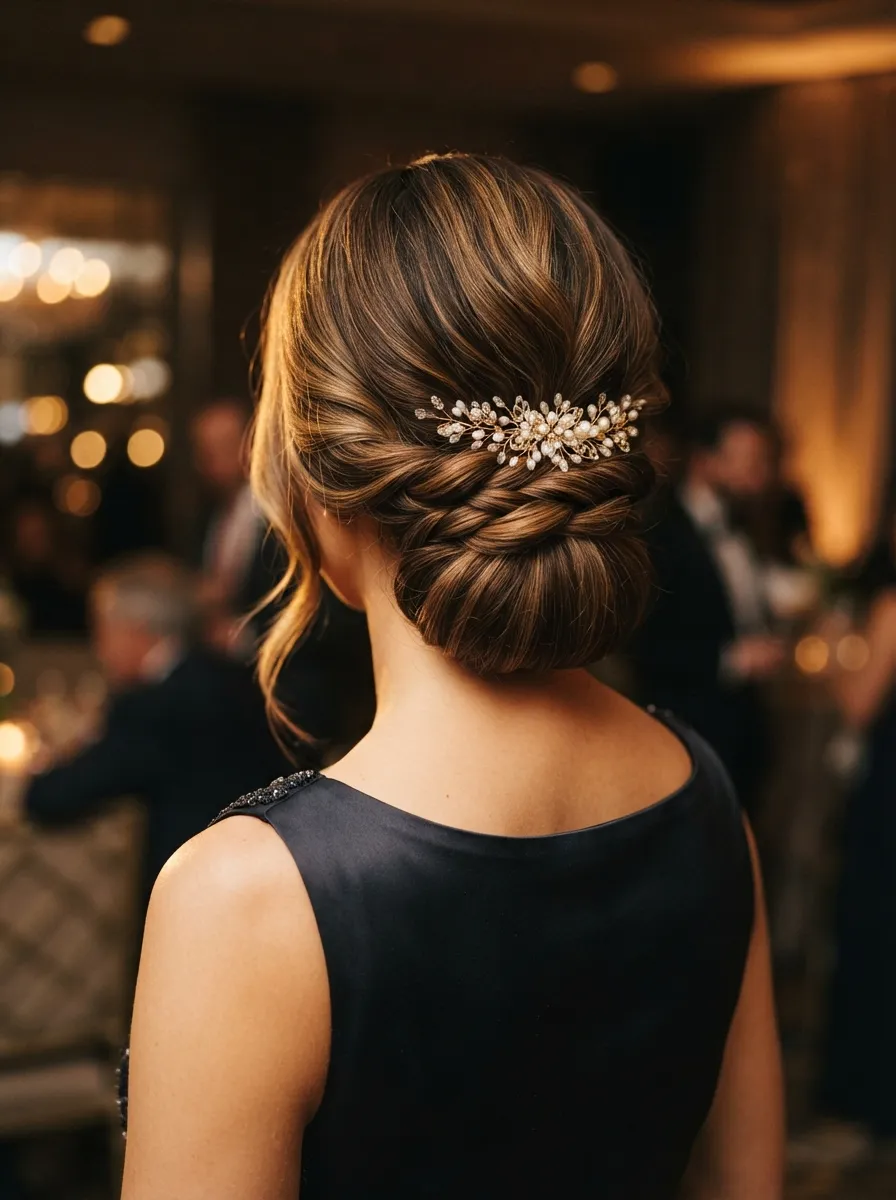
A chignon feels formal, but it is simpler to create than it looks. Gather your hair into a low ponytail, then instead of a plain bun, fold the ponytail up and tuck it into itself to form a loop. Pin the loop in place and tuck any loose ends around the base. Adding a twist means crossing two small sections before you form the loop, which gives extra texture. This style suits weddings, formal dinners, or work events where you want something elegant without spending money on a stylist. A simple decorative pin or small comb can dress it up even more. Practice this one a few times before an important event since the folding technique takes a little getting used to. Once you master it, you will find yourself using it often because it looks expensive while costing nothing beyond a hair tie and a few pins from your own bathroom drawer.
6. Space Buns
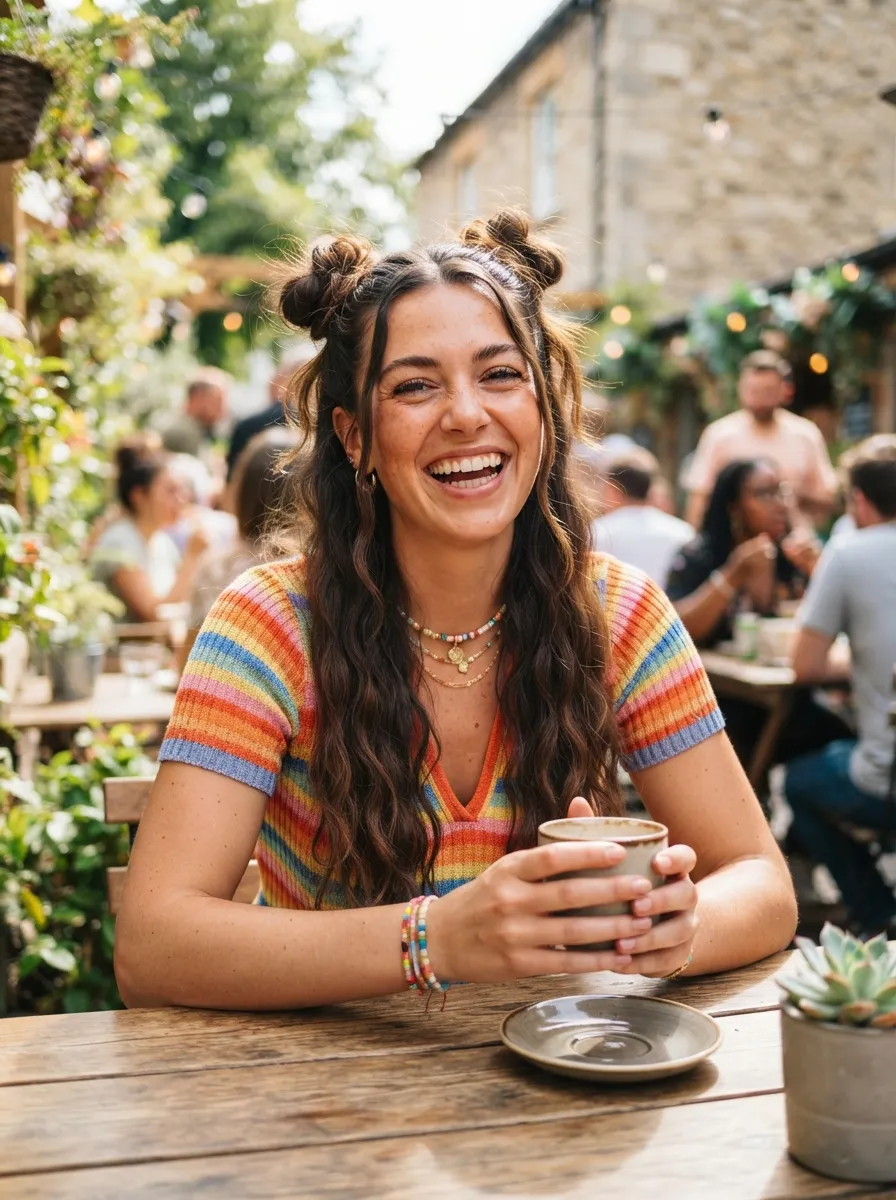
Space buns bring a fun, youthful energy to any outfit. Part your hair down the middle and split it into two even sections. Twist each section and wrap it around itself to form a bun, then secure with a small elastic and a few pins. These work great for concerts, casual outings, or just adding personality to a plain day. If your hair is thick, the buns will look fuller naturally. For thinner hair, backcombing slightly before wrapping adds volume. This look does not require expensive products, just two hair ties and a comb. Space buns also hide unwashed hair well since the buns sit high and do not require a sleek base. Try adding small braids on each side before forming the buns for a more detailed variation that still takes under ten minutes total. This is a budget friendly way to look creative without spending on styling tools or salon appointments.
7. Sleek High Ponytail Bun
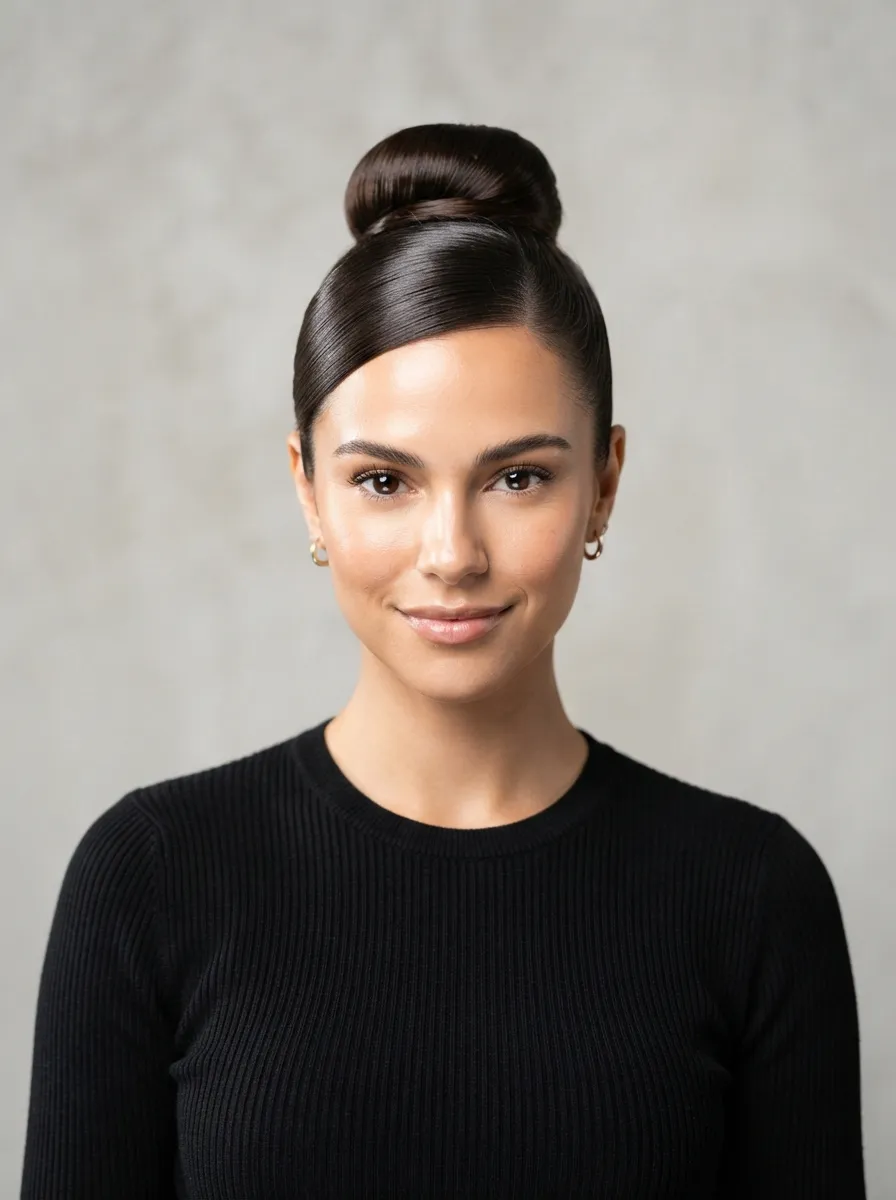
This style takes the classic ponytail and turns it into something more polished. Brush your hair back into a high ponytail, using a fine tooth comb to smooth away bumps. Wrap the ponytail around the base to form a tight bun, then secure with pins. The sleekness is what makes this style feel elevated compared to a regular bun. A small amount of gel or serum on your comb before brushing helps achieve that smooth finish without buying expensive smoothing products. This look works well for job interviews, presentations, or any setting where you want to look sharp and professional. It also keeps hair completely off your face and neck, which is practical during warmer months. If you have shorter layers around your face, a bit of hairspray on an old toothbrush can tame flyaways for a cleaner finish. This is one of the most versatile updos on this list because it adapts to both casual and formal settings.
8. Loose Fishtail Updo
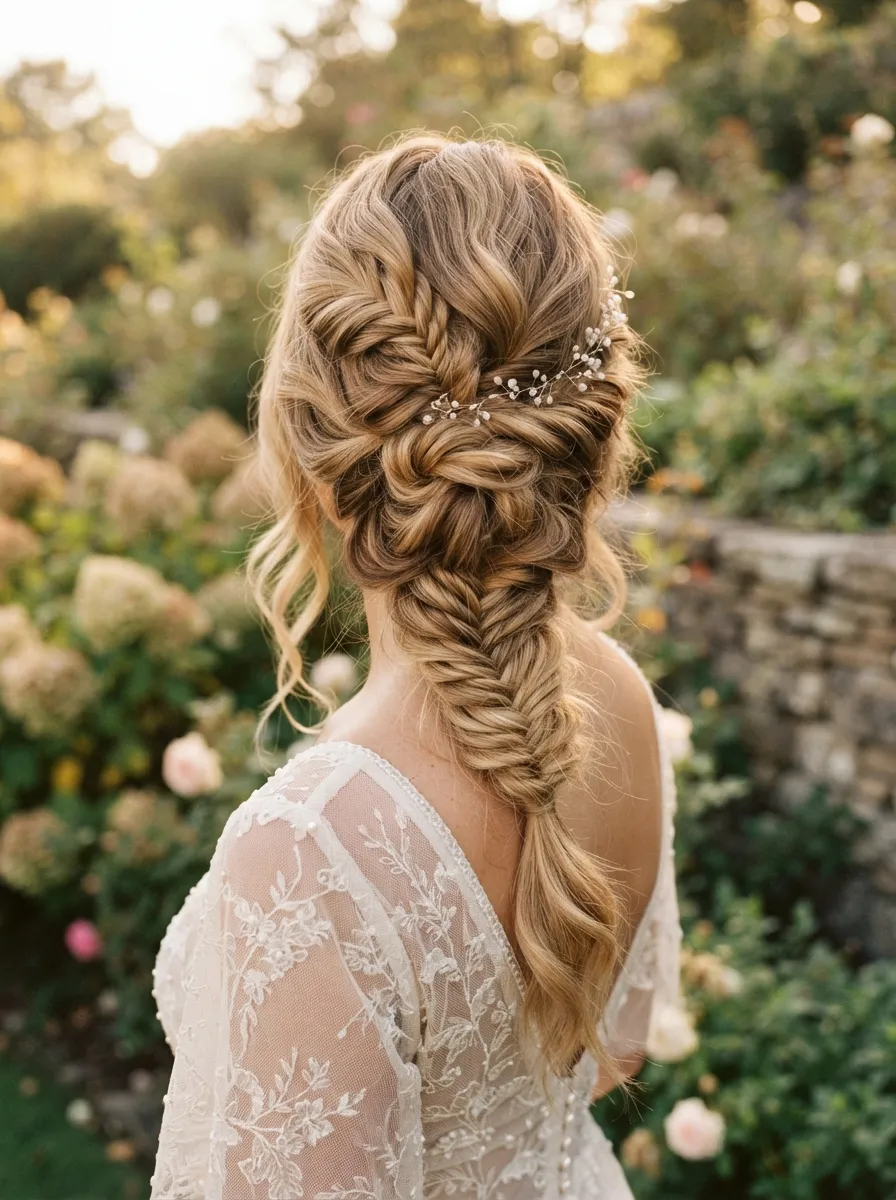
The fishtail braid adds texture that a regular braid cannot match. Split your hair into two sections and take small pieces from the outer edge of each section, crossing them to the opposite side repeatedly. Once you reach the end, pin the braid up into a loose bun or coil. This updo works well for romantic occasions like anniversaries or garden weddings. It takes practice to get the fishtail technique smooth, so try it a few times on a normal day before an event. Loosening the braid slightly after finishing gives it that soft, undone look that photographs beautifully. No special products are needed, just a hair tie, some bobby pins, and a little patience. If your arms get tired holding the braid at the back of your head, try braiding it over one shoulder first, then move it to position once finished and pin it in place.
9. Vintage Victory Rolls
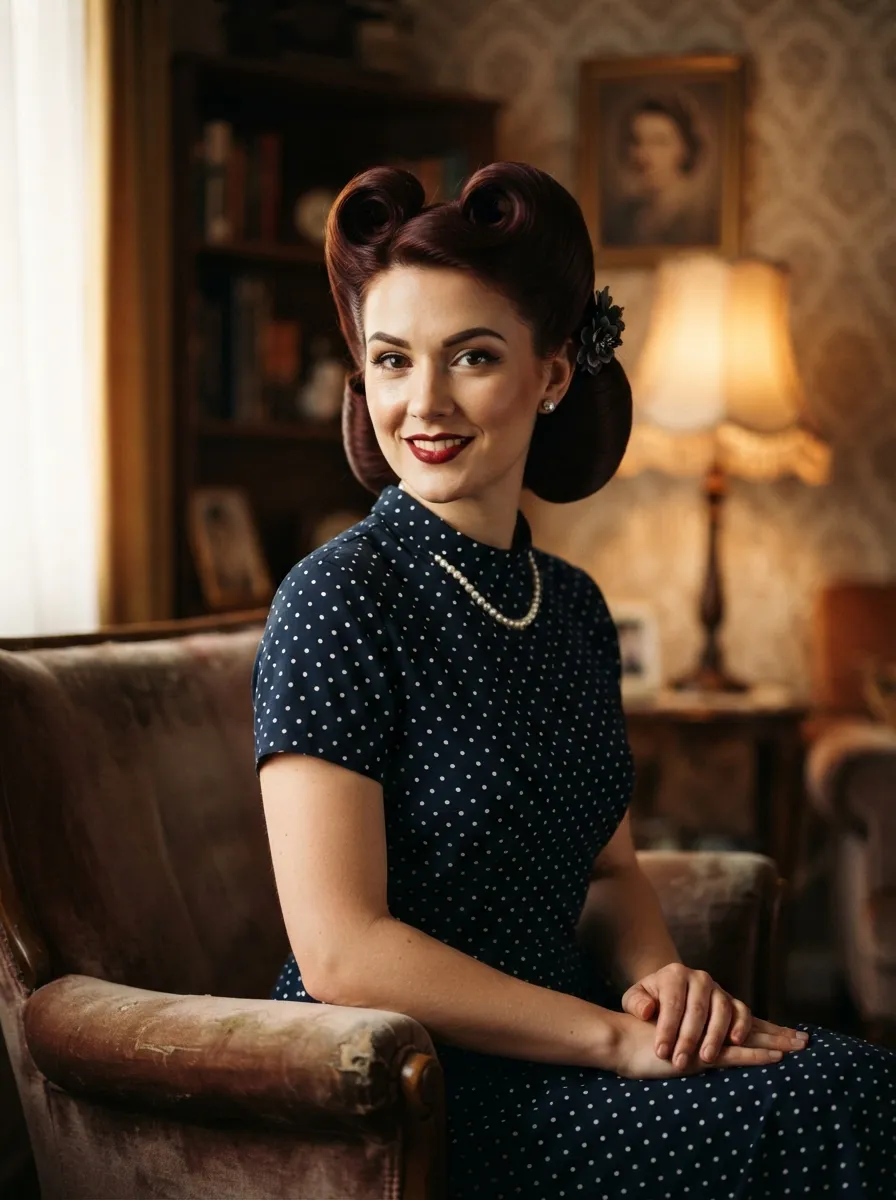
Victory rolls bring a retro touch to long hair styling. Take a section of hair near your face, backcomb it slightly for volume, then roll it inward toward your scalp and pin it in place. Repeat on the other side, then pull the rest of your hair back into a low bun or ponytail. This style works for themed parties, pin up photoshoots, or anyone who loves a vintage aesthetic. A little hairspray helps the rolls hold their shape throughout the day. Practice rolling with a comb handle first if you find it tricky using just your fingers. This look does not require curling irons or heat tools, which makes it gentle on hair health while still looking dramatic. Pair it with red lipstick and a simple blouse for a full vintage moment. Budget wise, all you need are bobby pins and hairspray, both inexpensive items found at any drugstore.
10. Twisted Half Bun
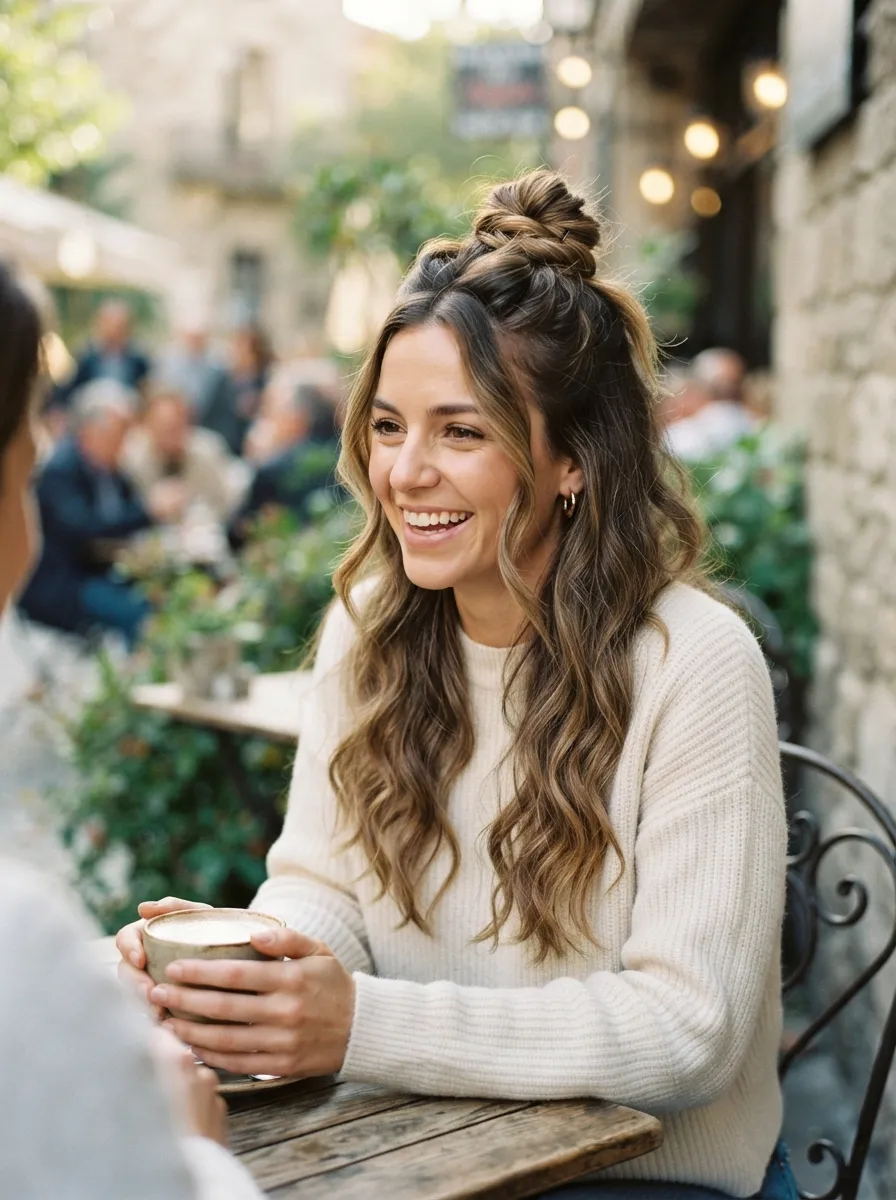
The twisted half bun combines two popular styles into one simple look. Pull the top section of your hair back, twist it a couple of times, then instead of leaving it loose, wrap it into a small bun and pin it down. The bottom half of your hair stays free, showing off length and movement. This style works for casual outings, coffee dates, or even a relaxed workday. It takes less than five minutes and requires no heat styling. If you want more texture, add a loose braid to the bottom section for contrast. This updo is especially useful on second or third day hair since a bit of natural oil actually helps the twist hold better. Keep a small mirror handy the first few times you try this so you can see the back of your head clearly while pinning. Once mastered, this becomes a quick go to style for almost any occasion.
11. Bubble Ponytail Updo
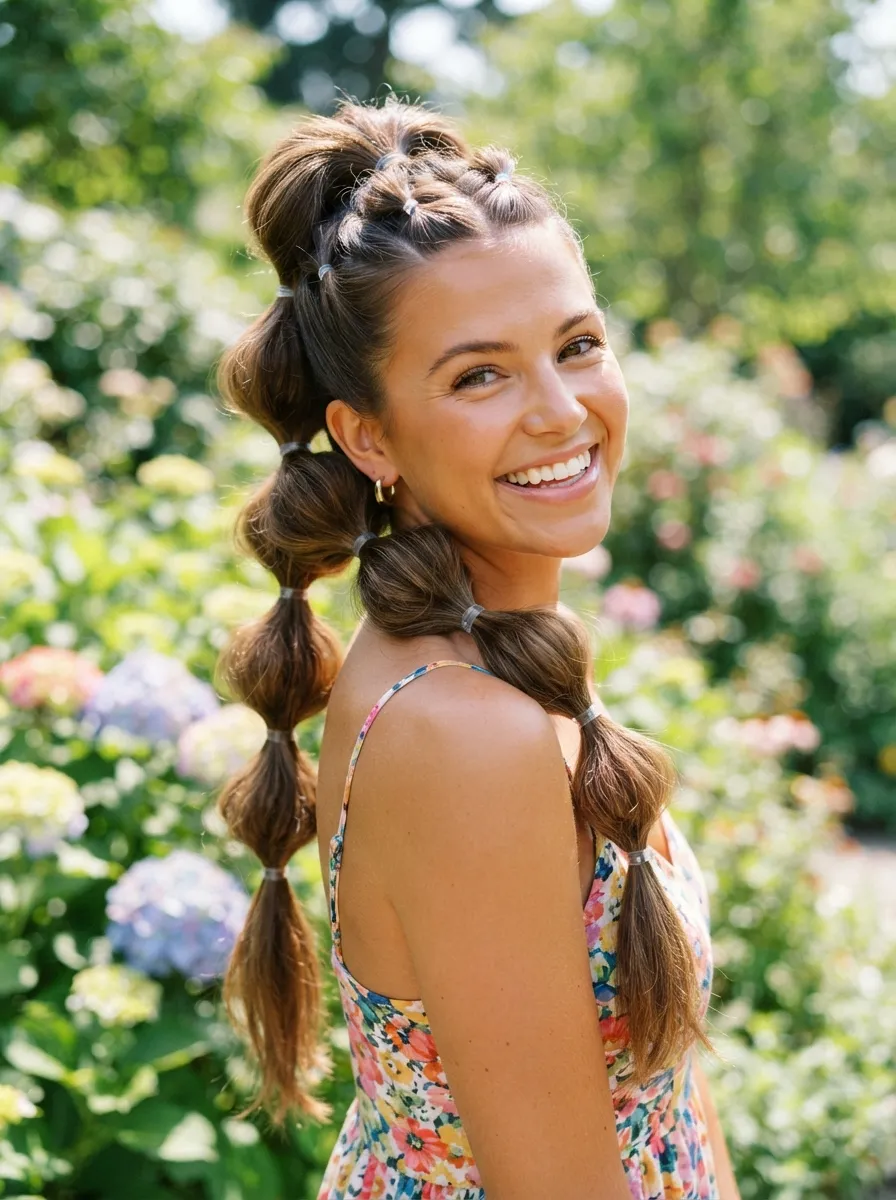
Bubble ponytails add a playful, sectioned look to long hair. Start with a regular ponytail, then add small elastics every few inches down the length. Gently pull the hair between each elastic outward to create the bubble shape. Once you reach the end, coil the ponytail up and pin it into a bun for an updo version. This style suits birthday parties, casual gatherings, or anyone wanting to try something different from a plain bun. Clear elastics work best so they blend into the hair rather than standing out. This look is fun for kids too, making it a shared activity for parents styling a daughter’s hair. It costs almost nothing since small elastics come in packs of one hundred or more at most stores. If your hair has natural waves, this style shows them off nicely once the bubbles are gently pulled apart for extra fullness and dimension.
12. Rope Twist Updo
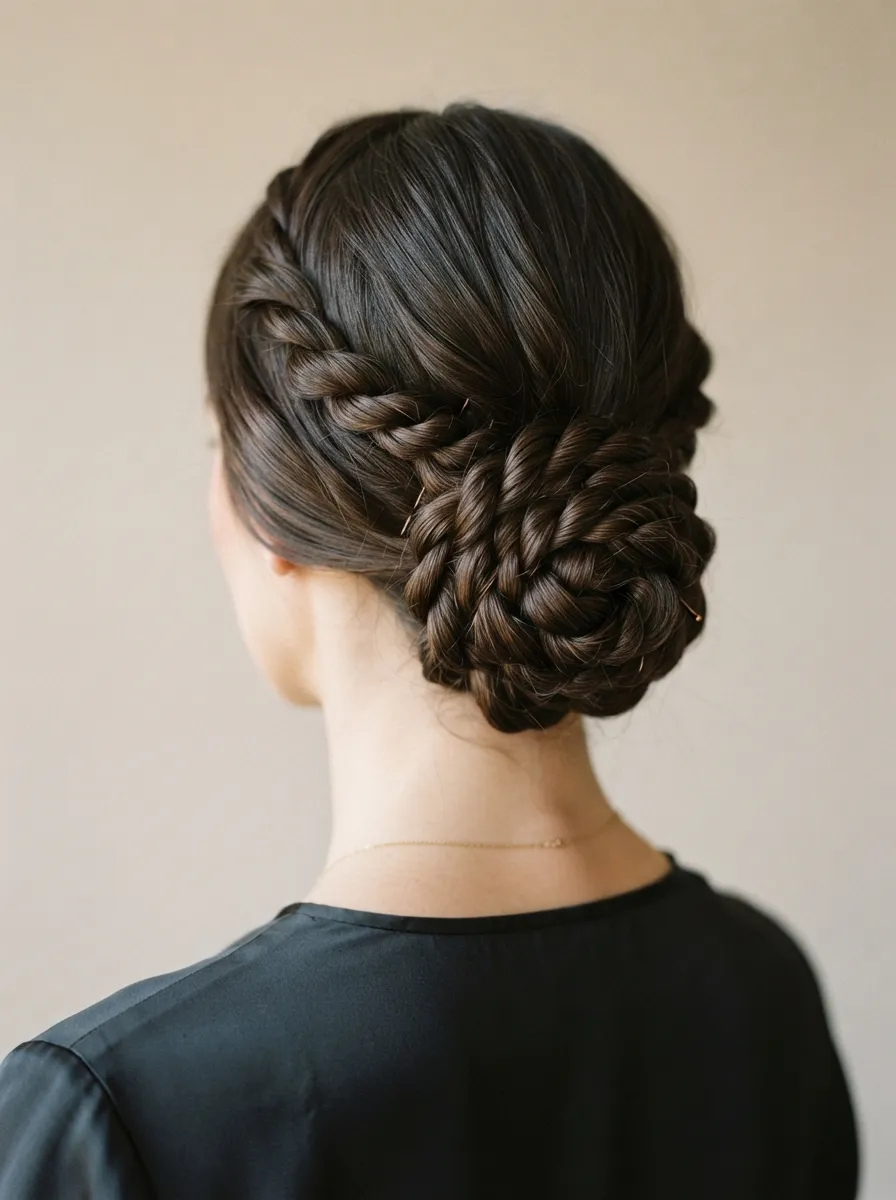
A rope twist is simpler than a braid but looks just as detailed. Take two sections of hair, twist each one individually in the same direction, then twist them around each other in the opposite direction. This creates a rope like pattern. Coil the finished twist into a bun and pin it at the base. This updo works well for casual weddings, office parties, or any semi formal event. It takes less time to master than a fishtail braid, making it a good starting point for beginners who want something more detailed than a plain bun. A shine serum applied lightly before twisting helps the rope catch light nicely in photos. This style also holds up well through a full day of wear without needing touch ups. All you need is a hair tie and a couple of pins, keeping the cost close to nothing while the result looks carefully done.
13. Pinned Back Waves
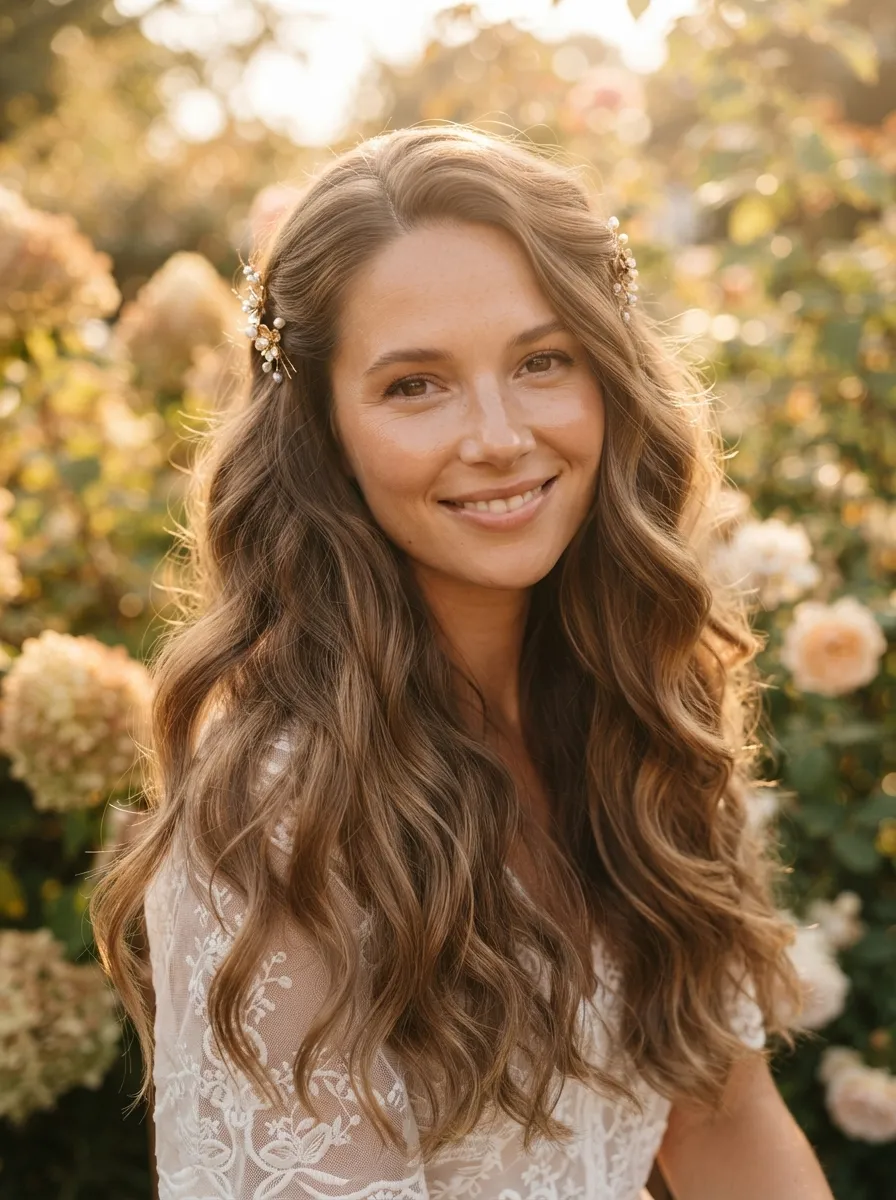
This is technically a half updo, but it transforms loose waves into something styled and intentional. Curl your hair with a wand or flat iron for loose waves, then take small sections near your temples and pin them back toward the crown. This keeps hair off your face while showing off the wave pattern down your back. It works beautifully for dates, parties, or any event where you want soft, romantic styling. Decorative pins add a nice touch without much extra effort. If you do not own a curling wand, braiding damp hair overnight and releasing the braids in the morning creates natural looking waves for free. This method also protects your hair from heat damage over time. Keep the pins simple and matte for a natural look, or choose something with small jewels for evening events. Either way, this style takes under ten minutes total once your waves are set.
14. Low Twisted Bun With Braid Wrap
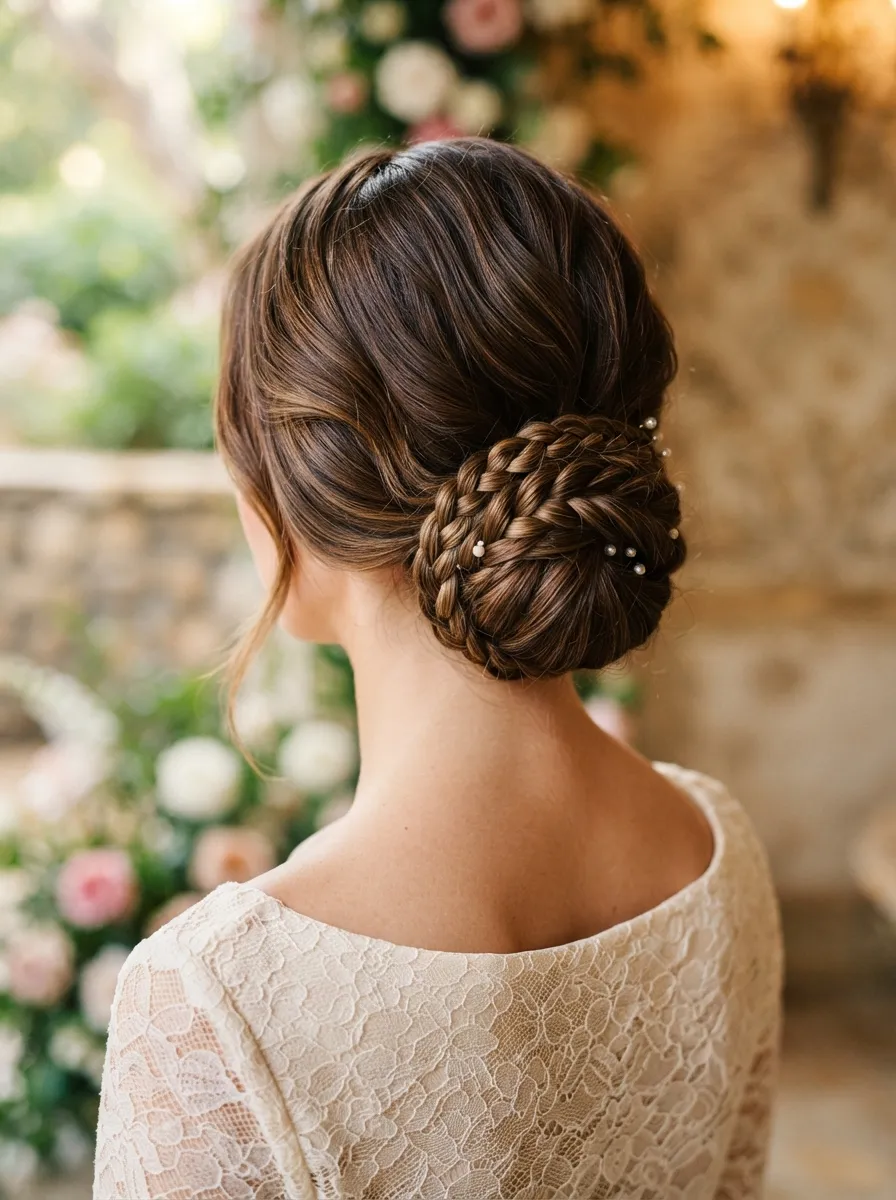
This updo takes the classic low bun and adds a small detail that makes it feel more finished. Form your low bun as usual, but before pinning everything down, take a thin section of hair and braid it separately. Wrap the small braid around the base of the bun like a ribbon and pin the end underneath. This tiny addition hides any bobby pins and adds texture without much extra work. It suits weddings, job interviews, or any occasion where small details matter. This technique also works well for hiding a messy bun that did not turn out as neat as planned, since the braid wrap covers imperfections nicely. No extra products are needed beyond what you already used for the bun itself. Practice the braid wrap step separately a few times so it becomes quick and easy before you need it for an actual event or busy morning.
15. Curly Updo With Face Framing Pieces
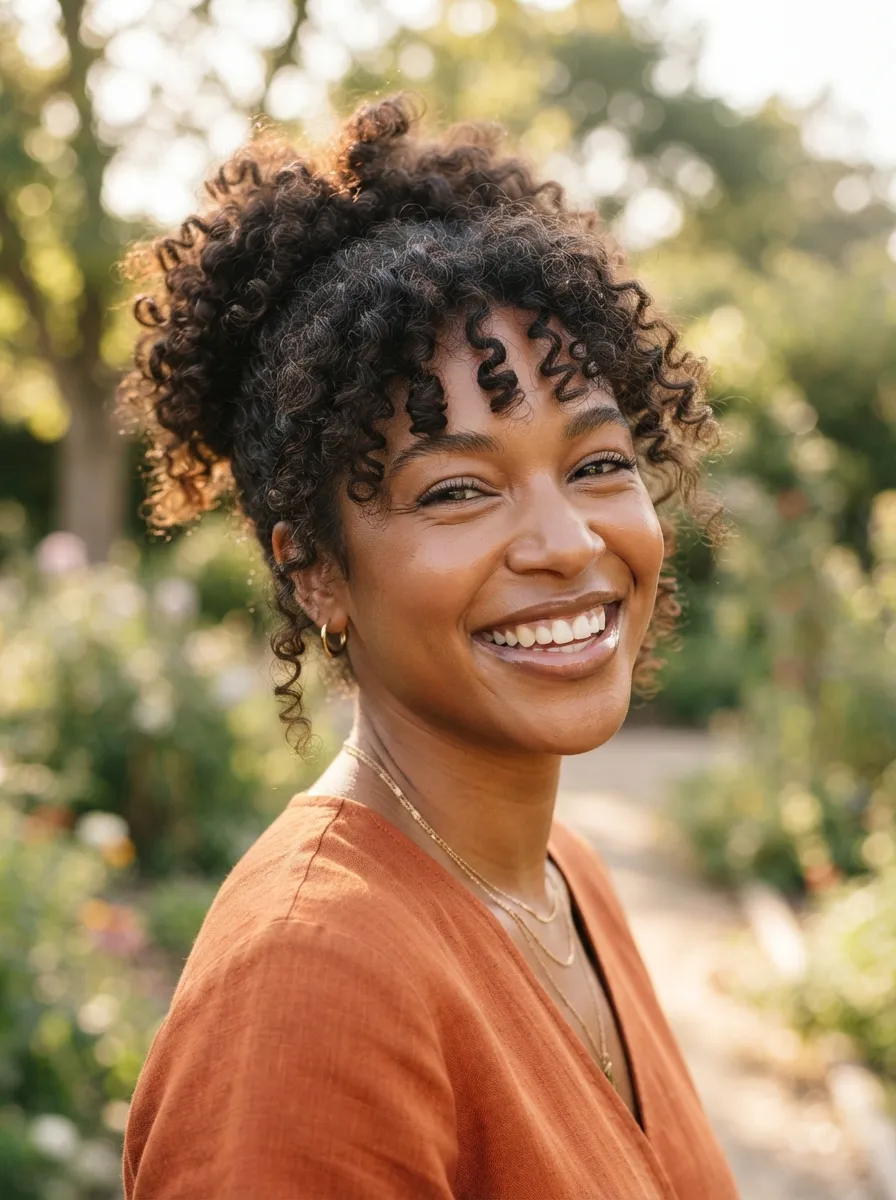
Curly hair deserves updos that celebrate its natural texture instead of fighting against it. Gather your curls loosely at the crown or back of your head, securing with a soft scrunchie that will not snag or break curls. Leave a few curly pieces loose around your face for softness. Avoid brushing curly hair when dry since this causes frizz. Instead, use your fingers to gently gather sections while hair is still slightly damp with a curl cream applied. This style works for everyday wear, work, or casual social events. It protects curl pattern from friction while still looking intentional and put together. A satin scrunchie is a small investment that prevents breakage compared to regular elastic bands. This updo also saves time on curly hair mornings since there is no need for extensive detangling or restyling, just a gentle gather and you are ready to go.
16. Twisted Bun With Hair Accessory
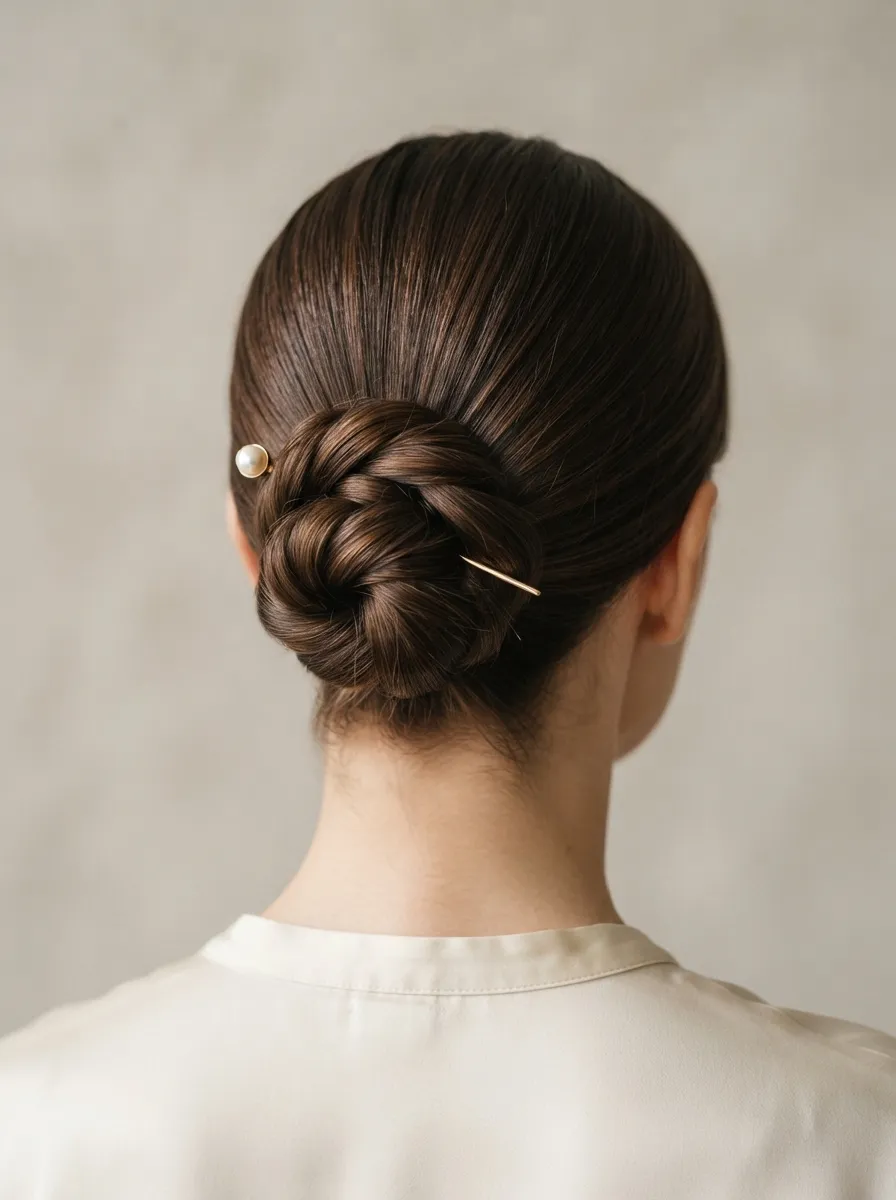
Sometimes the simplest updo becomes special with the right accessory. Twist your hair into a basic bun at the crown or back of your head, then add a decorative clip, comb, or pin. Pearl clips, small flowers, or metallic combs all work well depending on the occasion. This is a smart trick for last minute events when you do not have time for anything elaborate but still want to look styled. Thrift stores and dollar shops often carry inexpensive hair accessories that look far more expensive than their price tag suggests. Keep a small collection of different styles so you can match your updo to any outfit or event without extra effort. This approach also lets you reuse the same basic bun technique while changing the overall look simply by swapping accessories, making it one of the most budget friendly styling tricks on this entire list.
17. Braided Bun Combo
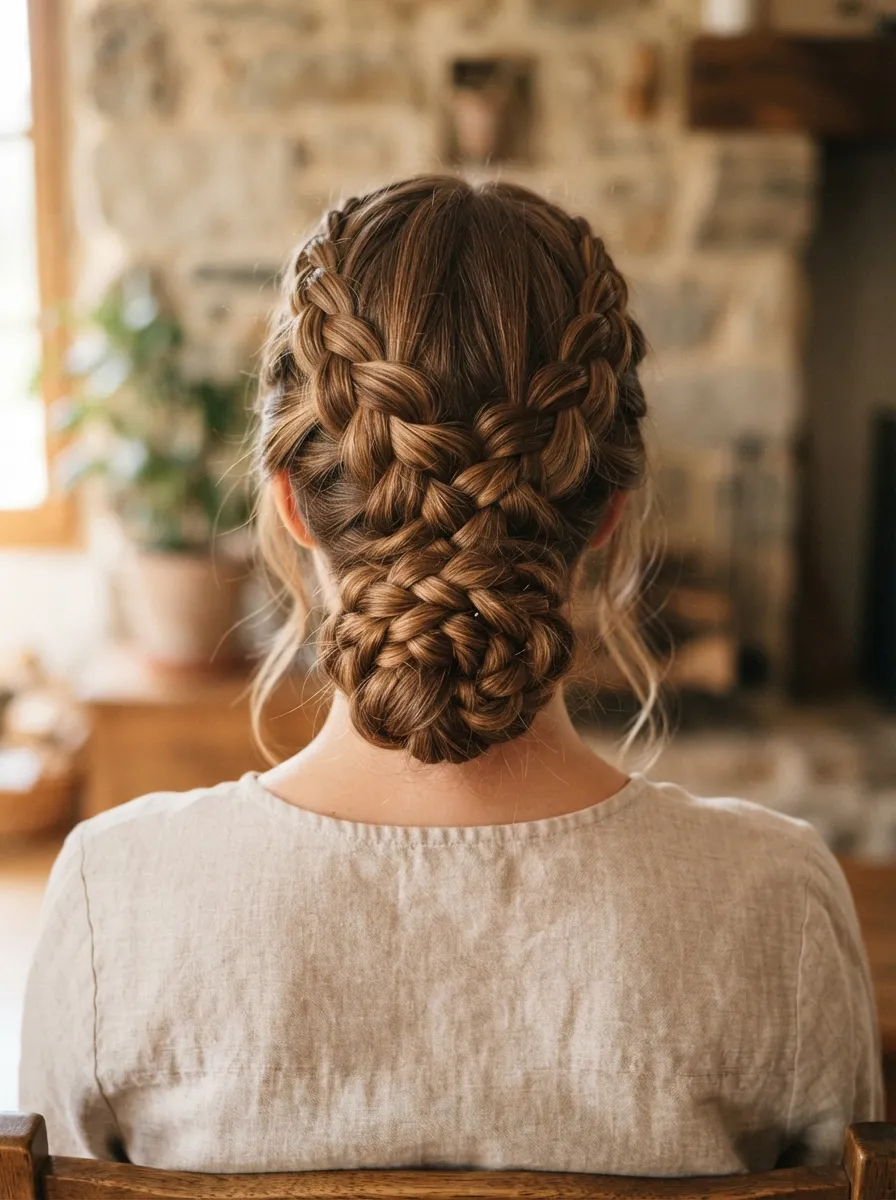
Combining a braid with a bun gives you the best of both styles. Braid your hair from the crown down to about the midpoint, then gather the remaining loose ends and the braid together into a bun at the nape or crown. Pin everything securely. This creates visual interest without requiring you to braid your entire length, which saves time and effort. It suits weddings, formal dinners, or any event where you want something detailed looking without spending an hour in front of the mirror. French braids give a more polished top section, while a simple three strand braid works fine for a casual version. This style also holds well through dancing or long events since the combination of braid and bun distributes tension evenly across your scalp. All you need are a few bobby pins and a hair tie, making this an affordable option compared to salon updos that often cost significantly more.
18. Messy High Bun With Volume
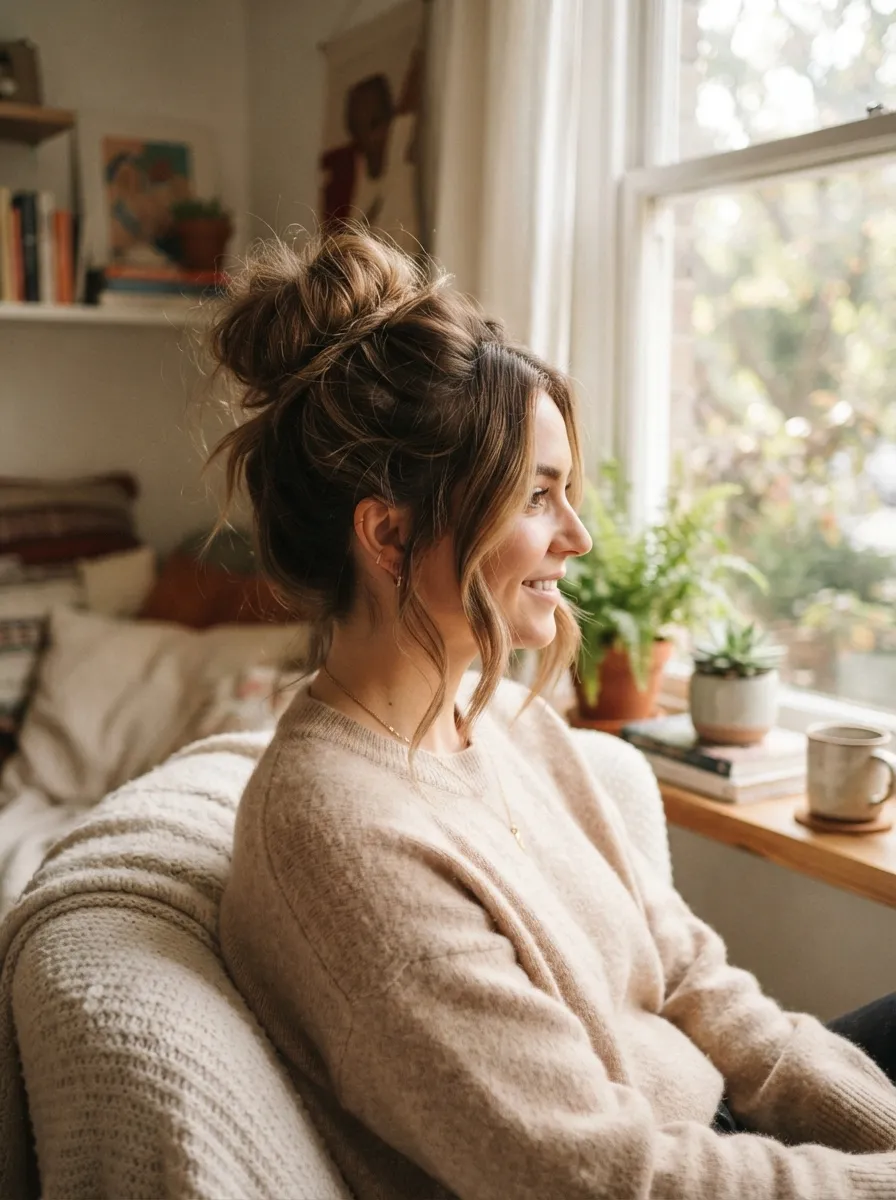
This updo focuses on height and volume rather than sleekness. Before gathering your hair, backcomb the crown section lightly to add lift. Then pull all your hair into a high ponytail and twist it into a loose, messy bun. Pull a few pieces out for texture. This style works for casual days, weekend outings, or even as an evening look when paired with statement earrings. The extra volume at the crown makes the whole style feel fuller, which is especially helpful for those with fine or thin hair. A texturizing spray helps hold the backcombed section, though this is optional if you are working with a tight budget. This look takes about five minutes once you get comfortable with the backcombing step. It also disguises second or third day hair well since the messy texture hides any lack of shine or cleanliness that fresh hair typically shows.
19. Side Swept Updo
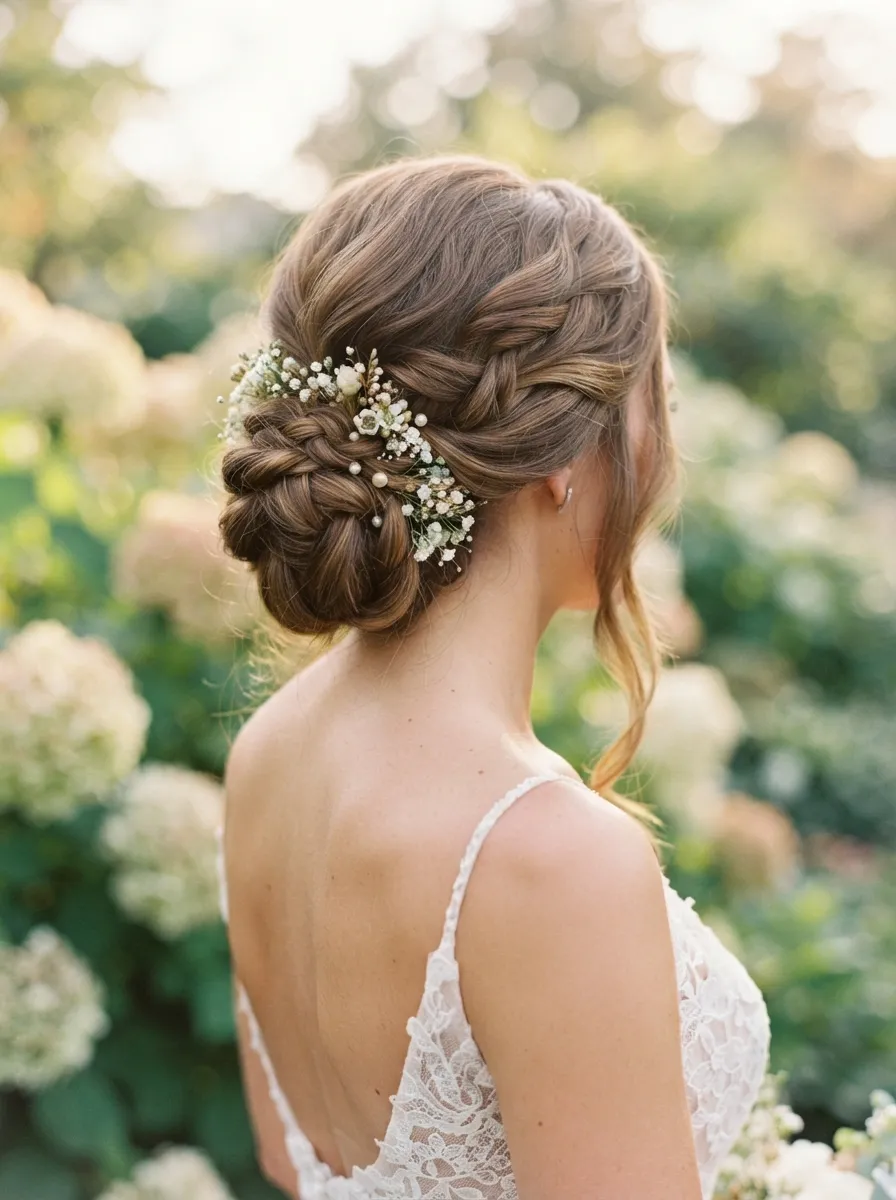
A side swept updo adds asymmetry to your styling, which feels more modern than a centered bun. Gather all your hair to one side at the nape of your neck, twist it, and pin it in place. You can leave the twist loose or wrap it into a small bun depending on the occasion. This style suits red carpet inspired looks, weddings, or evening events. It also works well for those with layers since the side placement hides shorter pieces more naturally than a centered updo would. Curling your hair before creating this style adds extra texture and makes the finished look feel more intentional. This updo photographs particularly well from certain angles, making it a popular choice for special event photos. Budget wise, this requires the same basic tools as any bun style, just a hair tie and a few pins, with the only real skill needed being practice with the side placement.
20. Twisted Updo With Hidden Pins
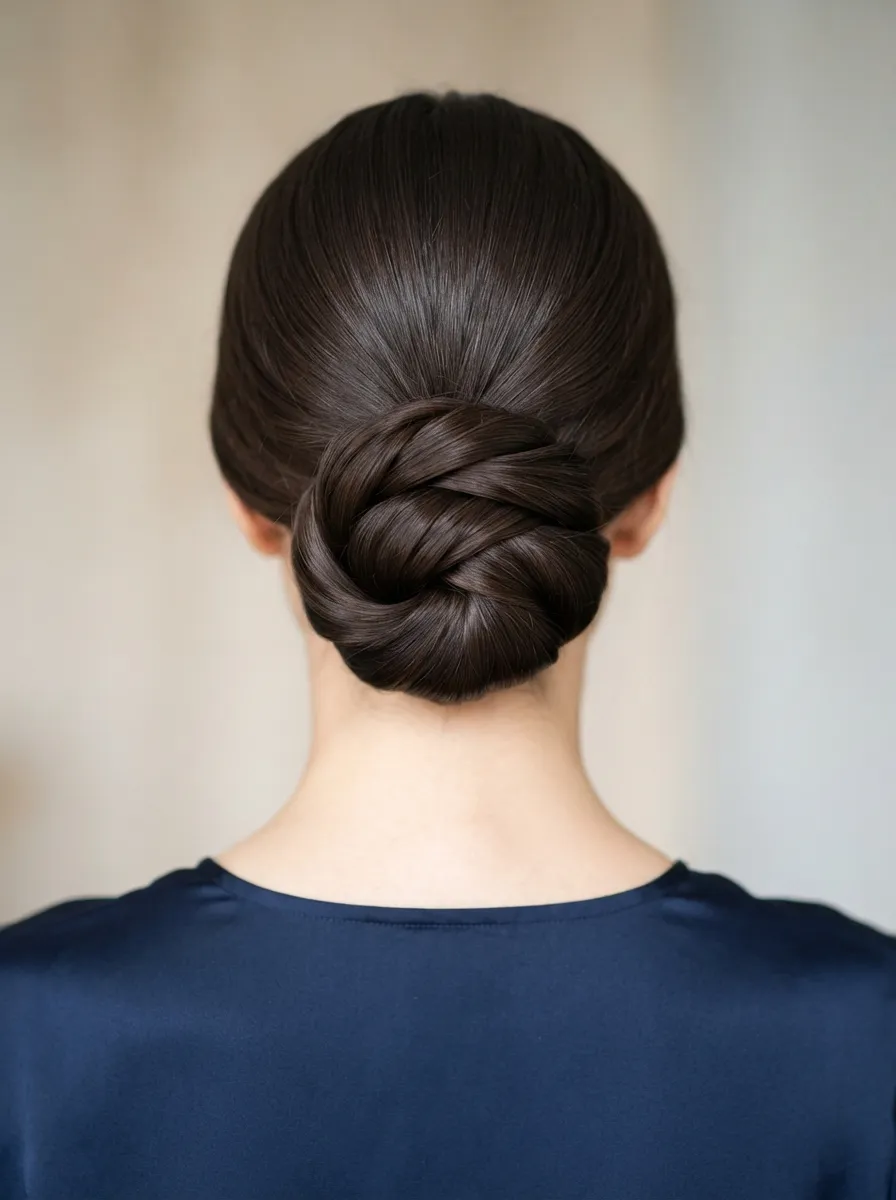
This updo focuses on a clean, finished appearance where the styling technique disappears completely. Twist your hair upward from the nape toward the crown, tucking the ends under as you go. Use pins that match your hair color exactly, inserting them at an angle so they grip more hair and stay hidden. This style suits job interviews, formal presentations, or any setting where you want a polished appearance without visible styling tools. It takes a bit more practice than a basic bun since keeping the twist tight and even requires steady hands. Practicing in front of two mirrors, one behind you and one in front, helps you see the back of your head while working. This updo holds well for long days without loosening, making it practical for weddings or events that last many hours. Matching bobby pins to your hair color is a small purchase that makes a noticeable difference in the finished look.
21. Braided Low Ponytail Updo
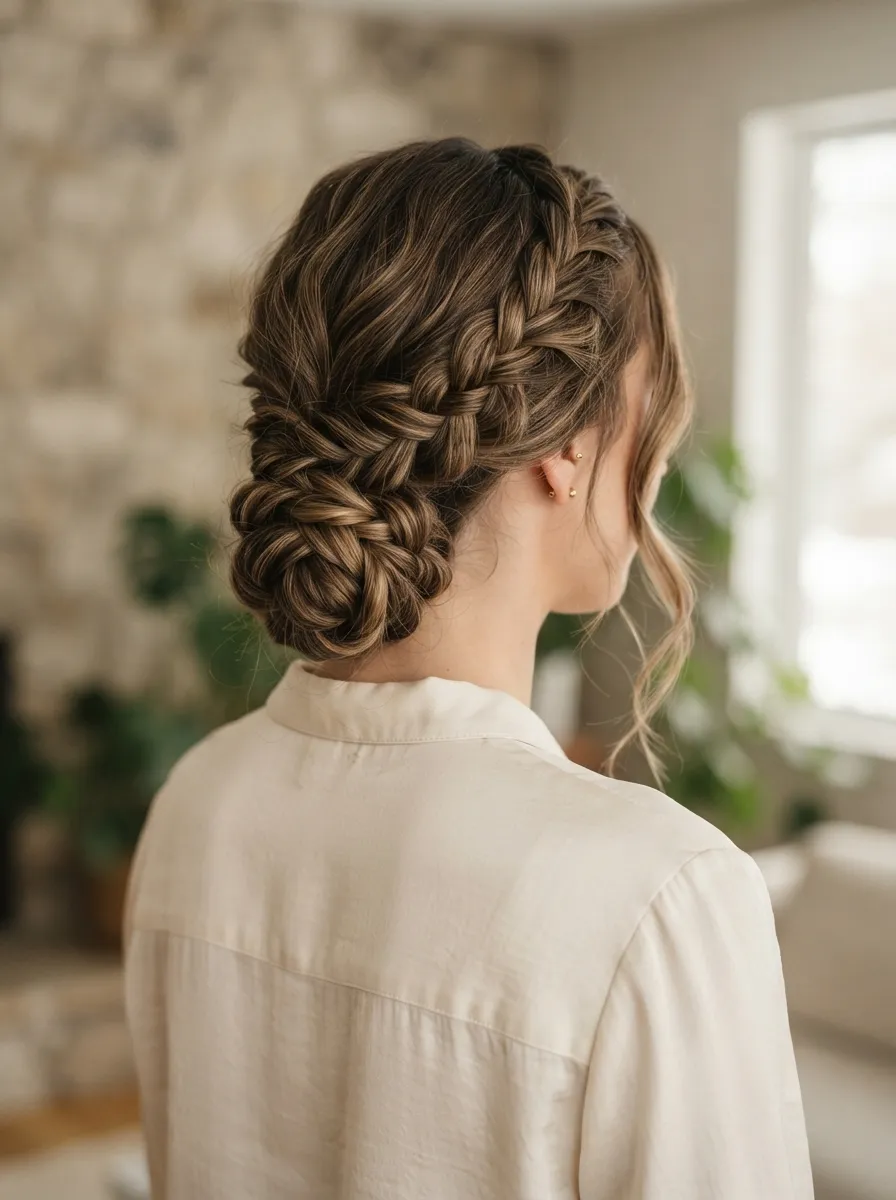
This style takes a simple low ponytail and elevates it with a braid. Gather your hair into a low ponytail, then braid the entire length. Coil the finished braid around the base of the ponytail and pin it in place to form a textured bun. This updo suits casual weddings, dinner parties, or work events where you want something more detailed than a plain bun but still practical. The braid adds texture and visual interest without requiring advanced styling skills. This is a good option for those still building confidence with braiding since any small imperfections in the braid actually blend in nicely once coiled into a bun shape. All you need is a hair tie and a few bobby pins, keeping costs low. This style also holds up well through movement, making it suitable for dancing or active events where a plain bun might start slipping loose after a few hours.
22. Effortless Undone Updo
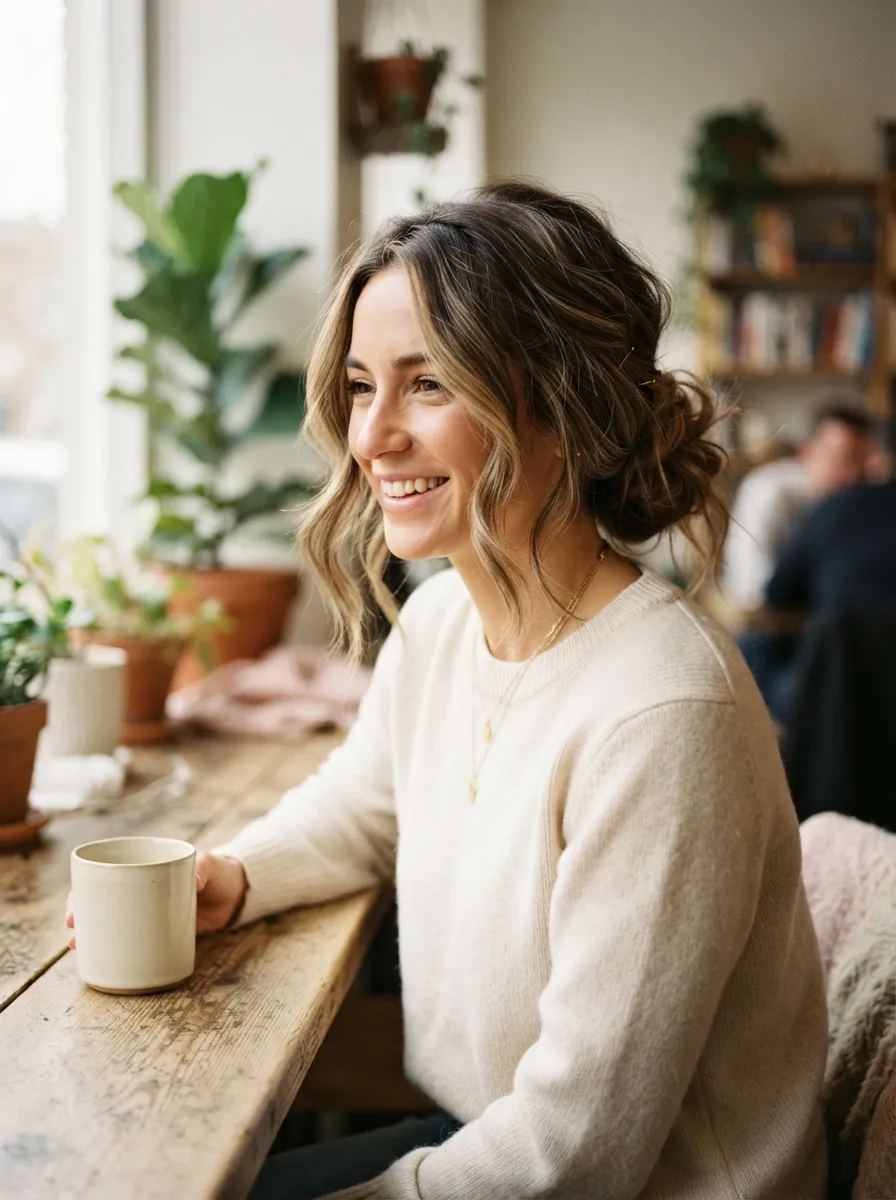
Sometimes the best updo is the one that looks like you barely tried. Gather your hair loosely at the back of your head, twist it once, and secure with a claw clip or a couple of pins. Do not smooth down flyaways or pull it tight. Let pieces fall naturally around your face and neck. This style works for almost any casual setting, running errands, meeting friends, or working from a coffee shop. It takes under a minute once you get comfortable with the loose, relaxed technique. A claw clip is one of the most budget friendly hair tools available and works well for this exact style. This updo also proves that you do not need expensive products or tools to look put together. Sometimes stepping away from precision and embracing a little imperfection creates the most natural and flattering result of all the styles on this list.
Conclusion
Long hair opens the door to so many updo possibilities, from five minute buns to more detailed braided styles worth saving for special occasions. The best part is that almost none of these looks require expensive tools or salon visits. A few hair ties, some bobby pins, and a little practice are usually all it takes. Try a new style each week and pay attention to which ones fit your lifestyle and hair type best. Over time, you will build a small collection of go to updos ready for any occasion, from a lazy morning to a formal event, all while keeping your styling routine simple and affordable.
Leave a Reply