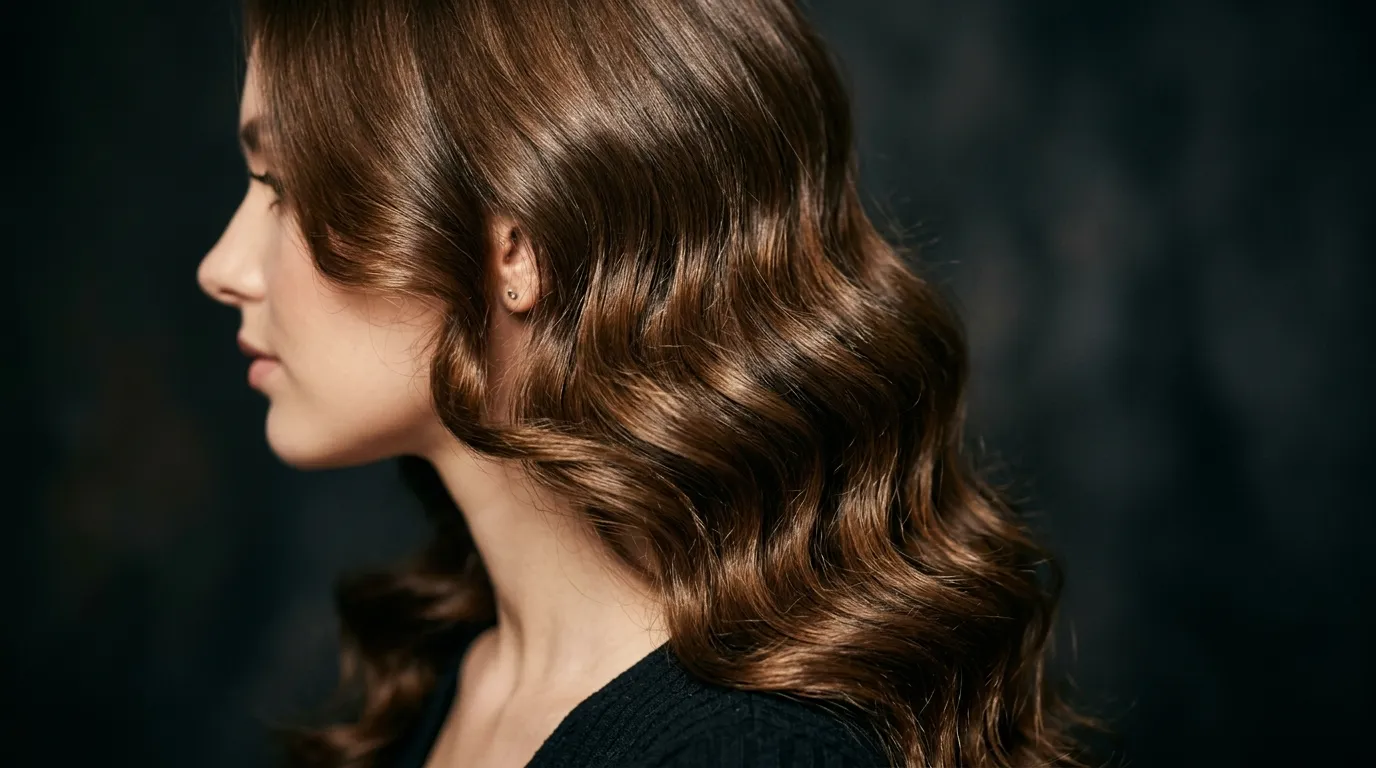
Red carpet inspired hairstyle ideas have a way of turning heads before anyone even sees the outfit. Whether you’re heading to a wedding, a big interview, prom, or just want to feel like a star for a night out, the right hairstyle can change everything. This list covers 25 glamorous, achievable looks inspired by award shows and premieres, broken down so you can recreate them at home without a stylist on speed dial. From sleek buns to loose curls, each idea comes with simple steps and budget friendly tips so you can get that polished, camera ready look without spending a fortune. Grab your hairbrush and a few basic tools, because your next big moment starts here. If you’re also looking for Easy Hairstyle Ideas, simple ponytails, effortless waves, quick buns, and easy braids can help you achieve a stylish look in minutes while fitting perfectly into even the busiest schedules.
1. Sleek Low Bun
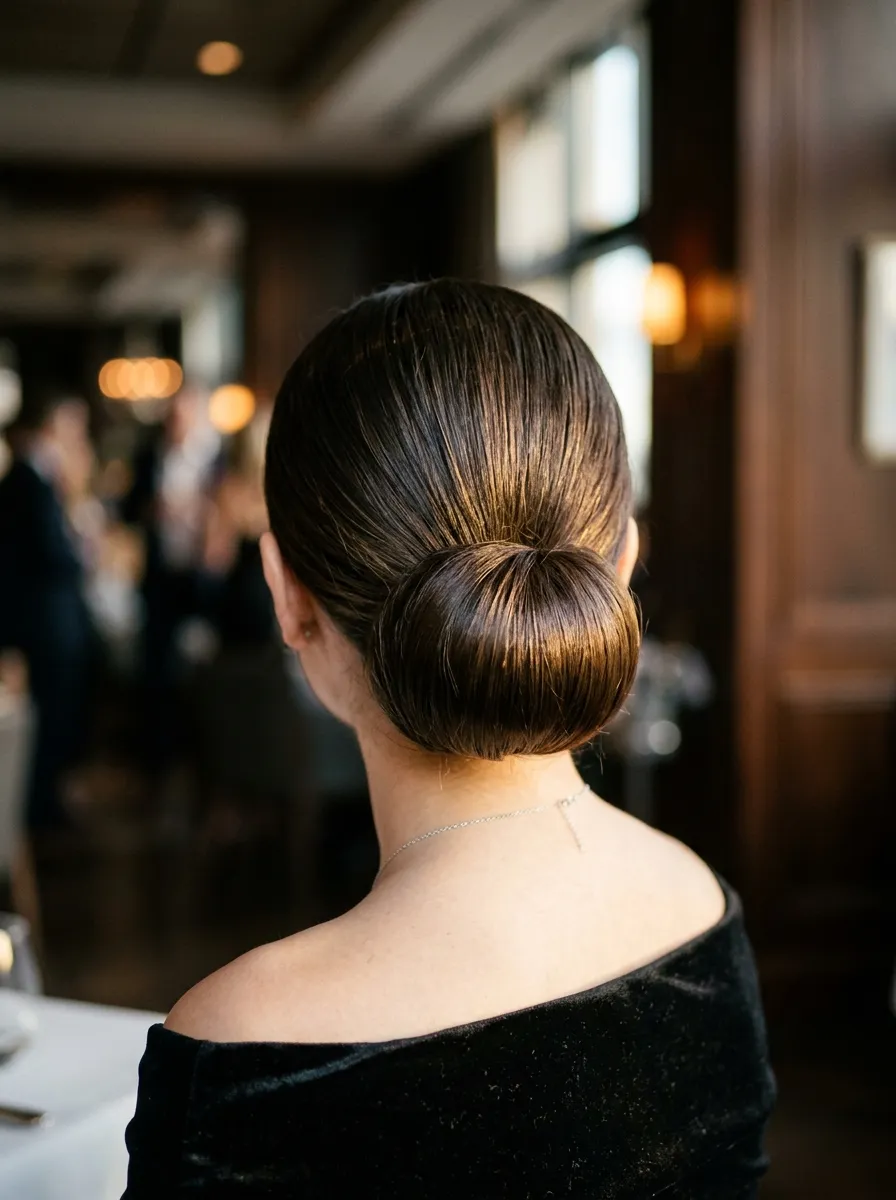
A sleek low bun screams old school glamour without much effort. Pull your hair back tight, smooth out any bumps with a fine tooth comb, and twist it into a bun near the nape of your neck. Secure it with bobby pins hidden underneath. For that glass like shine, run a small amount of gel or serum through your strands before pulling it back. You don’t need salon products either. A few drops of coconut oil or even hand lotion can smooth flyaways in a pinch. This style works on almost any hair length, and it pairs well with statement earrings since your neck and ears stay fully visible. If your hair is thin, tease the crown slightly before pulling it back for extra body. This look takes under ten minutes once you practice a couple times, and it holds up all night through dancing, hugging, and photos. Keep a small travel size hairspray in your bag for touch ups. This is the kind of hairstyle that looks expensive but costs you nothing beyond a comb, some pins, and a bit of patience.
2. Old Hollywood Waves
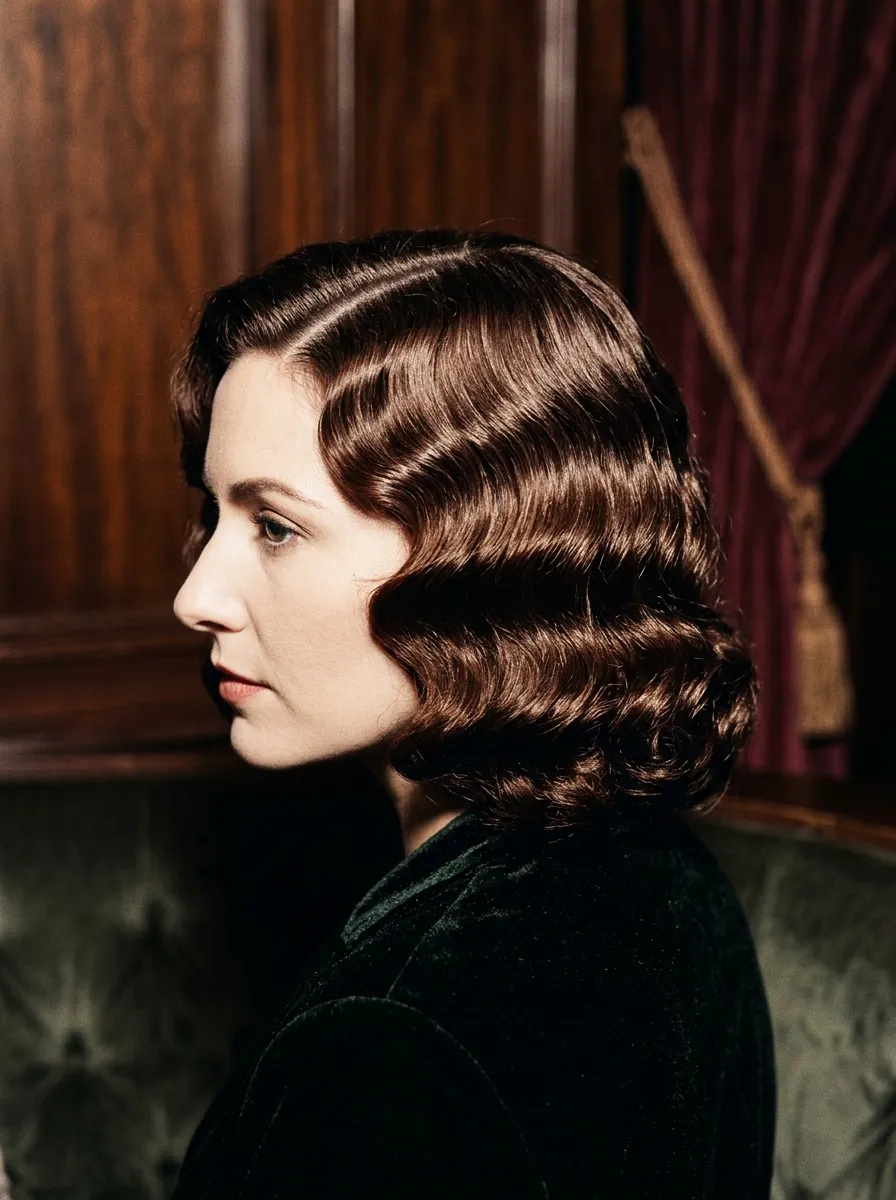
Old Hollywood waves bring that timeless movie star feel. Section damp hair and curl it away from your face using a one inch curling iron. Once the curls cool, brush them out gently with a wide tooth comb to soften them into waves. Use clips to pin the waves into an S shape pattern while they set, then remove once fully dry. A flat brush and a bit of hairspray help hold the shape without stiffness. This style looks best with a deep side part and a bit of shine serum for that polished finish. If you’re on a budget, a basic curling wand from a drugstore works just as well as pricier tools. Practice on a weekend before your event so you know how long the curls take to set. This look pairs beautifully with a bold lip and simple jewelry, letting the hair do the talking. It works for medium to long hair and holds up well for photos throughout the night. Old Hollywood waves are proof that a classic style never goes out of fashion, and you can create them using tools you likely already own.
3. Half Up Half Down with Volume
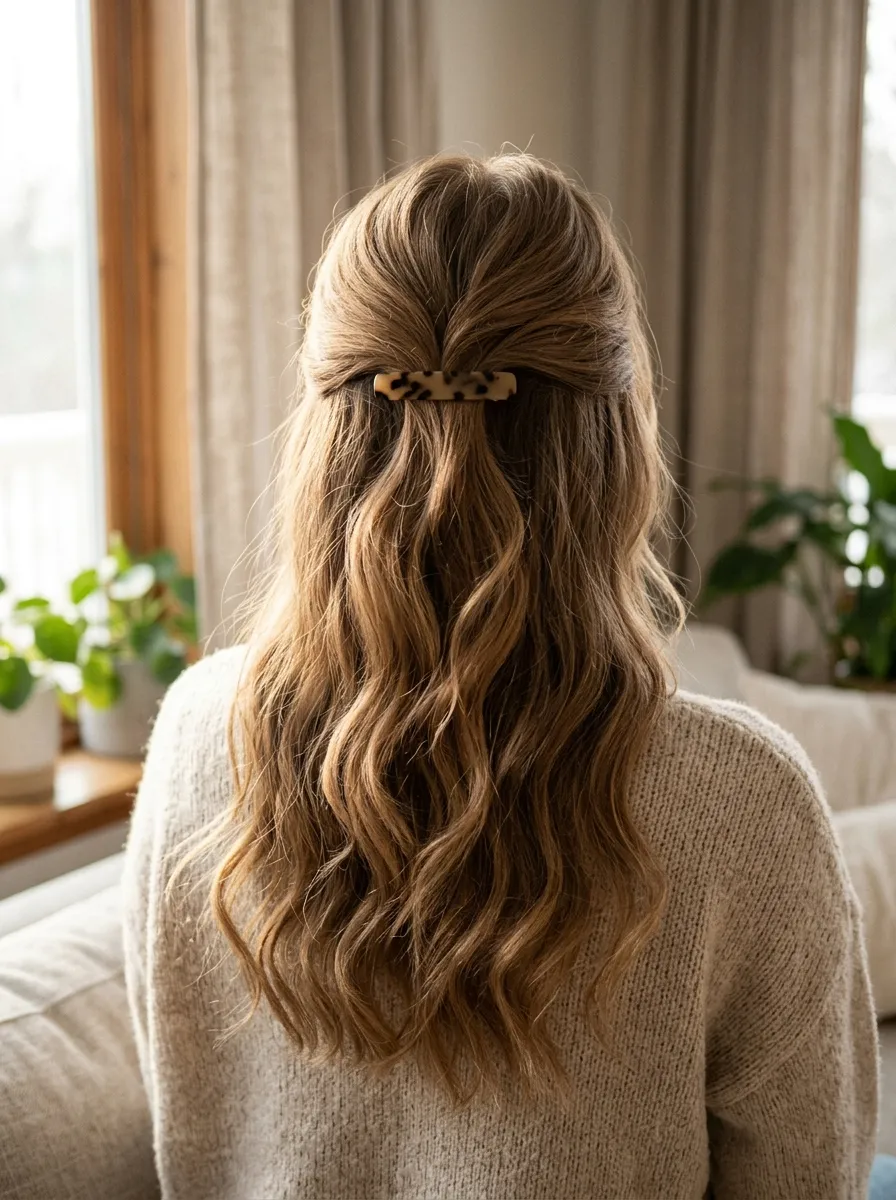
The half up half down style gives you the best of both worlds. Pull the top section of your hair back and secure it at the crown, leaving the rest to flow freely. Backcomb the crown section lightly with a comb for lift before pinning it in place. This adds height without looking overdone. Curl the remaining hair in loose waves using a curling iron or even overnight braids if you want a heat free option. Secure the top with a small clip, bobby pins, or even a pretty barrette for extra flair. This style flatters almost every face shape and hair texture, making it a safe pick for any red carpet moment. For a budget friendly touch, dry shampoo works wonders for adding texture and volume if your hair is freshly washed and too soft to hold curls. This look takes about fifteen minutes and requires no special training. It’s perfect for events where you want your hair to feel done up but not overly formal, striking a balance between elegant and relaxed all night long.
4. Side Swept Curls
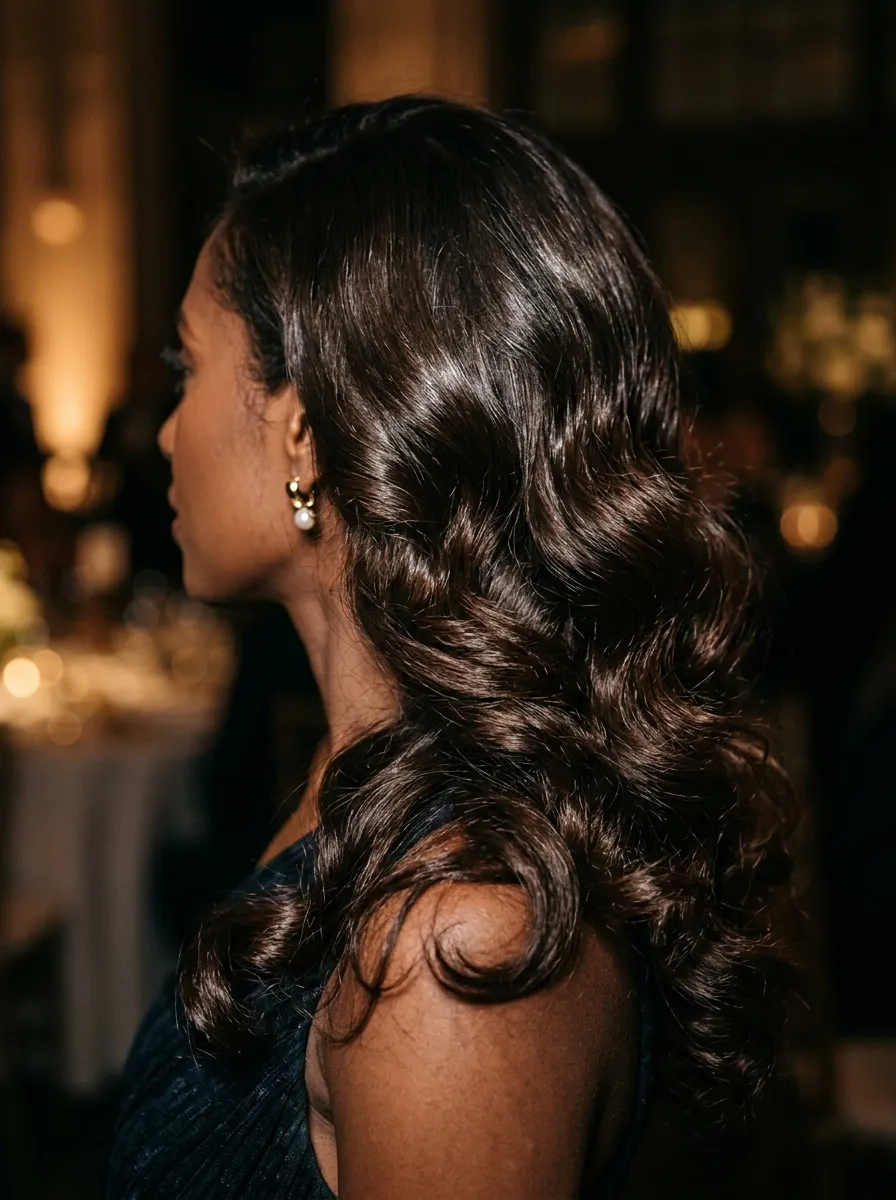
Side swept curls give off a romantic, glamorous vibe perfect for formal events. Curl your entire head of hair in one direction, then brush it all over one shoulder. Pin a small section near your part to keep the curls in place throughout the night. This style works especially well with strapless or off shoulder outfits since it draws attention to your neckline. Use a heat protectant spray before curling to keep your strands healthy, especially if you curl often. If you don’t own a curling iron, foam rollers left in overnight can create a similar soft curl pattern by morning. Finish with a light mist of hairspray to hold the shape without stiffness. This look pairs nicely with a middle or deep side part depending on your face shape. It’s a flattering, low maintenance option that photographs beautifully from every angle. Side swept curls are ideal if you want a soft, feminine look that still feels put together for a big event, and the whole process takes less than twenty minutes at home.
5. High Fashion Ponytail
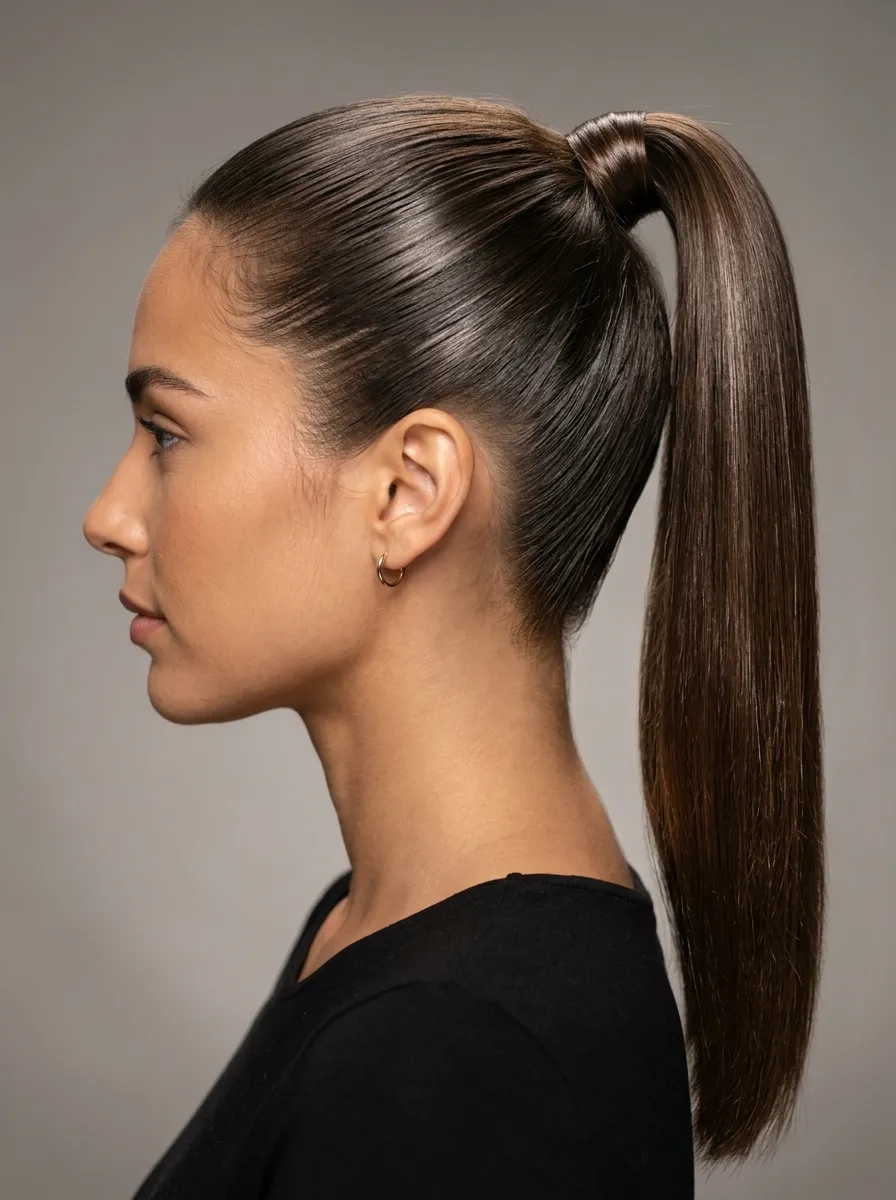
A high fashion ponytail turns a basic style into something bold. Brush your hair back smoothly and secure it high on your head with a strong elastic. Wrap a small section of hair around the base to hide the elastic for a cleaner finish. Smooth down any flyaways with a toothbrush and a touch of hairspray for that sleek, model like look. If you want extra length, clip in hair extensions before pulling everything into the ponytail. This works great for thinner hair that needs a little help looking fuller. Curl the ends of the ponytail for movement, or leave it straight for a sharper look depending on your outfit. This style is a favorite among celebrities because it’s simple yet striking, drawing attention to your face and jewelry. A budget friendly tip is to use a fine tooth comb dipped in water to smooth the front section instead of buying expensive edge control products. This hairstyle takes ten minutes or less and holds up through an entire event without needing touch ups.
6. Braided Crown
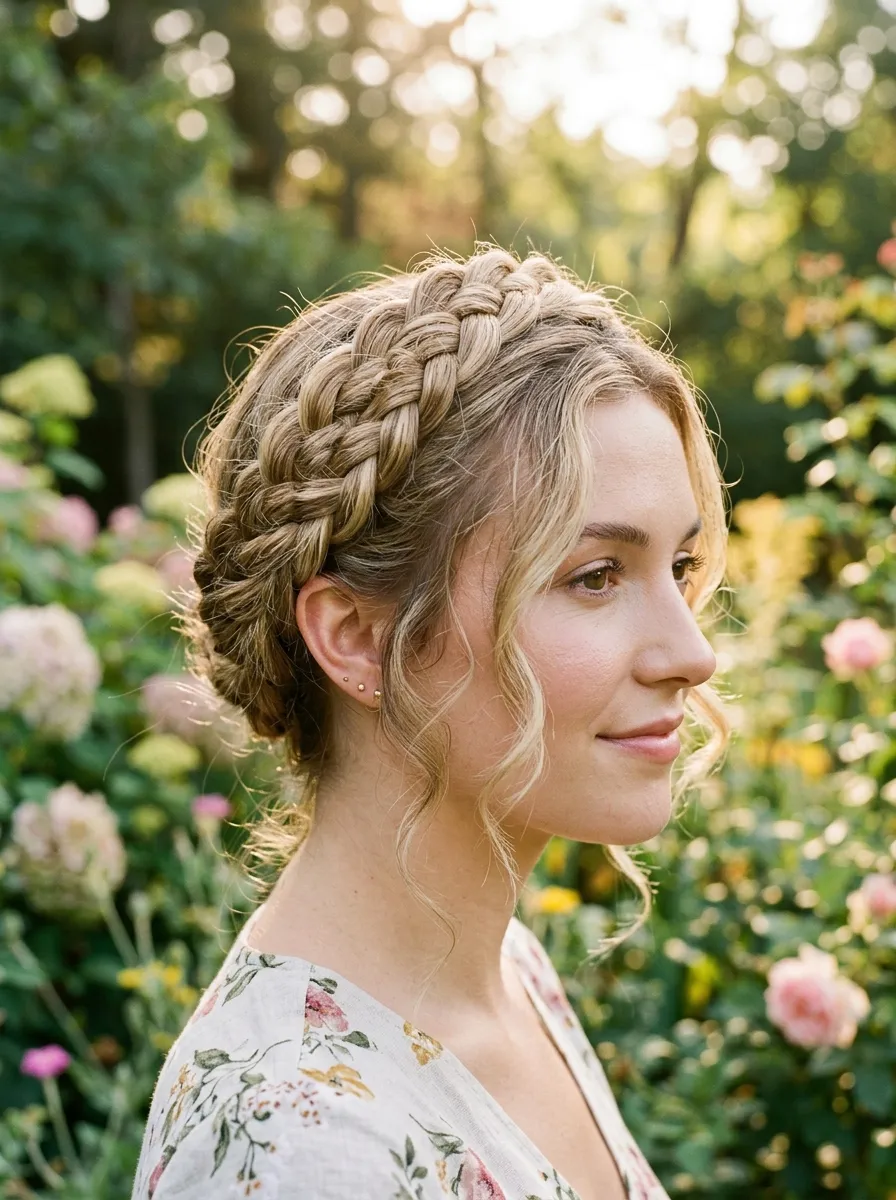
A braided crown feels romantic and regal at the same time. Section your hair into two parts and braid each side in a simple three strand braid. Wrap each braid around the top of your head like a crown and pin them in place. Pull a few face framing pieces loose for a softer, undone look. This style works for almost any hair length, though longer hair creates a fuller crown effect. If your hair is shorter, use a small amount of hair extensions clipped in beforehand for extra length to wrap around. This look is a great option if you want something that stays secure through dancing or windy outdoor events. A budget friendly trick is to spritz a bit of texturizing spray on your hair before braiding, which gives the braids more grip and keeps them from slipping. This hairstyle pairs beautifully with flower accessories or delicate pins tucked into the braid for extra shine. It takes about twenty minutes to master but looks like it took a professional hours to create.
7. Textured Bob with Waves
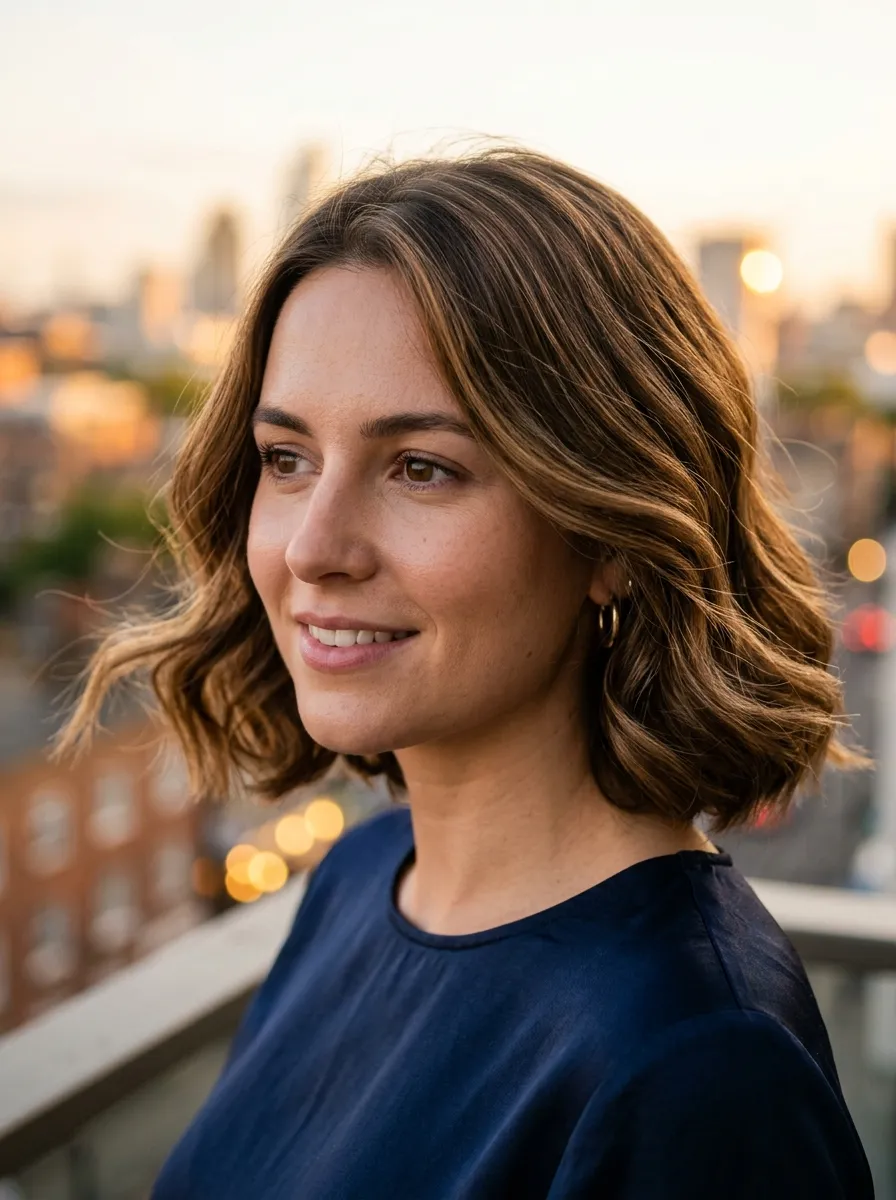
Short hair can absolutely shine on a red carpet, and a textured bob with waves proves it. Use a small curling wand to add loose waves throughout your bob, focusing on the mid lengths and ends rather than the roots. This keeps the style looking natural rather than overly done. Once curled, run your fingers through the waves to break them up and add texture. A light texturizing spray adds grip and keeps the waves from falling flat too quickly. This style flatters most face shapes and works beautifully with a deep side part for extra drama. If you’re short on time, a flat iron with a slight bend can create similar waves faster than a curling wand. This look is low maintenance yet still feels glamorous, making it perfect for shorter hair that people often assume can’t do much with formal styling. Add a delicate hair clip near the part for a subtle sparkle. This hairstyle takes under fifteen minutes and proves that short hair can be just as red carpet ready as long hair.
8. Voluminous Blowout
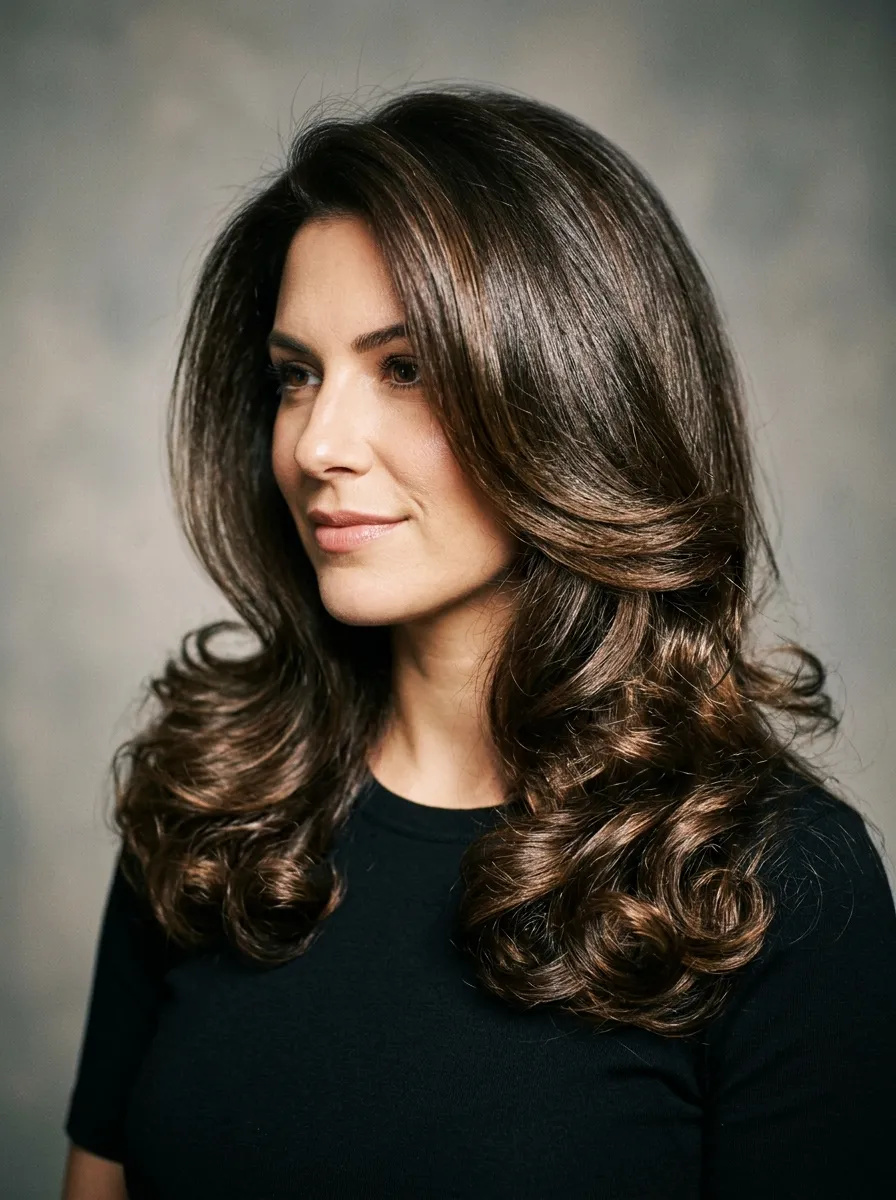
A voluminous blowout gives your hair that full, bouncy look you often see on award show carpets. Blow dry your hair upside down first to build volume at the roots, then use a round brush to smooth and curl the ends as you finish drying. Focus on lifting the roots with the brush rather than flattening them. Finish with a light spray of volumizing product to hold the fullness throughout the night. If you don’t own a round brush, wrapping sections around your fingers while blow drying can create a similar bounce. This style works on medium to long hair and looks best with a deep side part for extra drama. A budget friendly tip is to sleep with your hair in a loose braid the night before an event, which pre sets some natural wave and makes the blowout process faster. This hairstyle photographs beautifully because the volume catches light from every angle. It takes about twenty five minutes with a hair dryer and brush, and it holds up well through a full evening of photos and mingling.
9. Wet Look Slick Back
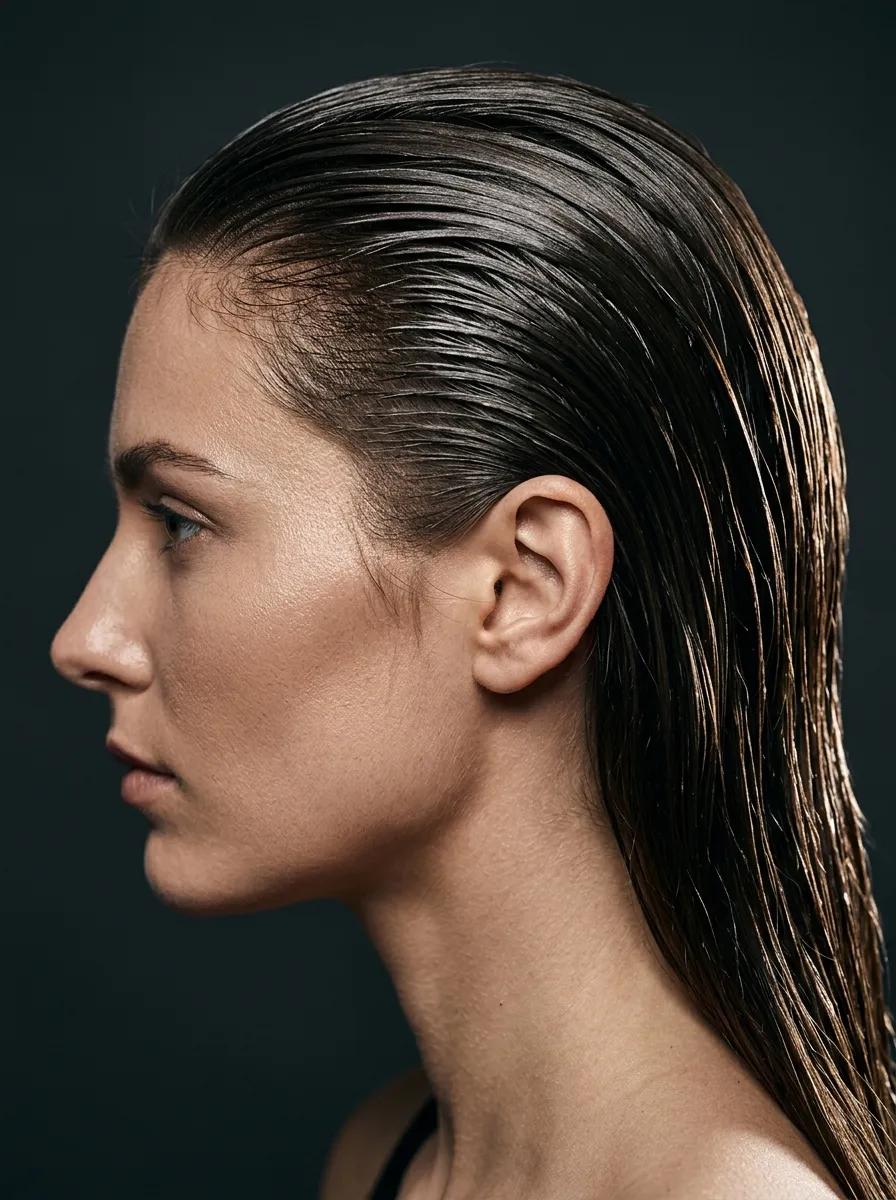
The wet look slick back is bold, modern, and surprisingly simple to achieve. Apply a gel or styling cream to damp hair, then comb it straight back from your forehead using a fine tooth comb. Keep combing until every strand lays flat and shiny, avoiding any bumps or parts. Let it air dry or use a blow dryer on low heat to set the style without adding frizz. This look works especially well for shorter hair or hair pulled into a low bun or ponytail afterward. A budget friendly option is using a small amount of aloe vera gel instead of expensive styling products, since it creates a similar shine and hold. This hairstyle pairs beautifully with bold makeup since it keeps all the attention on your face. It’s a favorite among celebrities for its sleek, editorial feel that photographs sharp and clean under any lighting. This style takes only a few minutes to create and holds up well through a night of photos, making it one of the easiest glam looks on this list.
10. Soft Romantic Updo
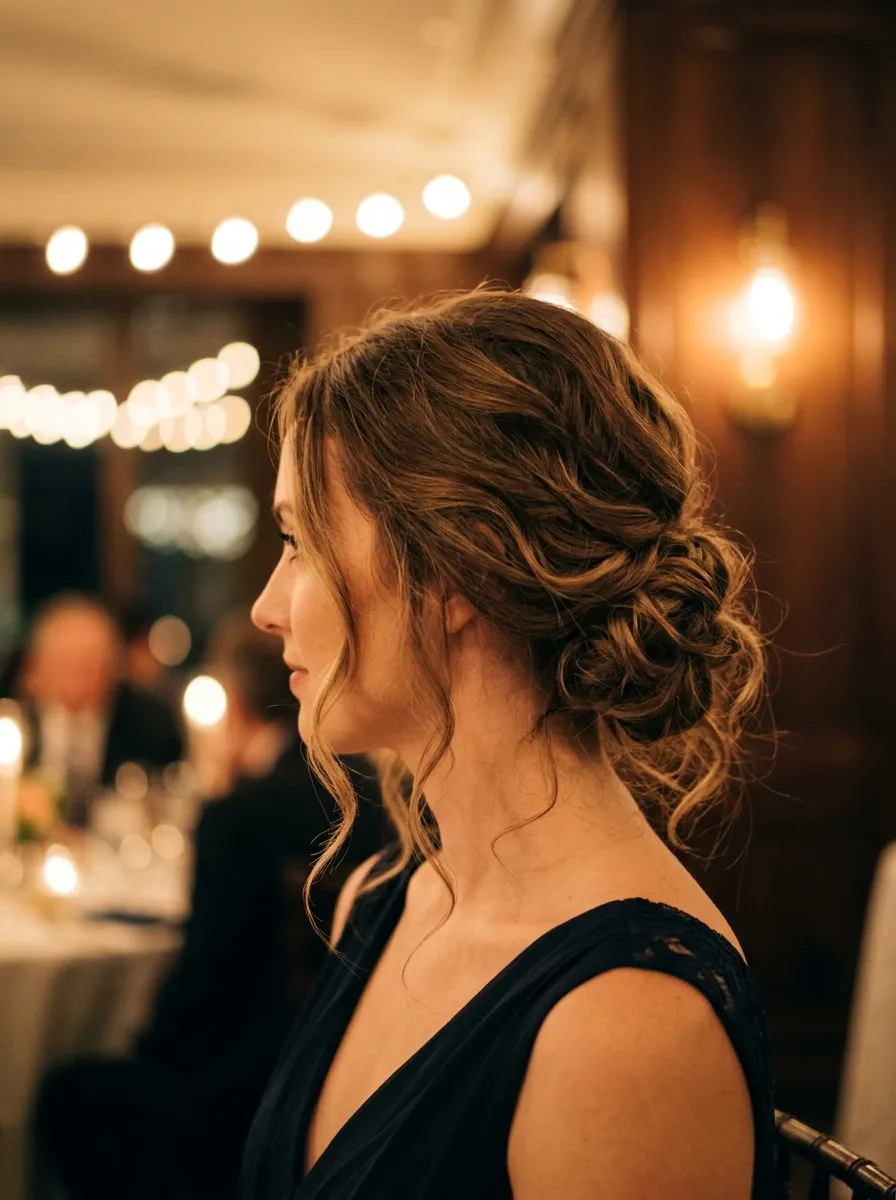
A soft romantic updo feels bridal and elegant without trying too hard. Gather your hair loosely at the back of your head and twist it into a low, textured bun, leaving a few pieces out to frame your face. Curl those loose pieces lightly for a softer finish. Pull small sections from the sides before securing everything, giving the updo a fuller, more relaxed shape rather than a tight, severe look. Bobby pins hidden throughout keep everything in place without looking stiff. This hairstyle works on most hair lengths and textures, and it pairs beautifully with delicate hair pins or small flowers tucked into the twist. A budget friendly trick is using a hair doughnut, which you can make at home with an old sock cut into a ring, to add volume to the bun without buying one. This look holds up well for long events like weddings or formal dinners since the loose style forgives small shifts throughout the night. It takes about twenty minutes and gives a dreamy, effortless glam finish.
11. Statement Side Part
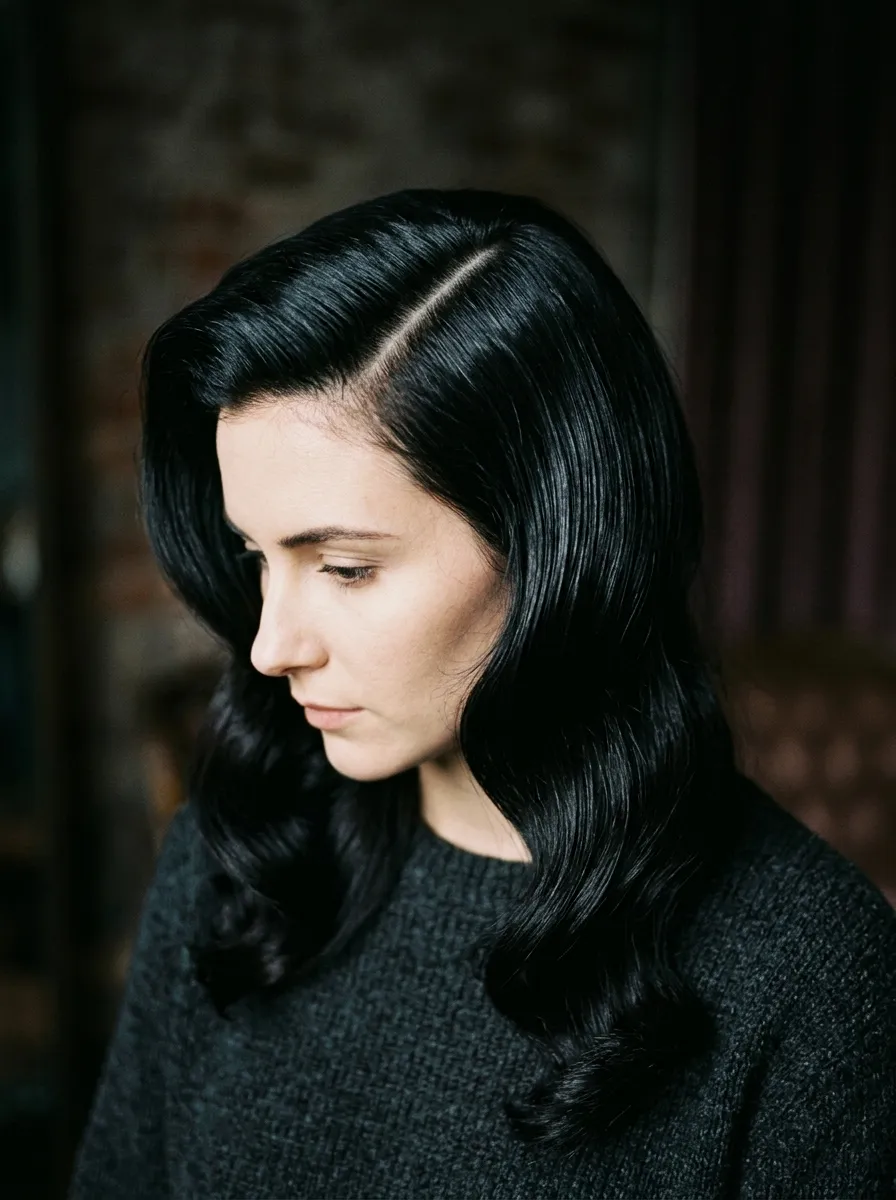
A statement side part is a small change that makes a big difference. Instead of your usual middle part, comb your hair into a deep side part, letting more volume fall on one side than the other. Smooth the shorter side close to your head with a bit of gel, while letting the longer side flow naturally or in loose waves. This creates an asymmetrical, high fashion feel without requiring a new haircut. A rat tail comb works well for creating a clean, precise part line. This style pairs beautifully with straight hair, waves, or even a sleek ponytail, making it a flexible option depending on your event. A budget friendly tip is using a bit of Vaseline or lip balm to slick down the shorter side if you don’t have hair gel on hand. This look draws attention to your cheekbones and jawline, making it a flattering option for photos. It takes less than five minutes to switch up your usual part, proving that sometimes the simplest changes create the most dramatic red carpet effect.
12. Glossy Straight Hair
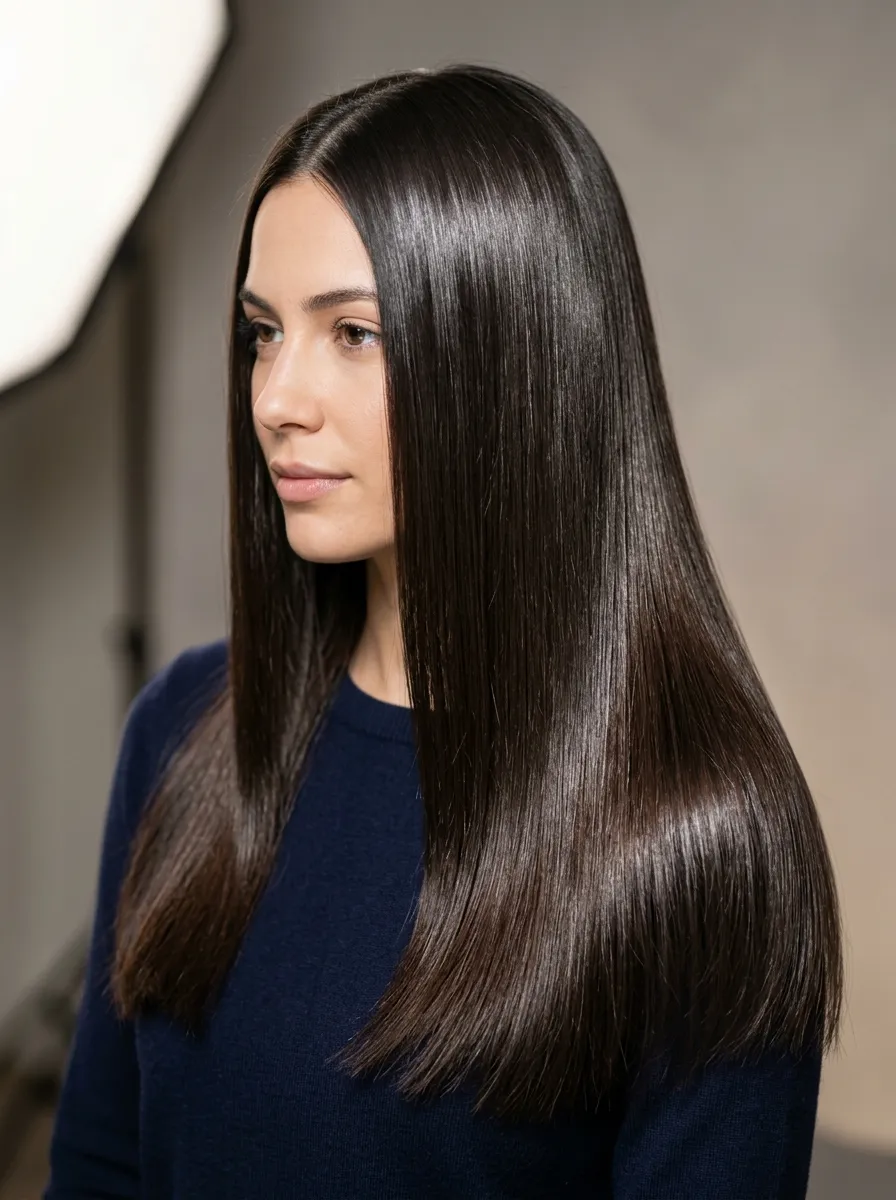
Sometimes the most glamorous choice is the simplest one. Glossy straight hair, done well, looks polished and expensive. Use a flat iron in small sections to remove any frizz or bumps, working from roots to ends slowly for the smoothest result. A shine serum applied to damp hair before drying helps boost the reflective, glass like finish once styled. Avoid touching your hair too much after straightening since oils from your hands can dull the shine. This style works on almost any hair length and pairs beautifully with a middle or side part depending on your face shape. A budget friendly tip is using a microfiber towel instead of a regular towel when drying your hair, since it reduces frizz and helps the straightening process go faster. This look is a favorite for red carpet events because it photographs cleanly under bright lights without looking overdone. It takes about fifteen minutes with a flat iron and holds up well through a full night, especially if you avoid humid environments or carry a small anti frizz spray for touch ups.
13. Twisted Chignon
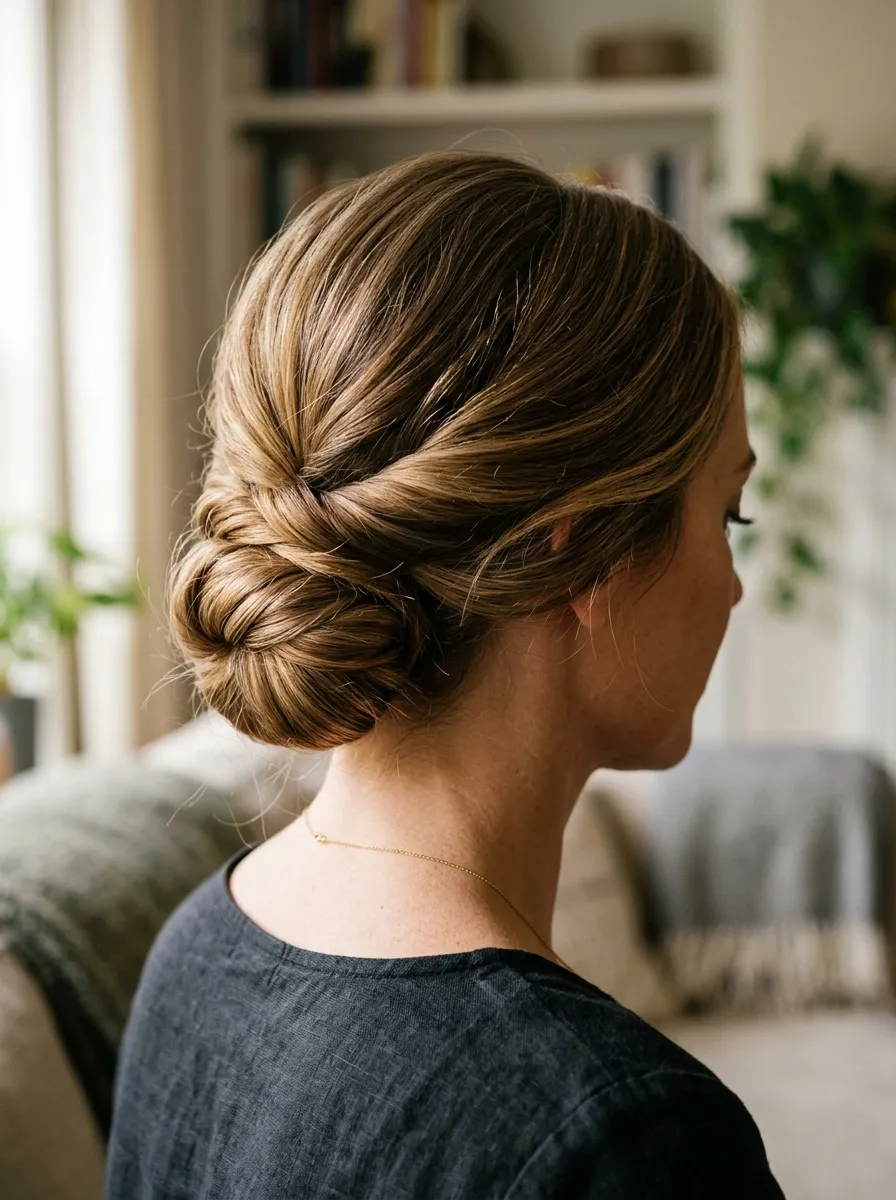
A twisted chignon is a classic updo that looks harder to create than it actually is. Gather your hair to one side at the nape of your neck, then twist it upward into a coiled knot and pin it in place. Leave a few strands loose near your face for softness if you want a less formal finish. This style works beautifully with a side part and pairs nicely with statement earrings since it keeps your neck visible. A texturizing spray applied before twisting gives the chignon more grip, especially if your hair is naturally smooth or slippery. If you don’t own bobby pins in your hair color, clear pins blend into almost any shade and work just as well. This hairstyle holds up for hours without needing touch ups, making it a solid choice for long events like galas or dinners. It takes about ten minutes once you get the twisting motion down. The twisted chignon feels sophisticated and timeless, proving that a simple twist and a few pins can create serious red carpet glamour.
14. Retro Pin Curls
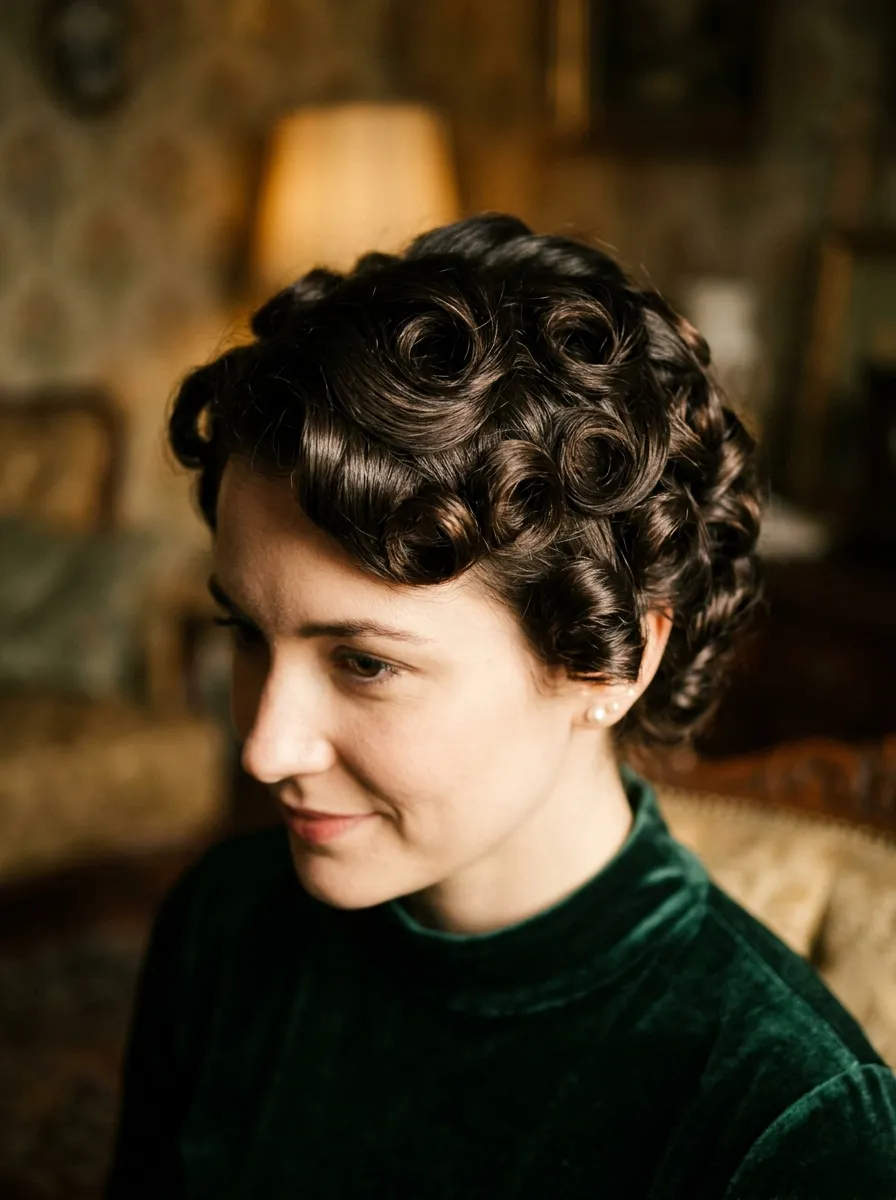
Retro pin curls bring a playful, vintage flair to any red carpet look. Section damp hair and wrap small pieces around your finger, pinning each curl flat against your head in a spiral shape. Let the curls set overnight or use a hair dryer on low heat to speed up the process. Once dry, remove the pins and gently separate the curls with your fingers for a soft, bouncy finish. This style works best on medium length hair, though shorter hair can create a cute, curly bob effect. A budget friendly tip is using bobby pins you already own instead of buying special pin curl clips. This hairstyle pairs beautifully with a bold red lip and simple jewelry for a full vintage inspired look. It takes some patience to master the curling and pinning technique, but the result feels unique compared to typical modern waves. Retro pin curls hold their shape well throughout an event, especially with a light hold hairspray, making this a fun and distinctive choice for anyone wanting to stand out.
15. Face Framing Layers with Curls
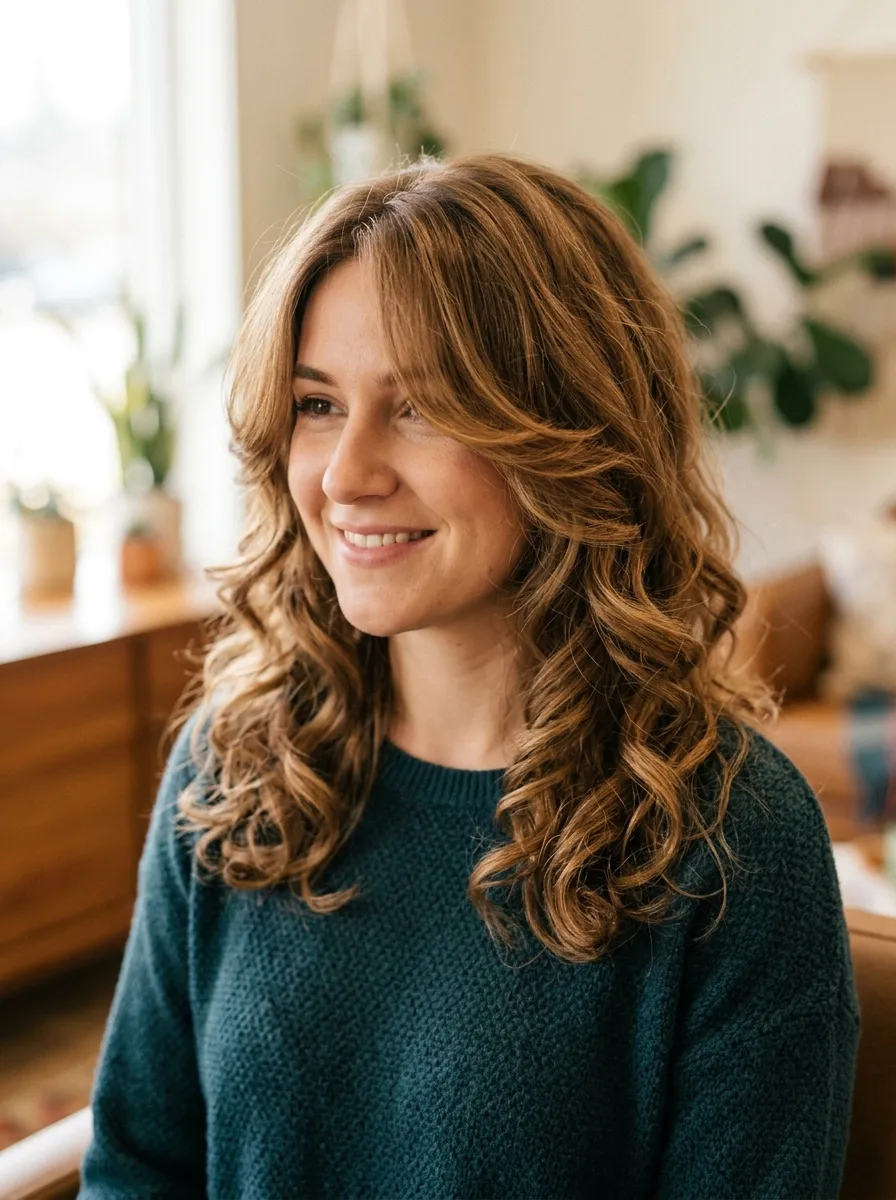
Face framing layers with curls draw attention right where you want it, around your eyes and cheekbones. Curl the shorter layers near your face using a small barrel curling iron, focusing on creating tight, defined curls close to your skin. Curl the rest of your hair in looser waves for contrast and texture. This combination gives your whole look more dimension without needing an updo. A lightweight curl cream applied before styling helps define the shorter pieces without weighing them down. This style works especially well if you already have layers cut into your hair, but you can fake the effect by curling random face framing sections even without layers. A budget friendly tip is using a pencil sized curling wand, which is often cheaper than larger styling tools and works perfectly for these smaller sections. This hairstyle flatters nearly every face shape by softening angles and drawing focus to your features. It takes about fifteen minutes and gives a naturally glamorous finish that photographs beautifully from any angle.
16. Sculpted Finger Waves
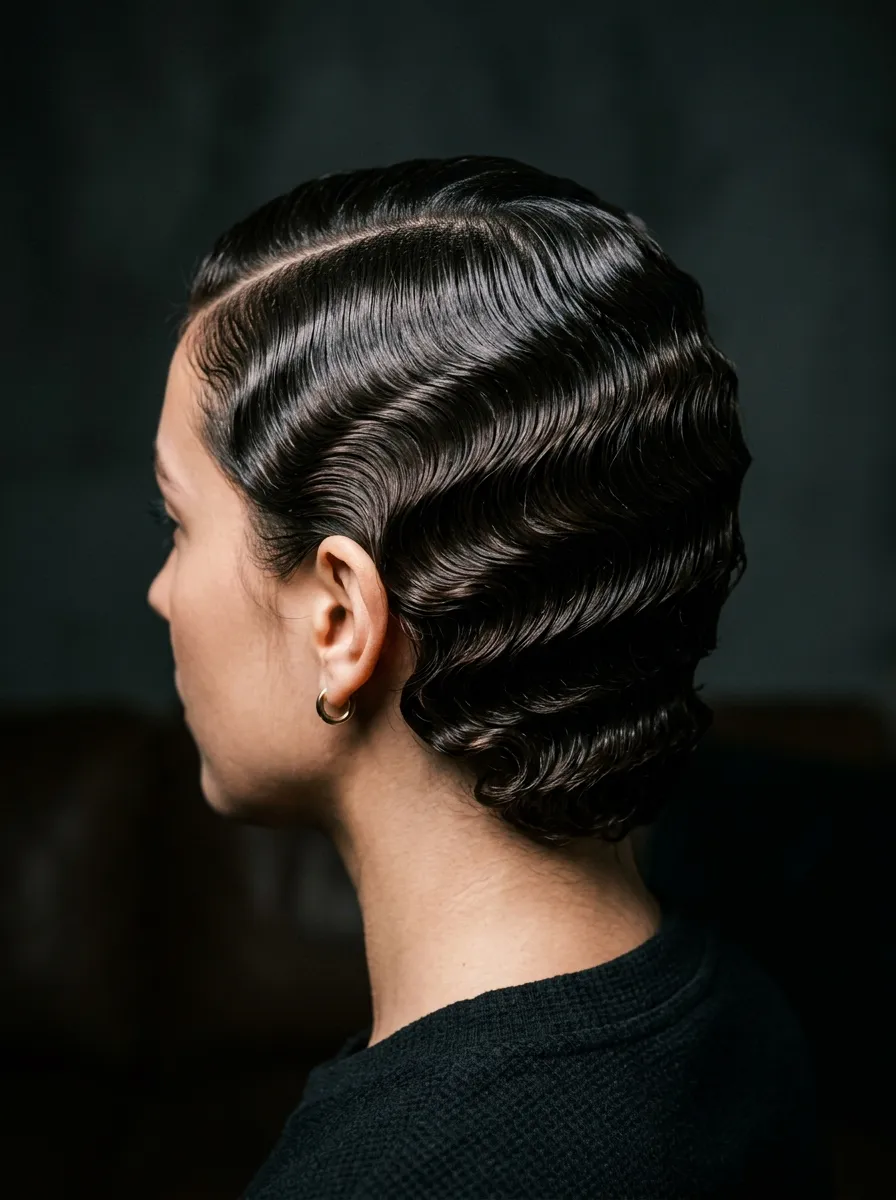
Sculpted finger waves bring serious old school glamour to any red carpet moment. Apply a styling gel to damp hair, then use your fingers and a fine tooth comb to push the hair into an S shape pattern close to your scalp. Pin each wave in place with flat clips while it dries completely. Once dry, remove the clips carefully to avoid disturbing the wave pattern. This style works best on shorter to medium length hair and creates a sleek, sculptural look unlike typical loose curls. A budget friendly tip is using a small amount of flaxseed gel, which you can make at home by boiling flaxseeds, as a natural alternative to store bought styling gel. This hairstyle pairs beautifully with bold vintage makeup for a full glamorous effect. It takes practice to perfect the wave shape, so try it a few times before your event. Sculpted finger waves hold their shape well and photograph with incredible definition, making this a striking option for anyone wanting a truly distinctive red carpet hairstyle.
17. Bubble Ponytail
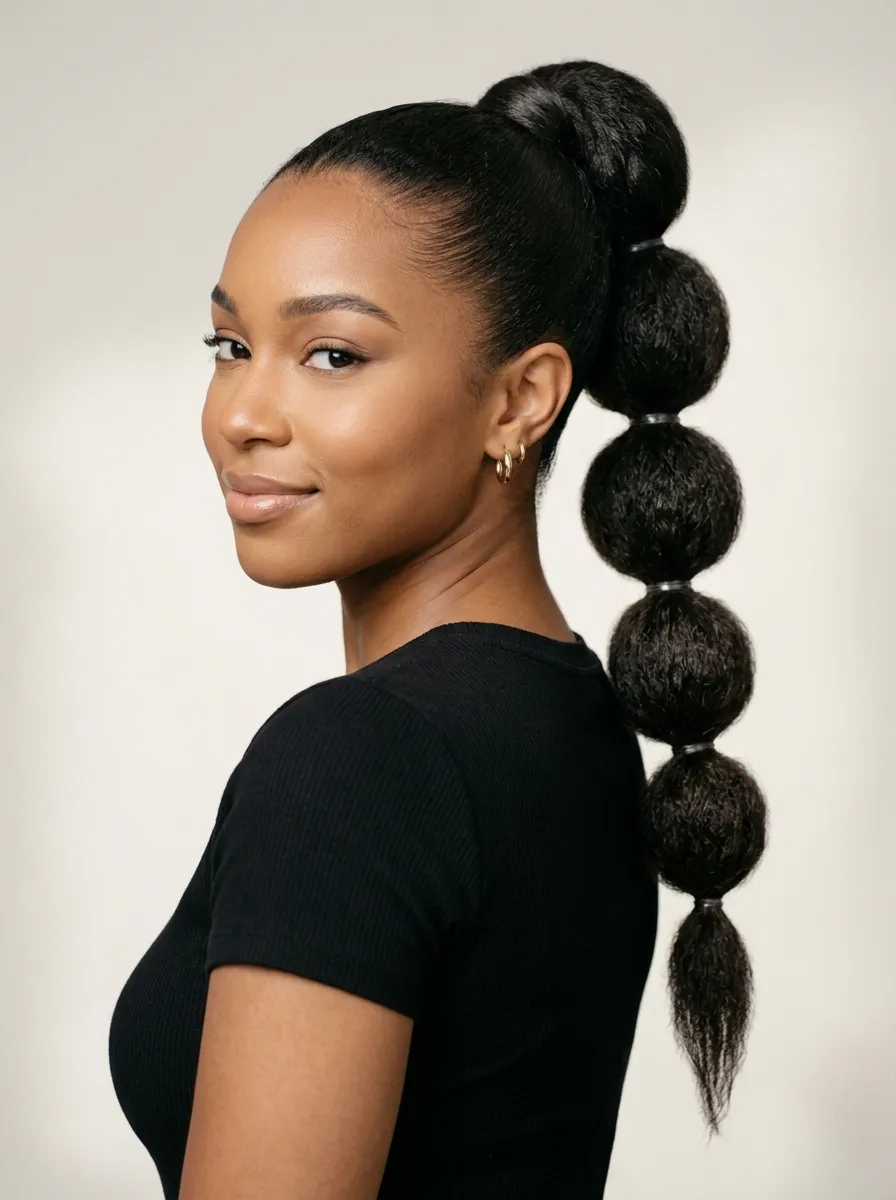
A bubble ponytail turns a basic style into something fun and eye catching. Pull your hair into a ponytail, then add small elastics every few inches down the length of the tail. Gently pull the hair between each elastic outward to create rounded, bubble like sections. This style looks more complex than it actually is, and it works on almost any hair length or texture. A budget friendly tip is using clear elastics from a multipack instead of buying specialty hair ties, since they blend in and hold just as well. This hairstyle pairs beautifully with sleek, straight hair for a modern finish or with slight waves for a softer look. Add a bit of shine spray between each section for extra sparkle under event lighting. This look works great for younger guests or anyone wanting something playful yet polished for a red carpet event. It takes about ten minutes to section and pull, making it one of the quickest yet most visually interesting hairstyles on this list.
18. Loose Braid with Ribbon
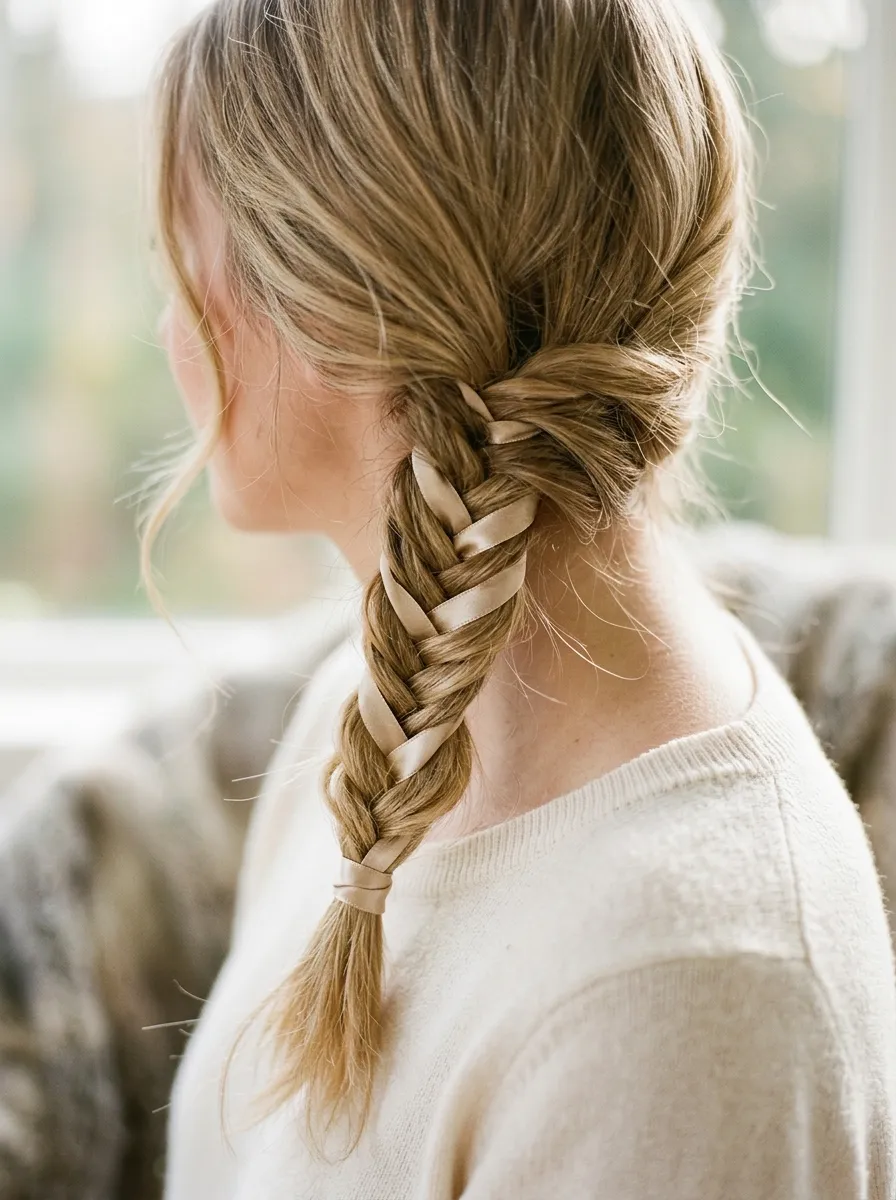
A loose braid with a ribbon adds a romantic, storybook touch to your red carpet look. Braid your hair loosely to one side, weaving a thin satin ribbon through the strands as you go for a pop of color or shine. Gently pull at the braid once finished to loosen it and add texture, giving it a soft, undone appearance rather than a tight, structured braid. This style works on long hair best, though medium length hair can still achieve a shorter version of the look. A budget friendly tip is using ribbon from an old gift box or craft store instead of buying specialty hair ribbon, since any thin satin or silk ribbon works well. This hairstyle pairs beautifully with flowing gowns or whimsical outfits for a cohesive, elegant theme. It takes about fifteen minutes to braid and adjust for the right amount of looseness. This look feels fresh and personal since you can match the ribbon color to your outfit, making it a customizable option for any red carpet event.
19. Voluminous Top Knot
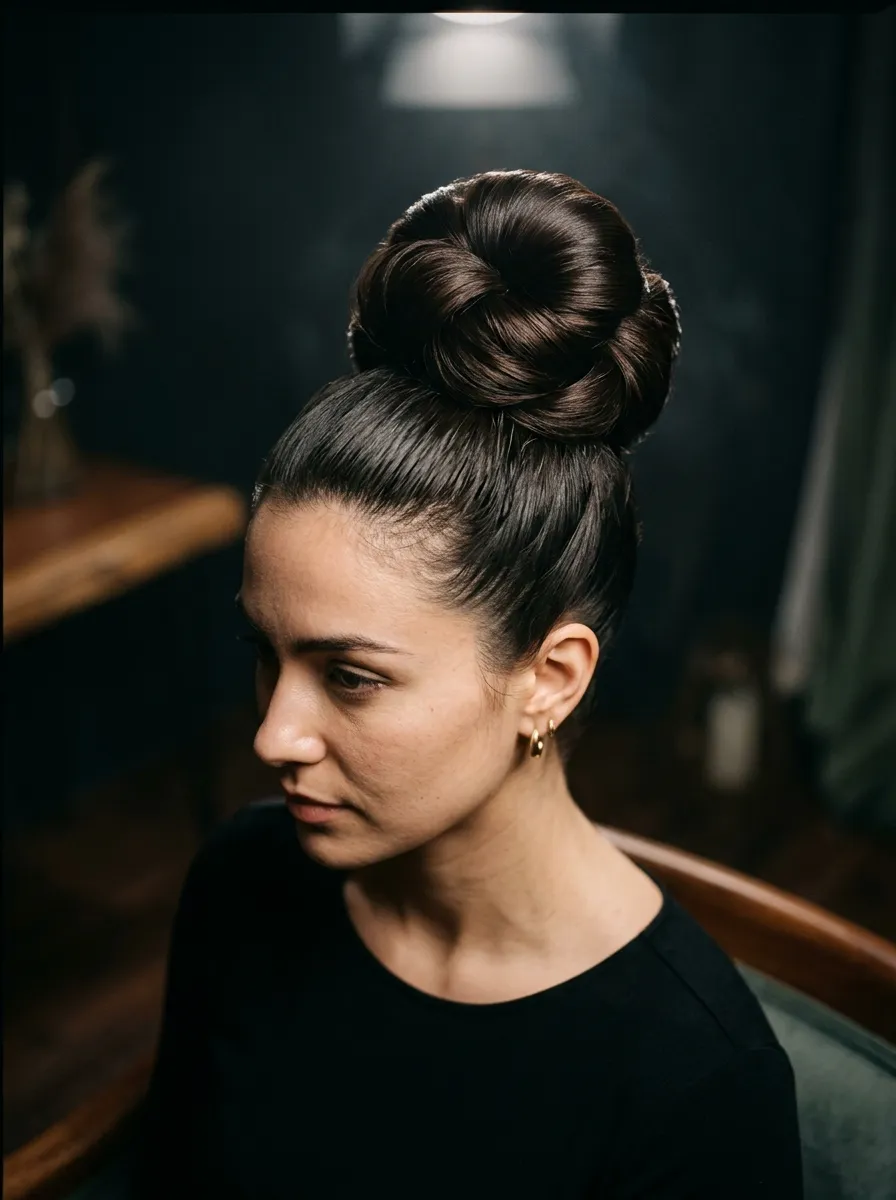
A voluminous top knot is bold, chic, and surprisingly easy to create. Gather your hair high on your head and twist it into a large, loose bun, allowing some volume and texture rather than pulling it too tight. Secure with several bobby pins hidden throughout the bun for a strong hold. Backcombing your hair slightly before gathering it adds extra fullness to the finished knot. This style works especially well for formal events since it keeps hair fully off your neck and shoulders, showing off statement jewelry or a bold neckline. A budget friendly tip is using a hair donut made from an old sock if you want extra volume without buying a special bun shaper. This hairstyle pairs beautifully with sleek, straight baby hairs at the front for a polished finish. It takes about ten minutes and holds up incredibly well through dancing or long events. The voluminous top knot feels modern and sculptural, making it a favorite among celebrities walking red carpets in structured, editorial looking gowns.
20. Cascading Curls
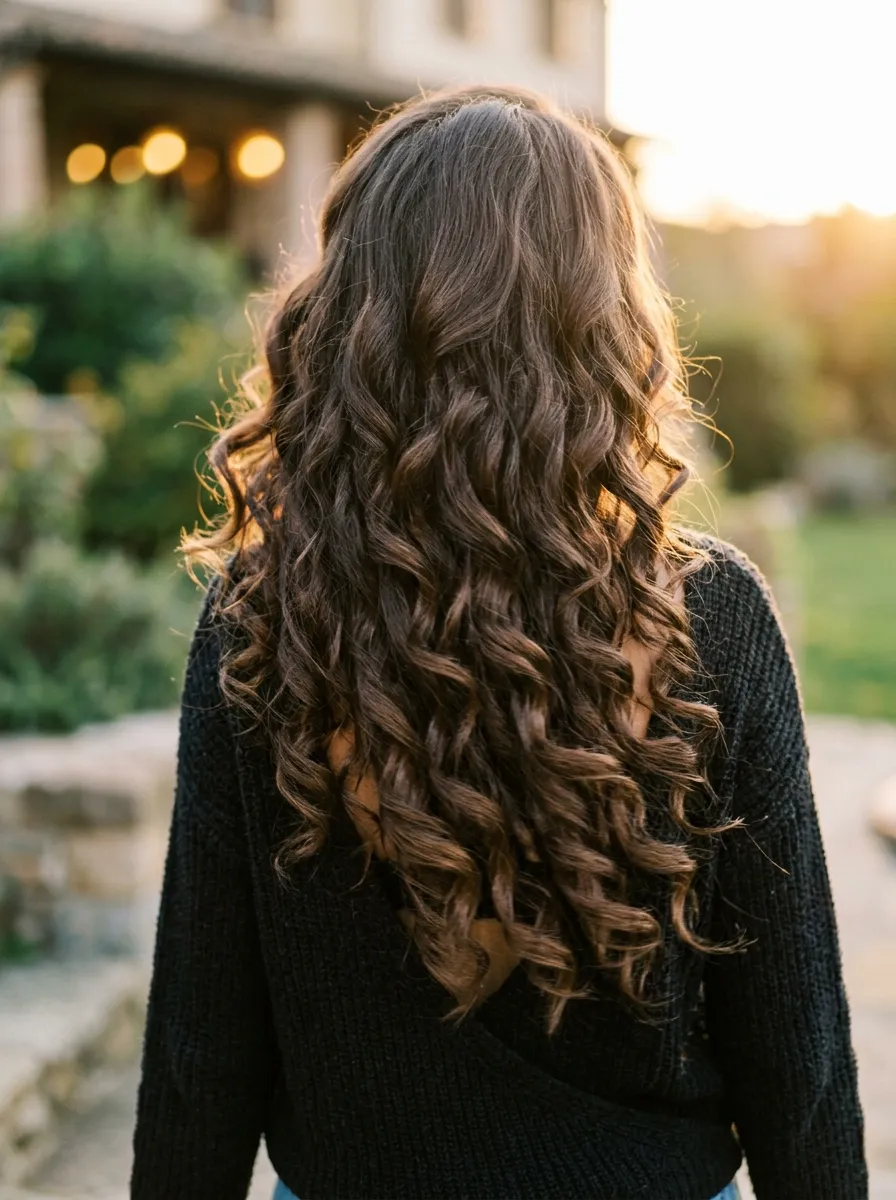
Cascading curls give you that full, glamorous look often seen on award show carpets. Curl your entire head of hair using a one inch curling iron, alternating the direction of each curl for a more natural, tumbling effect. Once finished, brush through the curls gently with your fingers or a wide tooth comb to soften them into loose, flowing waves rather than tight ringlets. Flip your head upside down and shake your roots for extra volume before finishing with hairspray. This style works best on long hair, though medium length hair can achieve a shorter, still full version. A budget friendly tip is sleeping in a loose braid the night before to pre curl your hair, cutting down on the amount of heat styling needed the day of your event. This hairstyle pairs beautifully with a middle part and minimal accessories, letting the volume and shine speak for themselves. It takes about twenty five minutes with a curling iron and photographs beautifully under bright lights, capturing movement in every shot.
21. Sleek Middle Part with Shine
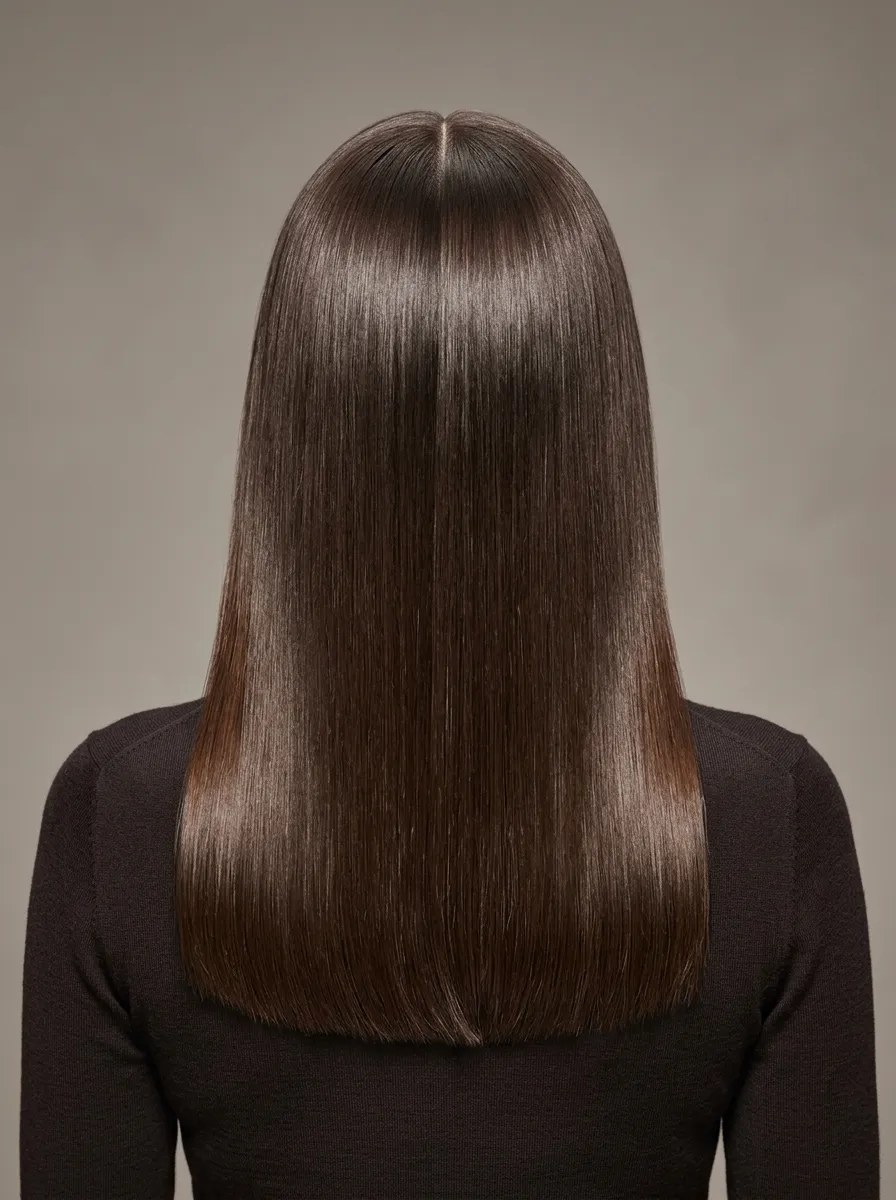
A sleek middle part with shine is simple, symmetrical, and always in style. Part your hair evenly down the middle using a rat tail comb, then straighten each side with a flat iron for a smooth, glass like finish. Apply a shine serum to damp hair before drying to boost the reflective quality once styled. Keep the part precise and clean, since this style relies on symmetry for its polished look. This hairstyle works on almost any hair length and pairs beautifully with a strong, structured outfit since the hair itself stays minimal and sleek. A budget friendly tip is using a fine tooth comb dipped lightly in water to smooth any flyaways along the part line instead of buying edge control gel. This look photographs cleanly under bright event lighting and complements bold makeup or statement jewelry since it keeps the focus on your features. It takes about fifteen minutes with a flat iron and holds up throughout a long event with just a small touch up spray kept in your bag.
22. Accessorized Updo with Pins
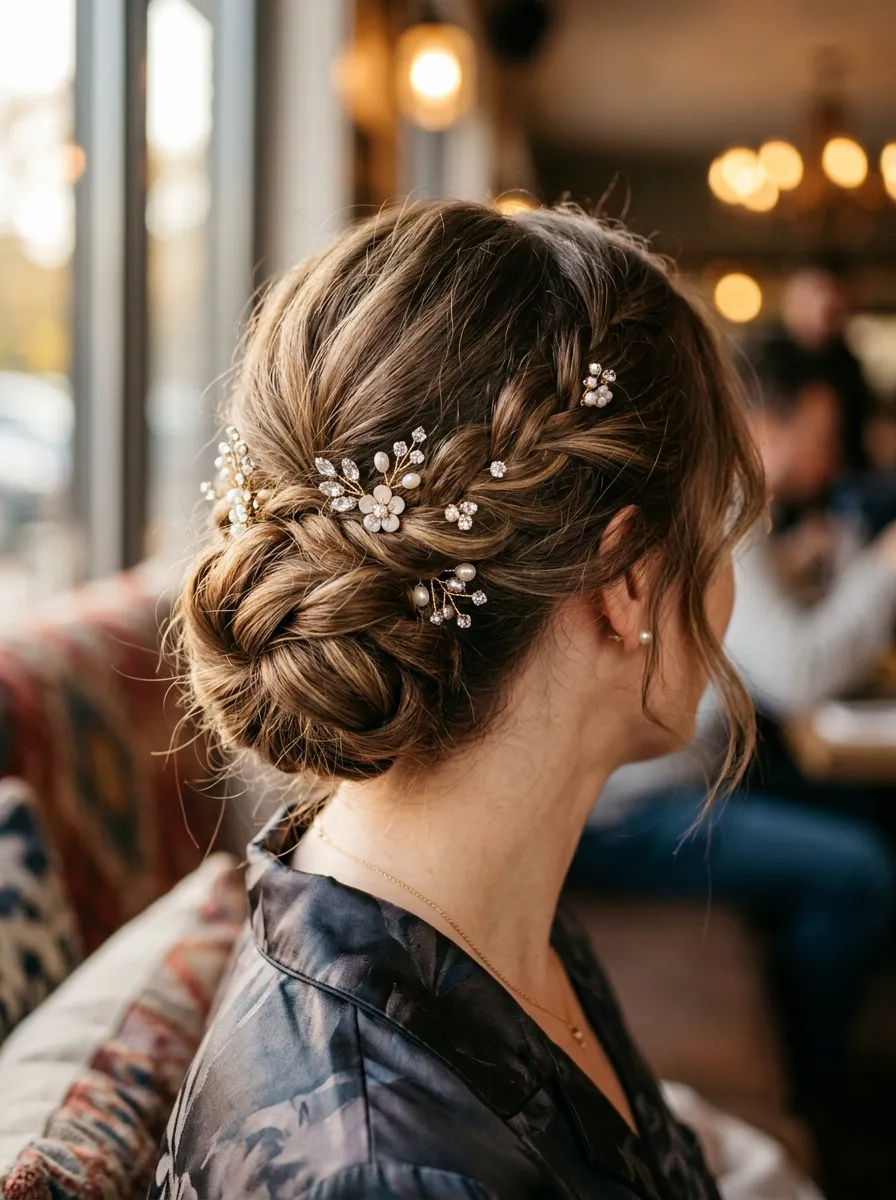
An accessorized updo with pins takes a simple style and makes it feel custom. Twist or pin your hair into any basic updo, whether a bun, twist, or gathered style, then add small decorative pins throughout for extra sparkle. Space the pins evenly for a balanced look rather than clustering them all in one spot. This style lets you personalize a simple hairstyle without needing advanced techniques, since the pins do most of the visual work. A budget friendly tip is buying a pack of plain bobby pins and adding small rhinestones with craft glue at home instead of purchasing expensive decorative pins from a beauty store. This hairstyle pairs beautifully with any formal outfit since you can match the pin color or shape to your event theme. It takes about twenty minutes total, including the base updo and pin placement. This look photographs wonderfully under event lighting since the pins catch light and add subtle sparkle to your overall red carpet appearance.
23. Textured Waves with Undercut Accent
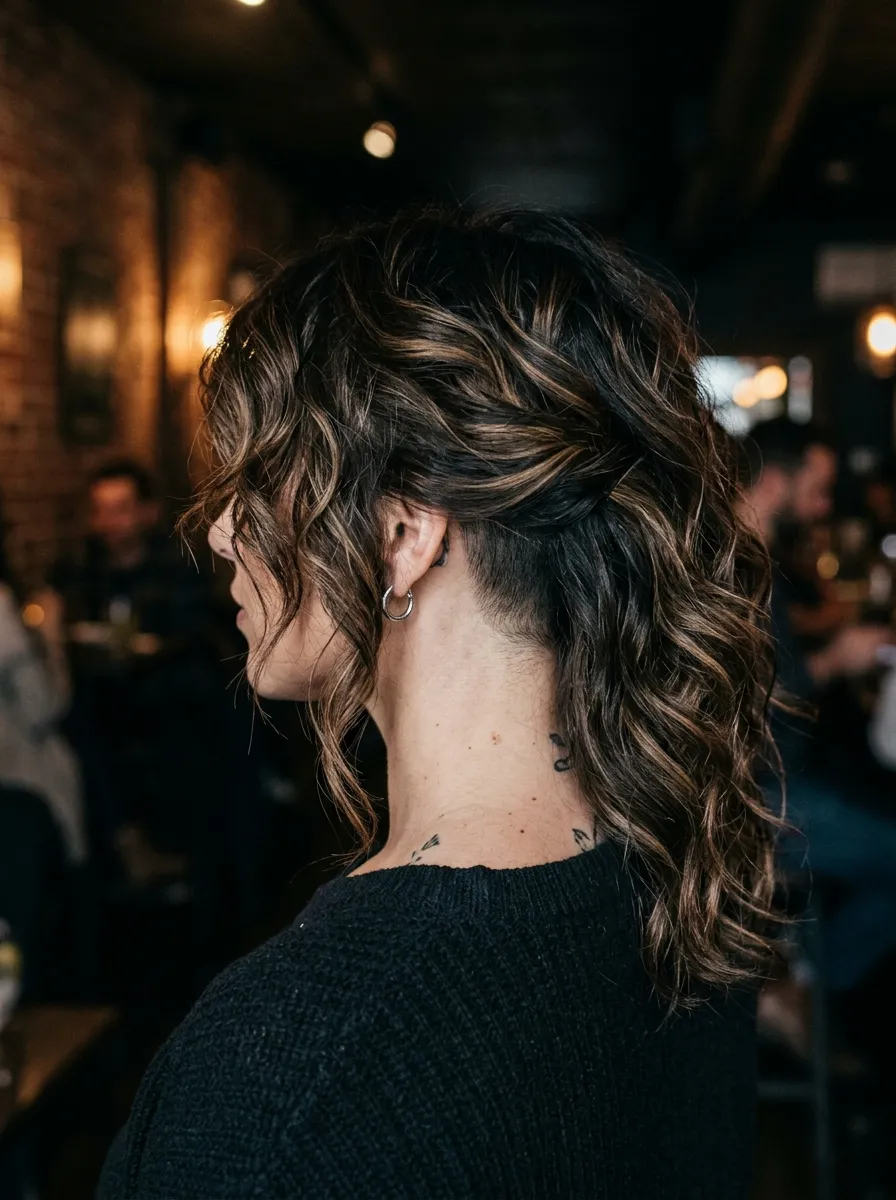
Textured waves with an undercut accent bring an edgy twist to classic red carpet glamour. If you already have an undercut, style loose waves on top and pin the top section slightly to reveal the shaved or shorter section underneath. This creates contrast between soft, romantic waves and a bold, modern edge. If you don’t have an undercut, you can fake the look temporarily by pulling a small section of hair tight and flat against your head, mimicking the shaved effect without any actual cutting. A budget friendly tip is using a small amount of gel on a fine comb to slick down the fake undercut section for a more convincing effect. This style works best with medium to long hair on top for the waves to have enough movement and body. This hairstyle pairs beautifully with bold, structured outfits or edgier gowns since it balances softness with an unexpected detail. It takes about twenty minutes and gives a distinctive, fashion forward finish that stands out from more traditional red carpet looks.
24. Classic French Twist
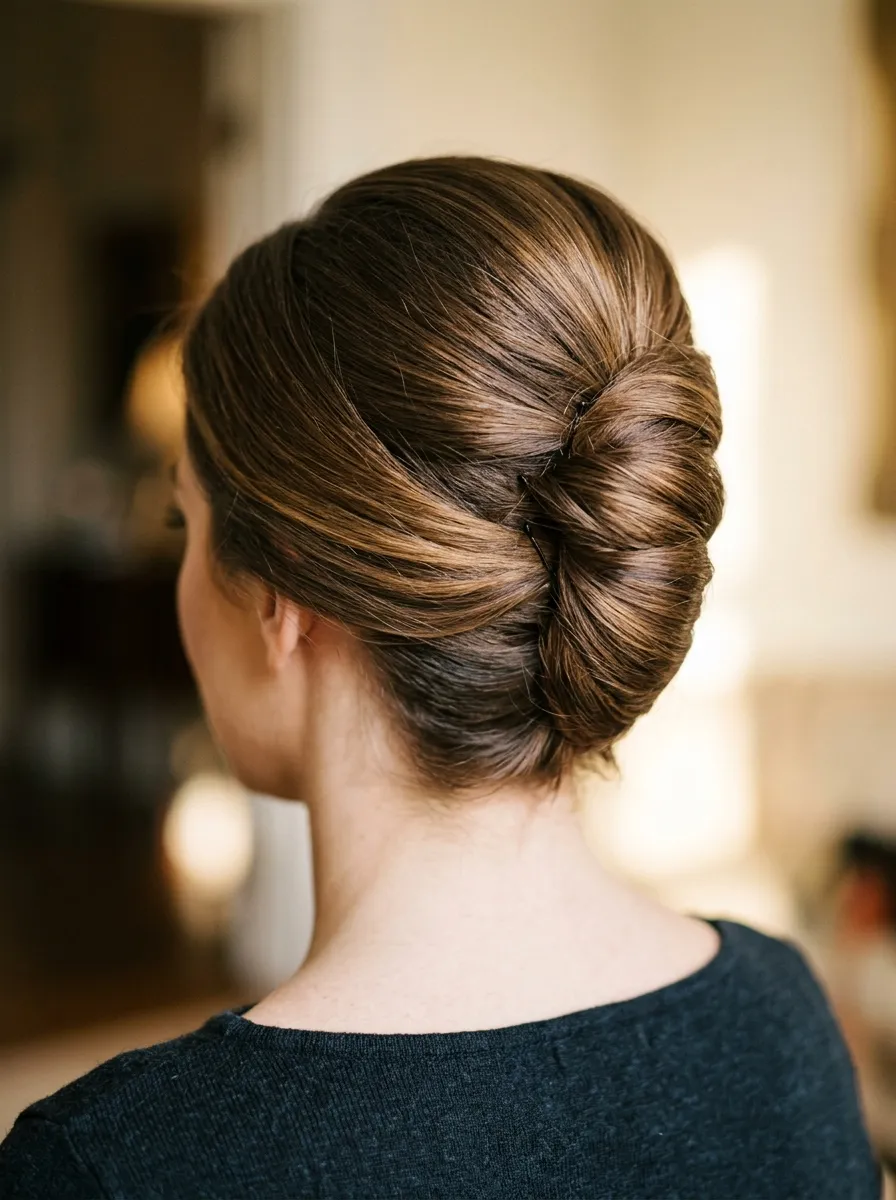
The classic French twist is timeless, elegant, and works for almost any formal event. Gather your hair to one side, then twist it upward into a vertical roll along the back of your head, securing with bobby pins as you go. Leave the top slightly loose for volume rather than pulling everything flat and tight. A texturizing spray applied before twisting helps the pins grip better, especially on smooth or fine hair. This style keeps your neck and shoulders visible, making it a great match with statement necklaces or off shoulder outfits. A budget friendly tip is practicing the twist a few times before your event since the technique takes some getting used to, and using pins you already own instead of buying a French twist tool. This hairstyle holds up incredibly well through long events since the twisted structure stays secure for hours. It takes about fifteen minutes once you know the motion. The classic French twist proves that some styles remain red carpet favorites for good reason, decade after decade.
25. Tousled Beach Waves for Red Carpet
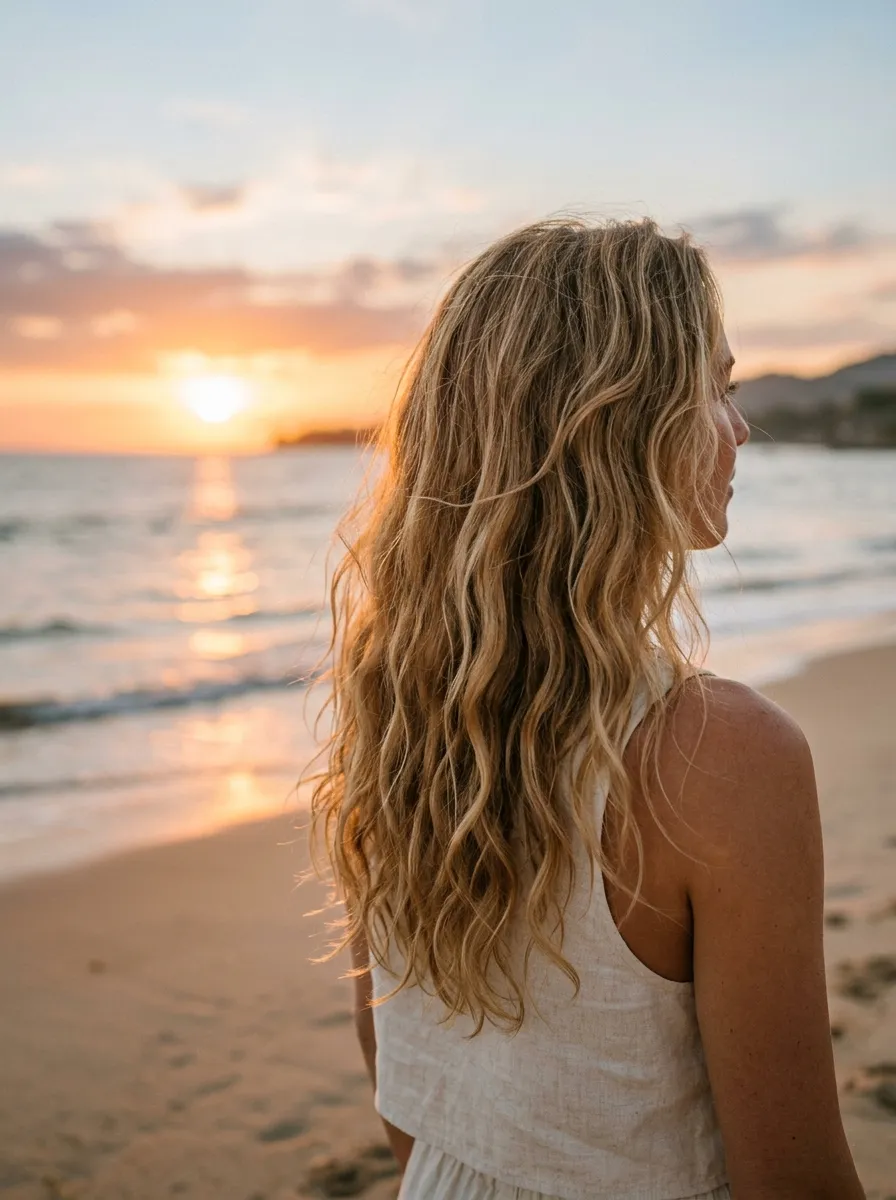
Tousled beach waves bring a relaxed, effortless glamour to red carpet style. Use a curling wand to create loose, uneven waves throughout your hair, avoiding perfect uniform curls for a more natural finish. Once curled, scrunch your hair gently with your hands and apply a texturizing spray to enhance the tousled, wind blown effect. This style works on almost any hair length and pairs beautifully with flowy, romantic outfits or beachy formal wear. A budget friendly tip is using a bit of sea salt spray, which you can make at home with water, sea salt, and a touch of leave in conditioner, instead of buying an expensive salon version. This hairstyle photographs wonderfully because the natural looking texture catches light softly rather than appearing too polished or stiff. It takes about twenty minutes and holds up well through outdoor events or windy conditions since the style already embraces a bit of movement. Tousled beach waves prove that relaxed hair can still feel completely red carpet ready.
26. Vintage Victory Rolls
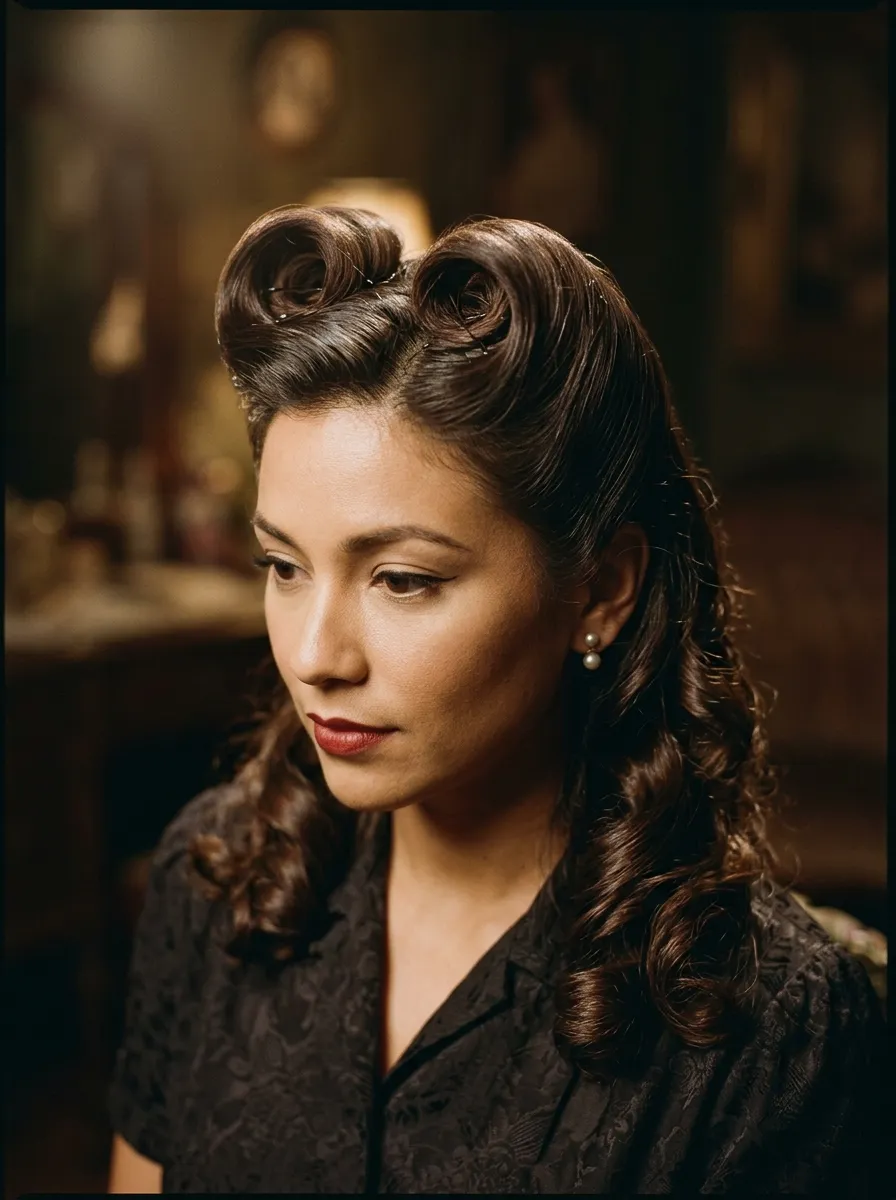
Vintage victory rolls bring bold, dramatic flair straight from classic pin up style. Section a piece of hair near your face and roll it backward toward your scalp, pinning it in a rolled shape once it reaches the desired position. Repeat on the other side, then curl or wave the remaining hair for contrast underneath the rolls. A strong hold hairspray keeps the rolled sections in place throughout the night. This style takes practice, so try a test run before your actual event. A budget friendly tip is using a foam roller cut in half to help shape the rolls if you find the freehand method tricky at first. This hairstyle pairs beautifully with bold vintage makeup, a red lip, and simple jewelry for a full retro effect. It works best on medium to long hair, giving enough length to both create the rolls and style the rest of your hair underneath. Vintage victory rolls stand out on any red carpet since they carry so much personality and structure.
Conclusion
Glamorous hair does not require a big budget or a professional stylist standing behind you. With a curling iron, a few bobby pins, and a little practice, any of these 25 styles can turn a regular night into a red carpet moment. Try a few looks at home before your next big event so you feel confident and ready when the moment comes. Whether you want sleek and simple or bold and textured, there’s a style on this list that matches your hair length, your outfit, and your personal taste. Pick one, practice the steps, and step out feeling like a star.
Leave a Reply